AccurioPro Flux Connector

The AccurioPro Flux Connector Node is no longer actively supported, but current licenses remain fully-functional.
Use the AccurioPro Flux Connector Node to send the processed output of a workflow to an AccurioPro Flux server. Specify the job settings as well as address data to use for the job. The AccurioPro Flux Connector node only supports PDF files.
Upload processed PDF files from a workflow to AccurioPro Flux Server to utilize its configured products and print settings. Print jobs processed by this node can then be uploaded to the AccurioPro Flux Server the same as any other incoming print jobs are.
Using the AccurioPro Flux Connector Node
Add the AccurioPro Flux Connector Node to the workflow by dragging the node’s icon onto the Workflow Builder canvas, and then double-clicking on the icon to open the AccurioPro Flux Connector Node’s window:
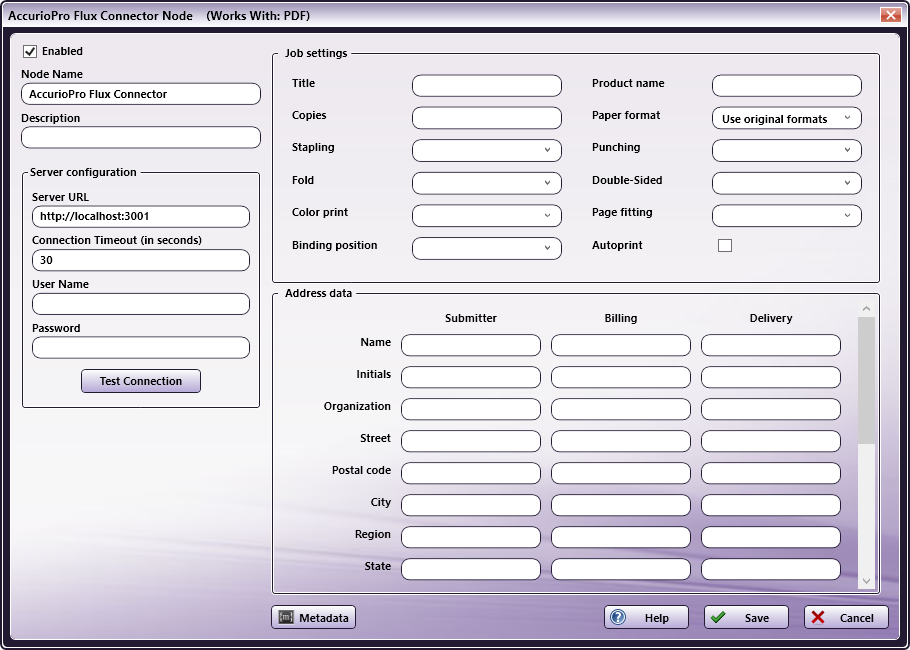
- Select the Enabled checkbox so that the process will run. When unchecked, this process is ignored. Documents pass through as if the node were not present (i.e., continue along the default or positive path). Note that a disabled node will not check for logic or error conditions.
- In the Node Name field, enter a meaningful name for the AccurioPro Flux Connector Node.
- In the Description field, enter a description for the AccurioPro Flux Connector. This is not required, but can be helpful with multiple collection points. If the description is long, hover the mouse over the field to read its entire contents.
- Click on the Metadata button and the Metadata Browser window opens. Use the screen to drag-and-drop variable names from the Select Metadata key area to the appropriate text fields.
- Select the Save button to apply the settings. Select the Cancel button to exit the window without saving any changes.
- Select the Help button to access online help.
Server Configuration Settings
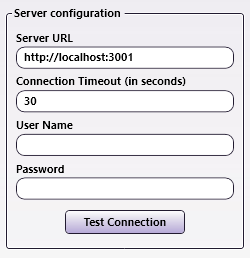
In the Server configuration area, specify how to the node will connect to the Flux server.
-
Server URL: Enter the HTTP URL for the Flux server. This must be in the form http://host:port
The default Server URL displays as http://localhost:3001
-
Connection Timeout (in seconds): The maximum number of seconds to wait for a server response before displaying a connection error.
-
User Name/Password: Specify a Flux server user account to use for the submission. This is required for testing the connection and submitting jobs.
Note: Metadata may not be entered in any of the above fields.
-
Test Connection: Click on this button to test the connection to the specified AccurioPro Flux server. A pop-up message provides details about the Test results.
Job Settings
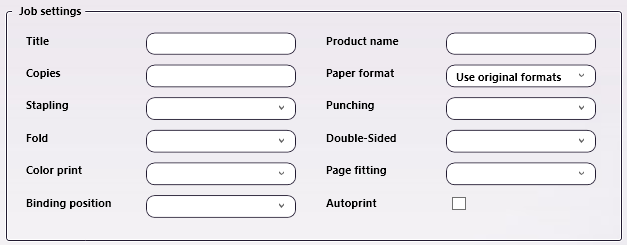
In the Job Settings area, specify the settings for jobs submitted to the AccurioPro Flux server. If a field is left empty, the default value is used by Flux. To use custom (manual) service options, enter the appropriate values to support these.
-
Title: The title to assign to the job.
-
Product name: The product to use for the job. A product with this name must exist in the Flux configuration. If it does not, All Settings is used.
-
Copies: The number of copies.
-
Paper format: The paper format to use for the job. A range of default paper formats as well as the use original formats option are available. Enter the value that matches the PDF paper format. This setting is ignored if a product is specified.
-
Stapling: The stapling setting to use. All default stapling options supported by Flux are available.
-
Punching: The punching setting to use. All default punching options supported by Flux are available.
-
Fold: The fold setting to use. All default fold options supported by Flux are available.
-
Double-Sided: The duplex setting to use. Left, Off, and Top are supported.
-
Color print: The color print setting to use. Color and Black & White are supported.
-
Page fitting: The page fitting setting to use. Bottom Left, Center, Center & Rotate, Scale & Center, and Scale, Center & Rotate are supported.
-
Binding position: The binding position setting to use. Left, Top, Right, and Bottom are supported.
-
Autoprint: To automatically print the job when it arrives at the Flux Server, select the checkbox.
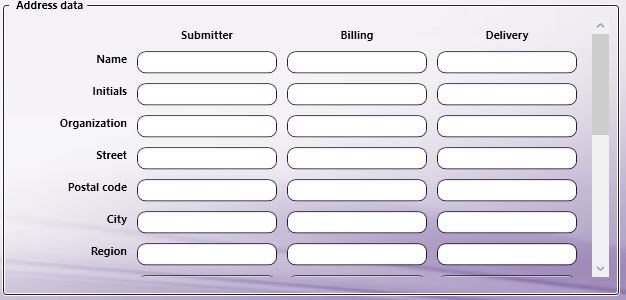
Address data
Specify the address data to use for the job. Every address field available in Flux is listed here. Enter the appropriate contents for each field or use Metadata placeholders.