Bulk Import Tool
Dispatcher Phoenix’s MFP Bulk Import Tool enables organizations to simplify the process of adding Konica Minolta MFPs to the Dispatcher Phoenix Devices Tool. This tool is designed to allow IT departments to streamline the process of importing multiple devices into Dispatcher Phoenix.
Note: This tool can bulk-import only Konica Monica MFPs. For example, you cannot use this tool to bulk-import devices into a web capture terminal.
Using the MFP Bulk Import Tool
The Bulk Import Tool should be used by large or enterprise organizations who need to import a large number of new devices. When new MFPs are purchased by an organization, their information, such as model and MAC address, are often available to the business prior to the devices’ arrival and installation. To proactively prepare new devices for use with Dispatcher Phoenix workflows and avoid unnecessary down-time, the MFP Bulk Import Tool allows organizations to bulk import device information before the devices are live on the network.
- Step One: Access the Devices Tool in Dispatcher Phoenix Web
- Step Two: Configure your MFP Defaults
- Step Three: Download the Bulk Import Excel Template
- Step Four: Configure the Bulk Import Excel Template
- Step Five: Import the Device List
- Step Six: Verify Device Information
- Step Seven: Register Devices
Note: When using this tool to import a large number of devices, the import may take several minutes.
Step One: Access the Devices Tool in Dispatcher Phoenix Web
To get started, do the following:
- Log into Dispatcher Phoenix Web with your Windows User Credentials.
- Select the Devices tile.
See the following illustration for an example:
![]()
The Devices Home Page lists any devices that have already been discovered, added, or registered. Any devices that have not been associated with a group are listed underneath the “No Group” category. See the following illustration for an example:

Step Two: Configure your MFP Defaults
To prepare for the Bulk Import process, please configure your MFP Defaults. Click here for instructions on how to configure the default MFP settings prior to importing one or more devices to Dispatcher Phoenix.
Step Three: Download the Bulk Import Excel Template
To download the Bulk Import Excel Template, click on the ADD button and selecting the Import Devices option from the dropdown, as shown in the following illustration:

Then, the Import Devices window will appear, as in the following illustration:
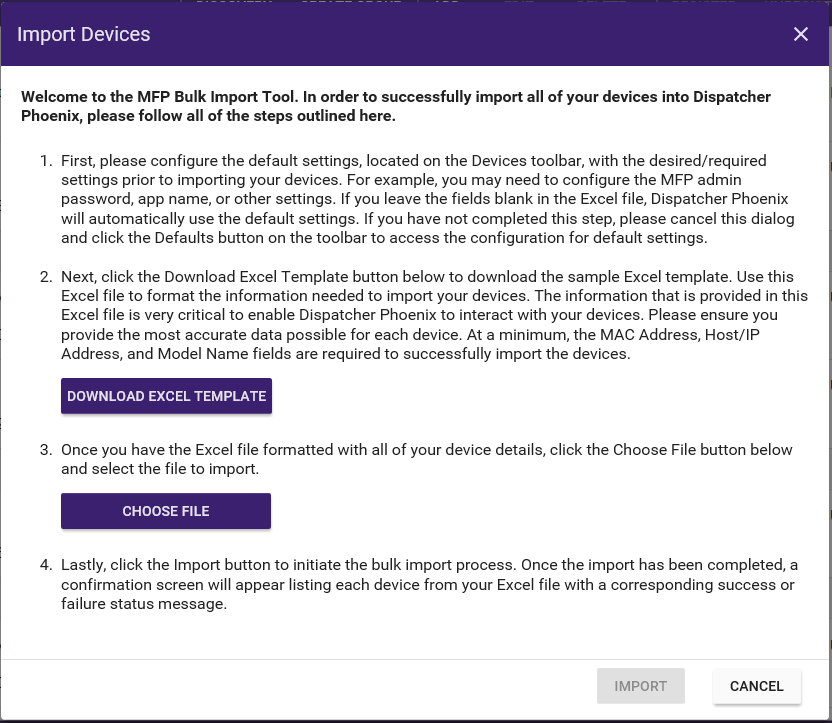
Under Step 2, click the DOWNLOAD EXCEL TEMPLATE button to download and/or save the file.
Step Four: Configure the Bulk Import Excel Template
Next, open the Excel Template to begin configuring each devices details. See the following illustration for an example:

The columns in this template can be rearranged. However, the text in the column headers cannot be changed. The following fields can be configured using the Excel Template:
- Location/Description - A description of the location and/or purpose of the device.
- Model - The proper model name of the device, such as “224e or bizhub 224e”. If the model name does not match a Konica Minolta device, a generic image will appear for that MFP.
- Friendly Name - The user friendly name of the device.
- MAC Address - The unique identifier assigned to this device on the network. This field ignores the following characters - (dash), : (colon) and . (period).
- Host/IP Address - The Host Name or IP Address of the device.
- Admin Password - The admin password for Dispatcher Phoenix on this device.
- Device Groups - The group(s) the device should be associated with. Each Group Name should be separated by a new line.
- Equipment ID - The device’s internal equipment ID number.
- Service ID - The device’s internal service ID number.
- Contact Person - The person who should be contacted regarding this device.
- Zip Code - The Zip Code of the address where this device is located.
- Panel App Name - The application name that should appear for Dispatcher Phoenix at the MFP Panel.
- Server URL - The URL for the Dispatcher Phoenix Server.
At a minimum, the following 3 (three) fields are required for each device:
- Model
- MAC Address
- Host/IP Address
Note: If any of the other fields are left blank, all pre-configured MFP Default Settings will be applied.

Step Five: Import the Device List
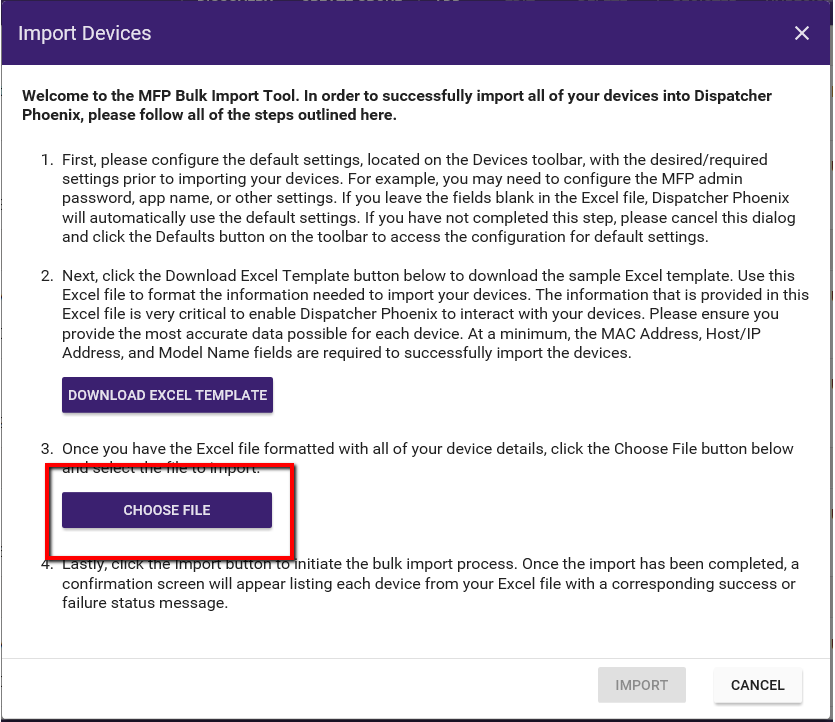
Once your template is configured with the necessary device details, navigate back to the Dispatcher Phoenix Devices Bulk Import Tool in Dispatcher Phoenix Web. Under Step 3, click the CHOOSE FILE button to upload your device list.
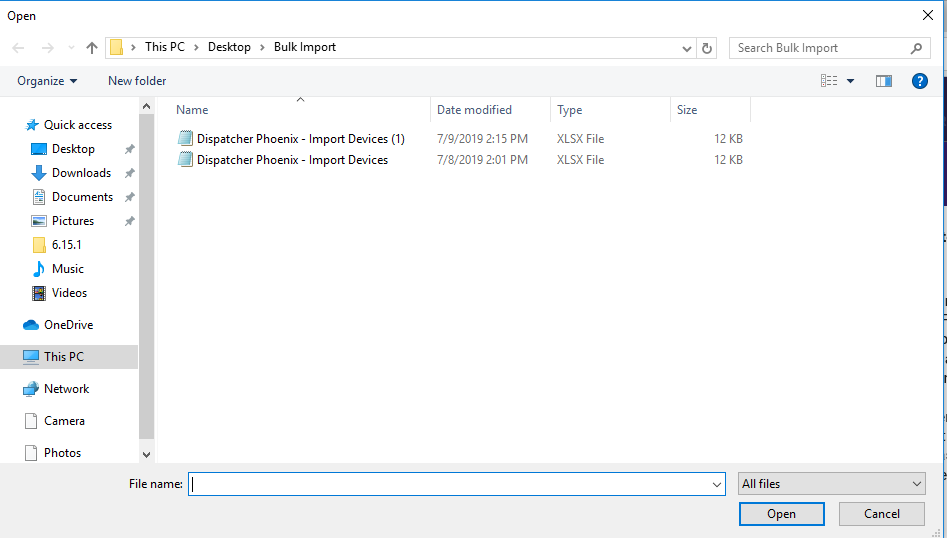
Using the file broswer, select the device list you’d like to import and click Open.
The file name will then appear next to the CHOOSE FILE button as shown in the illustration below:
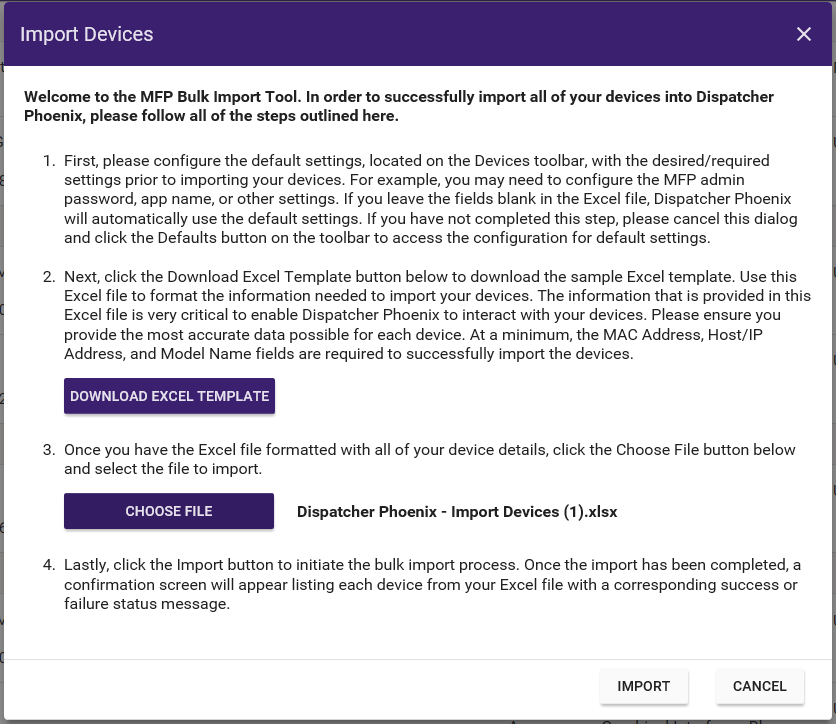
To begin the device import, click the IMPORT button.
Step Six: Verify Device Information
Once the import has been completed, a confirmation screen will appear listing each device from the Excel file with a corresponding success or failure status message, as show in the illustration below:
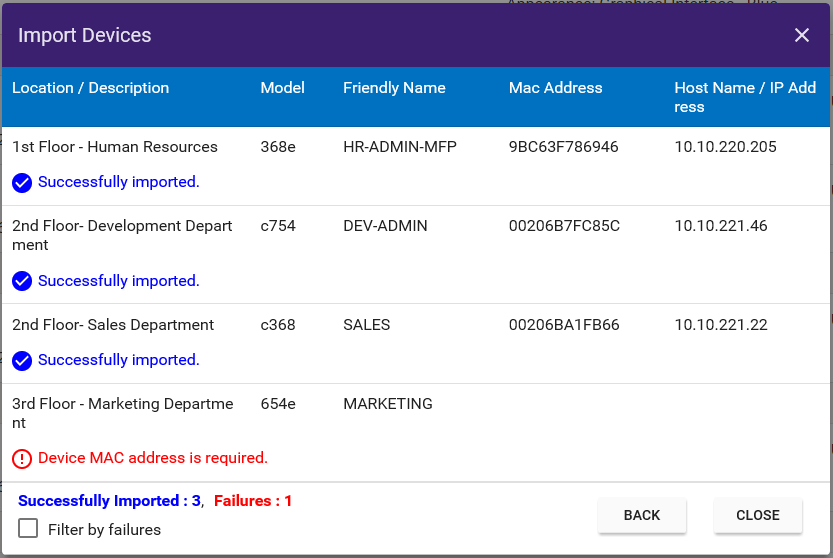
Using this window you can:
- View all pertinent device information for each device imported.
- Review the status of each device imported into Dispatcher Phoenix.
- View a summary of the number of successes and failures that have occurred during the import (a result of 0 will not display that particular text e.g., if i import with 5 successes then the failures part wont be display and vice versa).
- Use the Filter by failures check box to filter for failed imports. If there are ONLY successes or ONLY failures this check box will not appear as there would be nothing to filter.
Step Seven: Register Devices
When the devices have been fully configured on the network, you will need to register the devices to Dispatcher Phoenix in order to associate the device to specific workflows.
If an error occurs when attempting to register a device, check the MFP settings. If the MAC Address has been imported incorrectly, delete the device and re-add the MFP to complete the device registration.
For more information on Device Registration, click here.