Configuring Offload Servers
To install and configure a Dispatcher Phoenix Offload Server, do the following:
Step 1: Purchase Offload License
To begin, you should order the appropriate Offload license (with maintenance). Dispatcher Phoenix offers the following licenses for offloading:
-
MFP Connectivity
-
Web Connectivity
-
Mobile Connectivity
-
Workflow Processing (Basic and Advanced)
Step 2: Install Offload License
Once a license has been purchased and you have received a Purchase Code, you can install the Offload license on the server that you have designated for that purpose. Follow these steps:
-
Launch the Dispatcher Phoenix Installer.
-
Choose the appropriate license from the drop-down list; then select the Install Application button. See the following illustration:

-
Select the Yes button on the User Account Control pop-up window that appears.
-
Select the Next button on the window that appears. See the following illustration for an example:

-
Select the I accept the agreement radio button on the License Agreement window; then select the Next button.
-
Review the Readme text file; then select the Next button.
-
On the Select Additional Tasks window, customize the set up; then select the Next button.
-
Select the Install button on the Ready to Install window to begin the installation process.
-
Once the Dispatcher Phoenix Registration window appears, select the Next button. See the following illustration for an example:

-
On the Register Dispatcher Phoenix window, do the following:
-
Enter your SEC account credentials in the User Name and Password fields.
-
Paste your Purchase Code in the Purchase Code field.
-
Select the Activate button.
See the following illustration for an example:

-
-
On the Congratulations message that appears, select the OK button. Add In Manager will continue with the installation process.
-
Select the Close button when the installation process is complete.
Only the packages required for the license are installed, along with the Dispatcher Phoenix Log Viewer and Customer Feedback Agent. Please note that the Dispatcher Phoenix application will NOT be installed.

Step 3: Configure Offload Server
Configure MFP Connectivity Server
To configure your MFP Connectivity Offload Server, you must edit a configuration file. Please do the following:
- Go to the c:\ProgramData\Konica Minolta\Prescott\etc\ directory. See the following illustration:
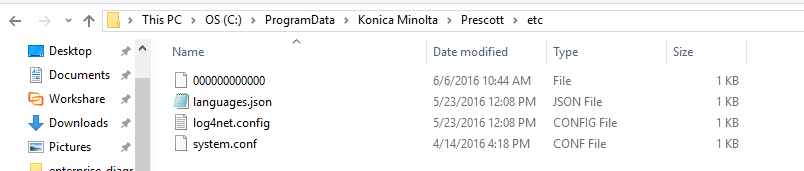
-
Open the system.conf file.
-
Change the host “127.0.0.1” default setting to the IP/Host name of the server running Dispatcher Phoenix. See illustration below:
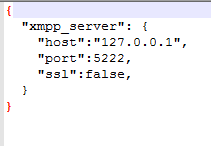
-
Save the file.
Optional Step (Recommended)
For optimal performance, we recommend installing the bEST Server in IIS. Before you get started, make sure the bEST Server is stopped. For proper logging to take place, IIS and the bEST server cannot be running at the same time. Do the following:
-
Go to Local Services and do the following:
-
Stop the KMBS bEST server.
-
Change the Startup type to “Disabled.”
Basic Set Up
-
Install IIS. Make sure that:
-
IIS+ dependencies for .net are installed. This varies based on Windows version but, in general, is available via the ‘Turn Windows features on or off’ in the Windows Control Panel.
-
IIS is enabled.
-
IIS Management Console is enabled
-
-
Once IIS is installed, configure the system. Follow these steps:
-
Launch the Internet Information Services (IIS) Manager from the Windows Start menu. See the following illustration for an example:
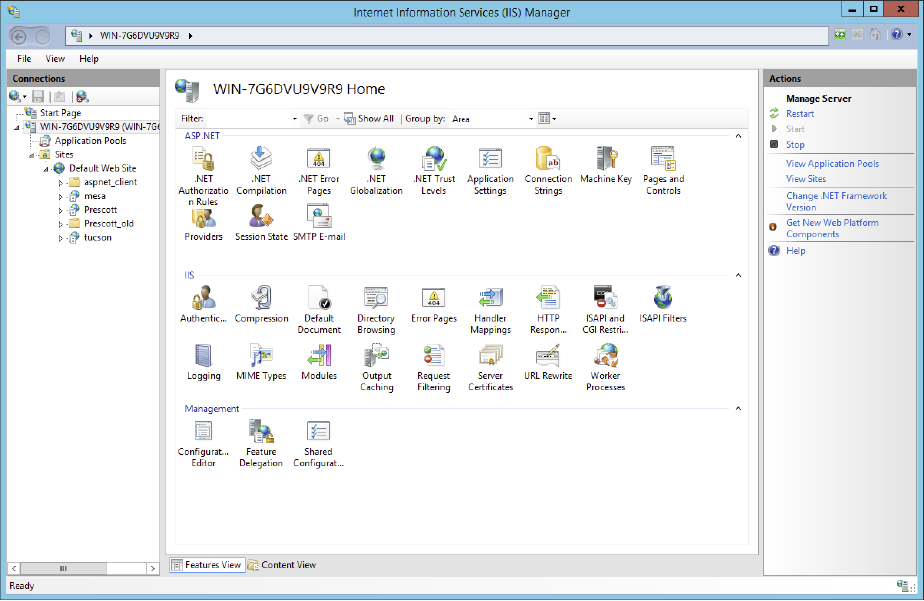
-
Click on the current server and sites underneath it to expand the list.
-
Right-click on Default Web Site; then choose the Add Application… option from the menu that appears.
-
On the Add Application window, do the following:
-
In the Alias field, enter Prescott.
-
In the Physical Path field, browse to and select
C:\Program Files\Konica Minolta\Prescott\
-
-
Ensure that IIS rewrites OpenAPI traffic to the application running in IIS. Due to the design of the MFP, all OpenAPI requests are set to the path of
/OpenAPIof the server that the MFP is communicating with. In order to support this, it is required that IIS rewrite traffic destined to that end point on the server to the actual application running in IIS. Do the following:a. Install Microsoft’s rewrite module (https://www.iis.net/downloads/microsoft/url-rewrite).
b. In the base server’s rewrite configuration, open the IIS Manager.
c. Click on the main server.
d. In the Management area, click on URL Rewrite.
e. Right-click on the inbound rule block; then click on the Add Rules(s)… option in the menu that appears.
f. Select Blank rule.
g. Select OK.
h. In the Edit Inbound Rule window, do the following:
-
In the Name field, enter a name for the rule.
-
From the Requested URL drop-down list, select Matches the Pattern.
-
From the Using drop-down list, select Exact Match.
-
From the Pattern drop-down list, select /OpenAPI.
-
From the Action type drop-down list, select Rewrite.
-
In the Rewrite URL field, enter /Prescott/OpenAPI (or whatever your application name is).
-
Select the Apply link to save the rule.
-
-
Set Up SSL on the Server. Do the following:
a. Open the IIS Manager.
b. Click on the server.
c. Double-click on Server Certificates.
d. Select the Create Self-Signed Certificate link on the right-hand side of the window.
e. On the Create Self-Signed Certificate window, do the following:
-
Enter a friendly name for the certificate in the field provided.
-
Select Web Hosting as the certificate store for the new certificate using the drop-down list provided.
-
Select the OK button. This will generate a certificate mapping for the server’s current name.
f. Once the certificate is generated, do the following:
-
expand the server.
-
Expand Sites.
-
Right-click on the Default Web Site; then select the Edit Bindings… options from the drop-down menu that appears.
-
Select the Add… button.
-
On the Add Site Binding window, do the following:
- From the Type drop-down list, select https.
- From the IP address drop-down list, select All Unassigned.
- In the Port field, enter 443.
- From the SSL Certificate drop-down list, select the SSL certificate previously generated.
- Select the OK button.
-
Configure for Workflow Processing Offloading (Basic and Advanced)
To configure for Workflow Processing offloading (both Basic and Advanced licenses), do the following:
-
Make sure that the offload server is broadcast publicly. Click here for more information.
-
Using the Primary Server’s DP Web Manage Cluster app, click on the Add Server button.
-
Enter the IP address of the Offload Workflow Processing (Basic/Advanced) server.
-
Select the Save button when you are done.
This adds the workflow processing offload server to the cluster.
Configure for Mobile Connectivity Offloading
To configure for Mobile offloading, you must edit the system configuration file for bEST Server. Do the following:
-
Go to the
c:\ProgramData\Konica Minolta\Prescott\etcdirectory. -
Open the system.conf file.
-
Edit the host “127.0.0.1” default setting of the XMPP Server Host/IP address to point to the IP address of the server (either a primary server or a Workflow Processing Offload server) running Dispatcher Phoenix.
-
Save the file.
-
Restart IIS or KMBS bEST Server from Windows Services (depending on your configuration).
Configure for Web Connectivity Offloading
To configure for Web offloading, you must edit the system configuration file for Dispatcher Phoenix Web. Do the following:
-
Go to the c:\Program Files\Konica Minolta\Dispatcher Phoenix Web directory.
-
Open the system.json file.
-
Edit the host “127.0.0.1” default setting of the XMPP Server Host/IP address to point to the IP address of the server (either a primary server or a Workflow Processing Offload server) running Dispatcher Phoenix.
-
Save the file.
-
Restart the Dispatcher Phoenix Web Server from Windows Services.