Email Parser
Email Parser is an optional node that is used to perform file extraction and/or routing of emails based on specified conditions. It can work in conjunction with the Email Out node. Email header metadata can be attached to extracted attachments before they are passed along to (and subsequently used by) the Email Out node.
Note: Only MIME-encoded emails are supported by Email Parser.
Using the Email Parser Node
To open the Email Parser Node window, add a process node for Email Parser Node and double-click on it.

-
Enabled - Check this box when there are multiple processes in a workflow. If unchecked, this process will be ignored. Emails will pass through as if the node was not present (i.e., continue along the default or ‘positive’ path). Note that a disabled node will not check for logic or error conditions.
-
Node Name - Enter a meaningful name for the Email Parser node.
-
Description - Enter a description for the Email Parser node. Although this is not required, it can be helpful to distinguish multiple processes from each other. If the description is long, you can hover the mouse over the field to read its entire contents.
-
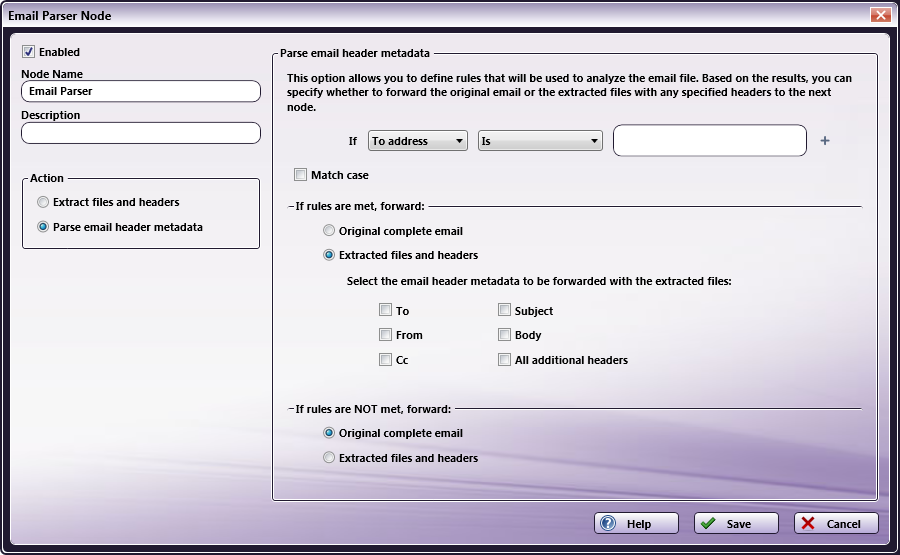
Action - In this area, you can specify how to process the emails coming through the node. Your choices are:
-
Extract files and headers - Select this option to extract the email’s attachments and header metadata. Then specify the appropriate options on the right-hand side of the window.
-
Parse email header metadata - Select this option to separate out the email’s metadata. Then specify the appropriate options on the right-hand side of the window.
-
-
Save - Saves your Email Parser definition.
-
Help - Accesses the Dispatcher Phoenix Online Help file.
-
Cancel - Exits the window without saving any changes.
Extracting Attachment Files and Headers
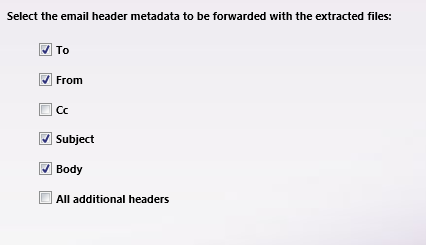
If you want to extract files that are attached to the email(s) being processed in this node, select the Extract files and headers radio button from the Action area on the left-hand side of the window. At this point, you will have the option of specifying which, if any, header metadata should be added to the extracted attachments by clicking on the appropriate check boxes. This information will be used later by the Email Out node. If you do not want any metadata included with the extracted files, the boxes should be left unchecked. To use additional email header metadata, check the All additional headers box.

For example: If you want the Email Out node to use the original email’s subject line, click the Subject check box to make sure that information is passed on along with the extracted attachments.
Note: When you select this option, the original MIME email will be discarded and only its attachments are processed/forwarded to the Email Out node.
Parsing Email Header Metadata
If you want to route along either the original email or the original email’s attachments including specific header metadata, based on specified rules met or not met, select the Parse email header metadata radio button from the Action area on the left-hand side of the window.
Setting Up Rules
You will need to set up conditional rules to be met or not met for the documents to be passed forward. Do the following:
-
Select the appropriate header metadata (To address, From address, Cc address, Subject, or Body).
-
Select the appropriate option (Is, Contains, Regular expression).
-
Input the appropriate filter text in the blank field provided.
-
Check the Match case box to include only emails that have header metadata that matches the specific case entered.
-
To add another rule (using the AND or OR operation), click on the + sign next to the input field. To remove a rule, click on the X next to the input field.
If you specify more than one rule, you can choose a logical operation (AND or OR) to use, as in the following illustration:

Note: You can specify as many rules as you want.
If Rules Are Met/Not Met
Once you have defined rules, you must specify what should happen next.
-
To forward only the original email which follows the rule(s) that you’ve specified, click the Original complete email radio button in the If rules are met, forward: area. The following will occur:
-
If the next node is an Email Out node, the original email will be attached to the new email.
-
If the next node is an Output folder, the email file will be deposited in the folder.
-
If the next node is a Printer node, the email file will be sent to the printer.
-
If the next node is an FTP node, the email file will be sent to the FTP server.
-
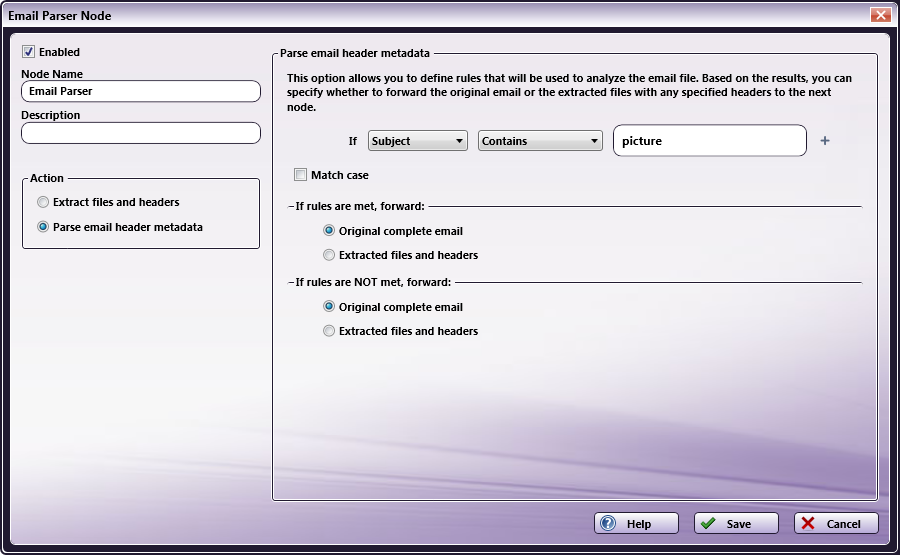
In the following illustration, only emails that have subject lines containing the word “picture” will be passed along:

- To forward the extracted attachments and header metadata of emails which follow the rule(s) that you’ve specified, click the Extracted files and headers radio button in the If rules are met, forward: area. At this point, you can specify which, if any, email header metadata that you would like passed on along with the extracted files. This information will be used later by the Email Out node.
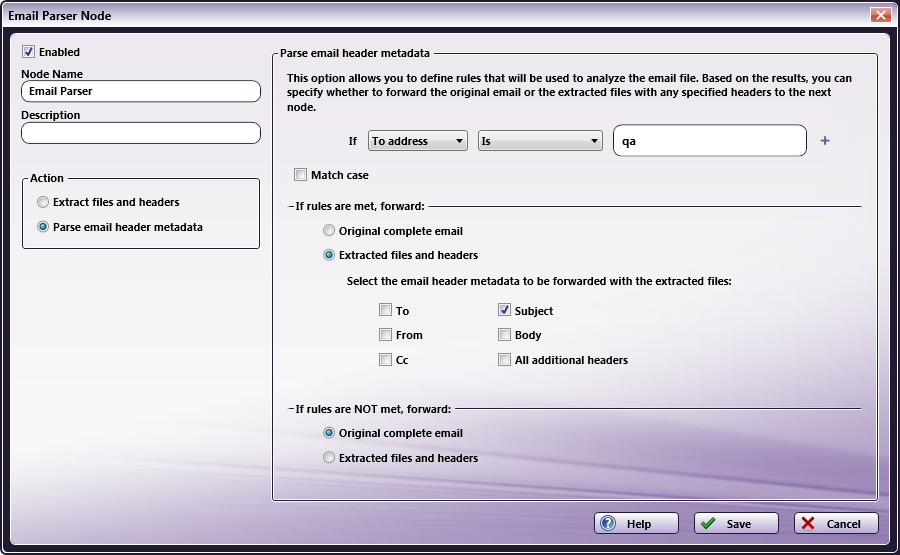
In the following illustration, the user has chosen to forward the Subject line information from email(s) which contain the letters “qa” in their To address:

- You can also define what to do if your rules are not met. You can choose to pass along the original complete email by clicking the Original complete email radio button in the If rules are NOT met, forward: area, OR pass along extracted files and metadata information by clicking the Extracted files and headers radio button in the If rules are NOT met, forward: area and marking the appropriate metadata via the supplied check boxes.

