Redact At Panel
Dispatcher Phoenix users can edit the configuration of a Redact node in a workflow directly from the MFP control panel. Any changes made to an existing Redaction node at the panel will be automatically reflected in Dispatcher Phoenix as well.
Note: The Redact feature is not available on MFPs with Native User Interfaces.
Getting Started
To modify your redaction configuration at the device panel, do the following:
-
Configure your workflow to include a MFP Panel node and at least one Redact node. Make sure that the Redact node has the Enable editing on MFP panel option enabled.
-
Make sure that your workflow is running.
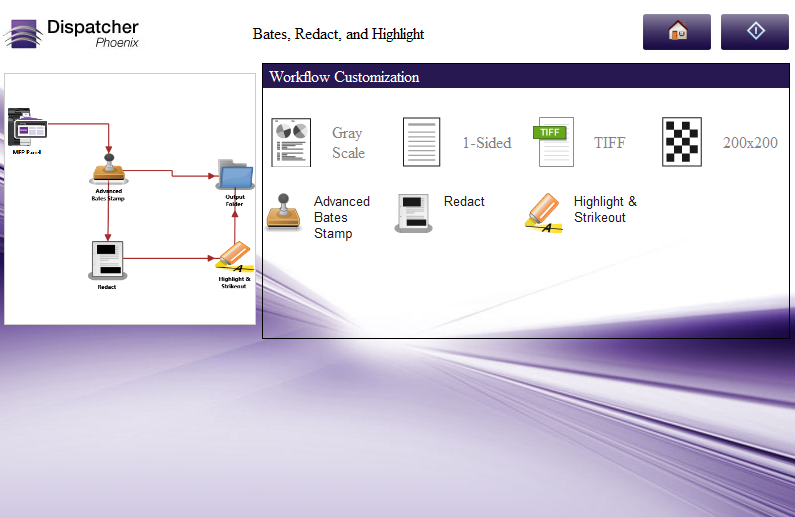
When you log into Dispatcher Phoenix and access the running workflow at the panel, you will see the Workflow Details screen, as in the following illustration:
To view or edit your Redaction node, tap on the icon of the Redaction node that you are interested in. The Node Configuration screen will appear, as in the following illustration:
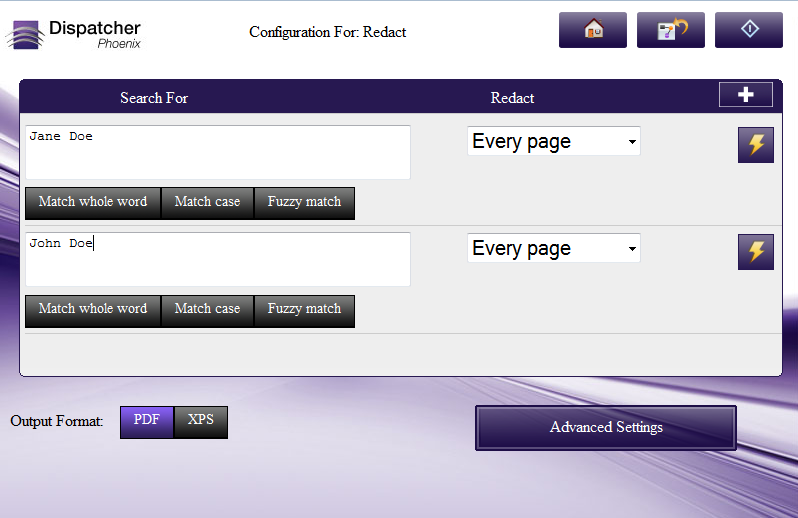
This screen displays the search text strings that have already been defined for the Redaction node. Two search strings are displayed at a time. Up and down arrows are provided to navigate to additional search strings.
On this screen, you can do the following:
-
Edit search text listed in the Search For fields.
-
Modify redact options for each search string using the Redact drop-down list. The options are the same as those found in the Redact Node Properties window in Dispatcher Phoenix.
-
Tap on the Match whole word, Match case, and Fuzzy match buttons to enable these settings for each search string.
-
Change the output format of the redacted file using the Output Format buttons (PDF or XPS).
-
Perform other actions on each search string by tapping on its Action icon.
-
Tap the + button to add another search string to the Redact node.
-
Set Advanced Settings for the OCR process by tapping on the Advanced Settings button.
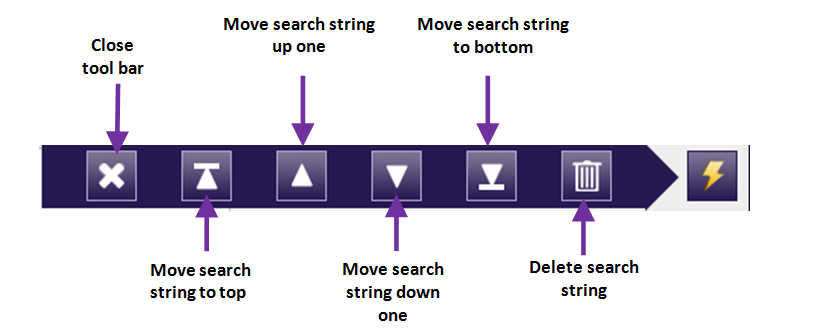
Using The Action Tool Bar
When you click on the Action icon, an Action tool bar for the specific search string will appear. The Action Tool Bar provides the following functionality:
Specifying Advanced OCR Settings
To improve the accuracy of the redaction process as well as its performance time, you may choose to change the default settings of the OCR engine by selecting the Advanced Settings button to access the Advanced Settings screen.
You can specify settings for:
-
Preprocessing
-
OCR recognition
-
Output format
The settings available on the MFP panel are similar to the Advanced OCR Settings available from the Redact node in Dispatcher Phoenix.
Adding A New Search String
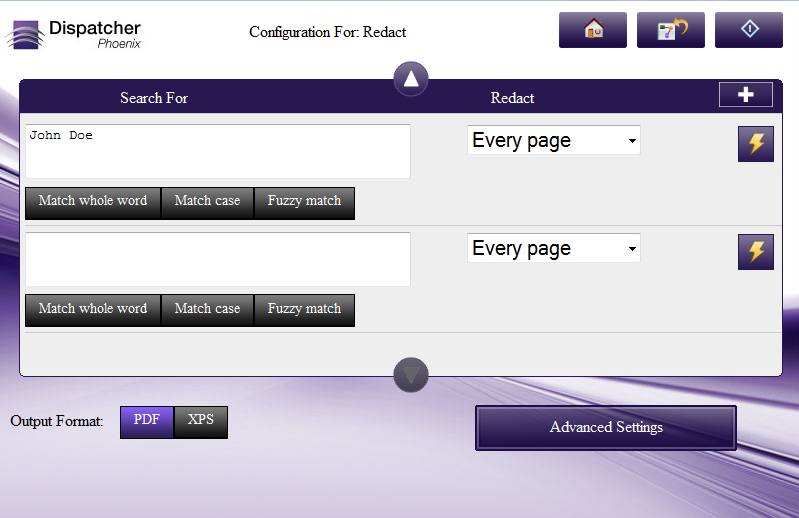
To add a new search string to the Redaction node, tap on the + button. An empty input field will appear at the bottom of the list, as in the following illustration:
Do the following:
-
Enter your search string in the “New Rule” text field.
-
Specify redaction options using the Redact drop-down list.
-
Tap the Match whole word, Match case, and/or Fuzzy match buttons to narrow the search.
-
Use the Action bar to move or remove the new search string.
Saving Your Changes
When you are finished with your changes, tap on the Workflow Details icon. The following confirmation message will appear:
