Configuring Ricoh for 2nd Gen. SOP Embedded Terminal
Configuration based on device generation (G2/G2.5/G3)
Configuring Ricoh SOP - Terminal Server CA installation (MFD's truststore)
Most configuration steps on the Smart Operations Panel will not require an authentication application to be installed (configuring before installing Ricoh SOP terminal), or being logged in as Machine administrator (configuring with Ricoh SOP terminal already installed).
Refer to Configuring Ricoh SOP - Recommended configuration for enabling Machine administrator (if it is not already enabled)
Refer to Logging in on Ricoh SOP as admin when Terminal Embedded is installed for details on how to log in as Machine administrator
G3
Build 79 and higher
Provide a trusted security certificate is mandatory
Configuration is done automatically apart from the manual steps below.
G2.5
Configuration is done automatically apart from the manual steps below.
G2
G2 devices that have preinstalled Java, need to have it turned on during the installation. Otherwise, remote configuration of the device is impossible and will need to be done manually according to Configuring Ricoh SOP - Automated configuration steps.
G2 devices that come with preinstalled Java (for list of these devices, please refer to the official SDK/J Compatibility chart provided by Ricoh), can be remotely configured only with Java enabled (limitation of the devices)
If Java is not turned on, the admin will be notified during installation. To enable Java on the MFD, please refer to Configuring Ricoh SOP - Enabling Java on G2 devices.
Manual configuration steps
Follow all the configuration steps below to prepare the MFD for installation of Dispatcher Paragon Embedded Terminal.
If you encounter any issues, please refer to Troubleshooting Dispatcher Paragon Embedded Terminal for Ricoh SOP.
Time settings
This step ensures, that the time of the device matches the time of the Dispatcher Paragon server. If you are positive, that the device has the same time as the server, you can skip this step. In the opposite case, accounting and billing codes will be negatively affected by this mismatch.
1. Go to the Ricoh MFD web interface (Web Image Monitor).
2. Log in as the Machine Administrator.
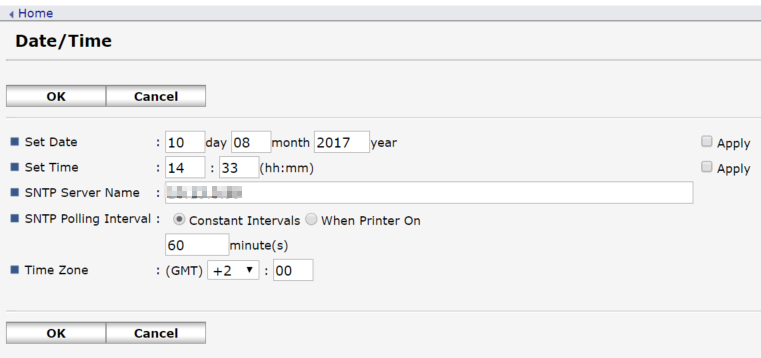
3. Go to Configuration > Date/Time.
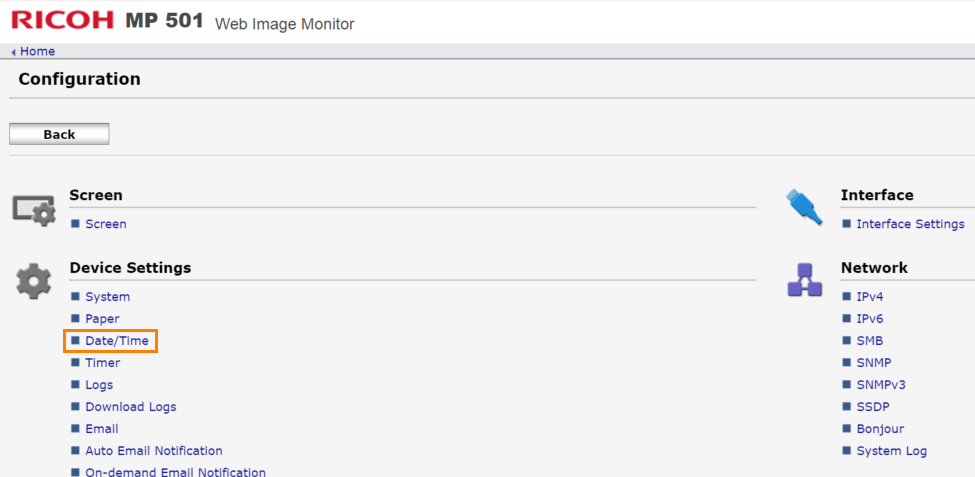
4. Set the time to match the Dispatcher Paragon server time or specify automatic time configuration via the NTP server.
Provide trusted security certificate to Ricoh MFDs
G2 and G2.5 devices were also affected by this change. From Build 84 these devices do not need to follow this section.
The new version of RXOP library 3.8.8.1 forces certificate validation during terminal installation. That is why Ricoh Europe introduced a new service available for its customers:
MFD's certificate requirements:
Signed by a Certification Authority (CA) that is already trusted by the servers of the customer
The CA is trusted by the managing Terminal Server
Certificate's Common Name (CN) is set either the FQDN, IP address, or hostname, depending on address used to access the MFD's administration interface
Subject Alternative Names (SAN) contain the FQDN, IP address, and/or hostname corresponding to the "Network address" provided during the installation of the embedded terminal in the management interface
Upload the certificate to the MFD:
Login to the MFD as Machine Administrator
Navigate to Device Management > Configuration > Security > Device certificate
Upload the certificate to the MFD and make it the main one
Terminal Server's truststore:
the CA certificate needs to be available in Local Computer's Trusted Root Certification Authorities (refer to System communication hardening for more information)
Setup card reader to be available from sleep mode
Navigate to the Screen Features menu within Settings (as machine admin).
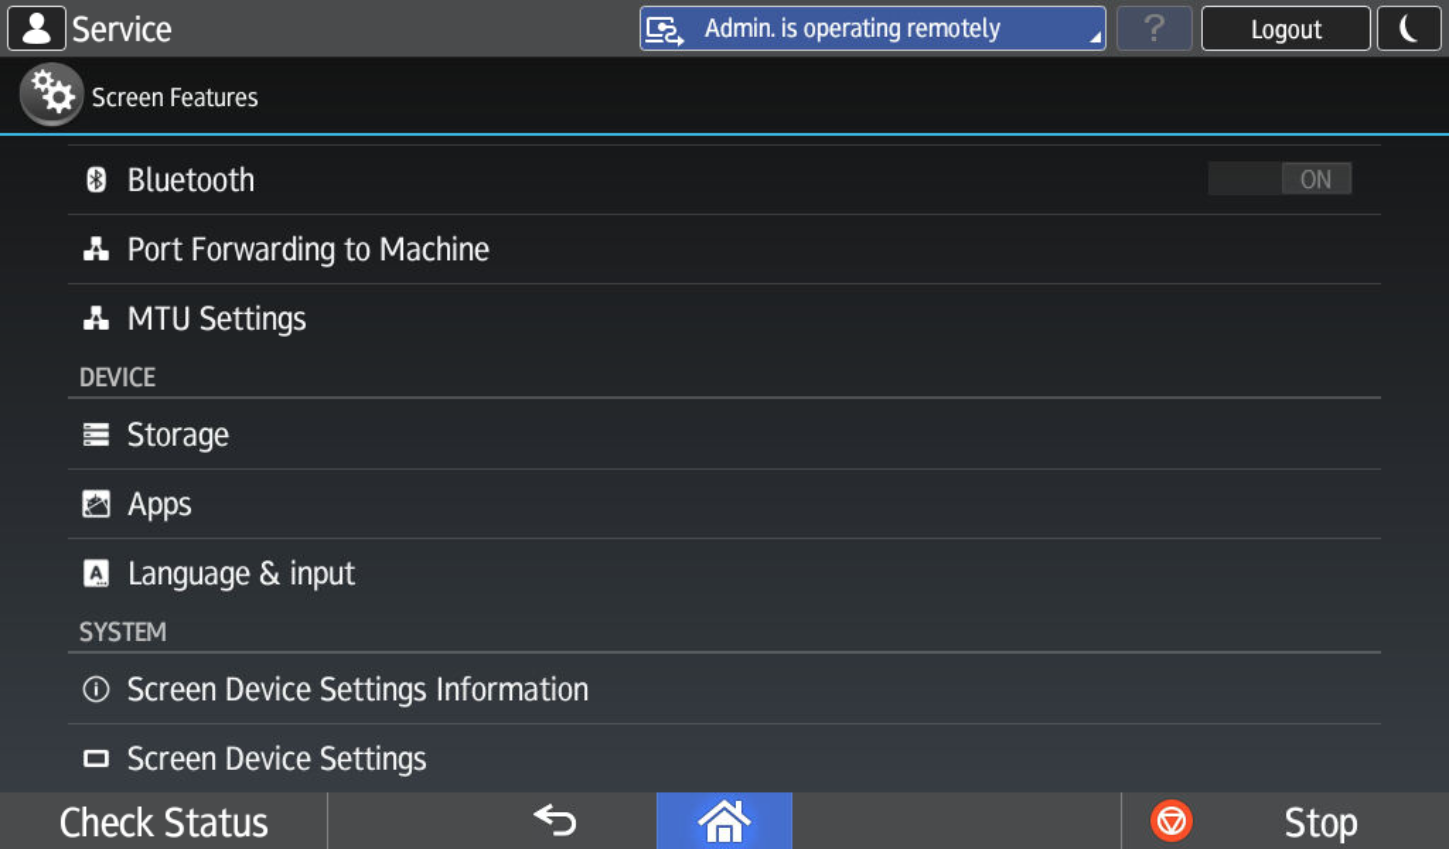
Navigate to Screen Device Settings
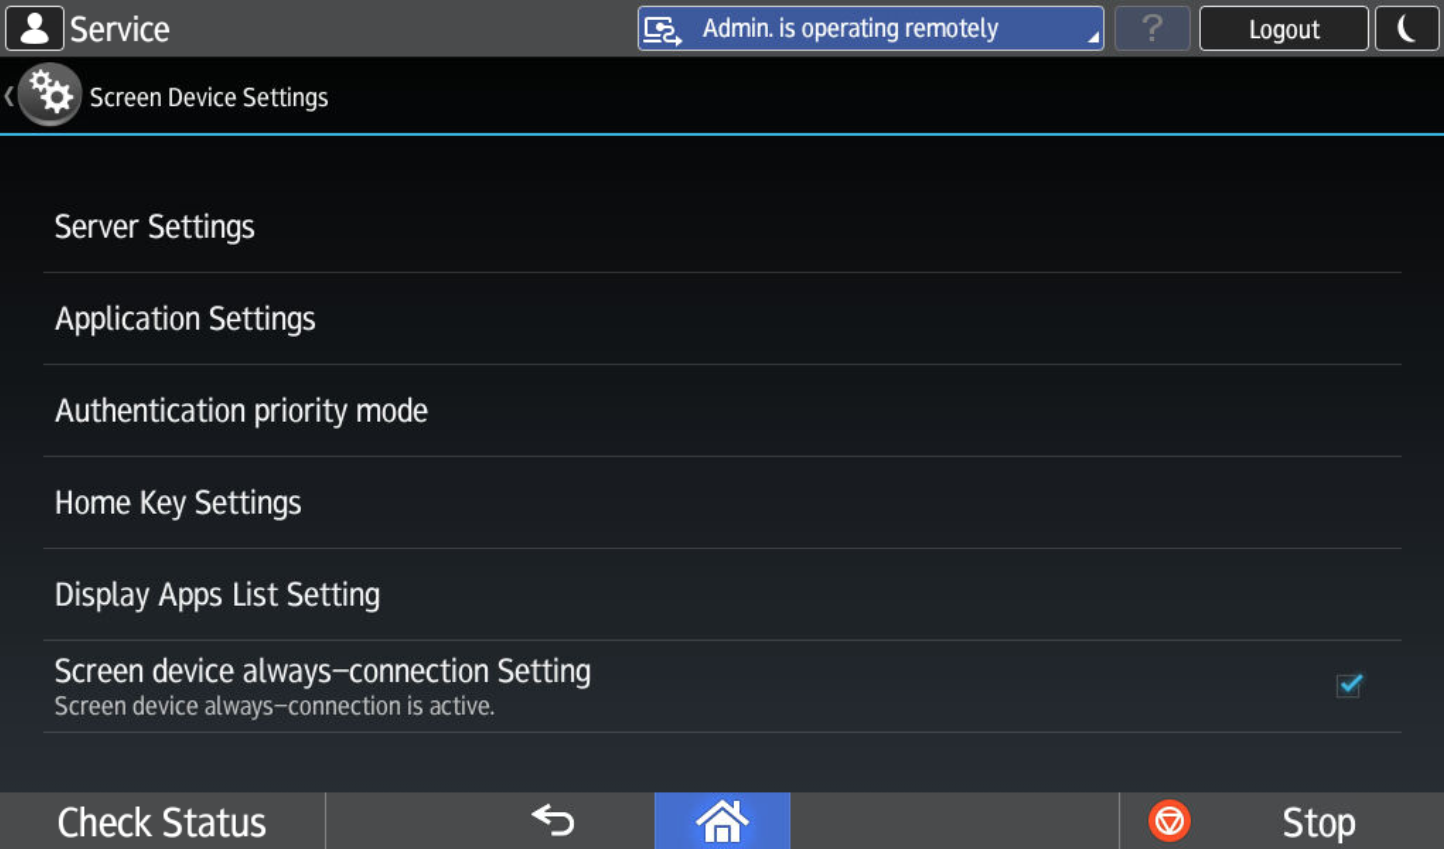
Turn Screen device always-connection Setting to true
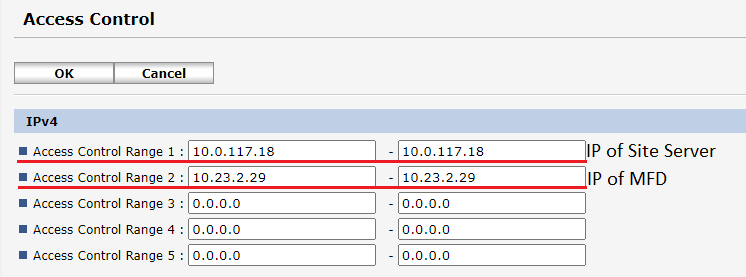
Setting up Access Control
If the MFD is configured to accept web traffic only from permitted IP addresses and networks (that can be set up in the Access Control panel on the device), in addition to adding the Site Server IP address the address of the MFD needs to be added as well. Otherwise, the installation will fail.
Using 3rd party card readers
If 3rd party card readers are used, the following configuration must be performed for every Terminal Server managing Ricoh SOP terminals so that they USB readers function correctly. This configuration will affect only Ricoh SOP MFDs other vendor MFDs are not affected.
Card reader configuration is done automatically during the installation process. By default, this process sets up the MFD to use YSoft USB Card Reader. If some 3rd party card readers are being used, the following configuration must be added to the Terminal Server configuration file located at <install_dir>\SPOC\terminalserver\TerminalServer.exe.config within the <appSettings> tags.
ricohSopSkipCardReaderConfiguration
By default, this value is set to false.
When set to true, the configuring the card reader step will be skipped during installation.
This is suggested when different types of card reader are used across Ricoh SOP MFDs.
ricohSopCardReaderVid
This references vendor ID of used card readers. The default value is 214C
This serves as a possible override, when one type of card reader is used across all Ricoh SOP MFDs
ricohSopCardReaderPid
This references product ID of used card readers. The default value is 0202
This serves as a possible override, when one type of card reader is used across all Ricoh SOP MFDs