DeeControl 2 - Quick Guide
DeeControl 2 is a visual editor for 3D models. Its main features are preparing a model for 3D printing and sending the print job to an eDee printer via Dispatcher Paragon.
Main screen
The purpose of this document is to allow the user to start using DeeControl 2 quickly. If you need a more detailed explanation, see DeeControl 2 - User Guide.
After starting DeeControl 2, the following screen appears:
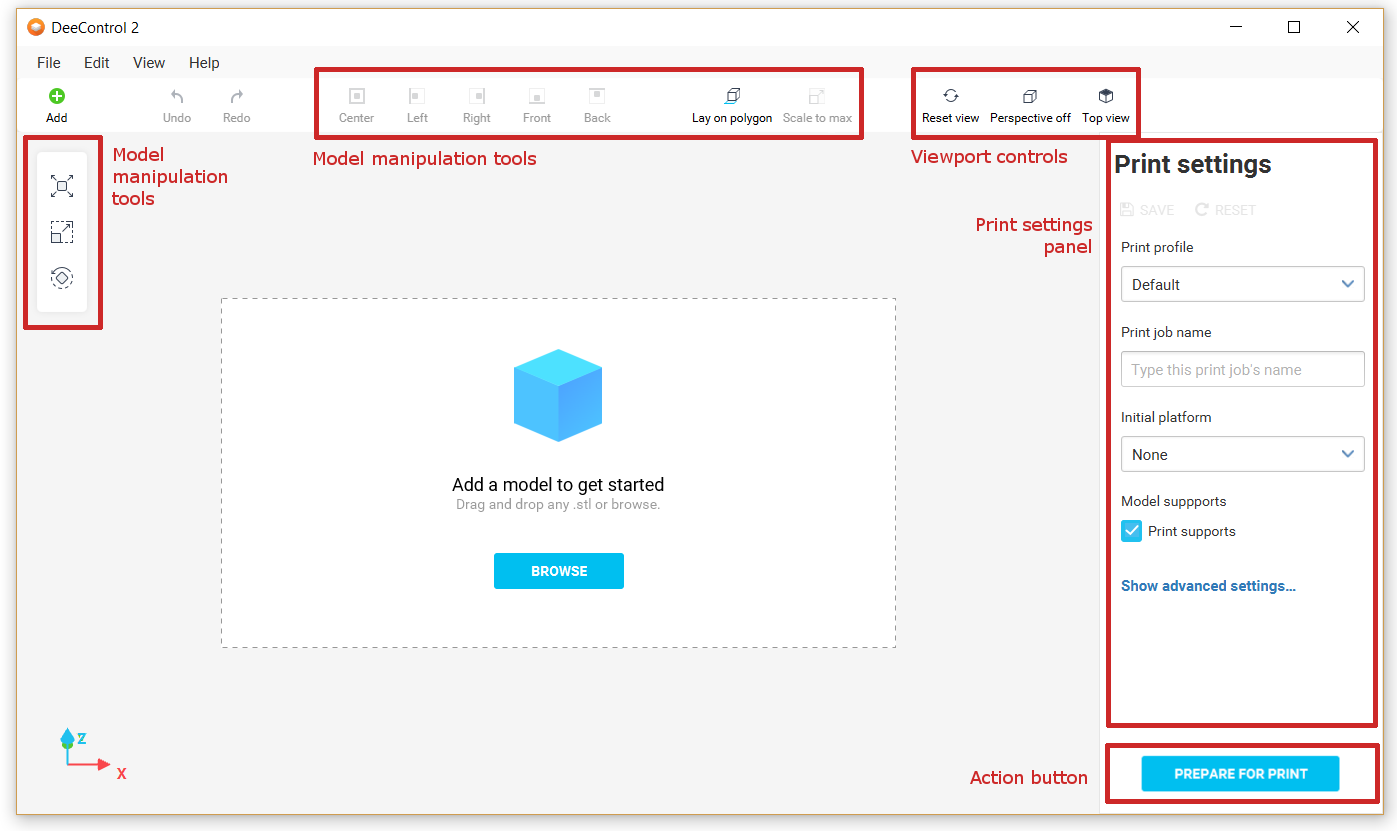
The most important parts of the layout are marked by in red.
Model manipulation tools (Move, Scale, Rotate, Align etc.)
Viewport controls
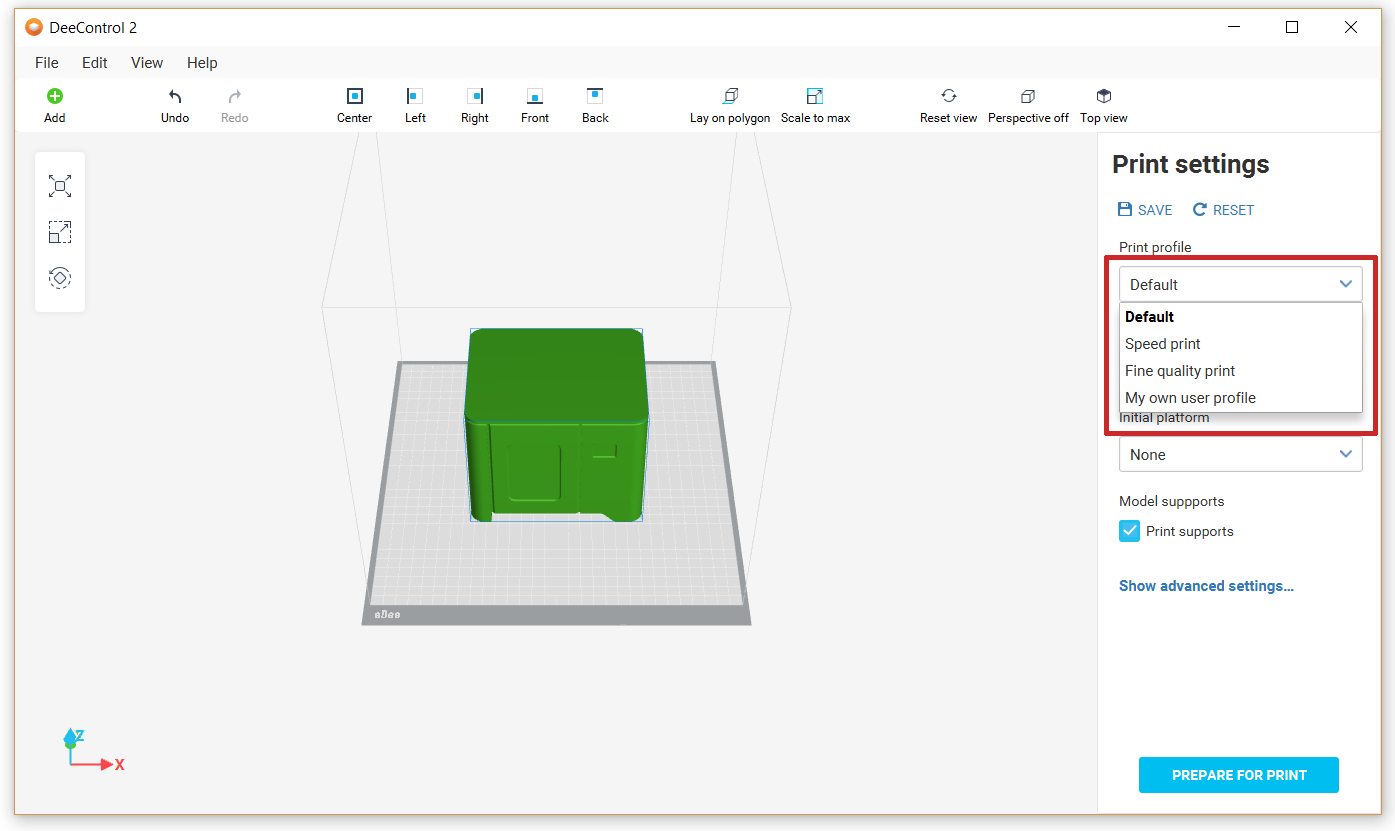
Print settings panel
Action button
Typical workflow
The typical workflow of printing a model is as follows:
Import an STL model by either dragging and dropping or clicking the "Add" button in the top left-hand corner
Use the model manipulation tools to arrange the model(s) on the print bed.
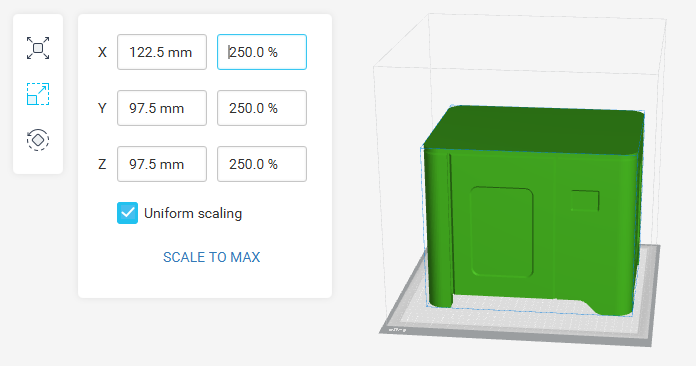
Scale tool
Select the model and either enter the absolute dimensions or relative percentage. Use Uniform Scaling option to scale the model proportionally. The SCALE TO MAX feature fits the model to the print bed so that its size is to the maximum.
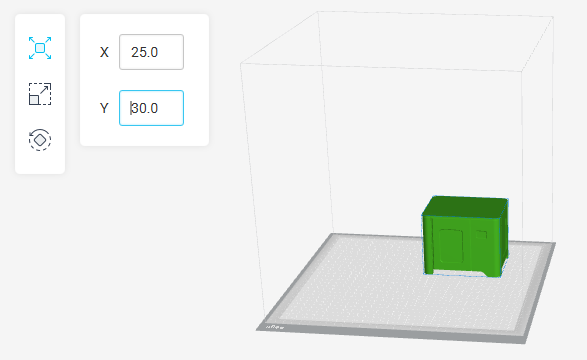
Move tool
Select the model and input the desired x,y coordinates. Alternatively, use drag and drop to move the model.
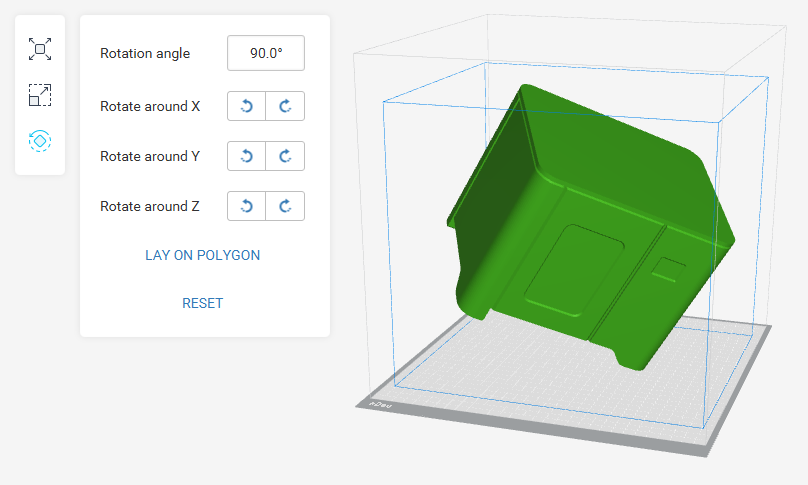
Rotate tool
Select the model, enter the desired relative change in degrees, and use the arrow buttons to apply. The orientation is shown by the 3D axis cross icon at the lower left-hand corner of the editor.
Select a suitable print profile in the slicer panel.
We recommend using the default profile for most cases. Change the advanced settings only if you know what you are doing.
Click the "PREPARE FOR PRINT" button

Review the print preview.
Tip: Use the slider to cut the model to see the infill.
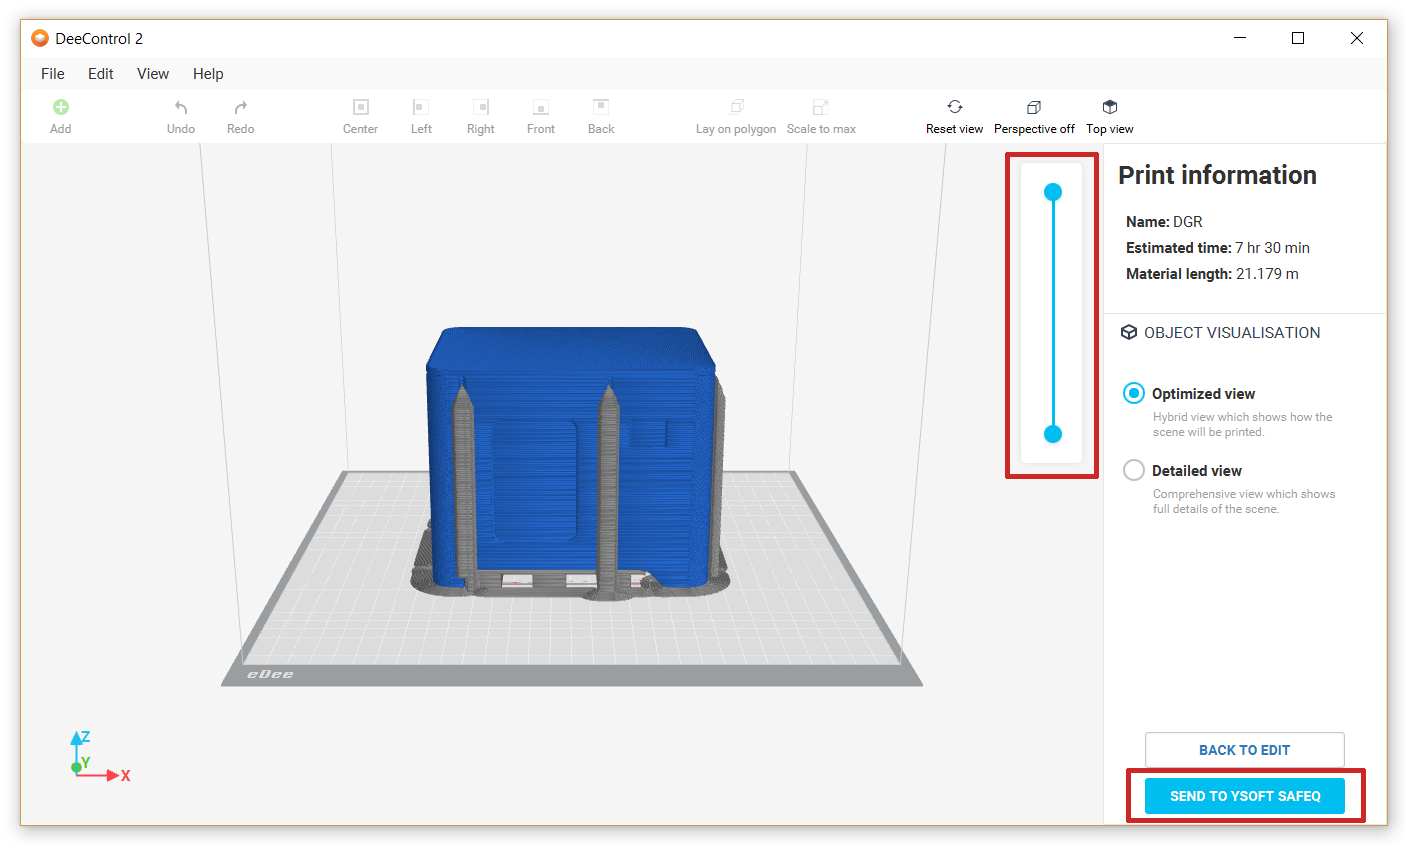
Click the "SEND TO YSOFT SAFEQ" button. This step requires configuration. For more information see chapter DeeControl 2 - User Guide, section How to Set Up a connection to Dispatcher Paragon Server.
After the print job has been successfully sent to Dispatcher Paragon, go to the eDee printer and follow the instructions on the terminal to start printing.