How to Configure E-mails
Dispatcher Paragon is capable of sending emails in various situations, including:
Scan to Email
Payment quota
Notifications
Reports
and others
Emails are sent using the standard SMTP Protocol.
Email Settings page
Connection to the SMTP server is configured under System > Email configuration.
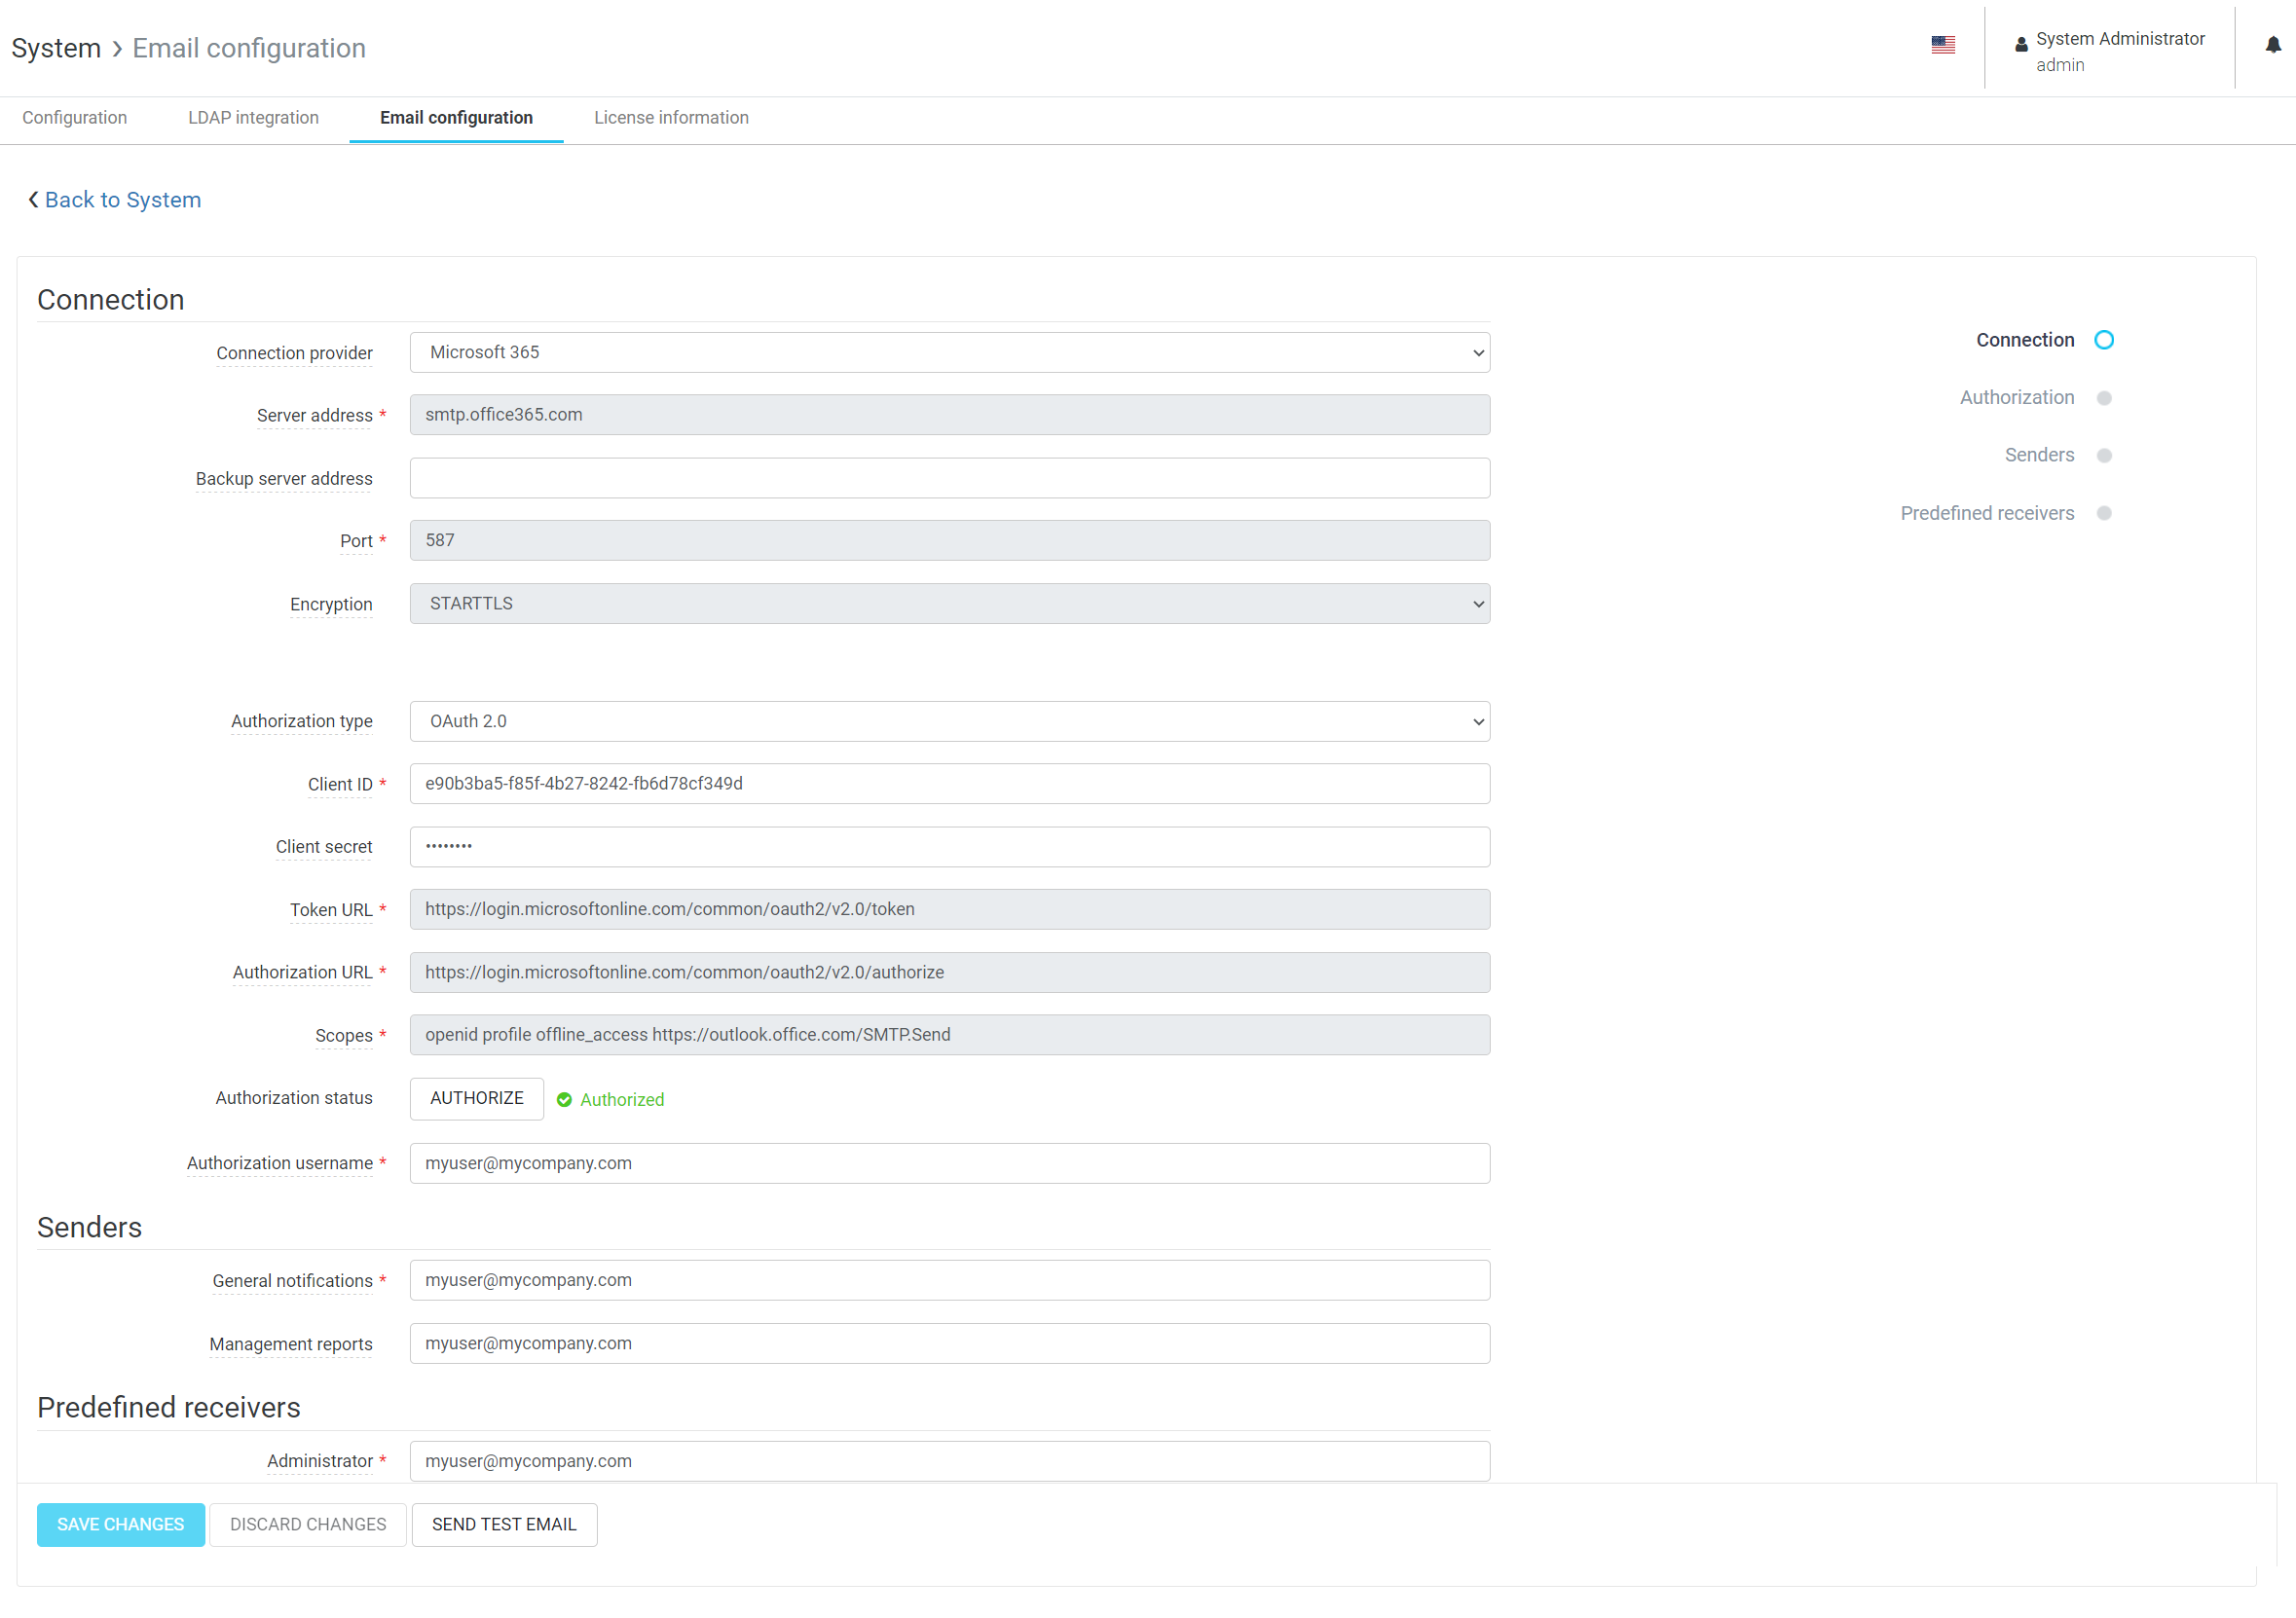
Connection
Dispatcher Paragon contains pre-set configurations for selected email providers, which can be selected in the Connection provider field.
If your provider is not on the list, select Custom and enter the values in accordance to the email provider manual.
Authentication
Dispatcher Paragon supports the following methods or authentication:
No authorization
Username and password: A constant set of credentials
OAuth 2.0: A more secure method using short-lived tokens to authorize requests
The OAuth 2.0 method requires that admin registers their Dispatcher Paragon instance with the email provider, which is described in the next section.
Senders
Email addresses that will appear as senders of the emails.
Email providers usually limit which addresses can be used as senders, so consult you email provider manual for details.
Note: In addition to this setting, specific Dispatcher Paragon features (such as Scan Connectors, Payment and others) allow to override the sender configuration.
Predefined receivers
Email addresses to which certain messages are sent.
OAuth 2.0 authentication setup
With the OAuth 2.0 authentication, it is required to register Dispatcher Paragon with the email provider. The registration must be done by the Dispatcher Paragon administrator, because it requires whitelisting the URL of the Dispatcher Paragon server.
Microsoft
Prerequisite
The user who will be used as email sender in Dispatcher Paragon must have a valid Microsoft 365 license assigned.
Enabling SMTP AUTH Protocol
Dispatcher Paragon sends emails using authorized SMTP protocol, which needs to be enabled for the organization in Microsoft Azure, and for the specific user in Microsoft 365 Center.
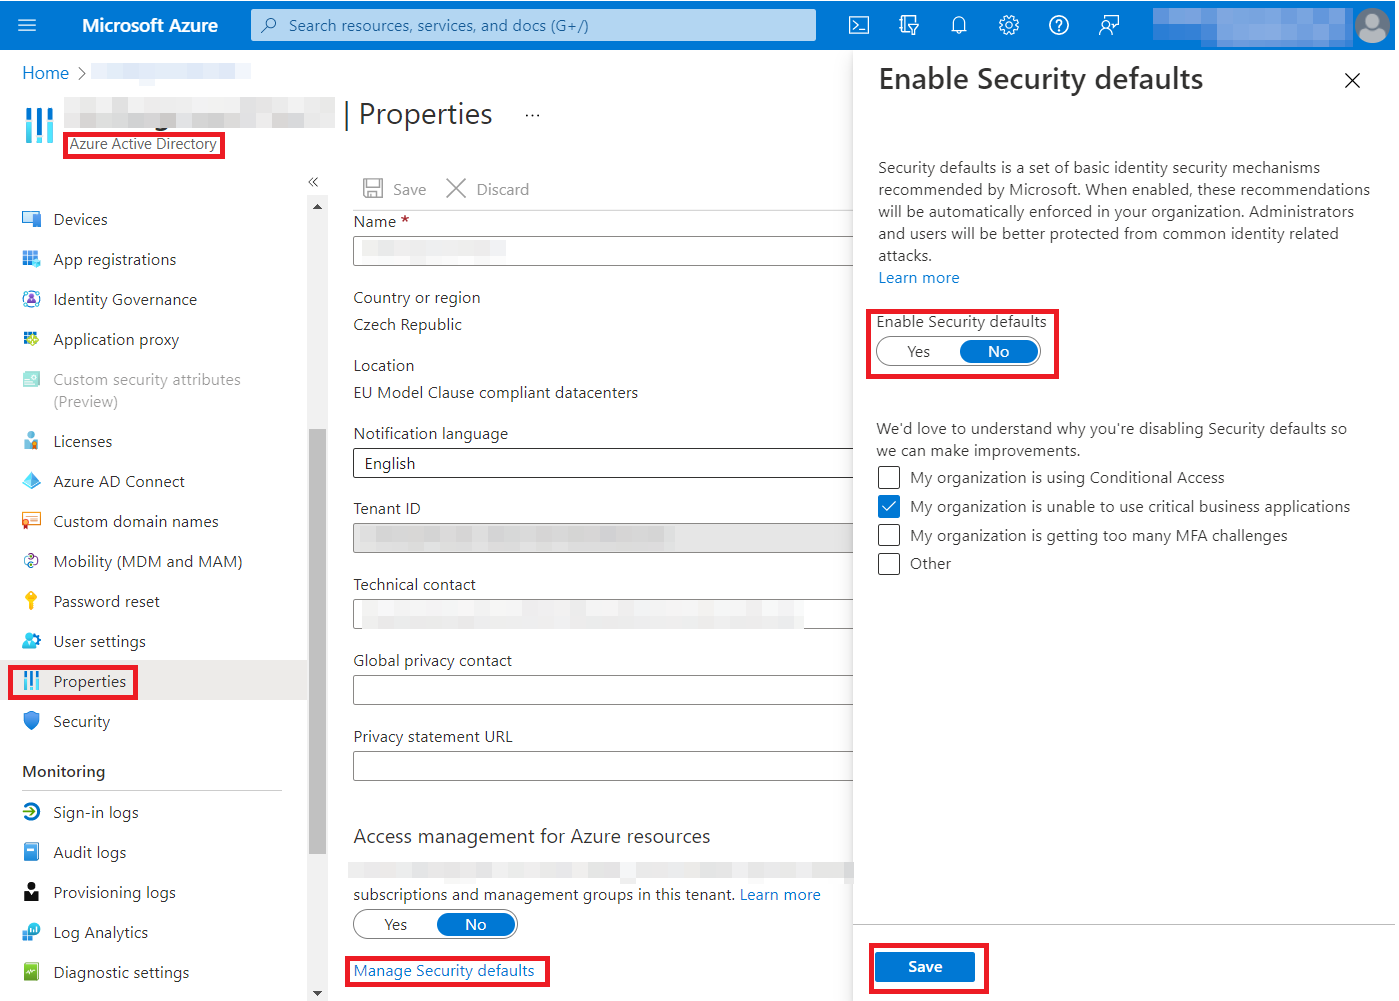
SMTP AUTH protocol is not available when Microsoft Security Defaults are active, even if used with the Modern Authentication with OAuth 2.0 (see Microsoft documentation on the topic)
Therefore, Security Defaults must be disabled for the tenant:
Navigate to https://portal.azure.com/#home
Select Azure Active Directory > Properties > Manage Security Defaults > click No in Enable Security Defaults. Click Save.
SMTP protocol must also be enabled for the user account which will be used as email sender:
Navigate to https://admin.microsoft.com/
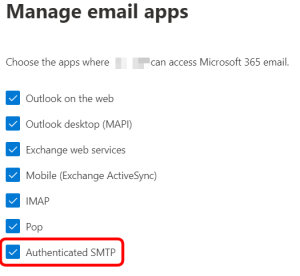
Select Users > Active users > select your user > select Mail tab > click Manage email apps.
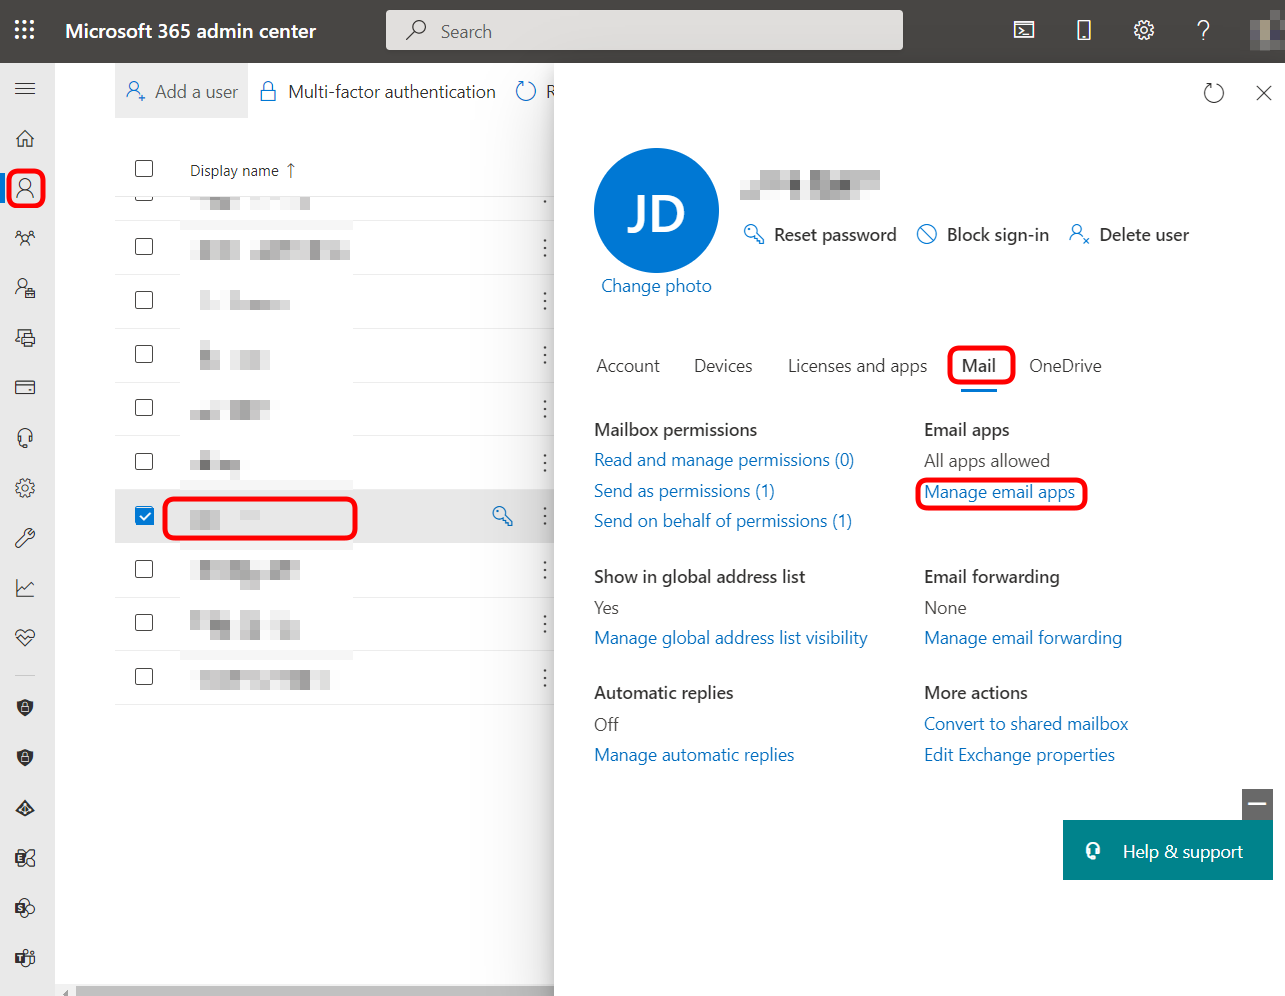
Make sure that Authenticated SMTP is selected
App registration
Next, we need an App registration which will contain URLs of your Dispatcher Paragon installation. The following steps are excerpts from the Microsoft guide:
Log in to https://portal.azure.com/#home
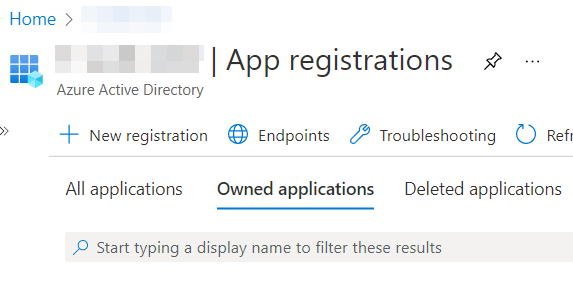
Under Azure Active Directory, you can find your App registrations. Click New registration or select an existing one
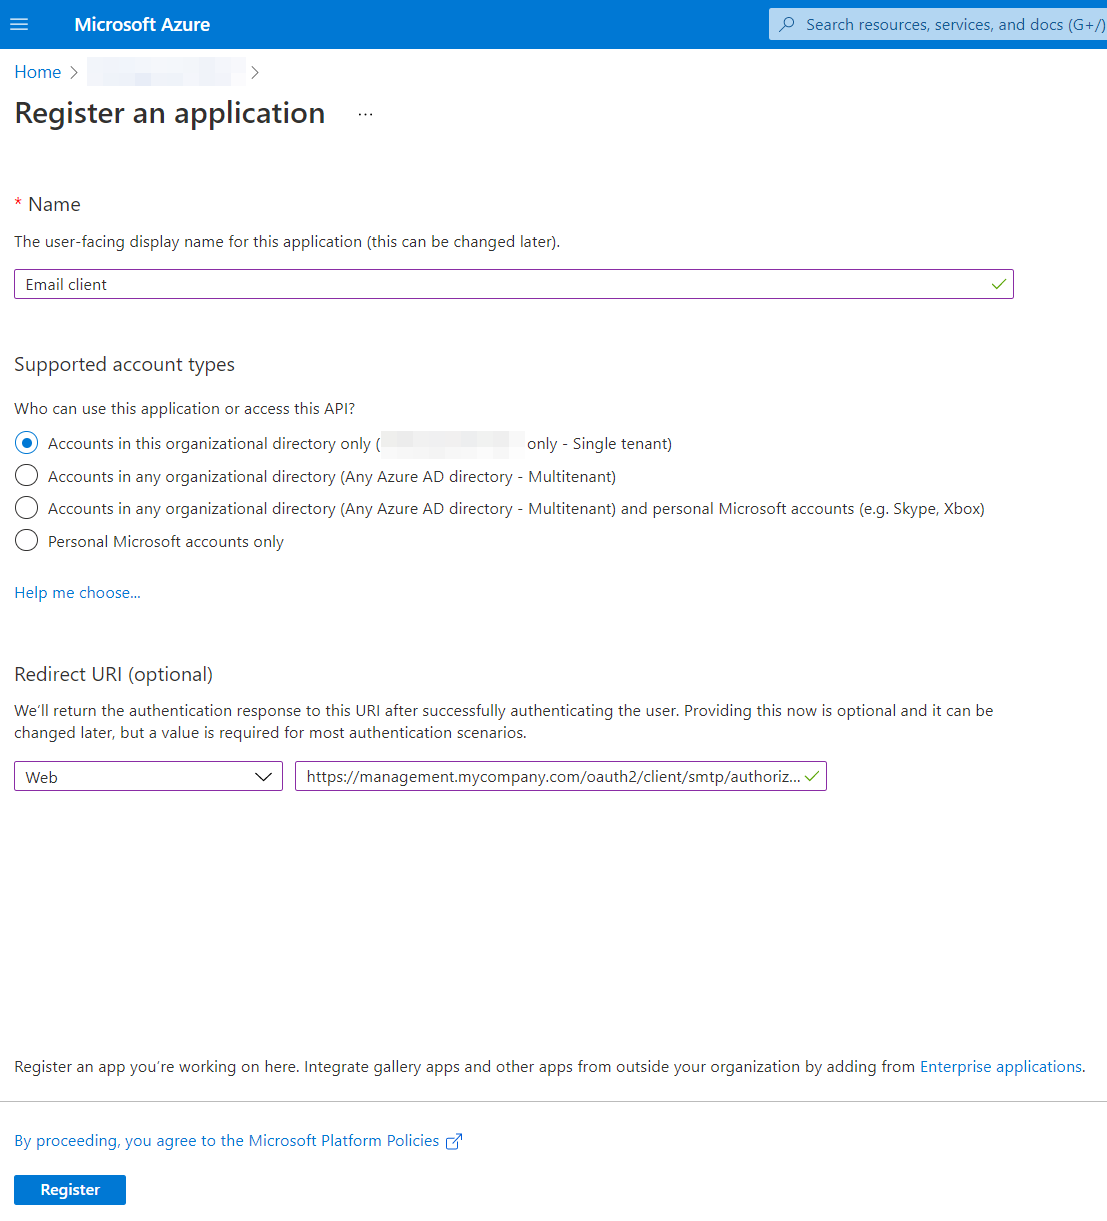
Fill in the form:
Choose a name - it will be visible to your user during registration
For Supported account types, select the first or second option:
Accounts in this organization only (Single tenant) is preferred if this App registration will only be used for Dispatcher Paragon Emails
Accounts in any organization directory (Multi tenant) is also supported
Personal accounts are not supported
In the Redirect URI section, select Web and fill in the following URL https://<management_interface_url>/oauth2/client/smtp/authorize-callback
<management_interface_url> must be the same as the URL you use to access your management interface
(If the URI changes, or if there are multiple URIs, they can be modified later under Authentication tab of the created Client registration)
Click Register
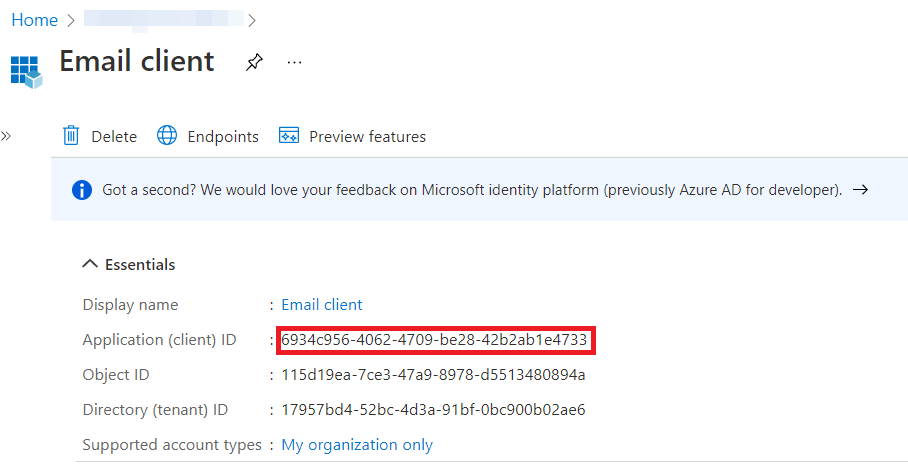
On the created Client registration, under Overview tab, take note of the Application (client) id (when prompted later, enter it to the Client ID field in Dispatcher Paragon)
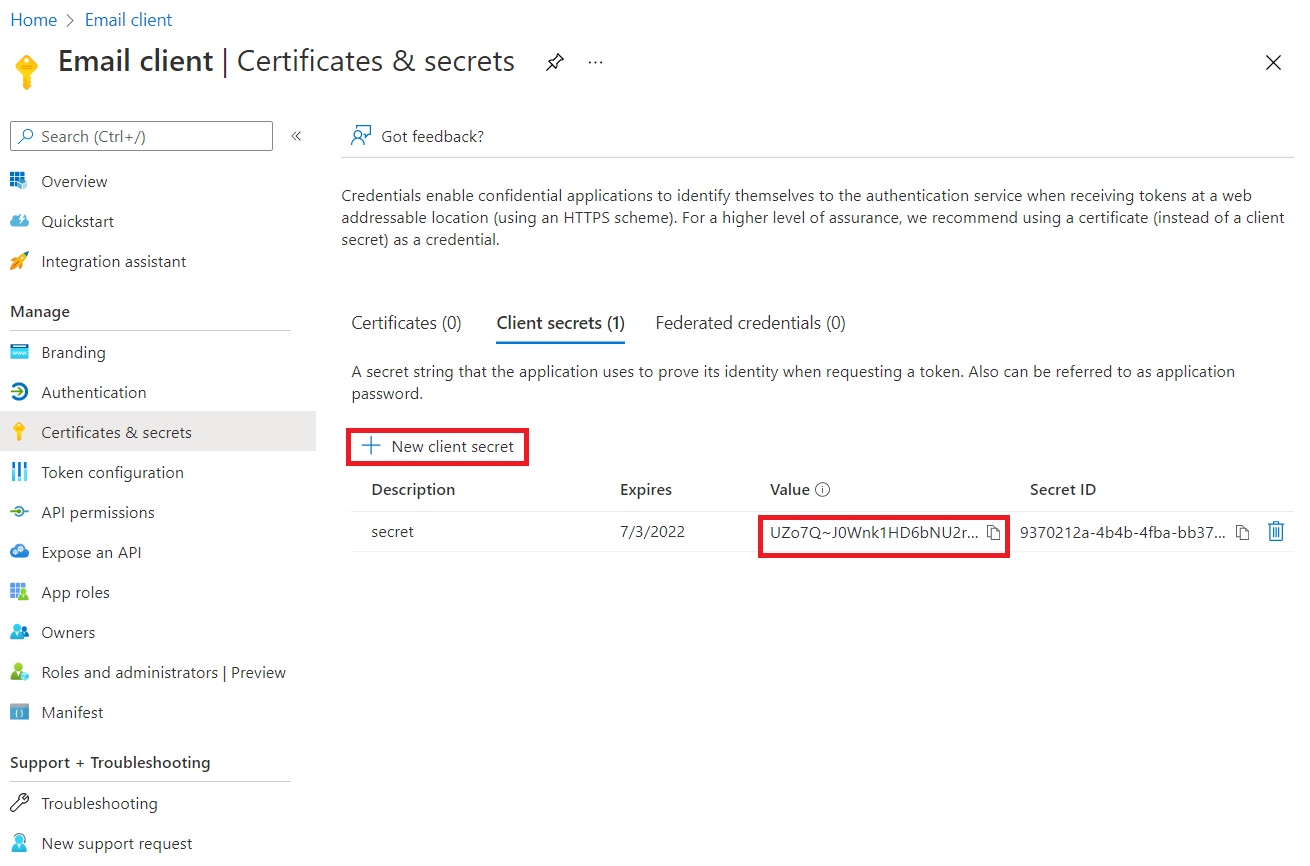
Under Certificates & secrets, create a New client Secret (choose name and validity according to your needs). Once created, take note of the Value (when prompted later, enter it to the Client Secret field in Dispatcher Paragon)
Note: The Secret Value is only visible immediately after creation. If lost, a new secret needs to be created.
Dispatcher Paragon Authorization
Navigate to System > Email configuration.
In Connection Provider, select Microsoft 365.
In Authorization type, select OAuth 2.0.
Fill in the Client ID and Client secret according to the steps above.
Click Authorize. A popup window will guide you through the authorization.
If your Management Service is accessible under multiple URLs, make sure to perform the authorization with the one that is registered in Azure. A common source of errors is using HTTP protocol where HTTPS is registered.
After successful authorization, your username will be copied over to Authorization username. In rare cases, the Authorization username may not be determined correctly, in which case it needs to be entered manually.
Fill in the rest of the form according to your needs and save it.
Only the user who performed the authorization can be the email sender (in the From: header). Sending emails on behalf of a different user is not supported
Dispatcher Paragon is now set up to authorize emails using OAuth 2.0 with Microsoft.
Scopes used for Microsoft
https://outlook.office.com/SMTP.Send - To be able to send emails
openid and profile - To prefill the username field
offline_access - To allow the authorization last for extended time
Support for Google OAuth 2.0 is experimental. Use at your own risk.
Prerequisite
The user who will be used as email sender in Dispatcher Paragon must have Google Mail enabled.
Client registration
We need a Client registration that will contain URLs of your Ysoft SafeQ installation.
Log in to https://console.cloud.google.com/cloud-resource-manager
Create a new Project
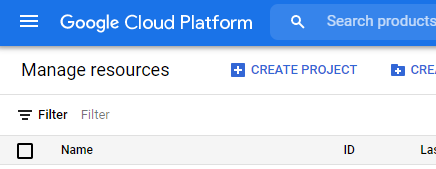
Name it according to your needs
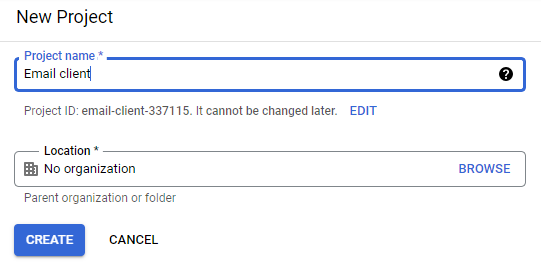
Click Create.
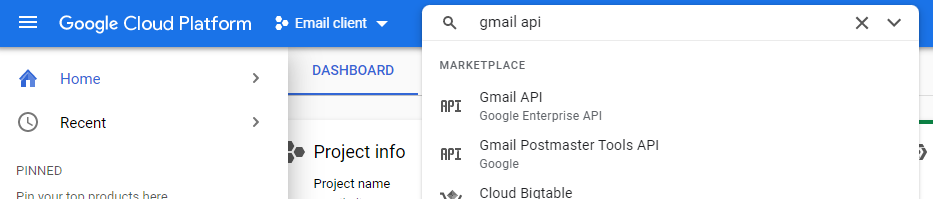
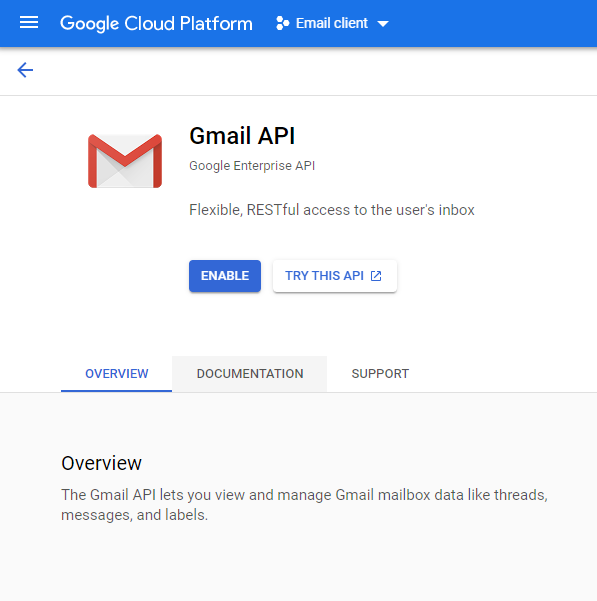
When the project is created, add Gmail API.
And enable it.
Create Credentials.

Credential type is User data.
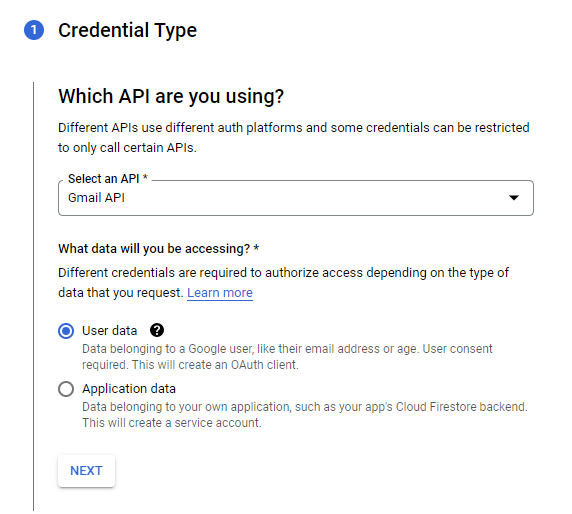
Click Next
Fill in App information
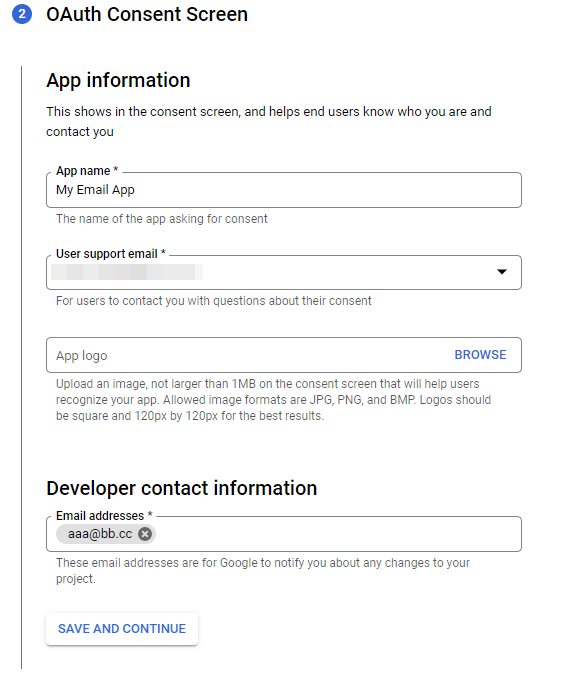
Click Save And Continue
It's not necessary to add any scopes, just click Save and Continue
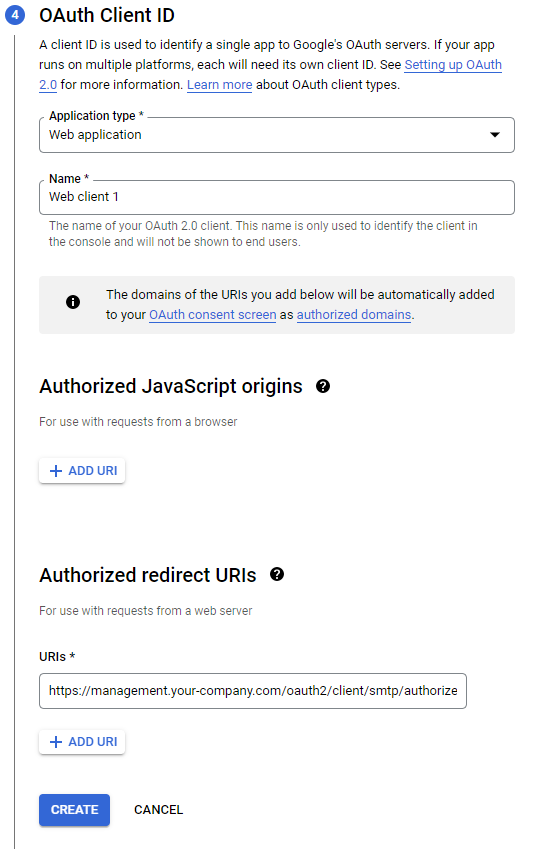
Fill OAuth Client ID form:
Application type: Web Application
Name: according you your needs
Authorized redirect URIs: Be sure to add Ysoft SafeQ address in this format: https://<your url>/oauth2/client/smtp/authorize-callback
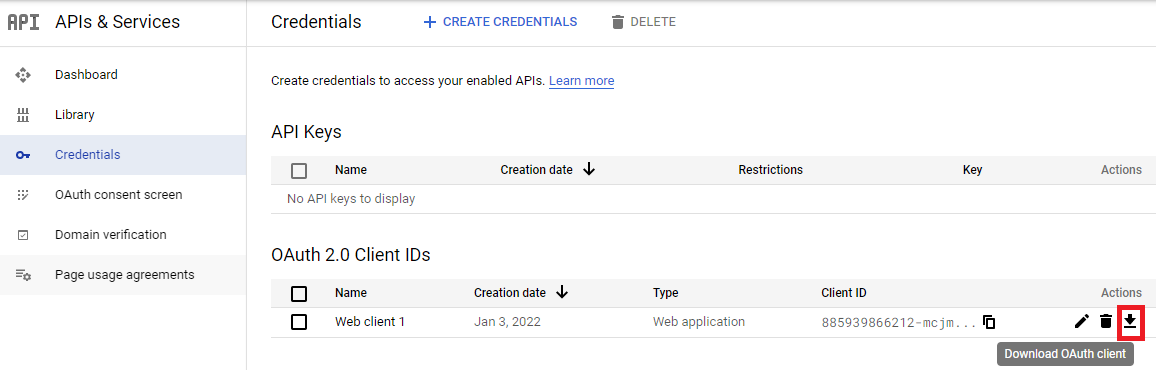
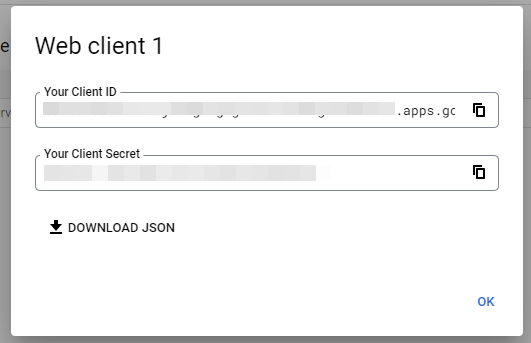
Generated Client ID and Client Secret are available on the Credentials tab
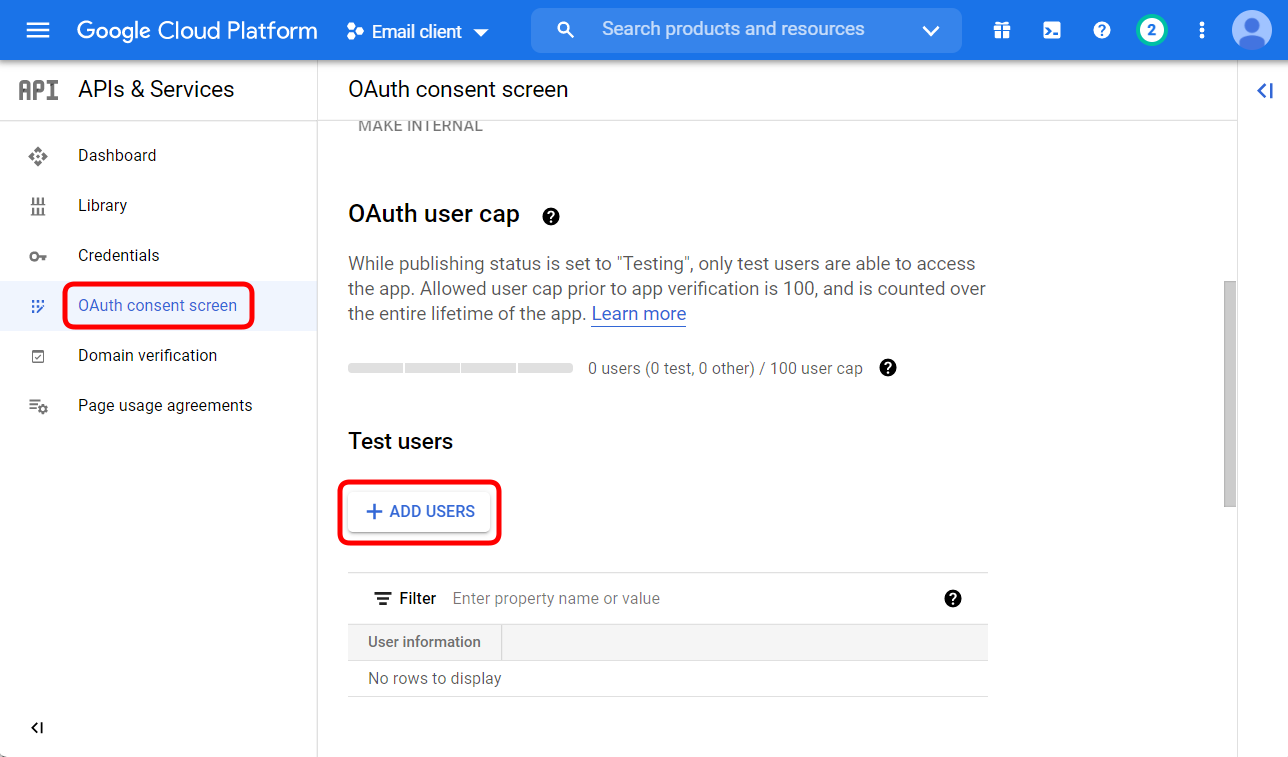
Adding a test user
The Client we have just created is not public, therefore only a limited range of users may use it.
In order to make the Client public, it must be verified by Google, which is out of scope of this guide.
For Ysoft SafeQ purposes, only a handful of users need to be specified.
Select OAuth consent screen and in the Test Users section, click Add users. Input email of the users which will be used as email sender in Dispatcher Paragon.
Ysoft SafeQ Authorization
Google is not included in the presets, so a Custom connection provider must be selected and parameters filled manually:
Connection | |
Server address | |
Port | 587 |
Encryption | STARTTLS |
Authorization | |
Authorization type | OAuth 2.0 |
Client ID and Client Secret | generated using above steps |
Token URL | |
Authorization URL | https://accounts.google.com/o/oauth2/v2/auth?prompt=consent&access_type=offline |
Scopes | openid profile email https://mail.google.com |
Click Authorize, a popup window will guide you through the authorization.
If your Management Service is accessible under multiple URLs, make sure to perform the authorization with the one that is registered in Google. A common source of errors is using HTTP protocol where HTTPS is registered.
After successful authorization, your username will be copied over to Authorization username. In rare cases, the Authorization username may not be determined correctly, in which case it needs to be entered manually.
Fill the rest of the form and save it.
SafeQ is now set up to authorize emails using OAuth 2.0 with Google.
Scopes used for Google
https://mail.google.com - To be able to send emails
openid, profile and email - To prefill the username field
In addition to that, access_type=offline allows the authorization to last for an extended time
OAuth 2.0 token lifetime and expiration
In OAuth 2.0, instead of a static password, a short-lived access token is used to authorize communication (such as sending emails). In SafeQ, the access token is propagated to every component, and is cached at the site level. Therefore, the site can keep sending emails for a limited time, even if connection to the Ysoft SafeQ Management Service becomes unavailable.
In order to facilitate authorizations longer that is the lifetime of the access token, another token is generated by the OAuth 2.0 Provider, a refresh token. The refresh token is used to retrieve a new access token every time it is about to expire and therefore has much longer validity. Moreover, a refresh token about to expire may be simply exchanged for another refresh token, as long as the underlying offline session is still active. Therefore, it is much more important to keep refresh tokens secured. In SafeQ, they are safely stored in Management Service database and encrypted if Data Protection is on. They are never passed to another component.
Various providers have varying rules for the offline session lifetime. It is also usually possible to terminate the session manually, thus rendering all refresh tokens invalid.
To summarize:
Access token - Stored at sites, has short expiration date and it expiration determines how long the site can keep sending emails when Management Service is offline
Refresh token - Stored in Management Service, its expiration determines how long Management Service may stay disconnected from the Internet, until a new authorization is needed
Offline session - Specified at the OAuth 2.0 provider, determines how long the authorization lasts before needing to re-login, even if Dispatcher Paragon is online
Access token caching and refreshing
As stated above, a valid access token is a prerequisite to be able to send emails with OAuth 2.0 authorization. Access tokens are stored in Spooler Controller and survive restart, but once they expire, a communication with Management Service is needed to fetch new ones.
Dispatcher Paragon employs the following strategy to make sure that every site has a non-expired access token at nearly all times:
Whenever a token is needed and is not already in cache, it is fetched from Management Service and cached according to its expiration date
All cached tokens are preemptively refreshed every hour
Therefore, in the worst case, the site may keep sending emails without Management Service, for the time equal to access token lifetime minus one hour.
Microsoft specific settings
Access token lifetime is by default random from 60 to 90 minutes, but can be extended up to 1 day. See the documentation for more details.
Offline session lifetime is directly influenced by User sign in frequency. By default, it uses a rolling window of 90 days after last usage, but that just means that as long as Dispatcher Paragon is running, the session is perpetually extended.
However, the policy may be configured to require re-authentication after a specified time (such as N days since the last login). Such policy is arguably not ideal for the user account used in Ysoft SafeQ for sending emails, because it requires the Dispatcher Paragon admin to repeat the manual authorization steps on a regular basis.
User password reset and password expiration policies alone have no impact on OAuth 2.0 session validity, unless coupled with explicit session revocation.
Limitations
Microsoft: Only the user who performed the authorization can be the email sender (in the From: header). Sending emails on behalf of a different user is not supported.
Spooler Controller installer allows to override email settings for that site. This override only supports Username and Password authentication.
Email settings only apply to each individual tenant. When SafeQ is deployed in multi-tenant setup and an external system (Cloud Central) is used to create tenant via API, Dispatcher Paragon is capable of sending invitation emails in Cluster Admin context, but these emails cannot be authorized with OAuth 2.0.