Scanning at a Konica Minolta Device Native
Quick Scan Workflows
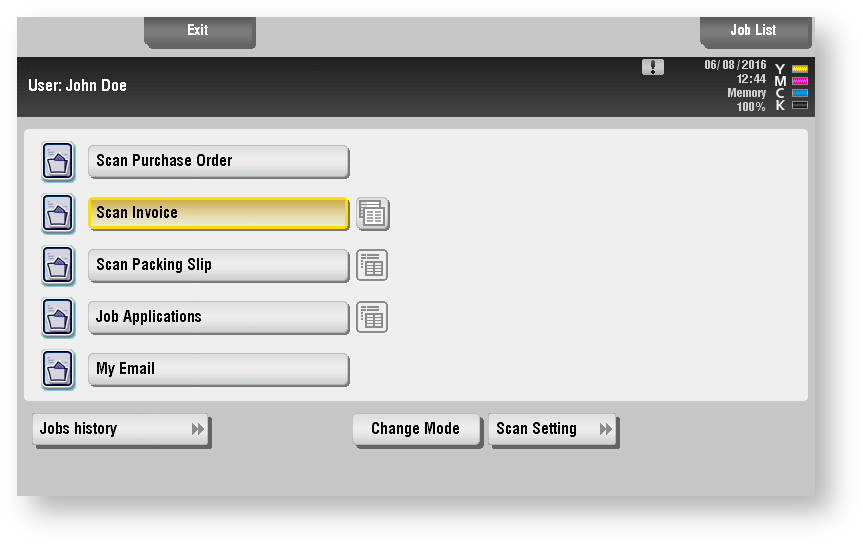
Scan workflows can be defined in a simple way for the user to tap and start the scan workflow immediately. These are the quick scan workflows.
Log into the embedded terminal.
On the main menu screen, tap Dispatcher Paragon Scan.
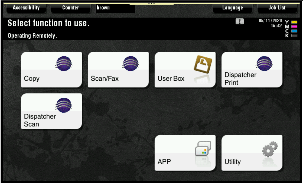
Your main menu screen may not look exactly like the one shown here.
You may need to press the Home button to get to the main menu screen.
Available scan workflows vary based on your permissions and Dispatcher Paragon configuration. To learn more, please contact your system administrator. Quick scan workflows enable you to start a specific workflow without any additional input. These are not marked with an icon next to the workflow name:
 . Tap one of the quick scan workflow buttons. Scanning starts immediately with the selected workflow after you press the Start button (on the device's panel).
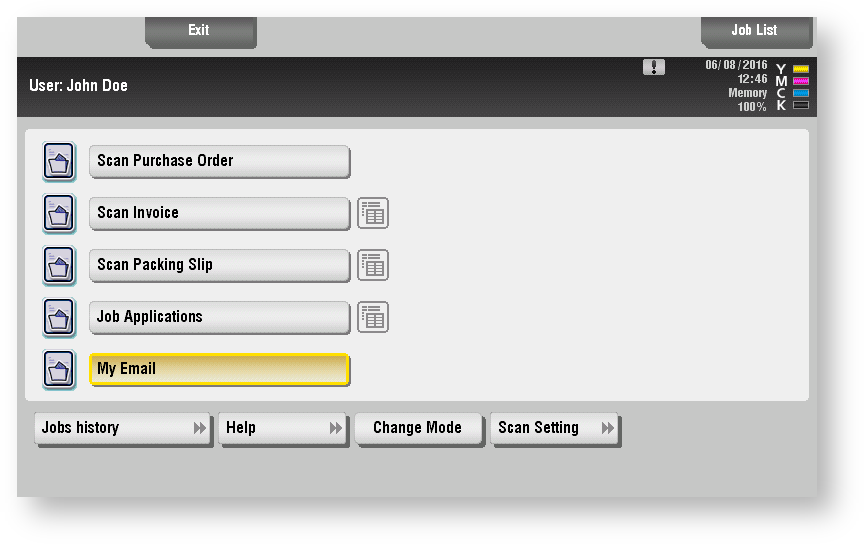
 Tap to show a description of the selected workflow.
 Tap to display and configure additional scan settings.
Scan Workflows with User Input
User input may be required with some scan workflows. This guide will show you how to use them.
Tap one of the scan workflows that require user input and you will be taken to the Workflow detail screen.
 This icon indicates the scan workflow requires user input and is not a quick scan workflow.
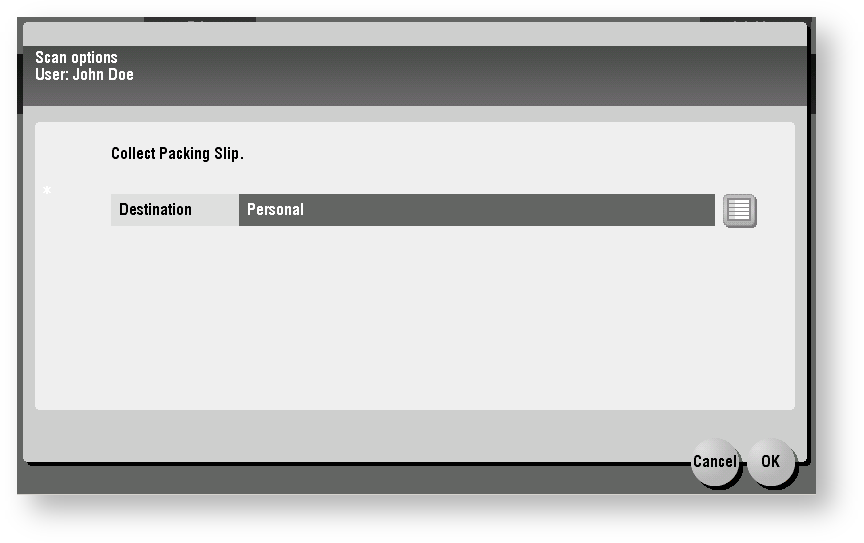
The Workflow detail screen is displayed requesting additional user input. Now you can change the user inputs of the scan workflow.
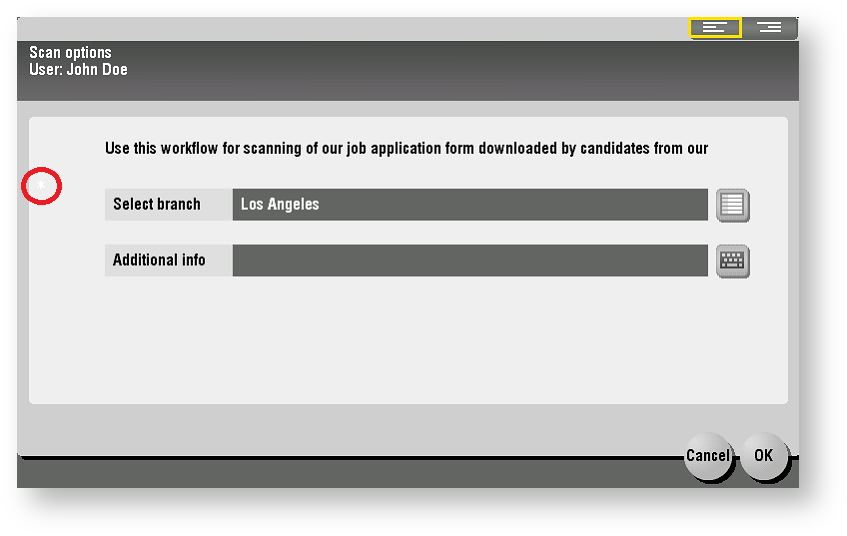
 Tap this icon to show a list of available values, which are a) a list user input field or b) to browse a folder's structure.
 Tap this icon to show the SW keyboard so you can change the user input value.
 Tap this icon to confirm the user input and proceed to scan on the Scan workflows screen.
 Tap this icon to discard the input and return to the Scan workflows screen.
User inputs with an asterisk * (in a red circle) are mandatory and must be completed. Otherwise, the scan workflow will not start and the user is prompted to enter the missing details.
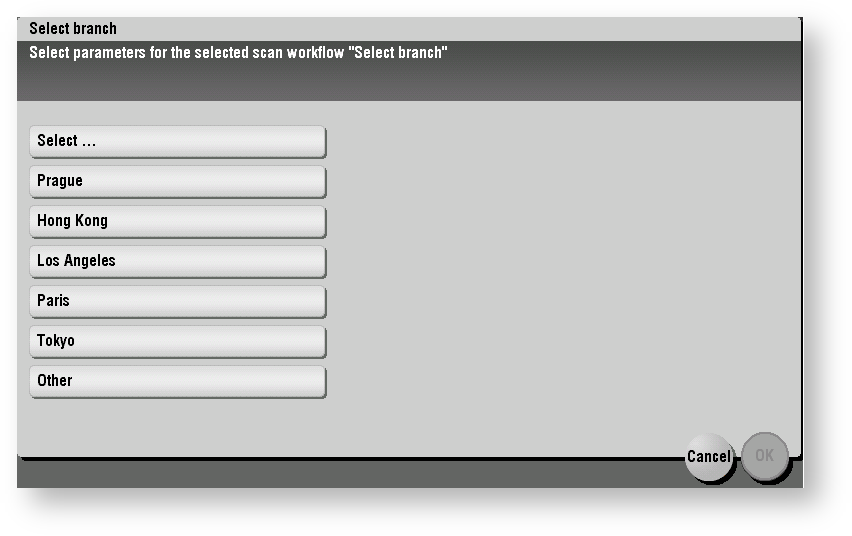
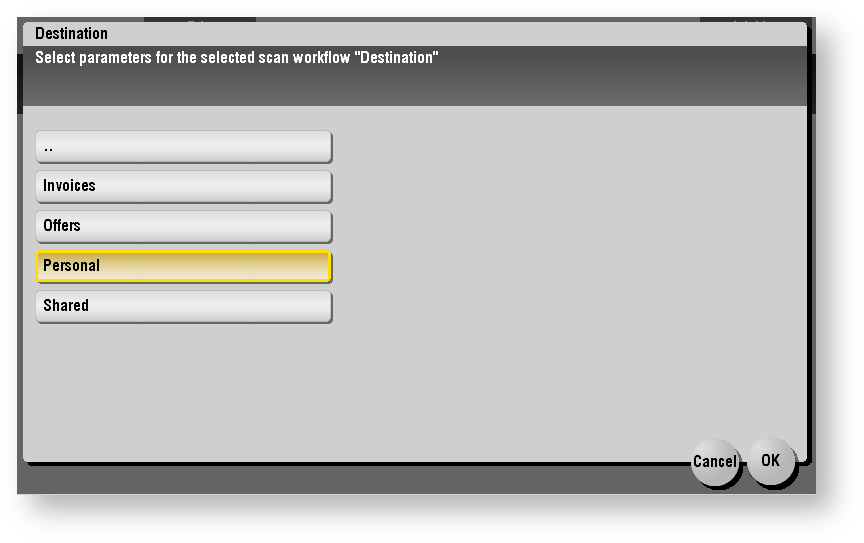
List selection screen. To select one of the options, tap the option row.
The OK button becomes available after a value is selected.
 Tap this icon to confirm input and return to the Workflow detail screen.
Tap this icon to discard input and return to the Workflow detail screen.
Tap this icon to confirm input and return to the Workflow detail screen.
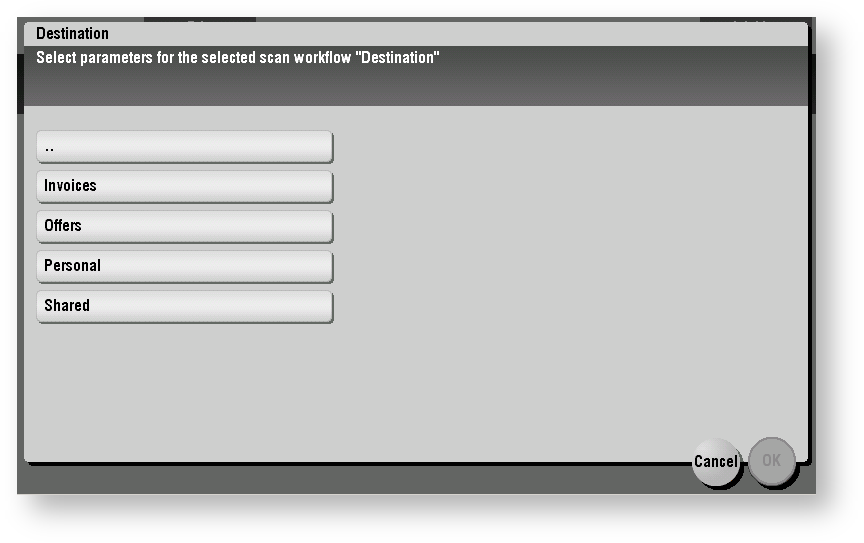
Tap this icon to discard input and return to the Workflow detail screen.Folder browsing screen. Folders are listed in alphabetical order.
Tap this icon to show a list of subfolders of the root folder.
Tap a folder to select it and confirm the selection. If you want to browse the folder to see its subfolders, open the Folder browsing screen again after confirmation. If you want to return to the parent folder, select ".." folder, confirm the selection, and open the Folder browsing screen again.The OK button becomes available after a value is selected.
Tap this icon to confirm input and return to the Workflow detail screen.
Tap this icon do discard input and return to the Workflow detail screen.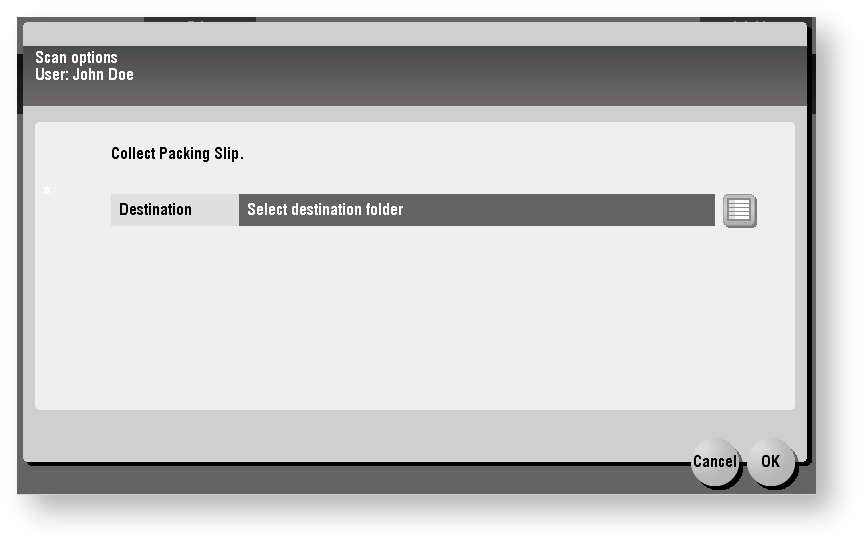
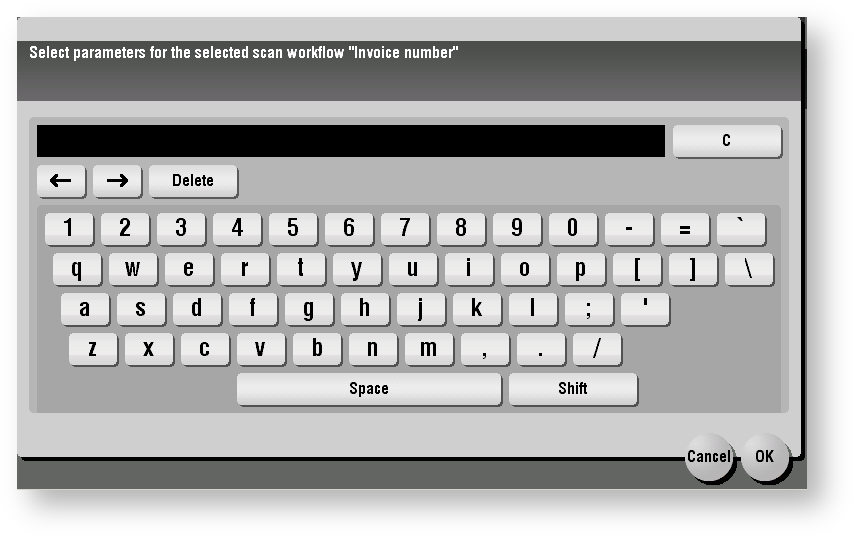
Text or numeric user input screen.
Tap the keyboard shown or the HW keyboard to enter the value of the selected user input.
 Tap this icon to confirm input and return to the Workflow detail screen.
Tap this icon to discard input and return to the Workflow detail screen.
Tap this icon to confirm input and return to the Workflow detail screen.
Tap this icon to discard input and return to the Workflow detail screen.
Additional Scan Settings
The Scan settings screen is displayed after tapping the Scan Settings button.
The Scan Settings button is available only when a scan workflow is selected.
The Scan settings screen contains the available scan settings. You can change the scan settings by tapping each option.
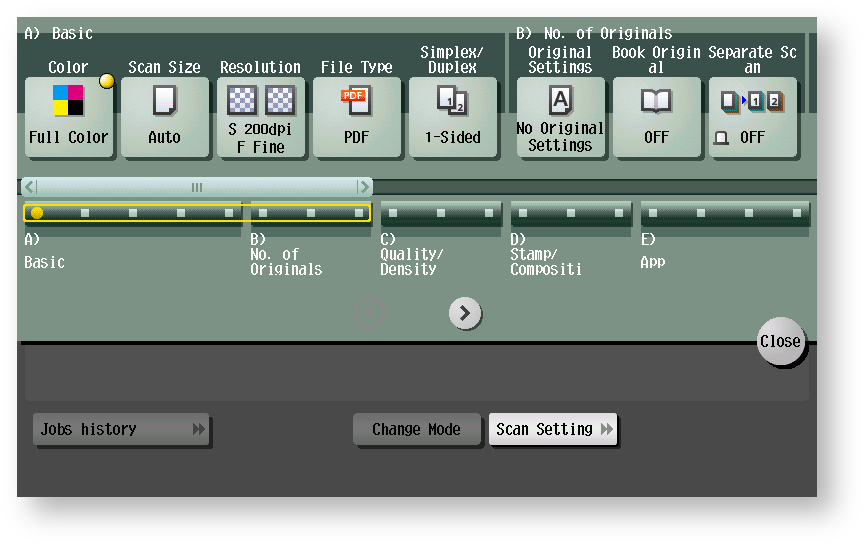
Some options might not be available as they can be disabled in the scan workflow by the system administrator.
Some older devices may not respect the administrator's choices and can choose simplex over the system default of duplex.
 Tap this icon to confirm the settings and return to the Scan workflows screen.