Note that this prompt will appear only if a certificate has not been installed before and SSL communication is enabled.
If Terminal Server communicates with the SOP application over SSL/TLS, then CA certificate of Terminal Server must be installed into SOP application.
In case you have problems with SSL/TLS communication, it can be switched off entirely. This is, however, not recommended in a production environment.
To switch off the SSL/TLS, change the Dispatcher Paragon configuration property dsSslEnabled to 'false'. This option is enabled by default.
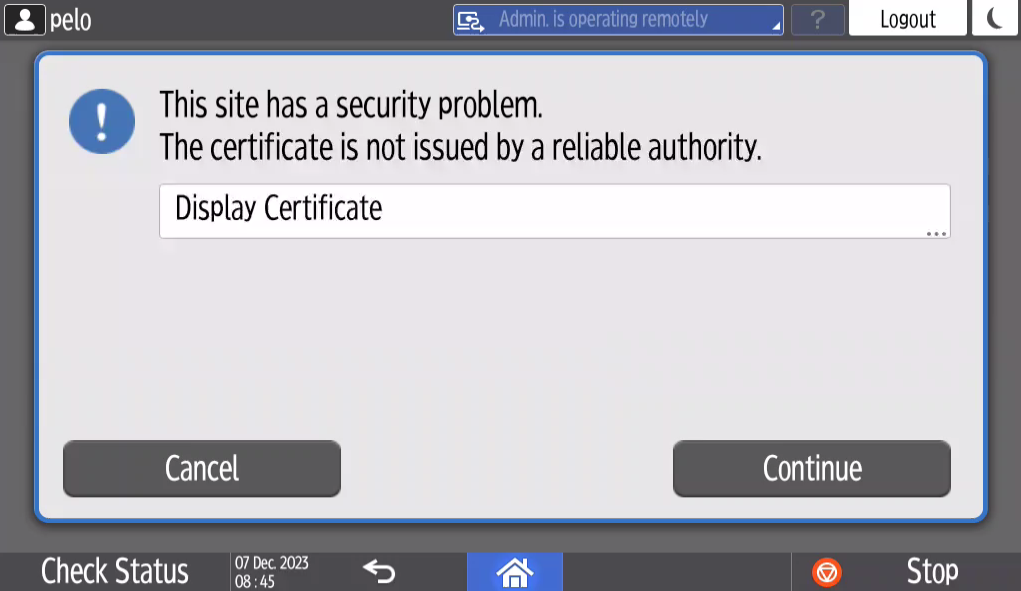
During terminal installation Terminal Server pushes its root certificate into the SOP application. However, it is not installed automatically. Administrator needs to confirm installation manually on MFD. SOP will display the following prompt:
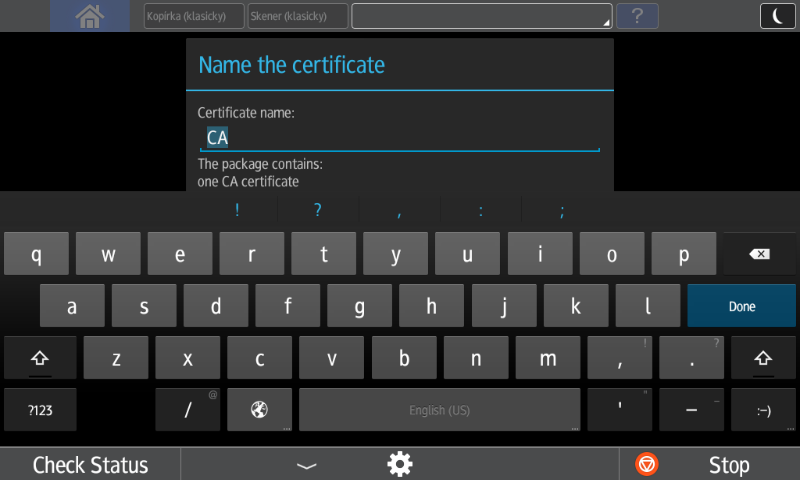
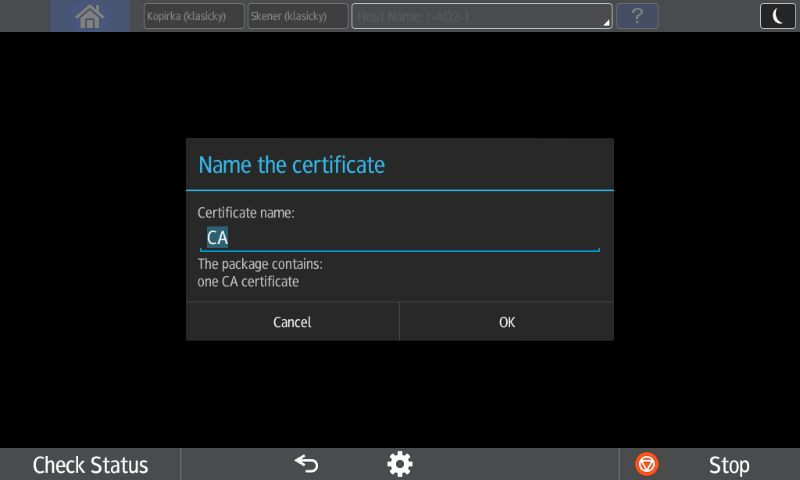
Administrator needs to confirm certificate installation. The certificate name is set by default as a Common Name (CN) of the CA certificate, but it can be changed arbitrarily. If Administrator does not confirm certificate installation then the SOP application will display warning to users about invalid certificate (unless the certificate is signed with publicly trusted CA).
You can repeatedly launch this prompt by reinstalling terminal in the management interface (eg. if CA used for signing Terminal Server certificate is changed).
Installing custom CA from SD card
The automatic procedure mentioned above installs CA certificate which is used to sign Terminal Server certificate.
However, there are use cases where you need to install a CA certificate manually:
- Terminal Server uses a self-signed certificate or CA that MFD doesn't trust
- When installing a G3 device
- When the automatic installation fails
To install the CA on the MFD, you will need to have the CA in .CRT format. This can be obtained e.g. using a web browser.
How to obtain the CA using Chromium web browser
1. Go to https://<domain_name>:5022/ts/v1/hello
Replace <domain_name> with Terminal Server IP address/domain
2. Click on View site information (left of the URL bar) / Connection is secure / Certificate is valid
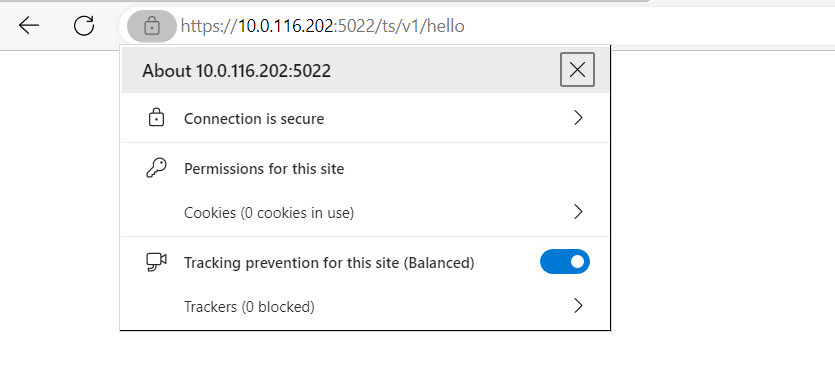

3. Open Details tab / Select the topmost certificate in the Certificate Hierarchy (e.g. "Generated CA") / Click Export...
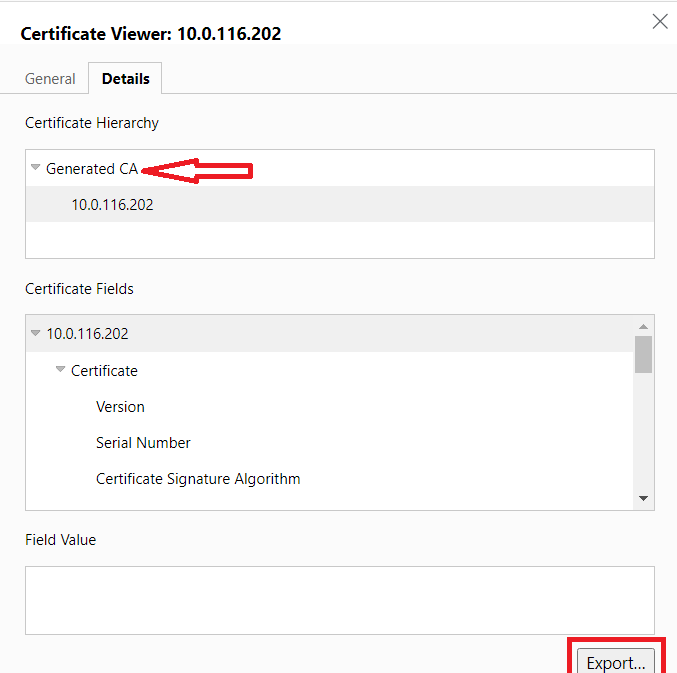
4. Save the .CRT file on a SD card.
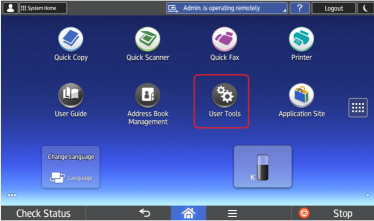
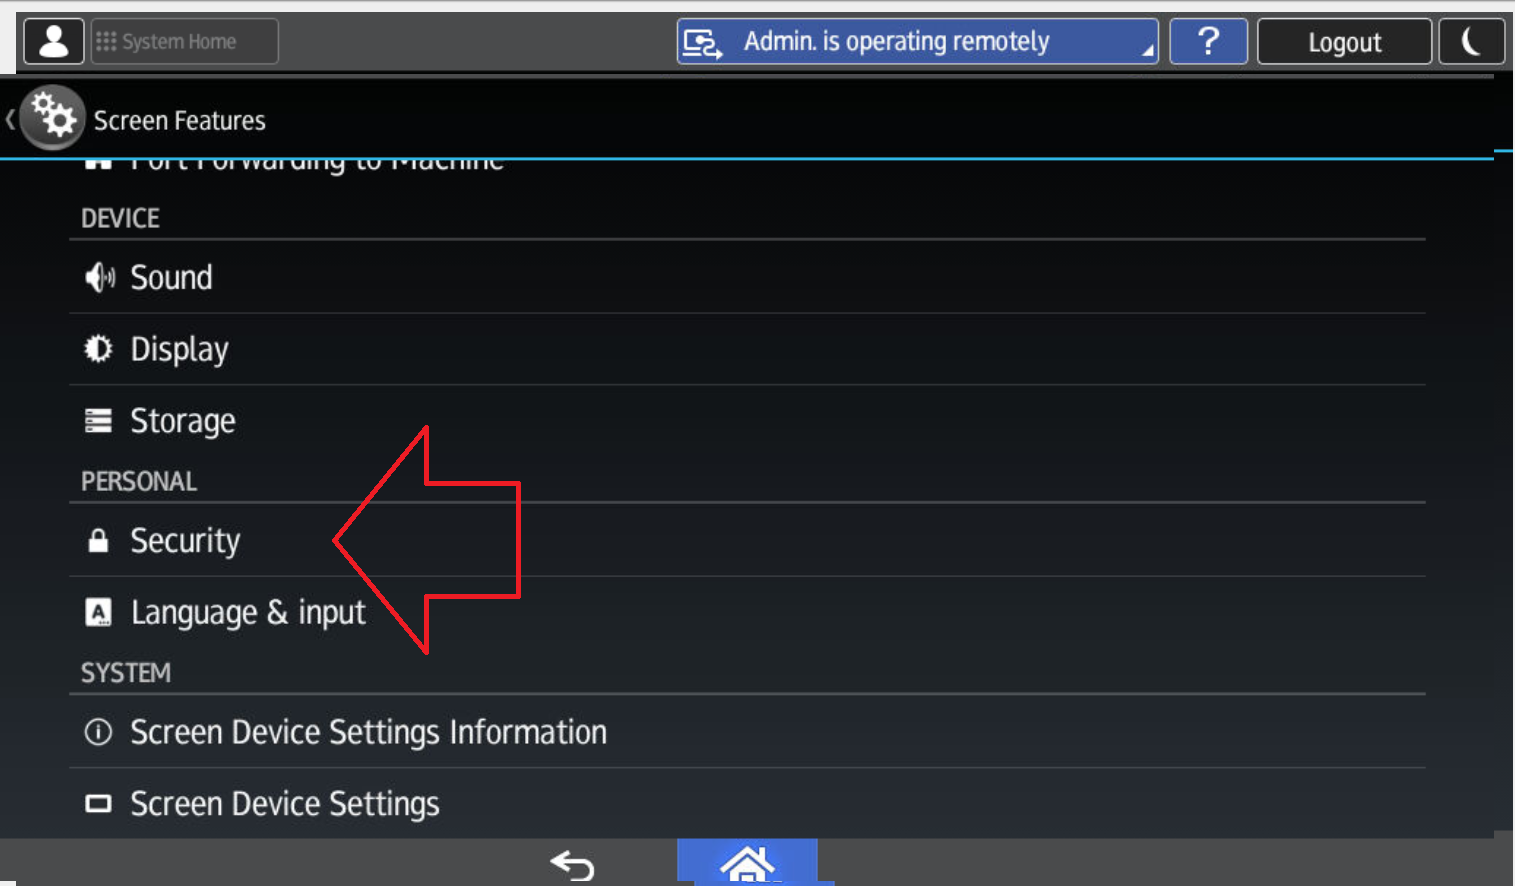
How to install the CA from SD card on the device
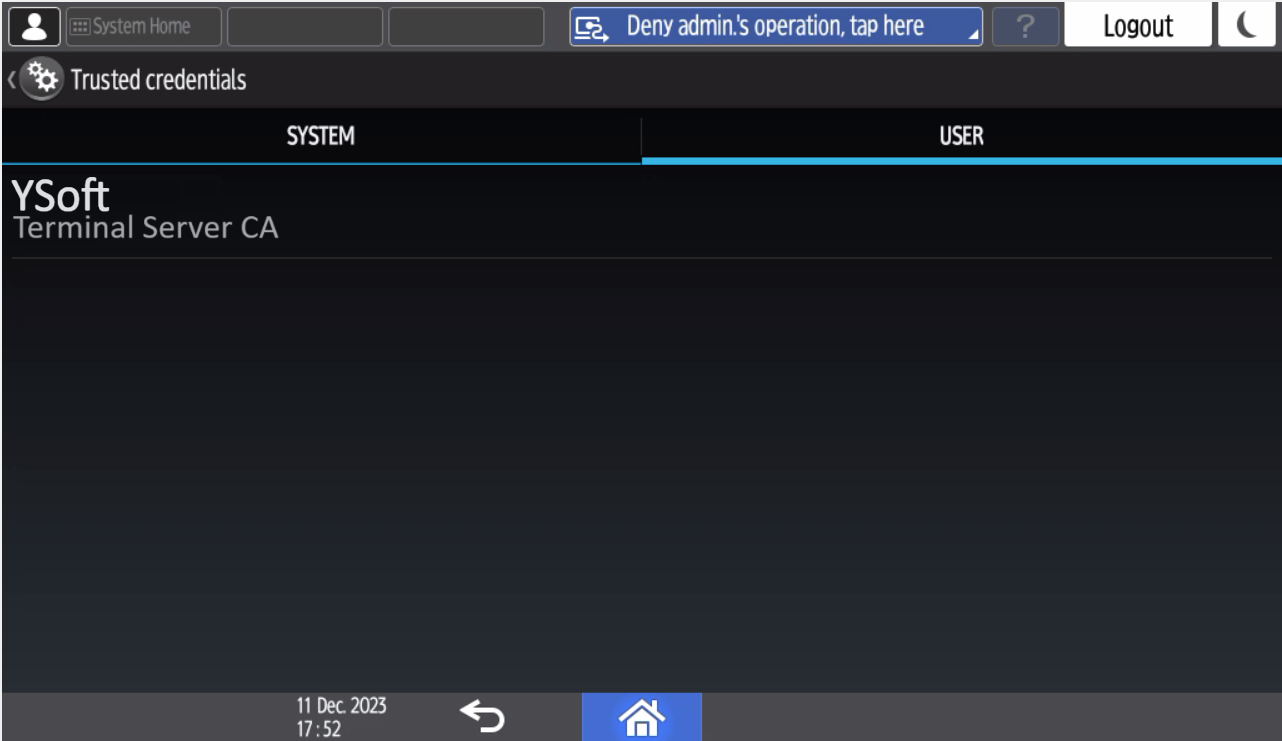
The trust store can be viewed when you login as an administrator on the device - User Tools / Screen Features / Security / Trusted credentials. The trusted certificates that are not shipped with the MFDs are on the User tab.
- Login as device administrator
- Go to User Tools / Screen Features / Security / Install from SD card

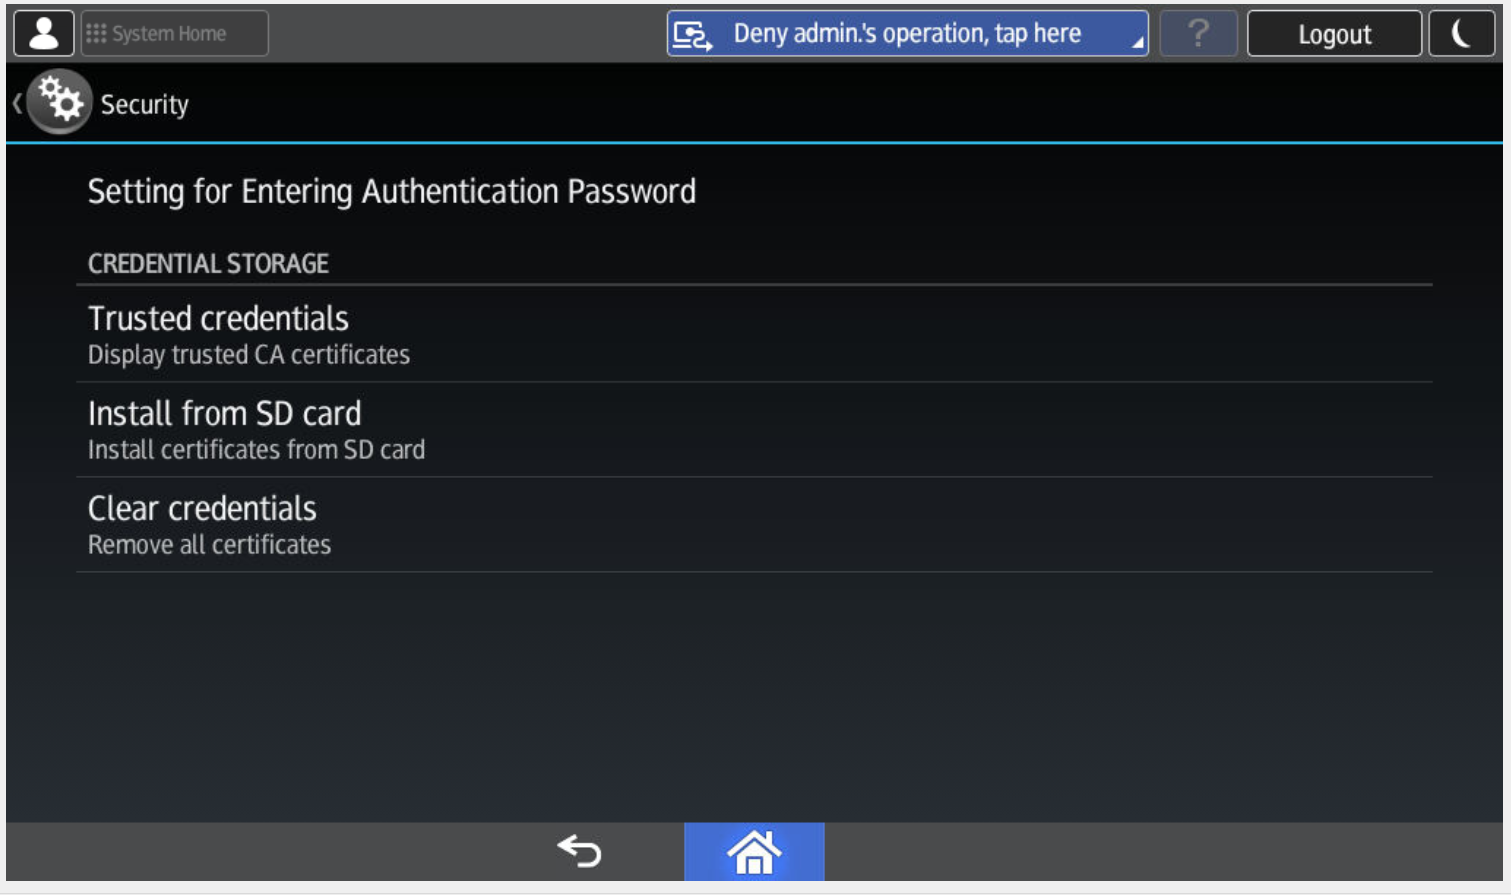
- You can verify that the CA is installed under Trusted credentials
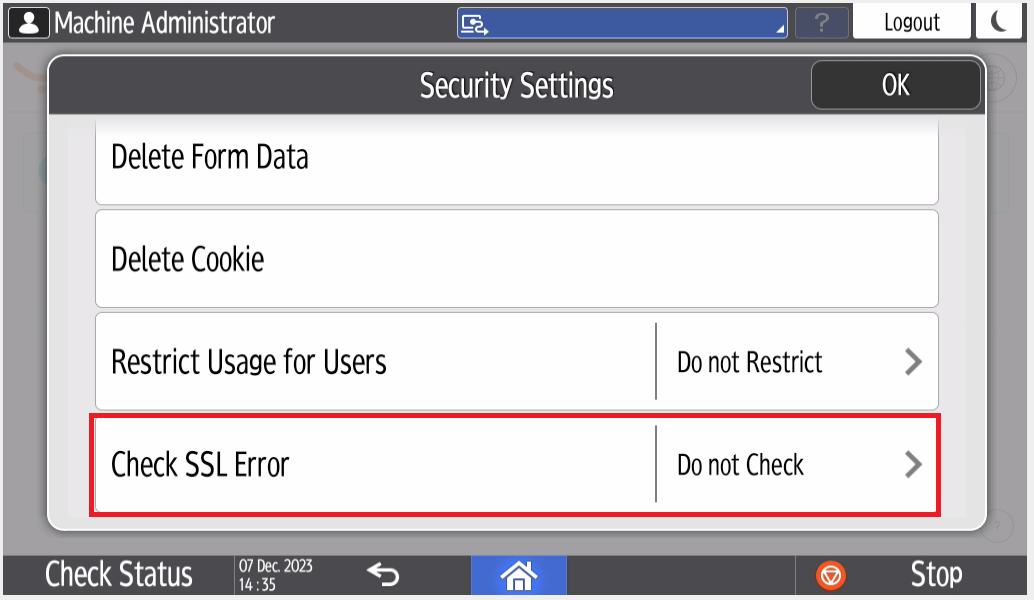
Disable checking SSL Error (no prompt for certificate installation)
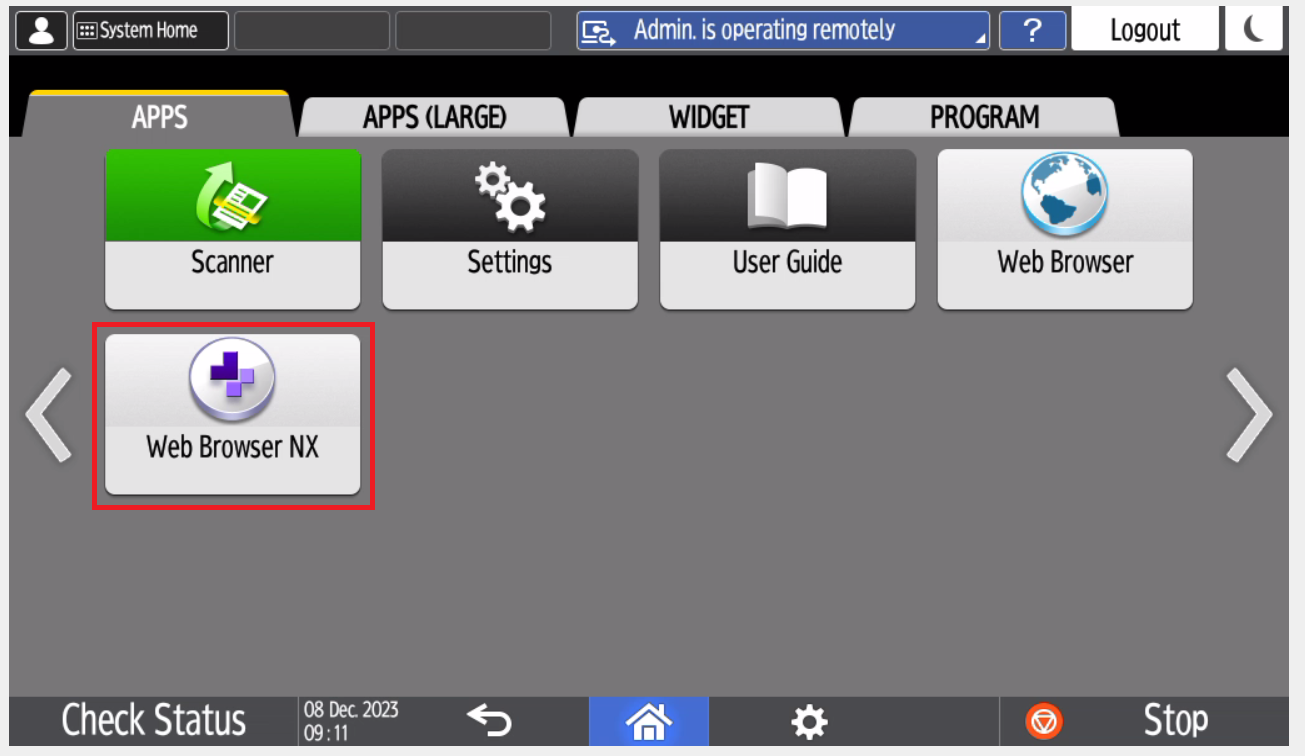
- Open Web Browser NX.
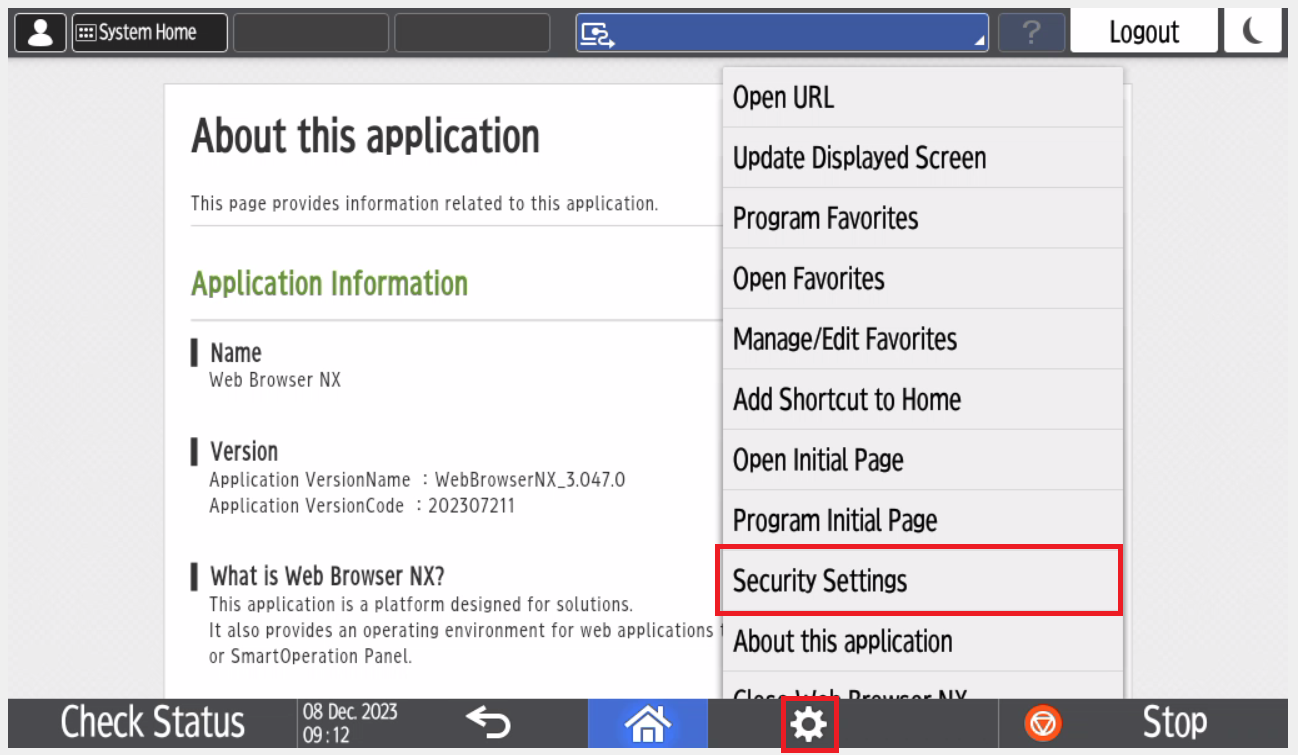
- Open Settings by clicking on the Cogwheel button next to the Home button.
- Open Security Settings.
- On Check SSL Error select Do not Check.