The document describes the installation and the use case of printing a document of Google apps via the Dispatcher Paragon server.
Prerequisites
- Dispatcher Paragon Management/Spooler Controller/FlexiSpooler
- Dedicated google account. The account will be owner of the registered printer and will be able to share the printer with users as required
- Following ports are open
- to Dispatcher Paragon server
- 515 (if LPR is used) (configurable)
- to internet
- 80 - for access to google via http and TLS
- 5222 - for access to talk.google.com
- between cluster nodes
- 3110 - for cluster communication (configurable)
- to Dispatcher Paragon server
- the DNS name talk.google.com must be resolvable from the server
Assumptions
The solution is created based on the following assumptions.
- Dispatcher Paragon works as expect
Solution description
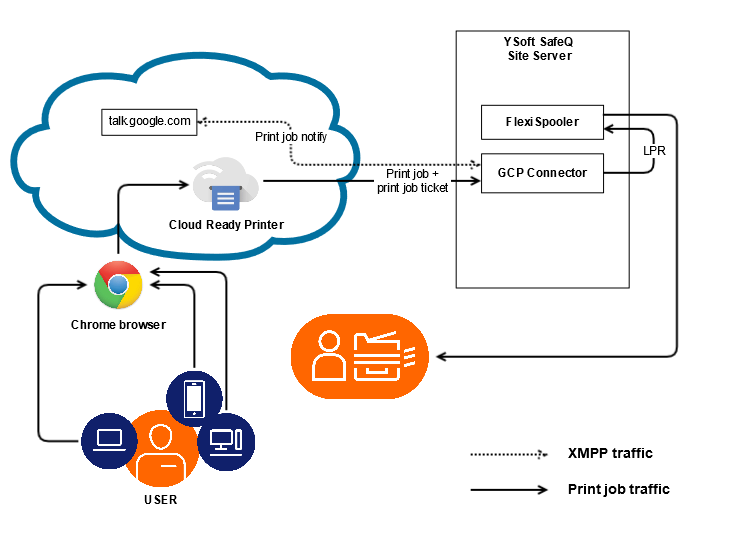
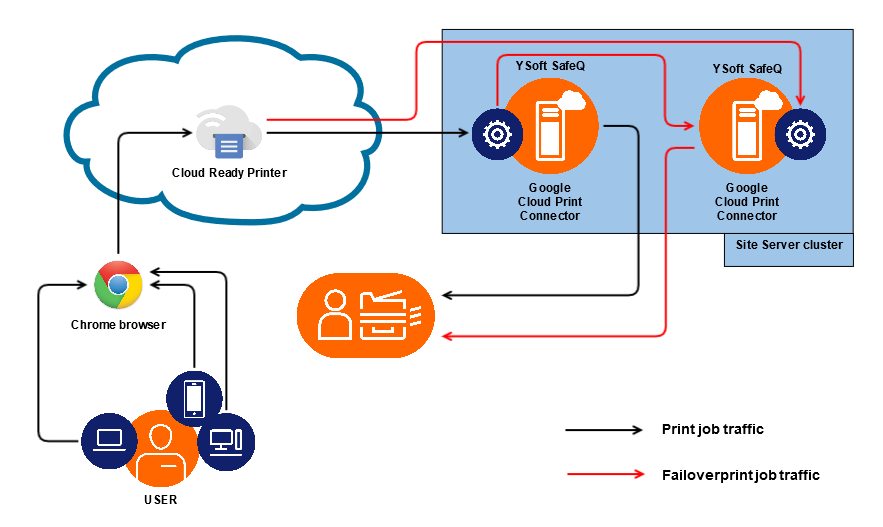
The Dispatcher Paragon server will be registered as a Cloud Ready Printer. It can be registered several times with different configuration. The connector is installed as a service. The service will create XMPP channel through which Google will notify the service about print jobs available for print. The service will download the print job file and print job ticket and will prepare a file for print which will send to Dispatcher Paragon server either via LPR protocol. When the server is not available then the connector save all the information to a file and periodically tries to reach the server. When the server is reachable again it restores the print job and will try to send it again.
Installation
The Setup Wizard will lead the user through the installation and will install the connector with the basic configuration.
Generation of a license request
In order to receive a license a license request must be generated. To generate the license request follow the steps bellow.
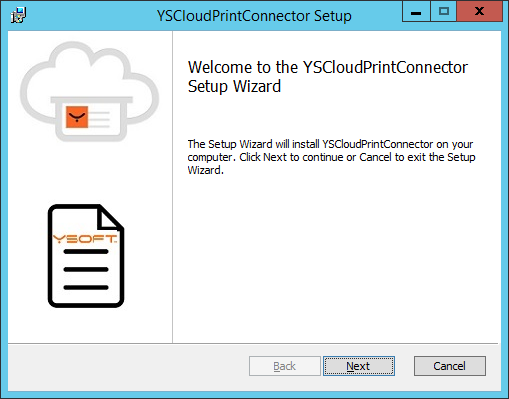
Run the installation package (YSCloudPrintConnectorSetup vx.x.x.x.msi)
- Click Next
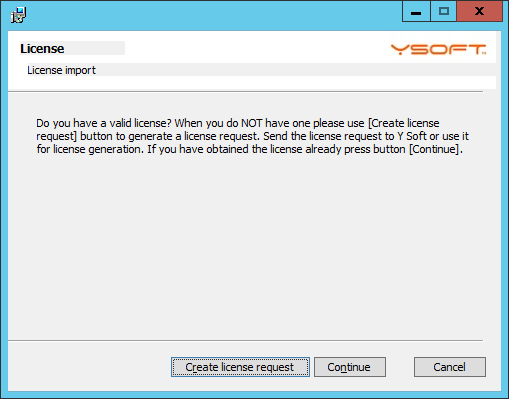
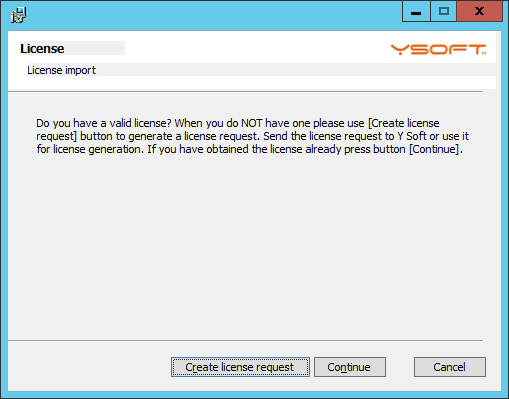
- Click Create license request
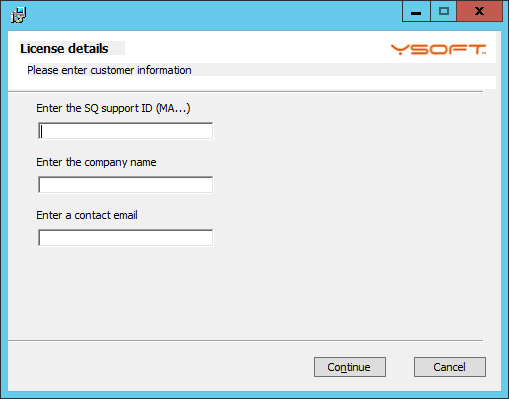
- Enter information and click Continue
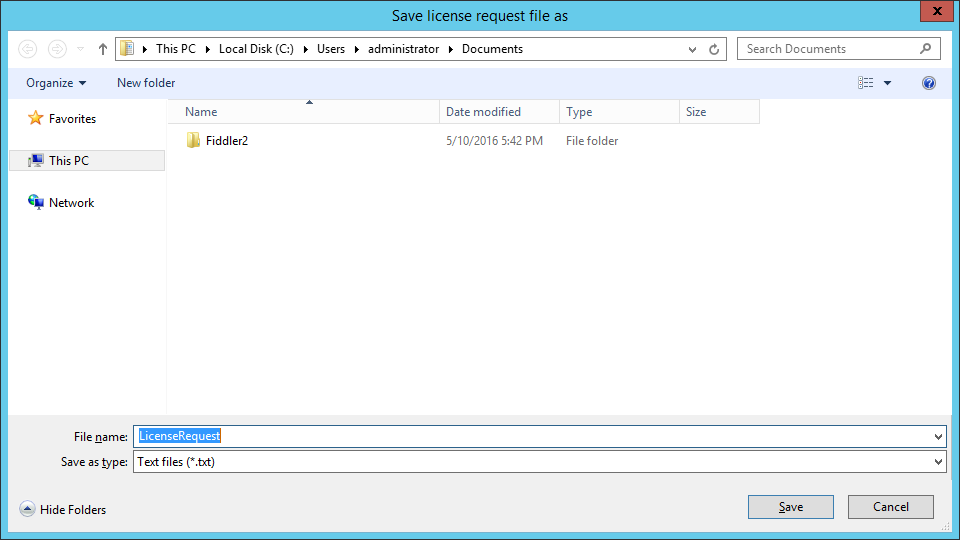
- Select a location and the name of the file where the license request will be saved and click Save
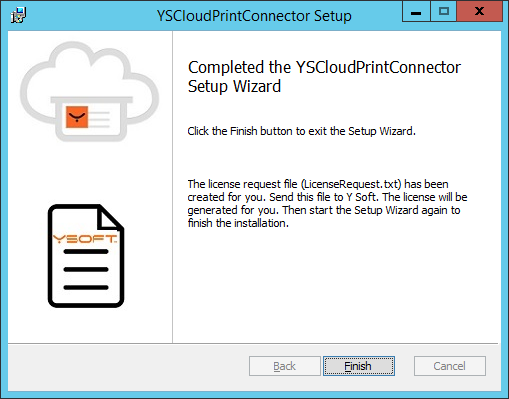
- Click Finish. The license request is saved in the file specified before. Send the file to Konica Minolta and the license will be generated for you and sent to you back.
Installation of the connector
When a valid license is available then the connector can be installed. To install the connector follow the steps below.
Run the installation package (YSCloudPrintConnectorSetup vx.x.x.x.msi)
- Click Next
- Click Continue
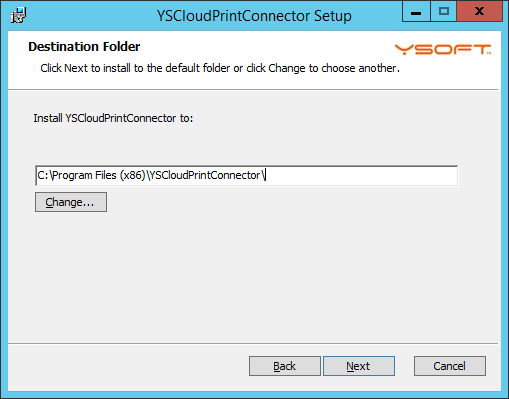
- Enter the destination folder and click Next
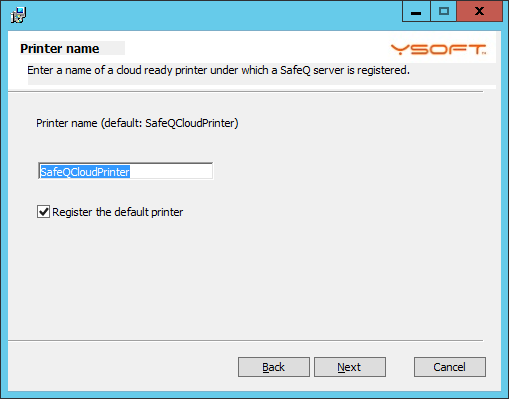
- Enter a name of a cloud ready printer under which a Dispatcher Paragon server is registered. When the check box Register the default printer is ticked then the installer will register a cloud ready printer with this name.
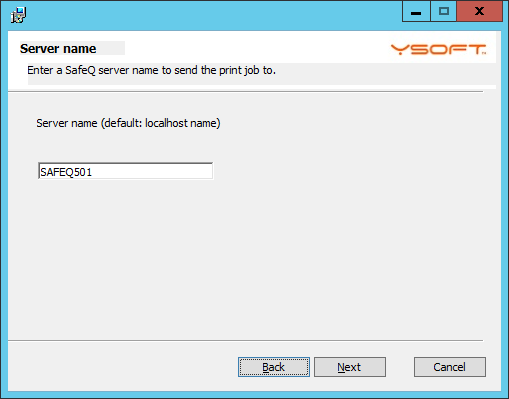
- Enter the name of the Dispatcher Paragon server which the connector will send the job to. This server is the server registered as a cloud ready printer.
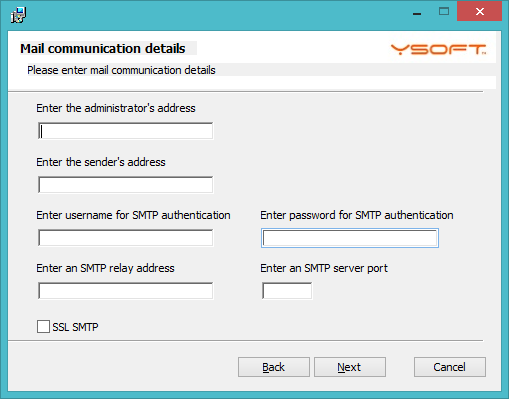
- Enter mail information
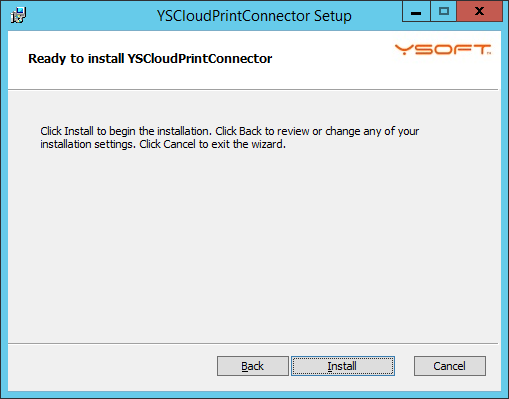
- Click Install
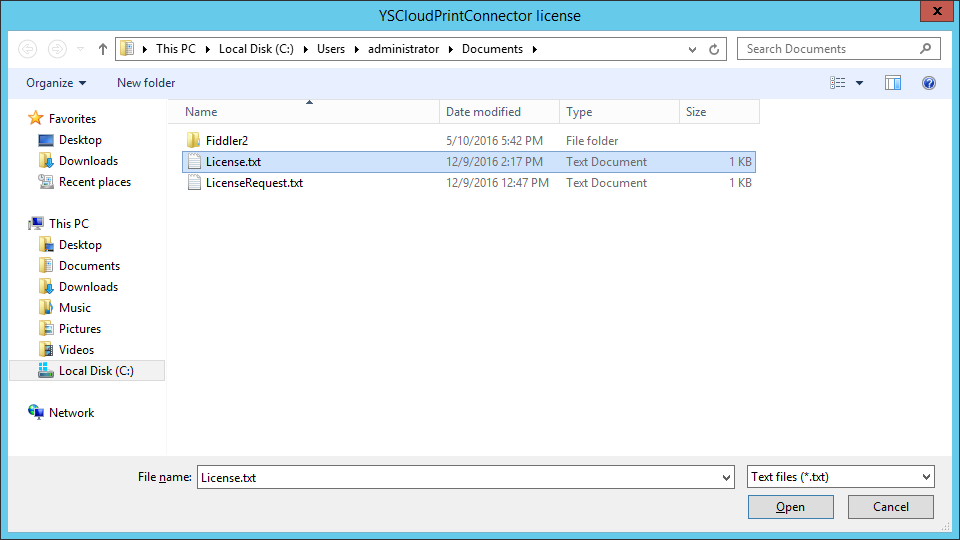
- Select the file with provided license and click Open
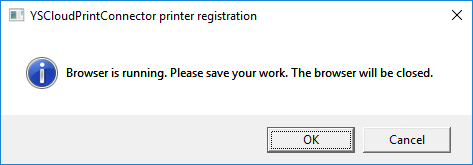
- If a web browser is open, the Setup Wizard will close it.
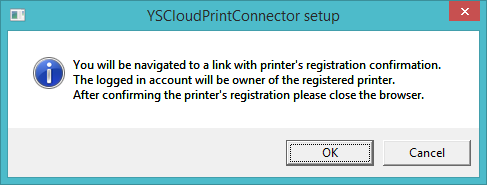
- The Setup Wizard will navigate you to a printer's registration page. Click OK
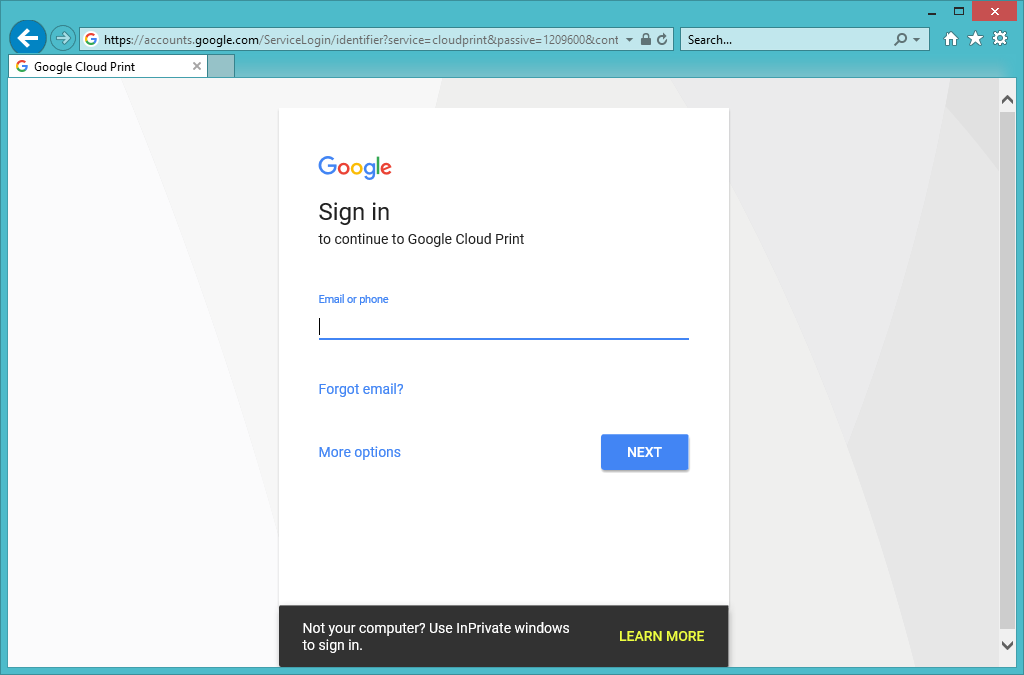
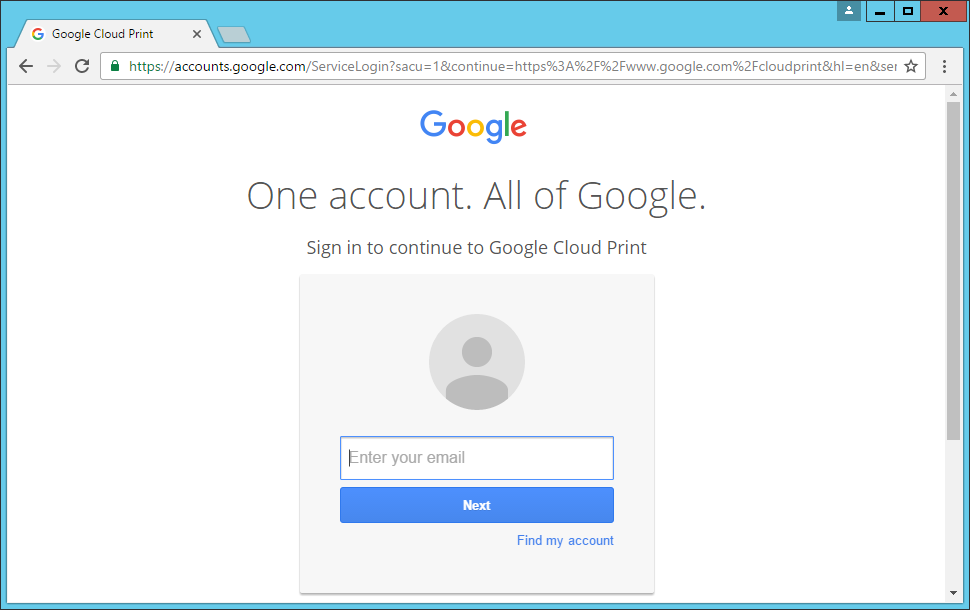
- Sign in with a google account. The account will be owner of the registered printer.
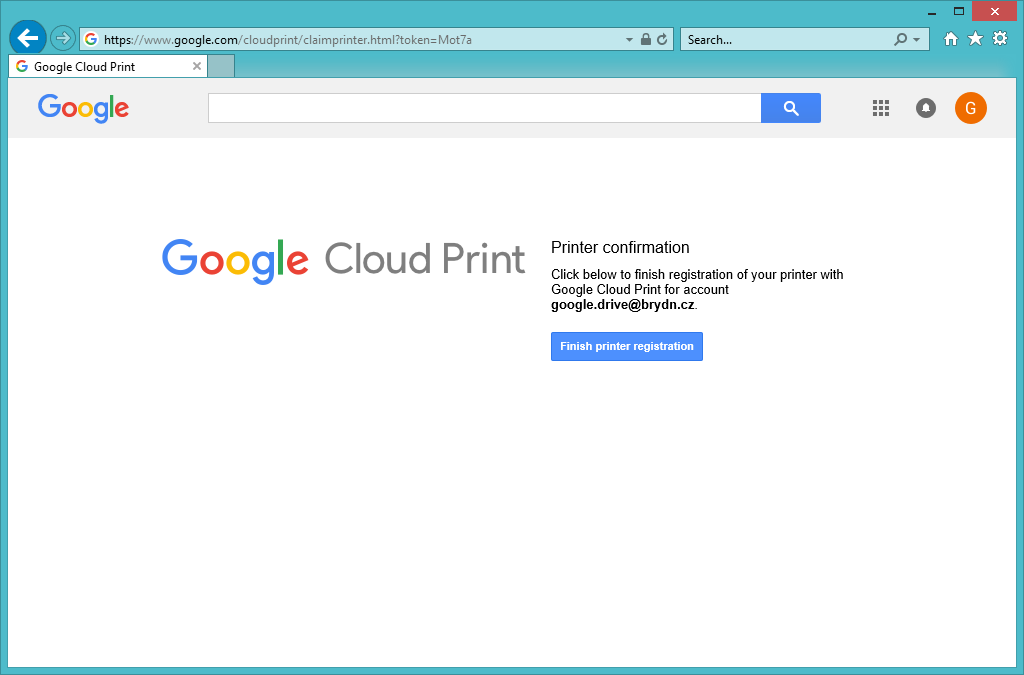
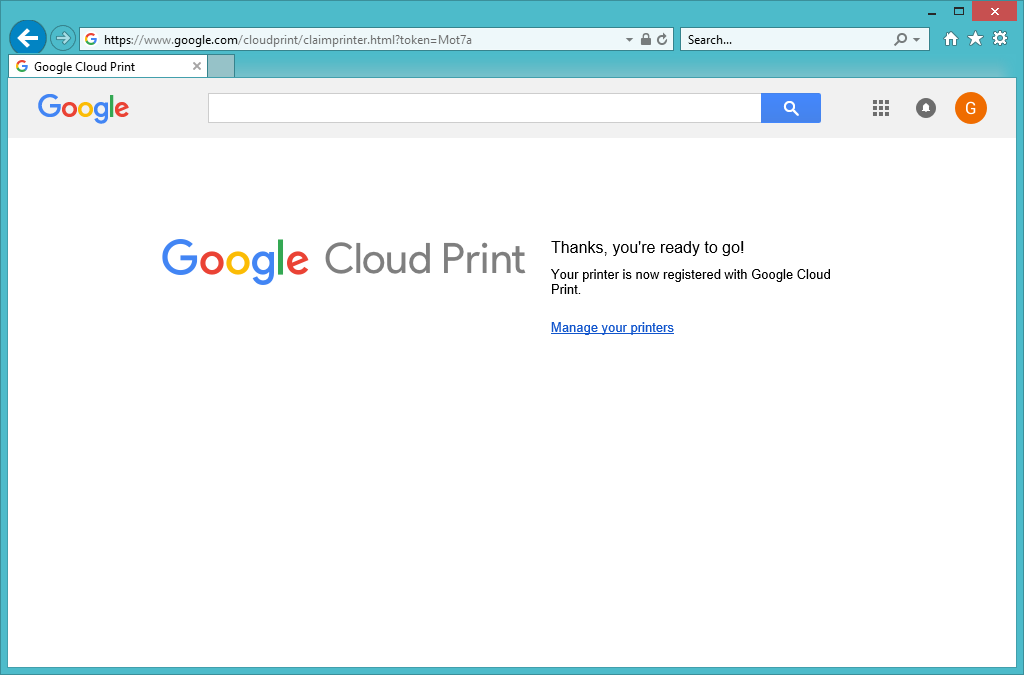
- Click Finish printer registration
- Close the browser or click OK of the dialog which says "Click OK when the printer registration is finished".
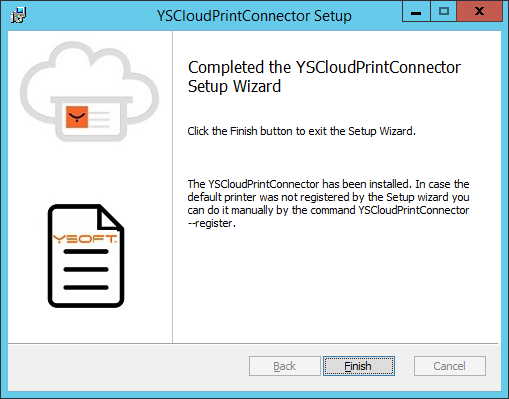
- Click Finish
Check the registered printer
After installation of the connector a new cloud ready printer is registered in the google eco system. In order to check the printer follow steps below:
- Open a web browser.
- Navigate to http://www.google.com/cloudprint
- Login with account credentials provided during the installation.
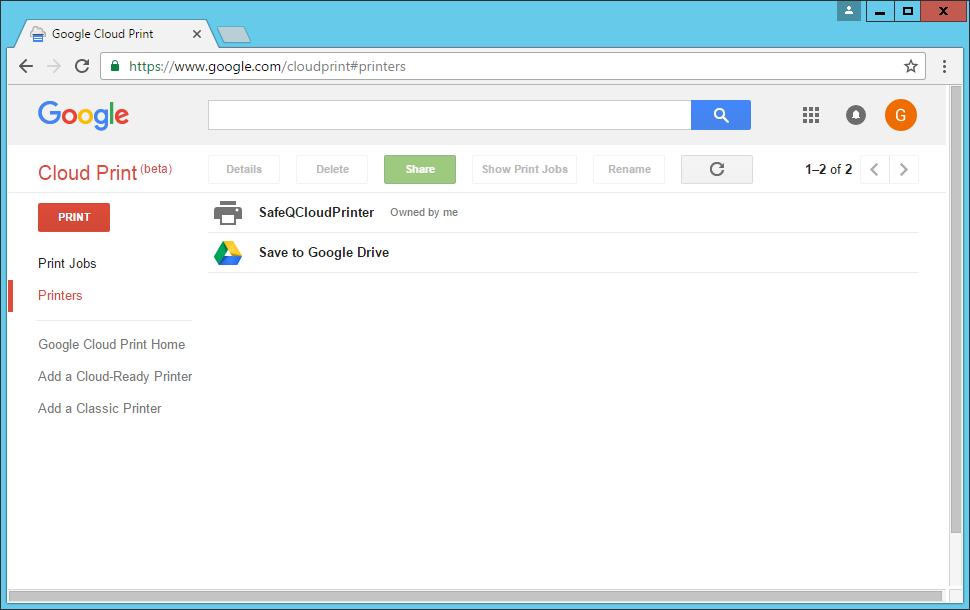
- Click on Printers.
- Select the registered printer and share as necessary.
Command line arguments
There are following command line arguments.
- run "YSCloudPrintConnector.exe --requestlicense" - it will create a file "LicenseRequest" that needs to be provided to YSoft for license generation (usually done by the Setup Wizard).
- run "YSCloudPrintConnector.exe --importlicense" - it will import a license (usually done by the Setup Wizard).
- run "YSCloudPrintConnector.exe --install" - it will install the YSCloudPrintConnector service. (for manual installation, it is usually done by the Setup Wizard) If --interactivelogin is provided then the user must finish printer registration by internet browser and interactive login.
- run "YSCloudPrintConnector.exe --register" - it will register the Dispatcher Paragon server as a Cloud Ready Printer in Google ecosystem with the name of the default printer.
- run "YSCloduPrintConnector.exe --register PrinterName" - to register a different printer.
- run "YSCloduPrintConnector.exe --update PrinterName" - to update a specific printer.
- run "YSCloduPrintConnector.exe --update" - to update the default printer.
- run "YSCloduPrintConnector.exe --delete PrinterName" - to delete a registered printer.
- run "YSCloduPrintConnector.exe --delete" - to update the registered default printer.
- run "YSCloduPrintConnector.exe --dbcredentials" to sets database user credentials.
- run "YSCloduPrintConnector.exe --proxycredentials" to sets proxy account credentials.
- run "YSCloduPrintConnector.exe --recreatecounters" to re-creates performance counters.
Permissions
By default, the Setup Wizard will install the connector with Local service as a service account. In case log or spooler folders will be moved to different that install folder than permissions for the service account must be setup accordingly.
Configuration
YSCloudPrintConnector configuration
Cloud Ready Printer registration properties
Below are listed properties used for Cloud Ready Printer registration. In order to register a printer run the following command: "YSCloudPrintConnector.exe --register [PrinterName]".
Registered printer parameters
<!-- Name of the application -->
<add key="ClientName" value="YSoftSafeQGoogleCloudPrintConnector" />
<!-- Name of the priner which the connector is visible under after the registration -->
<add key="PrinterName" value="GCPConnector" />
<!-- Proxy of the registered printer on Google -->
<add key="MACAddress" />
<!-- Provider of the connector (only information) -->
<add key="Manufacturer" value="Konica Minolta Corporation" />
<!-- Connector model (only information) -->
<add key="Model" value="YSoft Google Cloud Print Connector" />
<!-- URL (only information) -->
<add key="SetupURL" value="http://www.example.com" />
<!-- URL (only information) -->
<add key="SupportURL" value="http://www.example.com" />
<!-- URL (only information) -->
<add key="UpdateURL" value="http://www.example.com" />
<!-- Google domain which the connector belongs (only information) -->
<add key="Domain" value="" />
<!-- Capability device definition file -->
<add key="CddFile" value="YSCloudPrintConnectorCapabilities.cdd" />
<!-- Coma delimited list of SafeQ server where the print job will be sent to. if the first server is unsuccessful then the next will be tried -->
<add key="SafeQServer" value="" />
<!-- The license is provided by Konica Minolta. In order to get the syntax of the license acquiring process (request, import) please run YSCloudPrintConnector.exe from the command prompt. -->
<add key="License" value="" />
<!-- Port on which the printer/safeq server listens when LPR protocol is used to transfer print job to SafeQ server -->
<add key="LPRPort" value="515" />
<!-- Device type for job release SafeQ or LocalPrinter -->
<add key="TargetDevice" value="SafeQ" />
Configuring more printers per YCPC
The connector is capable of registering more than one printer. Each printer has a printer tag which is a prefix of the configuration parameter and has a friendly name which will be displayed in google. Let's assume that we have 2 printers. One printer will have friendly name TestPrinter01 and the second printer will have friendly name TestPrinter02. The first printer configuration attributes will have a name without any prefix. The second printer will have prefix T2. If a configuration parameter with this tag will not be found, then the default parameter is taken into account for configuration of the second printer.
The configuration file might look like this:
More registered printers
<add key="PrinterName" value="TestPrinter01" />
<add key="T2.PrinterName" value="TestPrinter02" />
<add key="SafeQServer" value="Server1,Server2" />
<add key="PJLLanguage" value="PDF" />
<add key="T2.PJLLanguage" value="PCL" />
The configuration above will say that both printers will send the print job to Dispatcher Paragon server Server1 and in the case when Server1 is not reachable they will send it to Server2. It also says that jobs will be sent to the default (first) printer in PDF format and to the second printer in PCL format
Xerox devices
Xerox devices use XPIF templates. In order to have such option on these devices available XPIF tag must be specified for these devices (<add key="Tags" value="XPIF"/>)
Server fault tolerance
There is an option to configure Dispatcher Paragon server redundancy. If there are more than 1 Dispatcher Paragon server you can enter them into configuration file following way:
<add key="SafeQServer" value="servername1,servername2"/>
When the connector cannot connect to the first server from the list then it will go through the list and will try to connect to a different server.
Connect a second registered printer to different Dispatcher Paragon server
When it is necessary to connect the printer to a different server than the default one following lines might be written into the configuration (let's consider the printer name T2)
<add key="T2.SafeQServer" value="servername1,servername2"/>
Google Cloud Print Connector service
Below are listed keys in the configuration file (YSCloudPrintConnector.exe.config) which are used for print job processing.
Connector parameters
<!-- Address for mail notification -->
<add key="AdministratorMailAddress" value="" />
<!-- Time between to cycles of configuration file check -->
<add key="ConfigFileMonitorInterval" />
<!-- Socket connection accepttimeout–>
<add key="ConnectionTimeout" />
<!-- Levelof logging. Possible values ERROR|WARN|INFO|DEBUG|TRACE|VERBOSE. Defaultvalue is INFO. -->
<add key="LogLevel" value="VERBOSE" />
<!-- Sender of notification message -->
<add key="MailSender" />
<!-- IP address or SMTP relay -->
<add key="MailServer" />
<!-- Port of SMTP communication -->
<add key="MailServerPort" />
<!-- Is the SMTP server SSL -->
<add key="MailServerSSL" />
<!-- Time interval of ping request. -->
<add key="PingPeriod" value="5" />
<!-- IPv4 address of local NIC which will be used for outgoing http webrequest communication–>
<add key ="PreferredIPv4AddressToBind" />
<!-- IPv6 address of local NIC which will be used for outgoing http webrequest communication–>
<add key = "PreferredIPv6AddressToBind"/>
<!-- The user must log in to Google interactively and finish the registration of an anonymously registered printer -->
<add key="RegistrationWithInteractiveLogin" value="false"/>
<!-- Period in seconds which the job is re-sent to printer or SafeQ server when the previous sent was unsuccesful -->
<add key="ResendJobsInterval" value="10" />
<!-- Number of print jobs per day per user. -1 means unlimited-->
<add key="DailyQuota" value="-1" />
<!-- Exponent for RSA encryption -->
<add key="RSAExponent" value="4801039"/>
<!-- Modulus for RSA encryption -->
<add key="RSAModulus" value="500508224108203547434568832423132732786748672487709963870837598441542038970505962222995695772091500078249196262667760786525513352880061779408608234740013"/>
<!-- Idle time between to cycles of watchdog runs (in seconds) -->
<add key="WatchDogIdleTime" value="60" />
<!-- DNS name of Google endpoint server for XMPP communication -->
<add key="XMPPServer" value="talk.google.com" />
<!-- Name of Google endpoint server for XMPP communication -->
<add key="XMPPServerCertificateSubjectName" value="gmail.com" />
<add key="SpoolerPath" value="C:\SafeQ5\GoogleSpooler\"/> - defines local folder where documents will be downloaded to and processed
<add key="ResendJobsInterval" value="60"/> - when the transfer to Dispatcher Paragon server fails than the connector will try to resend the document again each ResendJobsInterval seconds
Properties maintained by the service
Token
<add key="RefreshToken" value="" /> - token which is used for gathering access token<add key="AccessToken" value="" /> - token for authentication of robot account<add key="AccessTokenExpiration" value="" /> - time till the access token is valid.
<add key="OwnerName" value="" /> - Provided dedicated google account credentials<add key="OwnerPassword" value="" /> - Provided dedicated google account credentials<add key="XSRFToken" value="" /> - token gathered during registration of the first printer
Cluster configuration
In order to setup a cluster, make steps as follows (the appropriate license must be imported):
- Configure cluster nodes in the configuration file (see below).
- Install a connector on the first node.
- Make sure that the printer is registered in https://www.google.com/cloudprint#printers.
- Expand details of the registered printer and find the Proxy attribute of the printer.
- The value of the Proxy will be used as MACAddress attribute in the configuration file of the connector's second instance.
- Copy the configuration file of the first instance to the second.
- Remove parameters.
- AccessToken.
- AccessTokenExpiration.
- Add parameter MACAddress with the value from Proxy field of the registered printer.
- Install a second instance of the connector.
- Start the service.
Cluster configuration
<!-- Port which the job assignment server listens on -->
<add key="JobAssignmentPort" value="3110" />
<!-- Period of finished job list checking for jobs ready to unregister -->
<add key="JobExpirationCheckInterval" value="10" />
<!-- Retention time of downloaded job's registration -->
<add key="JobRetentionTime" value="60" />
<!-- Comma delimited list of nodes. The format is server1[:port],server2[:port] default port is 3110 -->
<add key="ClusterNodes" />
Print language conversion
The print job downloaded from Google is in PDF format. In order to make Dispatcher Paragon offline accountingpossiblethe format must be changed. The connector uses for conversionghostscripttool. It must be installed on the computer and following configuration parameters manages the conversion. The output devices are dependent on the GhsotScript version. Please make sure that the installed version ofghostscriptsupports configured devices. In the case of user conversion,you can configure the connector to use a user tool to convert the job's printing language as described below.
Print language conversion
<!-- In order to convert documents Ghostscript must be installed. -->
<add key="GhostScriptFullName" value="C:\gs\gs9.16\bin\gswin64c.exe" />
<!-- Parameters of ghost script for conversion to PCL -->
<add key="PCLConversionParameters" value="-dNOPAUSE -dBATCH -sDEVICE=pxlcolor"/>
<!-- Default value: PDF. Possible values for converion: PDF|PCL|POSTSCRIPT. Other emulations are not converted. -->
<add key="PJLLanguage" value="PDF" />
<!-- Parameters of ghost script for conversion to postscript -->
<add key="PSConversionParameters" value="-dNOPAUSE -dBATCH -sDEVICE=ps2write"/>
<!-- User print job conversion command (can be whatever exe/bat/cmd). Calling syntax: UserPDFConversionCommand outputfile inputfile -->
<add key="UserPDFConversionCommand"/>
Proxy server configuration for Internet connection
In case a proxy server for internet connection has to be configured the following values are used. In case you want to set proxy account credentials you need to run "YSCloduPrintConnector.exe --proxycredentials"
Proxy server configuration
<!-- URL of proxy server (http://proxy:port/) -->
<add key="ProxyURL" />
<!-- Login of account to authenticate on proxy -->
<add key="ProxyUserName" />
<!-- Password of account to authenticate on proxy -->
<add key="ProxyUserPassword" />
PJL Header template
This XML file is designed for print job PJL header creation. Together with CDD file, it will prepare PJL header as the end device requires. The syntax of the template is as follows:
PJL header
<?xml version="1.0" encoding="UTF-8"?>
<template>
 <pjl command="@PJL SET DUPLEX=$value$">
 <path>print/duplex/type</path>
 <replace value="NO_DUPLEX">OFF</replace>
 <replace value="LONG_EDGE">ON</replace>
 <replace value="SHORT_EDGE">ON</replace>
 </pjl>
</template>
- <pjlcommand""> - this is beginning of element which describes one line of PJL header. $value$ is a string which will be substituted by value sent by google in print ticket. This value depends on CDD file and on a user selection. If there is not found value in print ticket defined by the path child than the command is not written to the header. The command is not written into header also when element path is missing
- <path> -it defines path of the value which google sends as information about user selection.
- <replacevalue=""> - there might be a case when the cdd file defines different value than the PJL command requires. The element replace changes the provided value from google to the value which the device understands. If there is not replace element than the value from google replaces the $value$ string.
Device capability configuration (CDD file)
This configuration file describes options of an MFD which will be shown in user's printing dialog box. The description of particular options is available described here https://developers.google.com/cloud-print/docs/cdd. In order to prepare CDD file, you can use online conversion tool which converts PPD file (unix print driver) to CDD file. The tool is accessible here https://www.google.com/cloudprint/tools/cdd/cdd.html. The default supported capabilities for connector are defined in YSCloudPrintConnectorCapabilities.cdd file. There are following options that may be adjusted in order to enable different preset options.
- supported_content_type - a type of document which is supported by the connector. Currently, it is PDF.
- duplex
- color - color or BW
- page_orientation
- media_size (A3/A4)
- YSQueue - definition of secure and direct queues that are to be available within the Cloud Ready Printer
Default CDD file
{
  "printer": {
    "supported_content_type": [{"content_type": "application/pdf"}],
    "duplex" : {
      "option": [
        {"type": "NO_DUPLEX","is_default": true},
        {"type": "LONG_EDGE","is_default": false},
        {"type": "SHORT_EDGE","is_default": false},
      ]
    },
    "color" : {
      "option" : [{"vendor_id" : "YSoft","type" : "STANDARD_COLOR","custom_display_name" : "Standard color","is_default" : true},
        {"vendor_id" : "YSoft","type" : "STANDARD_MONOCHROME","custom_display_name" : "Standard BW","is_default" : false}
      ]
    },
    "page_orientation": {
      "option" : [{"type" : "PORTRAIT","is_default" : true},
        {"type" : "LANDSCAPE","is_default" : false}
      ]
    },
   "media_size": {
     "option": [{"custom_display_name": "A3","height_microns": 420158,"width_microns": 297038,"name": "ISO_A3", "is_continuous_feed": false,"is_default": false,"vendor_id": "A3"},
       {"custom_display_name": "A4","height_microns": 297038,"width_microns": 209902,"name": "ISO_A4","is_continuous_feed": false,"is_default": true,"vendor_id": "A4"}
     ]
   },
   "copies": {"default": 1},
   "vendor_capability": [{"id": "YSQueue","display_name": "Print Queue","select_cap": {
       "option": [{"display_name": "secure","value": "secure","is_default": true },
         {"display_name": "direct","value": "direct","is_default": false}
       ]},"type": "SELECT"
     },
     {"id": "YSStaple","display_name": "Staple","type": "SELECT","select_cap": {
       "option": [{"display_name": "not staple","value": "FREE","is_default": true},
         {"display_name": "staple", "value": "STAPLE", "is_default": false}
       ]}
     }
   ]
 },
 "version": "1.0"
}
The complete application settings section in the configuration file
Configuration file
<!-- Number of seconds till access token is refreshed (using refresh token). Default value: 3500. -->
<add key="AccessTokenTimeToLive" value="3500" />
<!-- Should be added a PJL header to the print job -->
<add key="AddPJLHeader" value="true" />
<!-- Address for mail notification -->
<add key="AdministratorMailAddress" value="" />
<!-- Capability device definition file -->
<add key="CddFile" value="YSCloudPrintConnectorCapabilities.cdd" />
<!-- Name of the application -->
<add key="ClientName" value="YSoftSafeQGoogleCloudPrintConnector" />
<!-- Comma delimited list of nodes. The format is server1[:port],server2[:port] default port is 3110 -->
<add key="ClusterNodes" />
<!-- Time between to cycles of configuration file check -->
<add key="ConfigFileMonitorInterval" />
<!-- Socket connection accept timeout -->
<add key="ConnectionTimeout" />
<!-- Is the database user the service account -->
<add key="DBIntegratedSecurity" value ="false"/>
<!-- Name of connector work database -->
<add key="DBName" />
<!-- Database user name (if not the service account is used) -->
<add key="DBUserName" />
<!-- Database user password -->
<add key="DBUserPassword" />
<!-- Name of the database server (it might be in form of servername or servername\dbinstance) -->
<add key="DBServerName"/>
<!-- Google domain which the connector belongs (only information) -->
<add key="Domain" value="" />
<!-- In order to convert documents Ghostscript must be installed. -->
<add key="GhostScriptFullName" value="C:\gs\gs9.16\bin\gswin64c.exe" />
<!-- Port which the job assignment server listens on -->
<add key="JobAssignmentPort" value="3110" />
<!-- Period of finished job list checking for jobs ready to unregister -->
<add key="JobExpirationCheckInterval" value="10" />
<!-- Retention time of downloaded job's registration -->
<add key="JobRetentionTime" value="60" />
<!-- The license is provided by Konica Minolta. In order to get the syntax of the license acquiring process (request, import) please run YSCloudPrintConnector.exe from the command prompt. -->
<add key="License" value="" />
<!-- Name of printer for print job release when SafeQ server is not used -->
<add key="LocalPrinterName" value="" />
<!-- Level of logging. Possible values ERROR|WARN|INFO|DEBUG|TRACE|VERBOSE. Default value is INFO. -->
<add key="LogLevel" value="VERBOSE" />
<!-- The PrintJob operation will be logged to database -->
<add key="LogToDatabase" value="false" />
<!-- Port on which the printer/safeq server listens when LPR protocol is used to transfer print job to SafeQ server -->
<add key="LPRPort" value="515" />
<!-- Proxy of the registered printer on Google -->
<add key="MACAddress" />
<!-- Sender of notification message -->
<add key="MailSender" />
<!-- IP address or SMTP relay -->
<add key="MailServer" />
<!-- Port of SMTP communication -->
<add key="MailServerPort" />
<!-- Is the SMTP server SSL -->
<add key="MailServerSSL" />
<!-- Provider of the connector (only information) -->
<add key="Manufacturer" value="Konica Minolta Corporation" />
<!-- Connector model (only information) -->
<add key="Model" value="YSoft Google Cloud Print Connector" />
<!-- Parameters of ghost script for conversion to PCL -->
<add key="PCLConversionParameters" value="-dNOPAUSE -dBATCH -sDEVICE=cljet5c"/>
<!-- command for user print emulation conversion. Calling syntax: PDFConversionCommand outputfile inputfile -->
<add key="PDFConversionCommand" value="" />
<!-- Time interval of ping request. -->
<add key="PingPeriod" value="5" />
<!-- PJL header template file -->
<add key="PJLHeaderTemplate" value="PJLHeaderTemplate.xml" />
<!-- Default value: PDF. Possible values for converion: PDF|PCL|POSTSCRIPT. Other emulations are not converted. -->
<add key="PJLLanguage" value="PDF" />
<!-- IPv4 address of local NIC which will be used for outgoing http webrequest communication-->
<add key ="PreferredIPv4AddressToBind" />
<!-- IPv6 address of local NIC which will be used for outgoing http webrequest communication-->
<add key = "PreferredIPv6AddressToBind"/>
<!-- URL of proxy server (http://proxy:port/) -->
<add key="ProxyURL" />
<!-- Login of account to authenticate on proxy -->
<add key="ProxyUserName" />
<!-- Password of account to authenticate on proxy -->
<add key="ProxyUserPassword" />
<!-- Name of the priner which the connector is visible under after the registration -->
<add key="PrinterName" value="GCPConnector" />
<!-- Parameters of ghost script for conversion to postscript -->
<add key="PSConversionParameters" value="-dNOPAUSE -dBATCH -sDEVICE=ps2write"/>
<!-- The user must log in to Google interactively and finish the registration of an anonymously registered printer -->
<add key="RegistrationWithInteractiveLogin" value="false"/>
<!-- Period in seconds which the job is re-sent to printer or SafeQ server when the previous sent was unsuccesful -->
<add key="ResendJobsInterval" value="10" />
<!-- Exponent for RSA encryption -->
<add key="RSAExponent" value="4801039"/>
<!-- Modulus for RSA encryption -->
<add key="RSAModulus" value="500508224108203547434568832423132732786748672487709963870837598441542038970505962222995695772091500078249196262667760786525513352880061779408608234740013"/>
<!-- Coma delimited list of SafeQ server where the print job will be sent to. if the first server is unsuccessful then the next will be tried -->
<add key="SafeQServer" value="SafeQ501" />
<!-- Will be the print job kept on server till a request -->
<add key="SendOnDemand" value="false" />
<!-- URL (only information) -->
<add key="SetupURL" value="http://www.example.com" />
<!-- Folder where downloaded files will be stored before they are sent to SafeQ server or printer -->
<add key="SpoolerPath" value="C:\GoogleSpooler\" />
<!-- URL (only information) -->
<add key="SupportURL" value="http://www.example.com" />
<!-- Device type for job release SafeQ or LocalPrinter -->
<add key="TargetDevice" value="SafeQ" />
<!-- Private key for decoding of test license -->
<add key="TestRSAPrivateKey" value=""/>
<!-- URL (only information) -->
<add key="UpdateURL" value="http://www.example.com" />
<!-- User print job conversion command (can be whatever exe/bat/cmd)-->
<add key="UserPDFConversionCommand"/>
<!-- Idle time between to cycles of watchdog runs (in seconds) -->
<add key="WatchDogIdleTime" value="60" />
<!-- DNS name of Google endpoint server for XMPP communication -->
<add key="XMPPServer" value="talk.google.com" />
<!-- Name of Google endpoint server for XMPP communication -->
<add key="XMPPServerCertificateSubjectName" value="gmail.com" />
Cloud Ready Printer update
If you need to update already registered printer you can update config file as necessary and then run following command "YSCloudPrintConnector.exe --update SpecialPrinter01" (without quotes). When you want to update the default printer "YSCloudPrintConnector.exe --update".
Performance monitor counters
The connector registers following performance monitor counters on the local host
- # jobs processed
- # jobs notified
- # postscript conversions
- # PCL conversions
- # jobs / sec
- average job processing duration
- average job conversion duration
- average job size
Cloud Ready Printer uninstall
For uninstallation of the connector run command "YSCloudPrintConnector.exe --uninstall".
Testing of solution
Prerequisites
- Dispatcher Paragon Management Server up and running.
- User credentials are configured.
- The customization is installed and configured as described above.
Test
Dispatcher Paragon server registration as Cloud Ready Printer
- Run the Setup Wizard.
- Run Chrome.
- Log in as the user dedicated for the connector.
- Go to http://www.google.com/cloudprint.
- Select Printers.
- New printer should be shown in the list.
Print a document via YSCloudPrintConnector
Prerequisites
- YSCloudPrintConnector is running.
- Dispatcher Paragon server is running.
- Dispatcher Paragon server is registered as Cloud Print Ready Printer.
Test
- Login to google as a user which is able to access the Dispatcher Paragon server as the Cloud ready printer.
- Go to http://Drive.google.com.
- Create a document.
- Print the document to the Cloud Ready Printer.
- Go to the http://www.google.com/cloudprint.
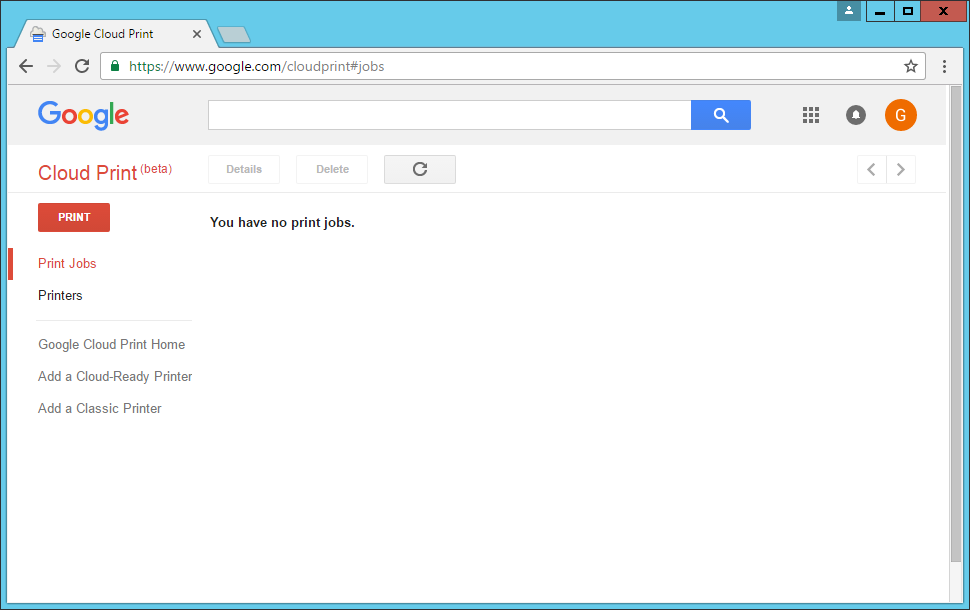
- Select Print Jobs.
- The document will be listed and the status will be Printed (it is sent to Dispatcher Paragon server).
- Login to MFD.
- Release the document.
Print the document when YSCloudPrintConnector is not running
- Login to google as a user which is able to access the Dispatcher Paragon server as the Cloud ready printer.
- Go to http://Drive.google.com.
- Create a document.
- Print the document to the Cloud Ready Printer.
- Go to the http://www.google.com/cloudprint.
- Select Print Jobs.
- The document will be listed and the status will be queued.
- When the YSCloudPrintConnector is running again than the job will be delivered to Dispatcher Paragon server.
Print the document when Dispatcher Paragon Server is not available
- Login to google as a user which is able to access the Dispatcher Paragon server as the Cloud ready printer.
- Go to http://Drive.google.com.
- Create a document.
- Print the document to the Cloud Ready Printer.
- Go to the http://www.google.com/cloudprint.
- Select Print Jobs.
- The document will be listed and the status will be In Progress.
- When Dispatcher Paragon server is available again than the job will be delivered to Dispatcher Paragon Server.
