Printing and Managing Jobs
ApeosPort-VI and older | ApeosPort-VII |
|---|---|
|
|
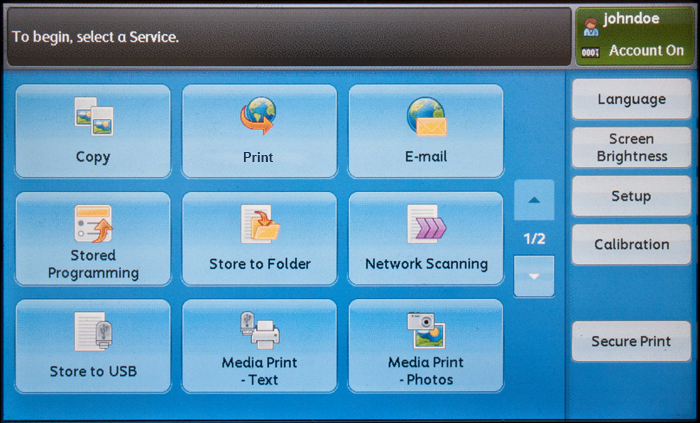
Your Main Menu screen may not look exactly like the one shown here.
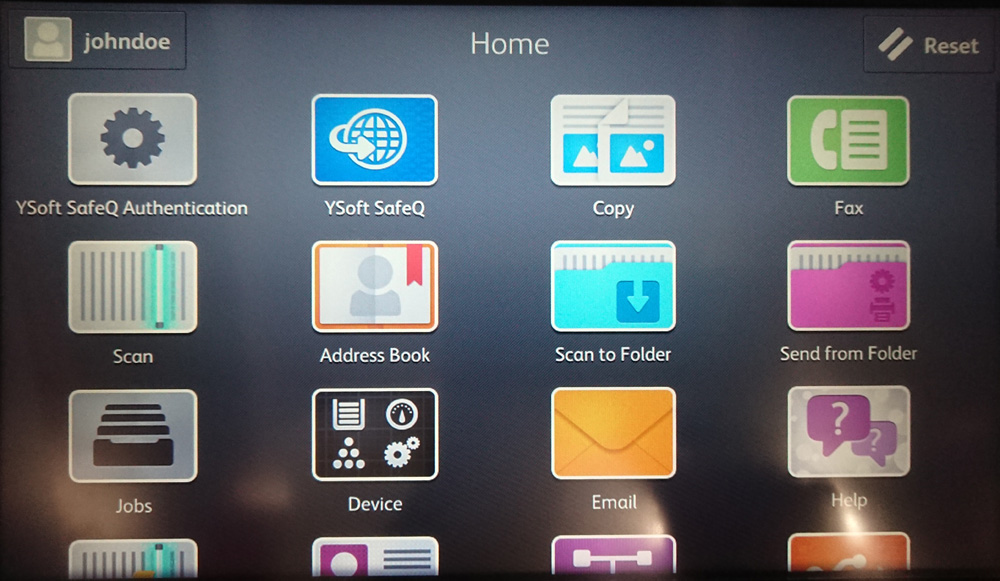
You may be redirected directly to the Dispatcher Paragon application. In that case, skip this step.
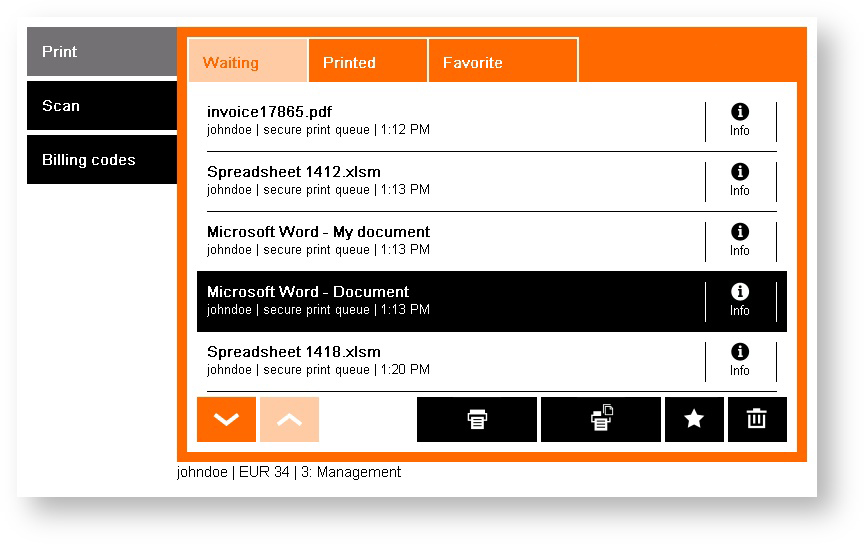
The print job menu is displayed.
 Select the jobs you want to print and tap the Print button.
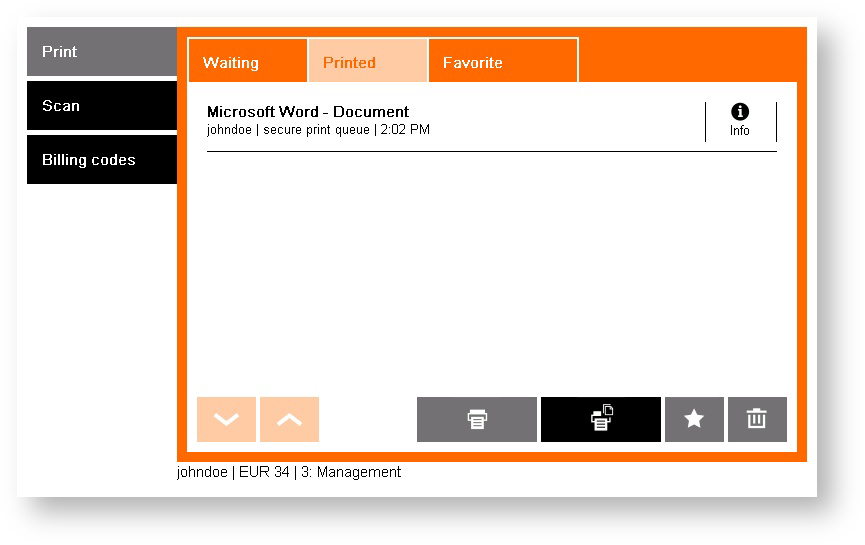
Sometimes, a print job is not compatible with a particular device. This can be due to a variety of reasons but means that the print job cannot be printed at the device. Incompatible jobs are marked with a red cross and cannot be selected for printing.
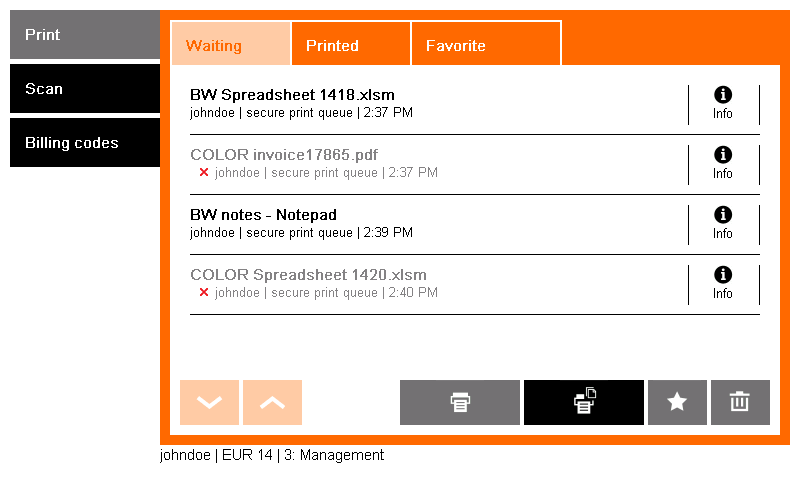
Sometimes, changing Finishing options makes the print job compatible. Finishing options are accessible from job information (see below). If the device still does not print and shows the job as being incompatible, either try a different device or contact the system administrator.
Once the job is printed, it appears in the Printed folder. This job can be reprinted in the future.
This behavior may not be available. It depends on the configuration of your Dispatcher Paragon.
You can also perform the following actions in the print menu:
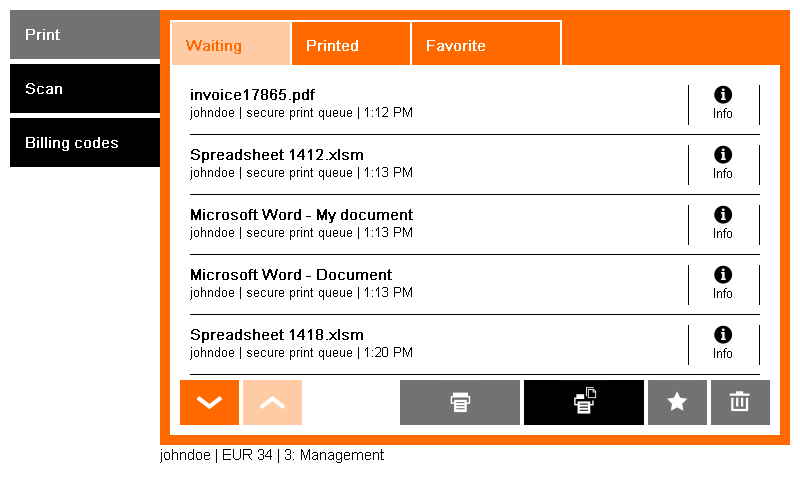
Select the jobs you want to print and tap the Print button. Tap the Print all button to print all your waiting jobs.
 Display the other pages of your job list.
 Navigate to the Waiting/Printed/Favorite folders.
 Select jobs and mark them favorite (only in Waiting/Printed/Favorite and All in one layouts).
 Select the jobs and delete them.
 Display more information and a print job preview of the selected job.
 Indicates finishing options was changed. Display more information and a print job preview of the selected job.
Job Details and Finishing Options
The info button provides access to print job details, its preview, and available finishing options.
Not all print jobs and devices are compatible and allow changing the finishing options at the terminal. Consult with your administrator or provider to see which devices are compatible.
- Tap the Info button next to the job to view the job's details.
- The job's details and a preview of the first page of the print job shows. Tap the OK button to exit or Print settings to access print job finishing options (if available).

Edit the settings of the print job. Use the up and down arrows at the bottom of the screen to show other available settings. Tap OK to confirm or Cancel to discard changes.
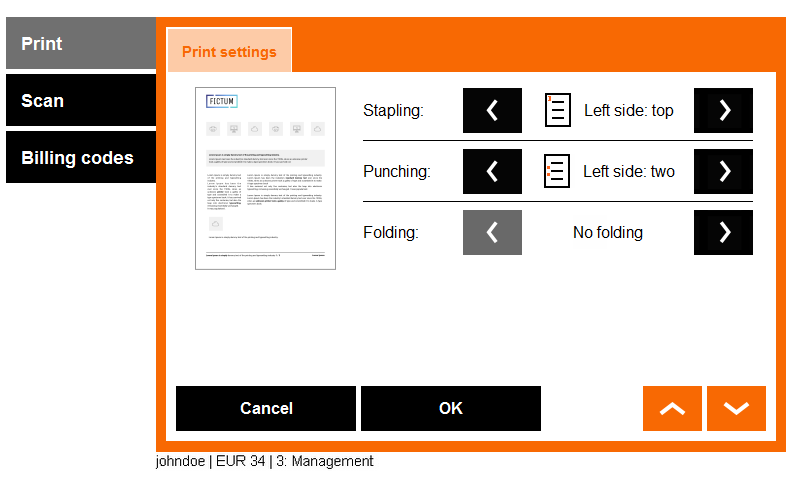
Not all options may be available. Always make sure to choose compatible combinations (i.e. don't choose left-side stapling with right-side binding). See the device's manual for supported combinations.
Review the new print job settings and tap OK to return to the job list. Select the print job and print it.
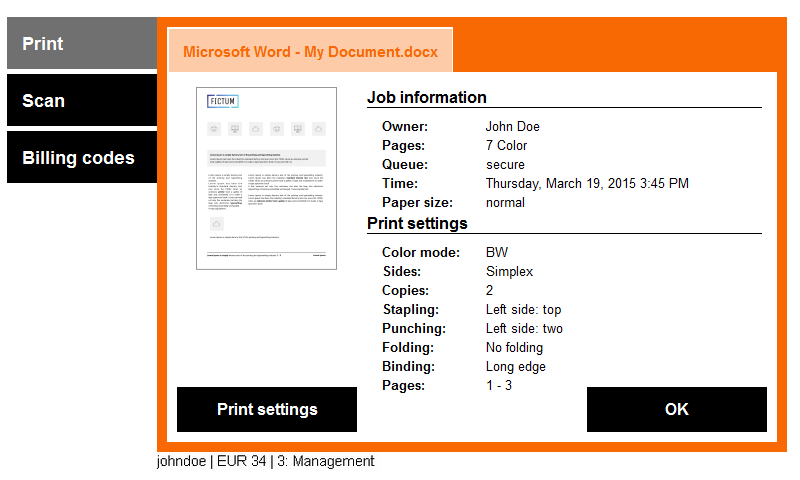
The selected finishing options are applicable for printing the job right away. If you log out and access the print job, its original settings will return.
Pressing OK button in finishing options always save finishing option settings even when there is no change from the original document. Then modified job detail button is shown.
Some of the print settings may be overridden by rules set by your administrator.