This document enables you to install Dispatcher Paragon quickly and easily and helps you configure the basic settings.
If you require further details, check the full official documentation. The official documentation has clearly defined installation sections and configuration options are discussed in a greater level of detail.
What You Get When You Download Dispatcher Paragon
When you download the Dispatcher Paragon package, you get everything you need to install the system. The package also includes important tools and standalone applications that can help you configure and troubleshoot Dispatcher Paragon, as well as documentation that provides both basic and detailed information about various aspects of the system.
Installing Dispatcher Paragon - Prerequisites
Once you have the Dispatcher Paragon installation package, you can begin the installation. However, to make sure your installation is successful, before you begin, consider the following important preliminary requirements:
- A physical or virtual server must be available, dedicated for the Dispatcher Paragon system, that meets the requirements to support Dispatcher Paragon functions.
- All Windows security and optional updates must be installed.
- MFDs and other printers that will be used with Dispatcher Paragon must be configured and connected to the network, and the associated required print drivers and hardware components (for example, terminals or network readers) must be available.
- If you plan to integrate Dispatcher Paragon with a User Domain such as Active Directory, Novell, or OpenLDAP, make sure you have all required information, especially domain controller access/connection information and an FDQN user directory.
Make sure you have a valid, new activation key.
The activation key is hardware-bound and once used, cannot be reused by a different computer.
When you are sure your system meets all the prerequisites, you can begin Dispatcher Paragon installation. With the interactive installer, all you need to do is to run the installation file and follow the steps in the installation wizard.
Installing Dispatcher Paragon
Dispatcher Paragon generally comes bundled in a self-installing package that sets up a Dispatcher Paragon server in your environment. The installer provides several installation scenarios that differ from each other depending on what type of server you are installing, and how it fits your solution design or server landscape. Many installer settings are pre-configured to default values that are enough for a typical Dispatcher Paragon installation.
- First Server - includes everything you need to use all Dispatcher Paragon core features
- Site Server - the server dedicated to the printing and scanning features on a site connected to management server
- Management Server cluster node - multiple management servers can together form a cluster
Each scenario has some optional features that can be chosen to enlarge your Dispatcher Paragon feature set but are not vital for Dispatcher Paragon core features like printing and scanning to work.
- Dispatcher Paragon Payment System
- Dispatcher Paragon Mobile Print Server
- Enable the spooling of jobs on this server
Dispatcher Paragon comes with a bundled PostgreSQL database that is pre-configured for optimal performance and security. External PostgreSQL and MSSQL database backends can also be used.
Installation Procedure
The installer provides a straightforward wizard-like user interface that guides you through the installation process. During the sequence of installation pages, you will be asked about the various setup aspects of your Dispatcher Paragon solution.
Choose Language
The installer is localized to a wide range of languages. Select the language you wish the installer to communicate with you in.
Welcome Page
Click NEXT to continue
License Agreement
Click I Agree to continue.
Server Environment
- The option First server will guide you through the installation process of Management Server. This is the foundation on which every Dispatcher Paragon solution is based. For small or mid-size installations, you probably will not need any additional servers. This guide will show you, step by step, how to install this scenario.
- The option Other servers offers the deployment of additional servers that can connect to Management Server and provide features that large or enterprise environments can benefit from.
Optional Features
Install payment system features - If ticked, Dispatcher Paragon Payment System will be installed.
Install mobile print server features - If ticked, Mobile Print Server will be installed.
Install spooling features - If ticked, Dispatcher Paragon will start spooling jobs on this server.
Additional setup needed
Both Dispatcher Paragon Mobile Print Server and Dispatcher Paragon Payment System will need to finish their integration by visiting the Dispatcher Paragon management interface and creating a setup suitable for your solution.
Install spooling features
Due to a temporary limitation in Dispatcher Paragon, only the spooling of jobs on the server is supported. Due to this fact, the value of the spooling features checkbox is regarded as always being ticked.
Pre-installation Check
The pre-installation check performs a series of tests to verify if the server environment is suitable for the installation. The installer will display a warning or error depending on your environment's status.
- Administrator access for the installer process
- Windows OS version (server edition)
- The availability of a .NET framework 4.8 or higher
- Essential network ports are checked if they are available
Every test made can have three outcomes and is displayed in the corresponding column.
OK - column showing all passed tests
Warnings - column displays events that are important but not essential for installation success. Typically, problems were detected, but the installer was able to resolve them.
Errors - something that is essential for Dispatcher Paragon to work is missing, and the installer was not able to compensate for it.
The user can continue the installation even if an error occurs, but the installation will probably fail later on, or Dispatcher Paragon will not work properly.
Installation Folder Path
Provide the location where you want your Dispatcher Paragon installed.
- There has to be at least 10 GB of free space on your disk drive.
- The folder path must not contain spaces and characters from this set: ~`!@#$%^&*()[]{}?§!=
Database Configuration
Choose the database backend you want to use with your Dispatcher Paragon installation. The recommended option is to use an embedded PostgreSQL that is pre-configured for optimal use with Dispatcher Paragon,
Embedded Database Configuration
Provide a password that will be used to access the embedded PostgreSQL database. You can provide your own or generate a password using the corresponding button.
Other Properties
Management Servers use unique GUIDs. Provide your own GUID or use the auto-generated value.
If your server has multiple network interfaces, you can select the network interface from the drop-down menu that will be used by Dispatcher Paragon.
Summary
An installation summary where the user can double check all the installation properties. After clicking Install, the installation process begins.
Installation Progress Page
The installation logs its progress in the form of status messages and the movement of the progress bar.
Installation Finished
The installer informs you about the successful completion of the installation process. Click Finish to exit safely.
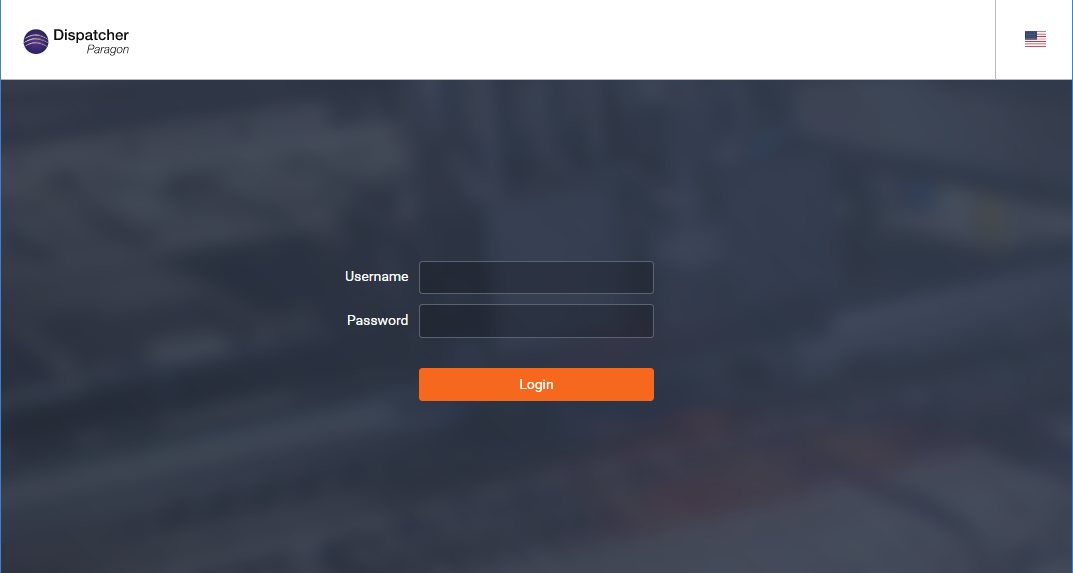
Logging Into Dispatcher Paragon
To use Dispatcher Paragon, log into the Dispatcher Paragon interface interface. The default login credentials are:
- user: admin
- password: admin
If the Dispatcher Paragon management interface is configured to use a different port than the standard port 80, enter the complete URL (e.g., http://dispatcher_paragon_server_IP:8080/).
Use default credentials to begin working with Dispatcher Paragon. Choose the desired language for the Dispatcher Paragon management interface by clicking the national flag.
CAPTCHA protection
If CAPTCHA protection is enabled in Dispatcher Paragon, after some (configurable) number of unsuccessful login attempts, users have to fill an additional input which is a text from an image.
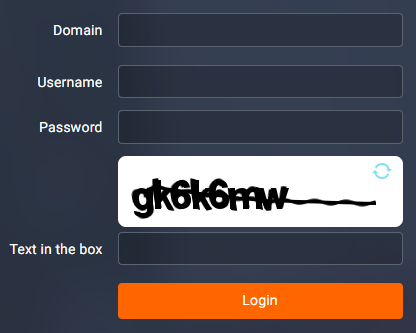
Image refresh
If the user cannot recognize the image, it can be changed by clicking the refresh icon in the corner of the image.
Configuration
To enable CAPTCHA protection, navigate to System > Configuration and set the level of setting to ADVANCED. Search for the Require CAPTCHA on login form setting and set it to Enabled.
The number of attempts to trigger the CAPTCHA can be configured in the setting. Failed login attempts are counted for a tenant and username pair. The expiration timeout of the counter is one hour.
For security reasons, always change the default admin credentials right after the installation
Activating Dispatcher Paragon
After installation is complete, Dispatcher Paragon must be activated. Dispatcher Paragon supports two types of activation: online and offline. The system requires an activation key, which is part of the license agreement you received after the product was purchased.
To activate Dispatcher Paragon using the online activation method, log into the Dispatcher Paragon management interface as administrator and on the Dashboard, enter the activation key. Dispatcher Paragon automatically contacts the Partner Portal and downloads the license.
If the Dispatcher Paragon server is not connected to the Internet, please perform offline activation.
You Are Now Ready
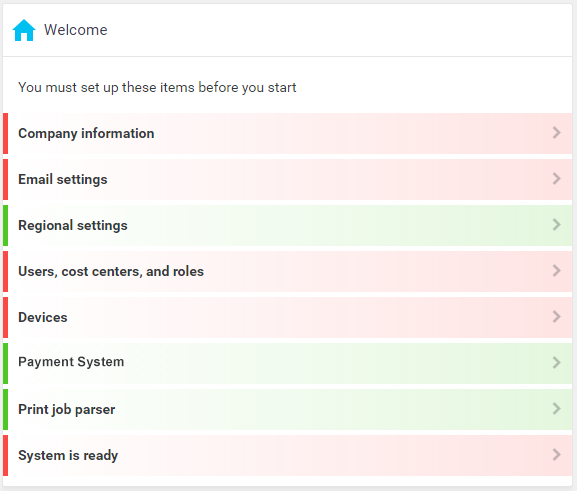
After you log in, the Dispatcher Paragon Dashboard page opens. A list of widgets is available that you can use to get information about various Dispatcher Paragon functions.
The most important first step is to use the Welcome to Dispatcher Paragon widget. This widget shows you the steps you need to perform before the Dispatcher Paragon system is ready to use.
Adding Users
If you use Active Directory and want to integrate Dispatcher Paragon with your AD domain, follow these steps. Otherwise, add users manually.
The following steps will guide you through the default Active Directory integration setup.
- Open the LDAP integration wizard through the Welcome to Dispatcher Paragon widget on the main screen. You can access different levels of detail (Basic, Advanced, and Expert). Particular sections are covered under the tabs:
- Status
- Settings
- Test
- Logs
The settings for LDAP replication can also be found on the interface interface: System > LDAP Integration
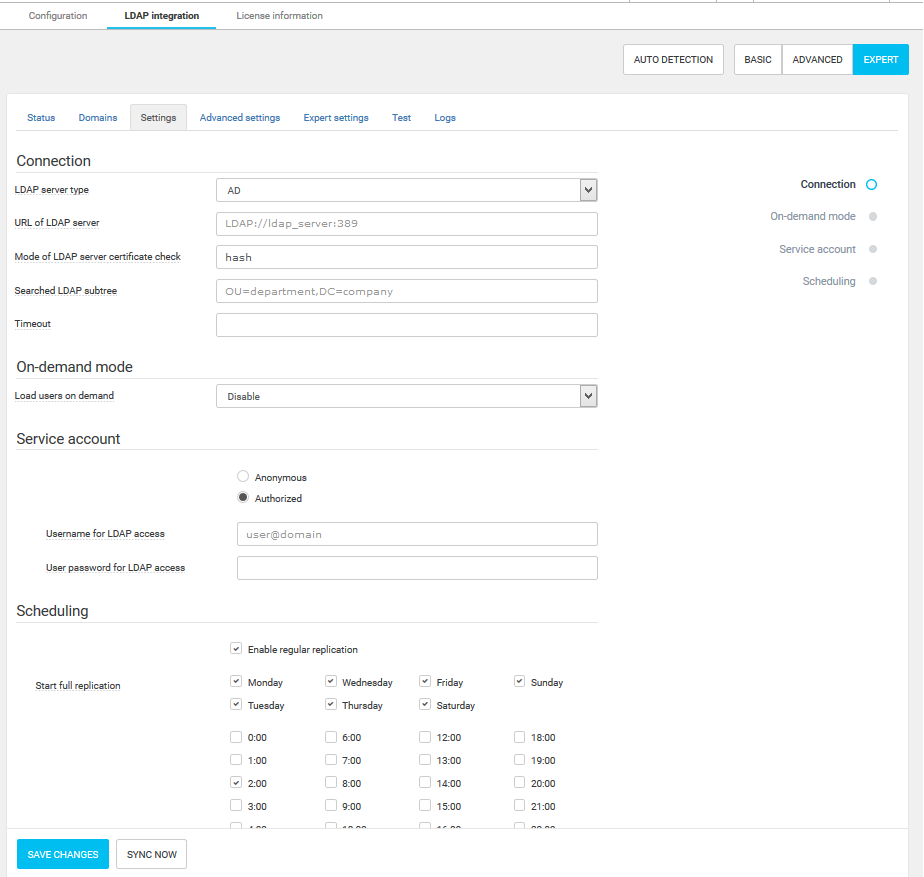
- Open the Connection section in Settings. On the Connection tab, you can configure the integration setting with LDAP. Available settings are:
- LDAP server type (AD, NDS, OpenLDAP)
- Load users on demand - This type of replication mode is sometimes referred to as semi-online. When enabled, users are created only during job reception or when logging into the terminal.
- Full and differential replication updates only users already registered within Dispatcher Paragon.
- Replication of roles and cost centers is unaffected.
When the <removeCardsInDiffLdapReplication> configuration option is enabled, users' cards removed from LDAP are not removed from the Dispatcher Paragon database when synchronization is run.
- URL of LDAP server
- Searched LDAP subtree
Service account
There is the possibility to use either an anonymous account or an authorized account to log into the LDAP server to search for users. The selected account must have at least read access to view the users and their attributes.
Please ask your domain administrator for this information.
- Open the Scheduling section. The Scheduling tab gives you the possibility to schedule the run of replication. All settings are revealed after you check the Enable regular synchronizations checkbox. The options are:
- Start full replication - Here you can select the days and times for full replication by clicking checkboxes.
- Start differential replication - Here you can specify the hours or time interval from the last replication to start differential replication. This type of replication will start every day.
You have to restart Dispatcher Paragon Management Server to apply these changes.
- Run the synchronization using the Sync now button.
- Check the result. The Status tab only contains information about the last synchronization with the LDAP server (date, duration, and result) and the count of added/updated/deleted users, cost centers, and roles. If an error occurs, the error is displayed here.
Adding a Printer
Many Dispatcher Paragon features require a terminal that controls the associated printer/MFD. For information about installing and configuring terminals, see the section Embedded Terminals installation and configuration in the documentation.
Adding a Printer to Dispatcher Paragon
After installing Dispatcher Paragon, add a printer to the Dispatcher Paragon system as follows:
- In the Dispatcher Paragon management interface, select Devices from the menu.
- Select Add device.
- Proceed through all the device setup options, and configure the settings according to your needs. (Skip Terminal type unless you want to connect a terminal to the system—a terminal is not required for direct printing.)
- In the Direct printing section, enter a unique name for the direct printing queue. We recommend a name like direct-<name of the machine>, for example, direct-printer1.
- Click Save changes to save the printer.
Configuring Roles and Access Definitions
Configuring Roles
The last thing you need to do is to set up access rights and/or restrictions. These rights and restrictions are determined by the Roles you define in the Dispatcher Paragon system. Dispatcher Paragon includes some predefined roles. If you want to create your own role:
In the management interface, select Users > Roles > Add new item.
- Each user can be assigned one or more roles. To assign a role to a user, edit the user and assign a role to him or her in the Roles section.
Create an access definition for the new role.
- After you create a role, to assign it to users, select Rules > Access definition.
Click Add new item, then select the desired User role and the Spooler Controller group. It is possible to define these restrictions for All devices in the group or just for one selected device. To allow or restrict the use of the printers in this group, click the icons below the print, copy, color, fax, and 3D options. A check means that the users the role is assigned to are permitted to perform the operation. A cross means they are not permitted to perform the operation.
By default, users are permitted to perform all operations. To force black-and-white printing for all users the role is assigned to, change the icon to a cross.
- After the settings are complete, click Add.
Basic Troubleshooting
- Dispatcher Paragon installation cannot proceed - Check to make sure the server meets all the prerequisites for Dispatcher Paragon installation. If you use the graphical Dispatcher Paragon installer, after the pre-installation check is performed, the Warnings and Problems sections provide information about conditions that have not been met.
- Dispatcher Paragon installation fail - If the installation proceeds but fails, look in the <PARAGON_HOME>\km-install.log to see if you can find the possible cause of the failure. This log file may redirect you to other log files, depending on the root cause of the failure.
- Activation issues - If you encounter any issues during the activation process (online/offline), first make sure you are using the correct activation code. Both online and offline activation processes tell you exactly where the fault is, so troubleshooting should be easy.
- A print job sent to the printer was not printed - If you sent a job to Dispatcher Paragon, but it did not print, there can be several causes:
1. In the Dispatcher Paragon interface interface, go to Reports > Job list and check to see if the job is listed there.
- If the job is not listed in the Job list, the printer's settings on the Windows workstation may not be correct. Verify that the printer and its port are configured exactly as described in this guide and that the queue to which you sent the print job has been created in Dispatcher Paragon.
- If the job is in the Job list, check the job's details to see why the job did not print.
2. Other causes of this problem could be incorrect printer settings in Dispatcher Paragon (IP address, queue name, etc.) or incorrect access settings for the printer. You can usually find these causes in the details about the job in the Job list.
3. If you cannot find the cause of the issue, contact Konica Minolta Support Center, who will be glad to help you.