To expose Dispatcher Paragon (or a specific part), an administrator must set up a reverse proxy that relays requests to the server in a DMZ running the service.
This manual covers both the unencrypted version of communication via HTTP and the encrypted version via HTTPS.
There are two possible channels where you can turn on encryption: from Mobile Terminal to Proxy, from Proxy to Terminal Server.
After successful configuration, the Reverse Proxy will respond to both unencrypted communication on port 5021 and encrypted communication on port 5022.
Requirements
- An IIS server accessible from outside the private network
A Step-by-step Guide
Step 1 - Installing Required IIS Modules
If your instance of IIS does not have the modules URL Rewrite and Application Request Routing installed, you must install them first. Otherwise, you can skip to Step 2.
To install the URL Rewrite module, go to the Microsoft Downloads Page and download the installer appropriate for your version of Windows. Install the module by following the install wizard instructions.
To install the Application Request Routing module, go to the Microsoft Downloads Page and download the installer appropriate for your version of Windows. Install the module by following the install wizard instructions.
Step 2 - Configuring Server Certificates for HTTPS
Using the keytool utility and pre-installed public/private key pair located in <install_dir>\Management\conf\ssl-keystore file, generate the certificate.
<install_dir>\Management\java\bin\keytool -importkeystore -srckeystore <install_dir>\Management\conf\ssl-keystore -destkeystore SERVERNAME.pfx -deststoretype PKCS12 -srcalias dispatcherparagontomcatSERVERNAME should be the Dispatcher Paragon server host name
When running the command, you will be asked to enter the private key password. You can find it in the tomcat configuration file <install_dir>\Management\tomcat\conf\server.xml, the attribute is called SSLPassword.
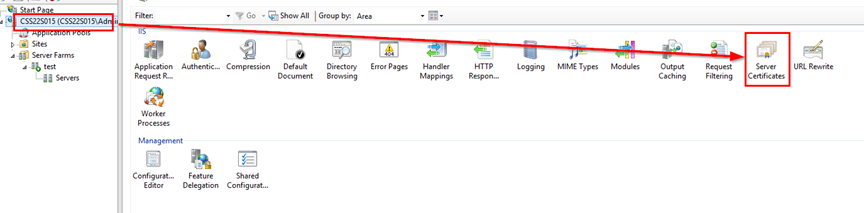
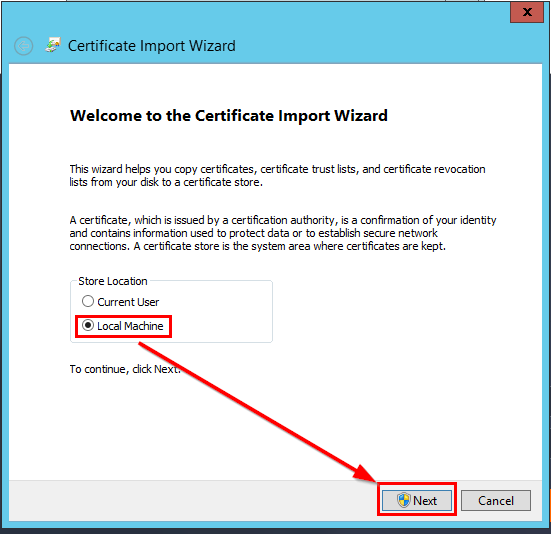
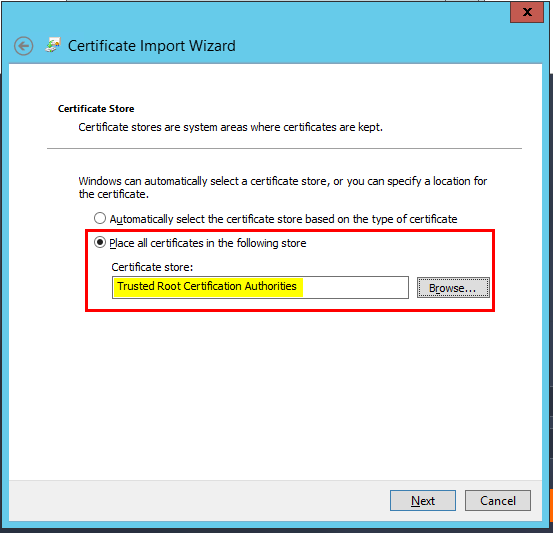
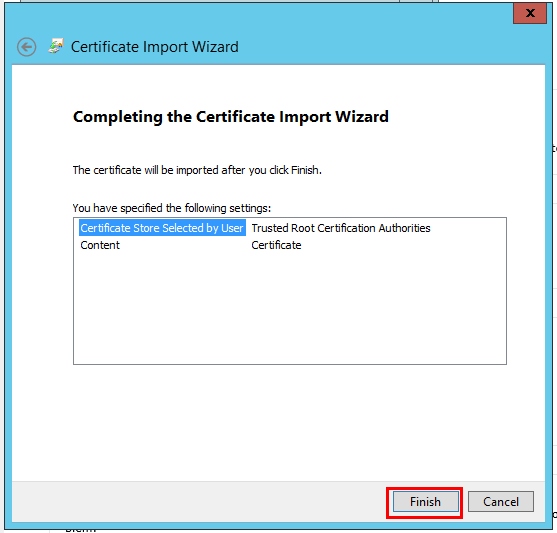
- After you have generated the certificate, you must import it into IIS. In the IIS Manager, follow the steps described in the images below.

- In the popup window, select the generated certificate file and enter the SSL password once again.
- You must use this same certificate on the Terminal Server. To do that, follow the guide at Configuring secured connection between terminals and Terminal Server.
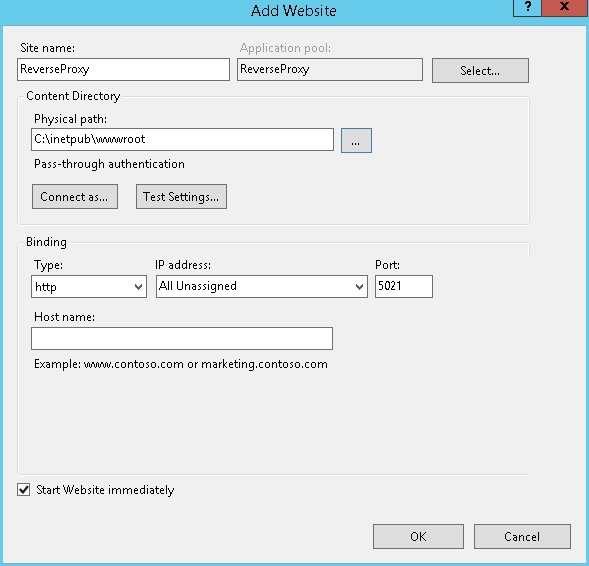
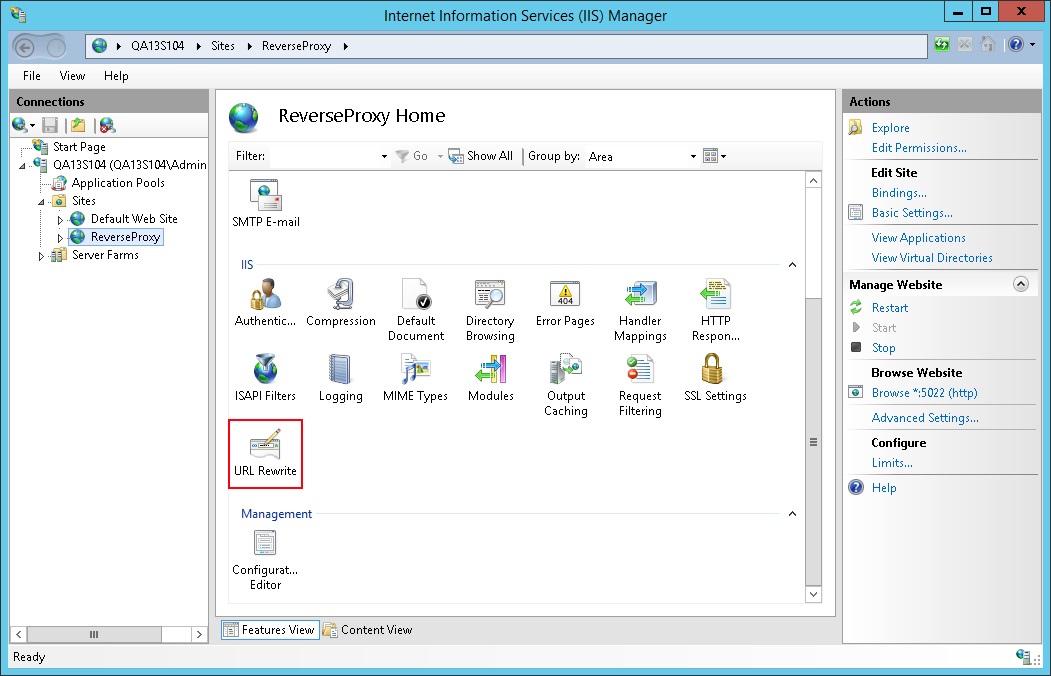
Step 3 - Setting Up a Reverse Proxy Site in IIS
Once you have the modules installed and the certificate is set up, you can start configuring the site used for the reverse proxy in the IIS Manager.
- Create a new site (ReverseProxy) with binding on port 5021.
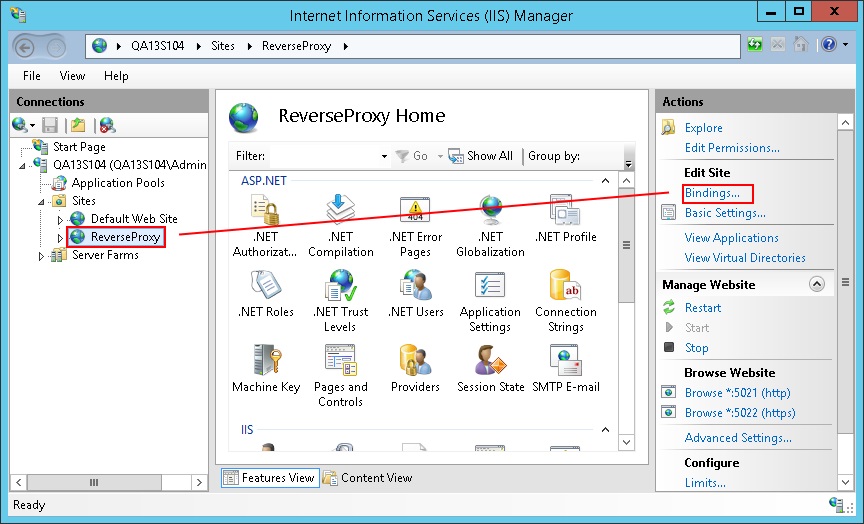
- Add HTTPS binding by clicking the Bindings action in the right pane in the site configuration.
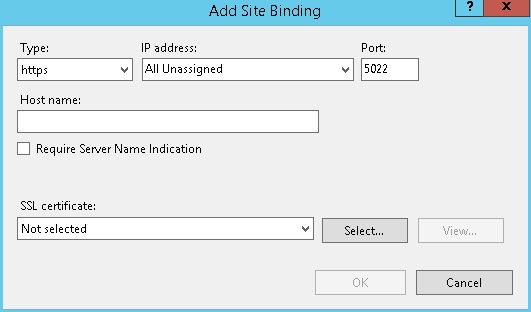
- In the popup dialog, click Add to add the HTTPS binding, then fill in the form and select the correct imported certificate in the SSL certificate drop-down menu.
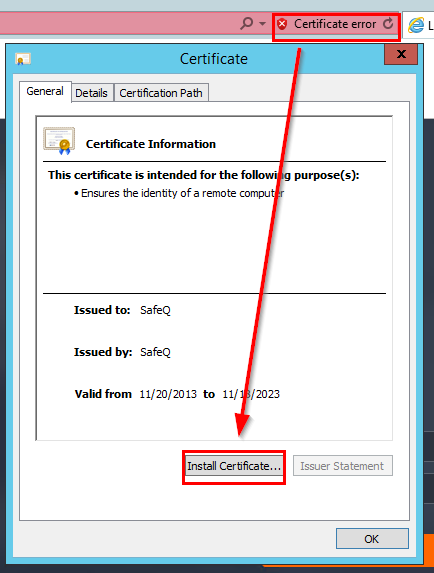
- Then on the proxy server machine, open the web browser and access the proxy using its IP address
- If your proxy server IP is 10.0.11.103, then open https://10.0.11.103:5022 in the web browser and install the certificate of the proxy server.
- If your proxy server IP is 10.0.11.103, then open https://10.0.11.103:5022 in the web browser and install the certificate of the proxy server.
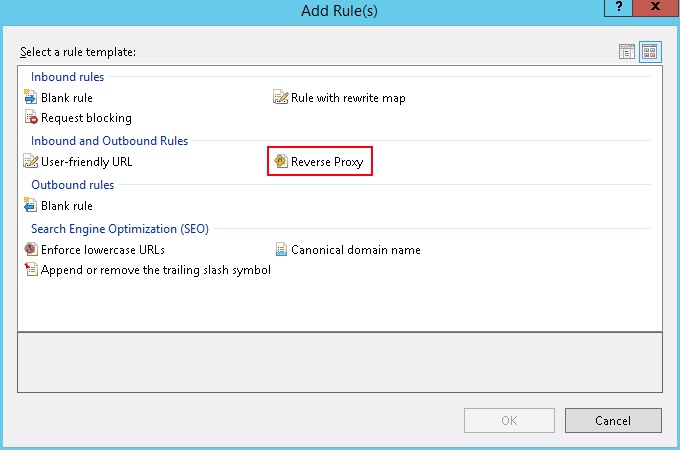
Step 4 - Adding the Rewrite Rule
When setting up the rewrite rule, you must make sure there are not any rules in the parents of the site that might override it.
- Double click the URL Rewrite Module icon, from the Actions Panel (on the right), select Add Rule(s).
- In the popup dialog, select Reverse Proxy and click OK. If you see another popup, click OK again.
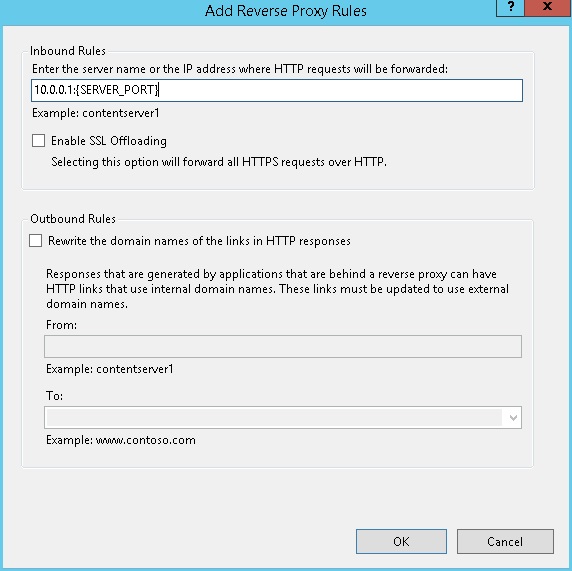
In the next dialog, fill in the field Enter the server name or the IP address... to match the IP address of the endpoint in your network, enter {SERVER_PORT} as the port and uncheck SSL Offloading.
Step 5 - Pointing Mobile Terminal to the Correct Address
Once the reverse proxy is set up in IIS, you must point the Mobile Terminal application to the right address.
- Generate a QR code for a printer.
- Scan the QR code with a scanning application of your choice to get the content of the QR code.
- You will receive text that looks similar to this: {"terminalServerEndpoint":"https://10.0.10.150:5022/et/v1/201"}
- You must change only the host part of the URL so that it corresponds to your exposed server on which you have set up the reverse proxy.
- Example: if the IP address of the server with the reverse proxy is 10.0.11.103, then you would modify the text so it looks like this: {"terminalServerEndpoint":" https://10.0.11.103:5022/et/v1/201 "}
- Generate a new QR code from the modified text (for example, with this online tool: https://www.ysofters.com/qr/ ).
- You can scan this new QR code using Mobile Terminal. If you have set up everything correctly, you should have the ability to log in and see your jobs.