Configuring Dispatcher Paragon as a Printer at Linux Using IPPS
IPPS is a secure version of Internet Printing Protocol (IPP). This approach requires having Dispatcher Paragon Mobile Integration Gateway installed on the server.
Make install Nginx proxy according to document (6.0.105) Slow printing using IPPS from Linux.
Adding and Setting Up a New Printer in the Command Line
This how to add and set up a new printer from Terminal (command line) without using mDNS/Bonjour discovery.
#!/bin/bashPRINTER="YSoftSafeQ6"sudo lpadmin -E -p "${PRINTER}" -v "ipps://safeq6.ysoft.local:8050/ipp/print" \-m 'everywhere' \-o 'printer-is-shared=false' \-o 'auth-info-required=username,password'sudo cupsenable "${PRINTER}" -Esudo cupsaccept "${PRINTER}"Replace "safeq6.ysoft.local" with the hostname or IP address of your Dispatcher Paragon Mobile Integration Gateway installation.
Note 1.: lpadmin might take about one minute to perform a proper configuration.
Note 2.: If you are using .local domains, make sure that your /etc/nsswitch.conf has a proper configuration (order of items: dns mdns), and the machine is able to resolve the address.
Configuring Dispatcher Paragon as a Printer at Linux Using LPR
LPR is a network protocol for submitting print jobs to a remote printer or print server. Dispatcher Paragon can behave as a print server in this case. This page explains how to configure a printer in Linux to use LPR for printing jobs via Dispatcher Paragon.
Adding and Setting Up a New Printer in the Graphical User Interface
The method for adding and setting up a new printer in a Linux system varies according to the distribution and working environment. Various display managers are available, but the instructions here guide you through the installation process in the popular Gnome environment, and Ubuntu distribution. For other display managers (or the command line), the procedure may be different, but the basics are always the same.
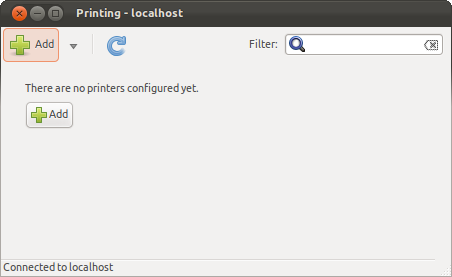
- To add a new printer, go to System Settings > Printing - localhost and click Add.
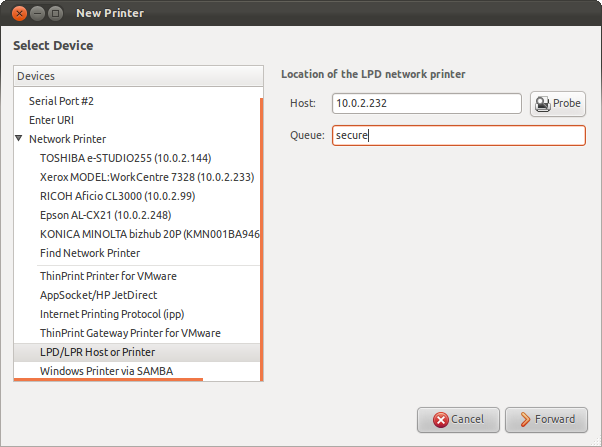
- In the device list, expand the Network Printer list and select LPD/LPR Host or Printer. Fill in the necessary data. Host is the IP address or hostname of your Dispatcher Paragon server. Queue is the name of the queue to which print jobs will be sent.
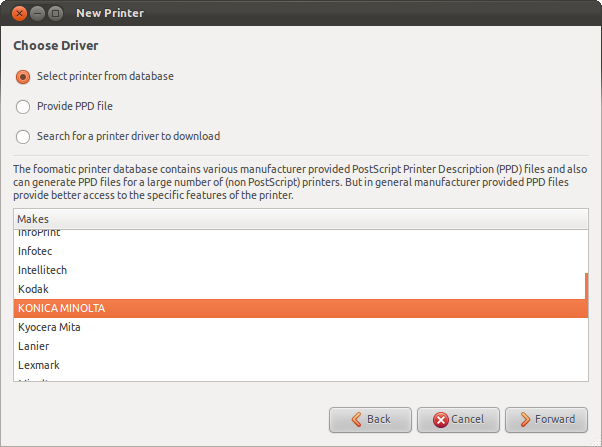
- Select the driver for the printer from the database, PPD file, or download it from the Internet. Choose the appropriate print driver that works with printers in your environment.
- Follow the wizard and fill in all the information according to your needs. Once everything is done, finish the wizard.
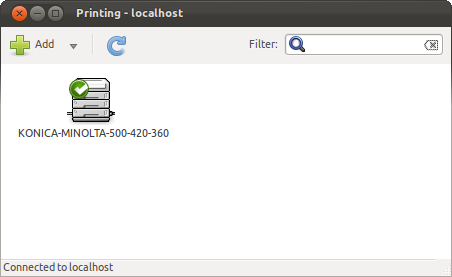
- Now it is possible to send print jobs to the newly created printer, which is configured to send the jobs to Dispatcher Paragon.
Adding and Setting Up a New Printer in the CUPS Interface
Adding and setting up a new printer in the graphical user interface
The method for adding and setting up a new printer in a Linux system varies according to the distribution and working environment. Various display managers are available, but the instructions here guide you through the installation process in the popular Gnome environment, and Ubuntu distribution. For other display managers (or the command line), the procedure may be different but the basics are always the same.
The procedure for adding and setting up a new printer in the CUPS interface is almost the same as for the graphical user interface. All you need to do is to select a hostname and queue for your printer as follows:
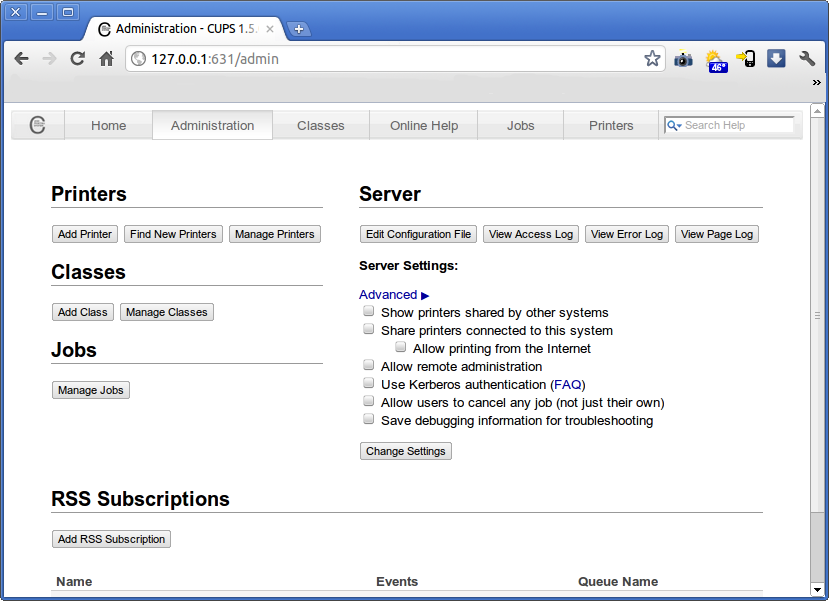
- Open the CUPS interface (usually http://<CUPS IP address>:631). Select the Administration tab, then click Add Printer. If necessary, enter the CUPS administrator credentials.
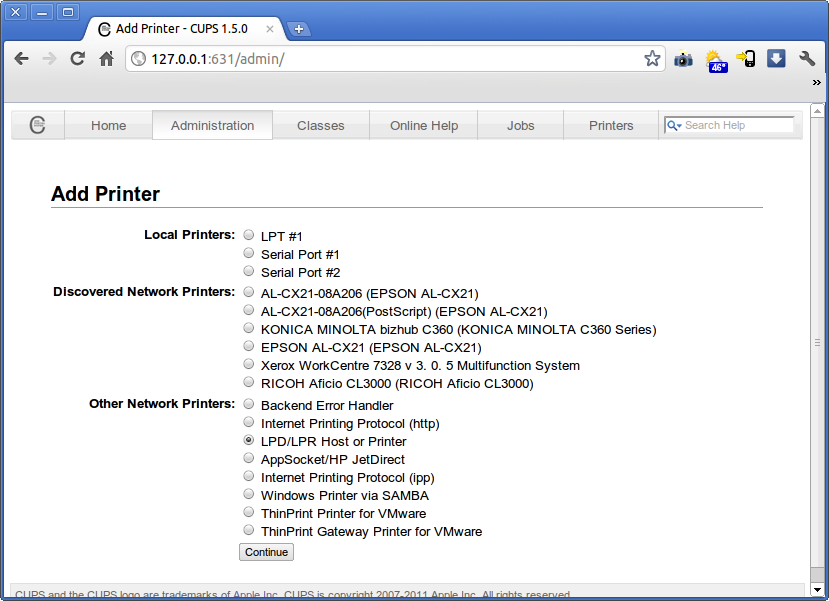
- In the Other Network Printers section, select LPD/LPR Host or Printer, then* click *Continue.
- The Connection text box is filled according to the following example lpd://hostname/queue
Example: If the server has the IP address 10.0.2.232 and the queue name secure, the connection string is lpd://10.0.2.232/secure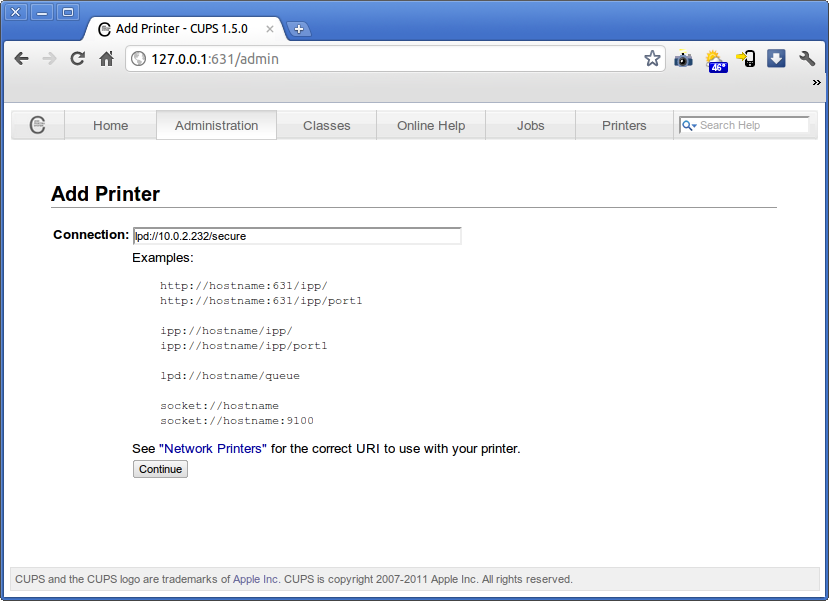
- Proceed through the remaining steps and set up the printer according to your needs. Once you complete all the steps of the Add Printer wizard, your printer can send prints to Dispatcher Paragon.
Using LPR and LPRNG Settings
This section is for experienced administrators and describes printcap settings.
This is an example of local printcap for printing to Dispatcher Paragon:
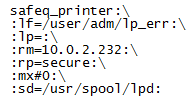
With these settings, a print sent to the safeq_printer will be sent directly to the Dispatcher Paragon server.