YSoft SafeQ Terminal UltraLight only supports scanning using SMB.
Adding FTP connection to address book via device web interface
Prerequisites
Make sure you add device into Dispatcher Paragon first.
- Credentials for Dispatcher Paragon FTP server
- Simply head to System > Configuration > Advanced and search for "ftp".
- An ftp / WebDAV username is property named scanServerUsername
- An ftp / WebDAV password is property named scanServerUserPassword
After you install Terminal Pro 4 into Dispatcher Paragon (add as a device), the terminal server creates FTP folder. The folder has same name as is devices' id. Check in devices' settings with Advanced view. As you can see, in our case it is number "1"

How to proceed
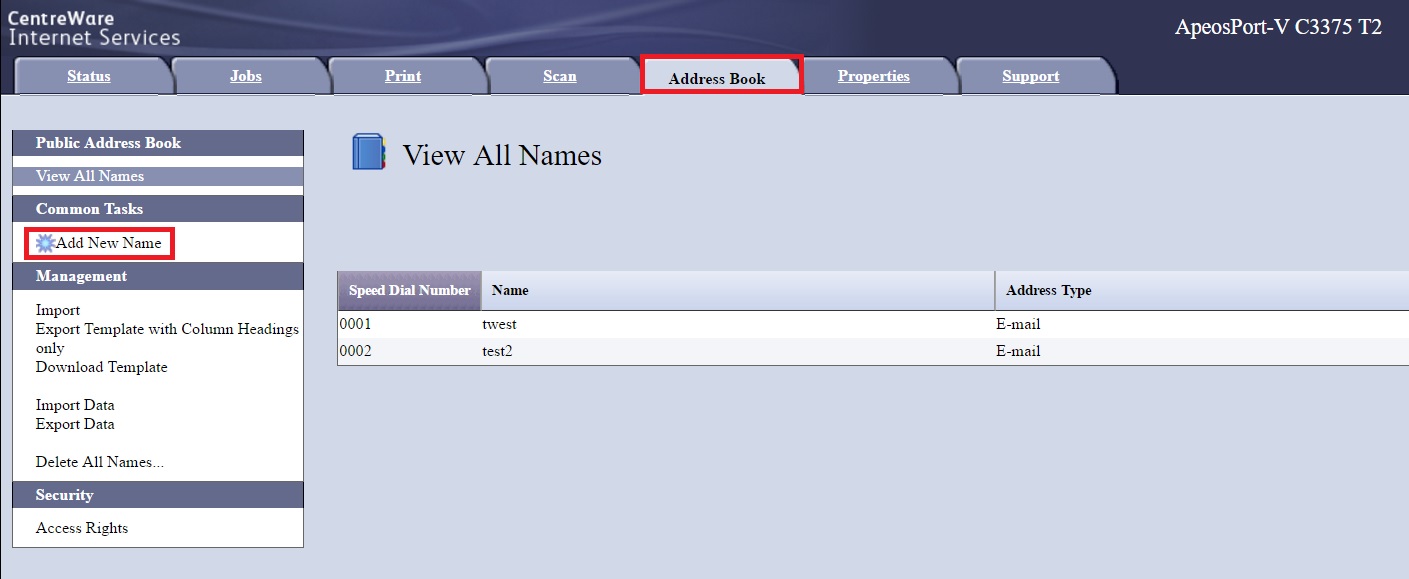
- Login into device web interface and go to Address book and click Add New Name.
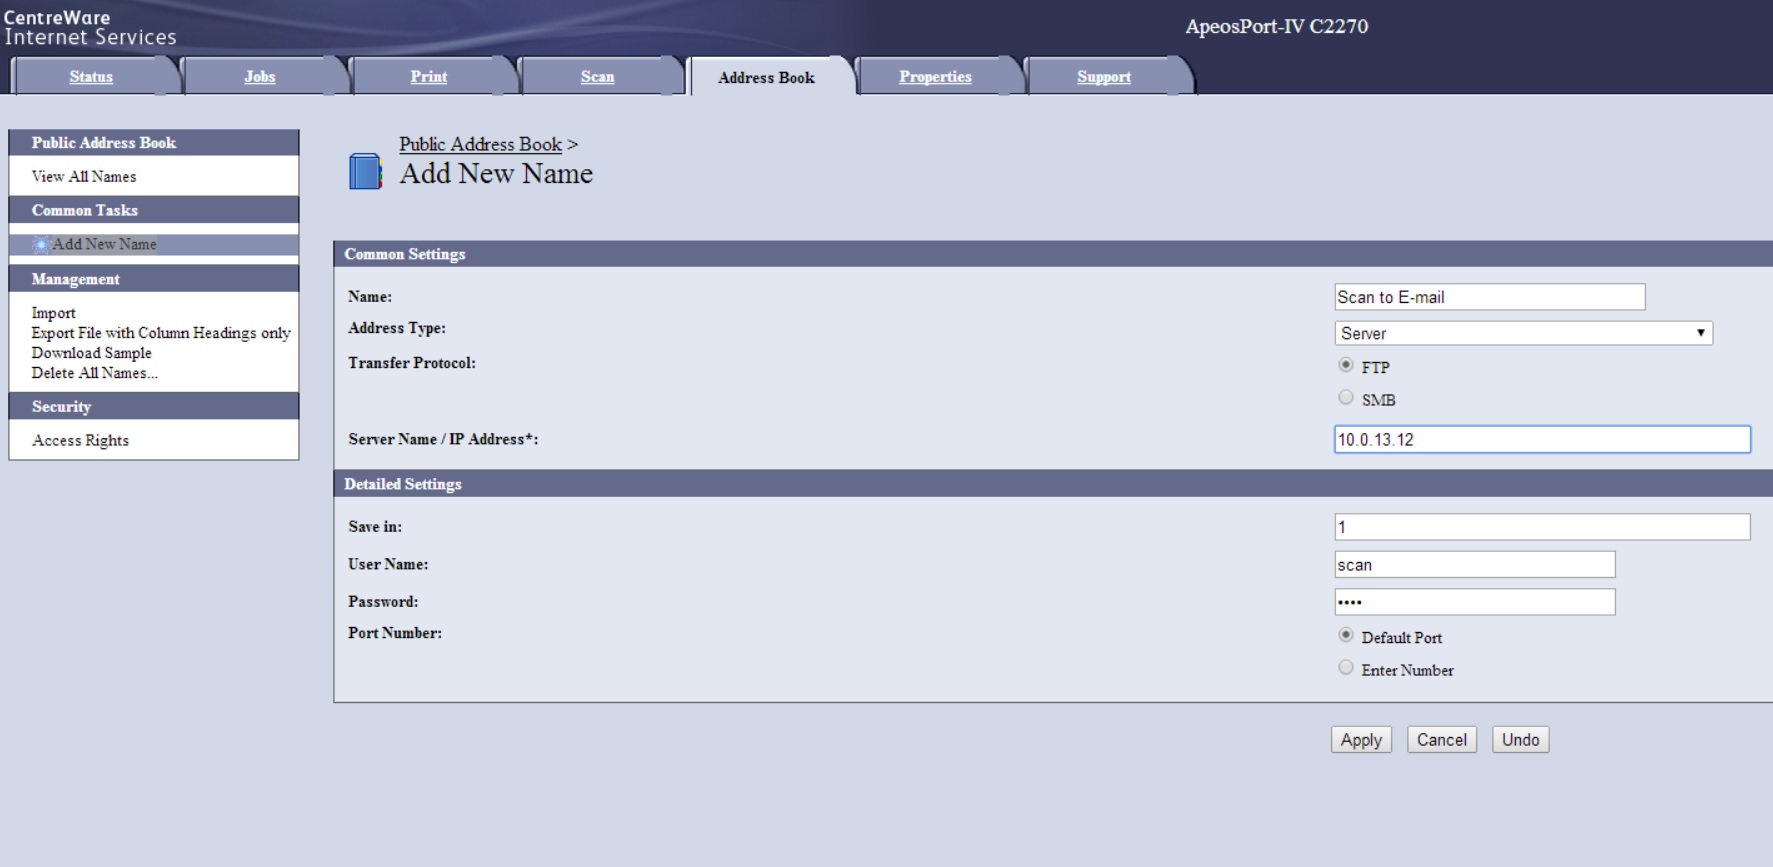
- Fill in all necessary fields and click Apply
- Display name (It is best to use the same name like name of the scan workflow in YSoft Dispatcher Paragon)
- select Server from Address Type drop down menu
- select FTP
- Fill the number of scan destination folder that was created during device addition into Dispatcher Paragon in Save in
- For User Name use scanServerUsername property value (more info in precondition)
- For Password use scanServerUserPassword property value (more info in precondition)
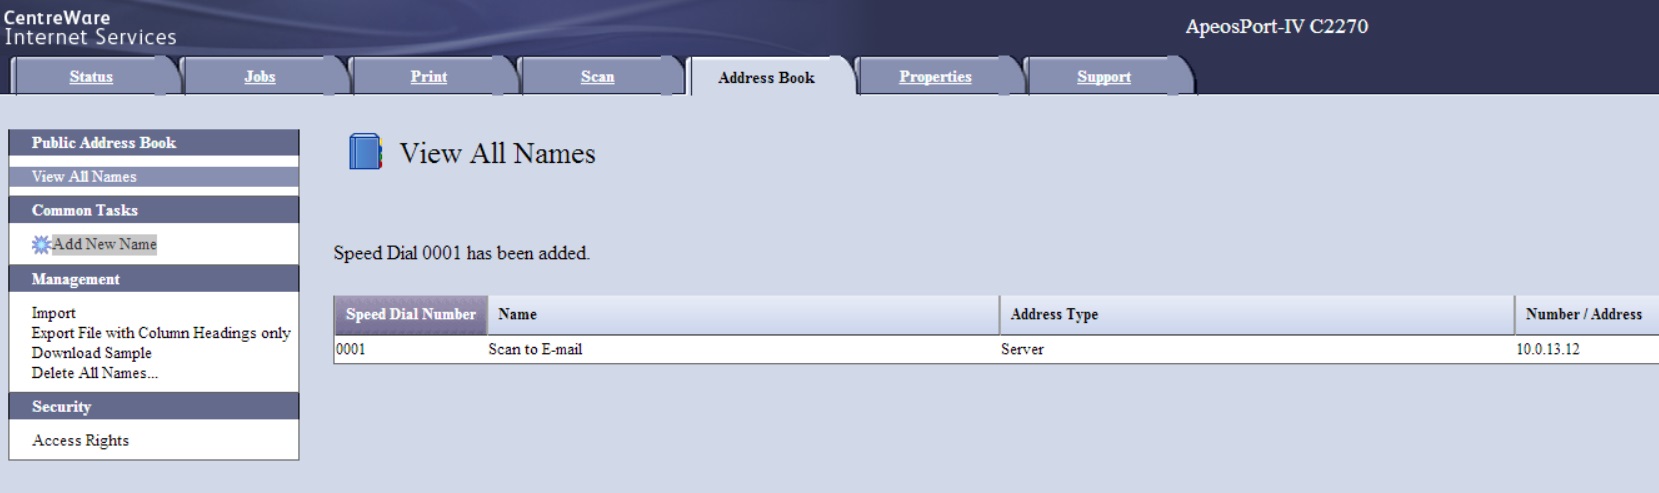
- Created FTP connection is saved into Address Book list.
- When the user authenticates on Terminal Pro, he selects workflow and enters Scan menu on device, he just selects created Address Book connection and performs scan. Scans will be then delivered according to the workflow settings.
Adding SMB folder to address book via device web interface
Prerequisites
Make sure that you add device into Dispatcher Paragon first.
Credentials that will be used by MFD to authenticate in filesystem.
- Path to a folder to which the scan should be stored.
How to proceed
- Login into device web interface and go to Address book and click Add New Name.
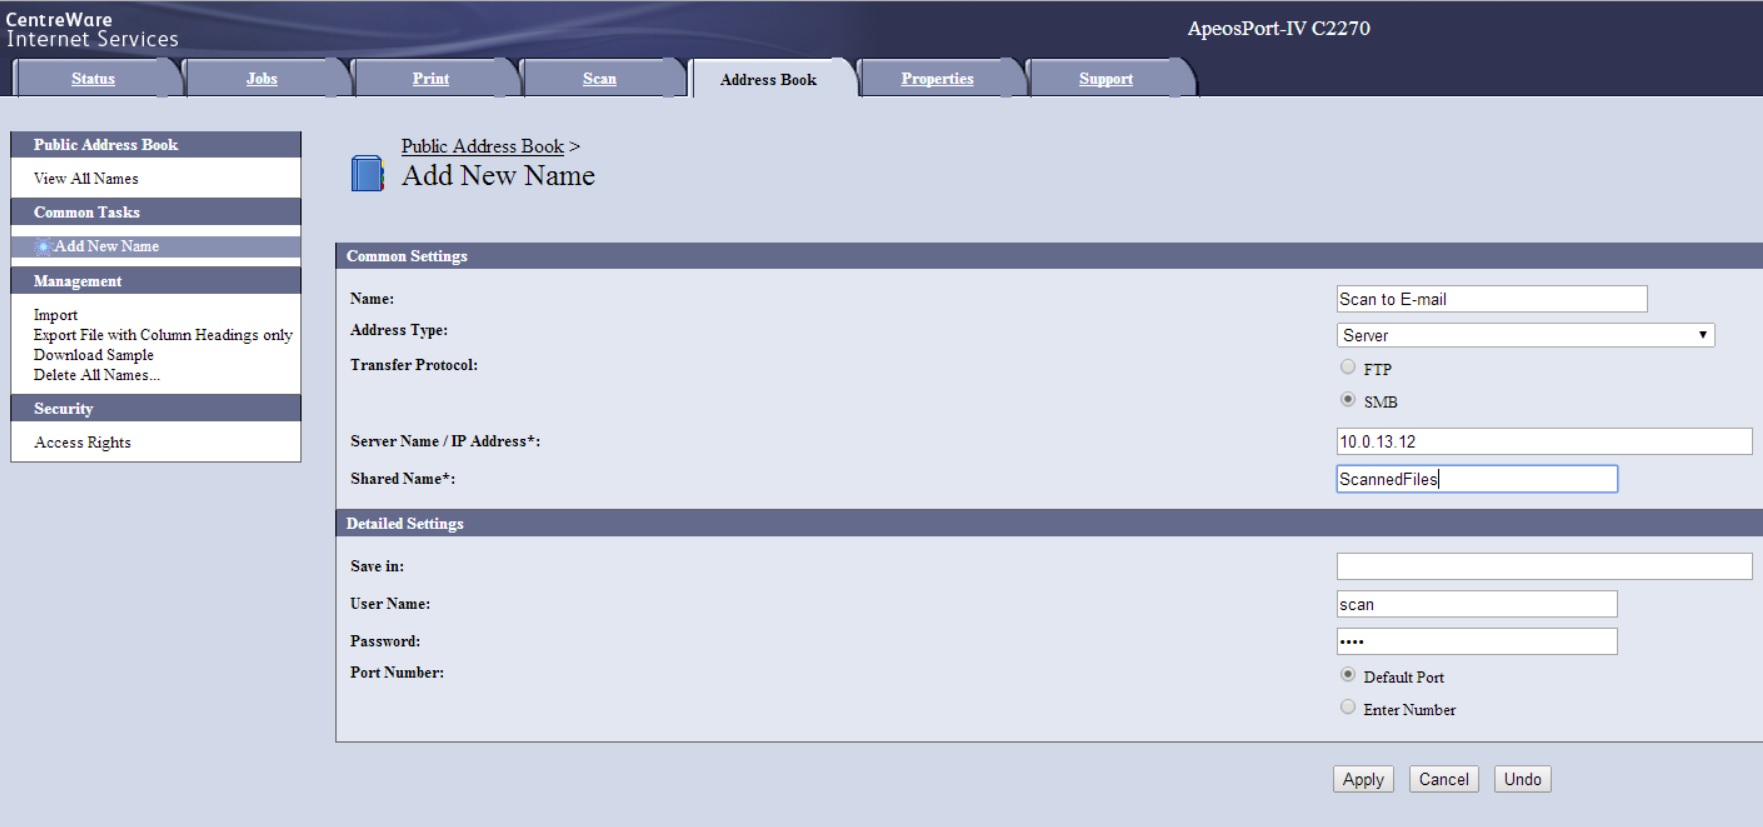
- Fill in all necessary fields and click Apply
- Display name (It is best to use the same name like name of the scan workflow in YSoft Dispatcher Paragon)
- select Server from Address Type drop down menu
- select SMB
- Fill IP address of machine on which the scan should be delivered
- Put a name of a shared folder into Shared Name
- If there are sub-folders in your shared folder and you would like to deliver scans into one of them please fill it in Save in
- For User Name and Password use credentials with read/write access rights
- Created FTP connection is saved into Address Book list.
When user authenticates on terminal and enters Scan menu on device, he just selects created SMB folder and performs scan. Scans will be delivered to this folder, and after logging out from Terminal Pro 4, scan files will be delivered to target destination according to configuration in used scan workflow.
SMB folder must be equal to Triggered hot folder for used scan workflow.