All of the steps listed in this document are done automatically during the installation. In following cases, they need to be done manually:
- On G2 machines without Java enabled (admin is informed about this during the installation)
- Remote configuration fails due to unexpected error (admin is notified about this situation during installation)
Configuring USB Card Reader
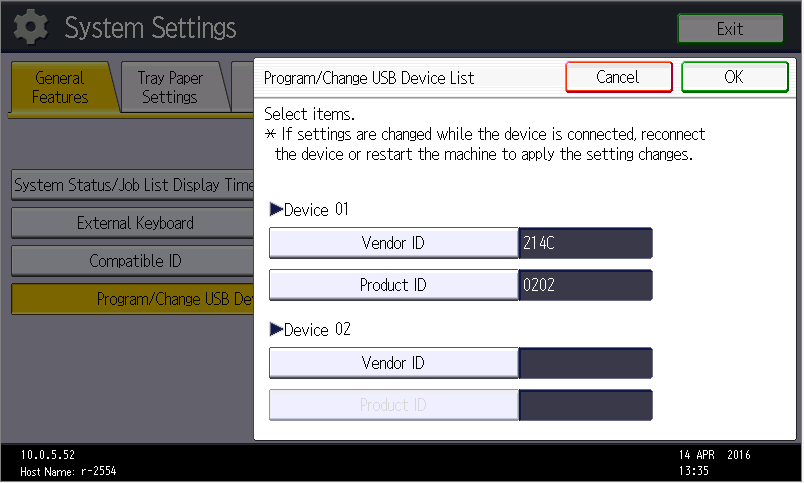
Configure card reader in System Settings.
- Select System Settings > General Features > Program/Change USB Device List
- Then enter values for Vendor ID - 214C and Product ID - 0202 for Device 01
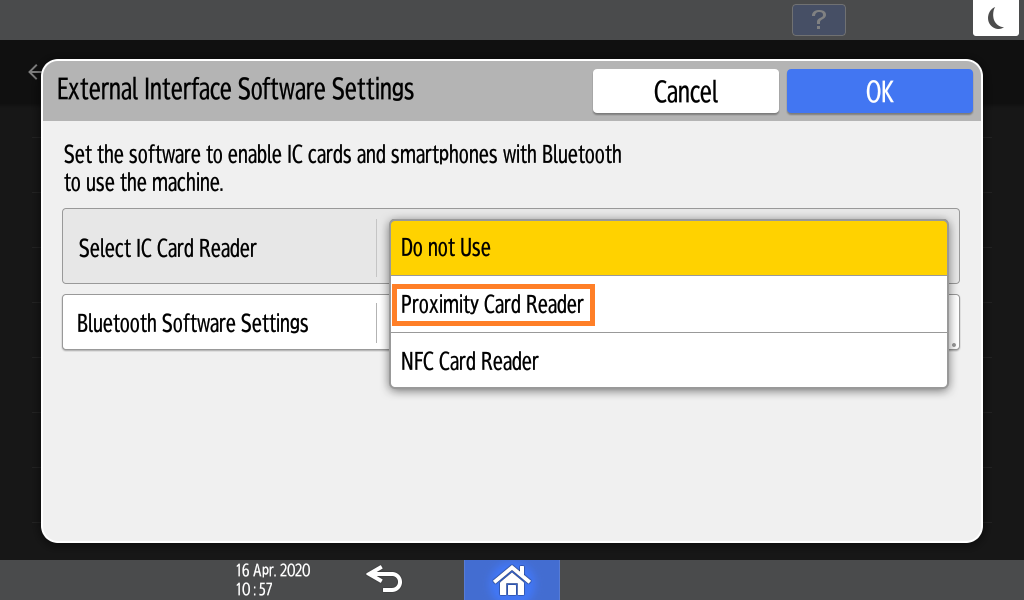
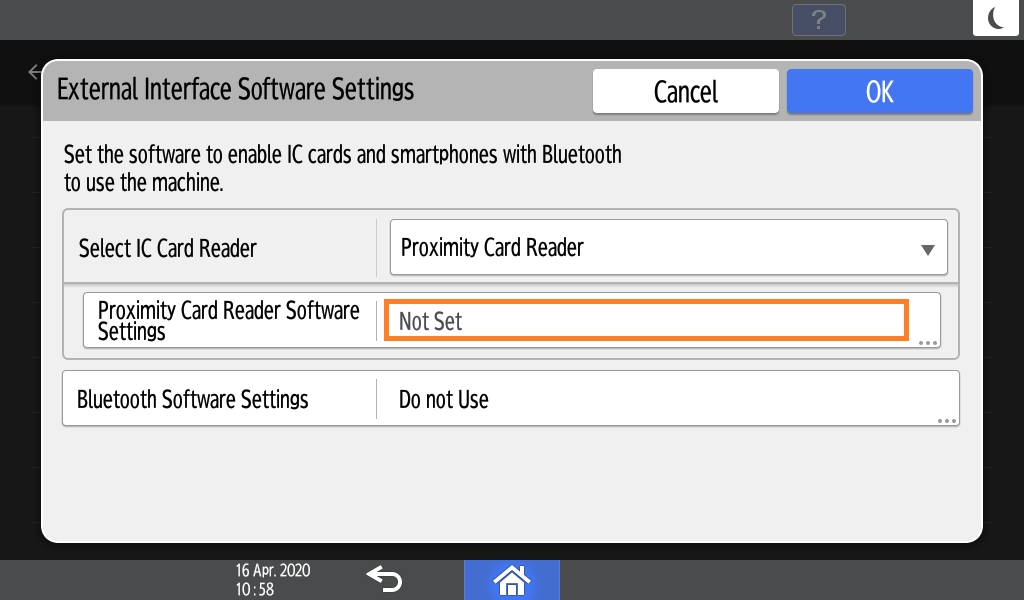
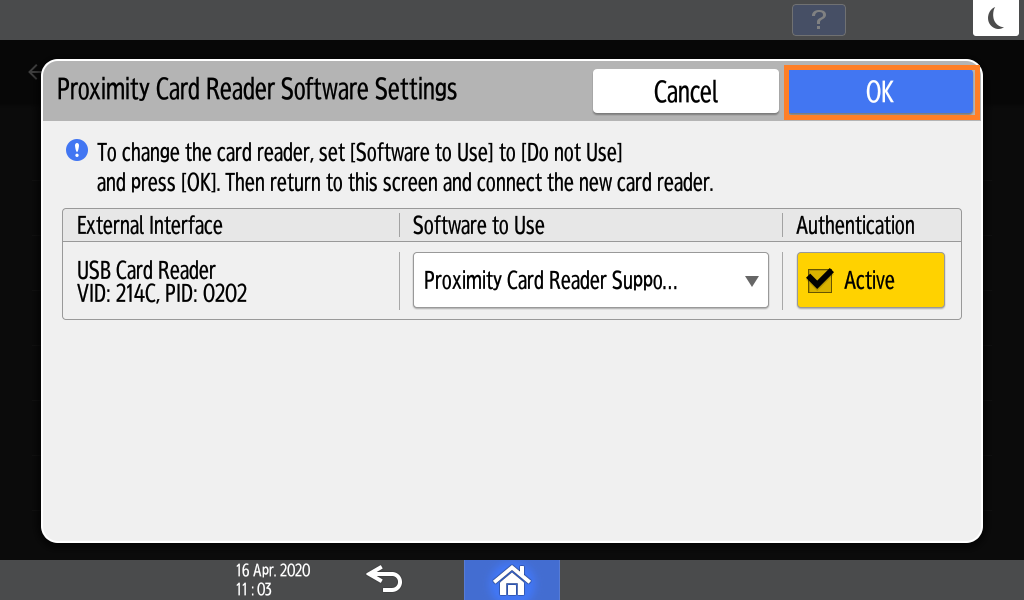
- Set up card reader in Smart Operational Panel
- User Tools / Settings -> Screen Features -> Screen Device Settings -> IC Card Bluetooth Software Settings / External Interface Software Settings -> Select IC Card Reader -> select "Proximity Card Reader"
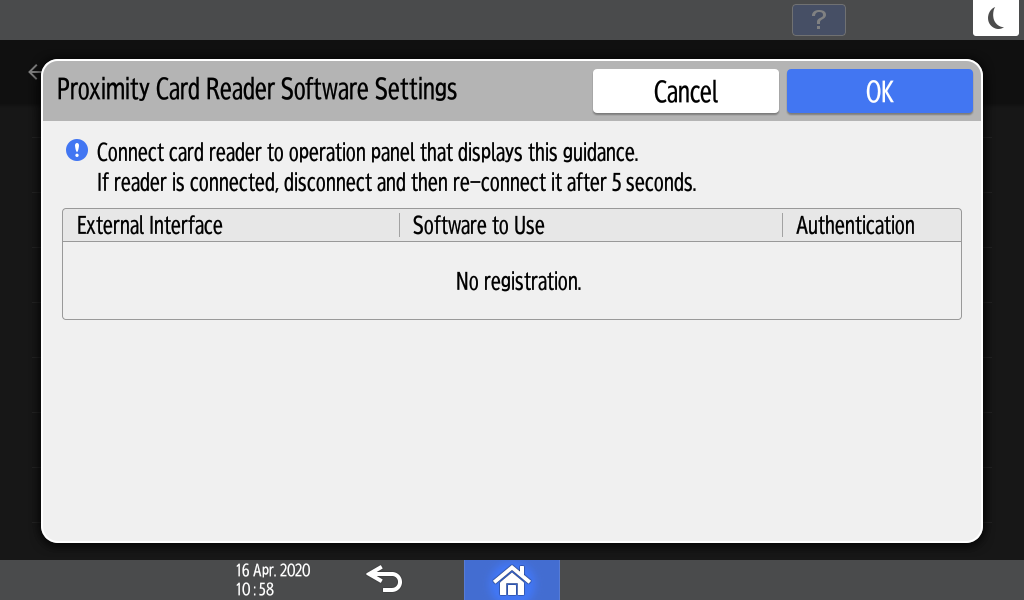
Note that you can use only Smart Operational Panel USB - either visible one, or hidden micro-USB through an adapter. Card reader will not work with MFD ports (on back or on a side of the device).
- Check the settings, confirm the change and restart the MFD
Service menu settings
Firmware update should be updated to newest version.
- SP mode 5-113-001 is set to 0 (default value).
- External optional Counter Type option to activate support for enhanced external charge unit management: SP mode 5-113-002 to 0.
- Access Control - SDK Certification Device 5-401-230 to 00000001 (Enables Custom Authentication).
- Access Control - Detail Option 5-401-240 to 00001000 .
Authentication settings in Web Image Monitor (WIM)
- Go to the Ricoh MFD web interface (Web Image Monitor).
- Login as an administrator.
- Under Device Management > Configuration change the following settings to allow display of authentication application.
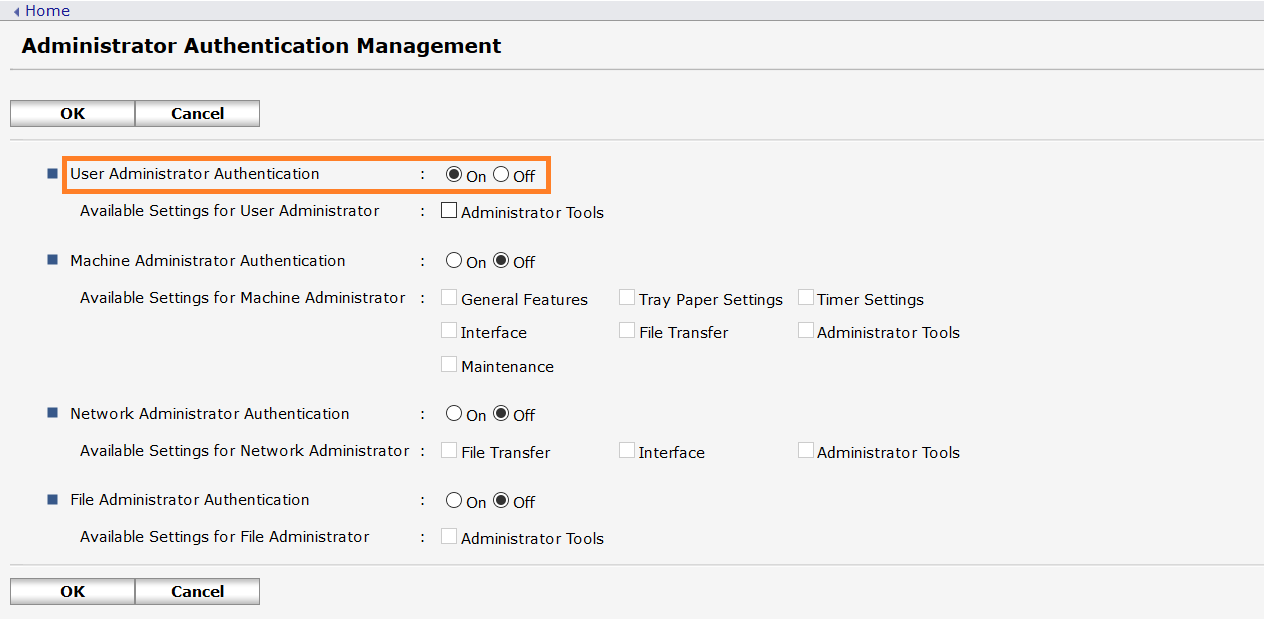
- In Administrator Authentication Management set User Administrator Authentication to On.
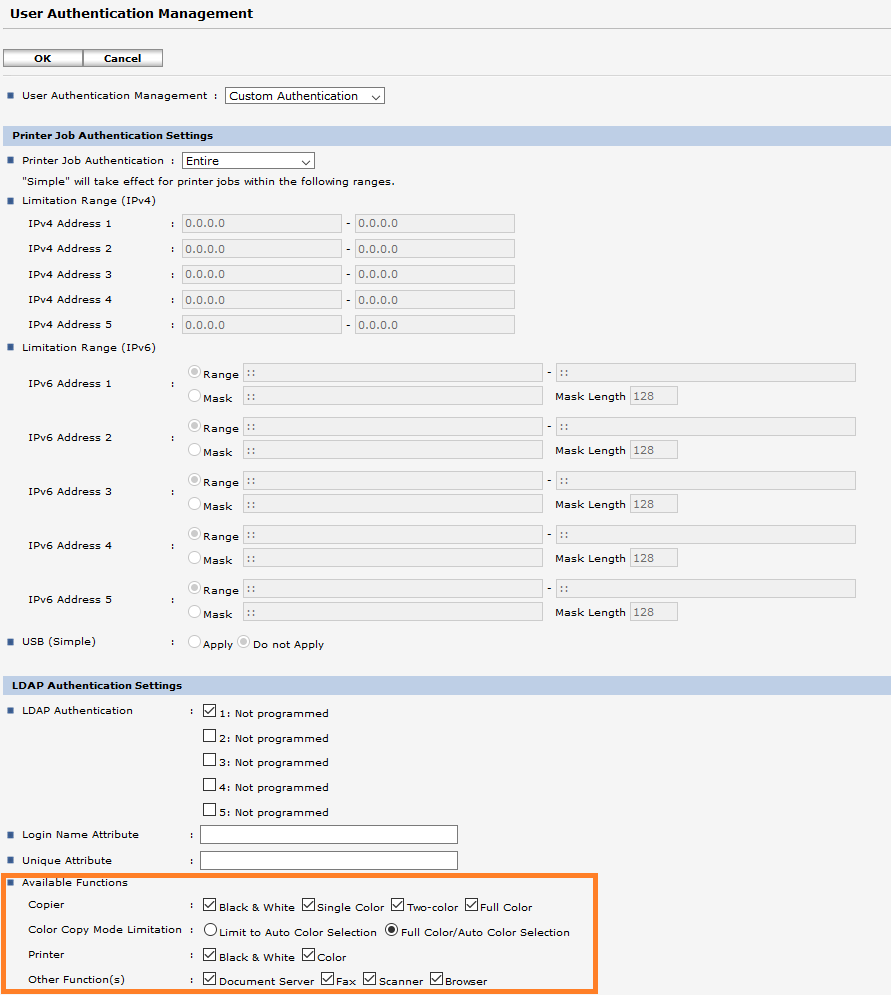
- In User Authentication Management set User Authentication Management to Custom Authentication.

- In User Authentication Management check that all functions are enabled.
- In Administrator Authentication Management set User Administrator Authentication to On.
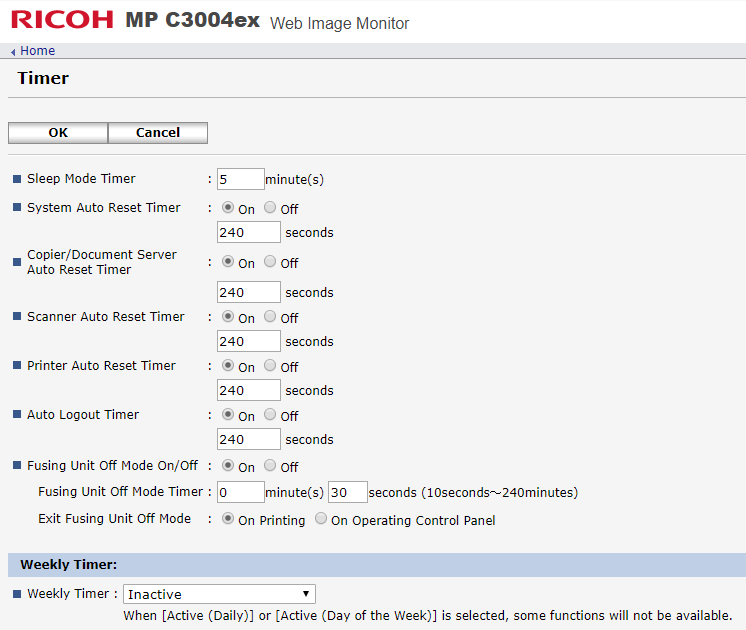
Set appropriate timers
Terminal inactivity timeout is a value for user automatic logout. It is defined for Cost centers and can be specified per user but now it is not supported, see page Requirements and Known Limitations of Dispatcher Paragon Embedded Terminal for Ricoh SOP.
Default value on MFD is automatically set to more than 3 minutes. It can be manually changed after installation.
- Login to WIM (Web Image Monitor) as machine administrator.
- Go to Device Management → Configuration → Timer (under Device Settings).
- As default set all timers higher than Terminal inactivity timeout (so for default Terminal inactivity value, set all values to more than 3 minutes).
- Most of the timers can be turned off if they are not needed.
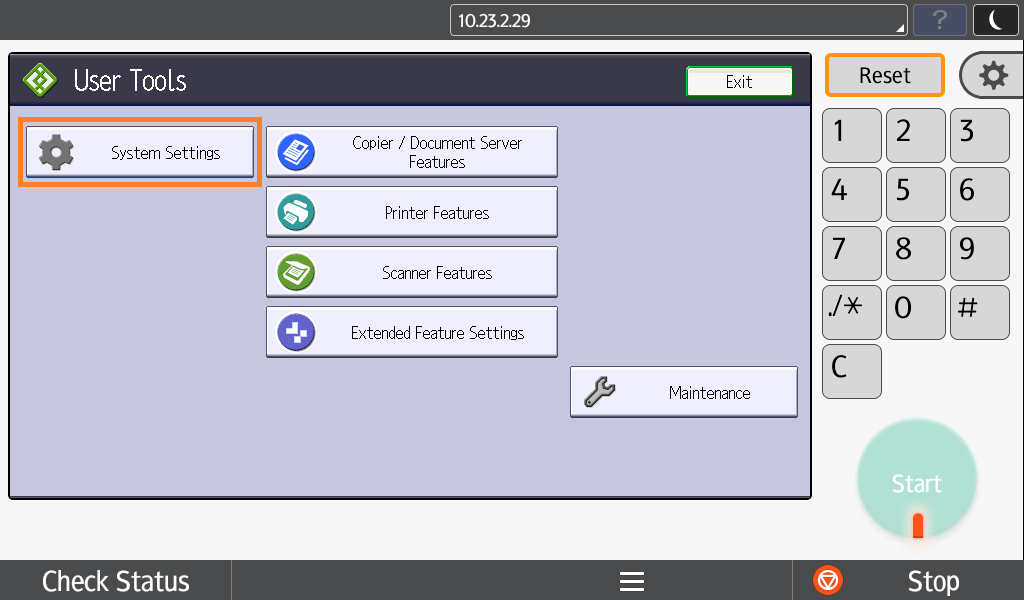
Key Counter Management settings on the MFD
- Go to the User Tools on MFD.

- Select Machine Features.
- Go to System Settings.
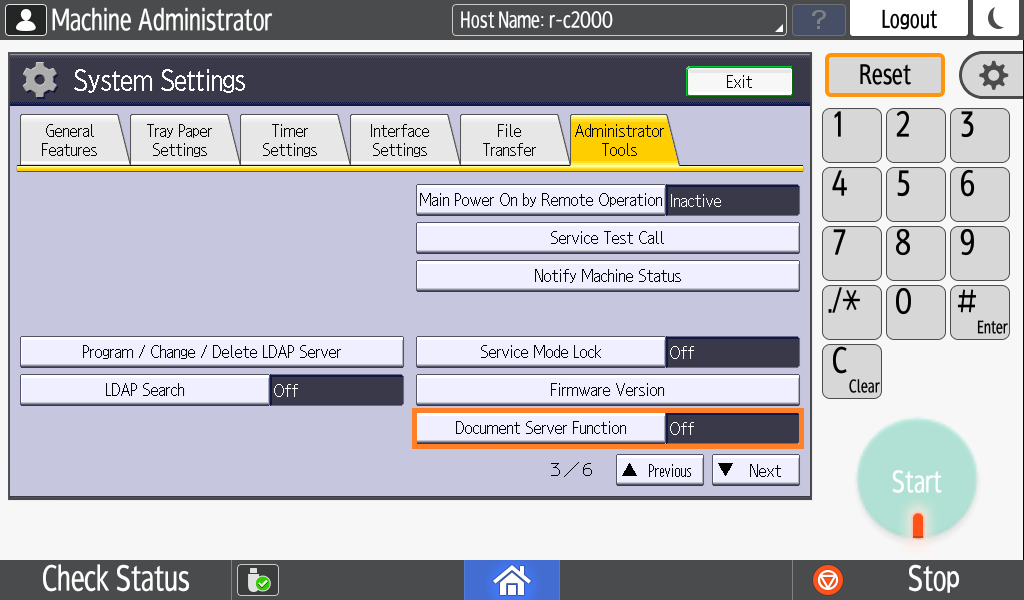
- Go to Administrator Tools > Key Counter Management (on a second page)
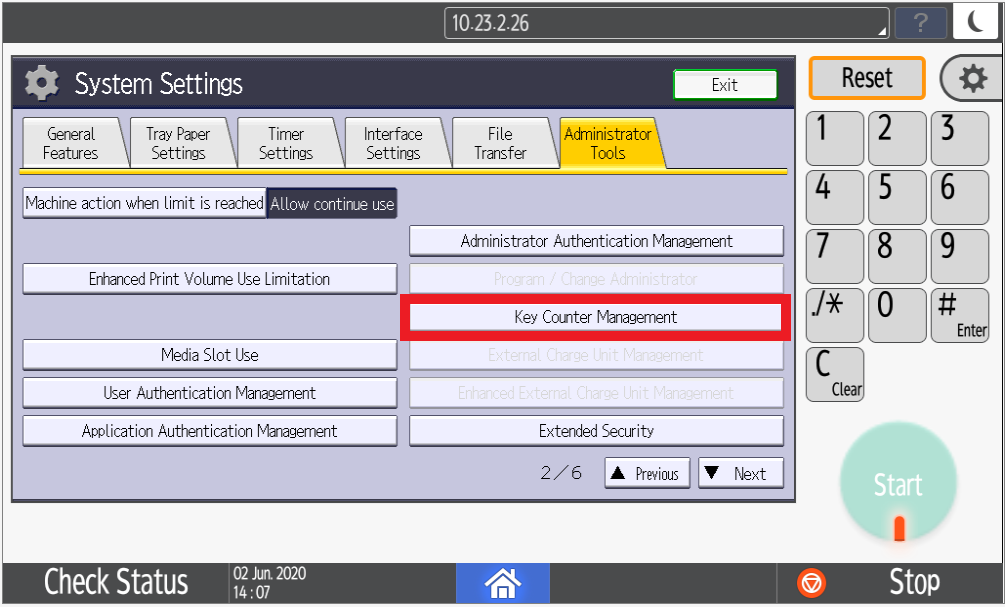
- Unblock all functions.
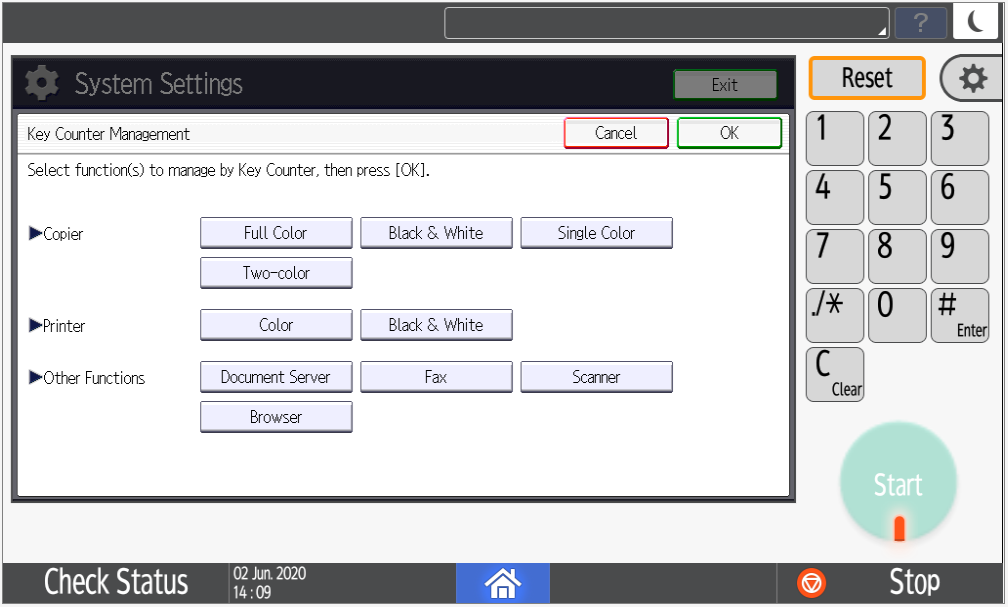
- Turn off Document Server Feature.
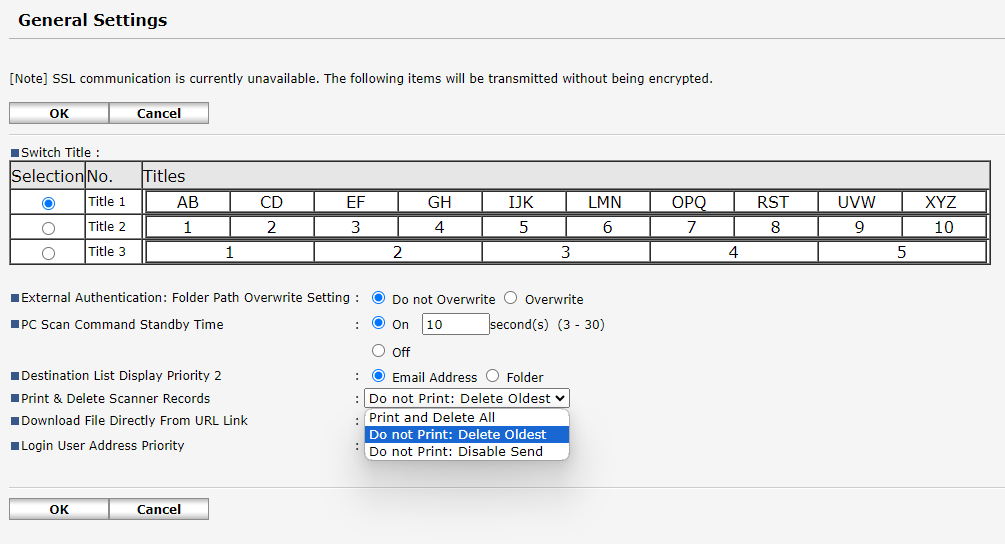
Scan journal settings
In order to always allow users to scan, it's recommended to set following scan journal delete strategy
- Login to WIM (Web Image Monitor) as machine administrator.
- Go to Device Management → Configuration → Scanner → General Settings
- Set Print & Delete Scanner Records to Do not Print: Delete Oldest