Limitations can be found on page Requirements and known limitations of Dispatcher Paragon Embedded Terminal for Sharp-eSF.
Installation Details
Ensure that Dispatcher Paragon Embedded Terminal is not present on the device before the installation. If it is the case then please remove it via device web's interface. It is recommended to restart the device before the installation.
Installation of Dispatcher Paragon Embedded Terminal for Sharp-eSF consists of two sections. The first section relates to preparation steps of a device for installation of Dispatcher Paragon Embedded Terminal for Sharp-eSF and the installation process itself. The second section relates to post installation configuration steps needed for allowing usage of Dispatcher Paragon Embedded Terminal for Sharp-eSF.
Installation of Dispatcher Paragon Embedded Terminal for Sharp-eSF
First of all, an administrator account has to created on a device to be able to configure permissions of Public user. This step is important since most permissions of public user will be taken away after the installation of Dispatcher Paragon Embedded Terminal for Sharp-eSF and administrator still needs to have access to device web interface. Once Public user has all permissions granted an administrator can install Dispatcher Paragon Embedded Terminal for Sharp-eSF via Dispatcher Paragon management interface. After the successful installation the user permissions will be changed via device web interface. This step is described in the second section.
- Go to device web interface.
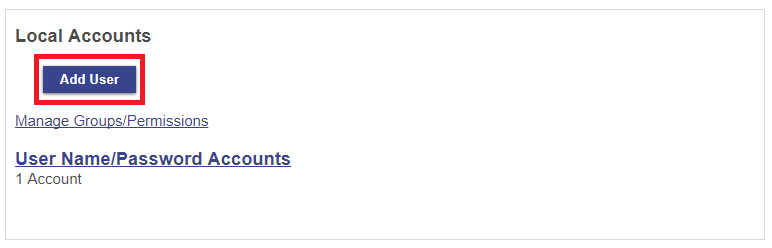
- Go to Setting > Security > Local Accounts and press Add User button.
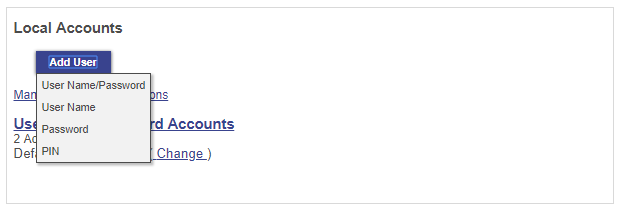
- Select User Name > Password.
- Then create the admin account by selection of Admin or All checkbox in Permission Groups section. At the and click to Save button.
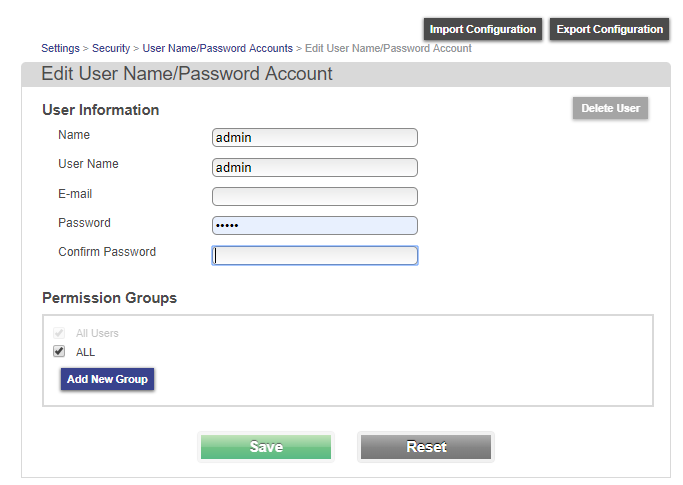
- Now you have created an administrator account which can always change configuration after login to device web interface.
- To be able to install or reinstall Dispatcher Paragon Embedded Terminal for Sharp-eSF an administrator has to grant all permissions to Public user. Public user is used by the Terminal Server for the installation and without permissions the
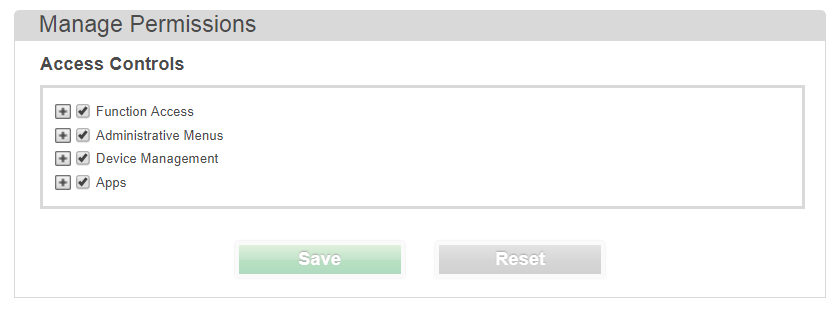
installation fails. Go to Setting > Security > Manage Permissions.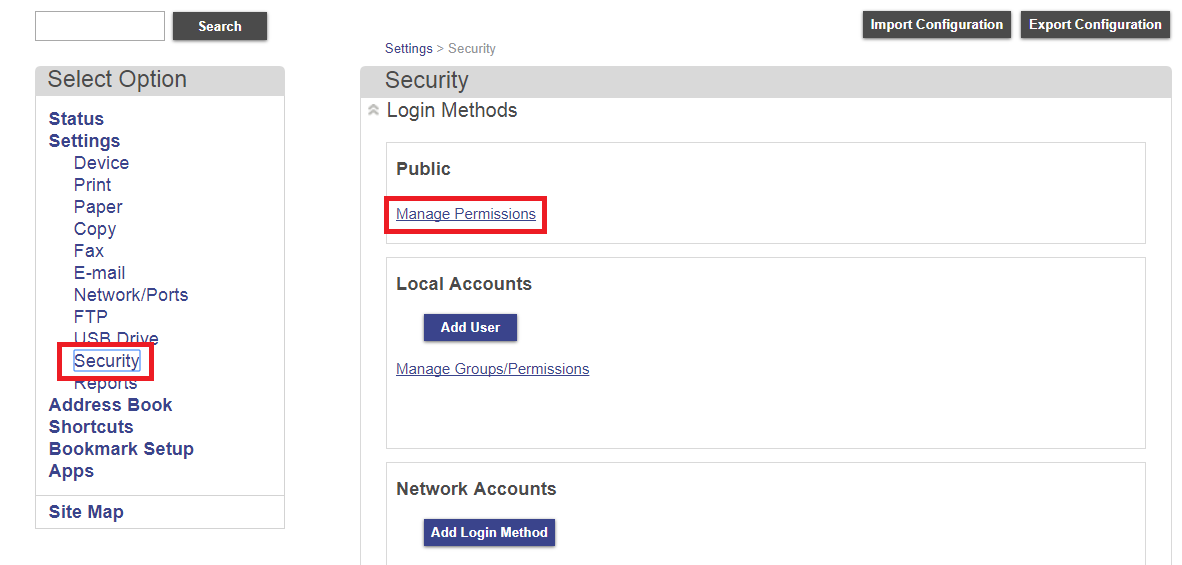
- In the Manage Permissions page grant all permissions and click to Save button.
Go to Network/Ports > TCP/IP.
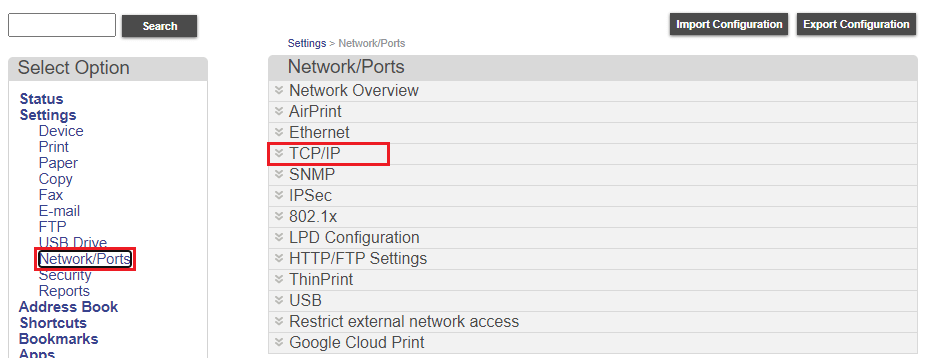
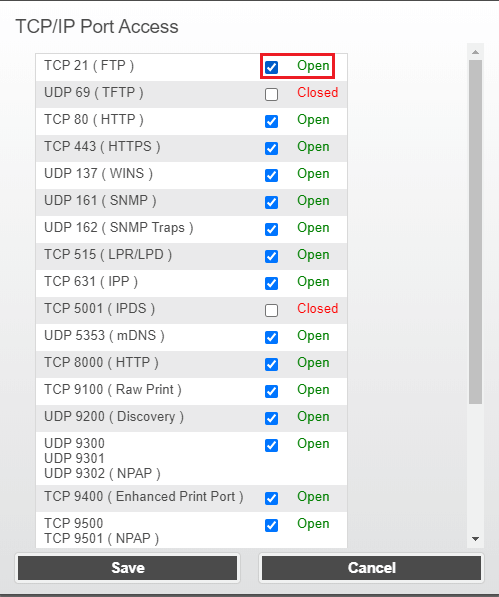
Select TCP/IP Port Access.

Set TPC 21 (FTP) to Open. Click the Save button.
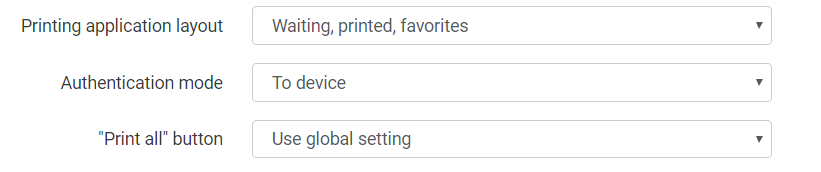
- Go to Dispatcher Paragon management interface and add new Sharp-eSF device. You can select Authentication mode To device or To Application. Based on this option authentication screen will be displayed either once when user wants to use a device or when user wants to use any device application.
- Authentication mode To device:
- Authentication mode To each application:

- Authentication mode To device:
- Finish the installation. If the installation succeeds then continue with post installation configuration steps described below.
Post installation configuration of a device for Dispatcher Paragon Embedded Terminal for Sharp-eSF
This section describes how to configure a device after successful installation of Dispatcher Paragon Embedded Terminal for Sharp-eSF. It is about setting permissions and setting Dispatcher Paragon Embedded Terminal for Sharp-eSF as authentication method for a device.
- Login as an administrator to device web interface.
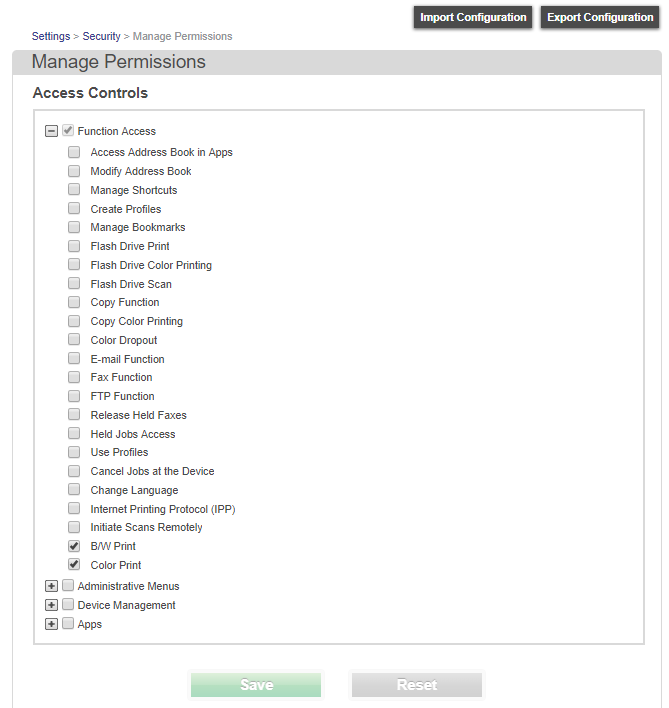
- Manage permissions of Public user. Go to Setting > Security > Public section > Manage Permissions.
- Take away all permissions except BW print and Color Print which are in Function Access. These permissions are necessary for print and copy functions. Administrator might consider keeping more permissions to users.
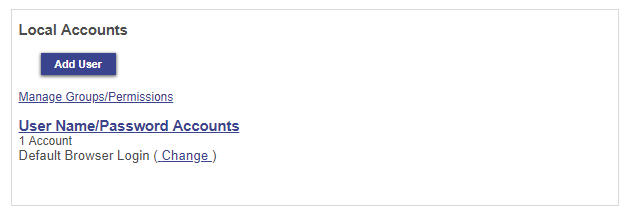
- Setup Dispatcher Paragon Login screen as authentication method. Go to Settings > Security > Local Accounts section > Default Browser Login (Change) and click to button Change.
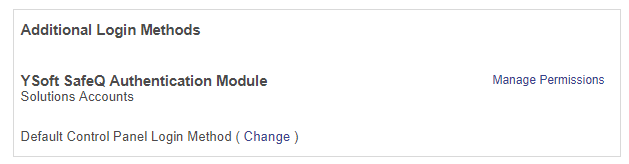
- Set Dispatcher Paragon Authentication Module as a default login option for Control Panel and click to Save button.

- Go to Security > Additional Login Methods section and click to Manage Permissions.
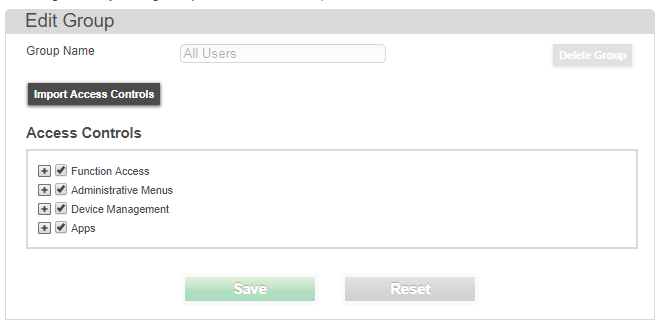
- Click to item in menu All users.
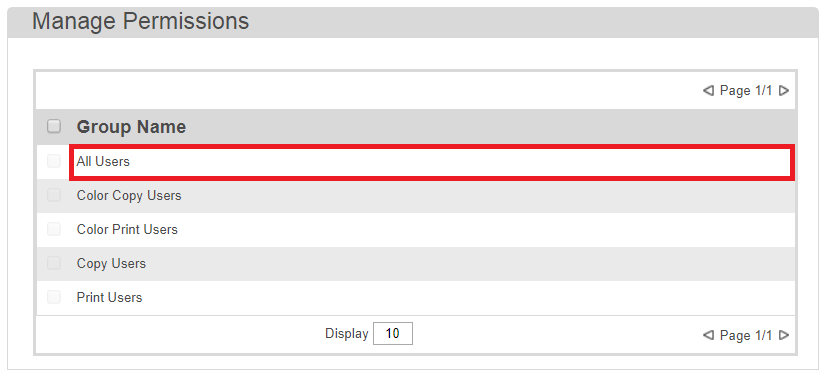
- Grant all permissions. Administrator might be more restrictive with granting permissions but must ensure that an user can login and access Dispatcher Paragon Embedded Terminal for Sharp-eSF.
- Go to device. Login as an user and ensure that it is possible to print and copy.