General Notes
Supposed you are configuring new MFD with default settings. If you are configuring older device with lot of customized settings, it may be useful to reset it to factory defaults first.
Most settings can be configured via internal web page of MFD with administration interface. Web interface of each device can be different, depending on device model. Language of the interface is mostly controlled by preferred language setting of the browser. Note that support of various browsers can differ between particular MFDs. To enter web interface, insert <MFD IP> to the browser address bar (you will be connected to http or https page based on MFD's current setting).
Limitations can be found on page Requirements and known limitations of Dispatcher Paragon Embedded Terminal for Sharp.
General MFD Configuration
Sharp MFD requirements
The device must support OSA 3.5 and have MX-AMX2 and MX-AMX3 modules installed for full Dispatcher Paragon Embedded Terminal functionality. It is customer's responsibility to have it installed. Available terminal functionality may differ in case only MX-AMX2 or MX-AMX3 module is installed.
How to check if MX-AMX modules are installed:
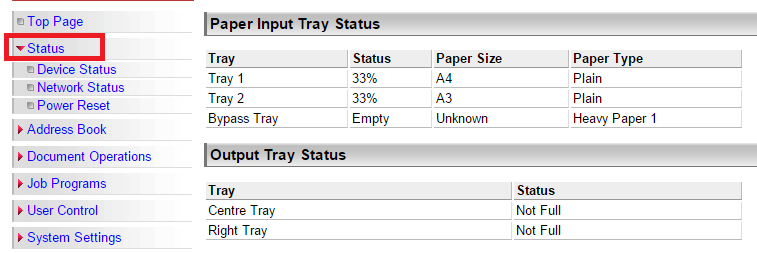
For Sharp model MX-2600N, check menu Status.

This method does not work for model MX-2610N since it shows only Options and not Software Options Installed.
For model MX-2610N go to menu System Setings > Product Key and check if both modules are marked with [Enable].

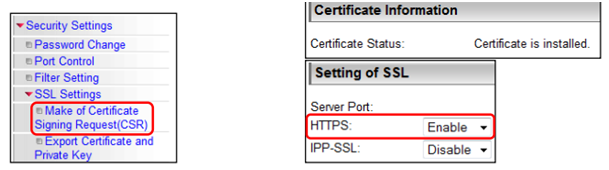
The MFD must be configured to communicate via the SSL protocol and the associated certificate must have been created.
How to create and enabled SSL certificate:
Dispatcher Paragon Embedded Terminal for Sharp
Dispatcher Paragon Embedded Terminal for Sharp is implementation of YSoft Terminal Professional in Sharp devices supporting a combination of OSA technologies, allowing usage of embedded accounting and GUI. Terminal is integral and inseparable part of the Dispatcher Paragon Server solution and operates only when connected to the server. Terminals work within the TCP/IP enabled networks only.
Sharp MFD configuration
SafeQ embedded installation, should be able to configure the device itself if previous requirements are met. If installation should not be successful you can check if device is having following settings.
This part describes first how to configure Sharp MFD in general; Installation and configuration of Sharp embedded terminal is automatically provided and distributed during SafeQ installation procedure. This means that installer of SafeQ Sharp embedded terminal should configure device automatically. You need to configure each device in case that first installation of Sharp embedded terminal will not be successful.
- Navigate to the web administrator menu of the device and log in as administrator. Default values are admin/admin for login and password.
- Navigate to Application Settings > External Applications Settings > Standard Application Settings and check that Dispatcher Paragon application and Dispatcher Paragon scan application are created.
- If not, create them with the add button.
- Enter Dispatcher Paragon as Application Name (Dispatcher Paragon Scan for scan application).
- Check the address for Application UI where TERMINAL_SERVER_IP is IP of the server where the terminal server is running.
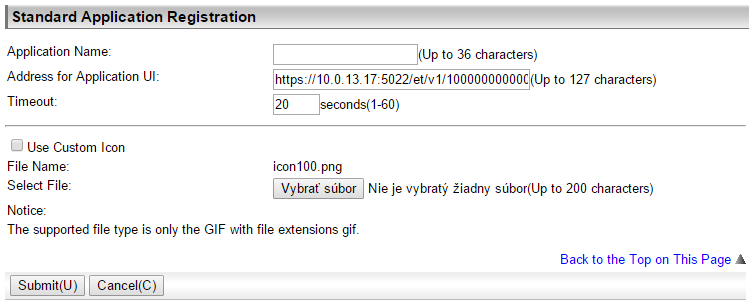
- Optionally, icon for application can be uploaded on some machines. Please upload icon file <TSHome>\Sharp\Terminal\icon100.png
- Now continue with the configuration of the authentication/external accounting, if module MX-AMX3 is installed. Navigate to Application Settings > External Applications Settings > External Accounting Application Settings and select Enable for External Account Control to enable MX-AMX3 module.
If authentication method is To device, also enable Set Authentication Server (Server 1). Then fill in these fields:
- Server 1 (Enable)
- Application Name (Dispatcher Paragon)
- Address for Application UI
- Address for Web Service
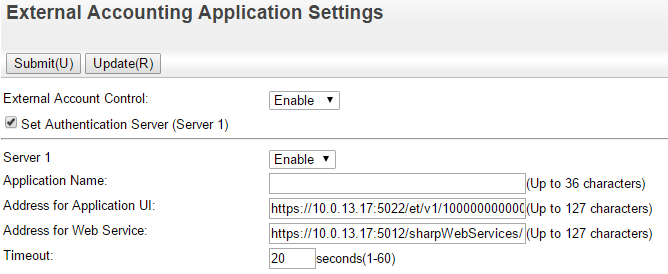
Press Submit. Restart of the device will be automatically required. Dispatcher Paragon Terminal Server must be running during each device restart, otherwise, new restart will be required.
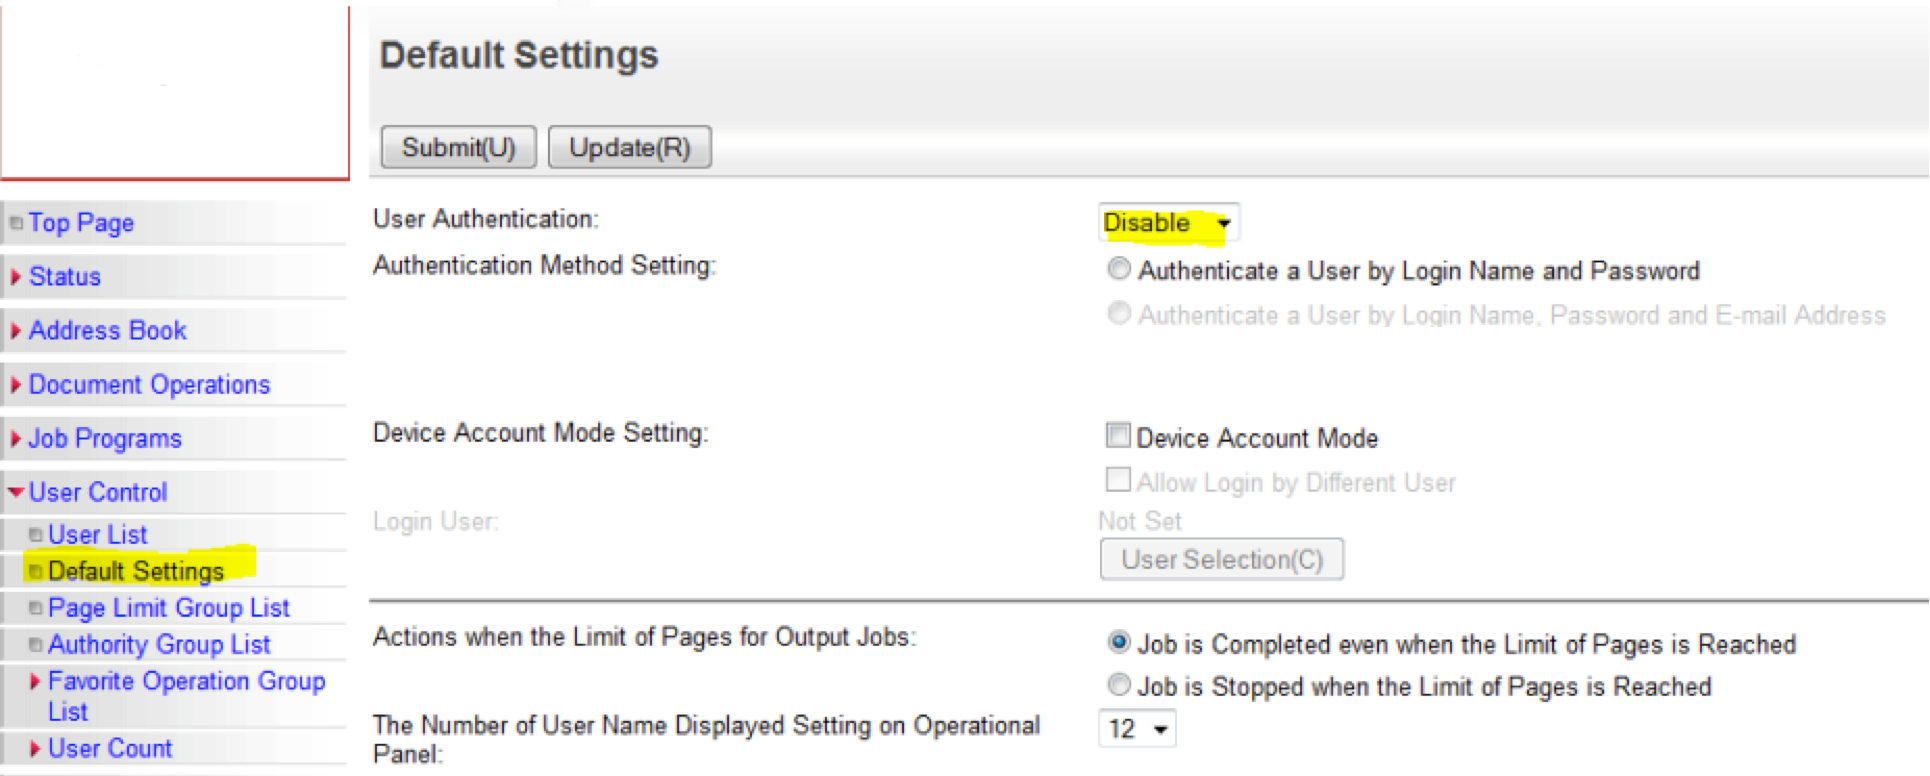
If User Authentication setting is present (under User Control and its Default Settings), it has to be set to Disable.
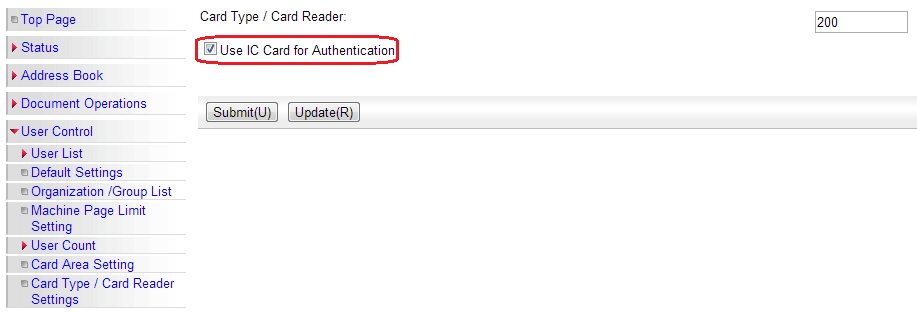
USB Card Reader configuration
Configuration is possible on web interface of Sharp device: User Control > Card Type/Card Reader Settings
There are two possible settings for USB card reader:
- USB Card reader set to keyboard mode and option Use IC Card for Authentication disabled.
- USB Card reader set to Sharp mode and option Use IC Card for Authentication enabled.