Follow these steps to configure the MFD
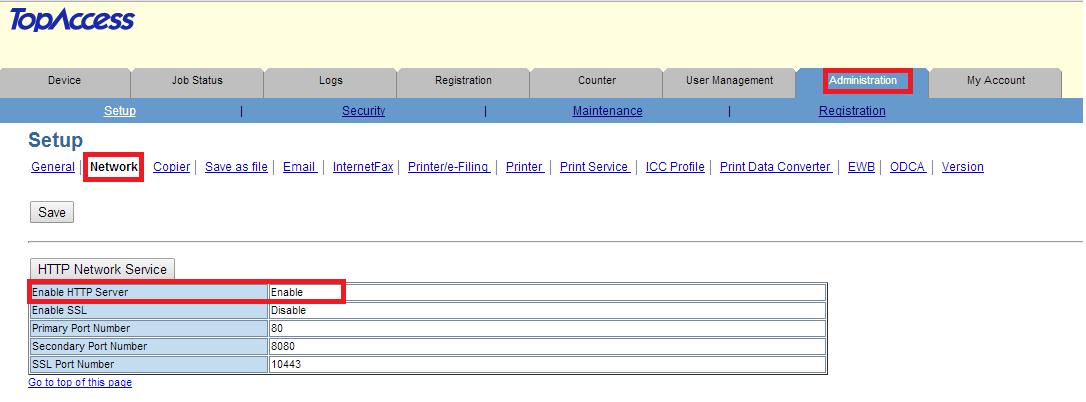
Enable the HTTP Protocol
- Navigate in your browser to the IP address of MFD to access web interface of MFD called TopAccess.
- Log in with valid credentials and navigate to Administration > Setup > Network and click on HTTP Network Service
- Make sure option Enable HTTP Server is Enabled.

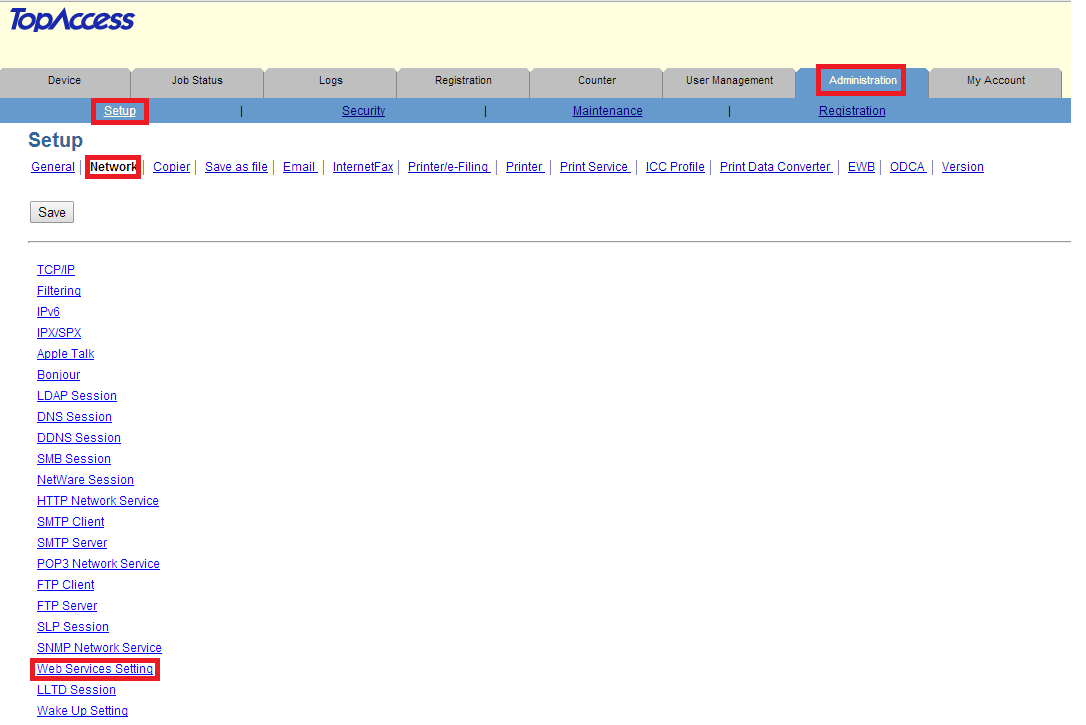
Enable the WSD Scan Service
- Navigate in your browser to the IP address of MFD to access web interface of MFD called TopAccess.
- Log in with valid credentials and navigate to Administration > Setup > Network and click on Web Services Setting.
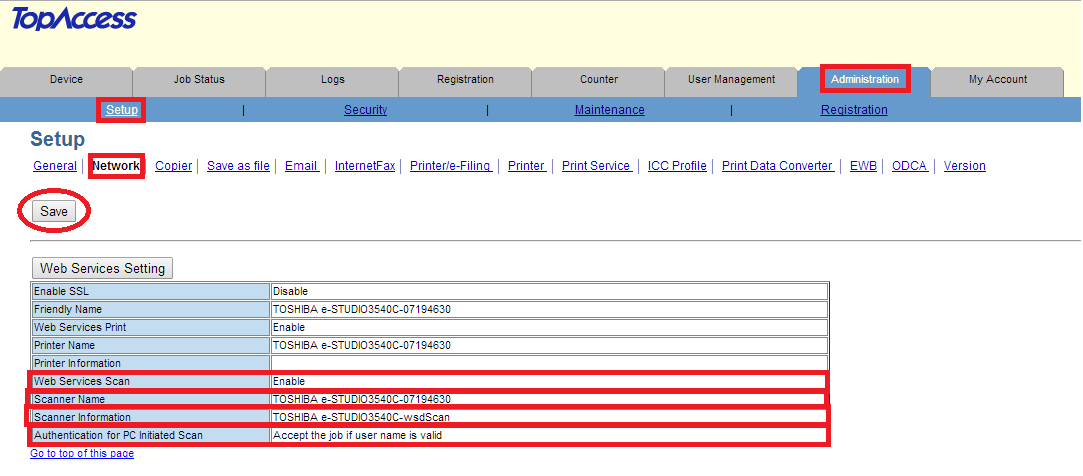
- Make sure Web Services Scan is Enabled.
- Fill in Scanner Name (any name will be accepted)
- Fill in Scanner Information (any string will be accepted)
- Set Authentication For PC Initiated Scan to Accept the job if user name is valid
- Save all taken changes.
If Authentication For PC Initiated Scan change is not possible please follow the documentation Configuring Toshiba for browser-based authentication with SDK 3.1, section Enable WSD scan with MDS mode.
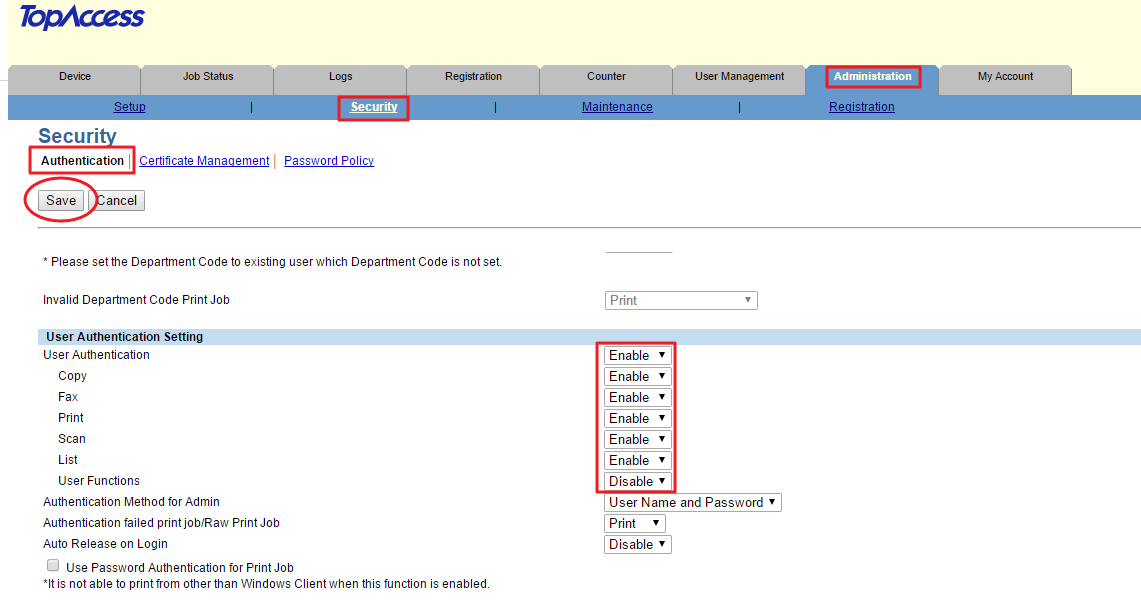
Rights Management
- Navigate in your browser to the IP address of MFD to access web interface of MFD called TopAccess.
- Log in with valid credentials and navigate to Administration > Security> Authentication.
- Set User Authentication to Enable.
- Save all taken changes.