This manual was created based on Xerox WorkCentre 7535 and should be applicable to most MFPs built on Endeavor™, although slight differences may occur. Please note additional documents for the 56xx, 57xx and 76xx.
Before installation of Dispatcher Paragon Embedded Terminal
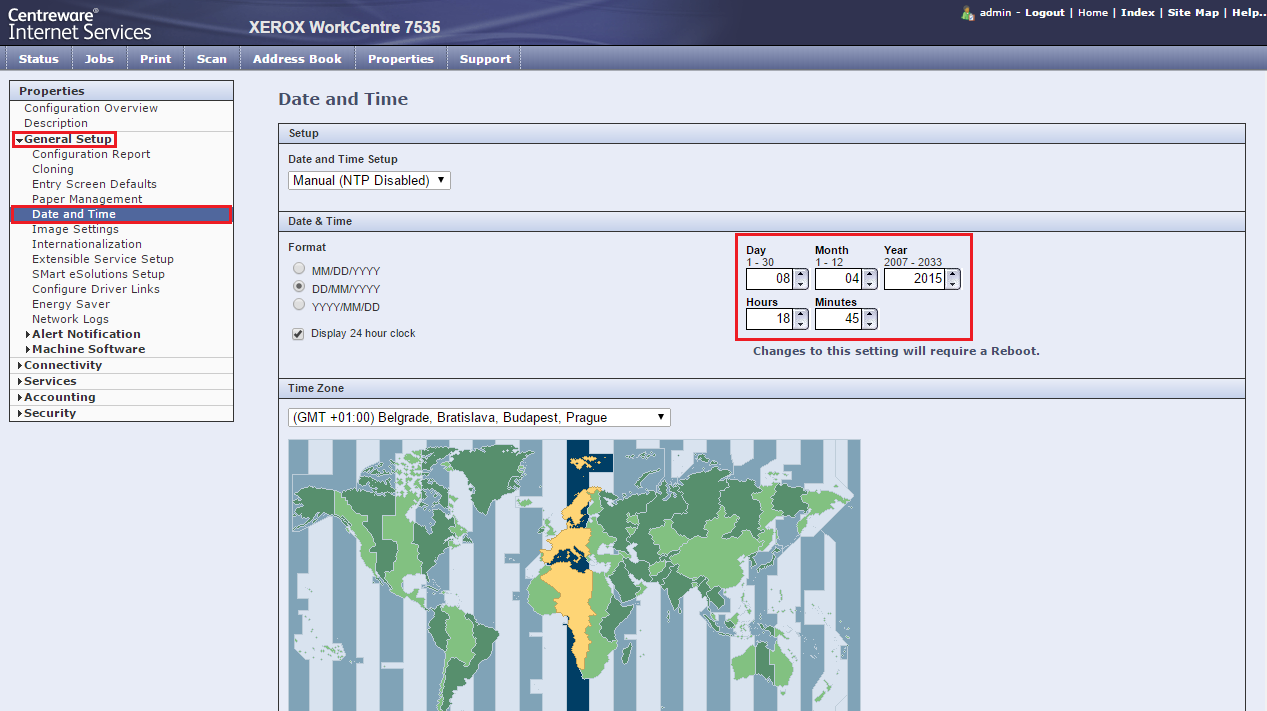
Time settings
Go to the Properties tab > General Setup > Date and Time.
Make sure to set the time to match the Dispatcher Paragon server time or specify automatic time configuration via NTP server.
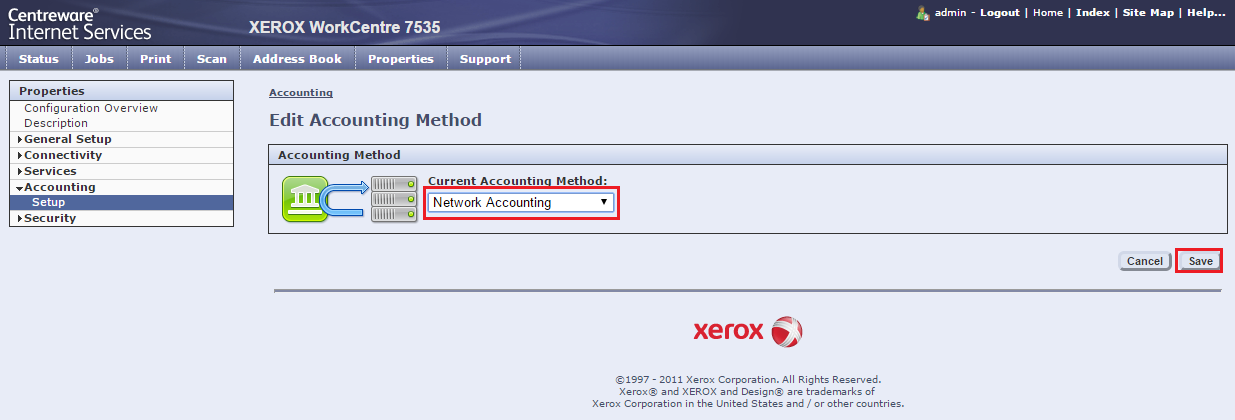
Network Accounting
Go to the Properties tab > Accounting > Setup and click on Edit...
On some older firmwares this menu is not available and Network accounting must be set using a device panel.

Then choose Network accounting and save the changes.
Then go to User Accounting Prompts/Validation.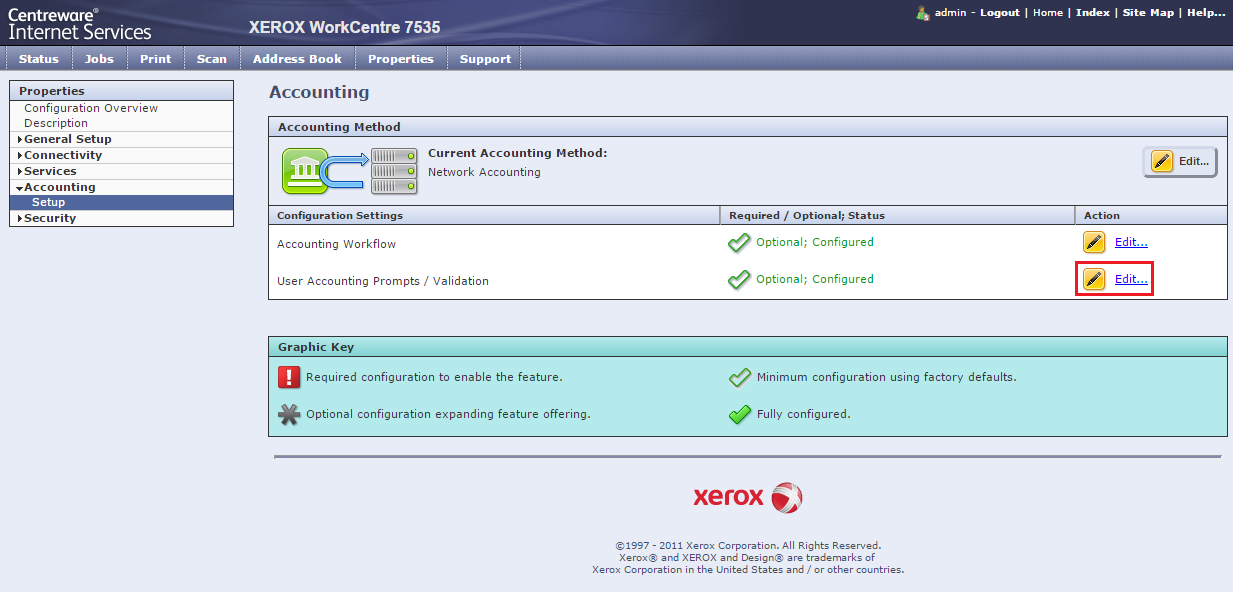
Choose to Display Prompts for labels, disable Validation and enable Prompt for all services.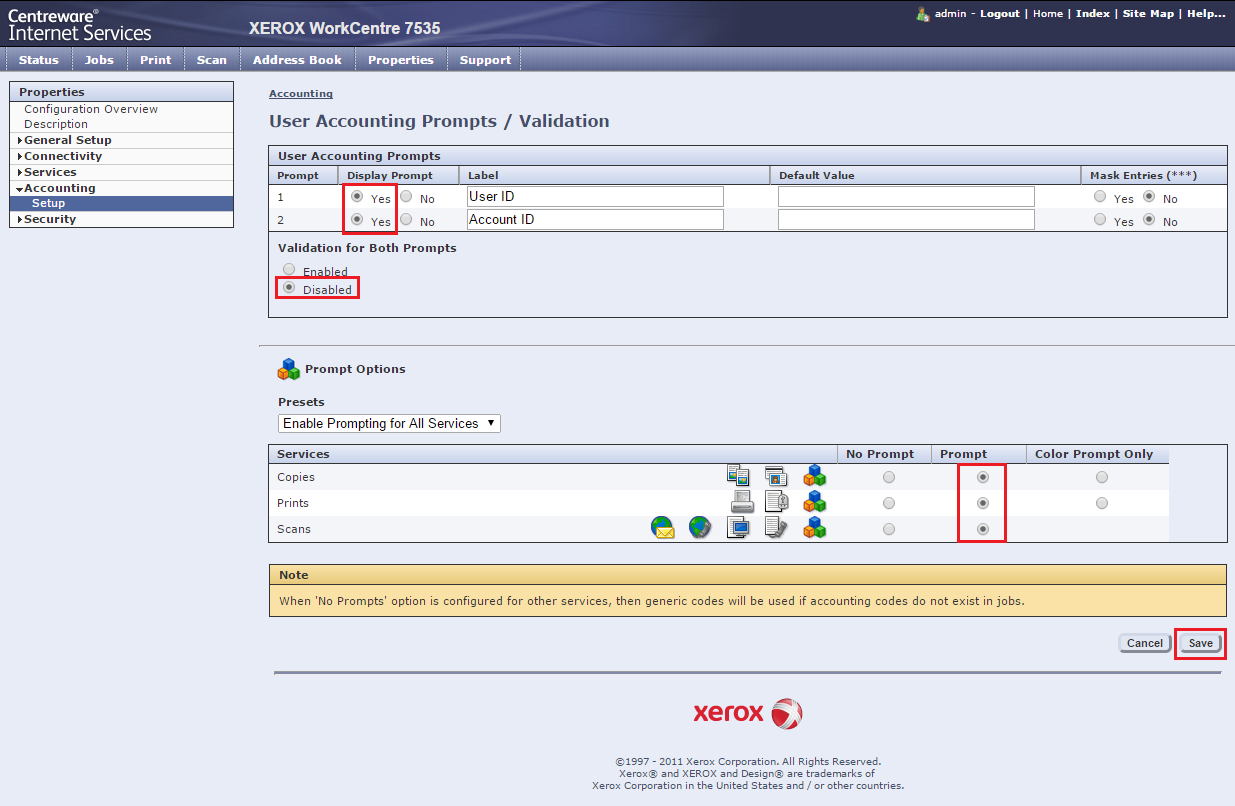
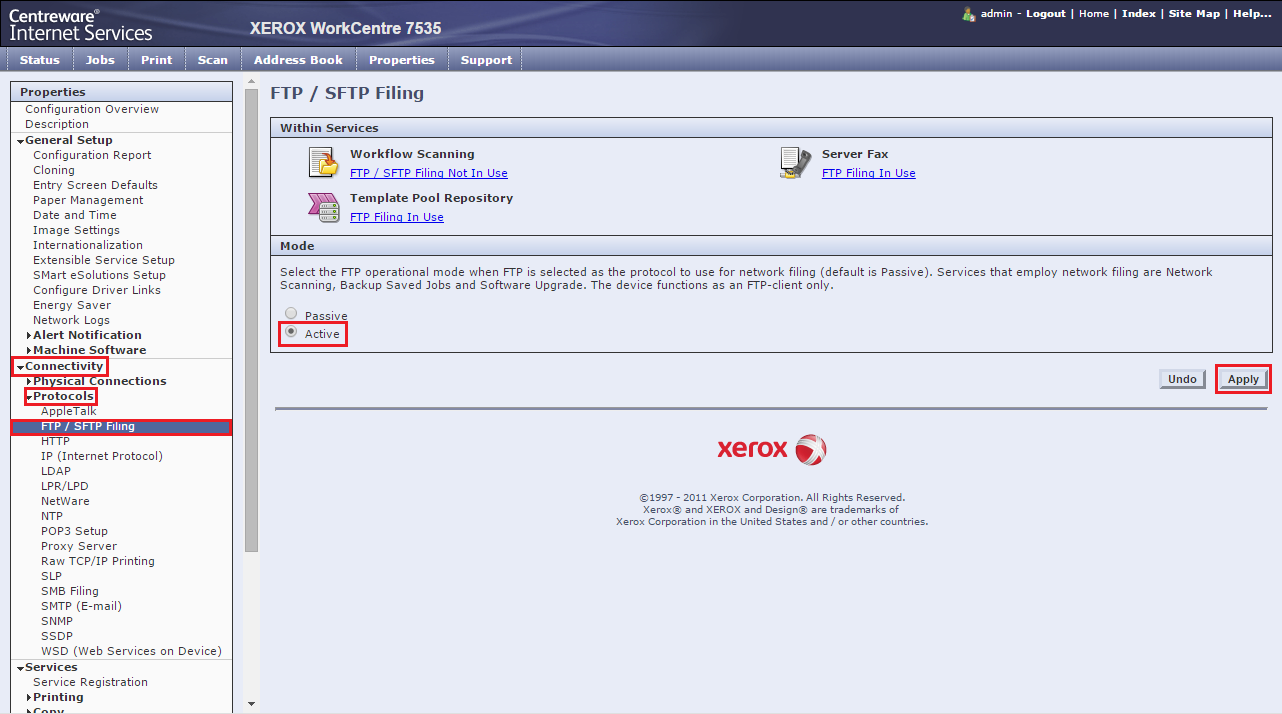
FTP mode
Go to the Properties tab > Connectivity > Protocols > FTP/SFTP Filing. Set the Mode to Active and click Apply.
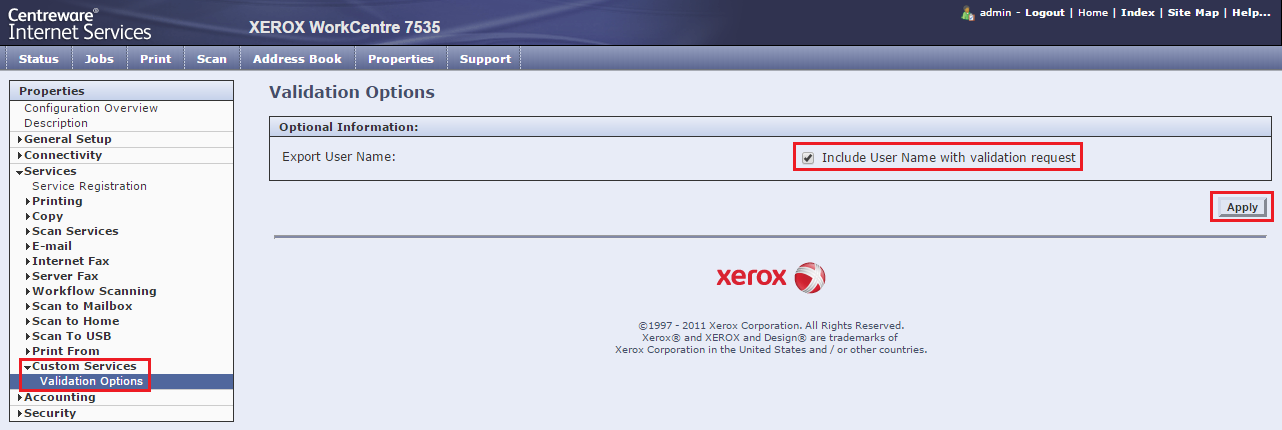
Include username with validation request
Go to the Properties tab > Services > Custom Services > Validation Options. Enable the Include User Name with validation request option.
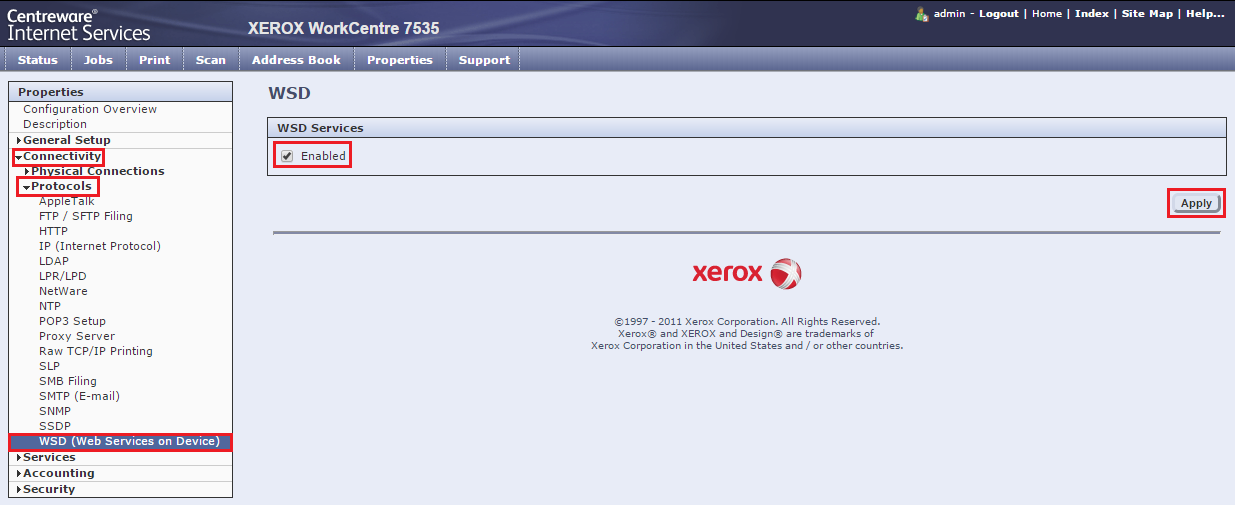
Web Services for Devices
Go to the Properties tab > Connectivity > Protocols > WSD and enable the Web Services for Devices (WSD).
Scan services for scanning with workflows
You will need to enable Scan Template management in device configuration for scanning with workflows later.
Go to the Properties tab > Connectivity > Protocols > HTTP > Web Services and then enable the options Scan Template Management and Scan Extensions.

You might also want to check that the Confirmation Sheets for Scanning Workflows are set to print only in case of an error. Otherwise, there might be a page printed every time someone uses the Scan option in Dispatcher Paragon terminal.
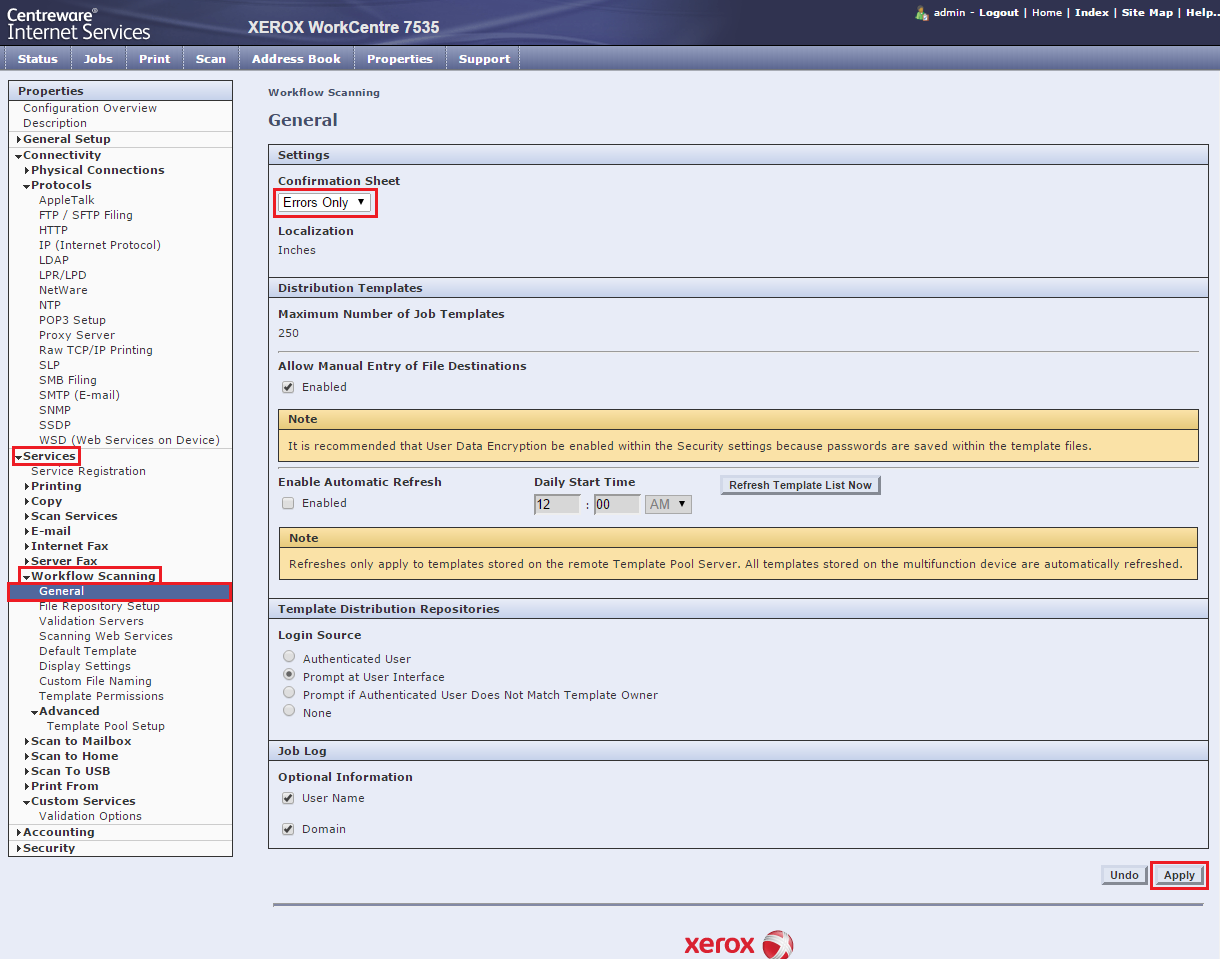
Go to the Properties tab > Services > Workflow Scanning > General. Set Confirmation Sheet to Errors Only.
SNMP settings
Go to the Properties tab > Connectivity > Protocols > SNMP. Enable the option Enable SNMP v1/v2c Protocols. Click Apply and continue to Edit SNMP v1/v2c Properties.
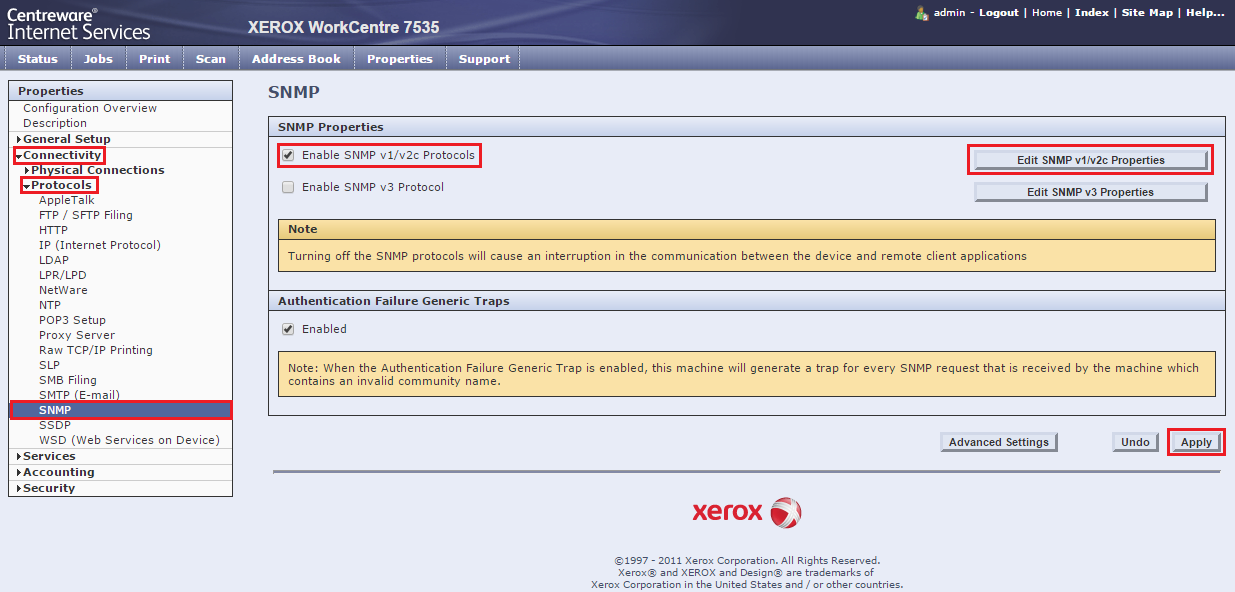
Set the Community Name (Read/Write) accordingly:
USB Card Reader settings
Go to the Properties tab > Security > Authentication > Setup > Xerox Secure Access Setup, click on Manually Override Settings on the bottom of the page and make the configuration according to the picture below:
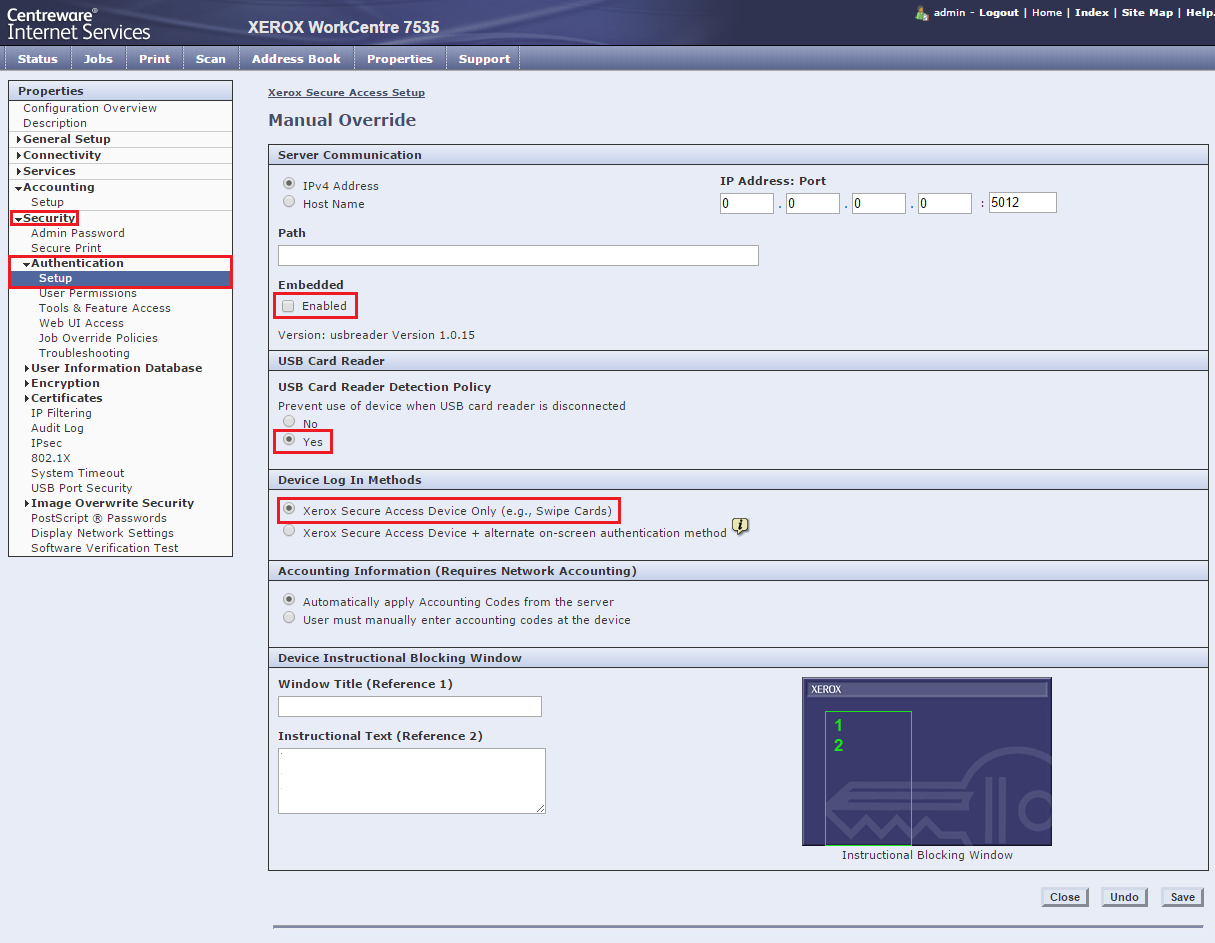
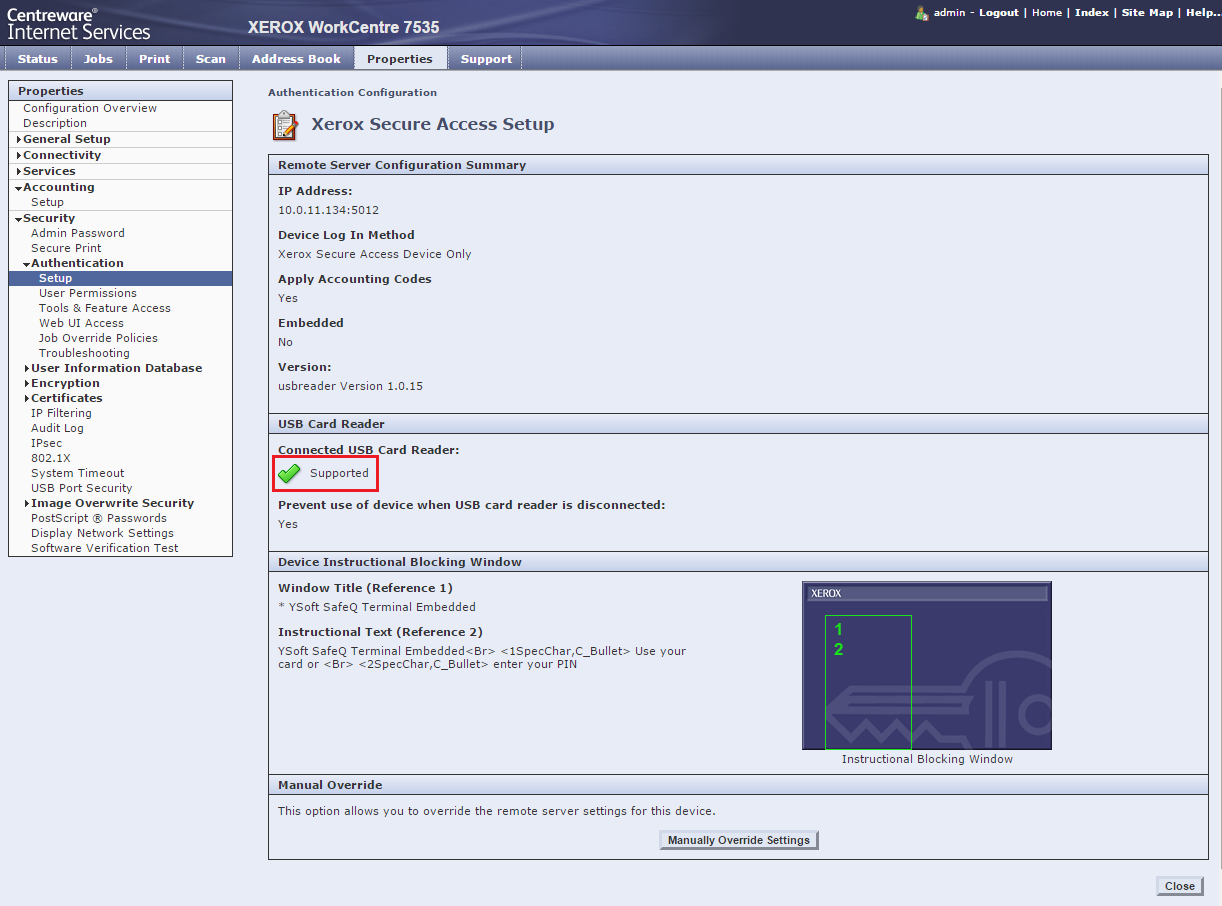
Save the settings and check whether your card reader is supported.
You may need to reload the page after some time to see the proper status of the card reader.
Proceed with the MFD installation in SafeQ to complete the installation of Dispatcher Paragon Embedded Terminal. Check the installation status and installation steps.
If there are some warnings present during the installation, you will need to do some further settings based on the messages.
After installation of Dispatcher Paragon Embedded Terminal
These settings are necessary only if requested by the Embedded Terminal installation or if some customization of configuration is requested.
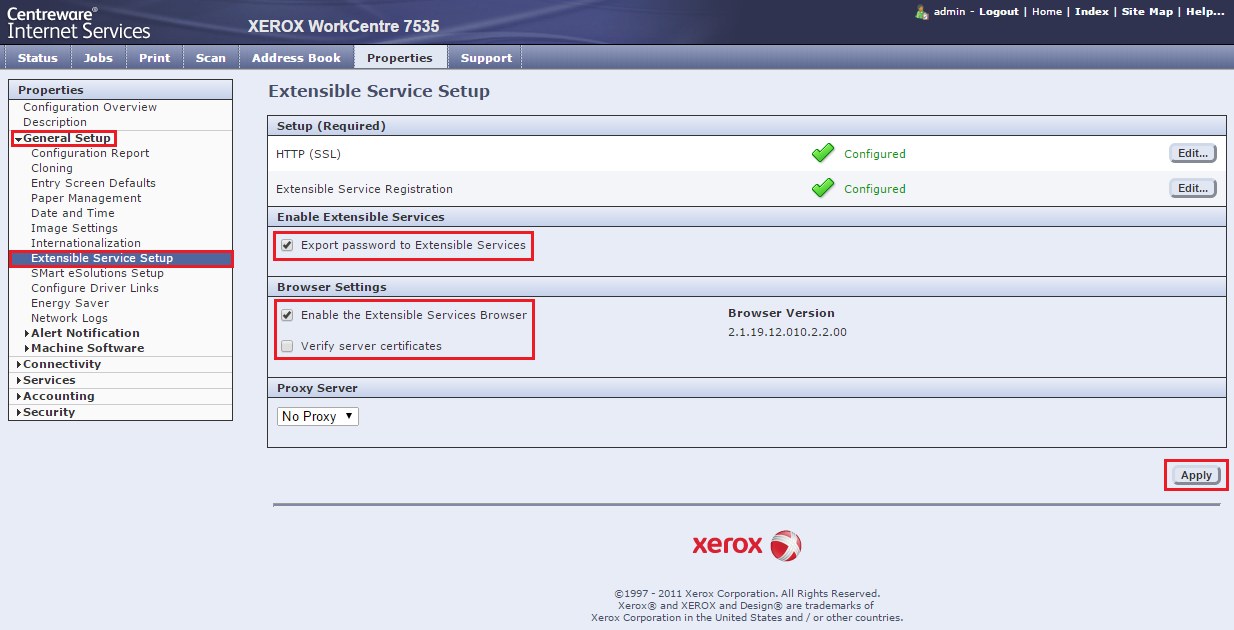
Extensible Service Browser
Go to the Properties tab > General Setup > Extensible Service Setup. Enable the Extensible Services Browser option and Export password to Extensible Services option (you can also check that Verify server certifcates is disabled).
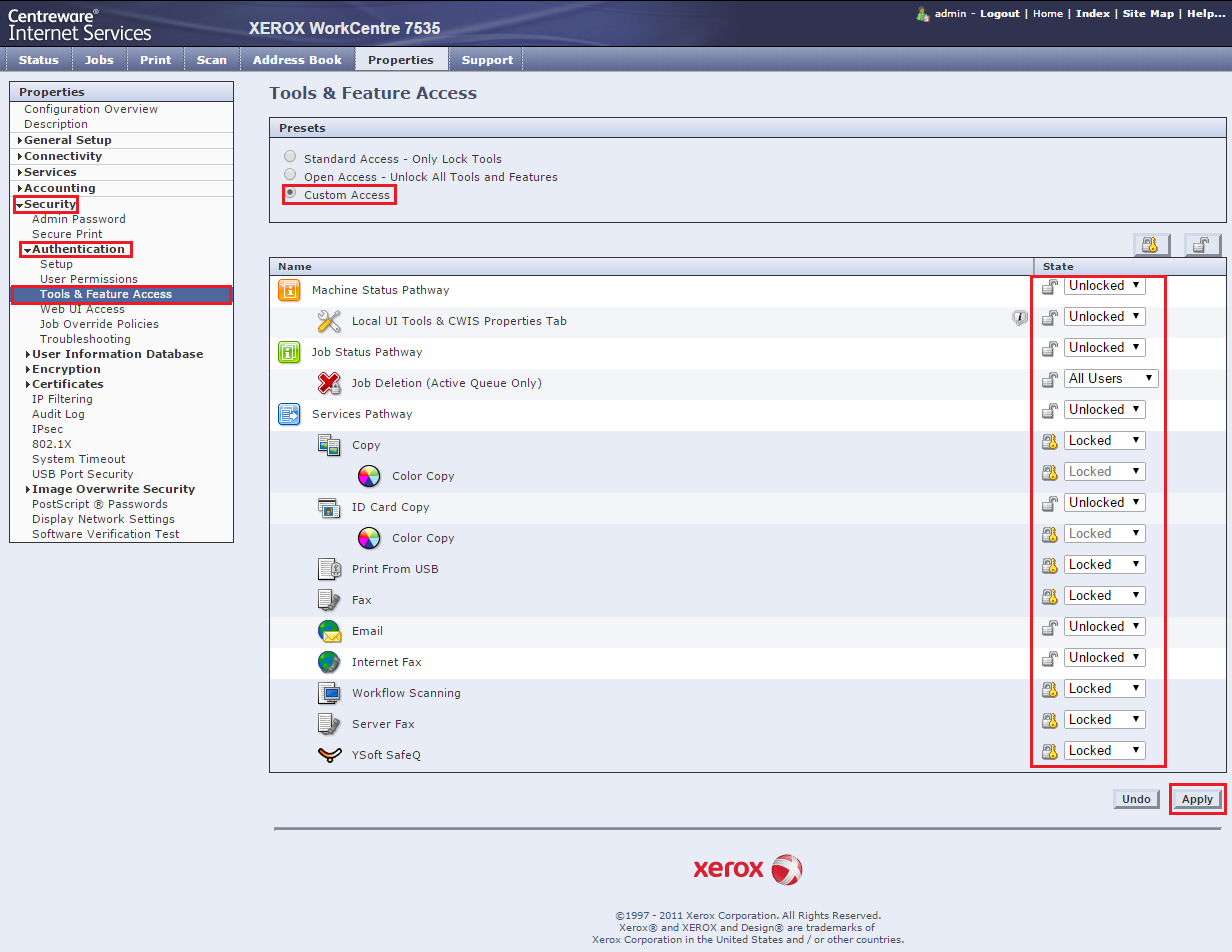
User Permissions Roles
Go to the Properties tab > Security > Authentication > Tools & Feature Access. Select Custom Access.
If you use device authentication mode To device, on the Services & Tools tab check that the Role State of the Services Pathway is set to Not Allowed.
You can configure Machine Status Pathway and Job Status Pathway locks freely.
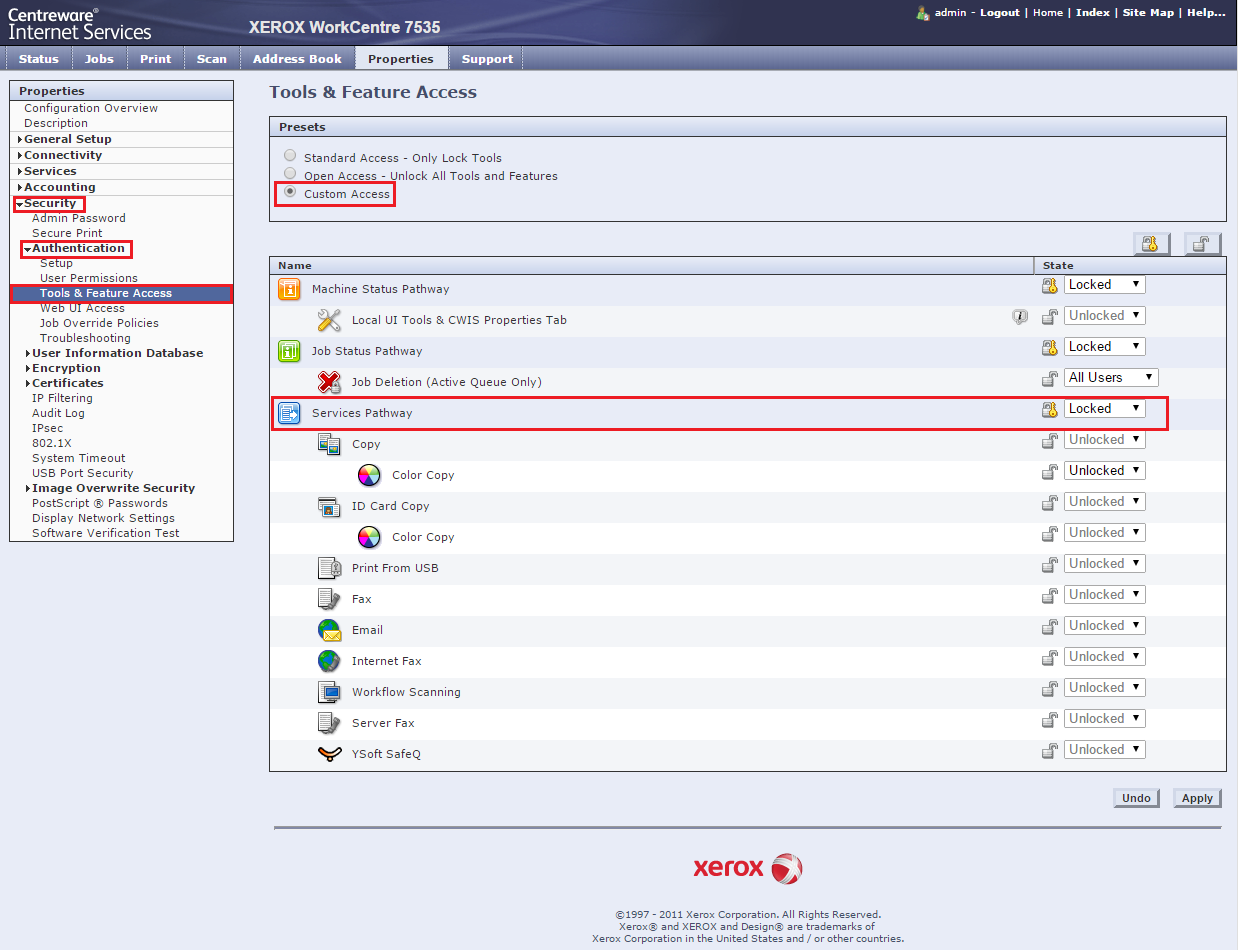
If you use device authentication mode To each application, set the options accordingly. Note that for some WorkCentre models, it is necessary to use only Per application settings for proper functionality.
Convenience Authentication
Go to the Properties tab > Security > Authentication > Setup > Xerox Secure Access Setup, click on Manually Override Settings on the bottom of the page.

Check that Accounting Information is applied automatically. It can be modified by selecting Automatically apply Accounting Codes from the server.
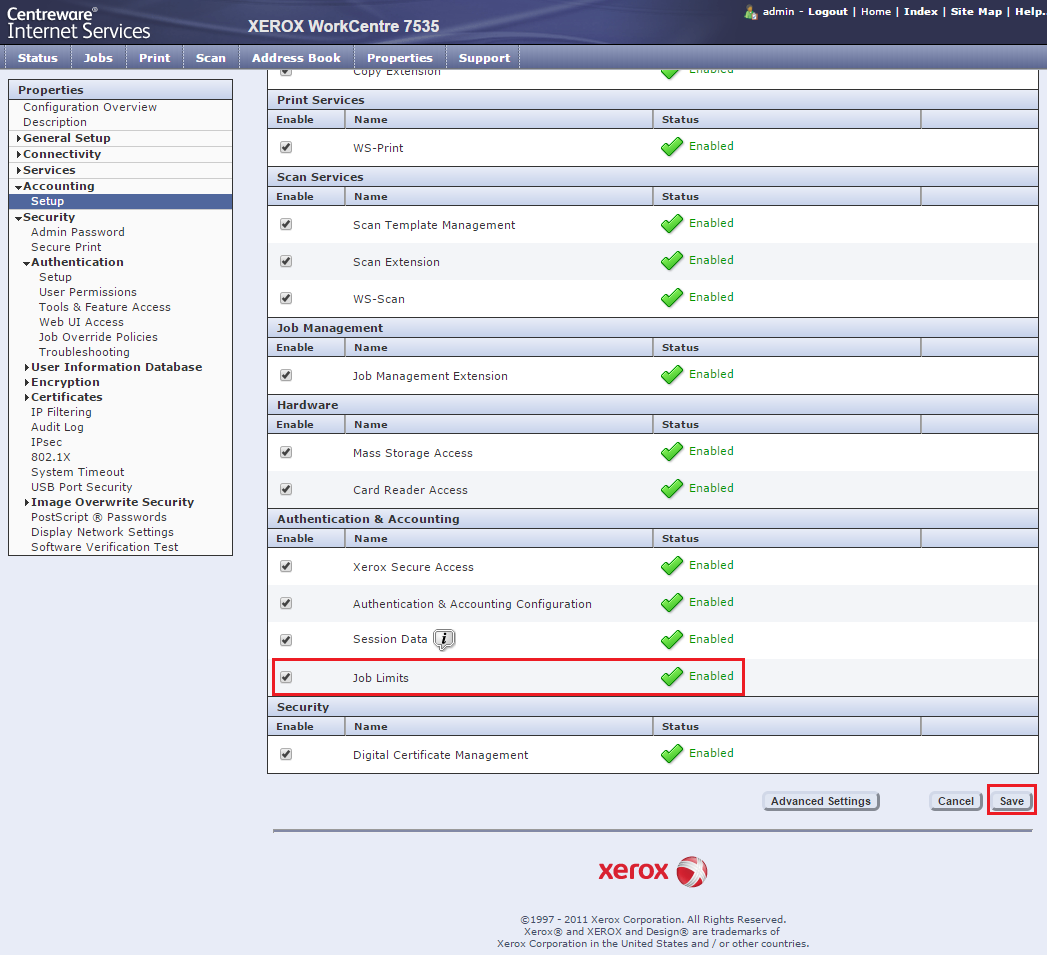
Job Limits
Some devices may not support this feature.
This setting is necessary only if you are using the Payments feature of the Dispatcher Paragon Embedded Terminal.
To enable Job Limits service, go to the Properties tab > Accounting > Setup and click Edit next to the Job Limits item. Select the check box for Job Limits. Click Apply.