
Install Dispatcher Paragon Cloud Terminal from Konica Minolta MarketPlace
Install via Konica Minolta MarketPlace (for more information see http://dp.bizhub.sh/MP/nib/en/installing/manage-licenses/#install-apps).
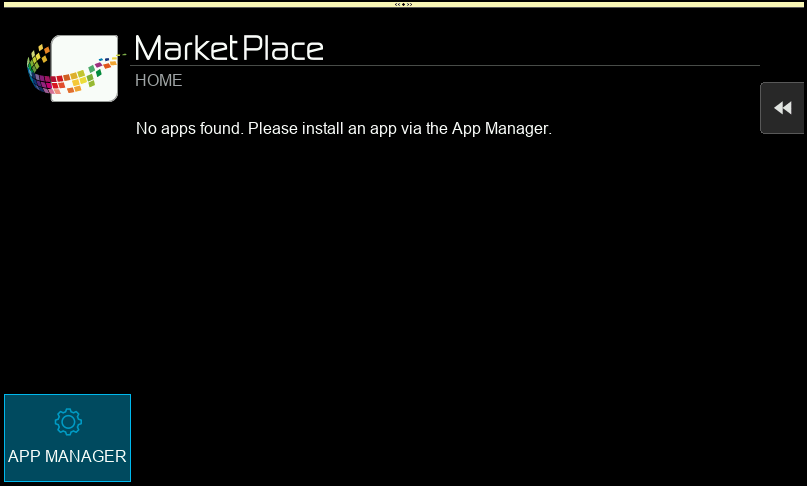
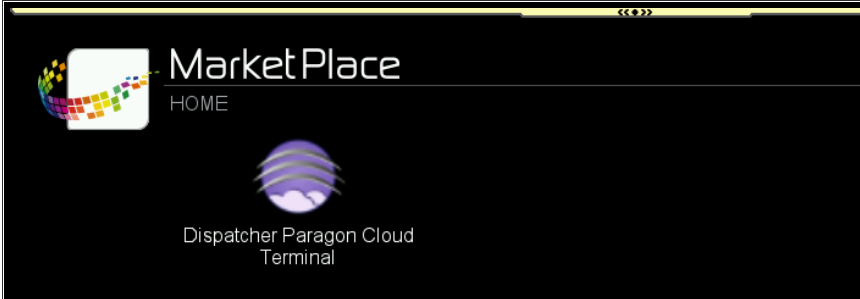
- In the MFD access Konica Minolta MarketPlace application.
- Tap on APP MANAGER button at the bottom left.
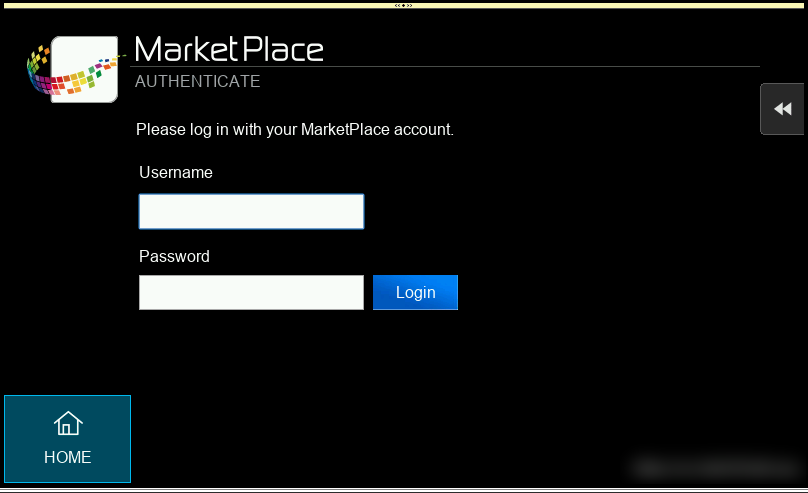
- You will be prompted to log in. Use your Konica Minolta MarketPlace credentials.
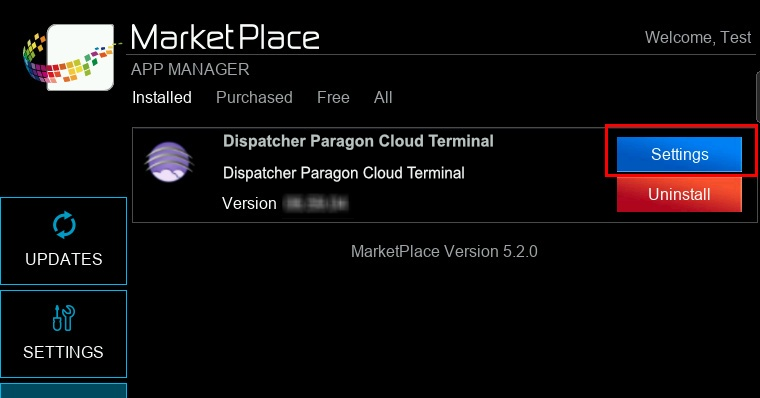
If application is not already installed → tap on Purchased list to see licensed applications → tap Install button.
After the successful installation you will see Dispatcher Paragon Cloud Terminal in Installed list and new options available (Settings or Uninstall).
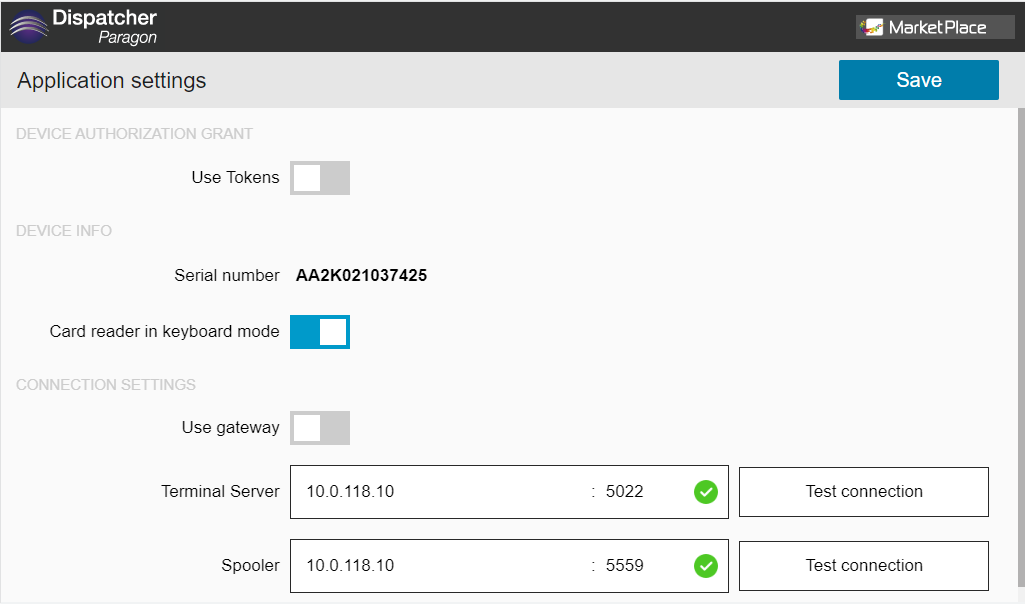
Set the network address of Terminal Server and FlexiSpooler (2 modes depending on security requirements)
On-premise Mode
Uses standard communication port - gateway unselected
- Terminal Server IP: 5022
FlexiSpooler IP: 5559
- Client v3 IP: 5002
Terminal Mode
Select gateway, it uses a single port, 443
- "ts" replace with terminal server pathway
- "fsp" replace with FlexiSpooler server path
"Webdav" replace with scan server path
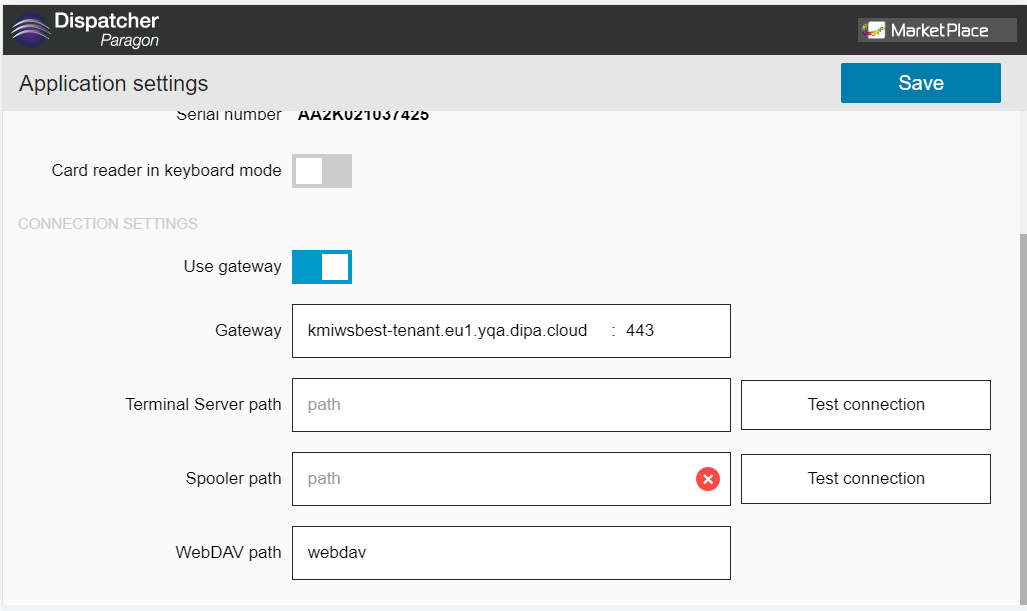
Make sure that the Management interface configuration option "scanServerType" includes "WebDAV" option. Otherwise, the Cloud Terminal will not be able to use the scan server.
Test Connections (either mode)
A red X indicates an issue that must be fixed
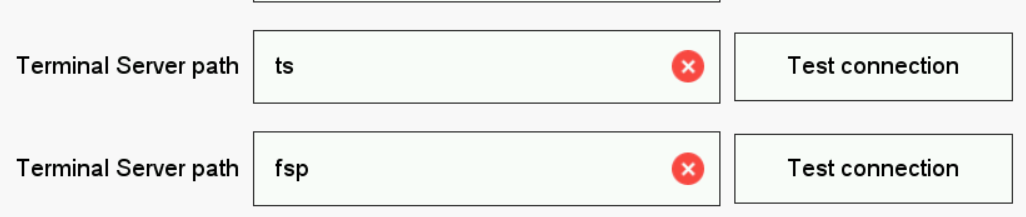
A green check indicates good connectivity

Card reader in keyboard mode
Administrator can disable usage of card reader configured to send the card number as keyboard input. Keyboard mode enabled by default.
Start the Dispatcher Paragon Cloud Terminal
Tap Dispatcher Paragon Cloud Terminal.
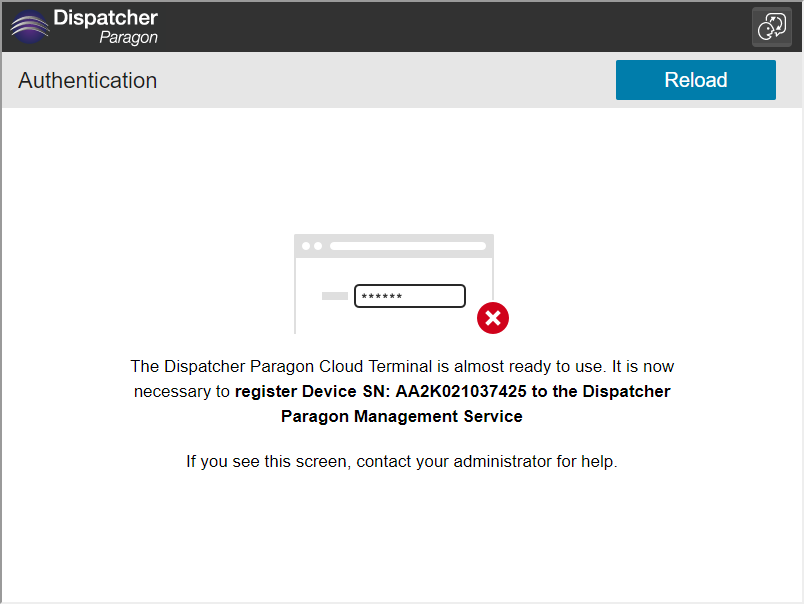
The "Must Register Device SN " screen will appear.
Proceed with "Installing Terminal in Dispatcher Paragon".
If the screen appears after initial installation, click reload.
Installing Terminal in Dispatcher Paragon
Make sure you have the "Dispatcher Paragon Cloud Terminal" license element present in your license.

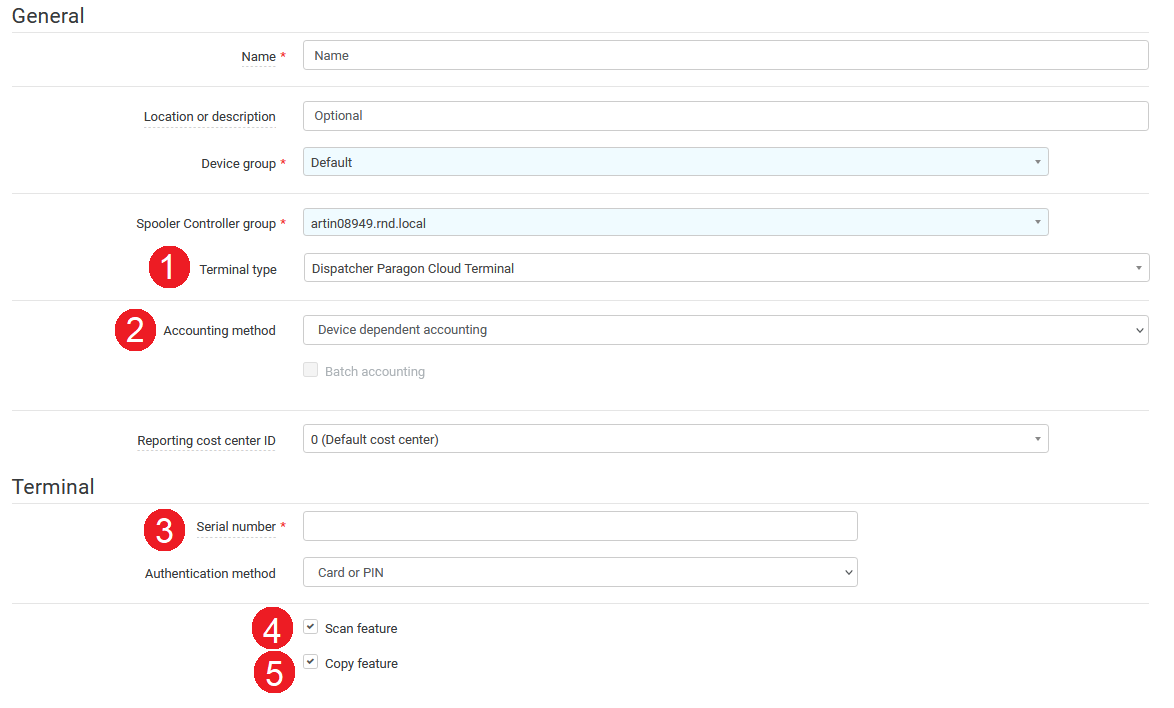
Add a Device
For full description, see - Management Interface - Devices
- Terminal type is Dispatcher Paragon Cloud Terminal.
- Select the accounting method from device dependent or Offline accounting.
- Serial number is required and can be obtained by browsing to the MFD.
- Check Scan to enable scan workflows on the MFD.
- Check Copy to enable Cloud terminal copy app on the MFD.
- Install the terminal.
- Click on Reload button in the Cloud Print app on the terminal of the printer if necessary.
After successful installation of the terminal in the management interface, there is not possible to change key values. These fields are disabled for editing. The reason is to avoid breaking the link between the MarketPlace and the terminal.
Unsuccessfully, installed terminal can be edited without restriction.

A terminal installed via Konica Minolta MarketPlace will appear in the management interface - Devices section. If it is deleted via management interface, the link between the MarketPlace and the Cloud terminal will be lost. The terminal will not work anymore.
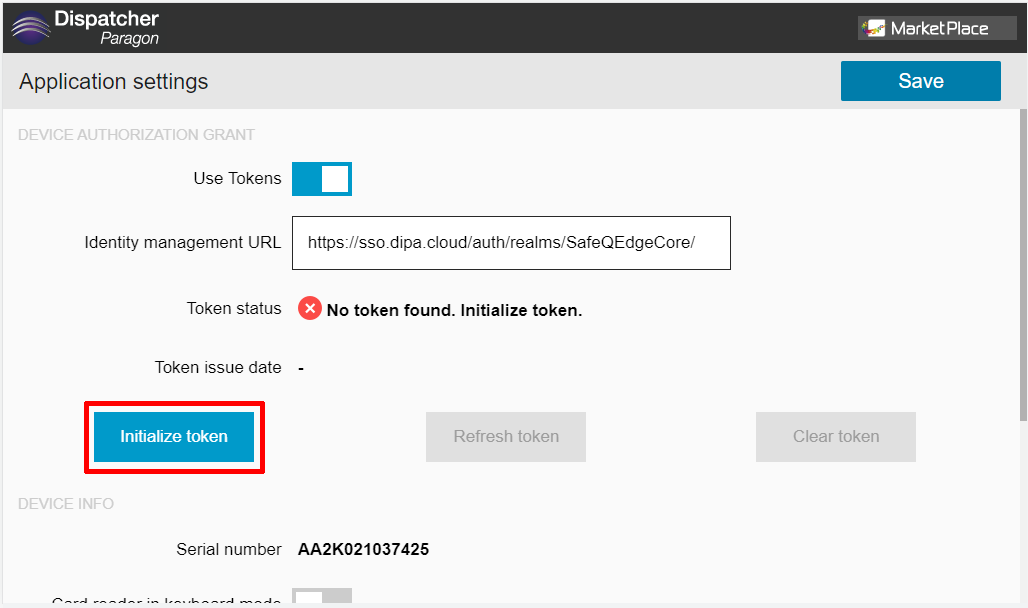
Device authorization grant
If requireClientJwtAuthentication option is enabled in management. It is necessary to perform a Device authorization grant on MFD.
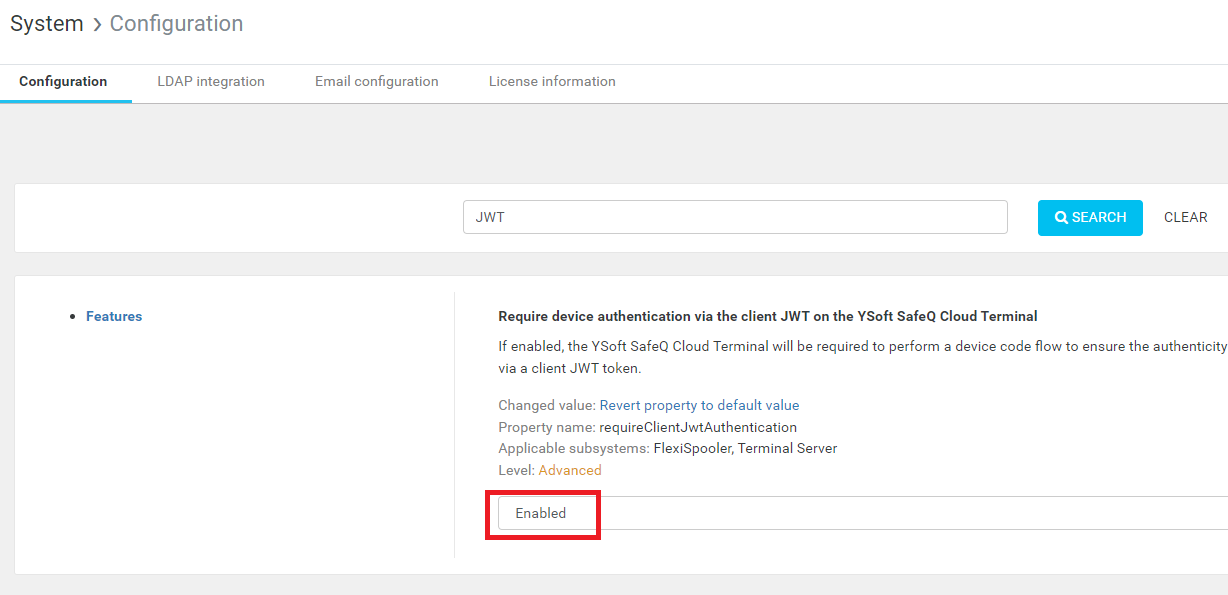
Without performing this operation device will not be usable and will show this error screen.
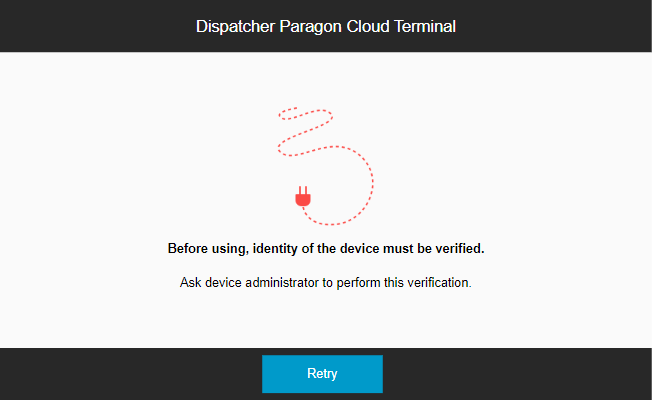
How to perform Device authorization grant on Cloud Terminal
- Open Cloud Terminal settings.
Turn on the “Use Tokens” option.
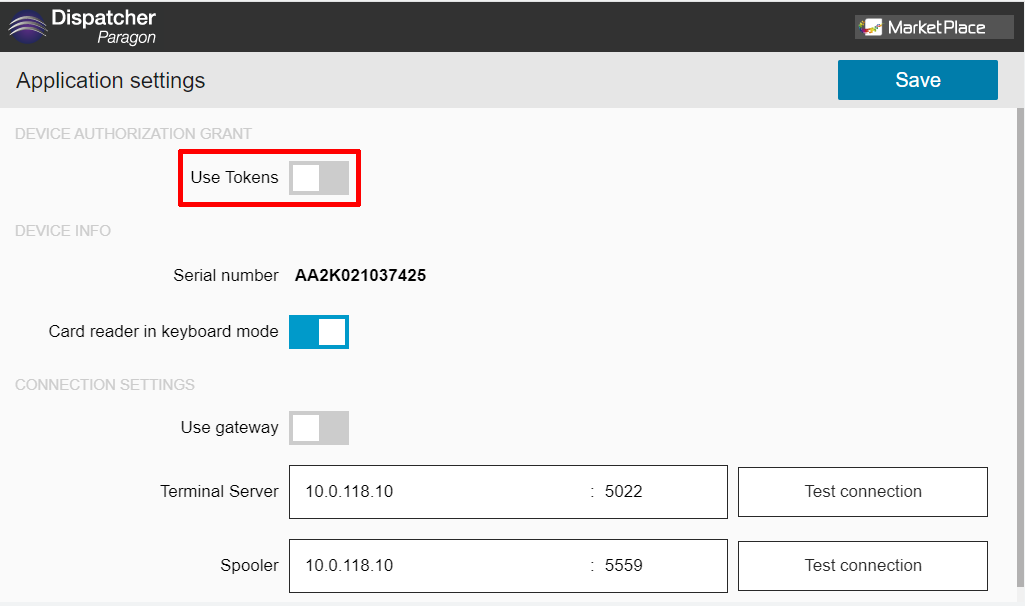
Enter the identity management URL and then click “Initialize token”.
Use your smartphone or PC to open the URL that is shown or use a QR code to open it. You will be asked to log in to identity management and confirm Device authorization.
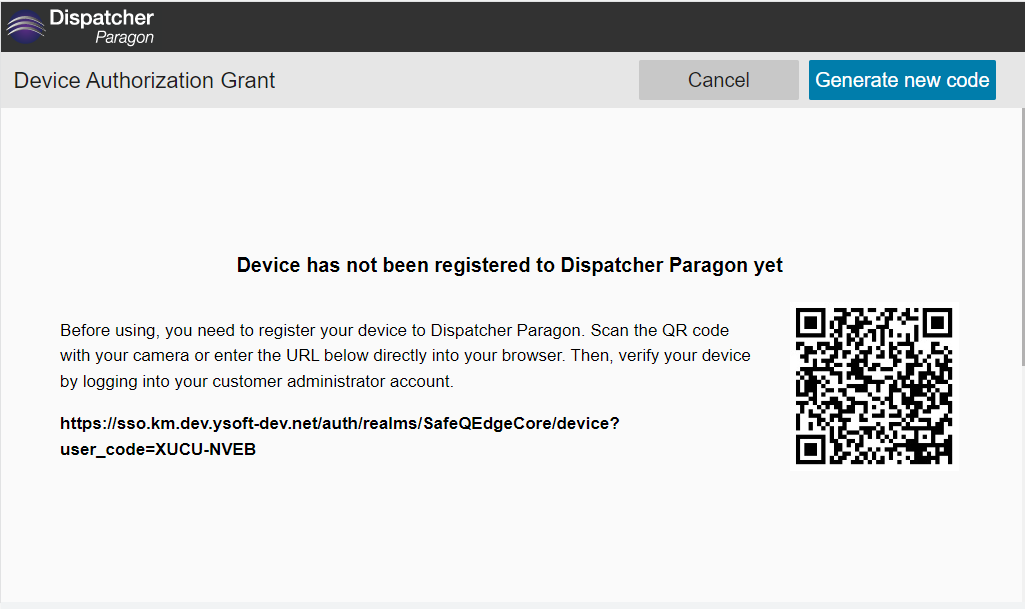
- The device automatically shows the result of this operation.
Settings with successfully obtained tokens should look like this:
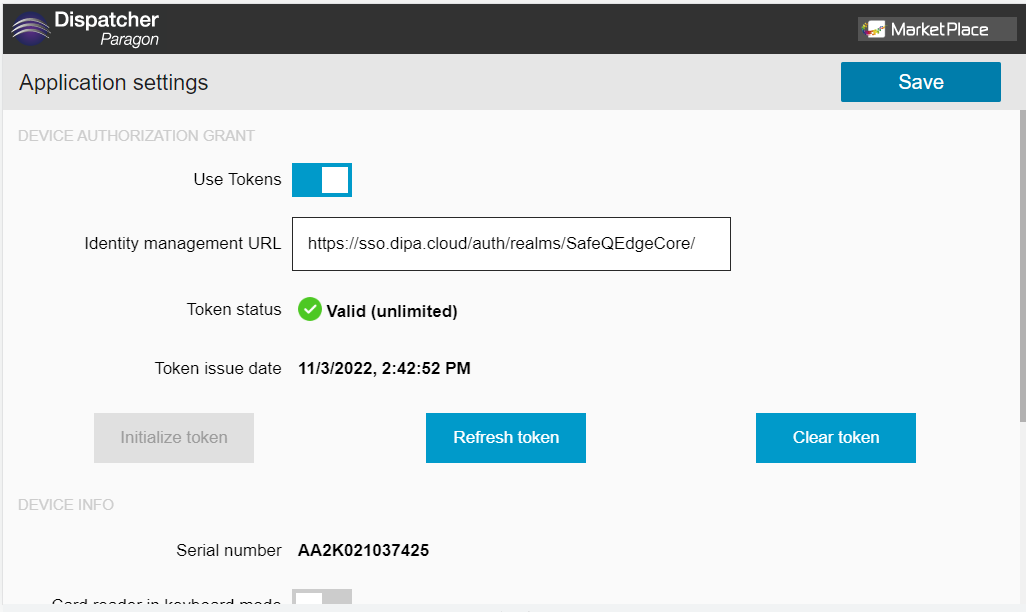
- Click "Save".
Identity Management Server Certificate
For security reasons, identity management requires server certificate validation.
When you open the identity management URL in your browser you can see what certificate it uses and which root authority it is signed by.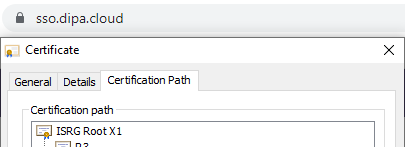 If the latest certificates are not installed on the printer, you can install newer root certificates with the printer firmware update or install the root authority certificate manually to the printer.
Administration - Security - PKI Settings - External Certificate Settings - Trusted CA Root Certificates - New Registration
Create Scan Workflow Access
Scan workflows are setup in the standard manner. See Management Interface - Scan Workflows
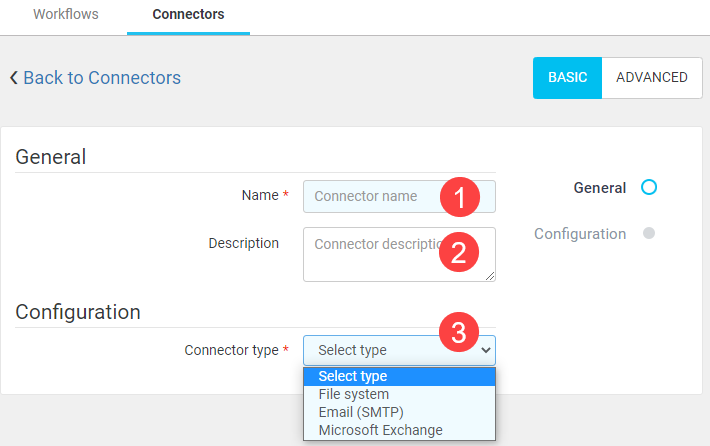
Create Connector
To create the Scan_to_Email workflow, first create the connector.
- Click Scan workflows
- Click Connectors
- Click Create New
- Name will allow you to identify the connector when setting up the scan workflow
- Description is optional
- Type:
- File scans to user's folder
- Email scans to user's personal company email address
- Microsoft Exchange scans to an external email address such as Gmail
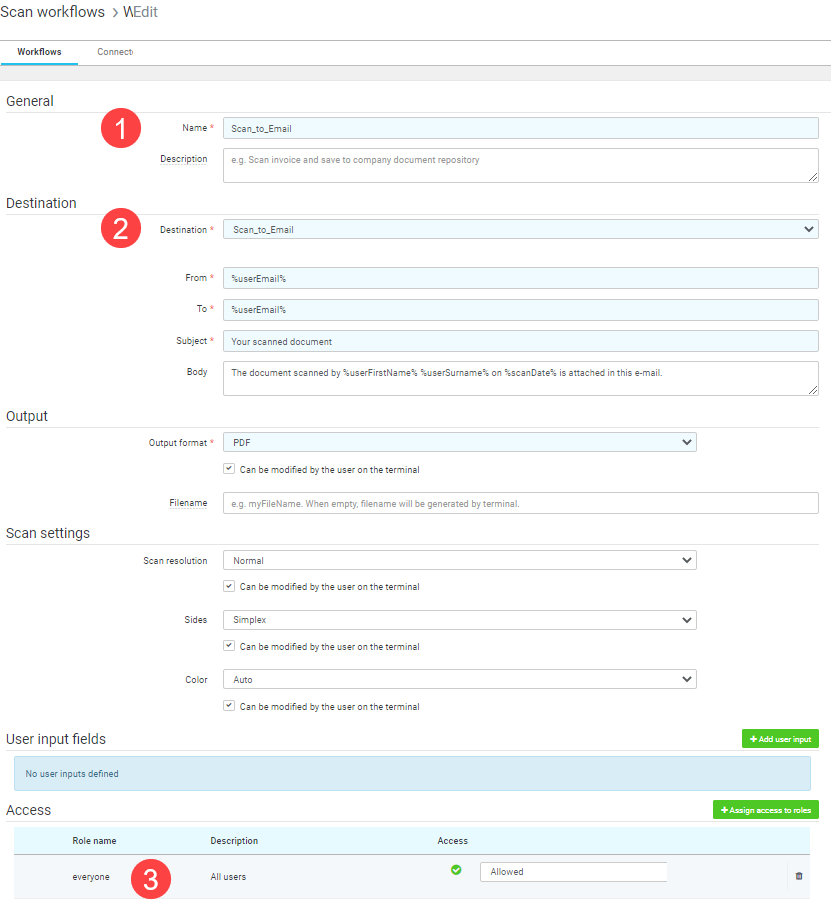
Create the Scan Workflow
- Click Workflow
- Name will be displayed to the user on the MFD
- Use the newly created connector
- Determine role(s) to have access
Cloud Terminal communicating via a proxy server
The Browser and WebDav Client settings of the MFD need to be configured to support Cloud Terminal to communicate via a proxy server.
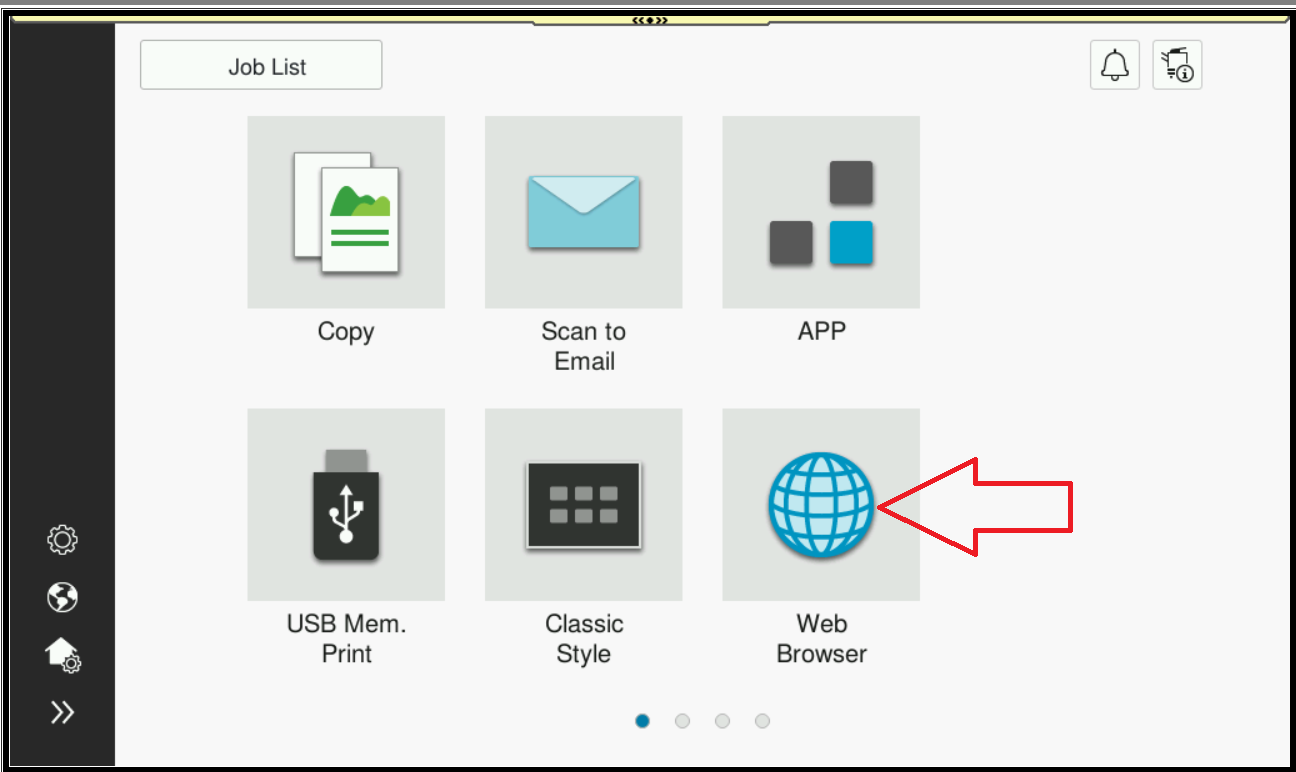
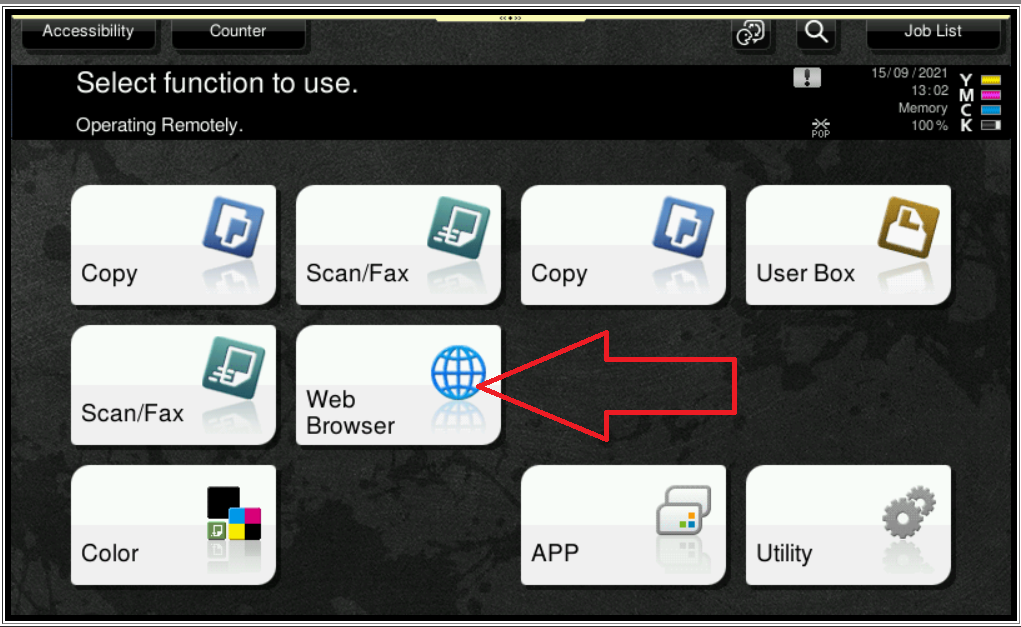
Web Browser Settings
Open the Web Browser application on the MFD menu.
Basic Style
Classic Style
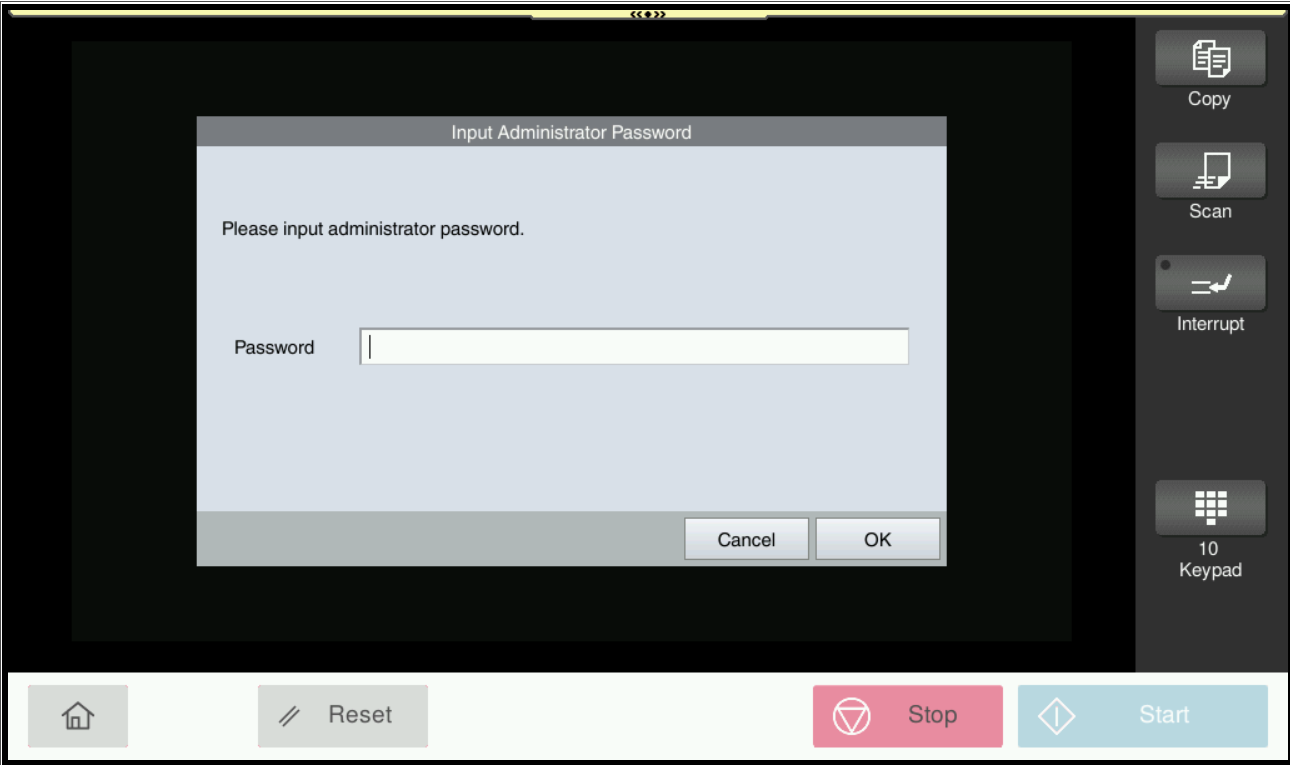
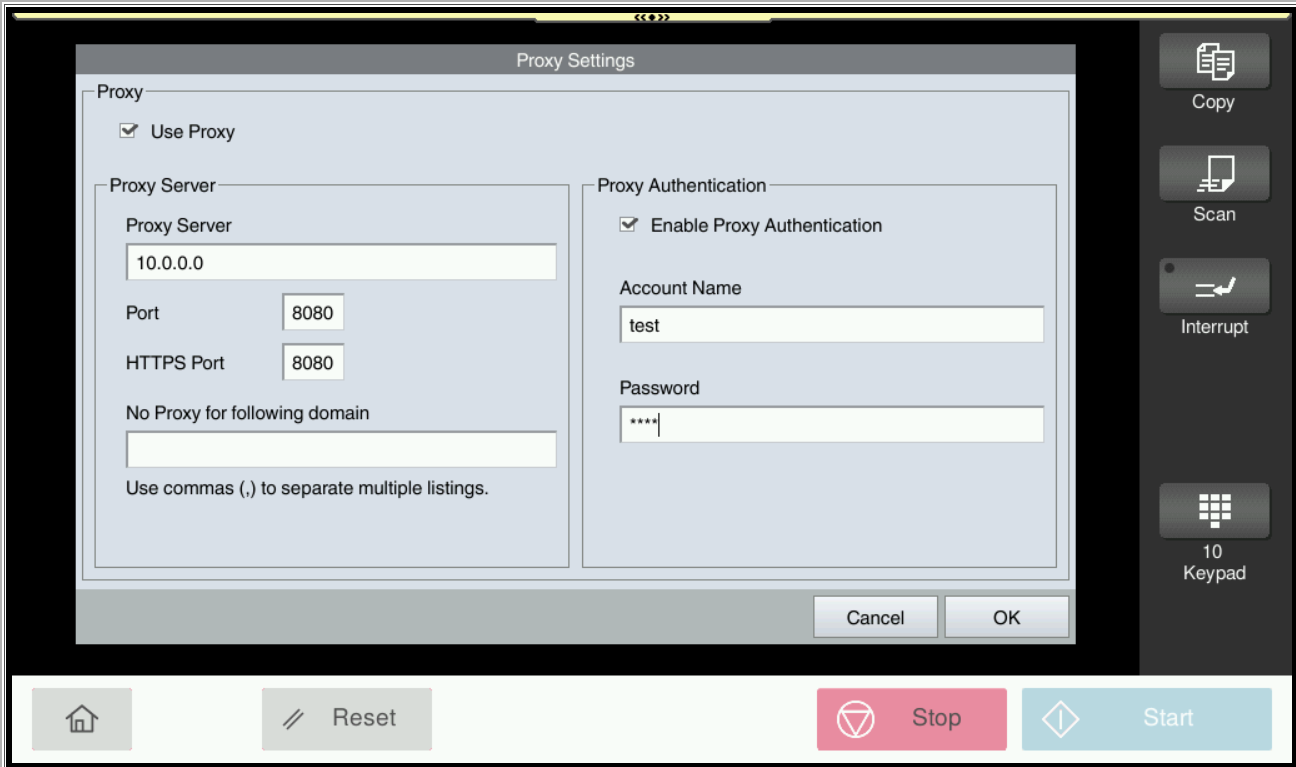
- Navigate to Settings of the Web Browser and authenticate by the Administrator password
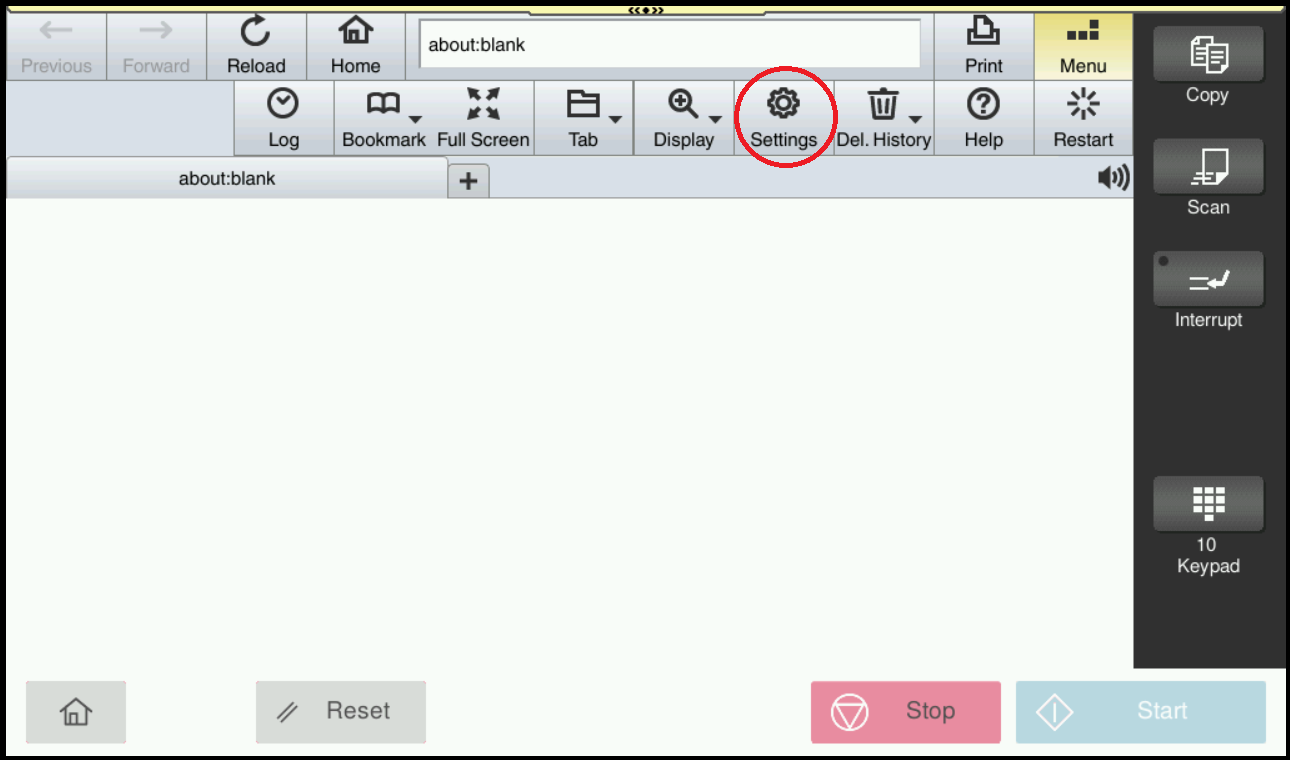
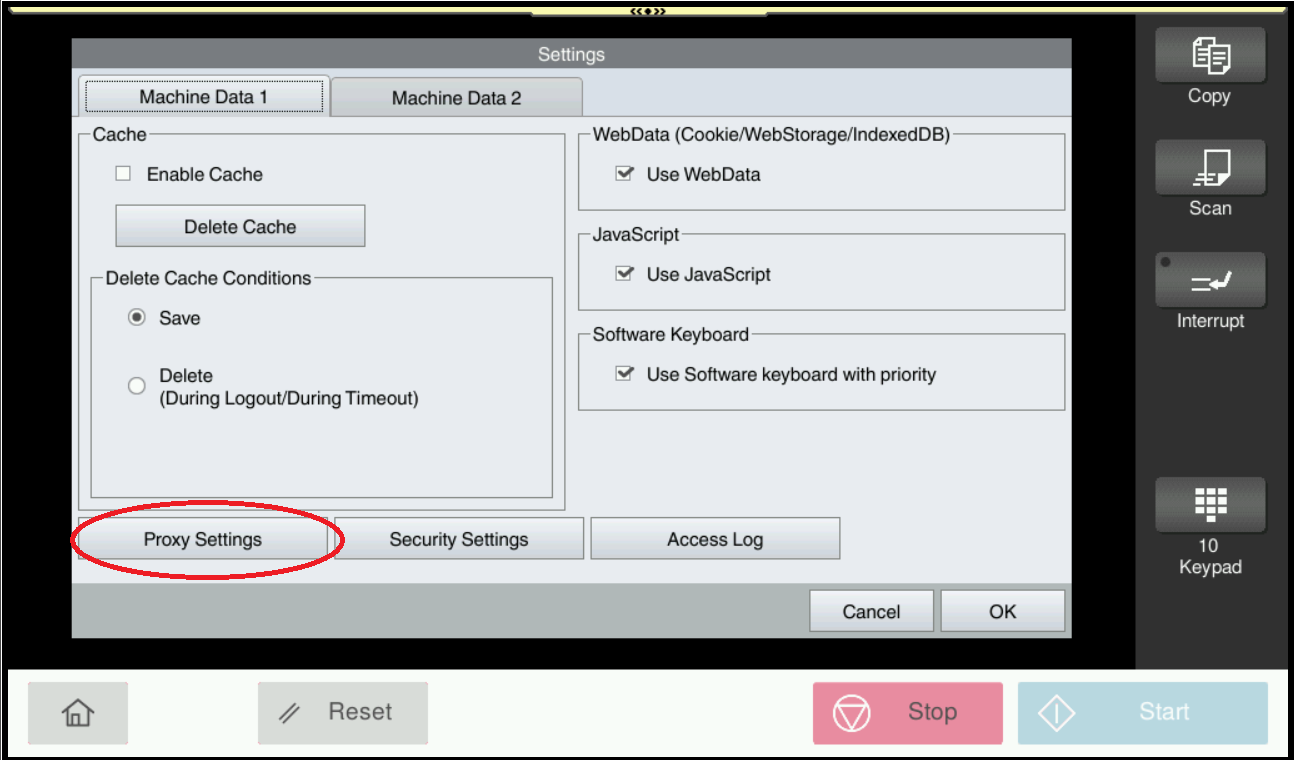
- Click on the Proxy Setting button
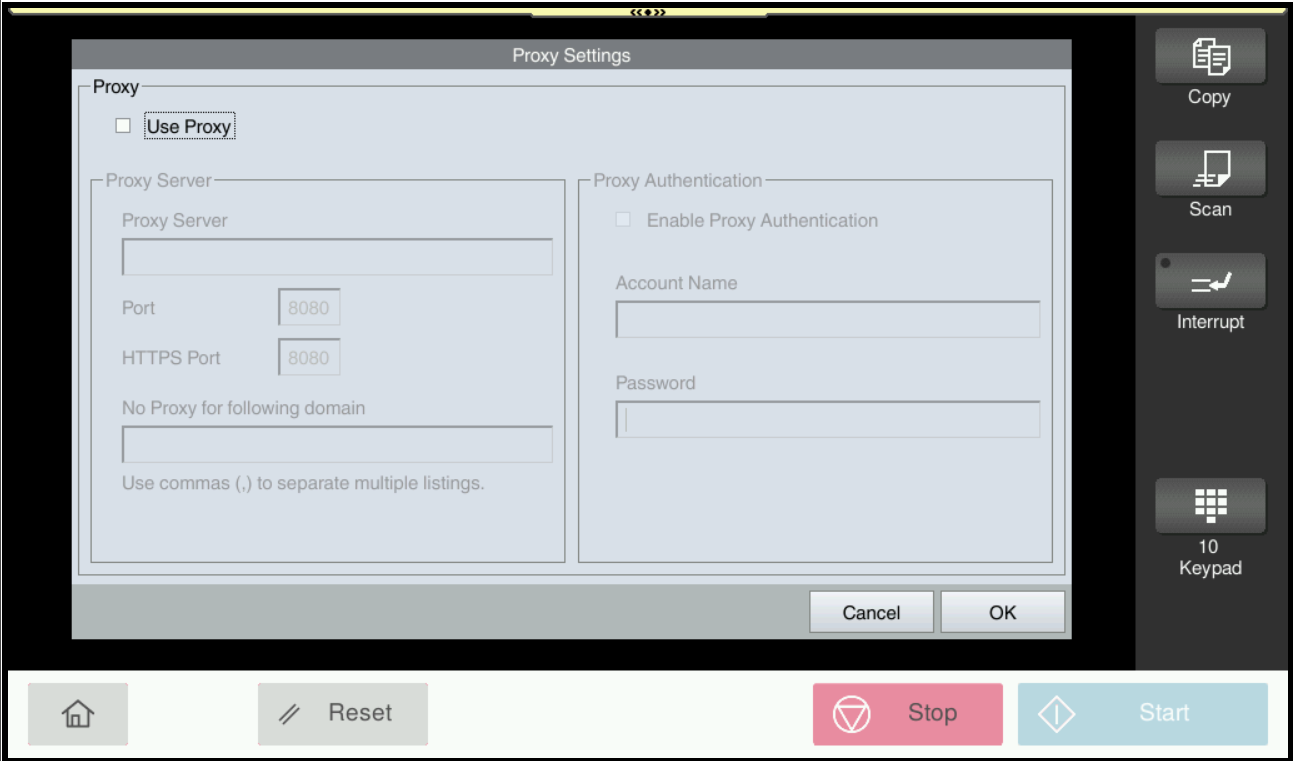
- Check the Use Proxy checkbox and fill Proxy Server address and ports in Proxy Server settings. (If the Proxy server needs authentication check also Enable Proxy Authentication checkbox and fill Account Name and Password in Proxy Authentication settings).
Click the OK button to save the Proxy Settings.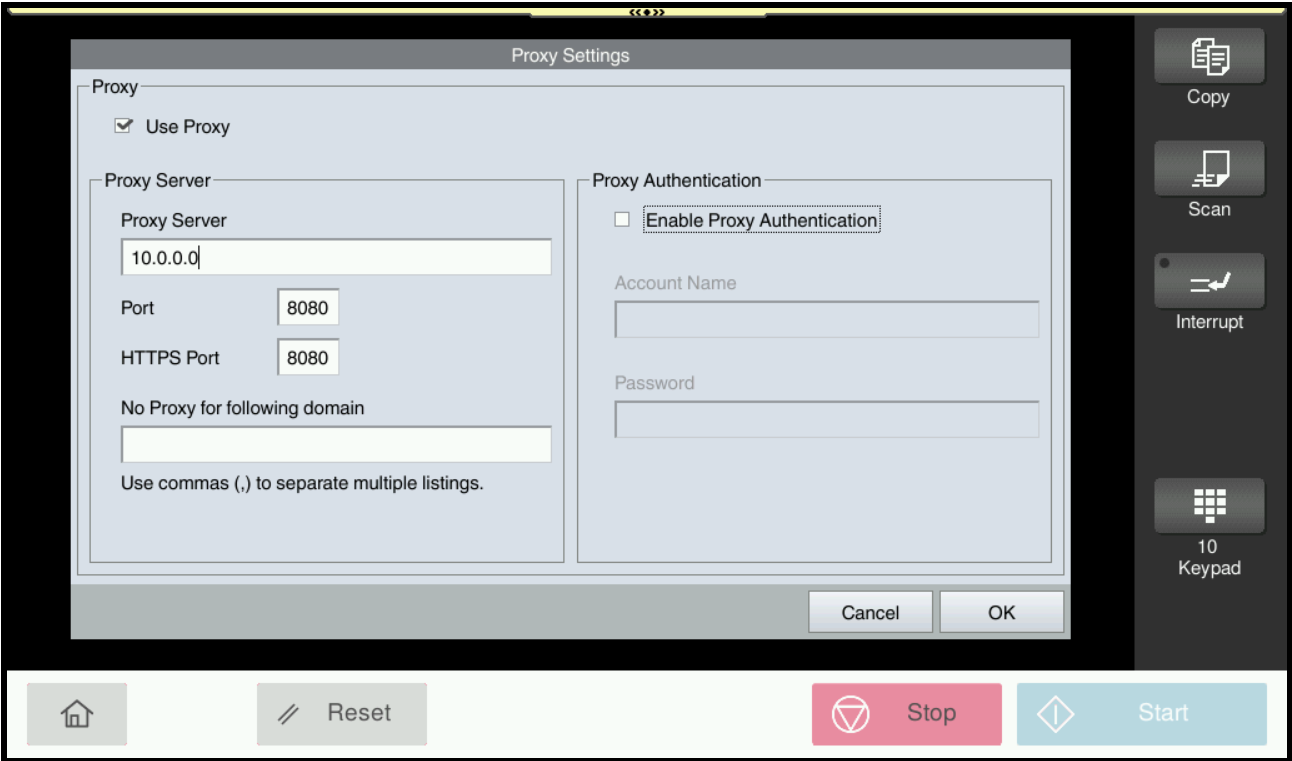
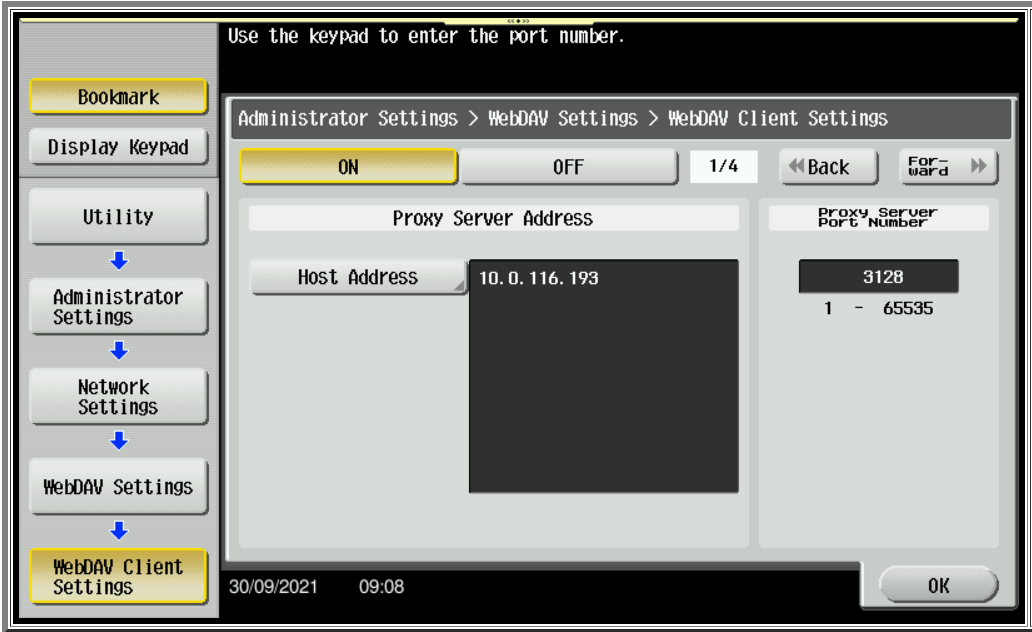
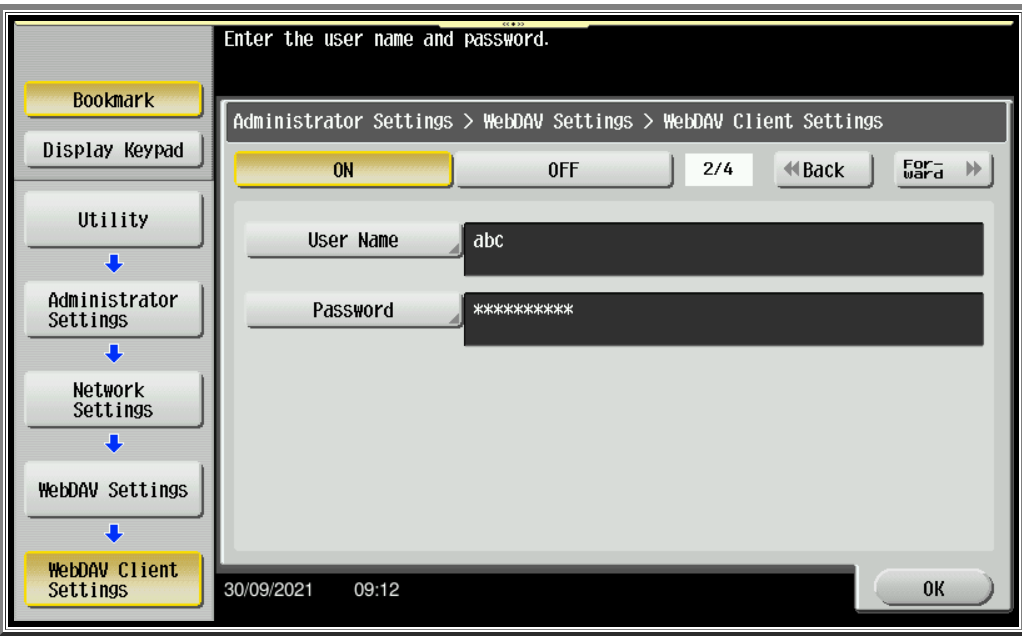
WebDAV Client Settings
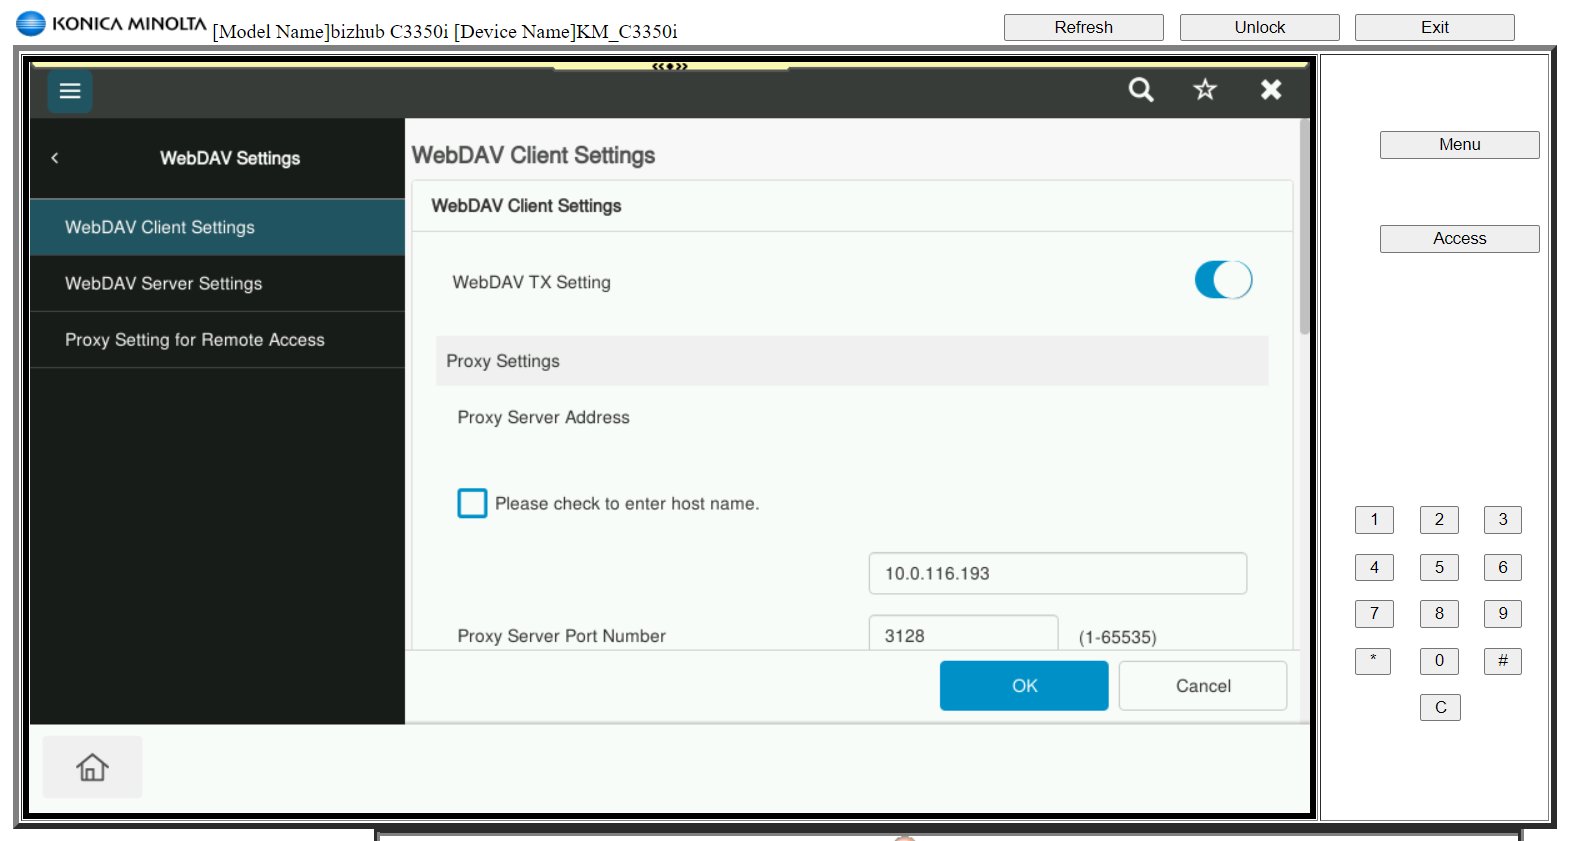
Log in as Administrator to the MFD and go to the Administrator Settings → Network → WebDAV Settings → WebDAV Client Settings
Fill in the Proxy Server Address and Proxy Server Port Number. If the Proxy server needs authentication fill in also User Name and Password.
IT6
IT5
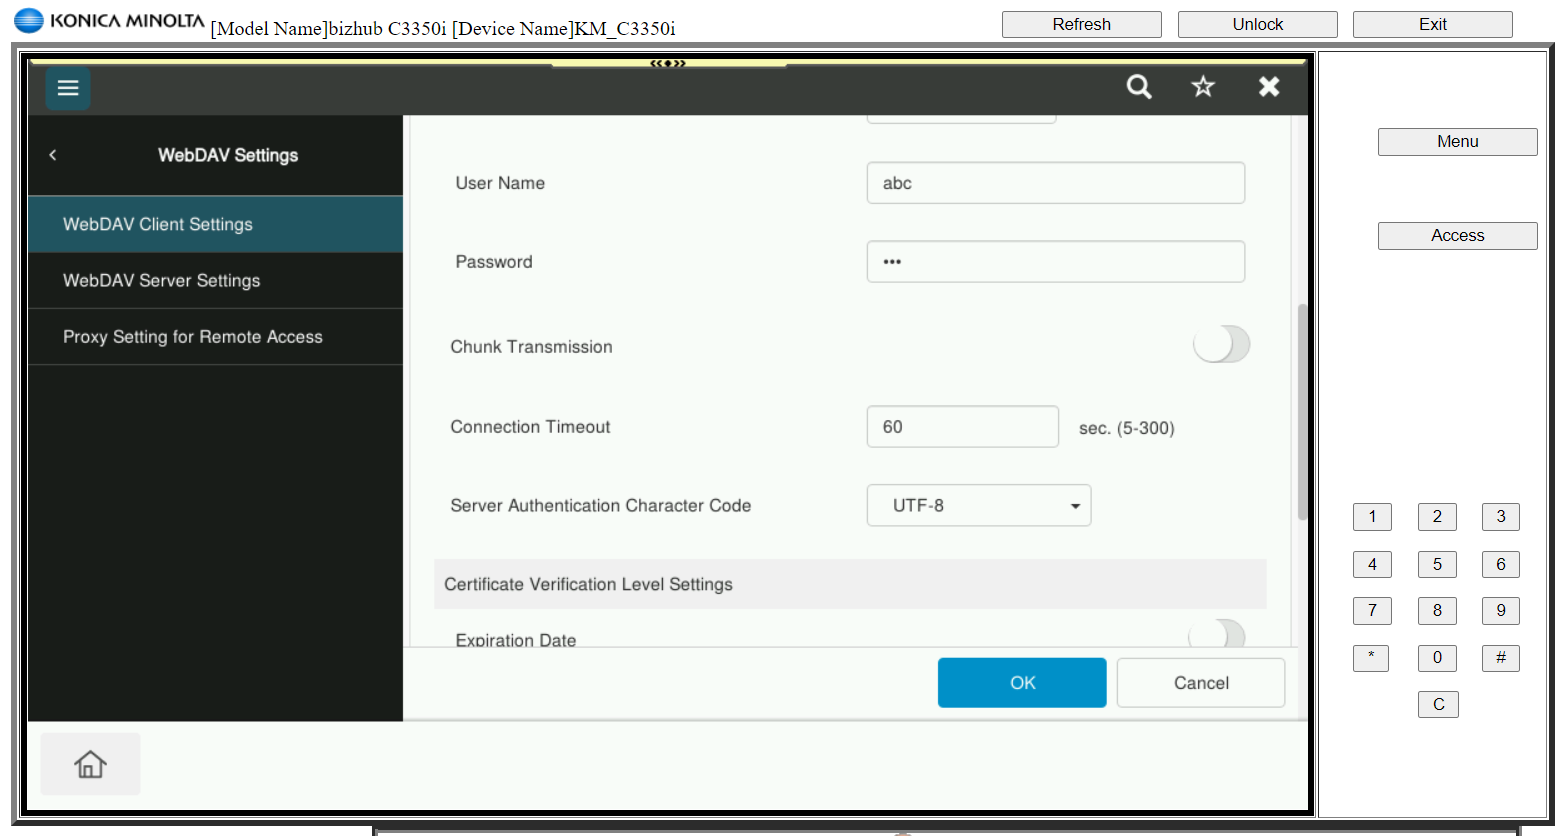
- Press Ok to confirm the settings.