Before installation
- Make sure that the device is configured properly. See the configuration guides for more information.
- Configure the device. See the configuration guides for more information.
Adding a device with terminal to Dispatcher Paragon
- Log in to the Dispatcher Paragon management interface, and use the account authorized to manage the system.
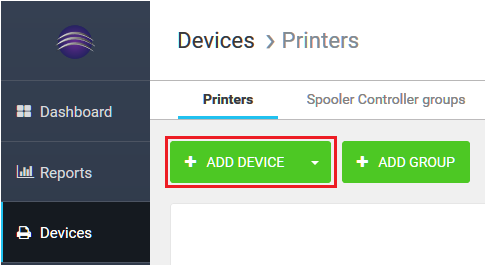
Open Devices > Printers from the menu. Click the Add Device button.
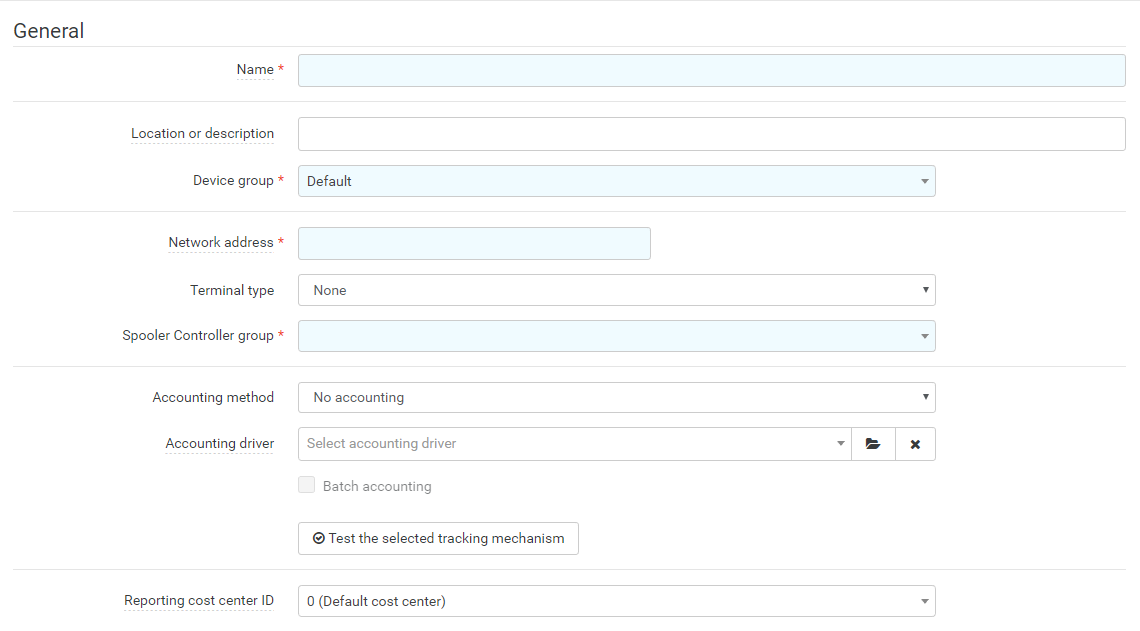
- General section
Here enter the necessary details to identify a device. Please note that Name and Network address are mandatory and must be unique. Here is a list of all available options for each device.
- Name - name your device. The name will be used to identify the device in Dispatcher Paragon. Tip: Make sure to call all devices in a similar manner (e.g. model number) for easier troubleshooting.
- Location or description - you can specify further details to recognize the device in the system and to describe the exact placement of the device.
- Device Group - this option defines in which group will the device be placed. Choose from existing groups.
- Terminal type - you can choose the embedded terminal for the exact vendor.
- Network address - mandatory configuration. Network address must be unique within a group or the Spooler Controller server. You can also use a domain name instead of an IP address.
- Spooler controller group - this option defines in which Spooler Controller will the device be registered. Choose one from the existing Spooler Controller groups.
- Accounting type - configuration defines the type of accounting to be used.
- Accounting driver - it is used for online accounting on external devices and also for device monitoring in the rest of the terminals.
- Price list - configured prices are used for accounting print, copy and scan jobs performed at the device. Prices are defined in the assigned price list.
- Reporting cost center ID - device may belong to a particular cost center. Choose from existing cost centers.
Terminal section
Here is a list of all available options for each device.
- Authentication method – Select the authentication method.
- Terminal type - When multiple types of the terminal are available for the given vendor, select the terminal type to install
- QR code size - Select the size of the QR code. The link for the QR code will be available after the device is saved for the first time.
- (Advanced only) Admin username and Admin password
- If it's necessary to use another admin username or password than global ones, it must be filled in.
In case the admin username or password is filled, then these custom credentials are used, thus only in case when both administrator username and password is empty, then global credentials are used.
By default, in the case of Konica Minolta, Olivetti and Develop devices, the global admin username has the default value 'admin' and the password is empty. Current values are empty.
- (Advanced only) Scan feature - Enable this option if you want to enable Dispatcher Paragon scanning features.
- (Advanced only) Copy feature - Enable this option if you want to enable Dispatcher Paragon copy features. Available only for Cloud terminals
- (Advanced only) Application feature - Enable this option if you want to enable Dispatcher Paragon printing features.
- (Advanced only) Payment feature - Enable this option if you want to use Payment System with this device. When enabled, users with money accounts will be charged for print, copy and scan activity according to the appropriate price list.
- (Advanced only) Printing application layout – Select the layout of the print application and folders displayed to the user.
- (Advanced only) Authentication mode – Keep the To device option. Users must authenticate to unlock the device and access any of the features. This option is available only for specific vendors.
- (Advanced only) "Print all" button – Specifies the accessibility and default state of the Print All switch on the embedded terminal. By default, it behaves according to the system settings defaultPrintAllButtonState which can be found at System > Configuration > Terminal UI.
- Force install - If checked, any proprietary MFD authentication or any authentication application that is on the MFD will be deleted without warning. If the checkbox isn't checked, installation of the terminal may fail because of the presence of any proprietary MFD authentication or 3rd party authentication application. The checkbox is visible only for KM, Olivetti, and Develop vendor.

- Direct printing section
This part allows you to specify direct queue(s) which enable the device to receive jobs without the need for the user to authenticate at the terminal (note: the print job is still authorized in Dispatcher Paragon). For each direct queue, you can enable or disable deleting the print jobs after being printed out (released at the printer) by choosing the option Delete after printing (in the Miscellaneous part).
Tags section- Tags - tab enables different print languages or user tags for the device. All print languages are enabled by default. This configuration must match tags for each job and also supported options on the device.
For Xerox devices that use XCPT tickets, make sure the checkbox XCPT-Xerox (in Device detail page) is checked when installing the Embedded Terminal. Otherwise, some finishing options might not work.
SNMP section (Advanced)
This part allows the configuration of SNMP v2 and SNMP v3 used with the device.- SNMP read-only community for remotely accessing the device states.
- SNMP read-write community for remotely reading and writing to device properties.
- Context
- Context name
- Privacy password
- Privacy algorithm
- Authentication username
- Authentication password
- Authentication algorithm
- Message encoding
- Equipment ID
- Service Agreement ID
- Contact person
Backend section (Advanced)
This part refers to the network protocol used for communication with the device and used for printing at the device.
- Backend - network protocol used for communication. The following network protocols are available:
- IPP - provides a standard network protocol for remote printing as well as for managing print jobs, media size, resolution, etc.
- IPP over SSL - basic IPP with job encryption over SSL.
- TCP/IP Raw - TCP/IP with a raw socket that allows access to the underlying transport provider.
- Network port - a port number that the device uses for communication. This option depends on the selected print backend.
- Queue name - queue name used for communication with the device.
- Job encoding - encoding type used by the device. Encoding is defined by the print driver used by the users at the time of creating a print job.
Miscellaneous section (Advanced)
- Limit scan addressee
- Delete jobs after print
- Monitor device state (available only for Dispatcher Paragon Embedded Terminal for Konica Minolta, Develop, Olivetti and Aurora)
Advanced accounting section (Advanced)
Here it is possible to select to enable a particular accounting method (this is an optional configuration).
- Online accounting
- Offline print accounting
- Offline copy accounting
- Coverage accounting - black prints
- Coverage accounting - color prints
Some options are available for editing only in the Advanced view. You can choose between Basic and Advanced in the top right corner. If any Advanced option is changed from its default value it will become editable also in the Basic view until its value is changed again to default.
Once you have entered all the necessary information, click on the Save changes button. After confirmation, the device will be automatically reinstalled with an updated configuration and embedded terminal.
- The embedded terminal is being installed. A new window with installation progress will appear.
- After installation is completed, a message Device installation is complete is displayed.

Should the installation process encounter any issues, please open the installation details with more information about the error. - If you need to change the settings of an already installed device or terminal, go to Devices > Printers, click the edit icon of the required printer. Please note, that some settings may require terminal reinstallation, which will occur automatically after saving the changes.
After an installation of the first OKI or Toshiba device, it is necessary to restart the Spooler Controller service. Otherwise, users would not be able to authenticate.