About
When OpenID Connect (OIDC) integration is enabled, user authentication requests to the Management Interface or end user interface are redirected to an external Identity Provider server URL. After a user authenticates at the external Identity Provider, they are redirected back to the application for the authentication session to be verified.
OIDC is a standard protocol for web browser Single Sign-On (SSO) using secure tokens. OIDC eliminates all local application passwords and instead uses standard cryptography and digital signatures to pass a secure sign-in token from an identity provider to a SaaS application.
See OpenID Connect documentation for more information about its principles.
Currently supported identity providers:
OIDC with user import versus OIDC without user import
When configuring the OIDC integration, you will have a choice between two modes of user management:
- OIDC with user import
- OIDC without user import
See the User import setting section of this document for details of where this setting (openIdConnectImportUsers) is located. Each of these two modes is targeted at a different use case.
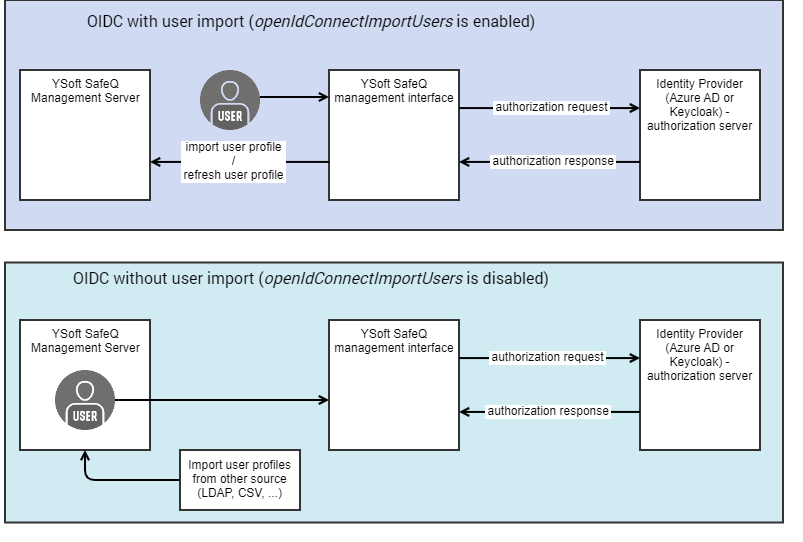
Be aware that in both modes, the usernames in Dispatcher Paragon must be in the UPN format (in most cases this would be the user's email address).In the case of OIDC with user import, the consequence of this is that users can print only via Dispatcher Paragon Mobile Integration Gateway.In the case of OIDC without user import, your print queues may not need any changes if you set the user aliases correctly because aliases will solve user matching to SAMAccountName (or another attribute you are using).
OIDC without user import (internal users, LDAP users)
This mode is intended for Dispatcher Paragon on-premise customers who:
- are only looking for Single Sign-On functionality.
- already have a way of replicating/managing their users, such as LDAP replication, CSV import, or one of our customizations (SWC-100 being the most common).
OIDC in this mode is comparable to other Single Sign-On possibilities in Dispatcher Paragon, such as SAML or Windows Integrated Login.
This mode, unlike the second one below, has only minor limitations. You can keep the way your Dispatcher Paragon is set up, all of your Dispatcher Paragon components (FlexiSpooler, End User Interface, and others), and even keep using passwords if you wish (for example, to log in to MFDs).
The added benefit is that login to the Management interface is:
- Simpler – users don't have to enter their username and password when they are already logged at your external Identity Provider.
- More secure – the external Identity Provider may employ Multi-Factor Authentication, password policies, etc.
Limitations
In this mode, your Dispatcher Paragon will have the following limitations:
- Only OpenID Provider Front-Channel logout is supported. This feature is enabled by default (not configurable). Relying Party (Management Service) Logout functionality is not supported.
- Front-channel logout on OpenID Provider is not called in case of a login error on the Management Service side.
- Authentication to Management Servers in a cluster is not supported, and user session is not exchanged between more servers.
In this mode, user accounts have the following characteristics:
- Users remain managed by Dispatcher Paragon Management Server. Users of the management interface can use OIDC as a way of logging in without a Dispatcher Paragon password, but their profiles are not updated from the external IdP.
- New users are not imported from the external IdP automatically – the administrator must first create their user accounts in the Management interface and then they can start logging in via OIDC.
- The user accounts remain editable in the Management interface even after OIDC login.
- This mode is fully compatible with LDAP replication.
OIDC with user import (OIDC, OAuth)
This mode is primarily used in Konica Minolta's cloud products and is not recommended for on-premise deployments.However, you may find it useful if you host your Dispatcher Paragon in a public cloud yourself (for example, in Microsoft Azure).
The benefits of integrated login:
- Simpler – users don't have to enter their username and password when they are already logged at your external Identity Provider.
- More secure – the Identity Provider may employ Multi-Factor Authentication, password policies, etc. In addition, passwords are not stored anywhere in Dispatcher Paragon.
- Users only need to be managed in one place – your external Identity Provider. Changes are replicated to Dispatcher Paragon at every login.
Limitations
Be aware that if you use this mode in your on-premise deployment, you will need to change your way of working with Dispatcher Paragon, as it will have the following limitations:
- Users can submit print jobs only via Dispatcher Paragon Mobile Integration Gateway. In YSoft cloud products, users can submit their print jobs only via IPP Gateway.
- Passwords are not stored anywhere in Dispatcher Paragon, so they cannot be used as a login method. This means that the users cannot use the following:
- Dispatcher Paragon End User Interface
- YSoft Desktop Interface
- Dispatcher Paragon Payment system
- At the MFD panel, users cannot log in with their username and password. Other authentication methods (card, PIN) work.
- Only OpenID Provider Front-Channel logout is supported and this feature is enabled by default (not configurable). Relying Party (Management Service) Logout functionality is not supported.
- Front-channel logout on OpenID Provider is not called in case of a login error on the Management Service side.
- Management Server cluster: Authentication to Management Servers is not shared among other nodes in the cluster, users must authenticate again to each Management interface.
In this mode, user accounts have the following characteristics:
- Users are fully managed by the external IdP. When a newly created user logs in to the Management interface for the first time, their profile is automatically created in the Management database using the information supplied by the external IdP. Likewise, a returning user's profile is updated from the external IdP every time they log in.
- OIDC users cannot be edited from the Management interface, because any changes would be overwritten on the next login.
- You may still create internal users (i.e. manually created users, or imported from CSV or from LDAP), and they can use the system and coexist with users imported via OIDC, but the first time the internal users use OpenID Connect to log in, their profile converts to being managed from external IdP via OIDC.
Reference:
- https://openid.net/connect/faq/
- https://docs.microsoft.com/en-us/azure/active-directory/
- https://www.keycloak.org
Setting up the OIDC integration
To enable the integration, you must:
- Configure the OIDC client in your external Identity Provider.
- Configure the Management Service / end user interface to act as the client.
- The secured communication for all communication lines is strongly recommended, see Setting secured communication with Spooler Controller and Configuring SSL/TLS for Dispatcher Paragon Management Service.
Configuring your external Identity provider
You can use Keycloak or Microsoft Azure as your external Identity providers. Keycloak is necessary only if you need to use more than one Identity Provider.
Configuring OIDC integration with Microsoft Azure AD
For more details about app registration, see Microsoft's App registration manual.
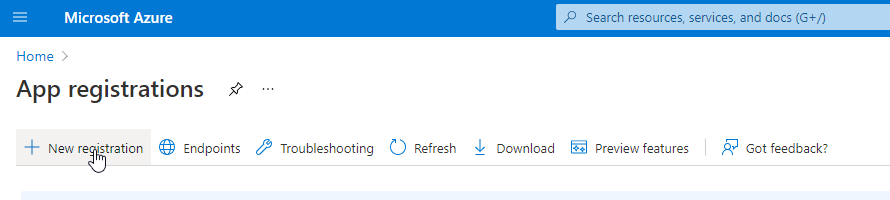
- Log in to Microsoft Azure portal.
- In Azure Active Directory, click App registrations > New registration.
- Choose the account type which suits your deployment the most. Note that you can leave the redirect URI empty and fill it in later.
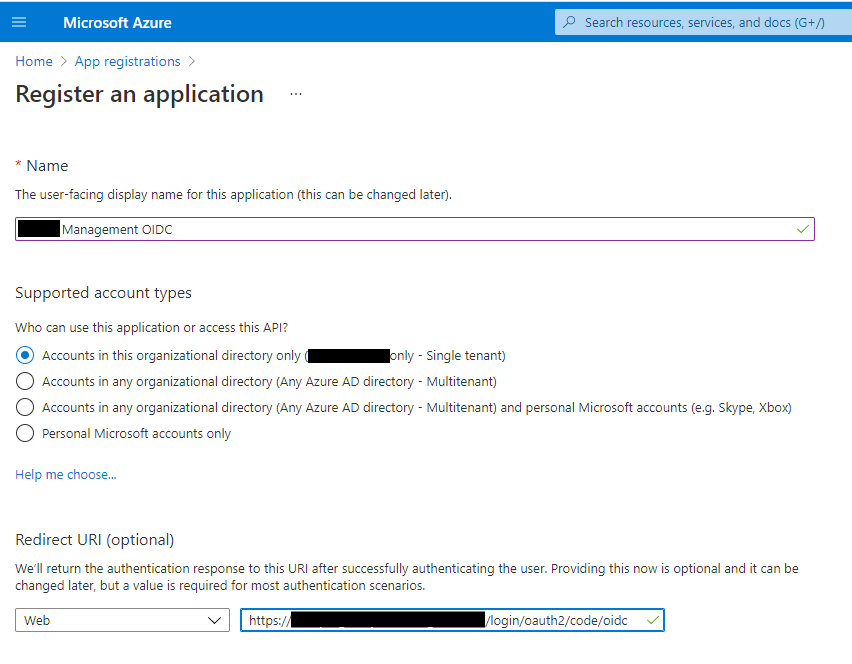
- Click Register.
On the Authentication tab, click Add platform > Web and fill in redirect URLs, e.g. https://management.company.net/login/oauth2/code/oidc.
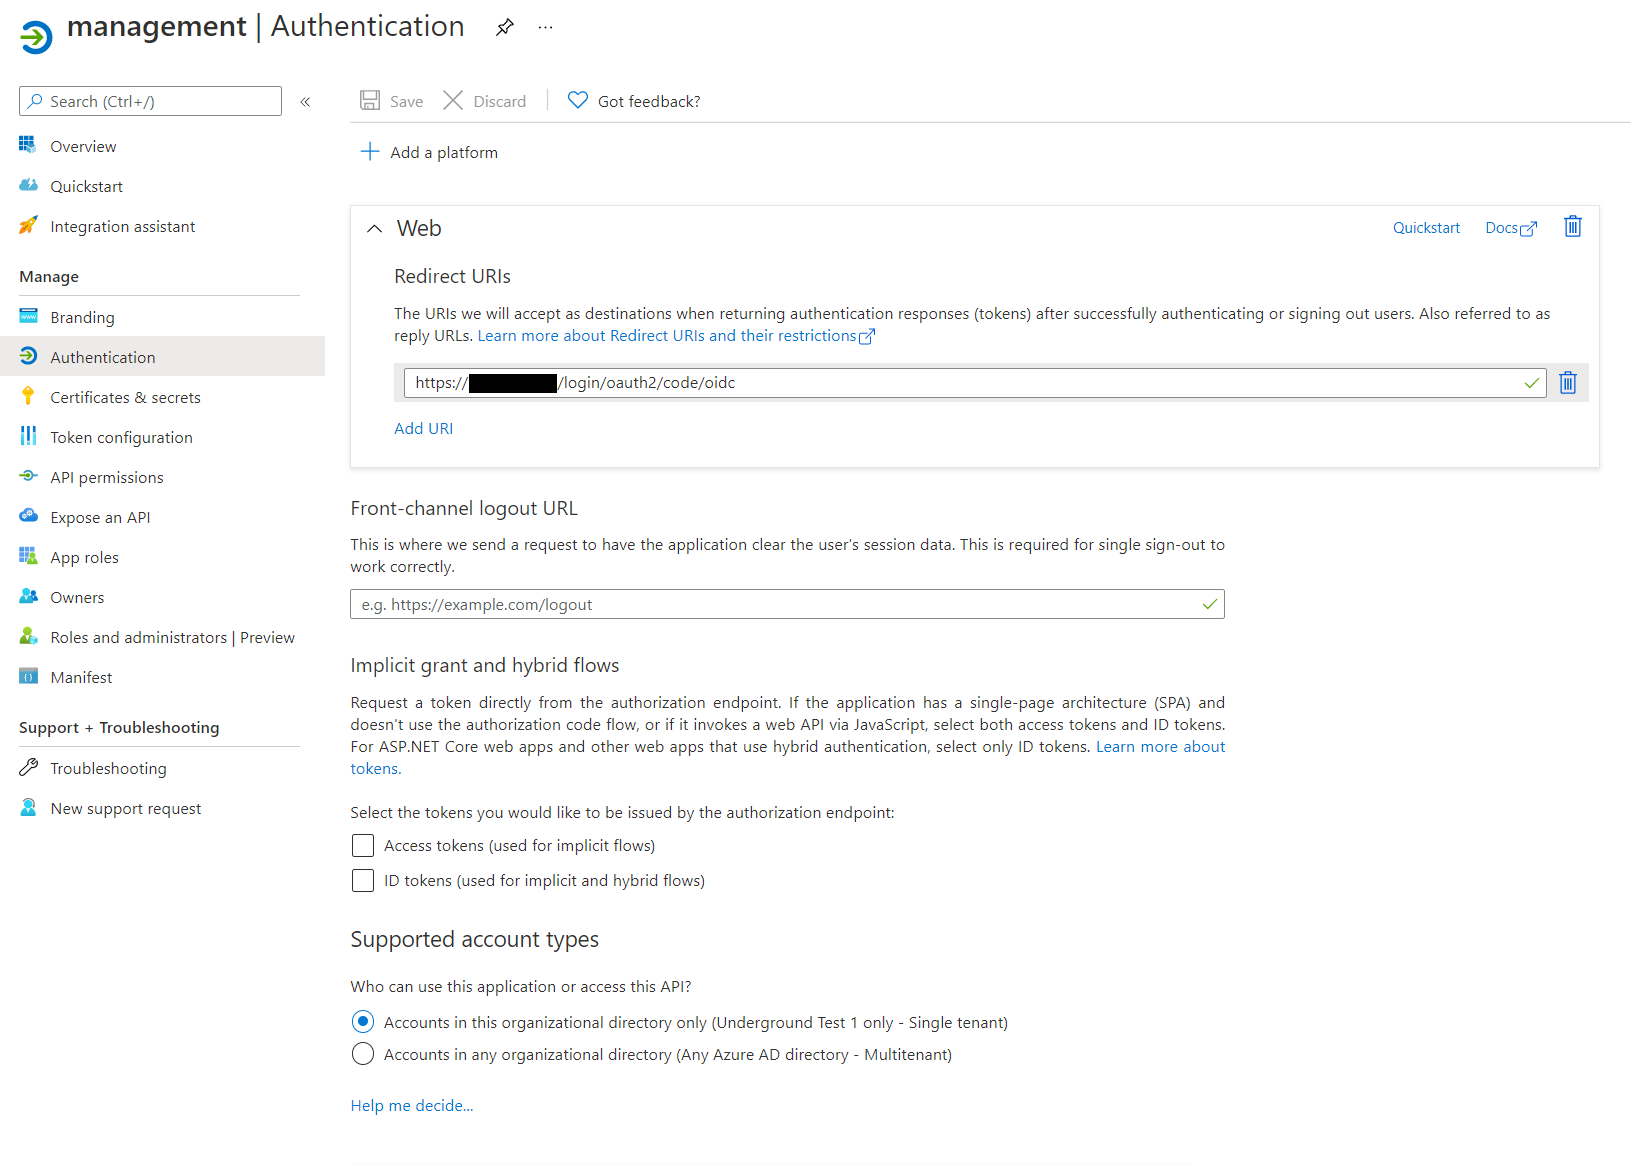
OIDC with Client v3
Environments using Client v3 need additional redirect URLs, one for each Job Service. Each one will be the URL of a given Job Service followed by /signin-oidc, e.g. https://job-service.example.com:5000/signin-oidc.
- On the Certificates & secrets tab create a client secret and note it down. After you leave this page, you can no longer access the secret.

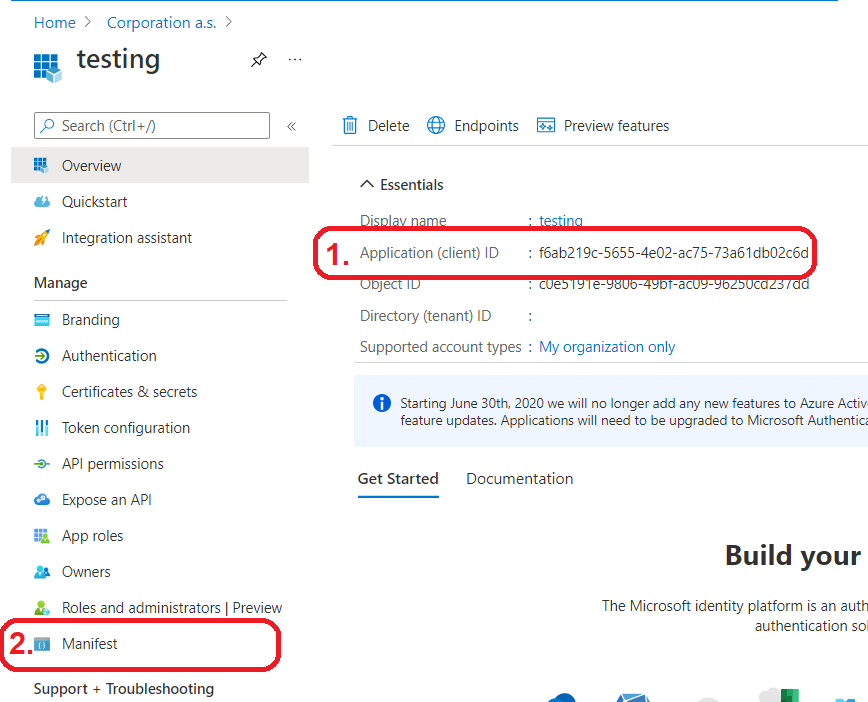
- After the configuration, check whether the endpoint https://login.microsoftonline.com/<directory-tenant-id>/v2.0/.well-known/openid-configuration works in your web browser and shows content with the configuration of other endpoints. (The directory tenant identifier could be found on the Overview tab as Directory (tenant) ID)
Limitation
By default the OIDC integration with Microsoft Azure AD does not share a user's first name and given name. To configure Azure AD to share the first name and given name of the user refer to How to register a new app in Microsoft Azure, section (Optional) Adding optional claims to share users first name and given name.
Configuring OIDC integration with Keycloak
For Keycloak, configure the OIDC client according to Keycloak documentation.
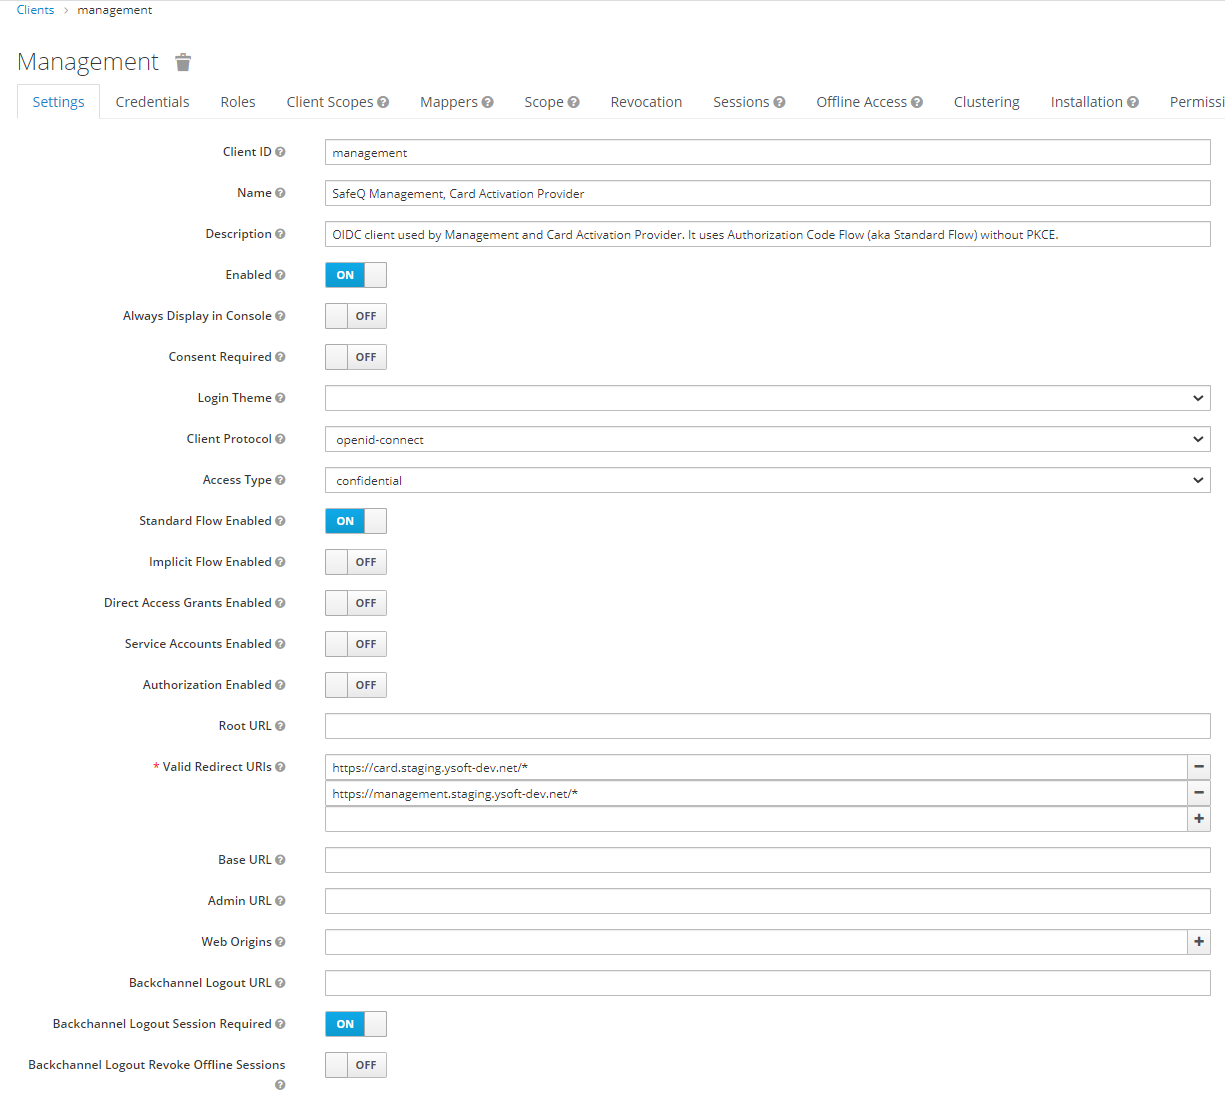
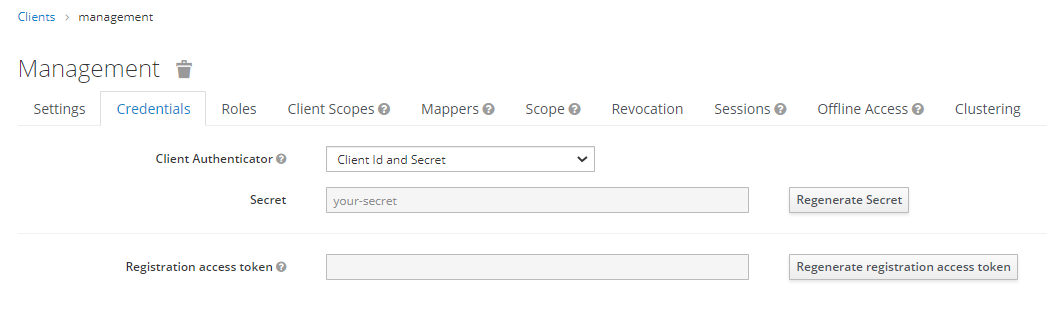
- Make sure that the client Access Type is confidential and the secrets are filled in on the Credentials tab.
- Make sure that Valid Redirect URIs contains the URL of the management interface, end user interface & Client v3:
- Management Interface
- For login add https://<MANAGEMENT HOST>/login/oauth2/code/oidc (e.g. https://management.company.net/login/oauth2/code/oidc)
- For logout add https://<MANAGEMENT HOST>/login/<tenant domain>?logout (e.g. https://management.company.net/login/tenant_1?logout)
- For end user UI
- For login add https://<SPOC HOST>:9443/end-user/ui/login/oauth2/code/oidc (e.g. https://spoc.company.net:9443/end-user/ui/login/oauth2/code/oidc)
- For logout add https://<SPOC HOST>:9443/end-user/ui/login (e.g. https://spoc.company.net:9443/end-user/ui/login)
- For each Job Service
- For login add <URL of Job Service>/signin-oidc
- Logout is not yet supported.
- Management Interface
- After the configuration, check whether the endpoint https://<keycloak-url>/auth/realms/<realm-name>/.well-known/openid-configuration works in your web browser and shows content with the configuration of other endpoints.
Configuring Dispatcher Paragon Management Interface
- Make sure that the Identity provider certificate authority is included in Management Service trusted authorities.
- Log in to the management interface.
- Go to System and configure these options:
- webAuthenticationMethod – set to value OpenID Connect to enable the feature.
- openIdConnectClientId – enter the client ID obtained during client registration at your external Identity Provider.
- openIdConnectClientSecret – enter the client secret value obtained during client registration at your external Identity Provider.
jobServiceOpenIdConnectClientSecret – enter the client secret obtained during client registration at your external Identity Provider. This secret is used by Client v3 users to log in. The value can be the same as or different from the openIdConnectClientSecret property.
Optional: Configure this option if the OIDC login for Client v3 is being configured and used.
Warning
For increased security, create a second client secret, different from openIdConnectClientSecret.
- openIdConnectAdditionalScopes – the Management Service automatically determines the necessary client scopes ("openid", "profile", "email" and "offline_access") but you can add extra scopes. The value of this configuration property should be a comma-separated list of additional scopes.
- openIdConnectIssuerLocation – enter the URL of the OpenID provider issuer that will be used for obtaining OpenID provider configuration information. The issuer address should not contain "/.well-known" part as this is added automatically. For example openIdConnectIssuerLocation with value "https://sso.company.net/auth/realms/realmName" will be resolved to "https://sso.company.net/auth/realms/realmName/.well-known/openid-configuration".
- For Keycloak, use this pattern: https://<keycloak-url>/auth/realms/<realm-name>
For Microsoft: https://login.microsoftonline.com/<directory-tenant-id>/v2.0
If you wish to allow users from multiple tenants, you can use "organizations" instead of tenant ID. See https://docs.microsoft.com/en-us/azure/active-directory/develop/v2-protocols-oidc#fetch-the-openid-connect-metadata-document for more details.
- openIdConnectDirectlyRedirectToProviderLoginPage – When this option is enabled and an unauthenticated user visits a page that requires authentication, the Management interface login screen is omitted and the user is redirected directly to the authorization server login. The Management Service default login page on URL "/login" is still available.
- openIdConnectTenantIdentificationClaim – Name of the claim that must be present in the access token to determine the tenant space user is authenticated to. Note that the value is ignored if the Management Service does not support multi-tenancy.
- openIdConnectImportUsers – With this setting enabled, users are managed by the external IdP via OIDC (OIDC with user import mode). With this setting disabled (OIDC without user import mode) users remain internal (or imported from another source, such as CSV or LDAP, if your Dispatcher Paragon is set up in this way).
- Restart necessary services.
Configuring Dispatcher Paragon End User Interface
- Make sure that the Identity provider certificate authority is included in end user interface trusted authorities.
- Log in to the Management interface.
- Go to System and configure these options:
- webAuthenticationMethodEUI – set to value OpenID Connect to enable the feature.
- openIdConnectIssuerLocation – enter the URL of the OpenID provider issuer that will be used for obtaining OpenID provider configuration information. The value is shared with Management Interface, see the previous section for details.
- euiOpenIdConnectClientId – enter the client ID obtained during client registration at your external Identity Provider.
- euiOpenIdConnectClientSecret – enter the client secret obtained during client registration at your external Identity Provider.
- euiOpenIdConnectAdditionalScopes – the end user interface automatically determines the necessary client scopes ("openid", "profile", and "email") but you can add extra scopes. The value of this configuration property should be a comma-separated list of additional scopes.
- euiOpenIdConnectFailedLoginPromptHint – the value specifies the behavior of the Single Sign on login button after failed user login, typically when the user can't be verified by Dispatcher Paragon. When the user logs in via Identity provider, the session in Identity Provider is usually created so when the user clicks on Single Sign On button in end user interface again, the session on Identity Provider is reused and the user doesn't have to log in again. This behavior could be unwanted when the user wants to log in to Identity Provider as a different person. So the configuration option euiOpenIdConnectFailedLoginPromptHint alters behavior of login in Identity Provider. See the documentation of Identity Provider:
- For Keycloak search for "prompt" values in Securing Apps documentation.
- For Microsoft search for "prompt" values in Microsoft identity platform and OpenID Connect protocol documentation.
- Restart necessary services.
Limitations
- End user interface OIDC authentication is available only in single tenant mode.
- End user interface OIDC authentication authenticates only users that exist in Management Interface.
- Username of authenticated user in Identity Provider must case-insensitively match the username or alias that is stored in Management Interface. Username is taken from OIDC ID token claim "preferred_username" The content of the claim must stay the same for the entire lifecycle of the user in identity platform and the same value mustn't be reassigned to a different user over time.
- End user interface OIDC authentication does not support directly OIDC user import, only Management Interface supports OIDC user import (as defined by Management Interface configuration option openIdConnectImportUsers).
- When the management interface OIDC user import feature is on and user authentication (refresh token) expires in the management interface, then the user can't log in via end user interface till the user refreshes the validity of the account in the management interface.
Additional information
Revoking access to OneDrive for Dispatcher Paragon
Because Dispatcher Paragon uses static user consent in the app registration, there is a predefined set of permissions, that the app asks for (OneDrive included). This means that you cannot delete the permission for OneDrive separately, you can only delete all Dispatcher Paragon permissions at once using the PowerShell AzureAD module. This action can prevent users from being able to log in using Microsoft Single sign-on, so after this action, you must the necessary permissions back.
For detailed instructions login to Azure Portal and go toAzure Active Directory > Enterprise applications > Cloud Print Management > Permissions > Review permissions > This application has more permissions than I want.
Creating client secret with a long expiration date
The option to create a client secret with no expiry date no longer exists in Azure Portal UI. However, client secrets with long expiration dates can be still created using Azure Command Line Interface (CLI). You can read more about Azure CLI in the official Microsoft documentation https://docs.microsoft.com/en-us/cli/azure/.
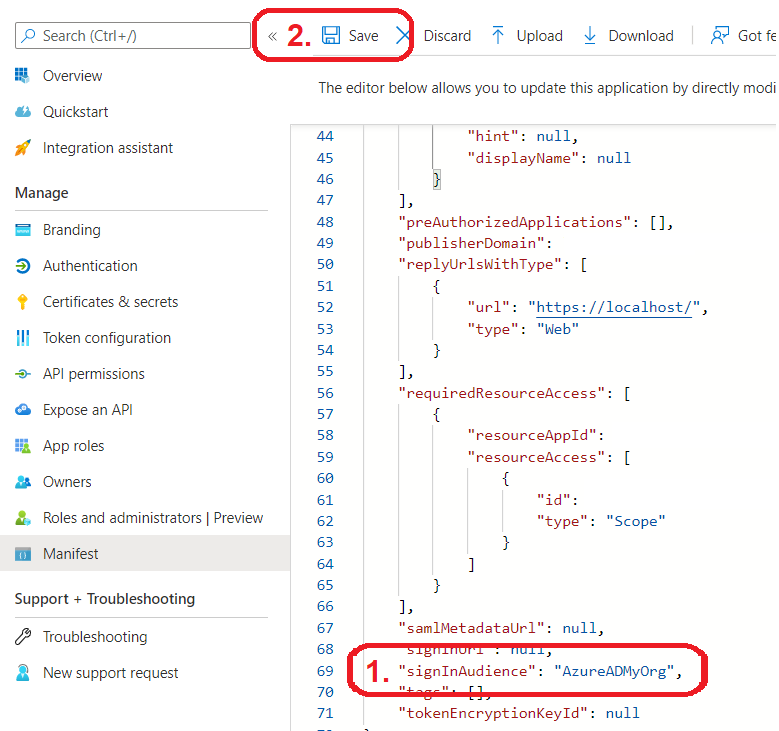
- In the Overview of your application in the Azure Portal, note down your Application (client) ID. You will need the ID to set the expiration date of the token in the Azure CLI. After that, go to Manifest.
Set the value of signInAudience to AzureADMyOrg and save the changes. Due to the limitation, existing credentials can be updated only for single-tenant applications. We recommend reverting SignInAudience to the original value after you update the expiration date of the token.
For all the supported values of signInAudience see https://docs.microsoft.com/en-us/azure/active-directory/develop/reference-app-manifest#signinaudience-attribute
- Create a new client secret with a long expiration date or update the existing client secret.
- Creating a new client secret with a long expiration date
Existing client secrets will remain unmodified for the application. New client secret will be added to the list of existing client secrets.Sign in with Azure CLI. You can select a tenant to sign in under with the --tenant argument. The value of this argument can be either a domain or the Azure object ID for the tenant.
az login --tenant <tenant>Create a new client secret with long expiration
az ad app credential reset --id <Application (client) ID> --end-date2299-12-31--credential-description"<description max 15 characters>"--appendExample: New client secret is available in the output. Note, that after you close the command prompt, you can no longer obtain the secret and you have to create a new one.
az ad app credential reset --id f6ab219c-5655-4e02-ac75-73a61db02c6d --end-date2299-12-31--credential-description"App secret"--append
Updating the existing client secret
You can update the expiration date only for one existing Client secret. The rest of the Application client secrets will be completely removed.
- Prepare the Value of the client secret for which you want to update the expiration date. At the time of the creation of the secret, this value was visible on the Client secrets tab.
Sign in with Azure CLI. You can select a tenant to sign in under with the --tenant argument. The value of this argument can be either a domain or the Azure object ID for the tenant.
az login --tenant <tenant>Reset client secrets for the application
az ad app credential reset --id <Application (client) ID> --password"<Client secret value>"--end-date2299-12-31--credential-description"<description max 15 characters>"Example:
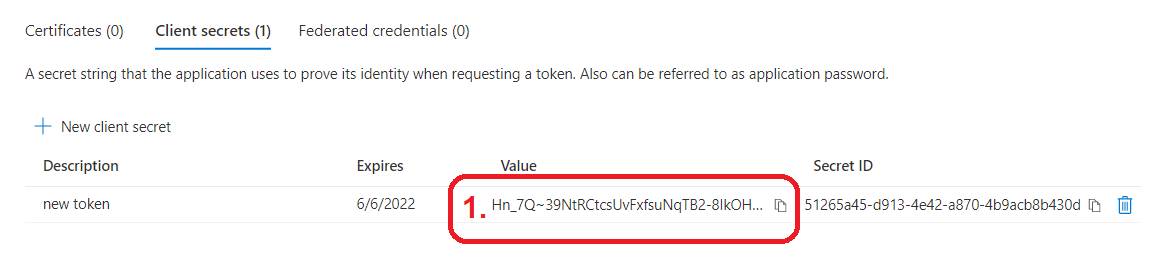
az ad app credential reset --id f6ab219c-5655-4e02-ac75-73a61db02c6d --password"Hn_7Q~39NtRCtcsUvFxfsuNqTB2-8IkOH-U~5"--end-date2299-12-31--credential-description"App secret"
- Prepare the Value of the client secret for which you want to update the expiration date. At the time of the creation of the secret, this value was visible on the Client secrets tab.
- Creating a new client secret with a long expiration date
- Revert signInAudience to the original value in the Manifest file.
Troubleshooting
User cannot log in, error "Response: 401 Unauthorized" in logs
Behavior
The error on the Management interface side occurs after the user logs in to the OIDC authorization server. The Management Service logs contain an error message:
User '<username not present in request parameter>' could not have been authenticated into the administration web interface due to error: '[invalid_token_response] An error occurred while attempting to retrieve the OAuth 2.0 Access Token Response: 401 Unauthorized: [no body]'.Cause and Solution
Management Service cannot obtain user access token because the Management Service OIDC client cannot authenticate to the authorization server. Check client secret registration on the side of your external IdP and use it in the configuration option openIdConnectClientSecret in the Management interface.
User cannot log in, error "The reply URL specified in the request does not match the reply URLs configured for the application"
Behavior
- The error occurs after the user logs in to the OIDC authorization server.
- Microsoft shows an error message "Sorry, but we're having trouble signing you in."
- The user is not redirected back to the Management interface.
Cause and Solution
You are accessing the Management interface using a different URL than the one registered in a redirect URI. For example, if you register https://management.company.net/login/oauth2/code/oidc, you must access the Management interface via https://management.company.net URL. This is because the same URL that you use to access the Management interface is provided in the request to the Identity Provider. A common source of this problem is using HTTP when HTTPS is registered.