Overview
The devices section covers all activities related to the management of devices in Dispatcher Paragon:
- Printers – devices and device groups
- Spooler Controller groups – Spooler Controller groups and Spooler Controllers
- Shared queues – management of shared queues and assignment of a shared queue to a specific user
- User tags – creation of specific user tags to be considered by the Rule-based Engine
- Printer templates – creation of templates to make mass installations easier
- Hardware – basic overview of YSoft SafeQ Terminal Pro 4, Dispatcher Paragonube 2 and YSoft be3D eDee
Printers
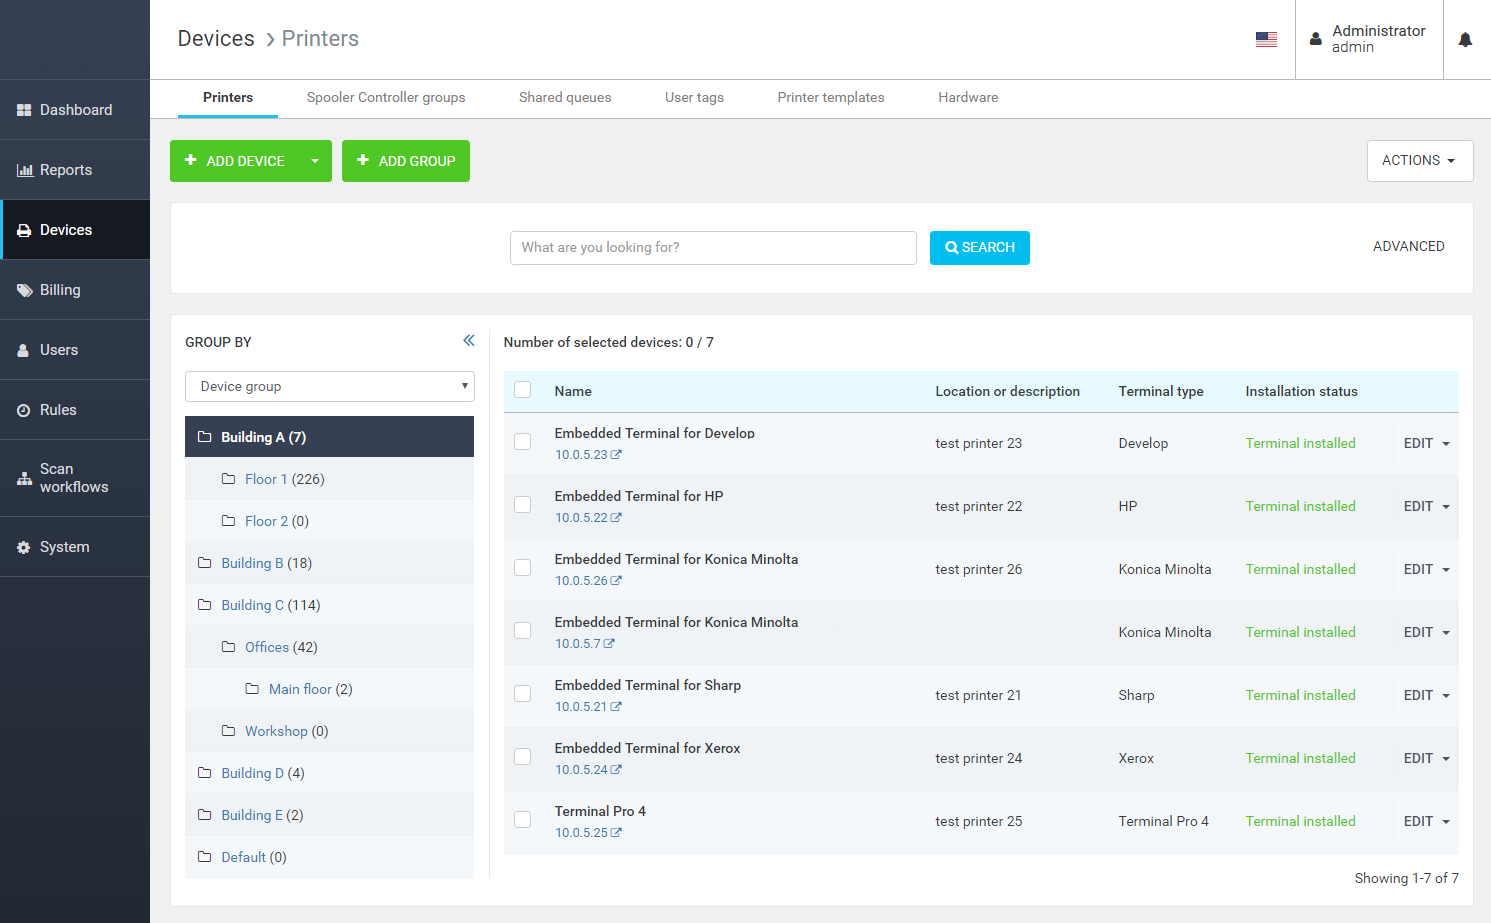
In the Device > Printer section, you can view all devices registered in Dispatcher Paragon.
Key features and actions of the Printers page are:
- Managing devices in device groups
- Creating and managing devices manually and from a template
- Reinstalling and uninstalling terminals
- Print QR codes for Mobile Terminals
- Moving devices among different groups
Showing device sessions (displaying the currently logged users on YSoft SafeQ Terminal Professional for a selected Spooler Controller group).
Force all supported devices' synchronization with Dispatcher Phoenix
You can select if devices will be grouped by Spooler Controller (including grouping by Spooler Controller and Spooler Controller group), Device group or not grouped at all. The selection is done by choosing the corresponding option from the Group by menu at the top of the grouping panel.
![]()
It is possible to collapse the grouping panel to have more space for the devices. This is the recommended layout when only a few devices are in use and there is no need for grouping.
The state of the grouping panel is remembered across the user sessions in case there is more than one device group or Spooler Controller group. Otherwise, the grouping panel will be collapsed. When more groups of either type are created, the grouping panel expands automatically for the first time to present all possible grouping options (which are remembered for each authenticated user as well as the grouping panel state).
![]()
Device synchronization status with Dispatcher Phoenix
When integration with Dispatcher Phoenix is enabled, a new column Dispatcher Phoenix status appears. In this column, there is shown a synchronization status of a given device with its counterpart in the Dispatcher Phoenix.
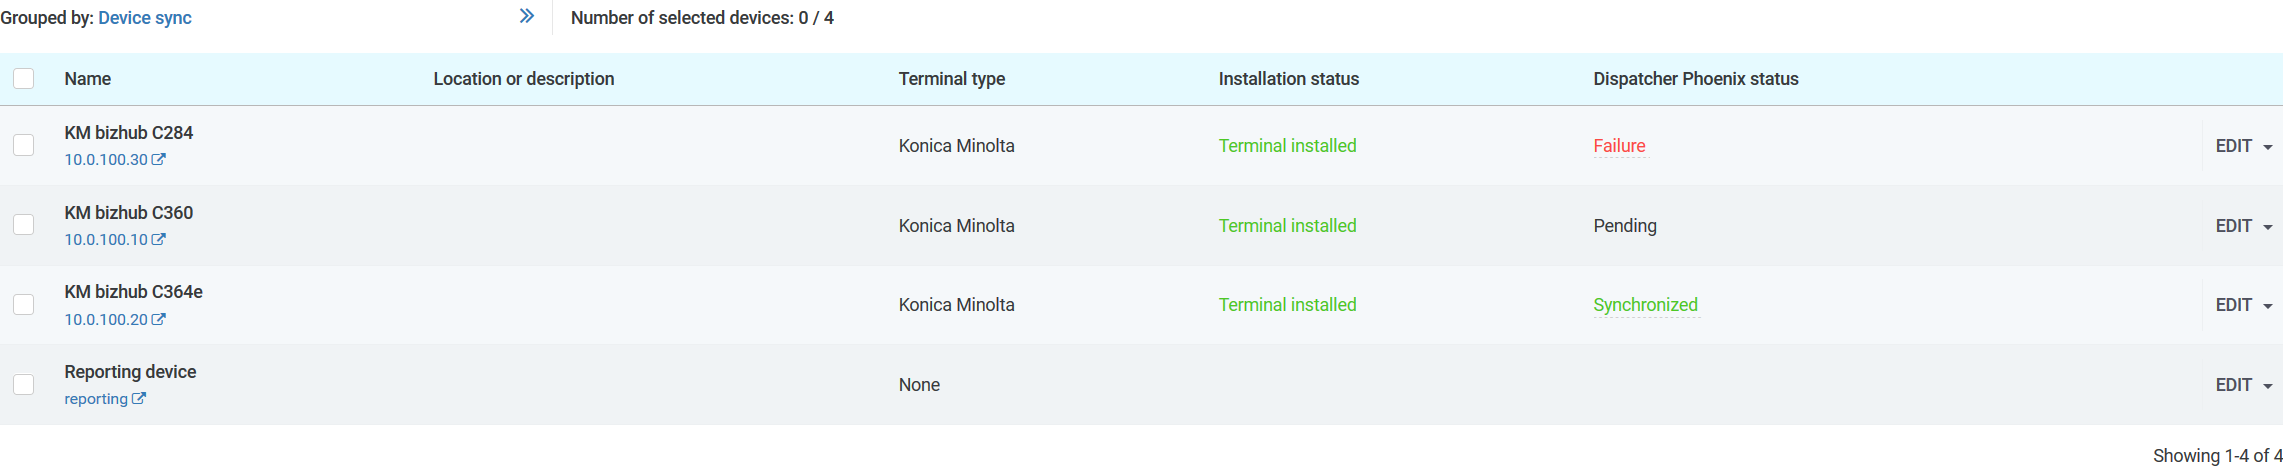
Synchronization status may be one of the following:
- Synchronized – means the device is correctly synchronized with its counterpart in the Dispatcher Phoenix.
- Failure – means there was an error when trying to synchronize the device with Dispatcher Phoenix. To find out the cause of the synchronization error, check the notifications in the Notification center (
 ).
). - Pending – means the device is currently waiting to be synchronized.
- No status – means this device is not eligible for synchronization with Dispatcher Phoenix. There can be multiple reasons why device is not eligible for synchronization (e.g. device has a MFD vendor unsupported by Dispatcher Phoenix, device's MAC address has not yet been resolved, etc.).
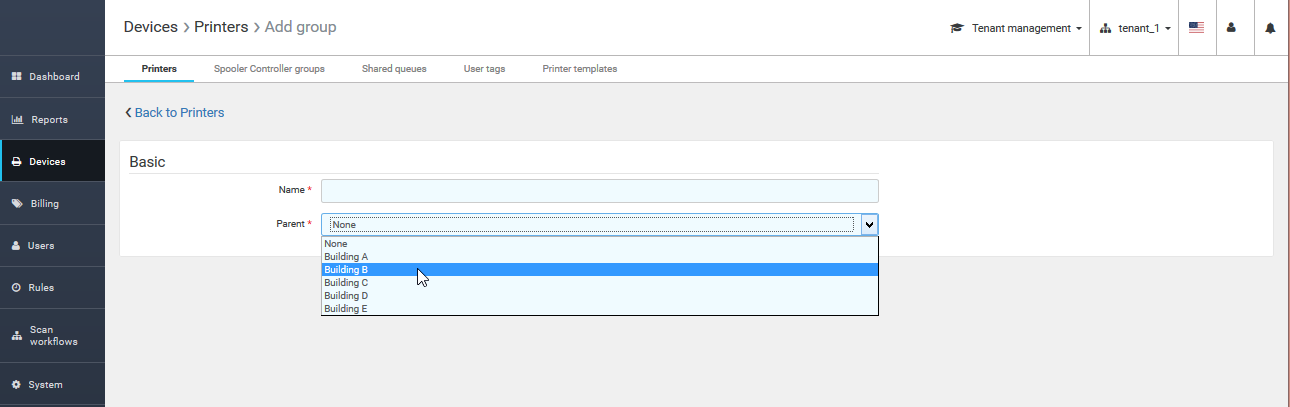
Device groups
Device groups help an administrator to group and structure devices according to their needs:
- Each device has to be part of a device group
- Three levels of device groups are allowed
- Device groups are independent of Spooler Controller and Spooler Controller Groups
- Mass operations can be performed based on device groups
When creating a new device group, define if the group is part of another group or is at the top level.
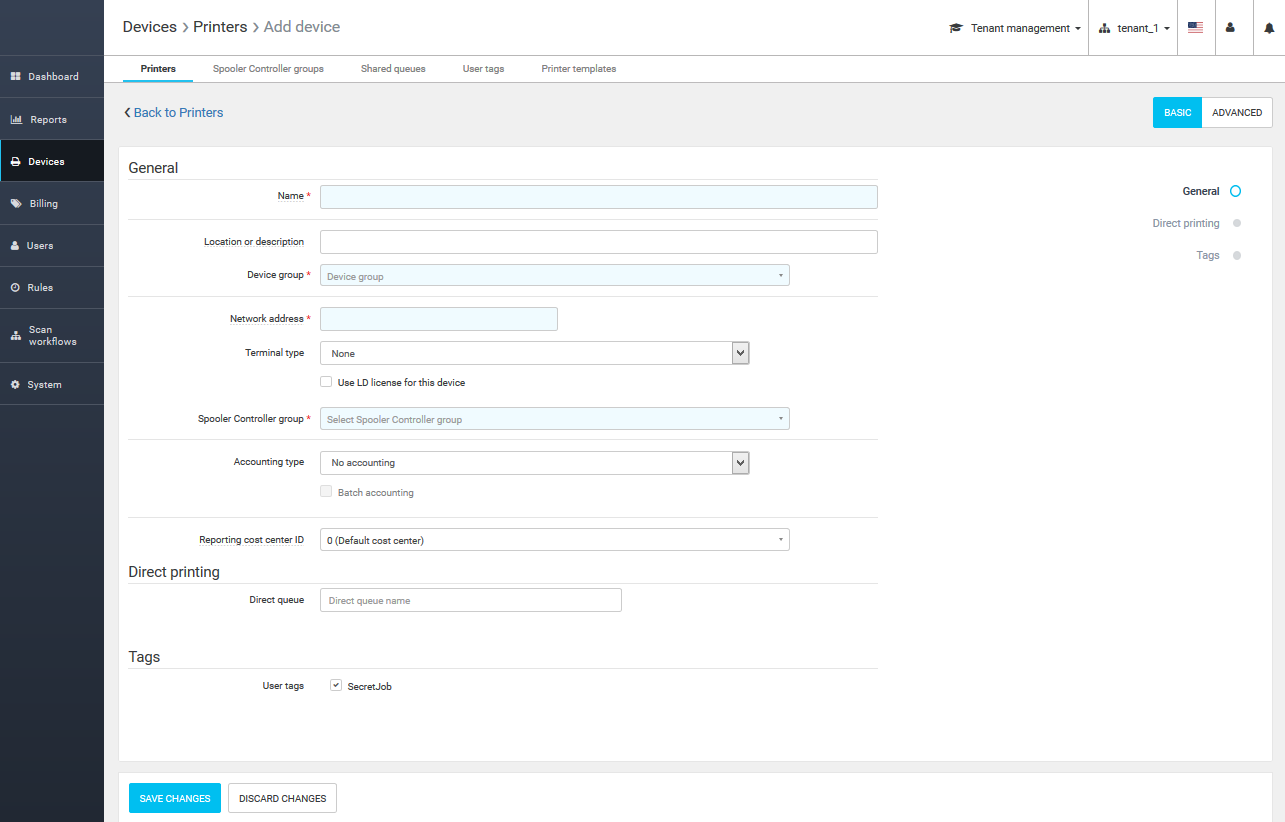
To create a new device, click Add new device or use the second menu of the button to use a predefined template.
Note: When adding a device that is entitled to use an LD license, tick the checkbox "Use LD license for this device". Device compatibility with the LD license will be checked via the SNMP once the device is saved.
Spooler Controller Groups
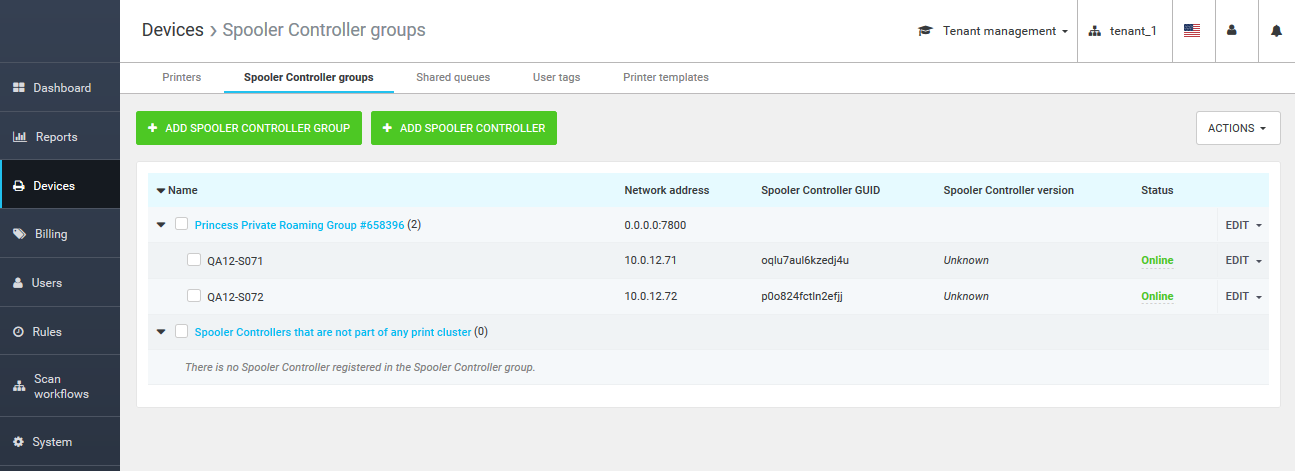
Spooler Controller groups can be accessed in Devices > Spooler Controller groups.
This page provides an overview and actions for Spooler Controllers and their assignment to a group.
A Spooler Controller group enables near roaming among particular Spooler Controllers nodes.
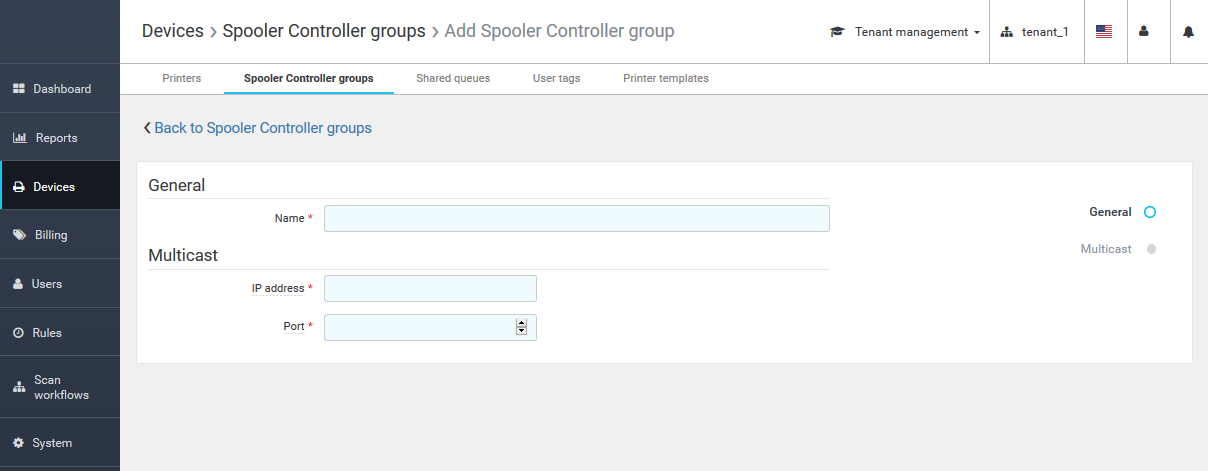
To create a new Spooler Controller group, click the Add button and enter the required values:
- Name – The unique name of the Spooler Controller group
- IP address – The multicast IP address of this Spooler Controller group (print cluster). Multicast addresses are addresses in the range from 224.0.0.0 to 239.255.255.255. To use one-to-one TCP connections instead of UDP multicast, use the value 0.0.0.0
Port – The TCP or UDP port of this Spooler Controller group (print cluster)
To configure Spooler Controller group discovery, see Spooler Controller Discovery based on DHCP Option 9.
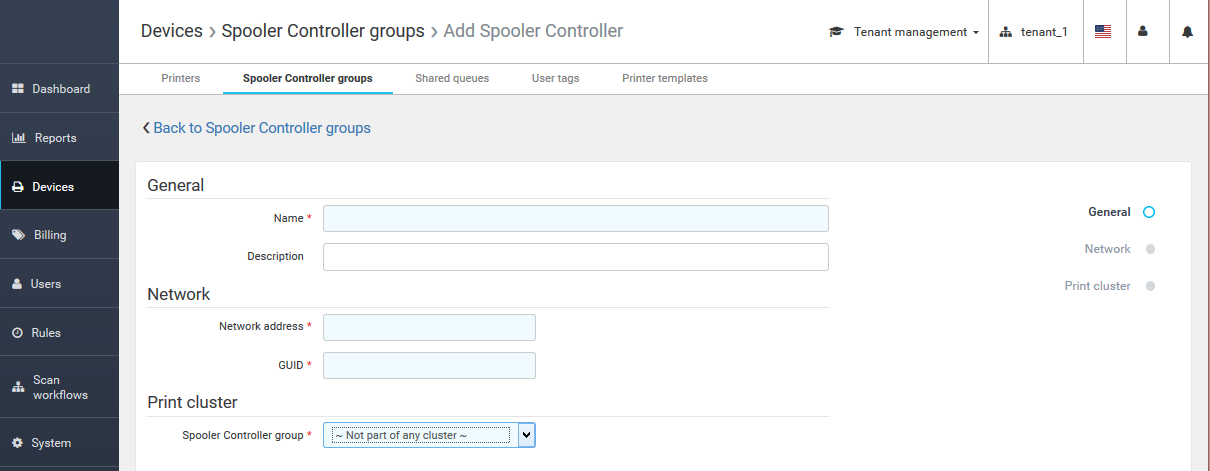
To create a new Spooler Controller, click the Add button and enter the required values:
- Name – The unique Spooler Controller name
- Network address – The IP address or hostname of the Spooler Controller
- GUID – The unique identifier of the Spooler Controller. The GUID must be exactly the same as the GUID defined in the Spooler Controller's configuration file guid.conf (in the property localGUID). This is the value that was entered during the Spooler Controller's installation
- Spooler Controller group – The Spooler Controller group (print cluster) of which the Spooler Controller is a member. The default value is "Not part of any cluster", which makes the Spooler Controller a standalone and, as the text states, not part of any print cluster
When creating a new Spooler Controller, assign it to an existing Spooler Controller group.
When Spooler Controller is automatically added, the name is by default the hostname or the IP address.
You can edit the name or description for a better overview in the Management interface in the edit form by clicking the Edit button next to the Spooler Controller.
For YSoft OMNI Bridge and Cloud deployments, the editing Spooler Controller's name or description is not allowed.
Shared Queues
Shared queues are secured queues. They enable multiple users to access selected documents (in accordance with the users' rights). All jobs sent to the shared queue are automatically accessible to all users with access rights to that queue.

To add a shared queue, follow these steps:

- Go to Devices > Shared queues and click Add new shared queue.
- Define the name of the shared queue and save.
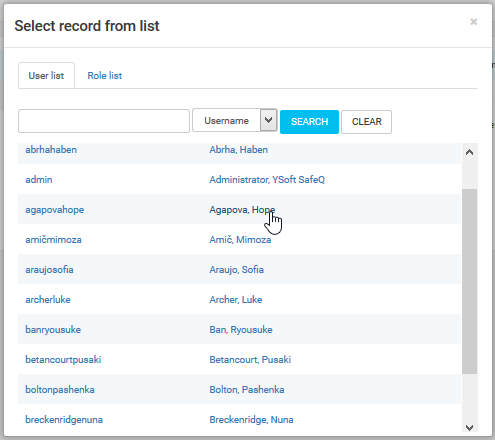
- Select the Shared queue from the list and click Add user to selected queue.
- Select the desired users or roles to be added to the queue.
User Tags
Device templates can be found in the web interface: Devices > Users tags.

On the Users tags page, click the button, enter the tag name and save it using the Save tag button.
Tag name correct format: The name must not contain spaces, must be 3-10 characters long, and can consist of only alphanumeric characters.
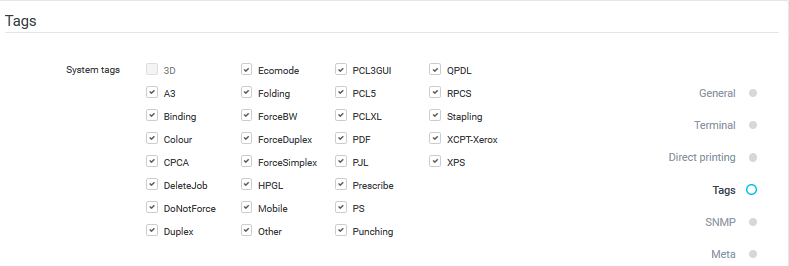
Once tags are created, define which of them to allow or disable. Open any existing (or create a new) device and go to the Tags section.
If the device has an embedded terminal, it must be reinstalled when the system tags are changed. The device wizard will prompt for a re-installation when the device changes are saved.
Printer Templates
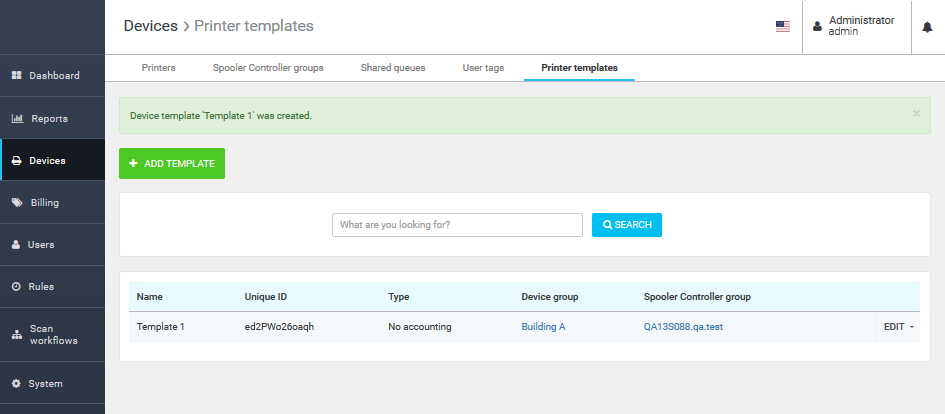
Device templates can be found in the web interface: Devices > Printer templates. On this panel, a user can manage device templates.
Attribute | Description |
|---|---|
Name | The device template name |
Unique ID | The unique ID of the template generated by the system |
Description | A device template description |
Device group | The relation to a specific group of devices |
Type | The device templates' accounting driver |
Spooler Controller group | The relation to a specific Spooler Controller group |
The definition of a template is the same as when creating a new device without a template. To create a new device from an existing template, use the menu under the Add device button.

Hardware
In the Devices > Hardware section, all external terminals and SafeQubes deployed in Dispatcher Paragon can be viewed.
Key features and actions of the hardware page are:
- Listing and searching each deployed YSoft SafeQ Terminal Pro 4, YSoft be3D eDee and YSoft SafeQube 2
- Displaying basic information about the Terminal – its identifier, network address, connection status and software update status

Possible software update status values:
- Out of date – The device has not received information about the update yet (it may be offline, configured incorrectly, or the heartbeat interval may be too long)
- Pending – An update was scheduled, but it has not started yet
- Updating – The update is currently being installed
- Failed – The update installation failed
- Up to date – The device has the correct software version installed, no updates were scheduled