Guide how to use Management web for administration of YSoft hardware.
Screenshots
Screenshots in this guide are from OS version 4.8, on older versions there may be slightly different colors and layout.
Basic operations
Login
- Go to https://<device IP address>:8083/web. On OS versions lower than 4.2 the address has to contain the particular tab, e.g https:// <device IP address> :8083/web/logs/ for logs tab.
- Login as manager (default login is manager and password oCfpB112g5bZpOcywAp7)

- Use web interface to interact with the device. When no activity is done for longer than 30 minutes you will be automatically logout.
Dashboard - System information
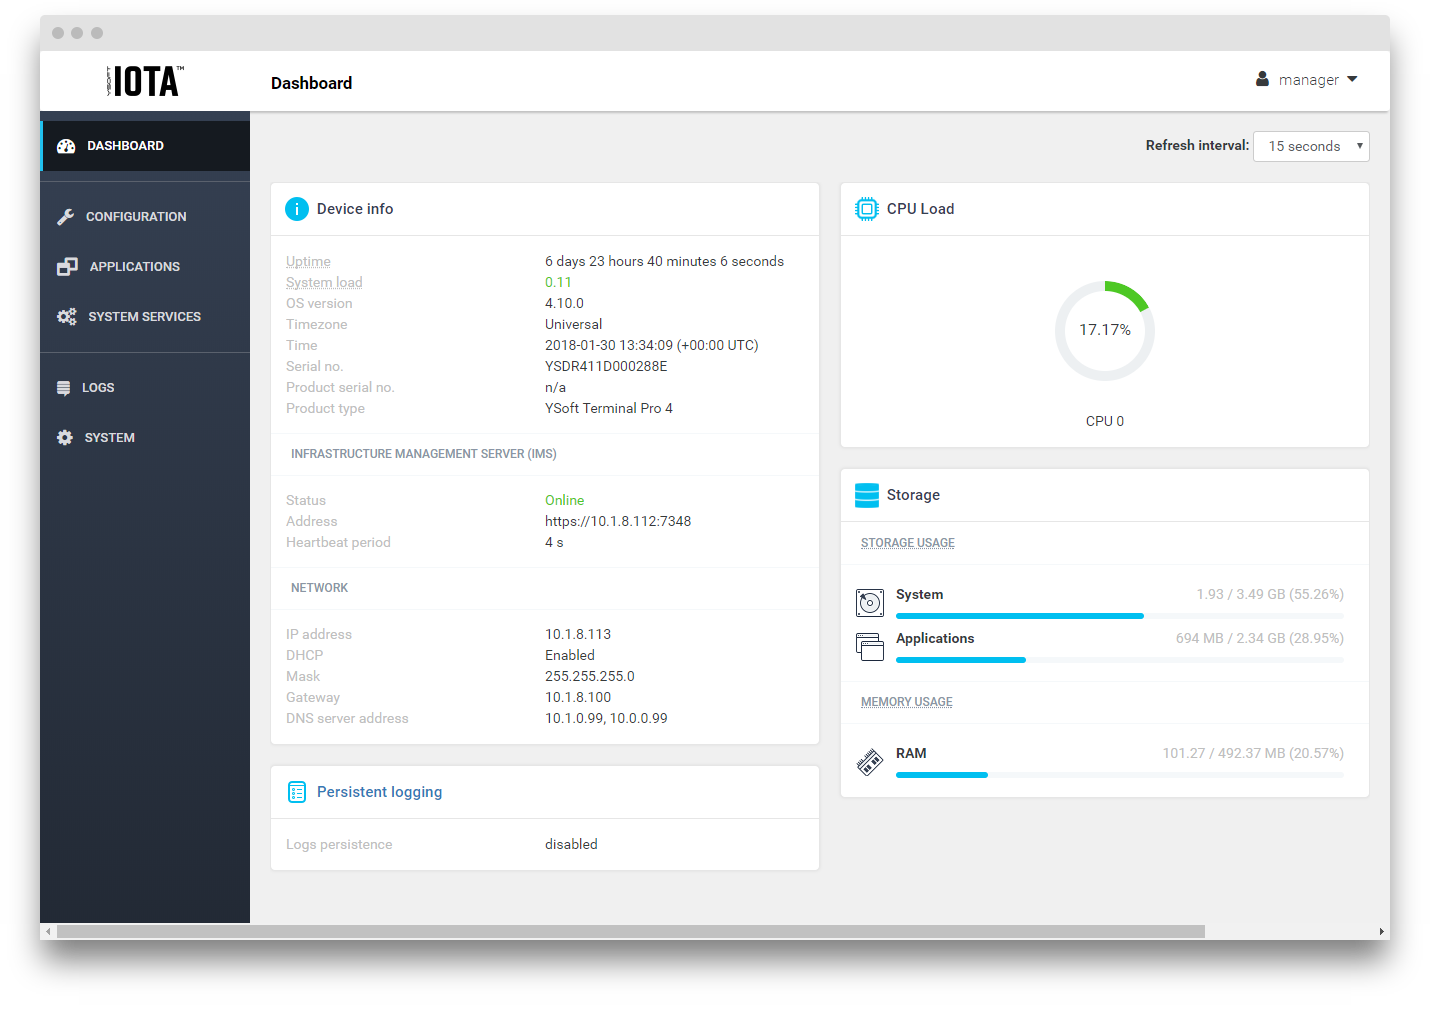
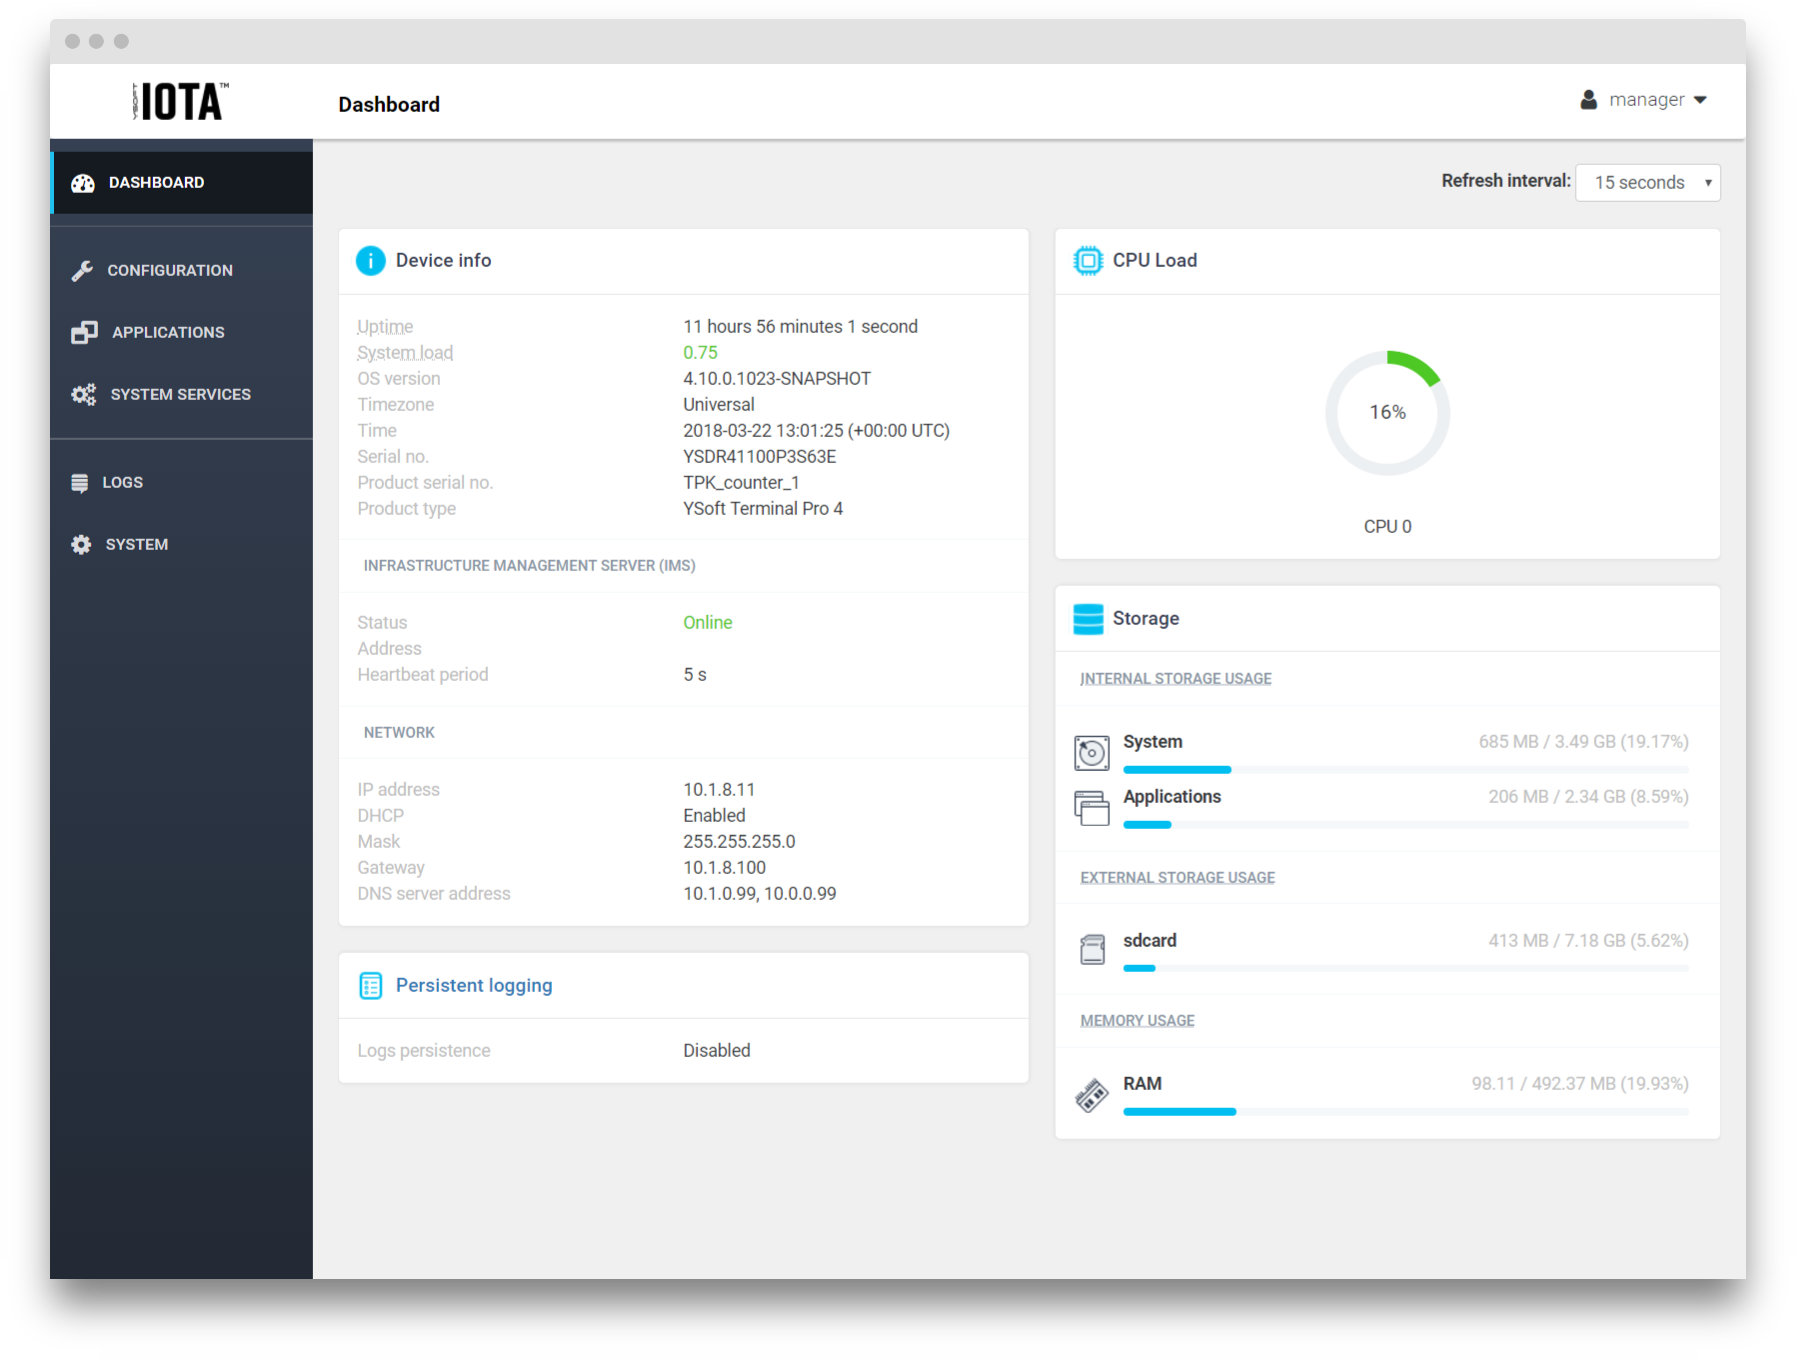
This is the default page you will be after successful login. It is accessible by Dashboard option in the left menu.
It contains some useful system metrics such as uptime, system load, cpu, ram and disk usage. For automatic refresh you should change refresh interval from 5 to 60 seconds.
Page layout:
- Main menu on the left side - these options brings you to the pages (each page may consist from several tabs) by clicking on them. Active page is highlighted (Dashboard on this screenshot).
- Tab switcher bellow title bar (not use on the Dashboard page) - on pages with several tabs you may switch these tabs by clicking on them.
- User drop down menu in the top right corner - display/hide by clicking on the arrow symbol.
- Content in the middle with Refresh interval dropdown menu, where you may choose interval for updating displayed info without reloading whole page (not used on all pages).
Logout
- Click in the right top corner near your login name on arrow down symbol. A popup menu will show up.

- Click on the Log out option.
Change Password
- Click in the right top corner near your login name on arrow down symbol. A popup menu will show up.

- Click on the Change password option.
- Fill in fields (your current password with which you have signed in to Current password field and new password twice to the other fields).
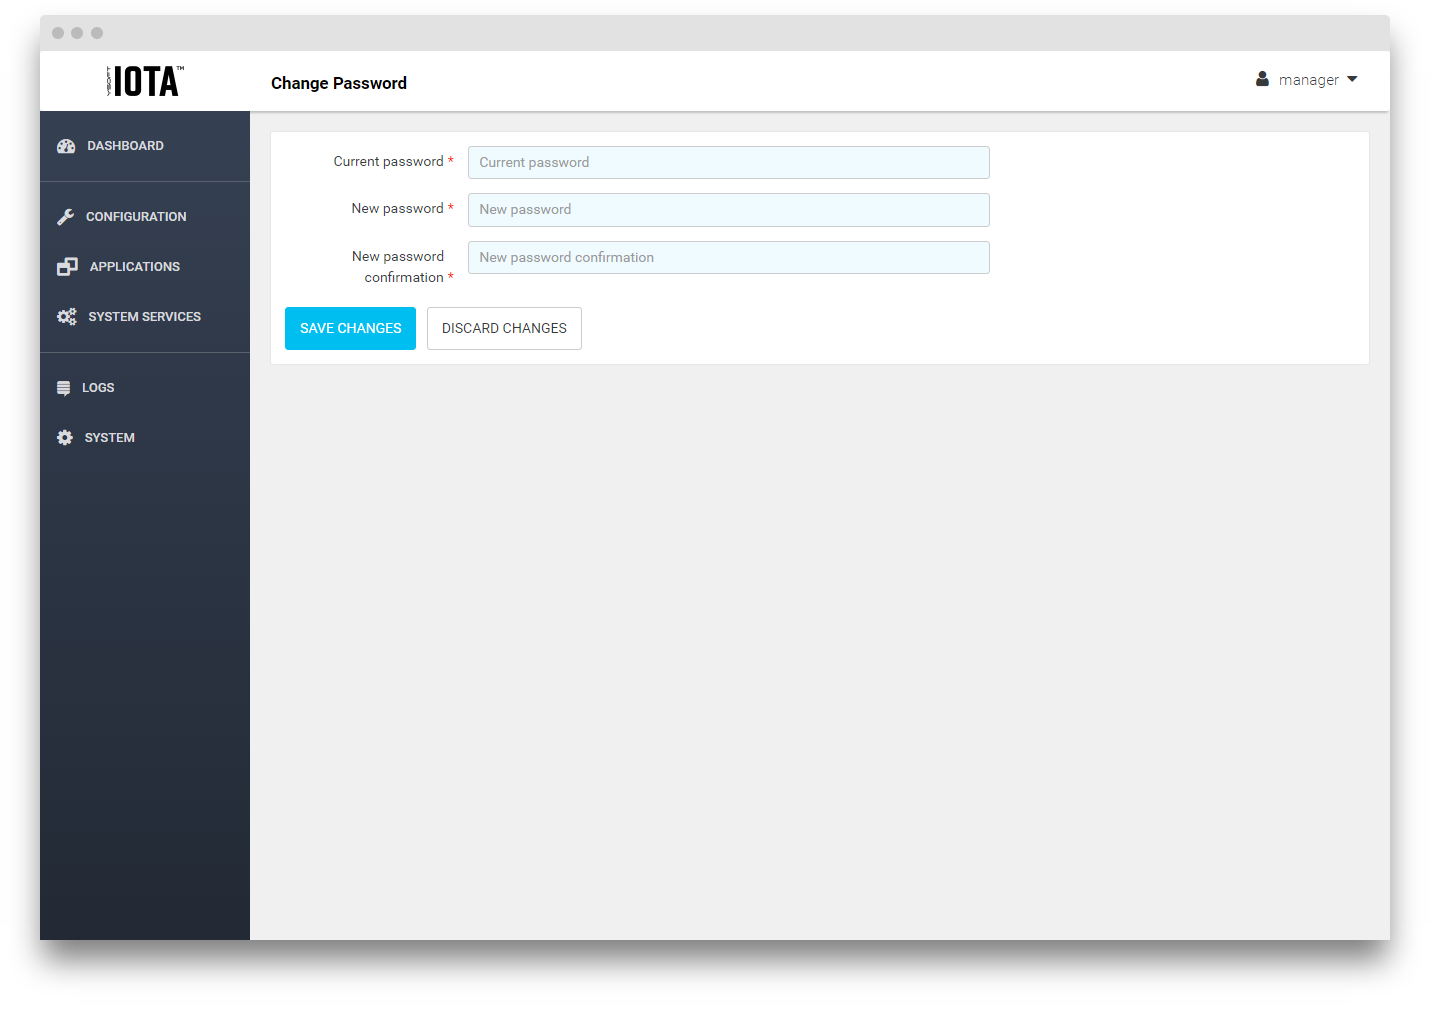
Press Save changes button.
Applications
Installing application
- Login to the web interface and go to the Applications page.

- Press Install application button .
- Select an application package (in tar.gz format). The name of the application package is parsed during installation, the part before first dash ("-") is used as a name of an application, whatever is after it until the .tar.gz is used as a version of the application. The application version is optional. If there is no dash in the installation package name, the application will be installed without specified version. For example: application with package name demoapp-1.2.tar.gz will be installed as application with name demoapp and version 1.2.
- Select whether automatically start installed application after system boot by Auto start switch. Application with active auto start will be started immediately after the installation.
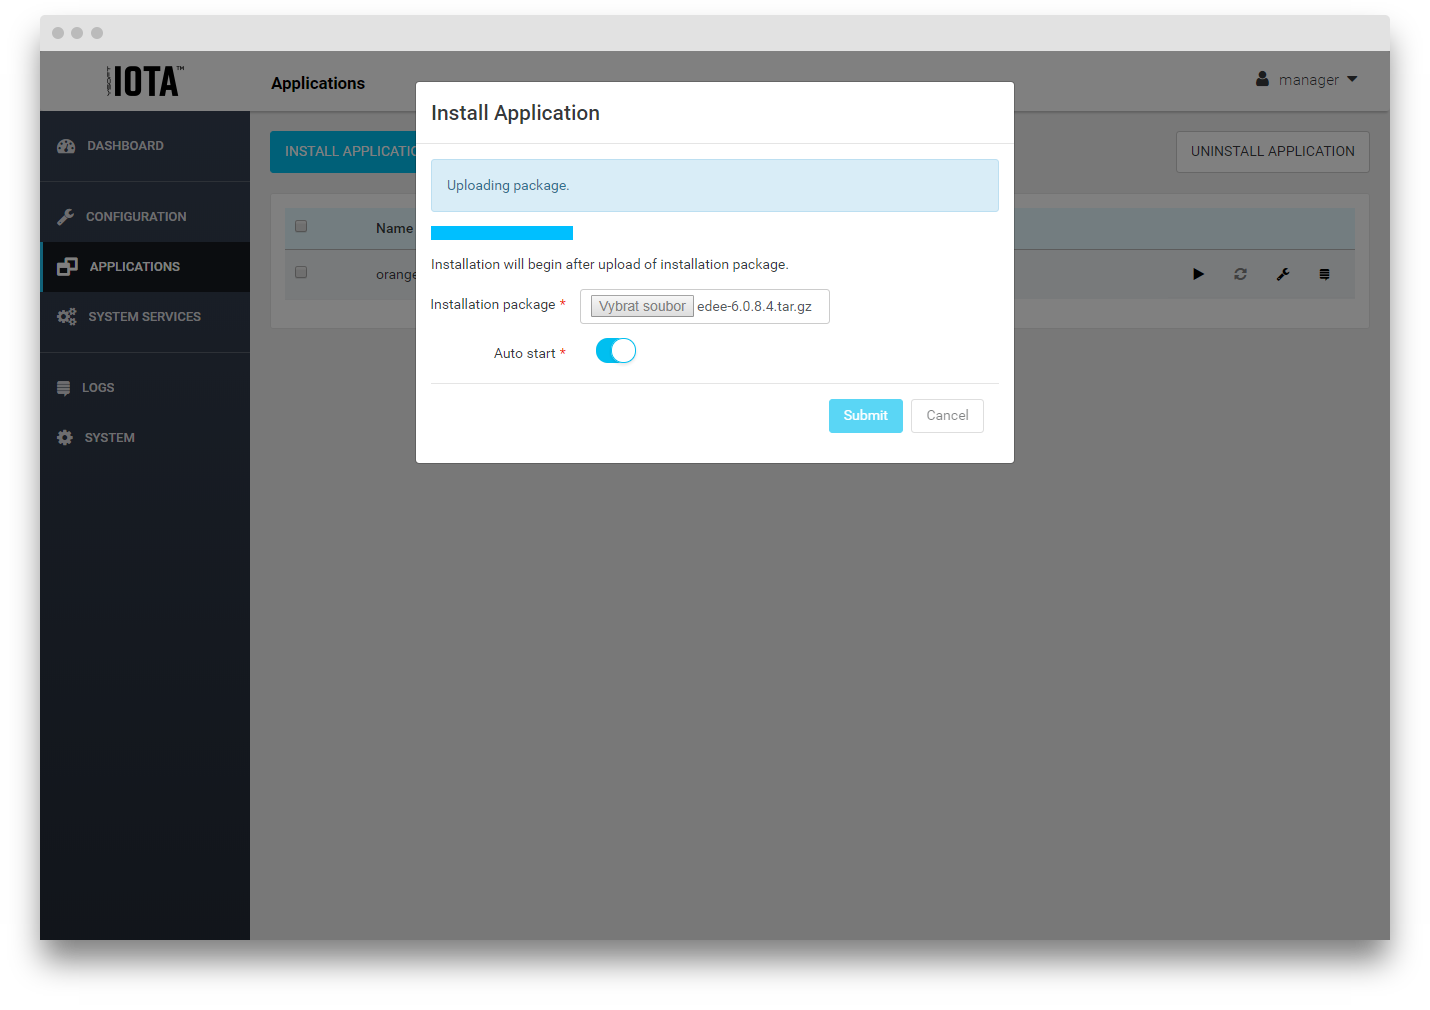
- Click Submit button to start application upload and install. You will be informed about upload status by progress bar.
Uninstalling application
- Login to the management web and go to Applications page.
- Check applications which you want to uninstall on the left side of applications table (on picture bellow the orange-1.2 app is chosen for uninstall).
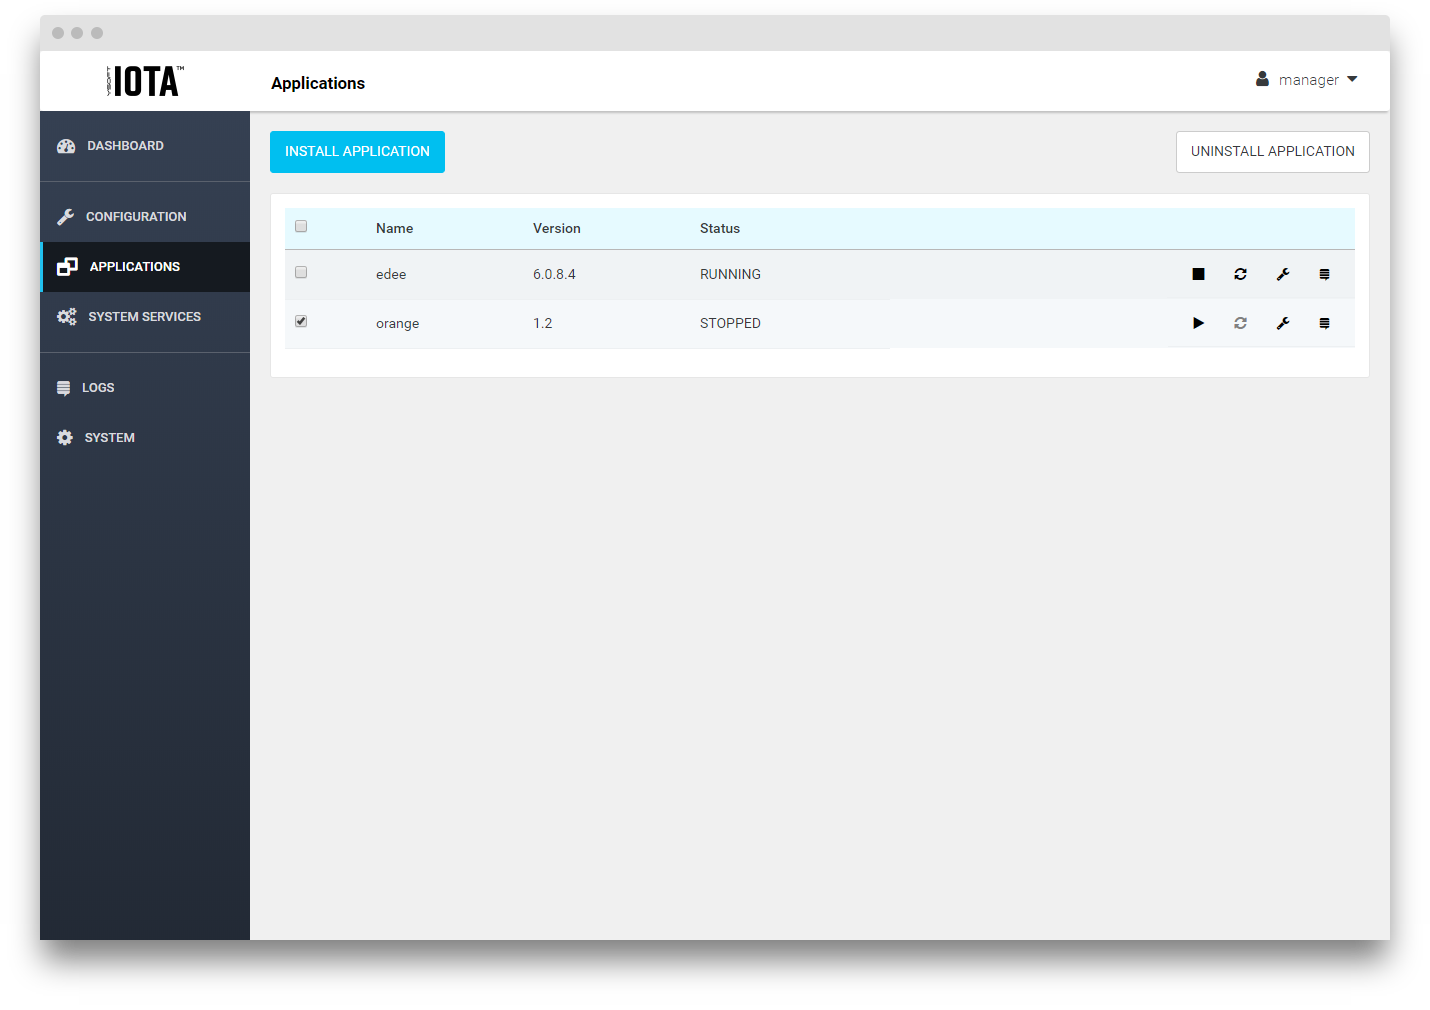
- Press Uninstall application button in top right corner and confirm uninstallation by clicking on the Uninstall button.
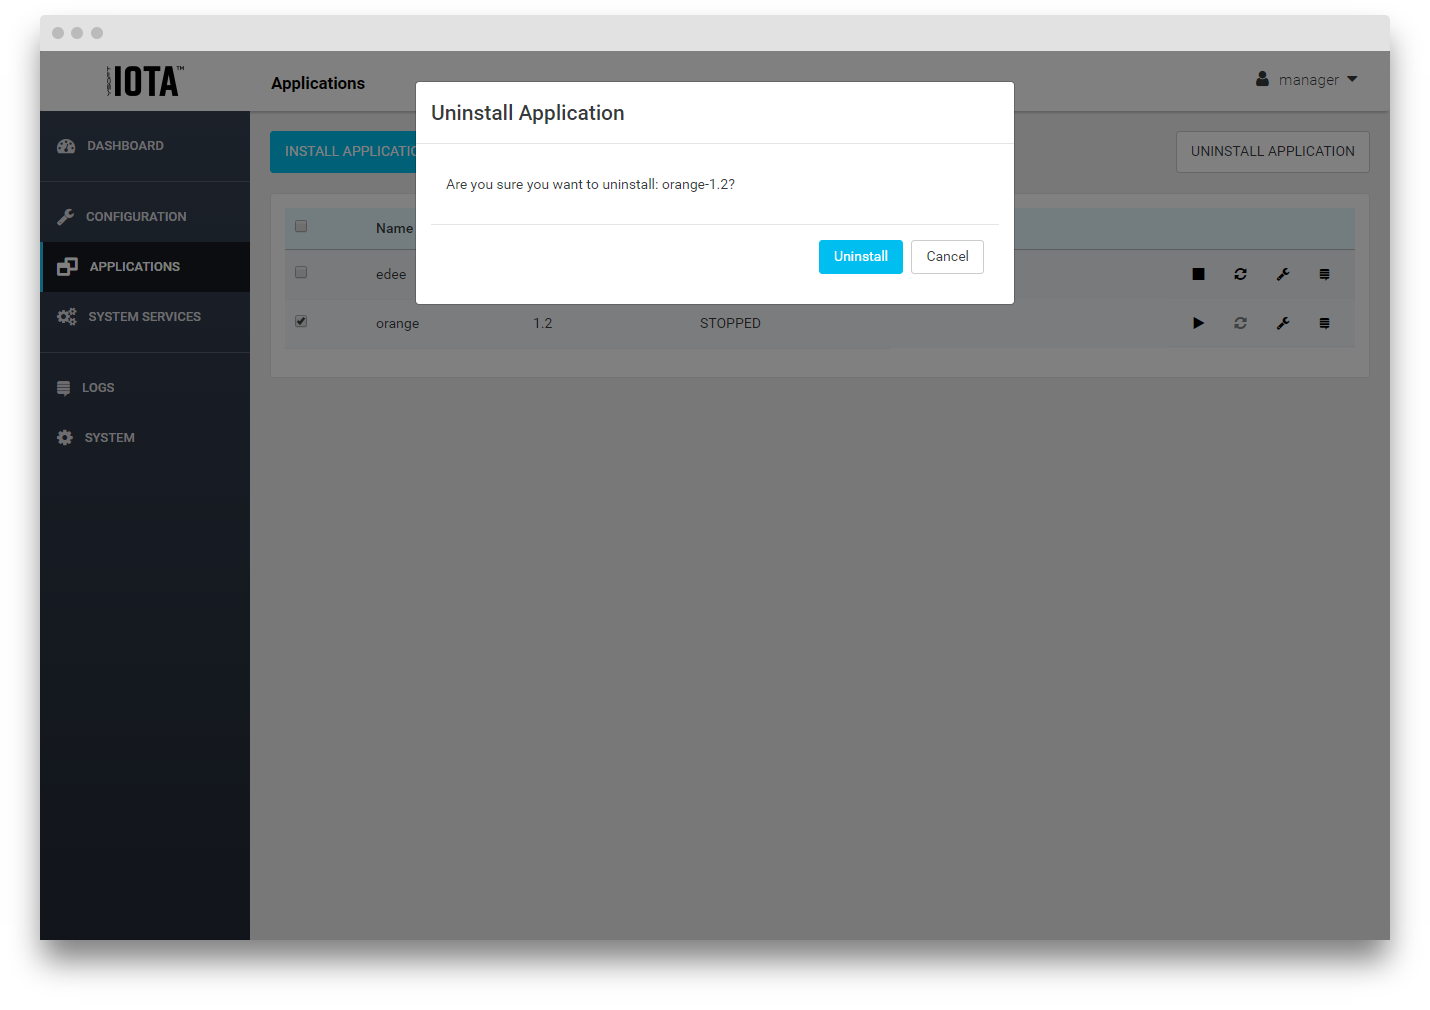
- You will be informed about app uninstallation.
When the uninstalled application is in busy state its uninstallation may be postponed until it completes its job. You will be informed about that by status message.
Reloading of the Applications page may be needed to refresh applications list after uninstallation.
Configuring Application
You may see installed and running (status RUNNING) applications after logging in to the web interface and going to Applications page.
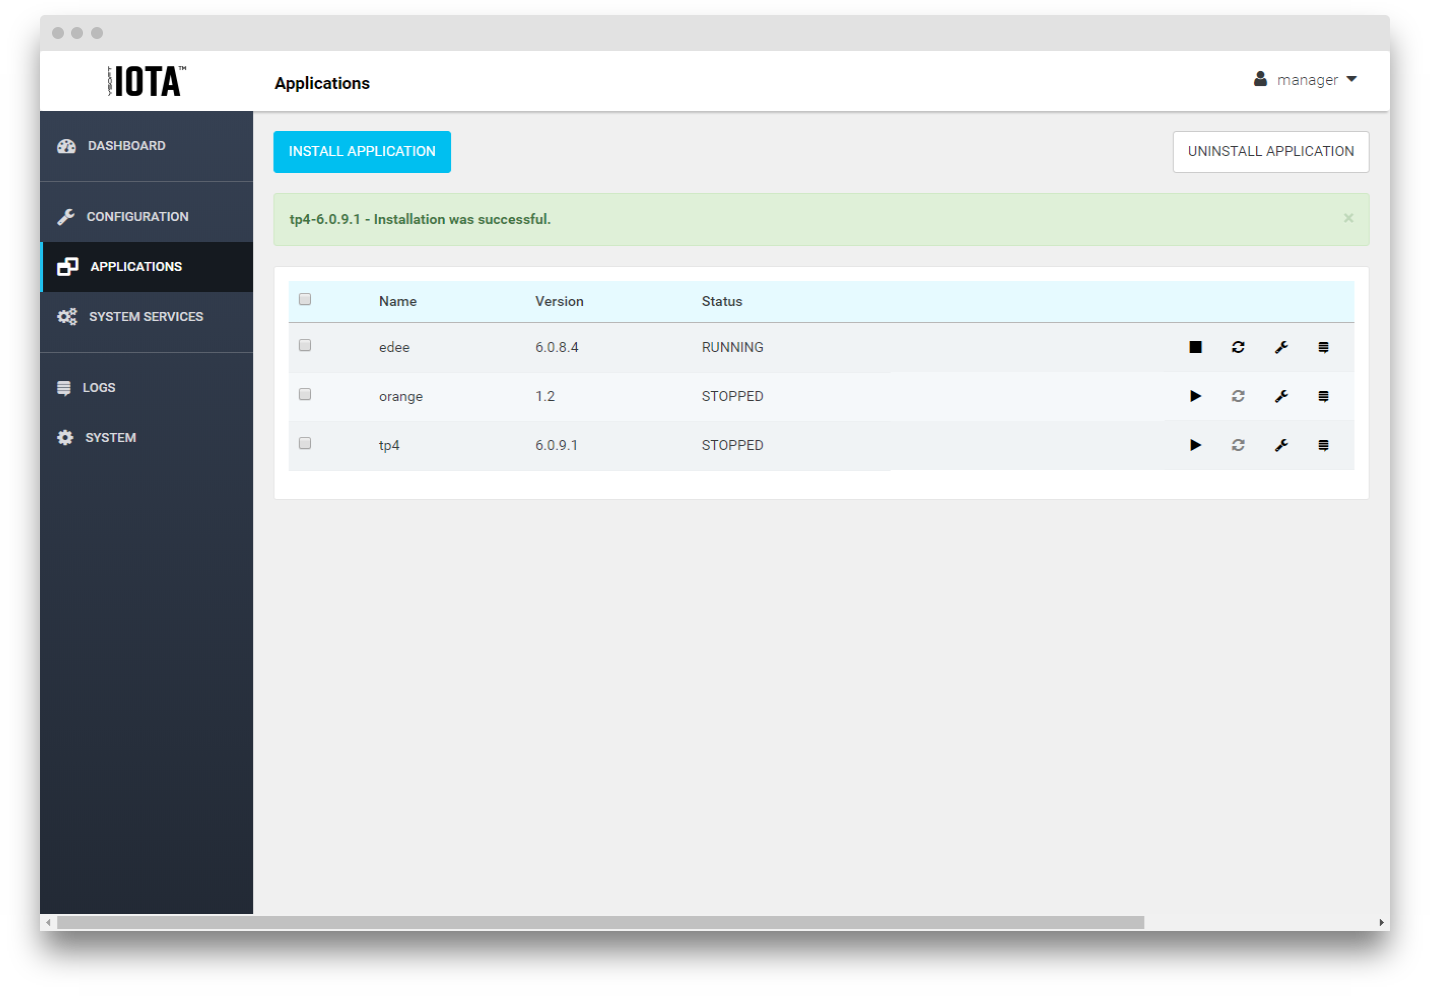
It is possible to control installed applications using icons on the right side (see picture above):
- Stop (rectangle icon) running application.
- Start (play button/arrow right) stopped application.
- Restart (circle) running application (shadowed arrows in circle is disabled because application is stopped so it can't be restarted).
Rest of the icons may be used to access more detailed info about each application:
- Edit and details (wrench icon) - see sections Setting autostart and Configuring application parameter below for more info.
- Show logs (stack icon) - display logs filtered for this application, see section Logs below for more info.
Application stop and restart checks if the application is busy before stopping it. If the application is not ready to be interrupted at the moment then it schedules the required action for the earliest moment application gets into non-busy state.
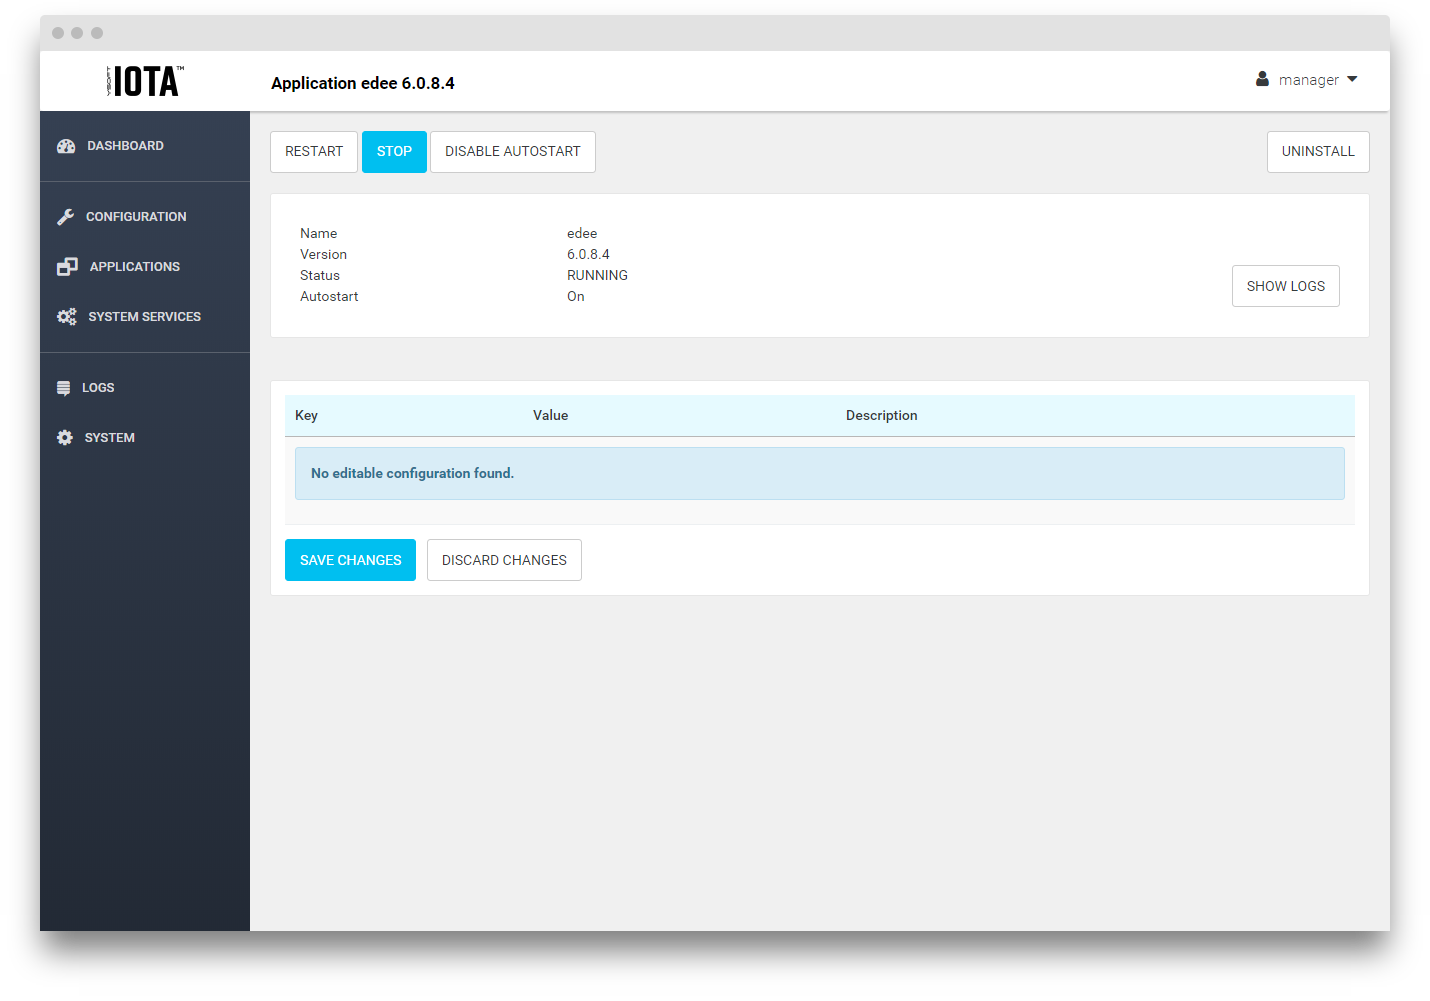
Setting application autostart
In the Applications page click wrench icon for a specific application. You will get to Application details page where you may enable autostart (or disable it when it is enabled), start, stop and restart the application.
Configuring application parameters
Only parameters defined in application description file can be changed over web interface.
- Login to the web interface and go to the Applications page.

- Click on wrench picture in row of application you want to configure to get into Application details page.
- At the bottom of the page see configuration table. Table describes configuration of the application with keys on the left, values in the middle and descriptions on the right.
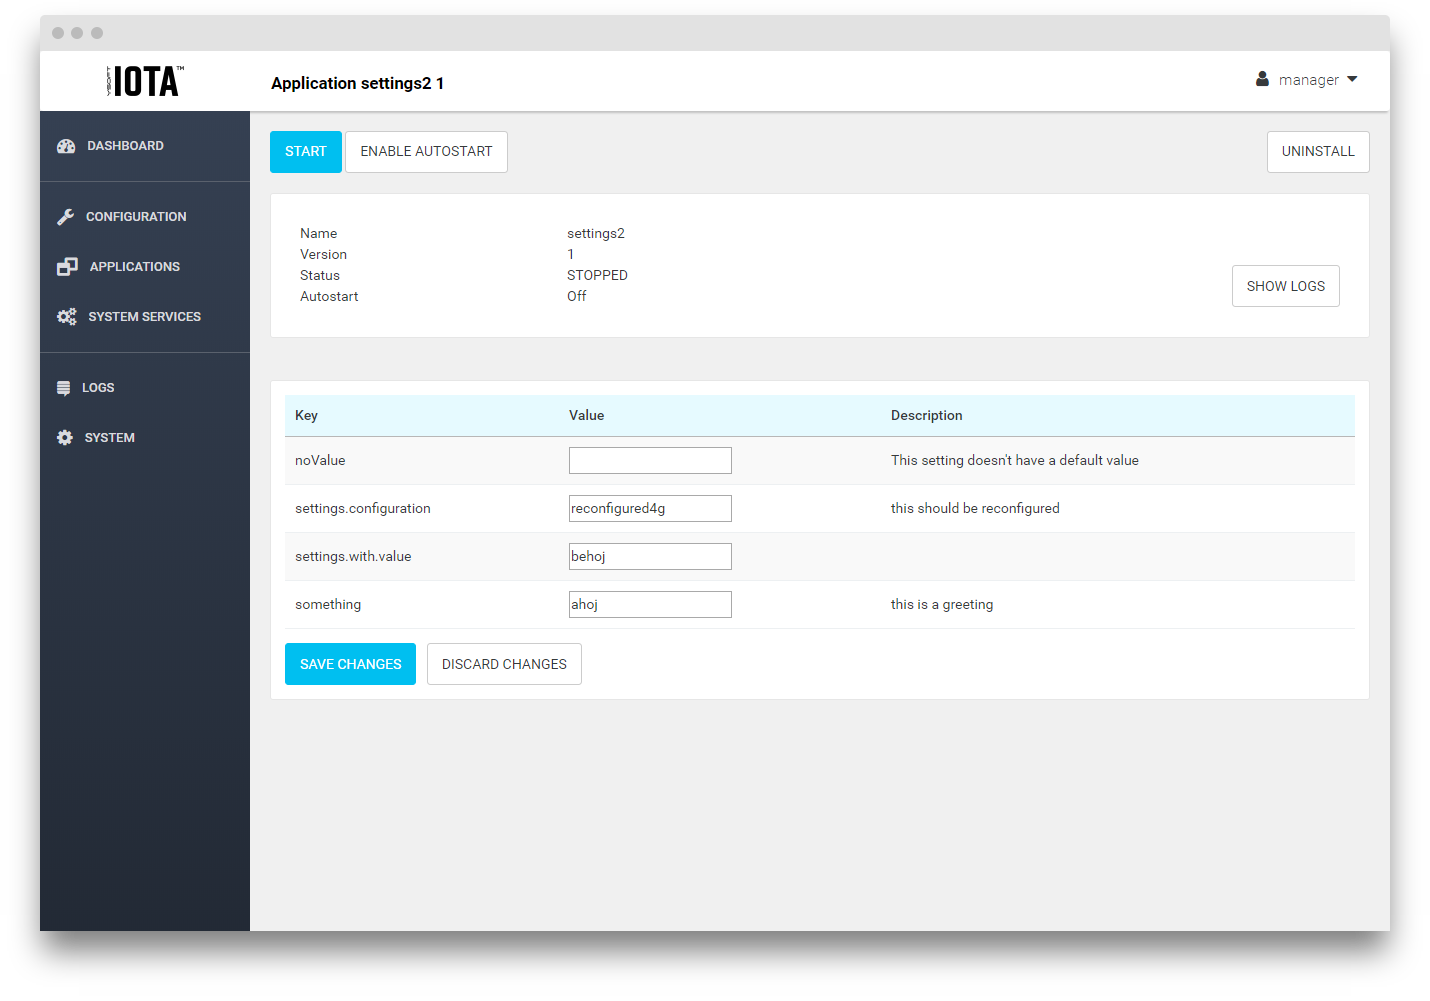
- Configure displayed parameters.
- Press the Save changes button.
For configuring applications first specify to which IMS server the device should connect (see Connection to Dispatcher Paragon Infrastructure Service (IMS) bellow)
System
Operating system update
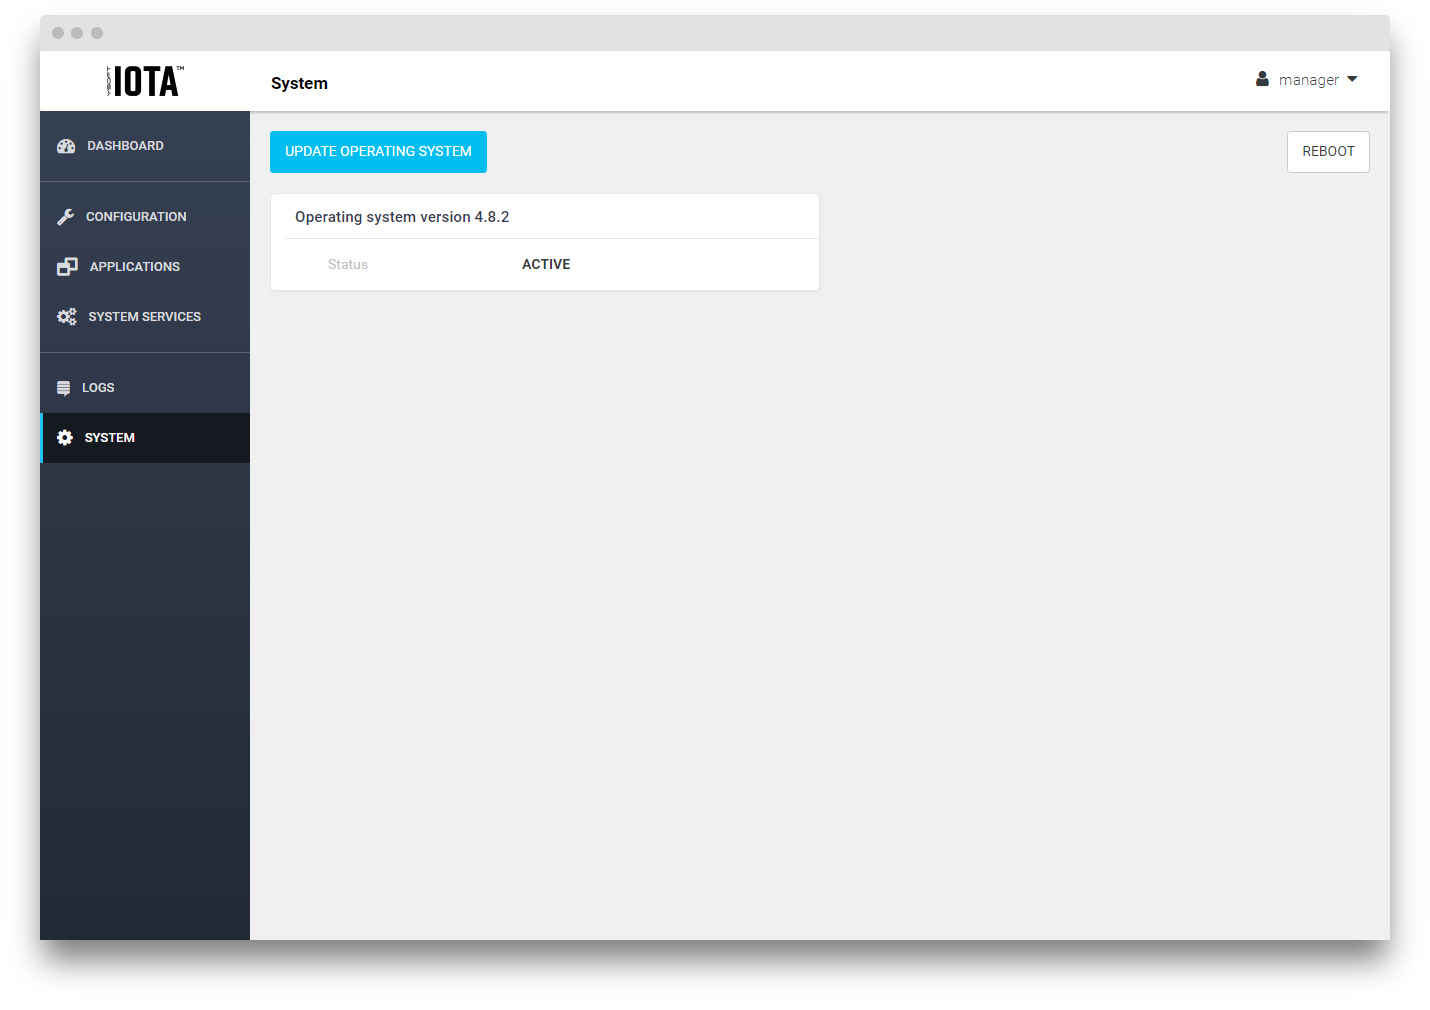
- Login to the web interface and go to the System page. You may see current OS version there.
- Press Update operating system button.
- Select operating system package from your file system (.tar.gz file) and click Submit button.
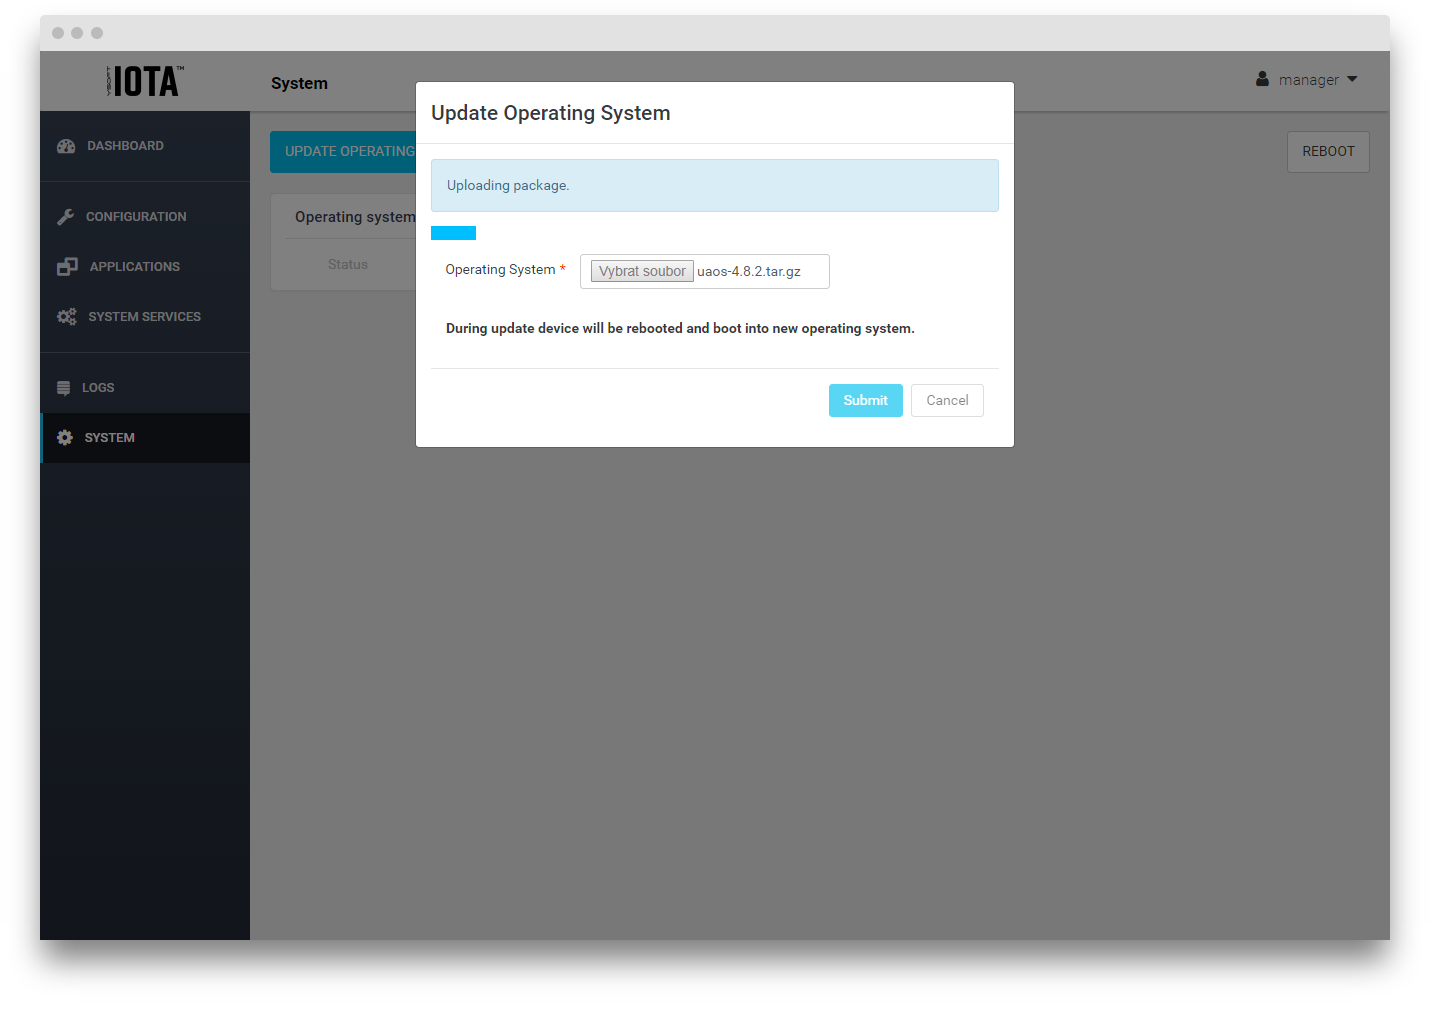
- Operating system will be uploaded, updated and device will automatically reboot. You will be informed about upload process by progress bar.
After the restart login to web interface again and check on Dashboard tab actual OS version.
Controlling system services
This feature is available in OS version 4.4 and higher.
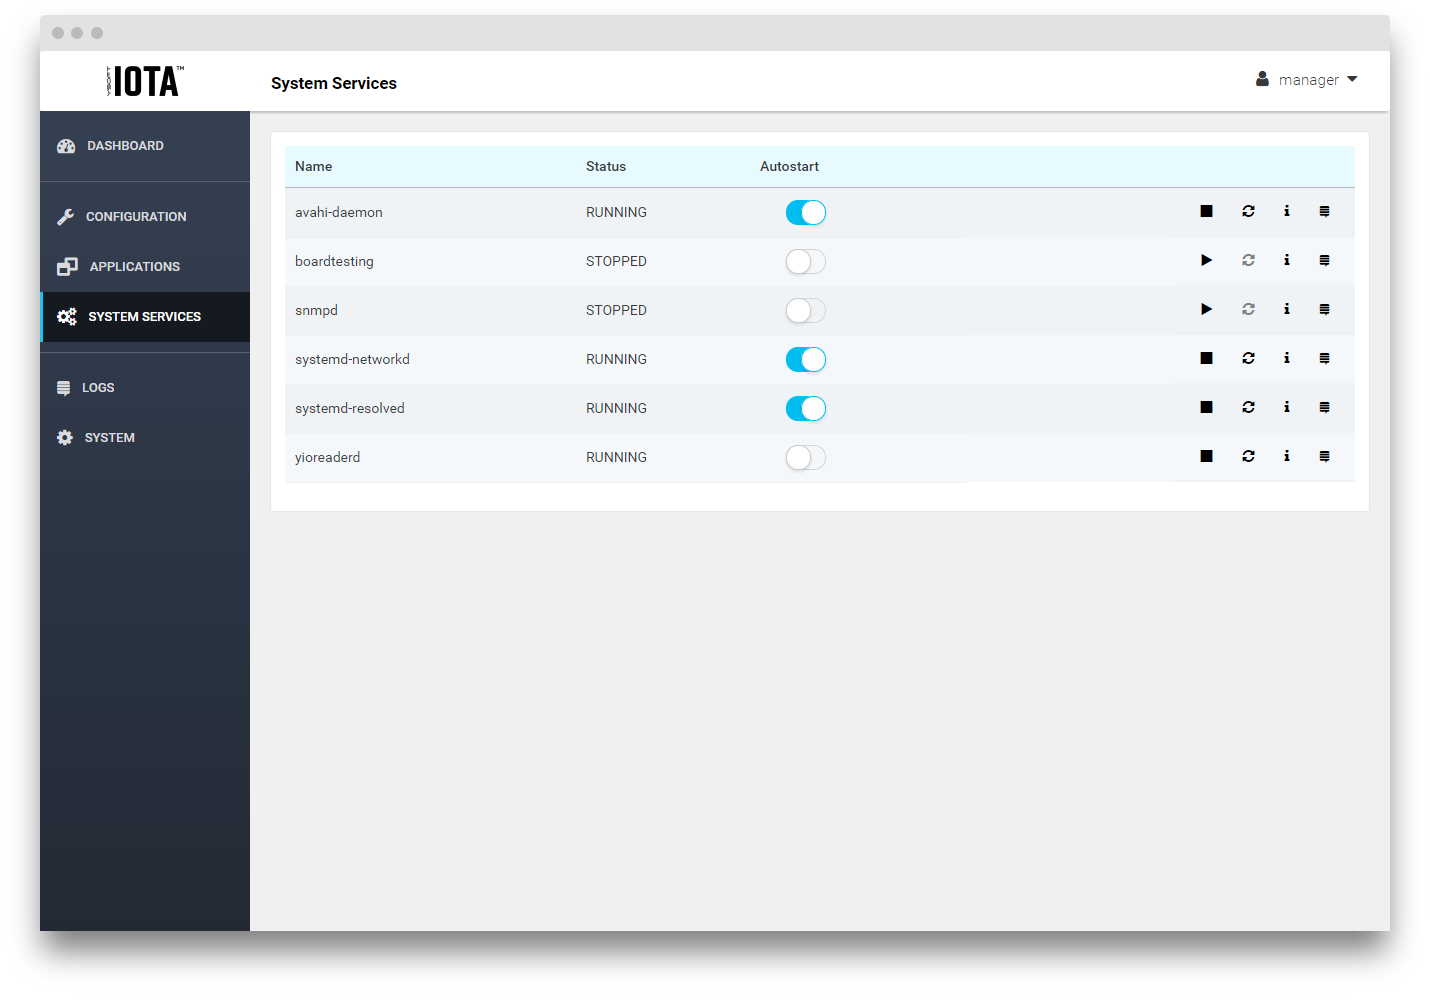
You may see supported and running (status RUNNING) services after logging in to the web interface and going to System services page.

It is possible to control these services using icons on the right side (see picture above):
- Stop (rectangle icon) running service.
- Start (play button/arrow right) stopped service.
- Restart (circle) running service (shadowed arrows in circle is disabled because service is stopped so it can't be restarted).
- Set autostart (switch in the middle), services with autostart will be started automatically after system boot.
Rest of the icons may be used to access more detailed info about each service:
- Service details (info icon) - see section System service details below for more info.
- Show logs (stack icon) - display logs filtered for this service, see section Logs below for more info.
System service details
When you login to the web, go to System services tab and then click 'info' icon for a specific service you will get to a detail page of the given service where you may enable autostart (or disable it when it is enabled), start, stop and restart the service.
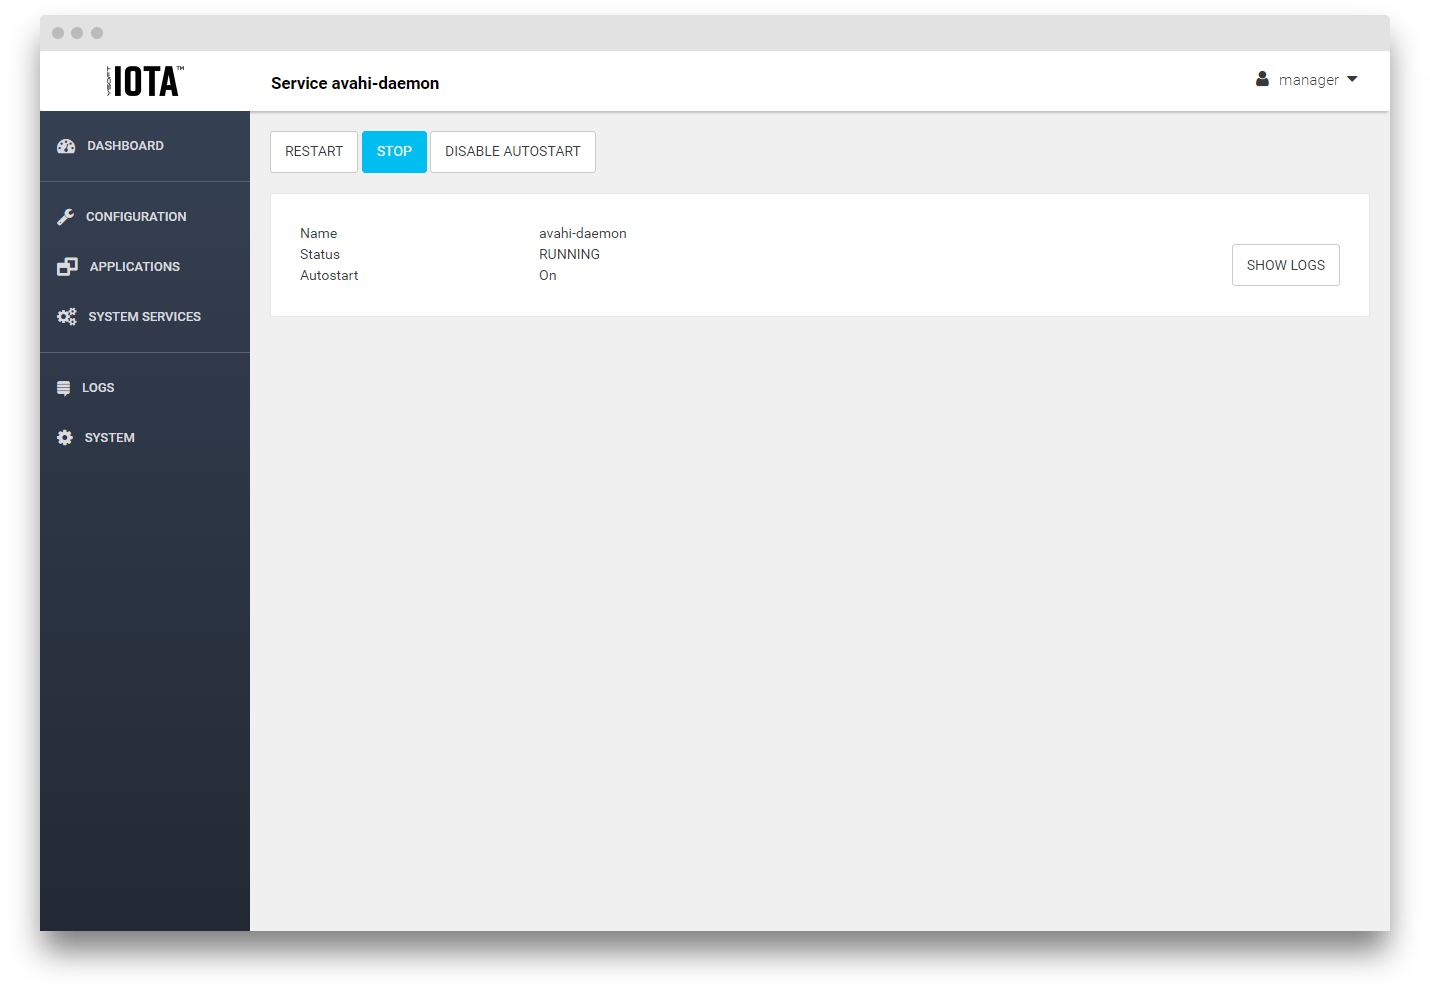
You can see logs of given service by using 'Show logs' button. This action will redirect you to prefilled Logs page.
Logs
Viewing and downloading logs
- Login to the web interface and go to the Logs page.
- Select whether you want to see logs for all units (default), OS unit, some application unit or custom filter.
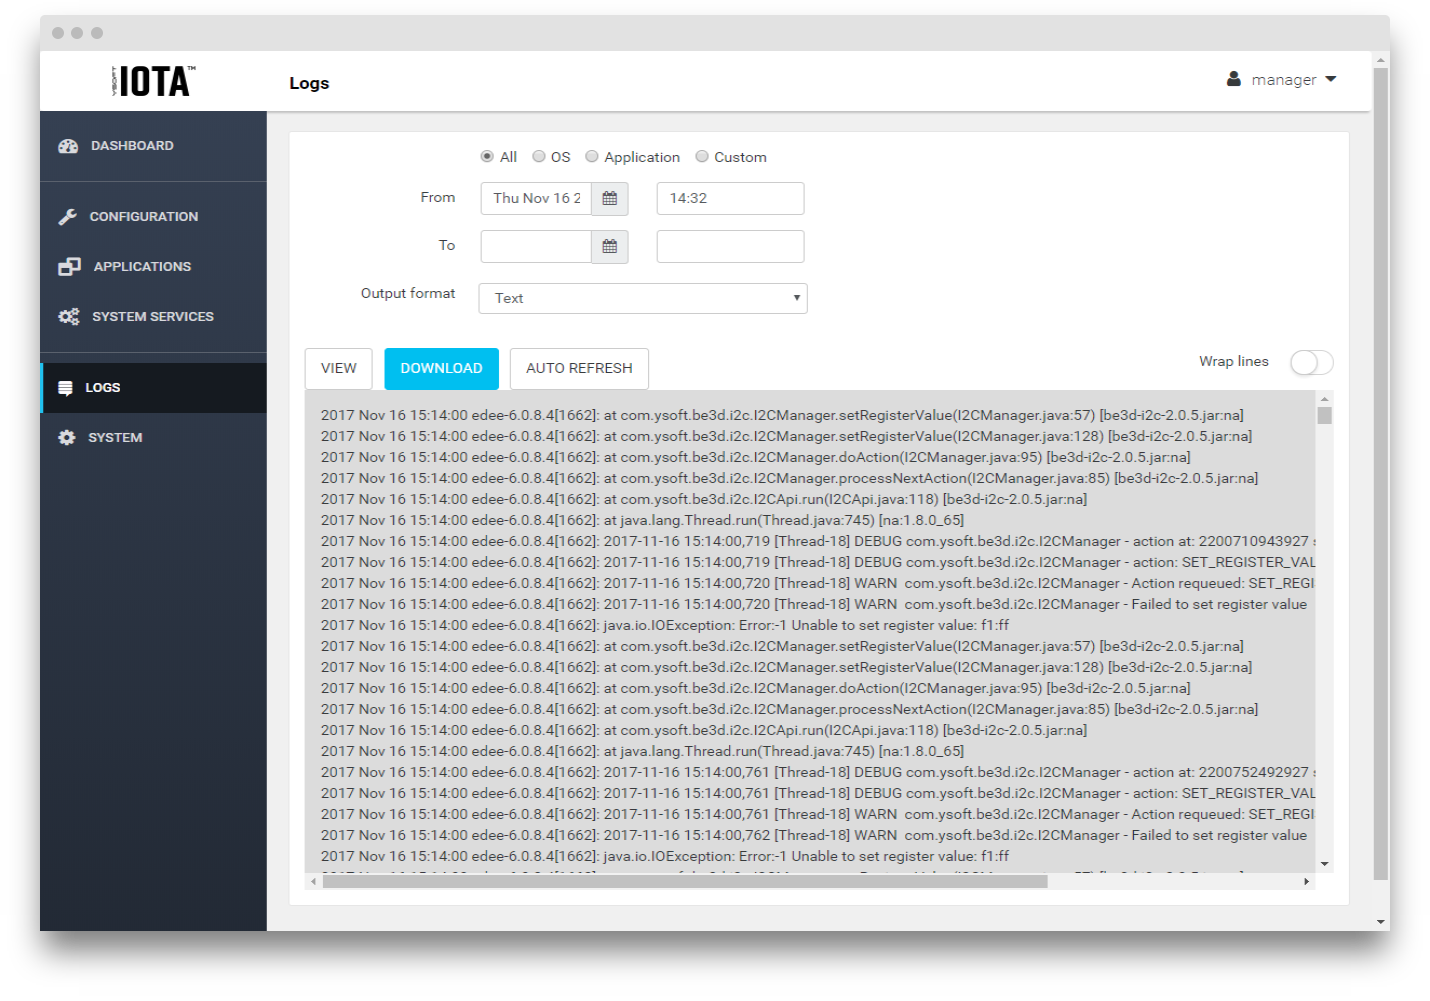
- Insert dates and times to filter by (from date and time are required).
- Choose output formatting (JSON or text).
- For simple viewing press View, for download of logs in the specified format press Download and for viewing with real time addition of new logs press Auto refresh.
- After logs are displayed you may turn on/off wrapping long lines using Wrap lines switch above displayed logs (default position of this switch is persisted in a cookie in your browser).
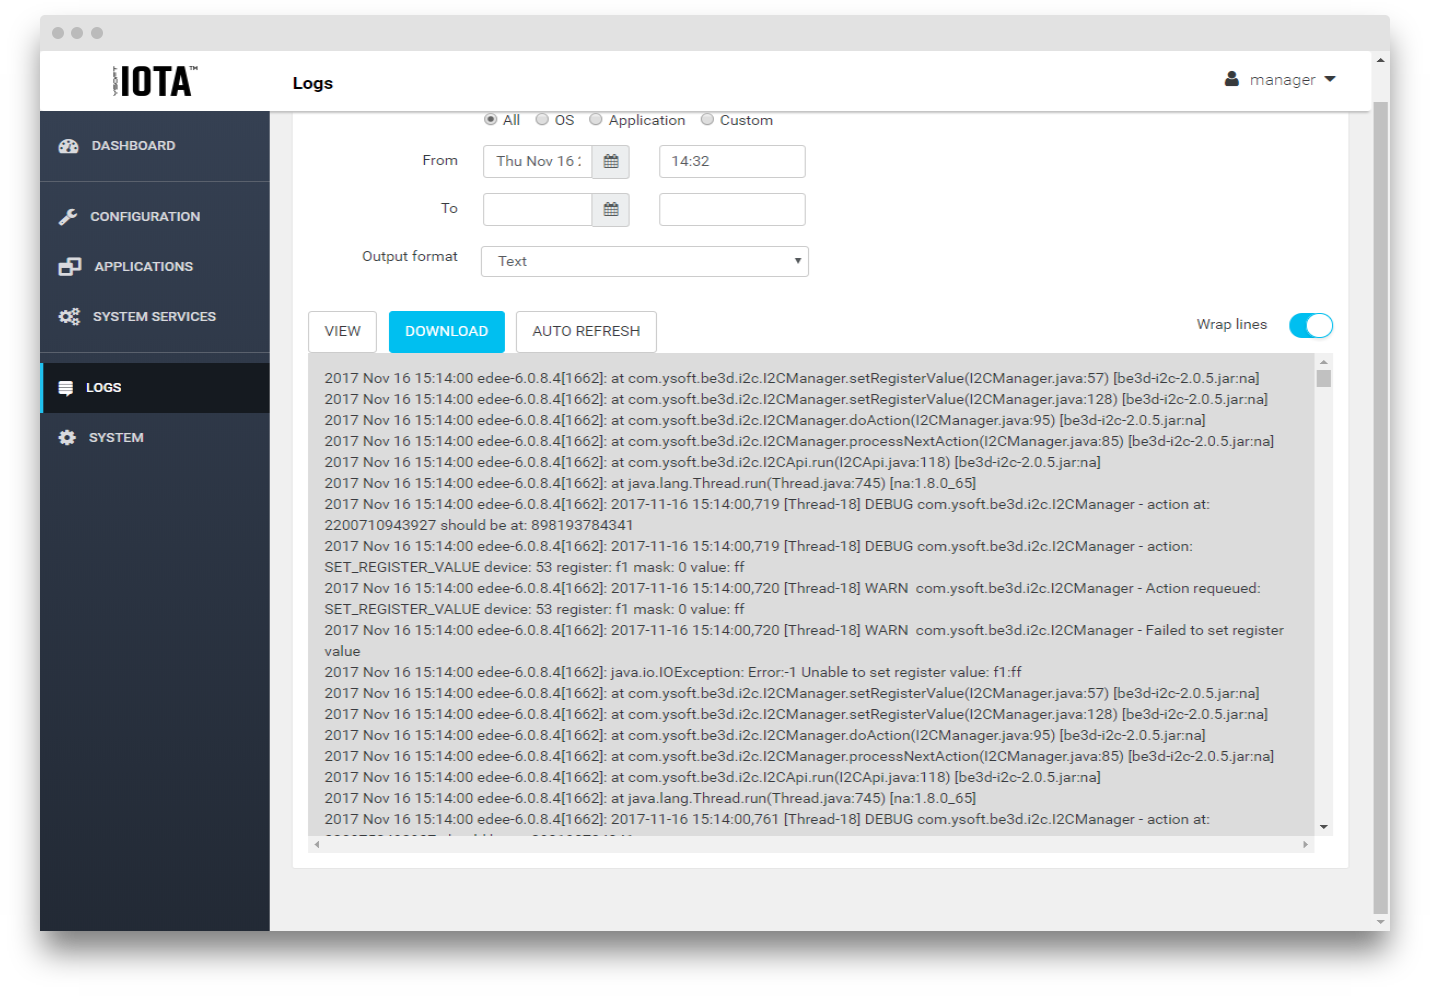
- The application dropdown contains only currently installed applications. Previously installed applications can be filtered by Custom filter.
Changing log level
This feature is available in OS version 4.10 and higher.
- Login to the web interface and go to the Configuration page and further to Logs tab.
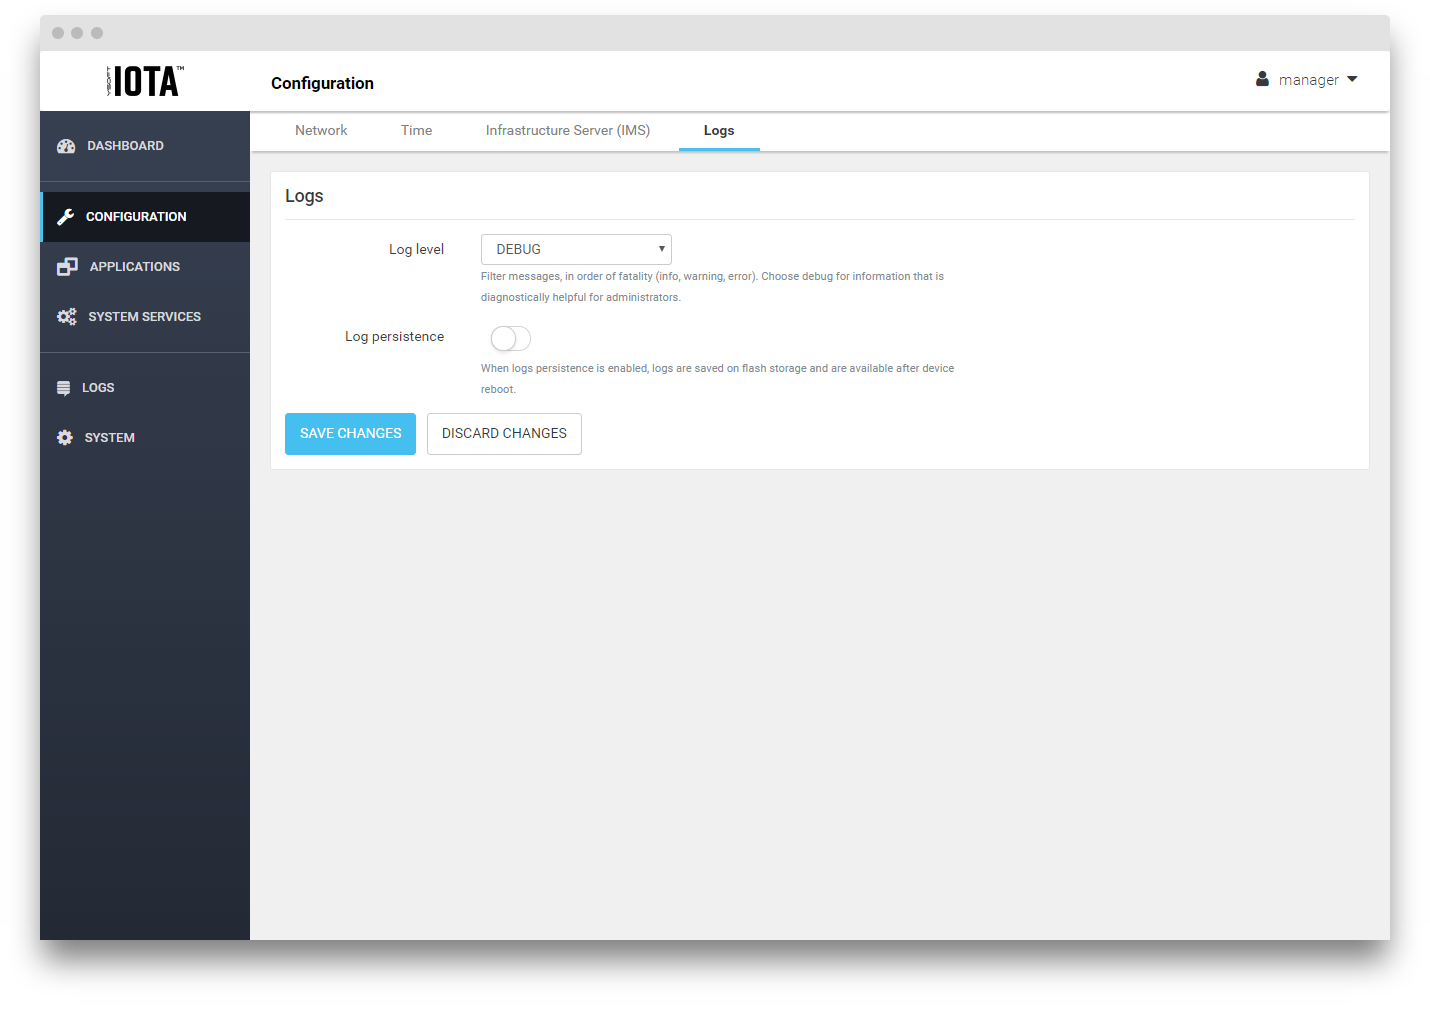
- Select log level from the Log level dropdown menu (all messages with more verbose log level than the selected level will not be saved into log, order of verbosity is ERROR, WARNING, INFO, DEBUG).
- Press Save changes button.
Enabling logs persistency
This feature is available in OS version 4.10 and higher.
By default logs are not persistent - they are not saved on the flash storage and they disappear after device reboot.
Logs persistency could be enabled for predefined time, during this time logs are saved on the flash storage.
- Login to the web interface and go to the Configuration page and further to Logs tab.

- Click on the Log persistency switch to display more settings.
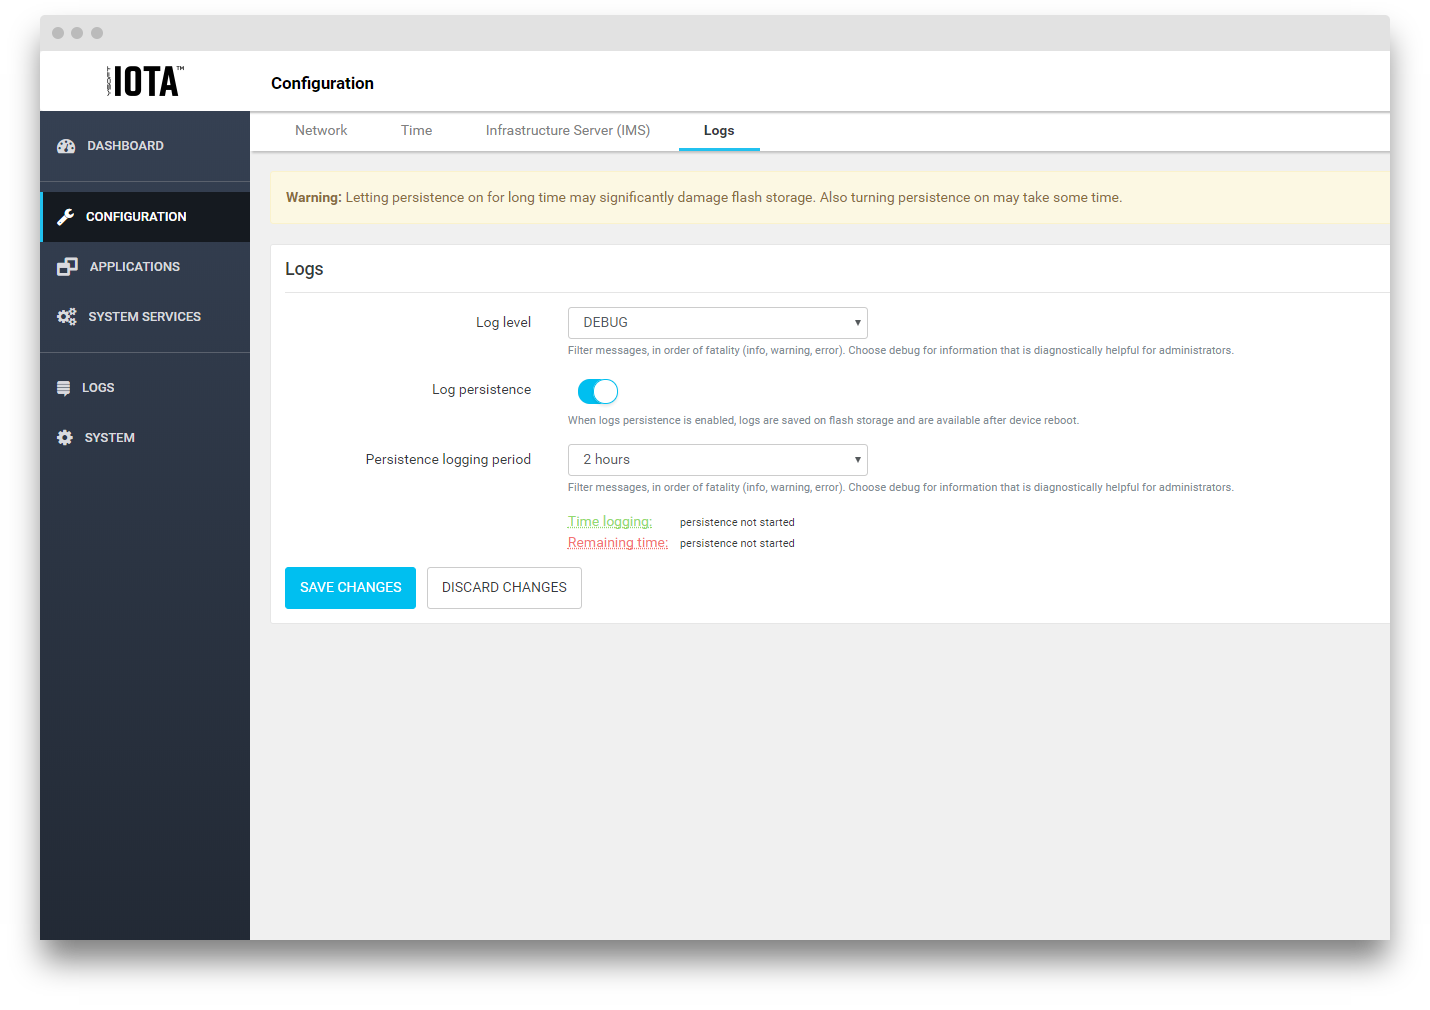
- Select period for which will be persistence of logs enabled by selecting from the Persistence logging period drowdown menu.
- Press Save changes button.
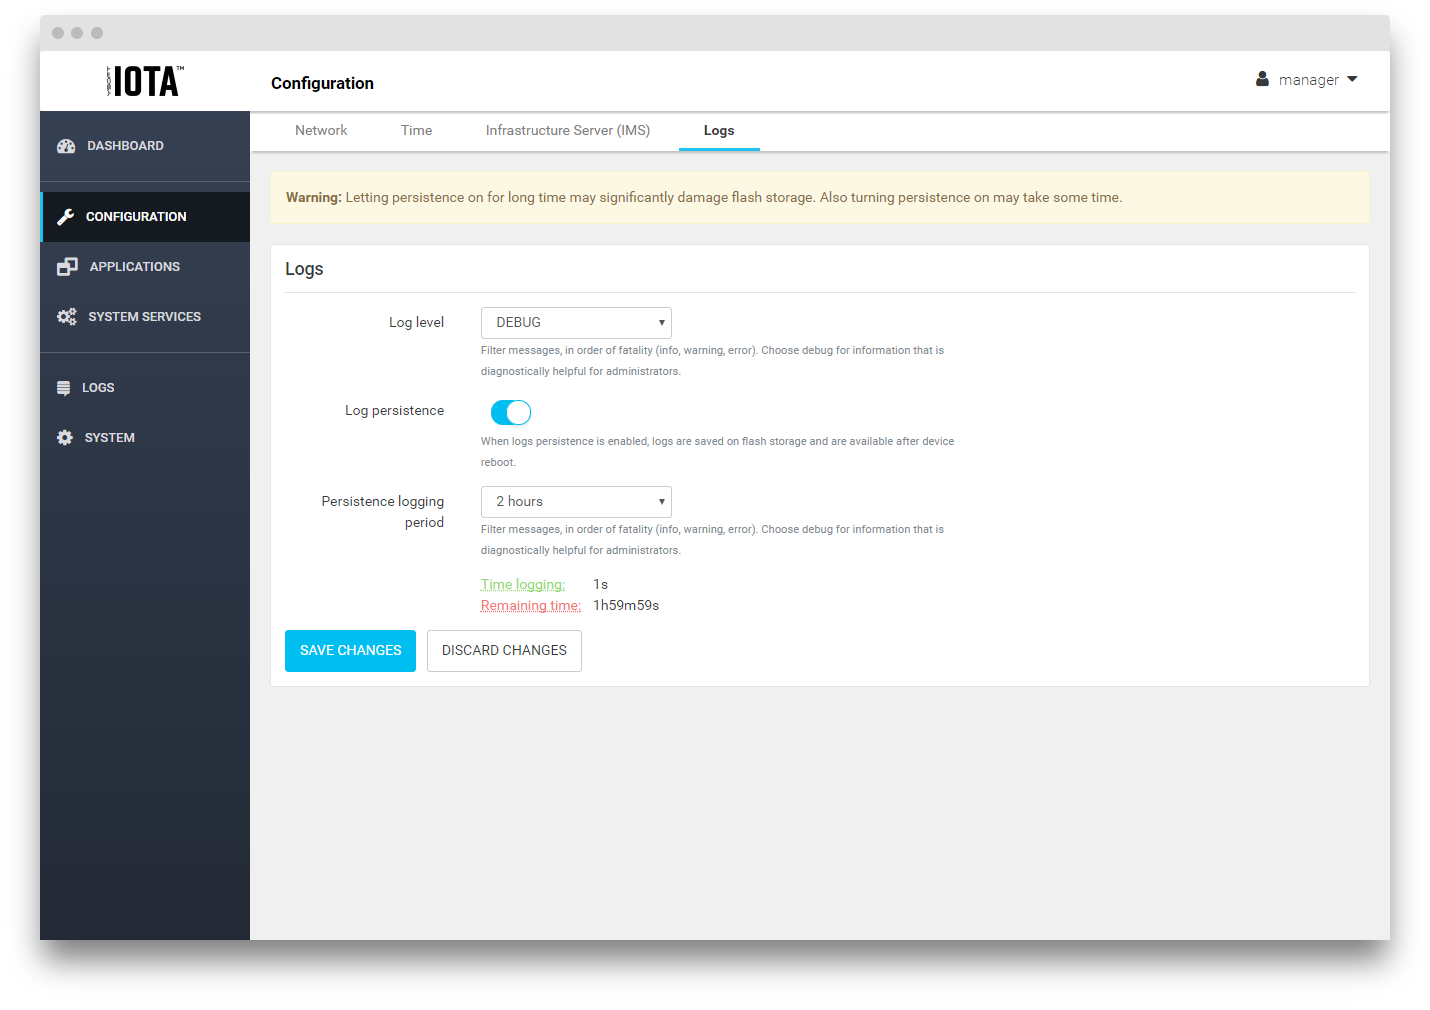
After saving changes or when persistence is already enabled you will see information about how long is persistency running and remaining time until persistency will be automatically turned off:
Other configuration
Networking
- Login to the web interface and go to the Configuration page and further to Network tab.

- In field next to Test connection you may insert an IP address and press Test button to test whether the device can ping the IP address successfully.
- In the form bellow it you may configure networking (DHCP on/off, static IP address, ...).
- Press Save changes button after setting all the values.
You may be disconnected from the device if you misconfigure your network connection. Be aware of all the settings before saving.
Time
- Login to the web interface and go to the Configuration page.
- Press Time horizontal tab.
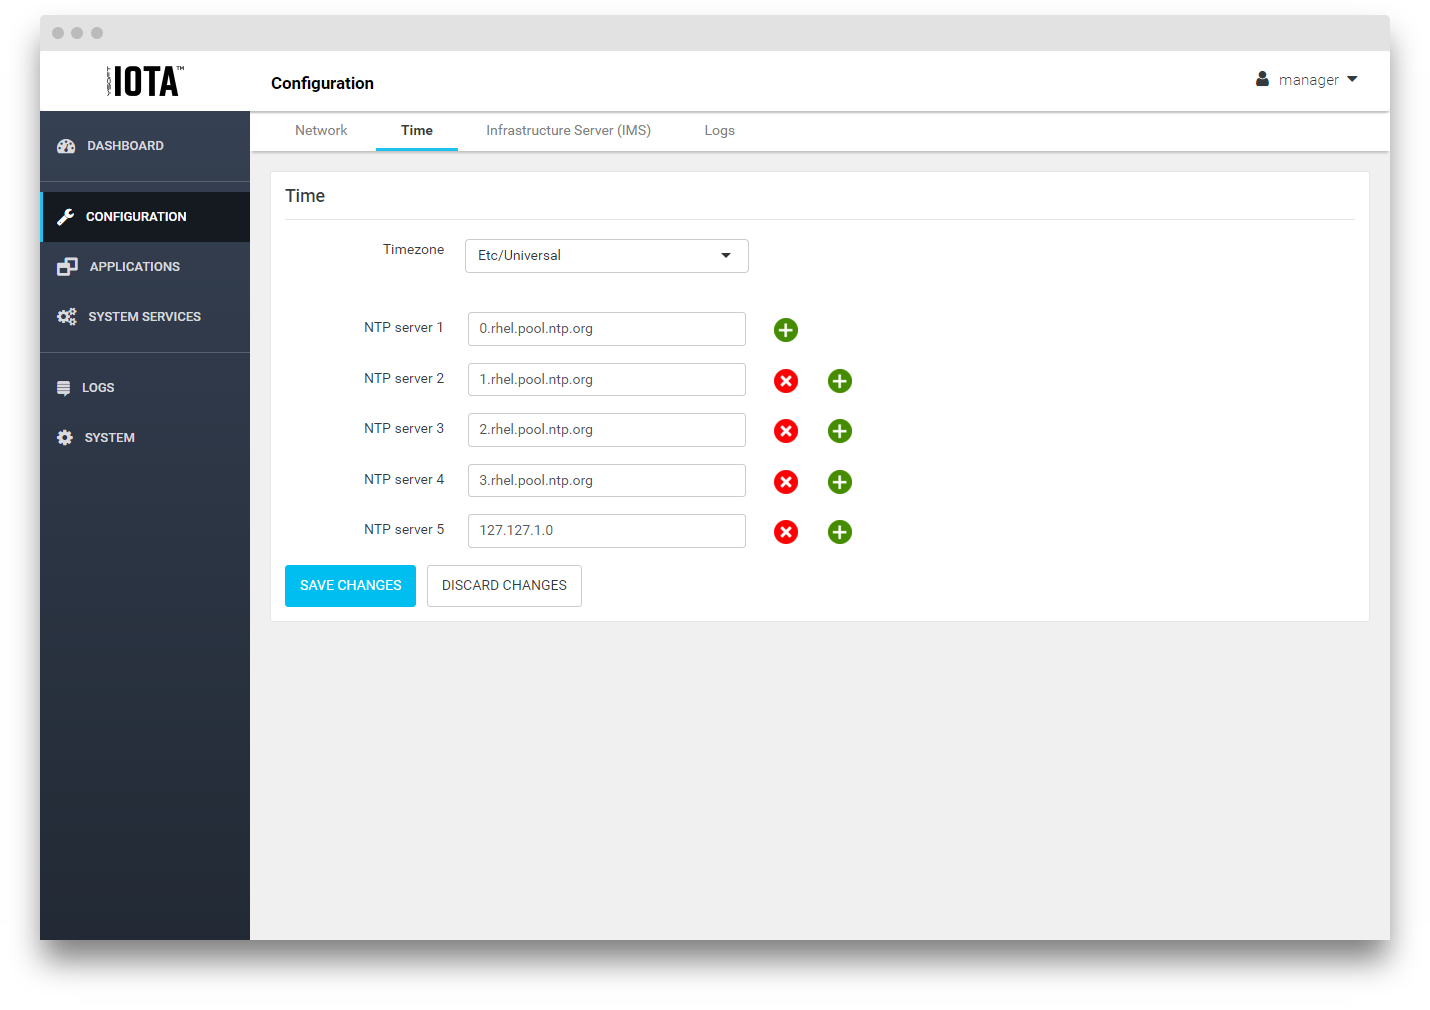
- Configure timezone and NTP servers (you may use '+' and 'x' buttons to add or remove NTP servers to maximum number of 7 servers).
- Press Save changes button.
Connection to Dispatcher Paragon Infrastructure Service (IMS)
- Login to the web interface and go to the Configuration page and further to Infrastructure Server (IMS) tab.
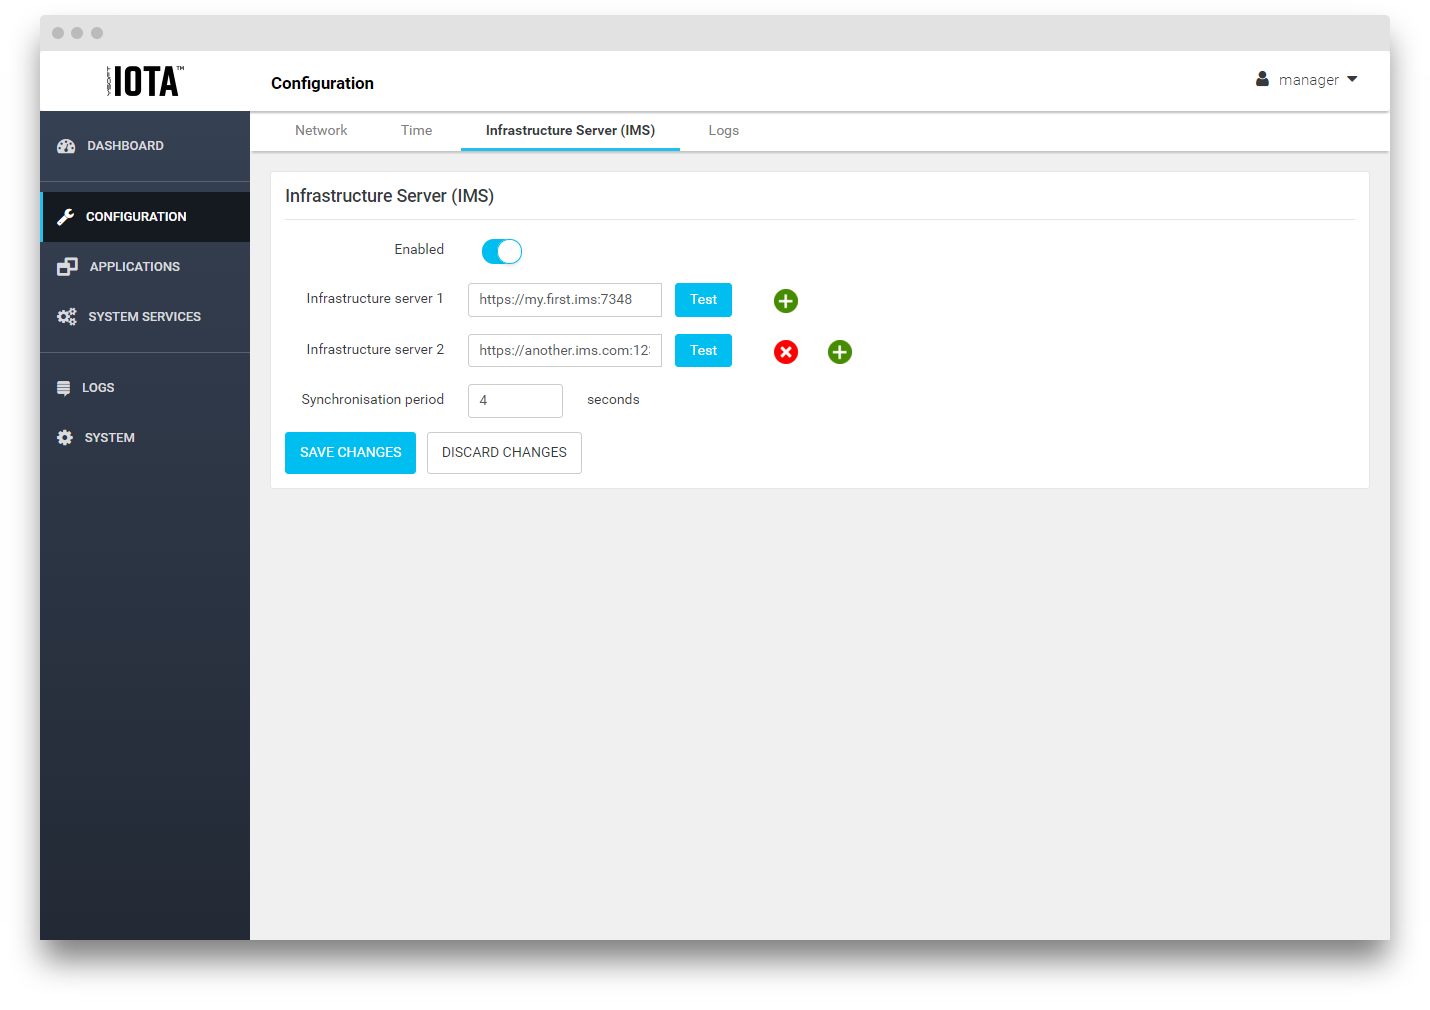
- Enter IMS address in format protocol://<IMS address>:port. It is possible to enter more addresses by pressing the '+' button on the right side of Infrastructure servers field and inserting new addresses into new fields which will appear (these fields could be removed by pressing the 'x' button on the right side).
- Ensure that the Enabled checkbox is on (on the picture above it is on).
- With filled in fields you may test connection to the filled in servers by pressing blue Test button on the right side of each Infrastructure server field. It will test network connection to that server not specifically connection to IMS.
- You can specify period in which the device will be sending heartbeats to the IMS, default Synchronization period is 4 seconds.
- Press the Save changes button.
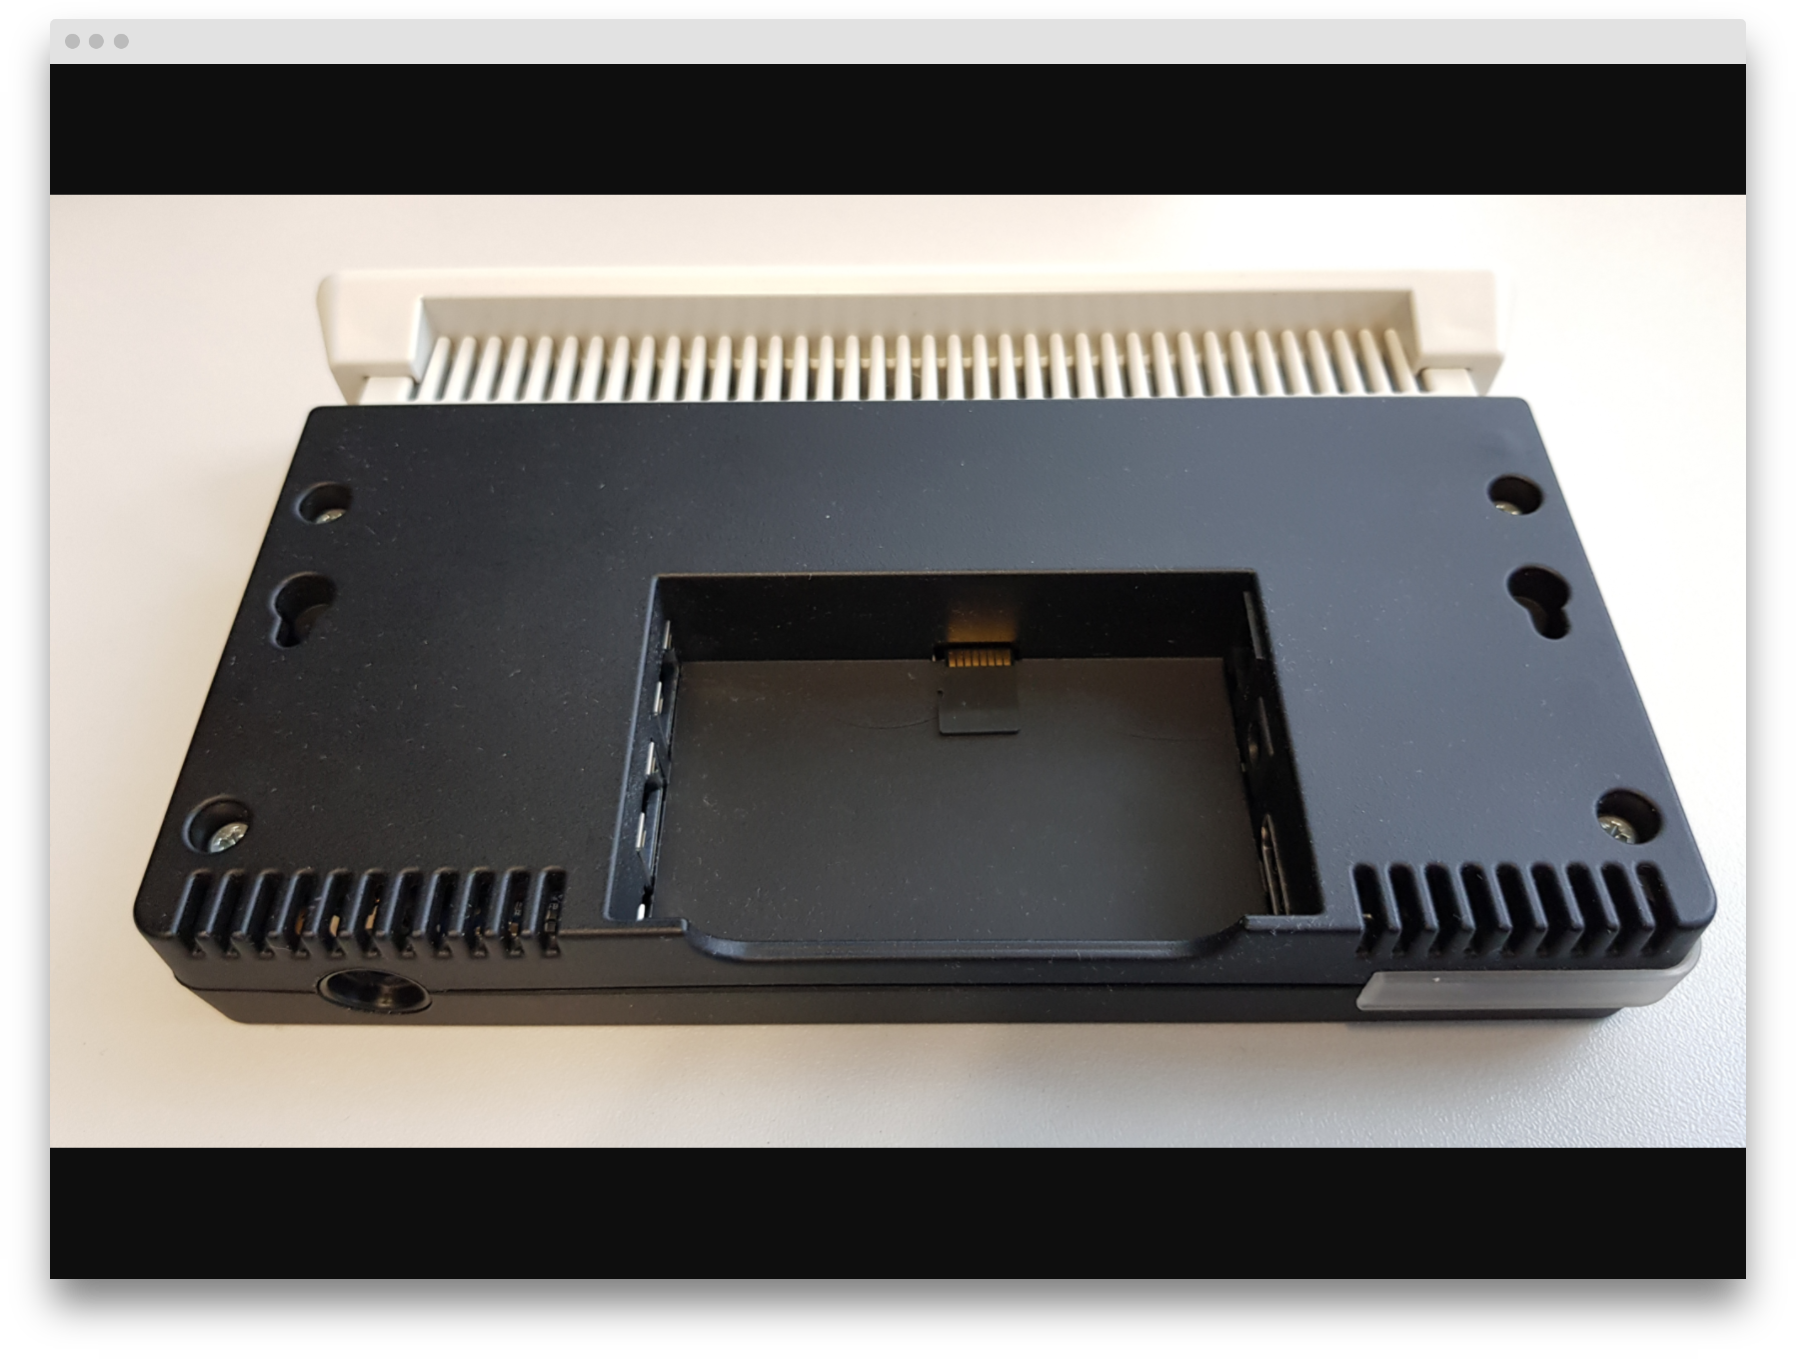
SD card setup
SD card is not supported on ursa device type.
Insert SD card into your device's SD card slot. Correct insertion produces an audible click.
Login to the web interface and go to the Configuration page and further to SD card tab.
SD card status informs whether card is not inserted, present or mounted. All applications using the card are listed here when the card is mounted.
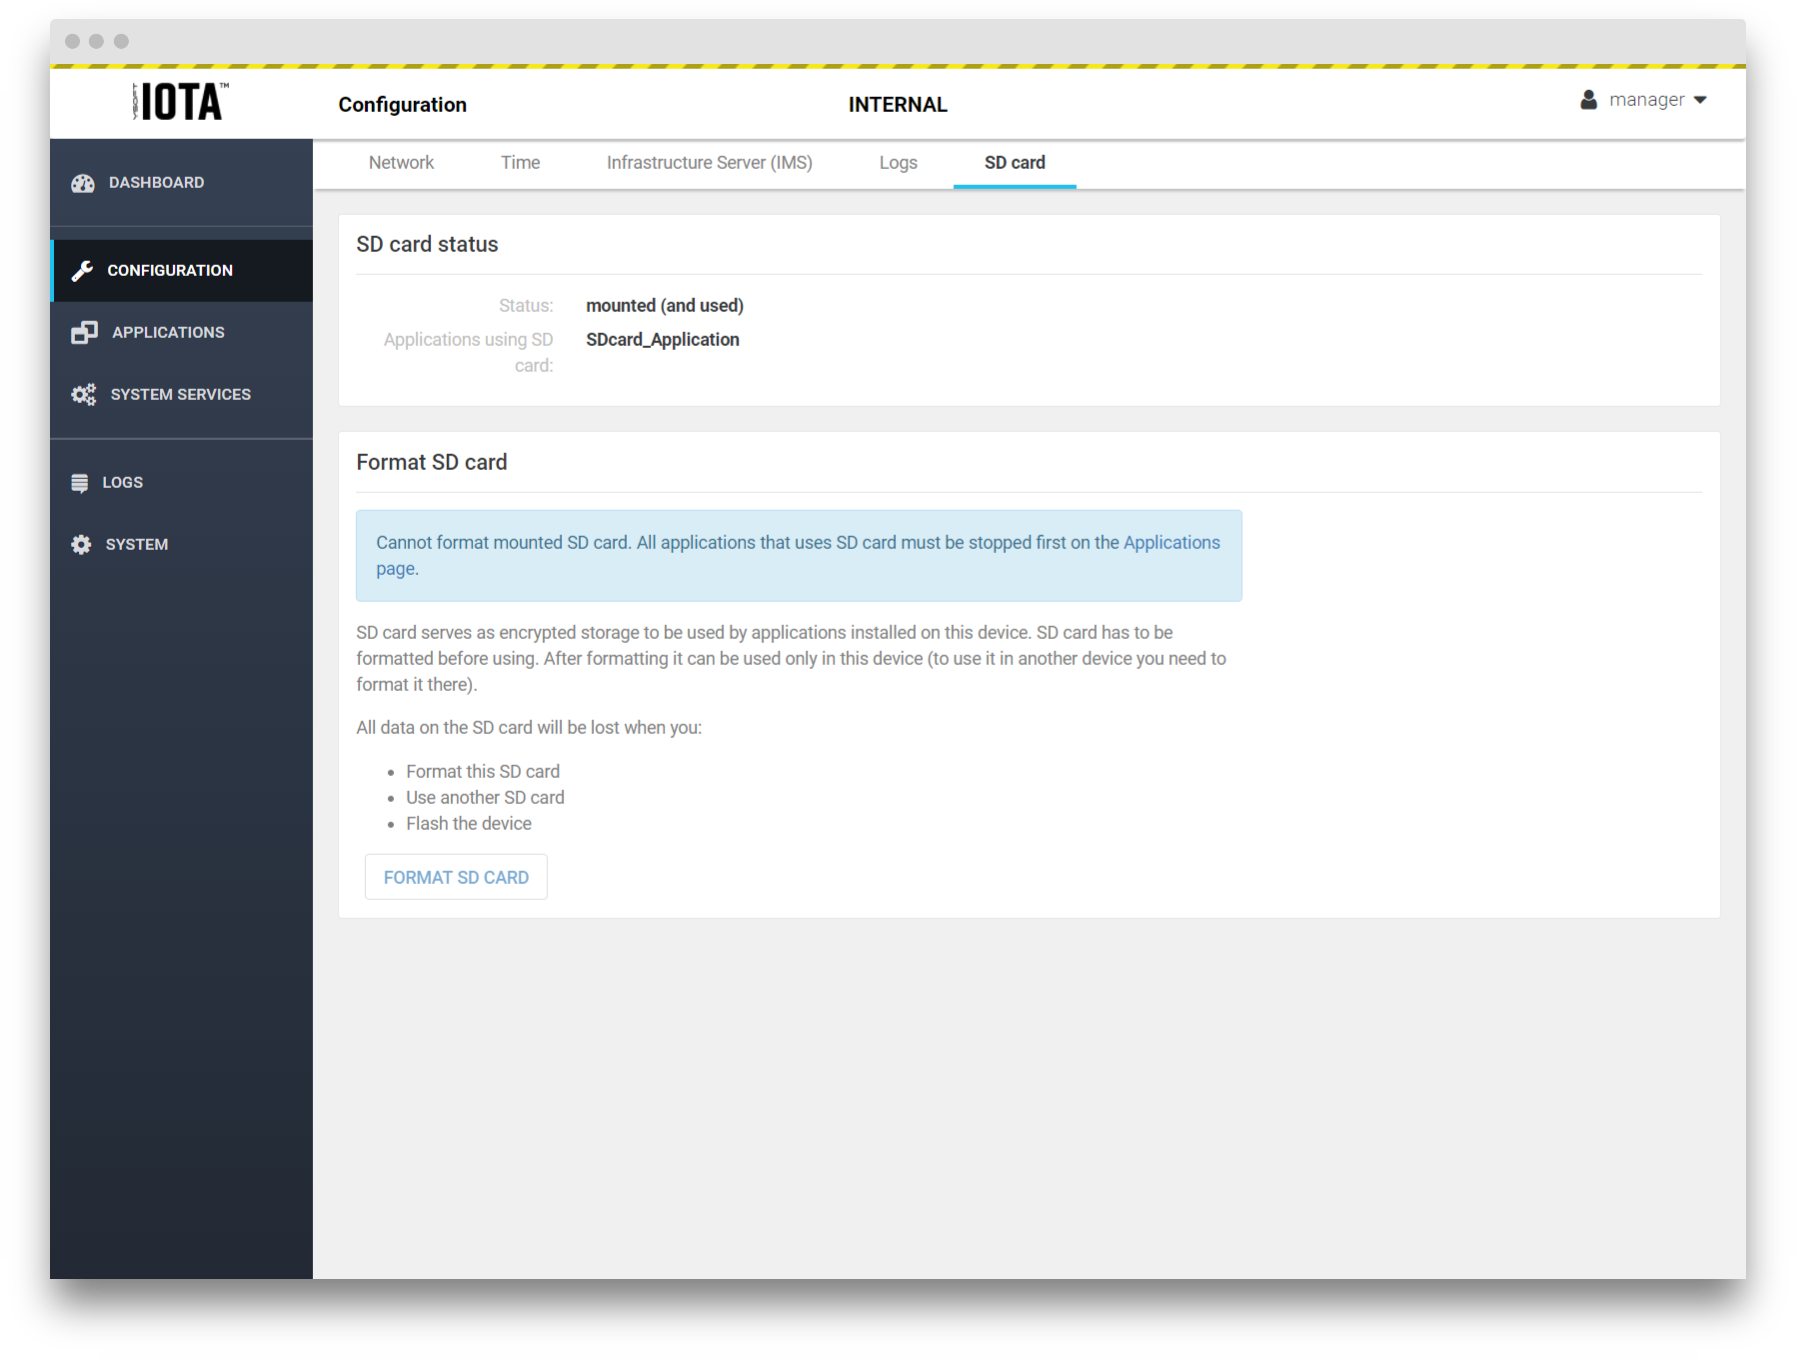
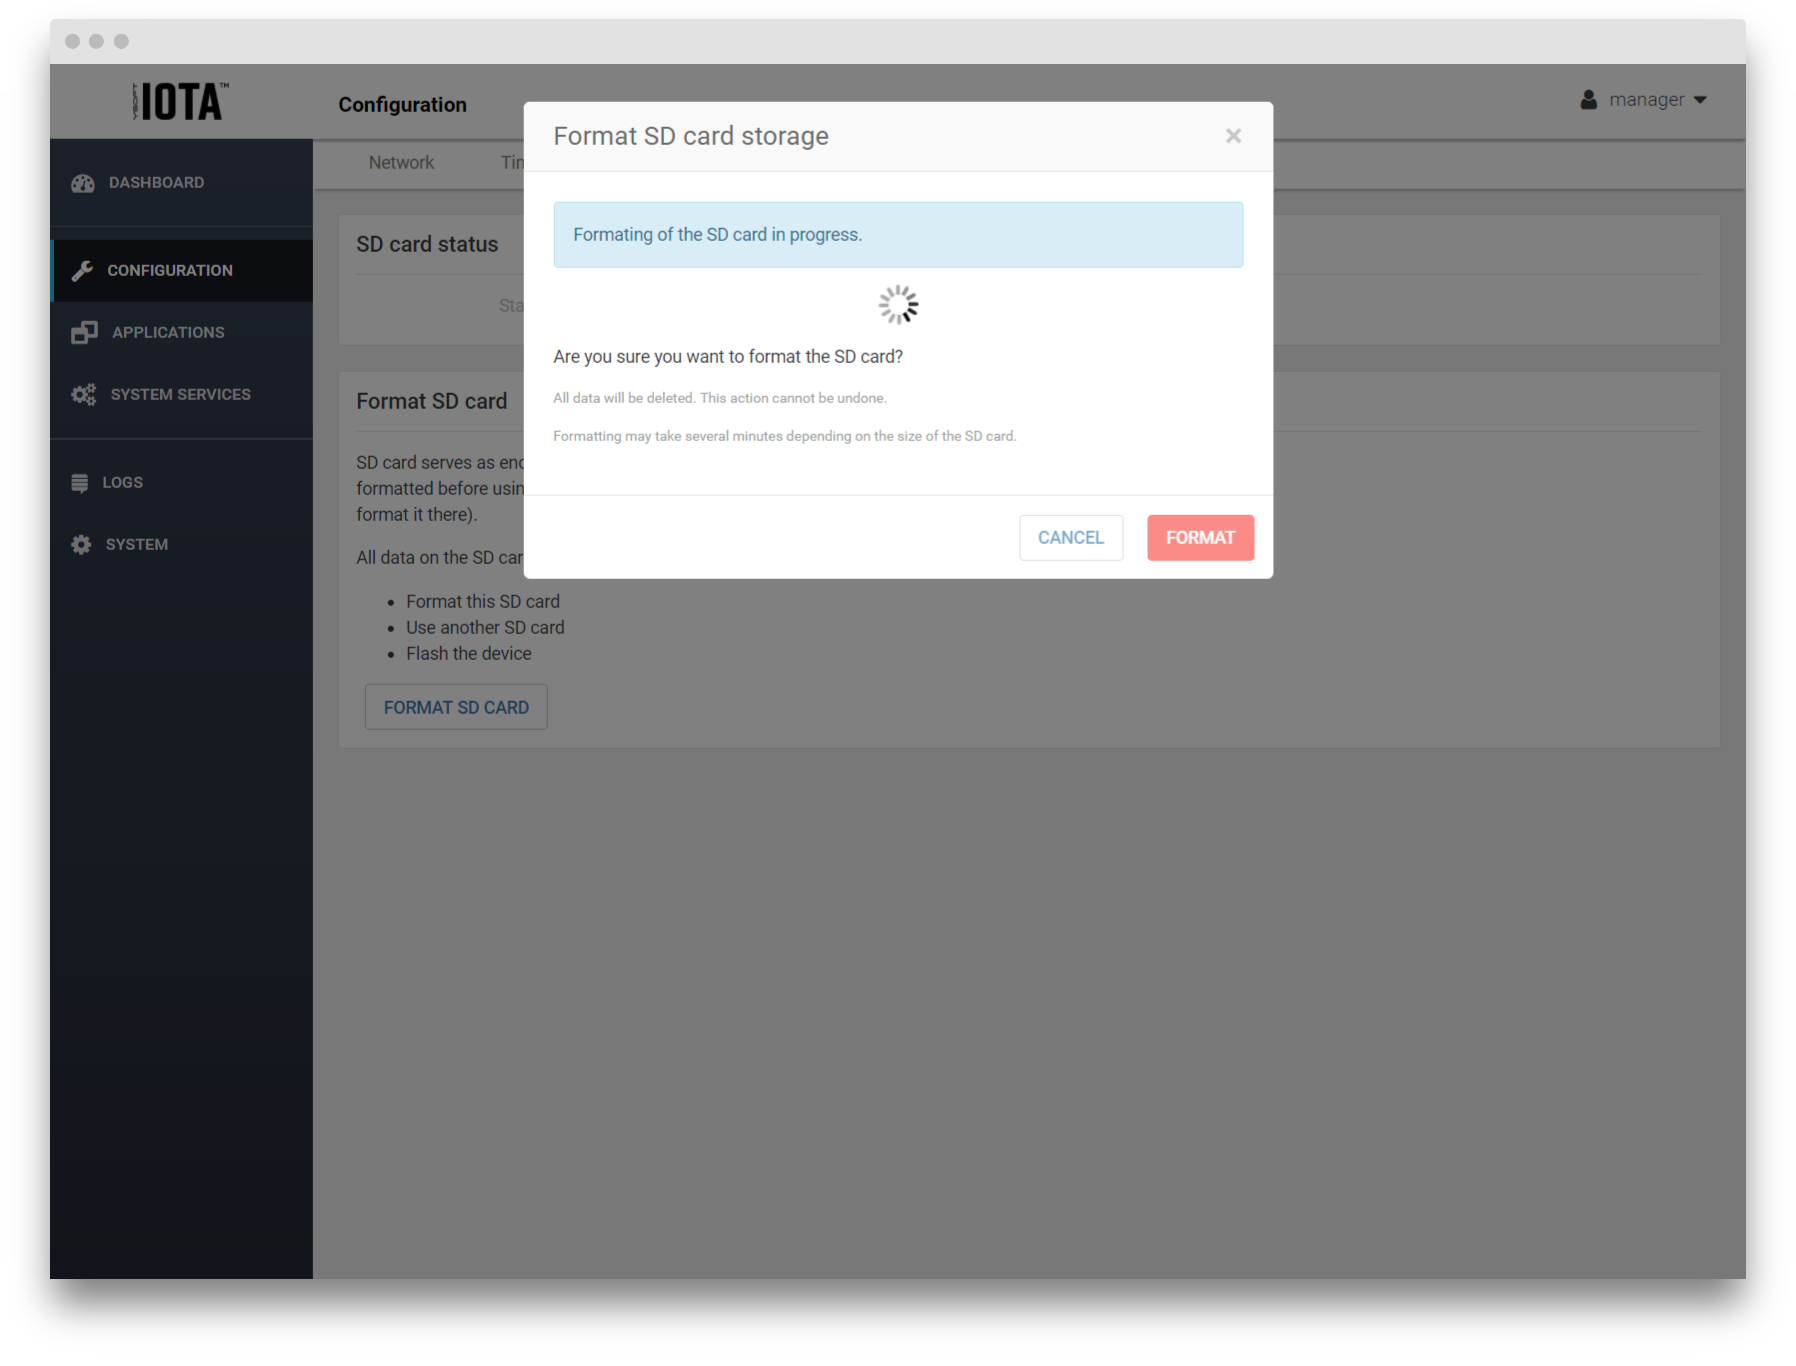
Press the Format SD Card button.
Warning
Formatting SD Card will erase all of its contents!
- Go to the Dashboard page. You can see the sdcard storage in right bottom section. The size and usage of SD cards are only shown if there is running application that uses the card.
SNMP
Available from OS version 4.5 and higher
- Login to the web interface and go to the System services tab.
- Proceed to detail of snmpd service (by clicking on info icon).
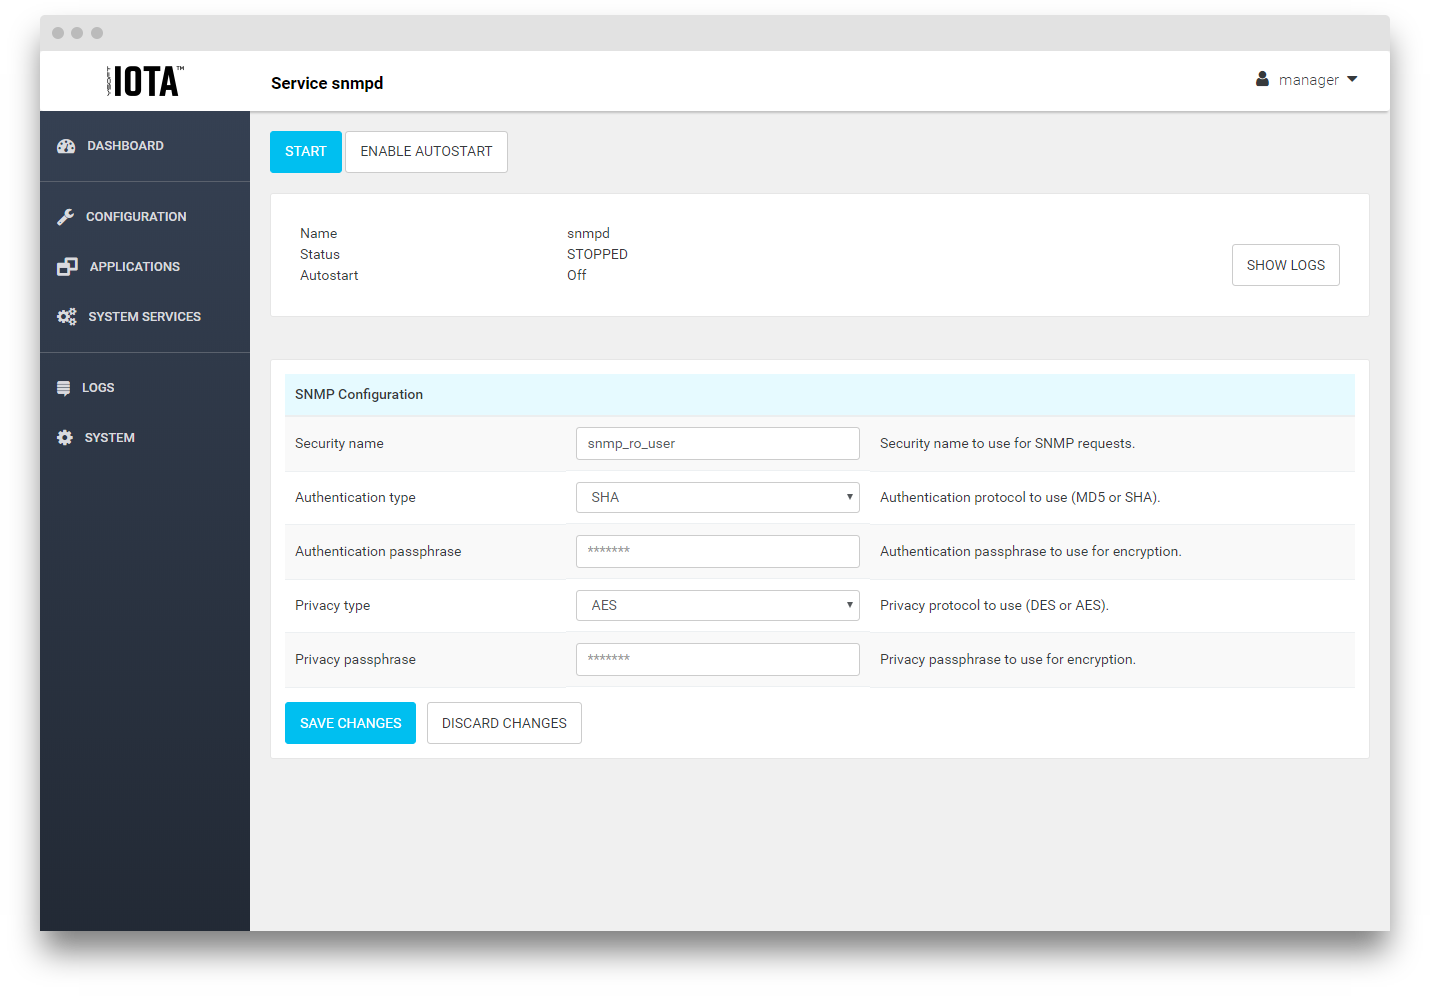
- Configure SNMP parameters.
- Press Save changes button.
- Go to System services tab and start/stop snmpd service. Also you may want to enable autostart for the snmpd service to be automatically started after boot.