Installation steps
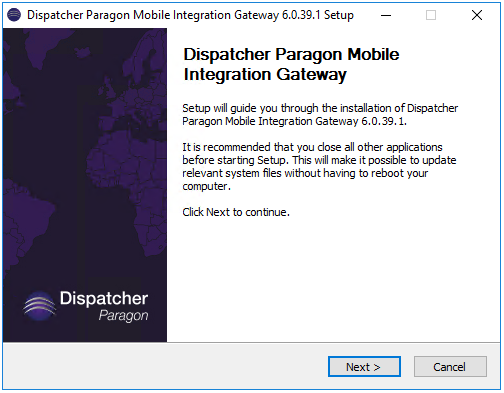
- Execute the installer.
Click Next and proceed to welcome screen.
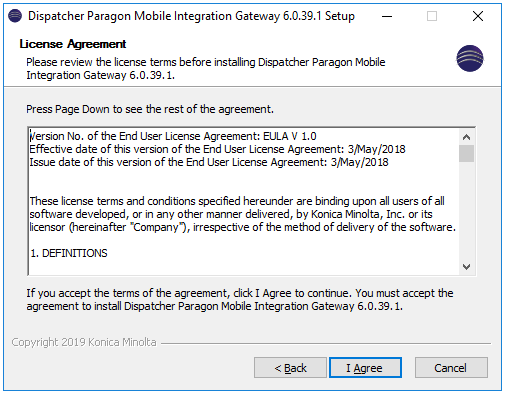
Click I Agree to accept the license agreement. Clicking on Cancel will decline the license agreement and stop the installation.
After you accept the license agreement, the installer runs a pre-installation check. This procedure checks several conditions and determines if the server meets all requirements for Dispatcher Paragon Mobile Integration Gateway installation.
If any of these conditions are not met, they will be displayed in either the Show warnings or Show problems area. Installation can continue with warnings. If there are problems, installation cannot continue. If any warnings or problems are indicated, review the warnings and resolve the problems before proceeding with the installation.
Installer checks these conditions:
- Version of Microsoft Windows
- Administrator rights of the user installing Dispatcher Paragon Mobile Integration Gateway
- Version of .NET framework

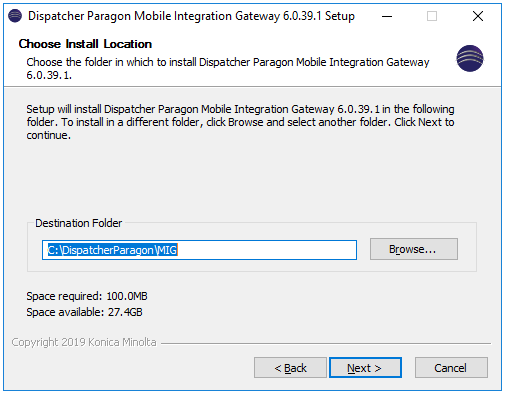
Select your destination folder for Dispatcher Paragon Mobile Integration Gateway.
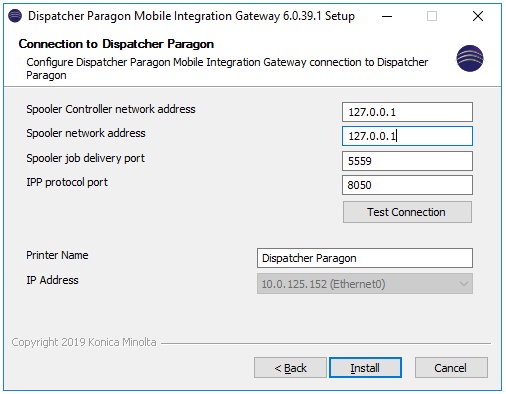
- Fill out the configuration form:
- Spooler Controller network address: Address of the server where a Dispatcher Paragon Spooler Controller is located.
- Spooler network address: IP address of Dispatcher Paragon FlexiSpooler (FSP) installed in server mode.
- Spooler job delivery port: TCP port of the FSP used for job delivery. The default port value is 5559.
- IPP protocol port: Port on which the printer will be announced (pick a port that is available and not used by other services)
- Printer name: Name of the printer that will be visible on the devices which will be using the Dispatcher Paragon Mobile Integration Gateway.
Click Test Connection to test the connection with the Dispatcher Paragon Spooler Controller. If the Spooler Controller is not running or the connection could not be established, you should not proceed to the next step and fix the connection problem first.
If the connection with Spooler Controller was successful, you can click Install.
During the installation will also be installed Apple's Bonjour.
If you have already installed Bonjour Print Services in the past, this step will be skipped.
- After the installation, there should be one running service:
- Dispatcher Paragon Mobile Integration Gateway (status: Started)
If the service is not started, check <MIG_DIR>\ logs directory for any indication of errors.
If the service will not start properly, check that you have inserted the right IP addresses and that you have the license for Mobile Print.
Silent installation
For running silent installation of Dispatcher Paragon Mobile Integration Gateway installer run this command with filled in values of parameters. Run it in folder where you have downloaded <installer_name>.exe. The installer may have different name, if so, the <installer_name>.exe should be replaced by the appropriate name.
Configuration Parameters
<installer_name>.exe /S /CFG:spocAddress=<spoc_address> /CFG:spoolerAddress=<spooler_address> /CFG:jobDeliveryPort=<job_delivery_port> /CFG:ippPort=<ipp_port> /CFG:printerName=<printer_name> /D=<destination_folder>spocAddress - Address of the server where a Dispatcher Paragon Spooler Controller is located. This parameters is mandatory.
- spoolerAddress - IP address of Dispatcher Paragon FlexiSpooler (FSP) installed in server mode. This parameters is mandatory.
- jobDeliveryPort - TCP port of the FSP used for job delivery. By default this is 5559.
- ippPort - Port on which the printer will be announced (pick a port that is available and not used by other services). By default this is 8050.
printerName - Name of the printer that will be visible on the devices which will be using the Dispatcher Paragon Mobile Integration Gateway. By default this is Dispatcher Paragon.
- D=<destination_folder> - If you want to specify installation directory (/D=<destination_folder>) it must be the last parameter of the call and there should be no quotation marks, e.g. <installer_name> /S <parameters> /D=<destination_folder>
When updating already present installation these parameters are optional.
Bonjour Configuration
All information regarding the options specified in the configuration file below can be found in the official Bonjour Printing Specification at https://developer.apple.com/bonjour/printing-specification.
This configuration is located in <MIG_DIR>\bin\services\MdnsService.xml
This configuration can be updated using the Mobile Gateway Administration interface, as described here: (6.0.105) Mobile Integration Gateway administration
This configuration should not be edited manually.
<?xml version="1.0" encoding="utf-8" ?><Service xmlns:xsi="http://www.w3.org/2001/XMLSchema-instance" xmlns:xsd="http://www.w3.org/2001/XMLSchema"><Name>Dispatcher Paragon</Name><ServiceType>_ipps._tcp,_universal</ServiceType><Domain>local.</Domain><Port>8050</Port><AdminUrl>https://10.0.11.55:8050/Administration</AdminUrl><Air>username,password</Air><Kind>document</Kind><Note>Dispatcher Paragon</Note><Pdl>application/pdf,image/jpeg,image/urf</Pdl><Product>(Dispatcher Paragon)</Product><Rp>ipp/print</Rp><Color>T</Color><Duplex>T</Duplex><Fax>F</Fax><Scan>F</Scan><Punch>0</Punch><Staple>F</Staple><Bind>F</Bind><Collate>F</Collate><PaperMax>legal-A4</PaperMax><Tls>1.2</Tls><Urf>V1.4,W8,SRGB24,RS600,IS1-2-3-4-5-6-7,PQ1-2-3-4-5,OB1-2-3-4-5-6-7-8-9,CP1,DM1</Urf><Uuid>db0def0a-40e1-11e5-a151-feff819cdc9f</Uuid><Qtotal>1</Qtotal><Ty>Dispatcher Paragon</Ty><TxtVers>1</TxtVers><SupportedPaperSizes><PaperSize>A4</PaperSize><PaperSize>Letter</PaperSize></SupportedPaperSizes><print_wfds>T</print_wfds><mopria-certified>1.3</mopria-certified><mig-version>6.0.39</mig-version></Service>MIG configuration
Logging
Logs can have several levels of detail. To change log level go to <MIG_DIR>\bin\NLog.config
There is an entry where you can change the minimal log level in attribute minlevel:
<logger name="*" minlevel="Info" writeTo="logfile" />
- To log everything, set minlevel to Debug
- To log errors and HTTP trafic, set minlevel to Info
- To log only warnings and errors, set minlevel to Warning
- To log only errors, set minlevel to Error
<?xml version="1.0" encoding="utf-8" ?><nlog xmlns="http://www.nlog-project.org/schemas/NLog.xsd"xmlns:xsi="http://www.w3.org/2001/XMLSchema-instance"xsi:schemaLocation="http://www.nlog-project.org/schemas/NLog.xsd NLog.xsd"autoReload="true"throwExceptions="false"internalLogLevel="Off" internalLogFile="c:\temp\nlog-internal.log"><targets><target name="logfile" xsi:type="File" fileName="../../logs/connector.log" archiveAboveSize="20971520" archiveNumbering="Date" archiveEvery="Day" archiveFileName="../../logs/connector.{#}.log" concurrentWrites="false"layout="${longdate} ${level:uppercase=true:padding=-5:fixedLength=true} ${threadid:padding=-2}| ${callsite:padding=-70:fixedLength=true} | ${message}${onexception:${newline}EXCEPTION\: ${exception:format=ToString}}"/><target name="console" xsi:type="ColoredConsole" /></targets><rules><logger name="*" minlevel="Info" writeTo="logfile" /><logger name="*" minlevel="Info" writeTo="console" /></rules></nlog>IP addresses and ports
To configure IP addresses and ports, go to <MIG_DIR>\bin\MigService.exe.config
In order to change Dispatcher Paragon IP address, set values for "user-auth-ip" and "job-sender-ip".
To change the port used by MIG, set the value for "ipp-port".
After changing the configuration, you have to restart Dispatcher Paragon Mobile Integration Gateway service.
Public user
To configure public user access you need to set the value for "allow-public-user" to "T". If the mobile client supplies a username via IPP protocol the supplied username will be used. If the mobile client does not supply a username the "public-user-name" and "public-user-password" will be used to send the job to Dispatcher Paragon. This option is convenient for print from Chromebooks. However, support for Chromebooks is limited.
<add key="user-auth-ip" value="10.0.11.62" /><add key="user-auth-port" value="5555" /><add key="job-sender-ip" value="10.0.11.62" /><add key="job-sender-port" value="5559" /><add key="sos-license-ip" value="10.0.11.62" /><add key="sos-license-port" value="5555" /><add key="job-delivery-protocol" value="HTTPS" /><add key="ipp-port" value="8050" /><add key="allow-public-user" value="F" /><add key="public-user-name" value="AirPrintPublic" /><add key="public-user-password" value="AirPrintPublic" /><add key="job-prefix" value="" /><add key="pdf-validation" value="T" /><add key="certificate-hash" value="" />User cache
For decreasing the high amount of authentication requests to the site server during each print operation, there is a cache for storing the successfully authorized users. By default, the cache is enabled and the authorized users are stored in the cache for 500 minutes. For changing the validity of user authorization stored in this cache (time limit of record expiration), change the value of "credential-cache-expiration". The required value is in minutes. To completely disable the use of the cache, set "use-user-credential-cache" to "F".
<add key="use-user-credential-cache" value="T" xdt:Transform="Replace" xdt:Locator="Match(key)"/><add key="credential-cache-expiration" value="500" xdt:Transform="Replace" xdt:Locator="Match(key)"/>Print job tags
In order to change print job tags (default tag is "Mobile"), change the value for job-tags in <MIG_DIR>\bin\MigService.exe.config.
<add key="job-tags" value="Mobile" xdt:Transform="Replace" xdt:Locator="Match(key)"/>Temporary files folder
The MIG service is using temporary files, to store some PDF and image transformation data, to decrease the server's RAM utilization during the printing process.
To customize, where those temporary files will be stored, there is a setting, in MigService.exe.config, with a folder path.
<add key="temporary-files-folder-path" value="" />The value of this setting can be:
empty - if no value is specified, it will use the TEMP folder of Microsoft Windows operating system (by default C:\Windows\Temp)
Example<addkey="temporary-files-folder-path"value=""/>relative path - to the <MIG_DIR>\bin\MigService.exe service
Examples<addkey="temporary-files-folder-path"value="Temp"/> <!-- it will be <MIG_DIR>\bin\Temp -->OR<addkey="temporary-files-folder-path"value="..\FolderA"/> <!-- it will be <MIG_DIR>\FolderA -->absolute path - any valid folder path on the server. It is NOT recommended to use any network shares, because of performance degradation of the service
Examples<addkey="temporary-files-folder-path"value="C:\Temp\SafeQ\MIG"/>OR<addkey="temporary-files-folder-path"value="S:\FolderA\FolderB\FolderC"/>
Folder permissions
The service needs to have Read, Write, Create, Delete, List files on specified folder!
Also, the service is able to create the folder on a specified path, if the folder doesn't exist, but it needs to have valid permission on the file system!
Change port after installation
To change port after installation
Change the port value in <MIG_DIR>\bin\services\MdnsService.xml
<Port>8050</Port>- Change the port value in <MIG_DIR>\bin\MigService.exe.config as described in the MIG configuration section on this page.
- Restart the MigService.exe service
The firewall exception must be set for the new port number before MigService.exe is restarted.
Security Certificate
MIG uses a secure connection by default using its own security certificate. In case a custom security certificate is required, either use the administration web (6.0.105) Mobile Integration Gateway administration or follow these steps:
Troubleshooting
Installer
Logfile of installer is located at the <MIG_DIR>\InstallationLog.txt.
For better identification of the issue, click Ignore on any error window that pop-ups during installation, it will keep the installation log intact. Clicking Cancel will cancel the installation and uninstall any installed files (including the log file).
If the Dispatcher Paragon does not have a valid license for Mobile Print, the Dispatcher Paragon Mobile Integration Gateway will refuse any print job and display information that the Dispatcher Paragon has no license. More information is in the logs located at <MIG_DIR>\logs\*.
Log files location
Log files of MIG are located at <MIG_DIR>\logs.
Limitations
- In some cases, Bonjour is logging too many errors into Windows application logs. In most cases, it does not affect the functionality of MIG.
- When updating from one version to another, the default page size setting is lost and must be set again via the Mobile Integration Gateway web interface.