About
This section describes how to schedule a Web report to an email or to a file. The look of the user interface may differ based on currently selected values and licensed features.
Both email and file web reports can be accessed from the Scheduled reports section. Additionally, it is possible to schedule Counter reports.
Working with Scheduled Reports
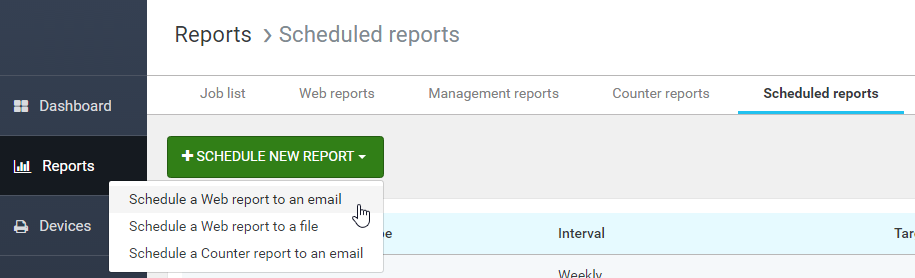
An administrator can create a new scheduled report with the button Schedule new report while choosing the report type.

An Administrator can modify and delete existing scheduled reports by using the icons in the overview of the Scheduled reports.
Scheduling New Web Report to Email
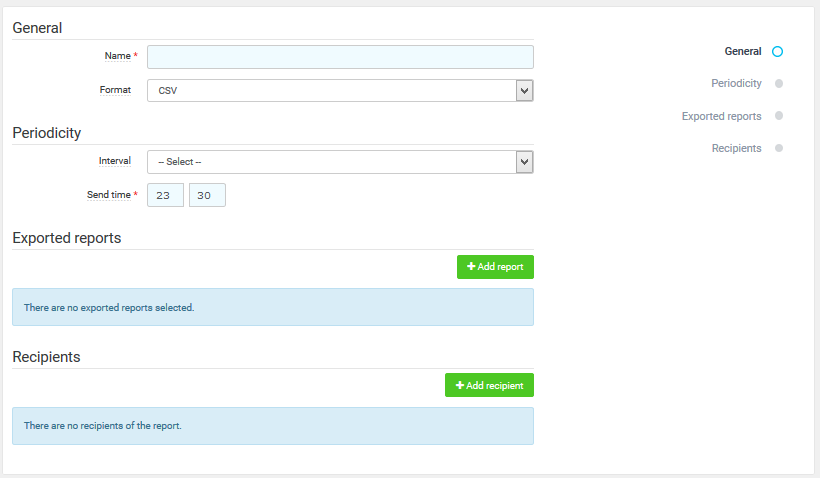
Configuration:
- Name – A name for the new scheduled report.
- Format – Format of the exported report. Supported formats are CSV, HTML, PDF, XLSX, and XML.
Interval – Interval that determines how often and for what period the report will be generated:
Previous day – The report will be created daily containing data for the previous day.
Previous 7 days – The report will be created weekly containing data for the previous 7 days.
Calendar month – The report will be created monthly on a selected day of the month. The report will contain data starting from the selected day of the previous month until (but not including) the same day of the current month.
Monthly – The report will be created monthly on a selected day of the month. The report will contain data from the first to the last day (inclusive) of the previous month.
- Day of month – The day of the month when the report will be generated. This field is available only for the monthly and calendar month intervals.
- Day of week – The day of the week when the report will be generated. This field is available only for the Previous 7 days interval.
- Send time – The time of day when the report will be generated and sent.
- Exported reports – A list of reports added from the list of saved web reports. All selected reports will be generated and sent to defined email addresses. Each report determines its structure (columns, counters, etc.).
- Recipients – A list of email recipients who will receive the report.
The Save changes button saves and activates the new scheduled email web report.
Scheduling New Web Report to File
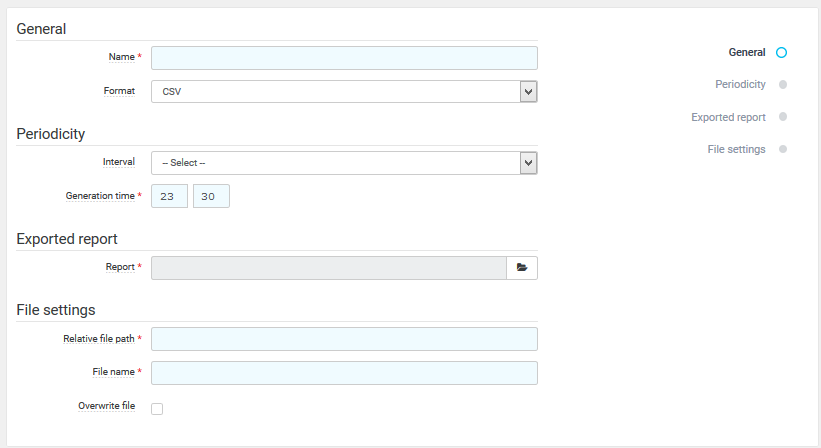
Configuration:
- Name – A name for the new scheduled report.
- Format – Format of the exported report. Supported formats are CSV, HTML, PDF, XLSX, and XML.
Interval – Interval that determines how often and for what period the report will be generated:
Previous day – The report will be created daily containing data for the previous day.
Previous 7 days – The report will be created weekly containing data for the previous 7 days.
Calendar month – The report will be created monthly on a selected day of the month. The report will contain data starting from the selected day of the previous month until (but not including) the same day of the current month.
Monthly – The report will be created monthly on a selected day of the month. The report will contain data from the first to the last day (inclusive) of the previous month.
- Day of month – The day of the month when the report will be generated. This field is available only for the monthly and calendar month intervals.
- Day of week – The day of the week when the report will be generated. This field is available only for the Previous 7 days interval.
- Report – A report from the list of saved web reports. The selected report will be generated and uploaded to the SAFEQ directory. The report determines its structure (columns, counters, etc.).
- Relative file path – Path to a sub-folder inside the root directory where the report will be saved.
- File name – File name prefix for the report. The full file name is created based on the file name, interval, format, and the Overwrite file switch.
- Overwrite file – If enabled, the report is always saved into the same file, possibly overwriting the previous report. If disabled, a timestamp is added to the file name so that older reports are not overwritten.
The Save changes button saves and activates the new scheduled file web report.
Scheduling New Counter Report to Email
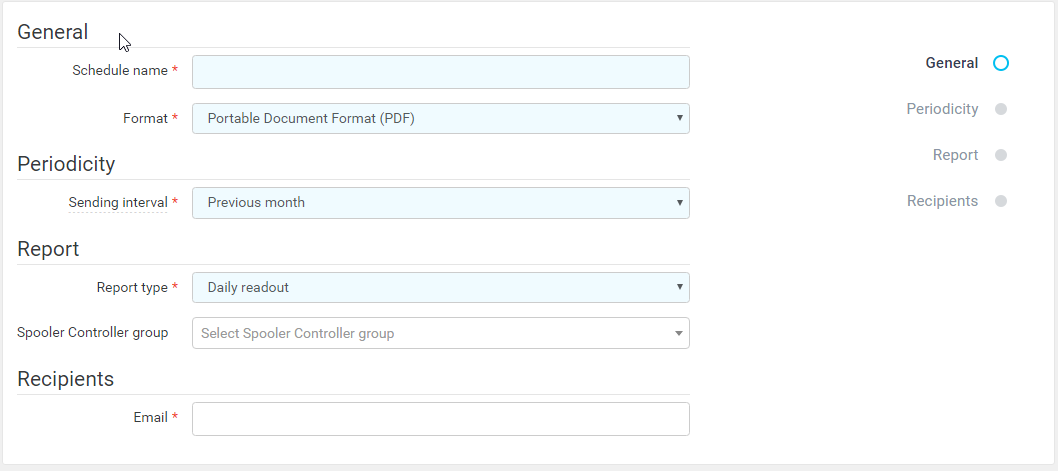
Configuration:
- Name – A name of the new scheduled report.
- Format – Format of the report. Supported formats are CSV, HTML, XML, XLSX, and PDF.
Sending interval – Interval that determines how often and for what period the report will be generated:
Previous week – The report will be created weekly containing data for the whole previous week. The report is sent on the first day of the following week right after midnight. The first day of the week is determined based on the server locale.
- Previous month – The report will be created monthly containing data for the previous whole month. The report is sent on the first day of the following month right after midnight.
- Report type – The type of the counter reports. Available options are Daily readout (last known counters for each day) and First and last readout.
- Spooler Controller group – Optionally, limits the report to a particular Spooler Controller group.
- Recipients – A list of email recipients who will receive the report.
The Save changes button saves and activates the new scheduled report.