With Dispatcher Paragon Embedded Terminal, you can select billing (project) codes in the application menu for copying and scanning (and possibly also printing).
Whether or not will the selected billing code apply also to your print jobs depends on the configuration done by your administrator.
Open the Billing codes application
1. In the Main menu select Billing codes application.
ApeosPort-VI and older | ApeosPort-VII |
|---|---|
|
|
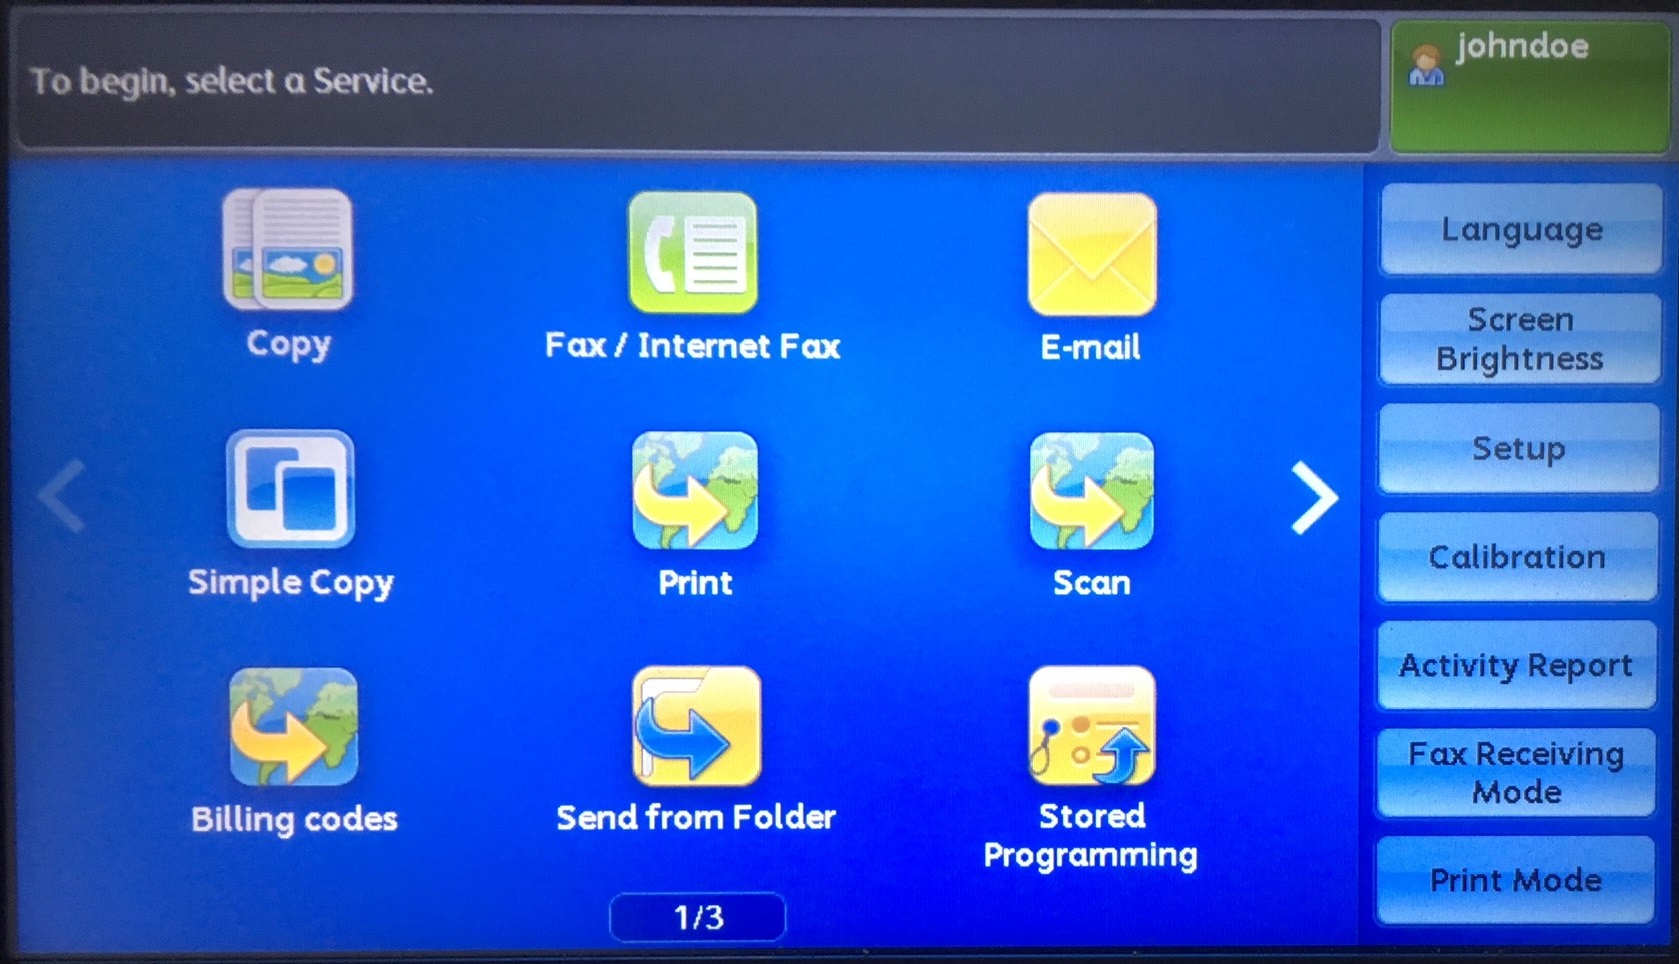
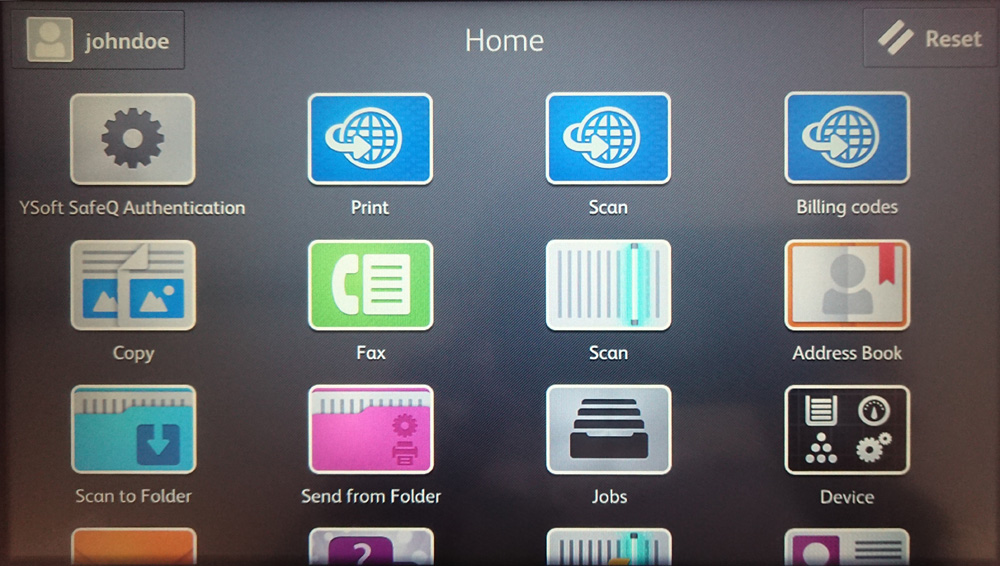
Your Main Menu screen may not look exactly like the one shown here.
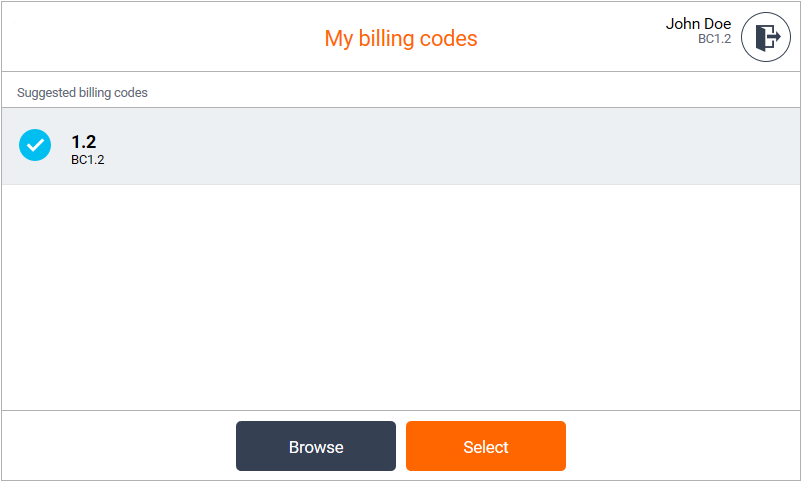
2. My billing codes screen is displayed.
My billing codes screen
This is the first screen you will see after opening the Billing codes application.
When you have default billing code assigned, then you will see that default billing code selected.
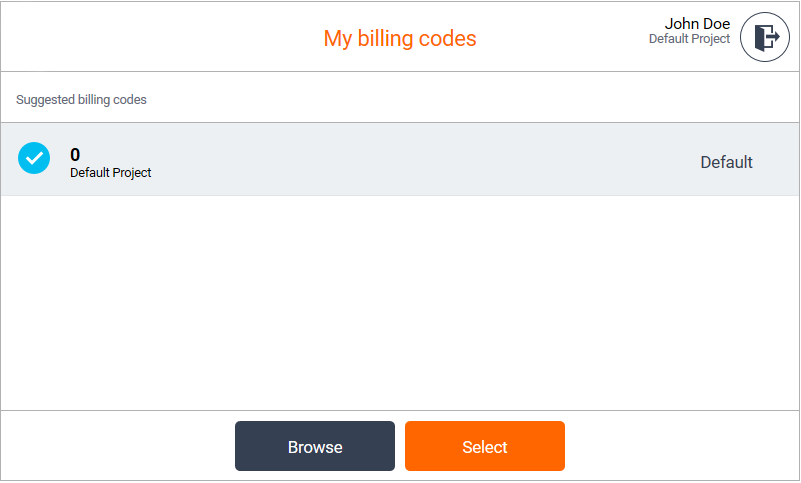
Otherwise, you will see an information message instead of a billing codes list.
![]()
If you have selected a different billing code by browsing or searching, you will see that billing code in the billing codes list.
Whether you have assigned your default billing code
or not
 .
.
You can browse or search for another billing code by tapping Browse.
You can assign selected billing code to yourself by tapping Select. Tapping it also close the application.
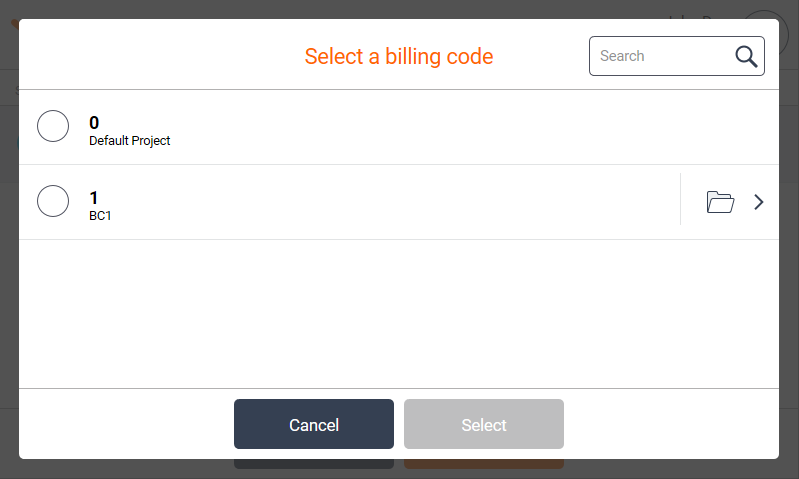
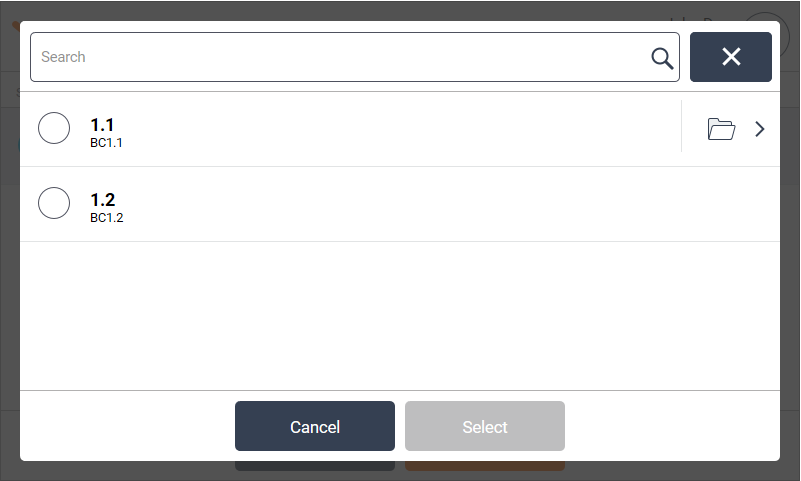
Browsing/Searching screen
Browsing
Browsing screen displays a billing codes tree structure which you can go through to find, select and assign a billing code to yourself.
- After opening the Browsing screen you will see the root of the billing codes tree structure.
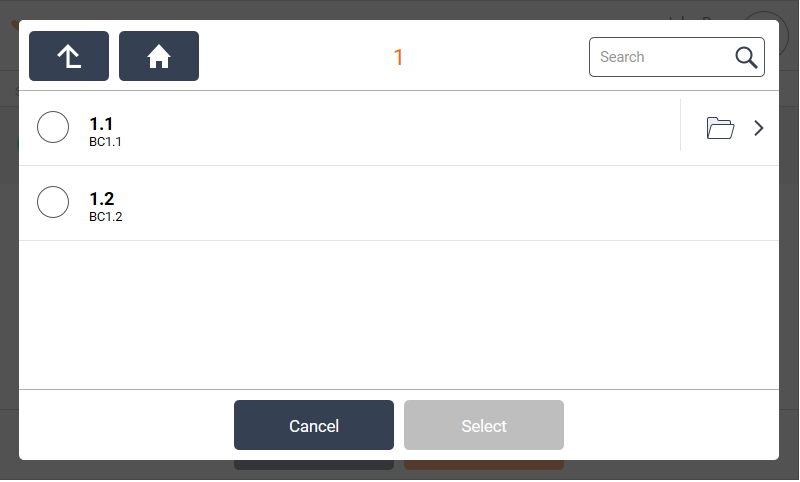
- If you want to find the billing code, you can use the navigation buttons. You can go deeper in the tree structure by pressing
 on the right side of a billing code. It is available only for billing codes with at least one child billing code. You can go up to the previous level in the tree structure by pressing
  .
.You can display the root billing codes by pressing
 .
.
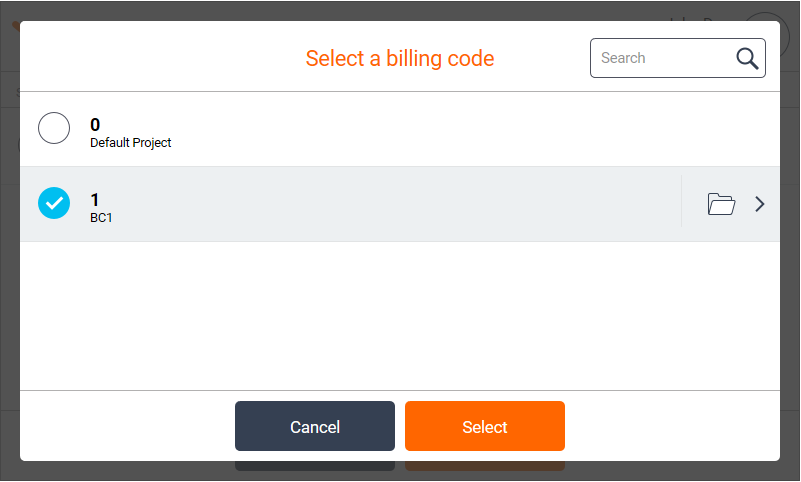
- When you select a billing code, the Select button is enabled and by pressing it you can assign the selected billing code to yourself.
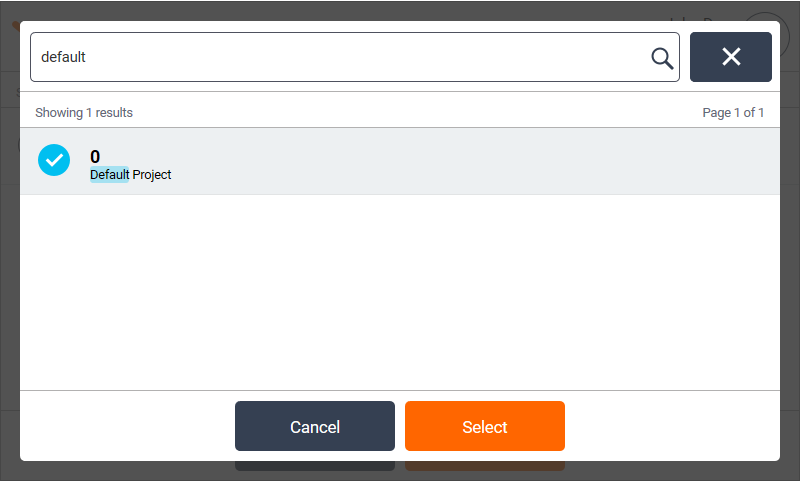
Searching
If you cannot find the desired billing code using browsing, you can use the search box on the browse screen to find the billing code by searching.
Text from the search box is searched in the billing code name and description.
- Tap inside the Search line.
- The search box will fill the window width.
- Write down a text you are searching for.
- Press symbol of magnifying glass if you want to search. Or press the cross if you want to cancel searching and return to browsing.
- After the successful search you can see a billing codes list.
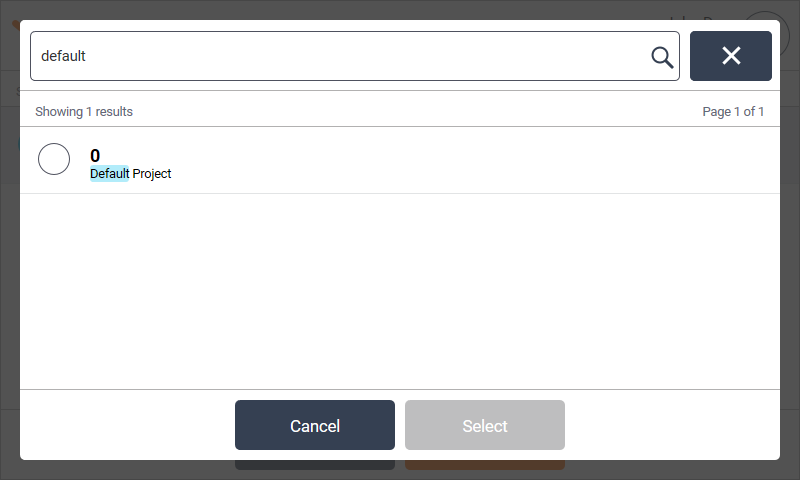
- When you select a billing code, Select button is enabled and by pressing it you can assign the selected billing code to yourself.
You can use Cancel for return to the My billing codes screen.
Searching screen displays a billing codes list of all matching billing codes. The billing codes with at least one child billing code have the folder button on the right side of a billing code. The folder button you can use to go deeper in the billing codes tree structure.
Default Billing code
Based on your configuration, the default billing code is selected automatically immediately after login (in this case: 0: Default Project). Until you change it, all copies, scans and prints will be accounted to your default billing code.
Your default billing code can be changed in the Dispatcher Paragon management interface.
Continue with print, scan or copy
When you have selected the billing code you can continue with printing, scanning or copying.