This document has been created based on Xerox WorkCentre 7435 (System FW 75.3.1, Controller + PS ROM 1.222.18) and updated based on System FW 75.14.43
Enabling JBA ("Network accounting")
If JBA technology is required for accounting (you are using MFD specific accounting instead of SNMP or job analysis accounting), it must be turned on.
Furthermore, for Onbox and Offbox user verification has to be set on (otherwise, it has to be set off).
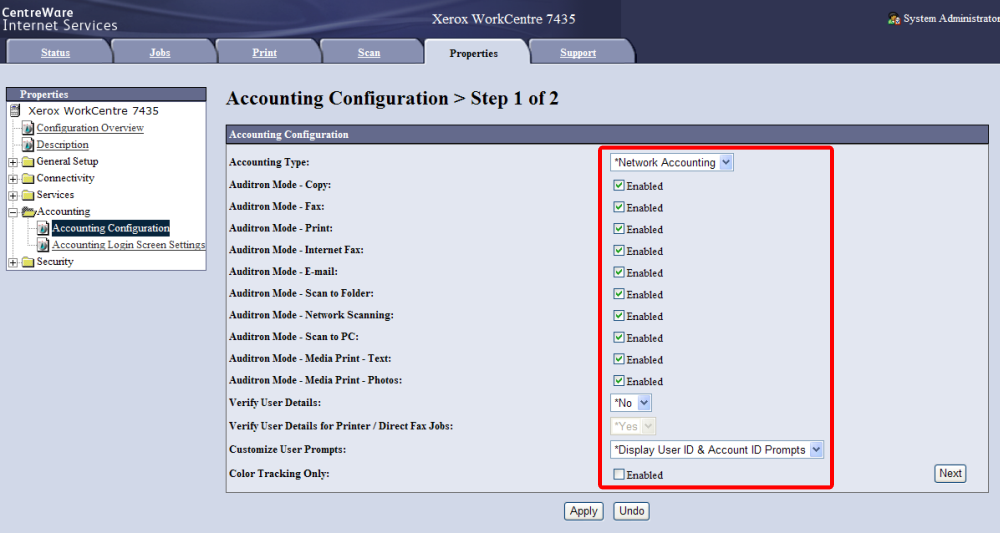
Enable Network Accounting: Properties > Accounting > Accounting Configuration and Customize User Prompts.
Match the settings in the screenshot below and select Apply. Select reboot.
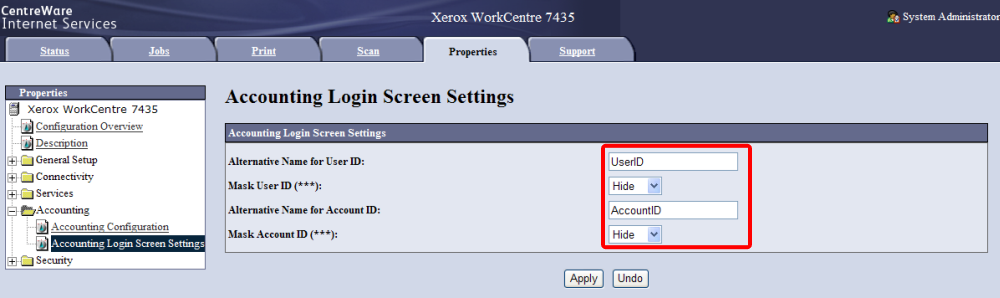
Hide mask for login screen: Properties > Accounting > Accounting Login Screen Settings.
Match the settings in the screenshot below and select Apply. Select reboot.
Checking enabled features
Xerox device may come with many options disabled by factory settings. Please ensure following options are enabled:
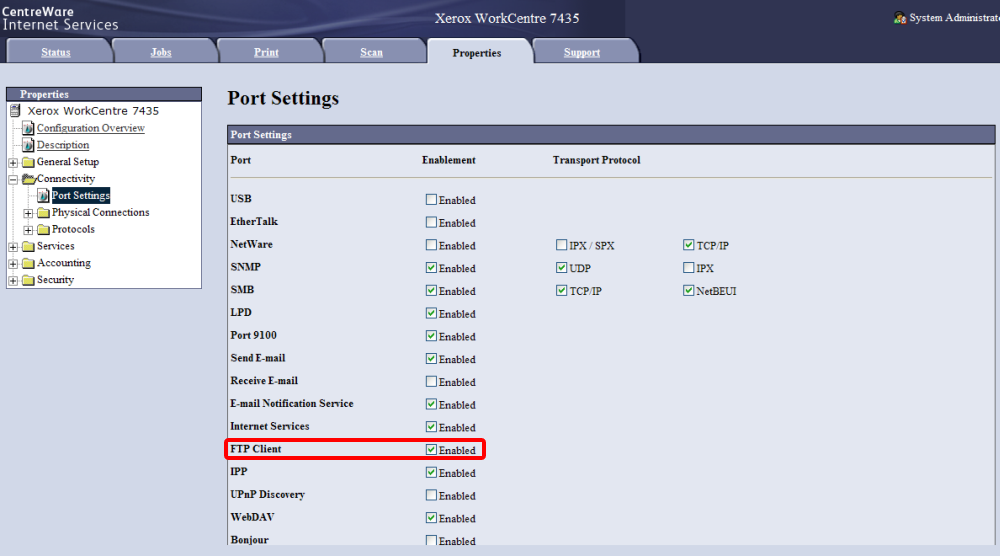
FTP: Properties > Connectivity > Port Settings > FTP Client.
Make sure proper settings are applied, select Apply. Select reboot.
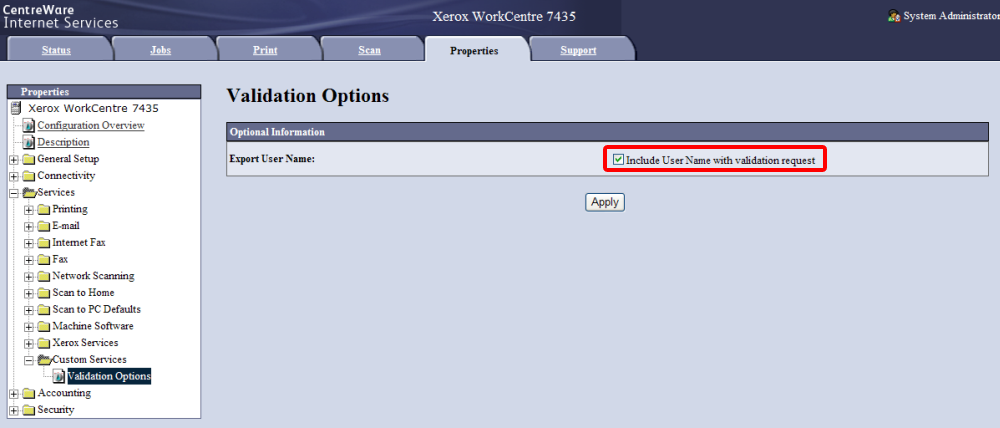
Check Export User validation: Properties > Services > Custom Services > Validation Options > Enable Export User Name.
Match the settings in the screenshot below and select Apply. Reboot is not required.
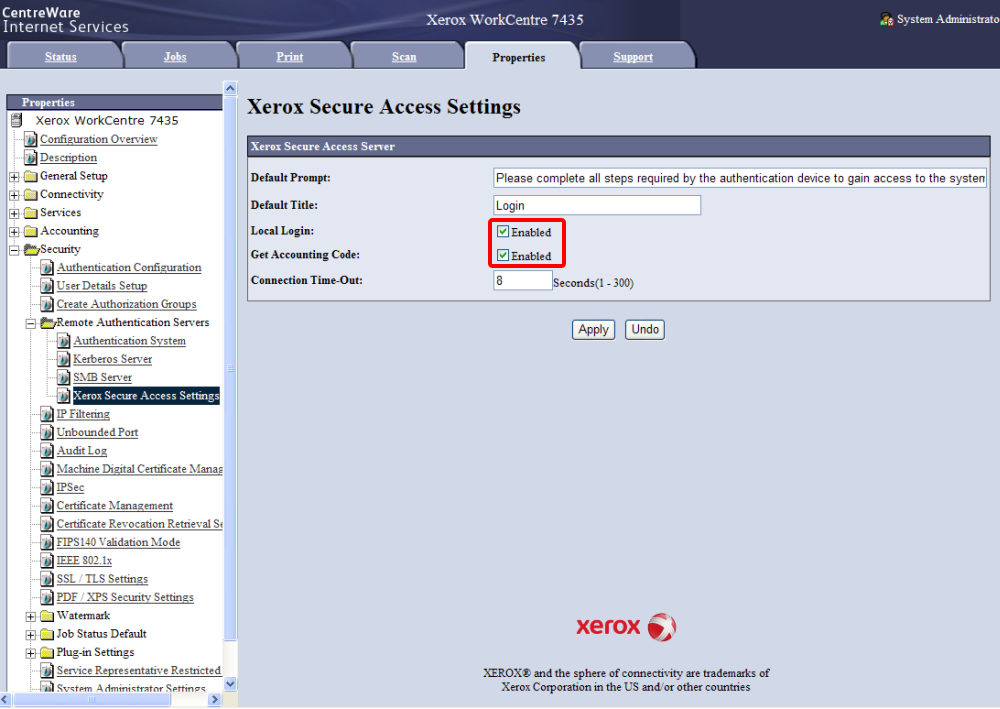
Configuring Xerox Secure Access
Xerox secure access: Properties > Security > Remote Authentication Services > Xerox Secure Access Settings (texts illustrate situation before SafeQ Embedded Terminal installation).
Match the settings in the screenshot below and select Apply. Select reboot.
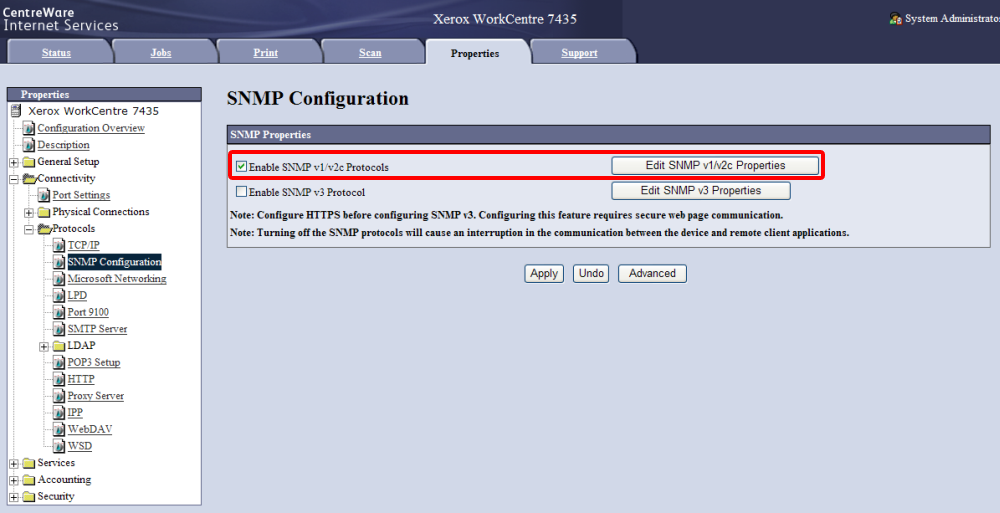
SNMP Community setting
You will later need to fill proper SNMP community in device configuration. You can check current MFD setting under Properties > Connectivity > Protocols > SNMP Configuration > Edit SNMP v1/v2c Properties.
Match the settings in the screenshot below and select Apply. Reboot is not required.
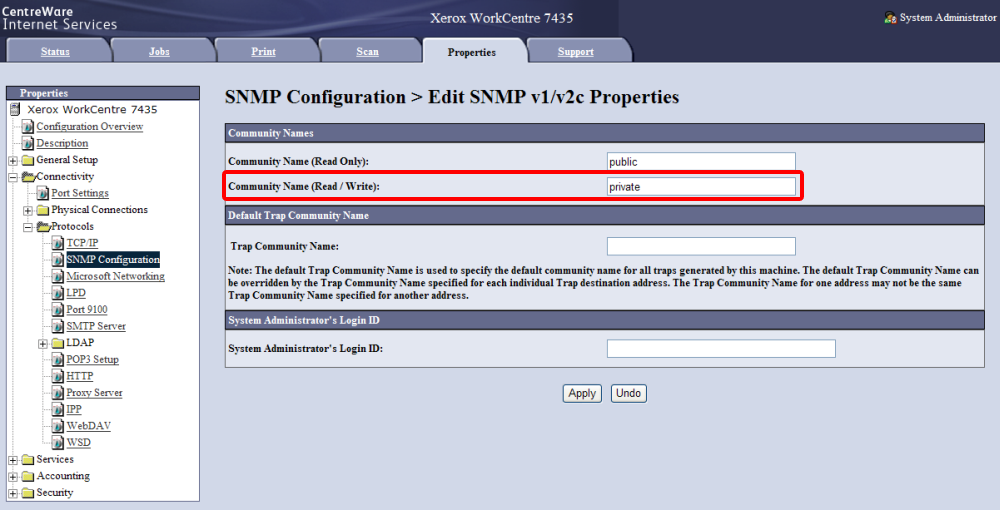
In device configuration, corresponding Community Name (Read/Write) has to be filled.
Match the settings in the screenshot below and select Apply. Reboot is not required.
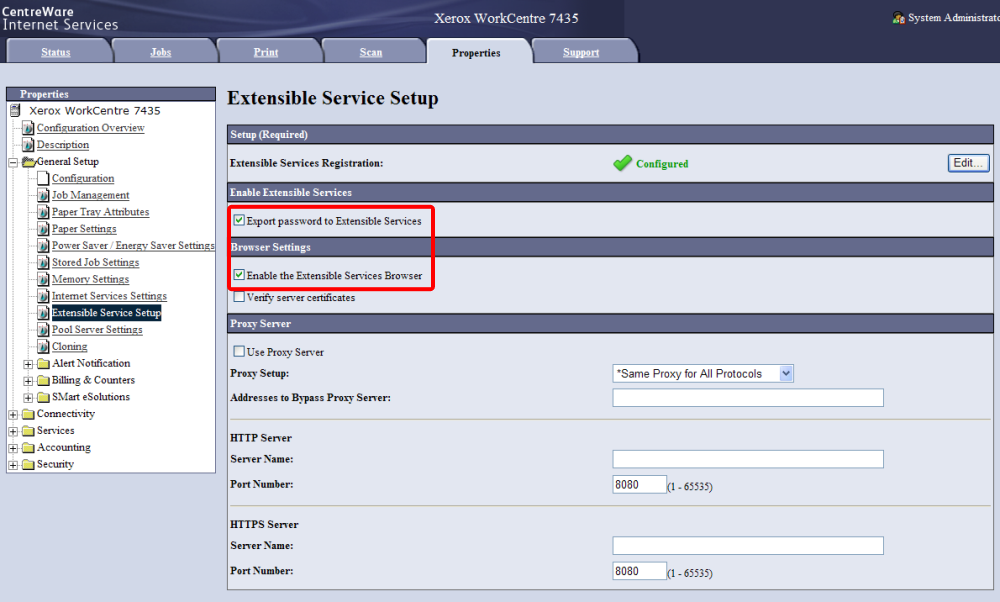
Scan Services
You will need to enable Scan Template management in device configuration for scanning with workflows later. You can check current MFD setting under Properties > General Setup > Extensible Service Setup. Export password and Enable the Extendable Services Browser should be enabled.
Match the settings in the screenshot below and select Apply. Reboot is not required.
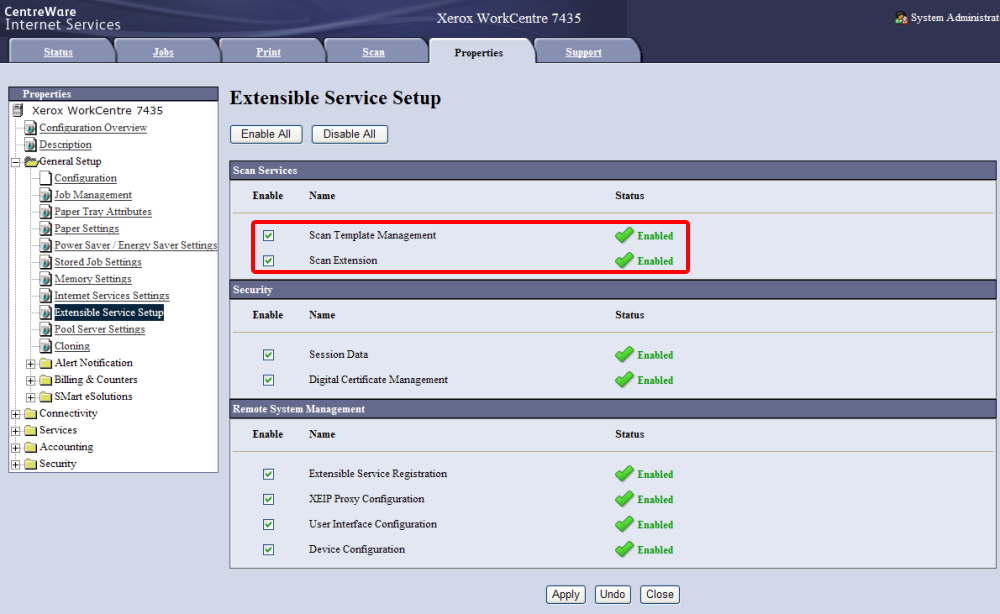
Edit Extensible Services Setup. Scan Template Management and Scan Extensions should be enabled.
Match the settings in the screenshot below and select Apply. Reboot is not required.
Proceed to MFD installation in SafeQ (Page ) to complete the installation in SafeQ.
Post-installation checks and additional settings
User access rights must be configured globally (only if LDAP is properly set-up, user logins/aliases can be used for per group access rights, but it still has to be configured manually per device).
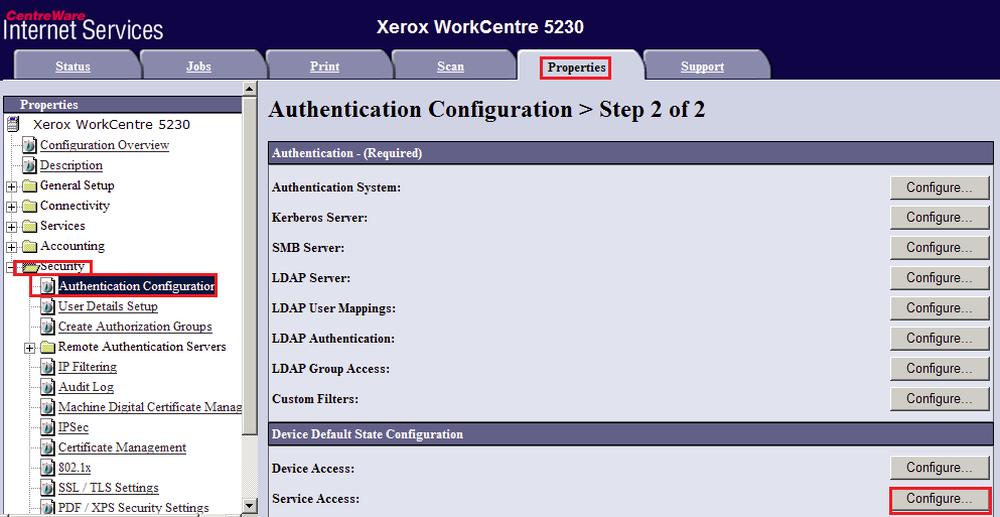
Authentication mode: Properties > Security > Authentication Configuration.
Check current settings and click Next.

Click on Configure... button for Service Access.
Click on Next button for Service Access (on previous page).
a) If you chose device authentication mode To device, make sure that all services are locked.
b) If you chose device authentication mode To each application, make sure that Dispatcher Paragon is locked, other services may be unlocked.
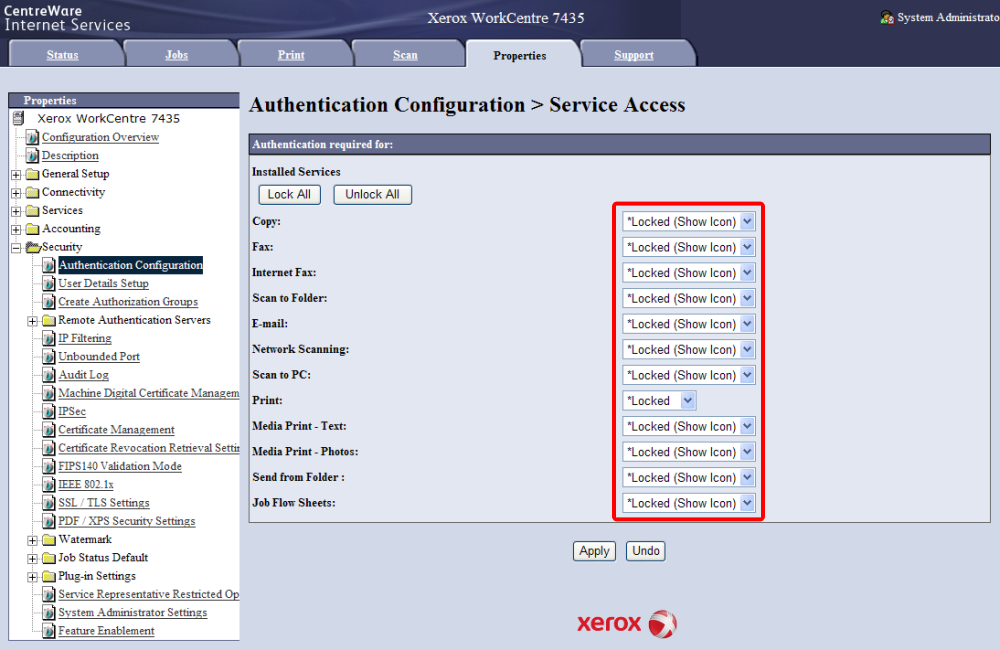
In case you change title of your application and reinstall the embedded terminal, the Dispatcher Paragon application can get unlocked. In that case, please lock the application again manually.