This manual was created based on Fuji Xerox ApeosPort C2570 and should be applicable to most Fuji Xerox ApeosPort MFDs, although slight differences may occur.
Requirements
Device has to support the Dispatcher Paragon Embedded Terminal, supported devices are listed on the Partner Portal in the Hardware Compatibility List (HCL).
Device has to support eXtensible Customizing Platform (XCP) versions 1.2+ (for YSoft Terminal Application - 2nd Gen. is required version 1.4+).
External Access Kit (Web Browser, EBW v4) is installed (Should be done by Fuji Xerox service engineer).
Proper NVM is set in service mode (Should be done by Fuji Xerox service engineer).
If you are planning on using Elatec TWN4 reader, make sure the reader has Keyboard standard firmware.
Limitations can be found on page Requirements and known limitations of Dispatcher Paragon Embedded Terminal for FujiXerox.
General notes
- During MFD configuration, MFD sometimes requires reboot. When prompted for reboot, follow the instruction displayed either on web browser or on MFD operation panel.
- Make sure that External Access Kit is installed and configured at the MFD.
General configuration
General settings
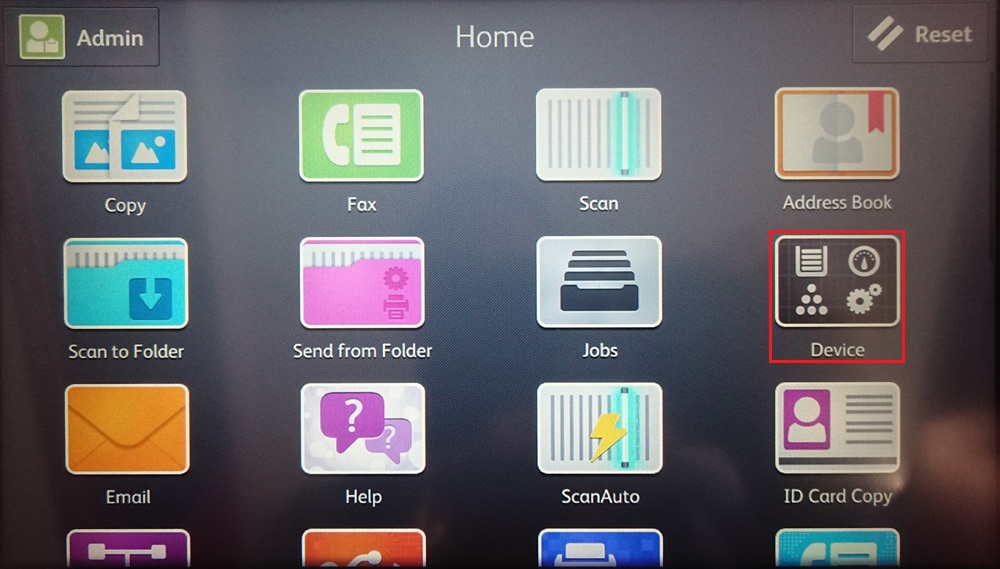
Login to MFD as a system Administrator (Default credential is 11111) and go to Device.
Configure date and time according to the server running Dispatcher Paragon
Go to Device > System Settings > System Clock / Timers
- Time Zone
- Date
- Time
Set these options in the aforementioned order, because the Time Zone setting has effect on the Time setting.
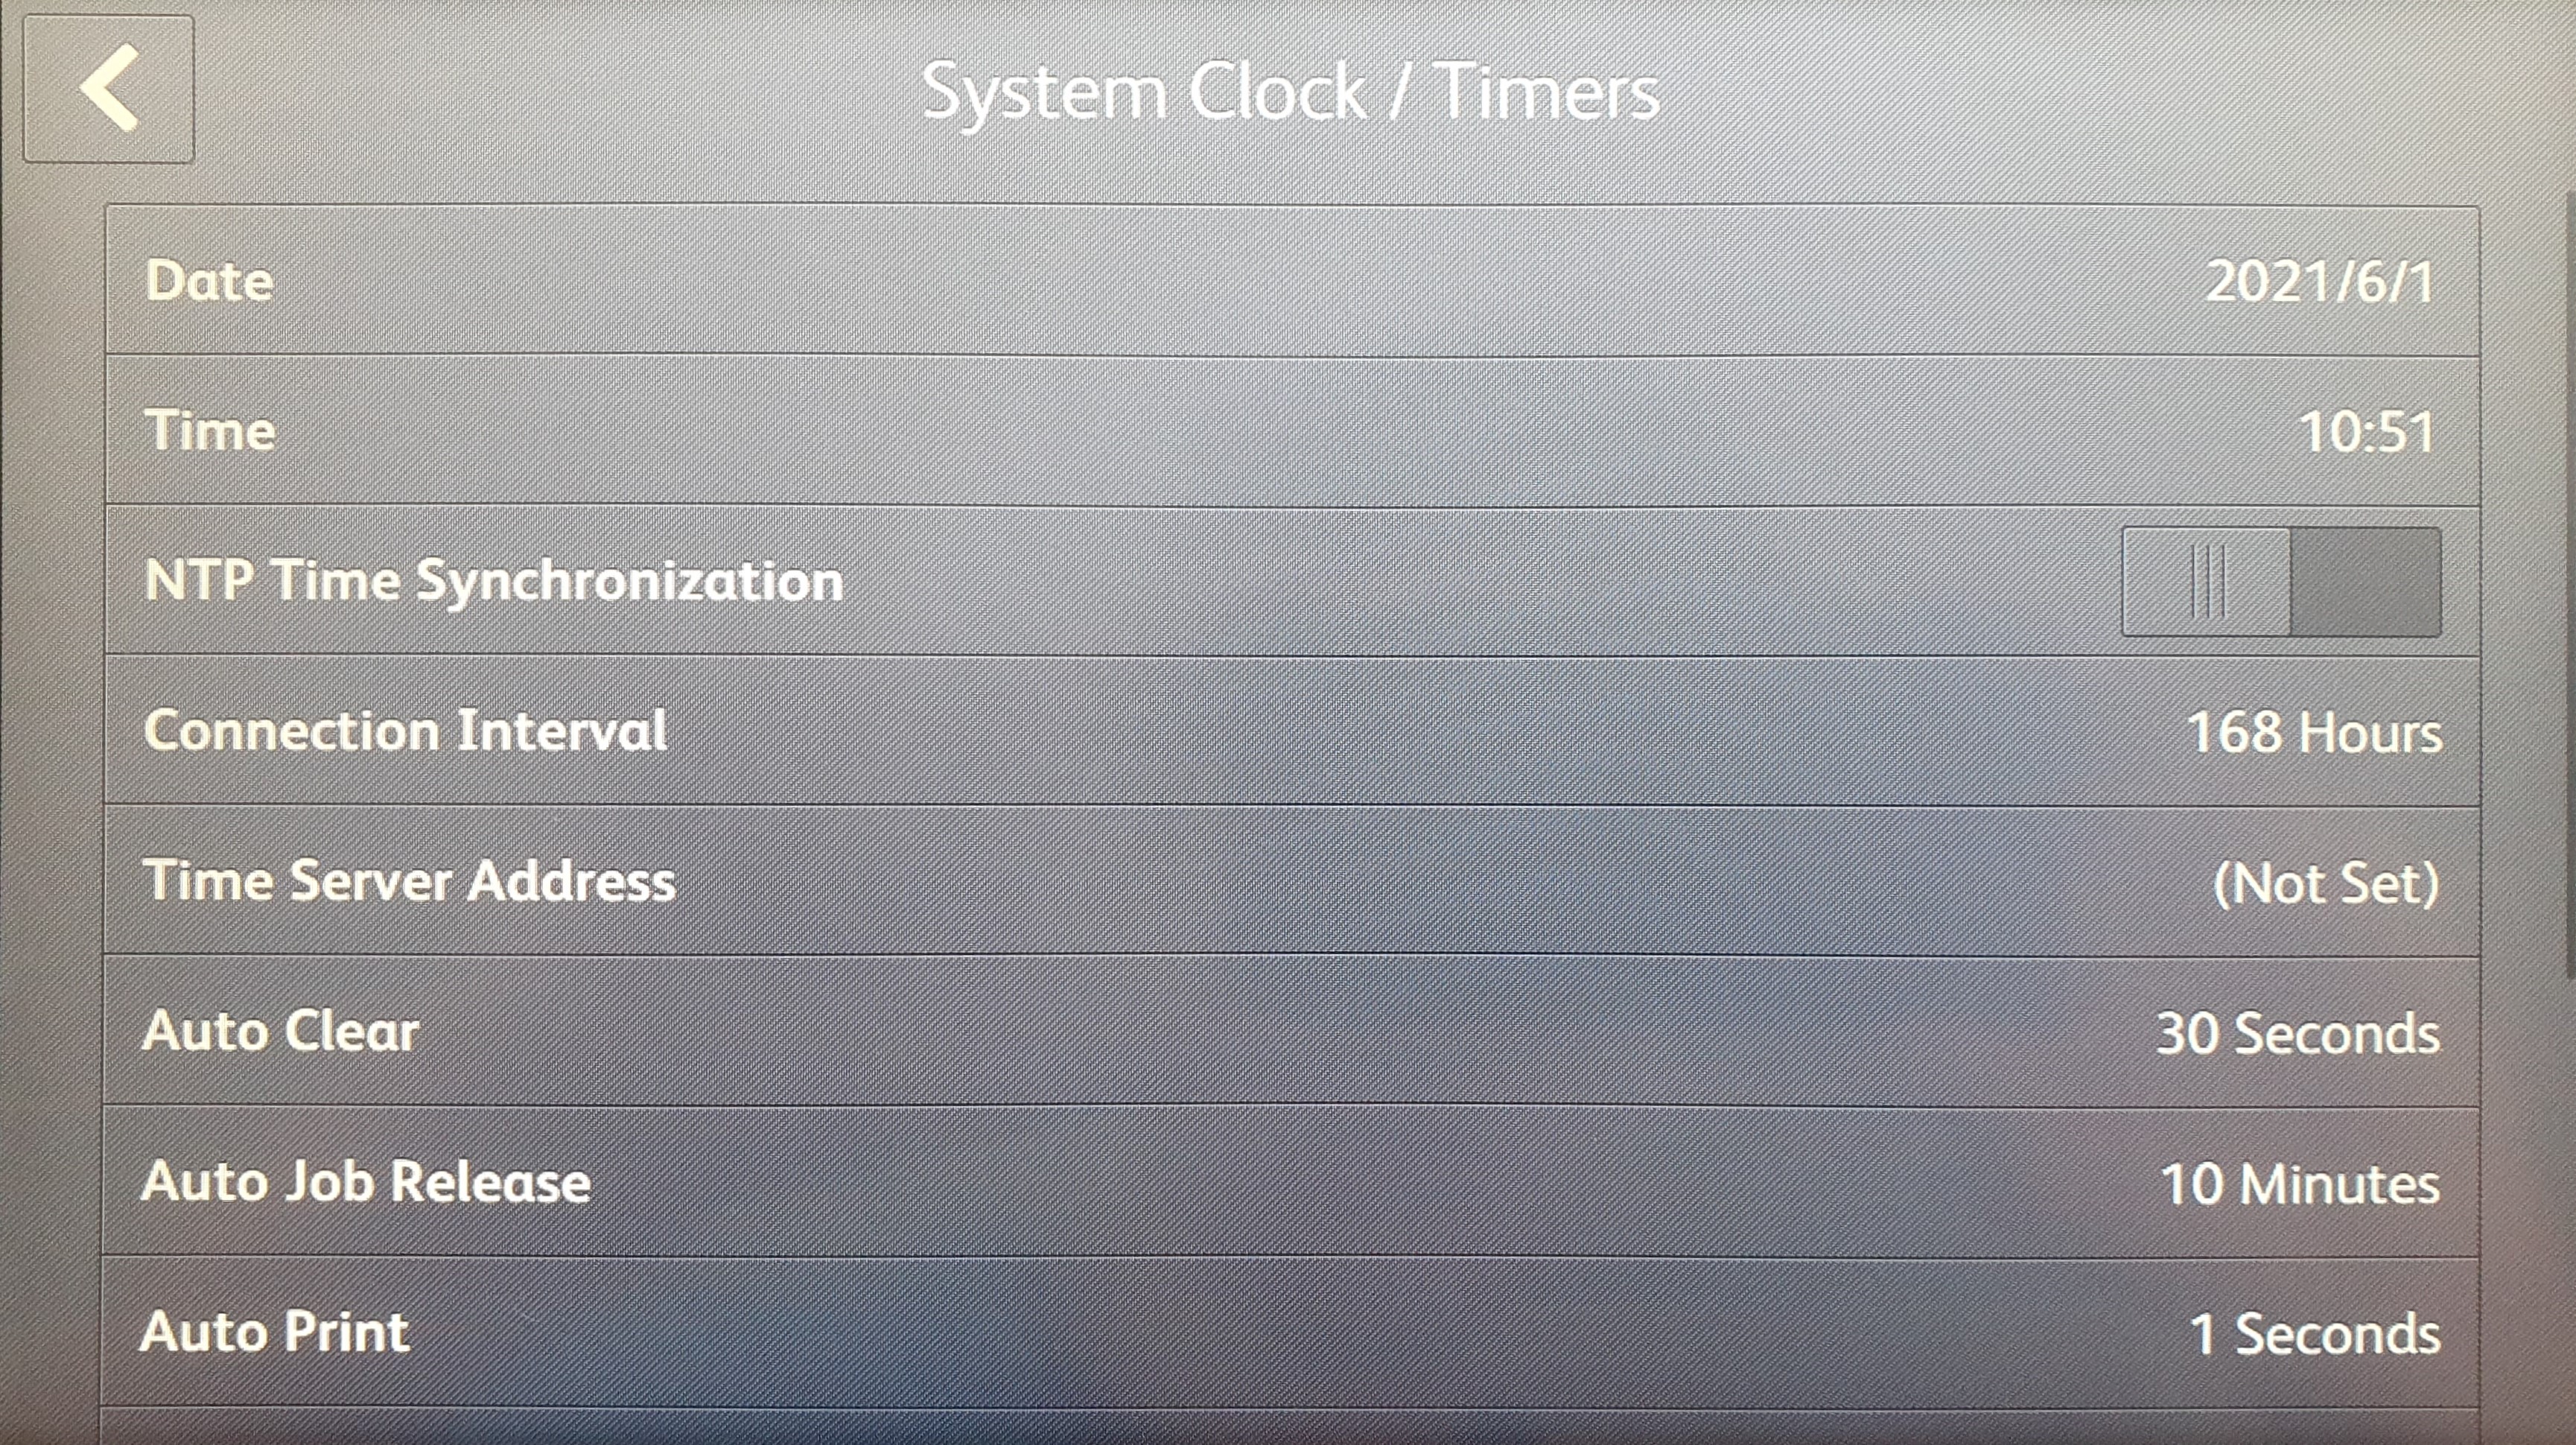
Configure NTP
This is optional
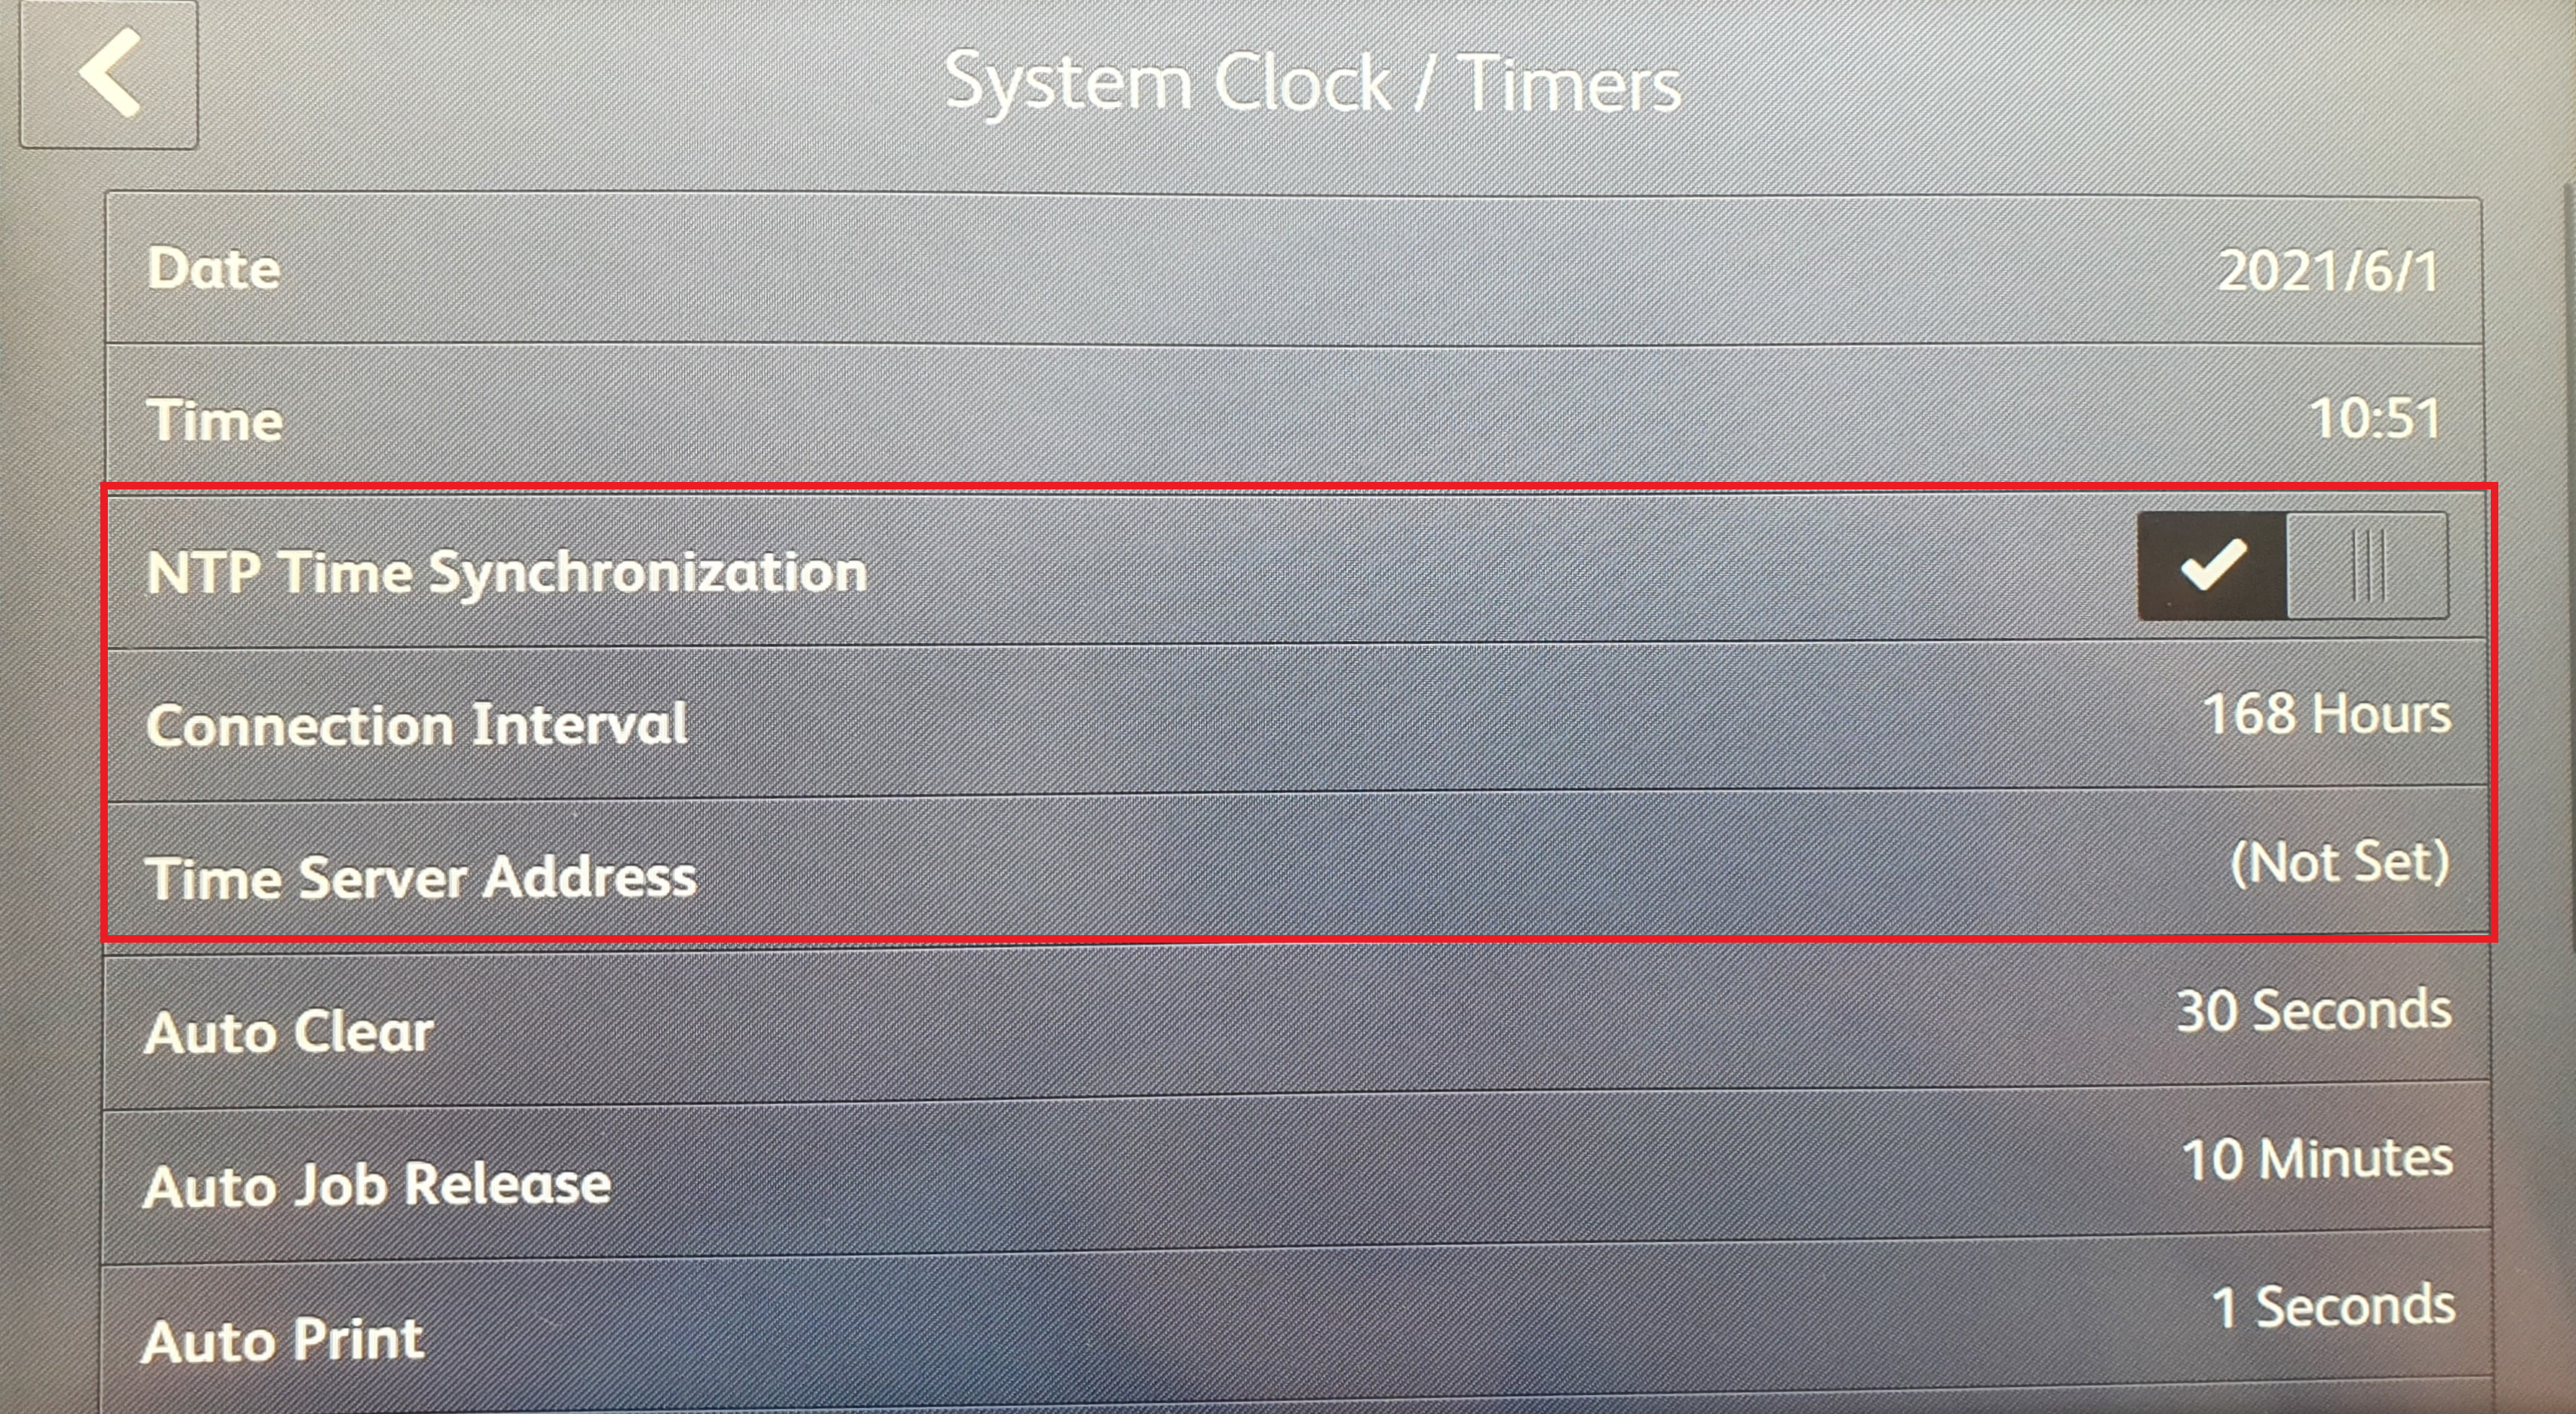
Go to Device > System Settings > System Clock / Timers
- NTP time synchronization: On
- NTP server address
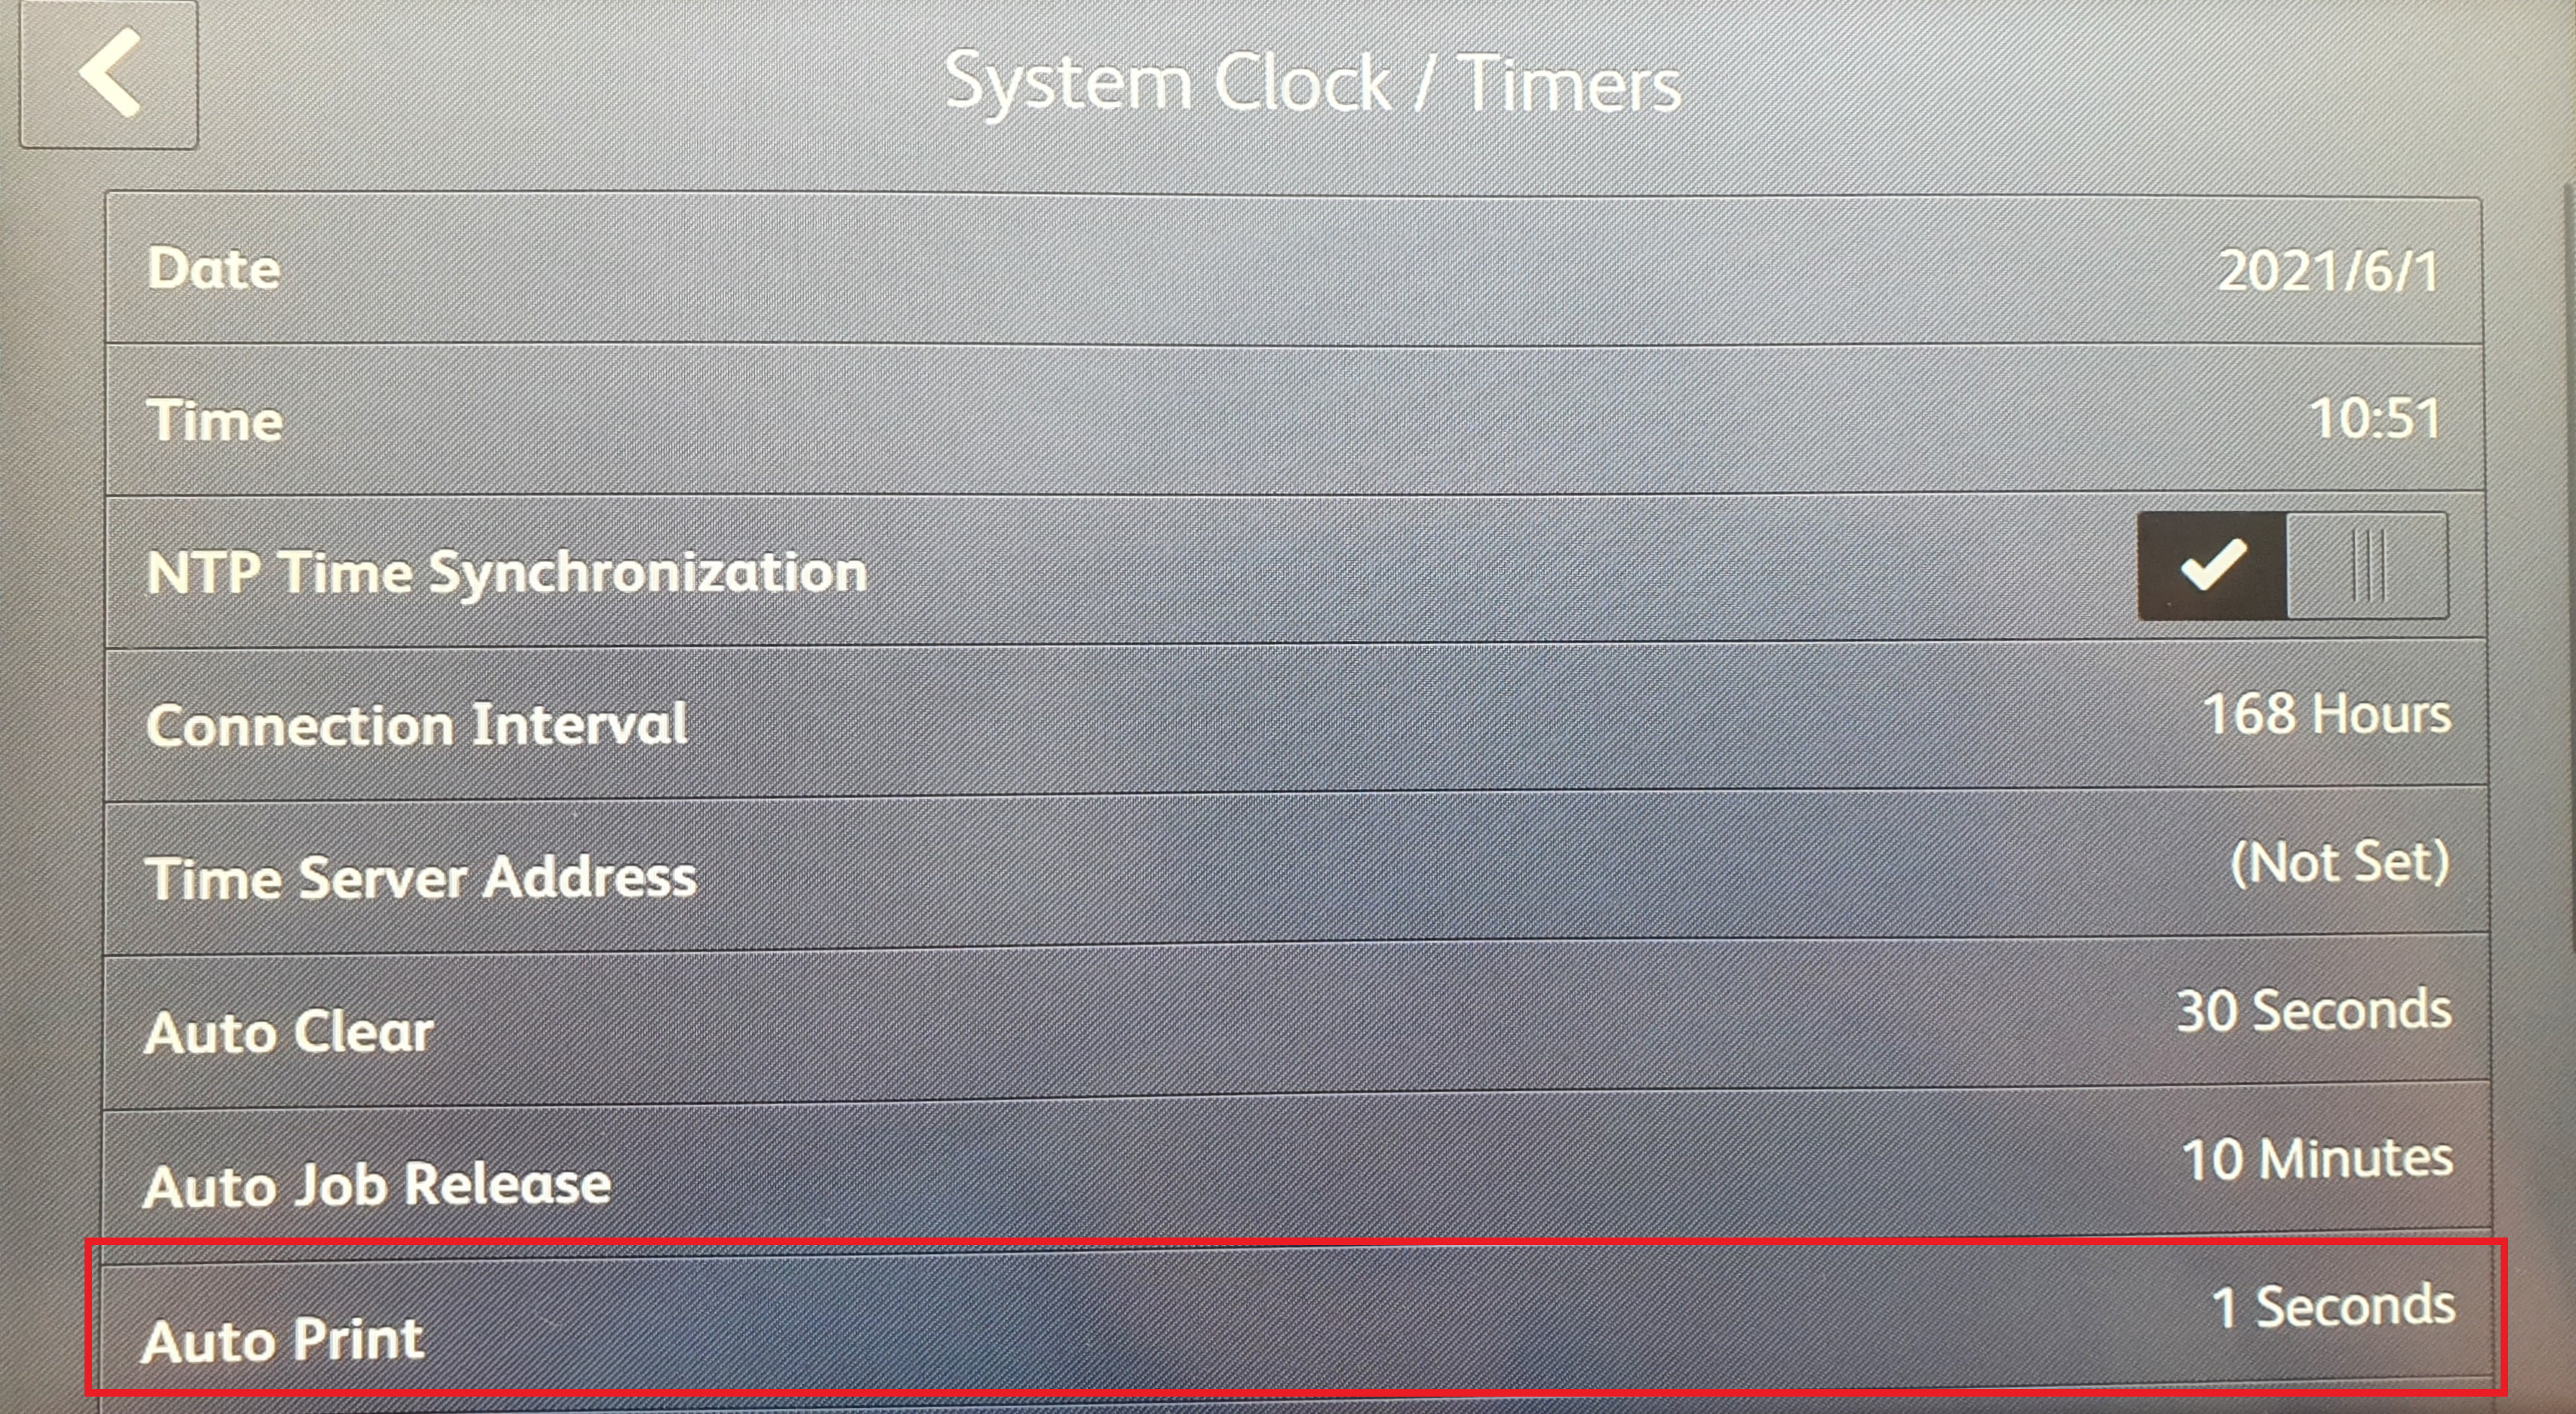
Configure waiting time to release print job
Go to Device > System Settings > System Clock / Timers
- Auto Print: 1 Seconds
Security settings
Administrator user ID and password
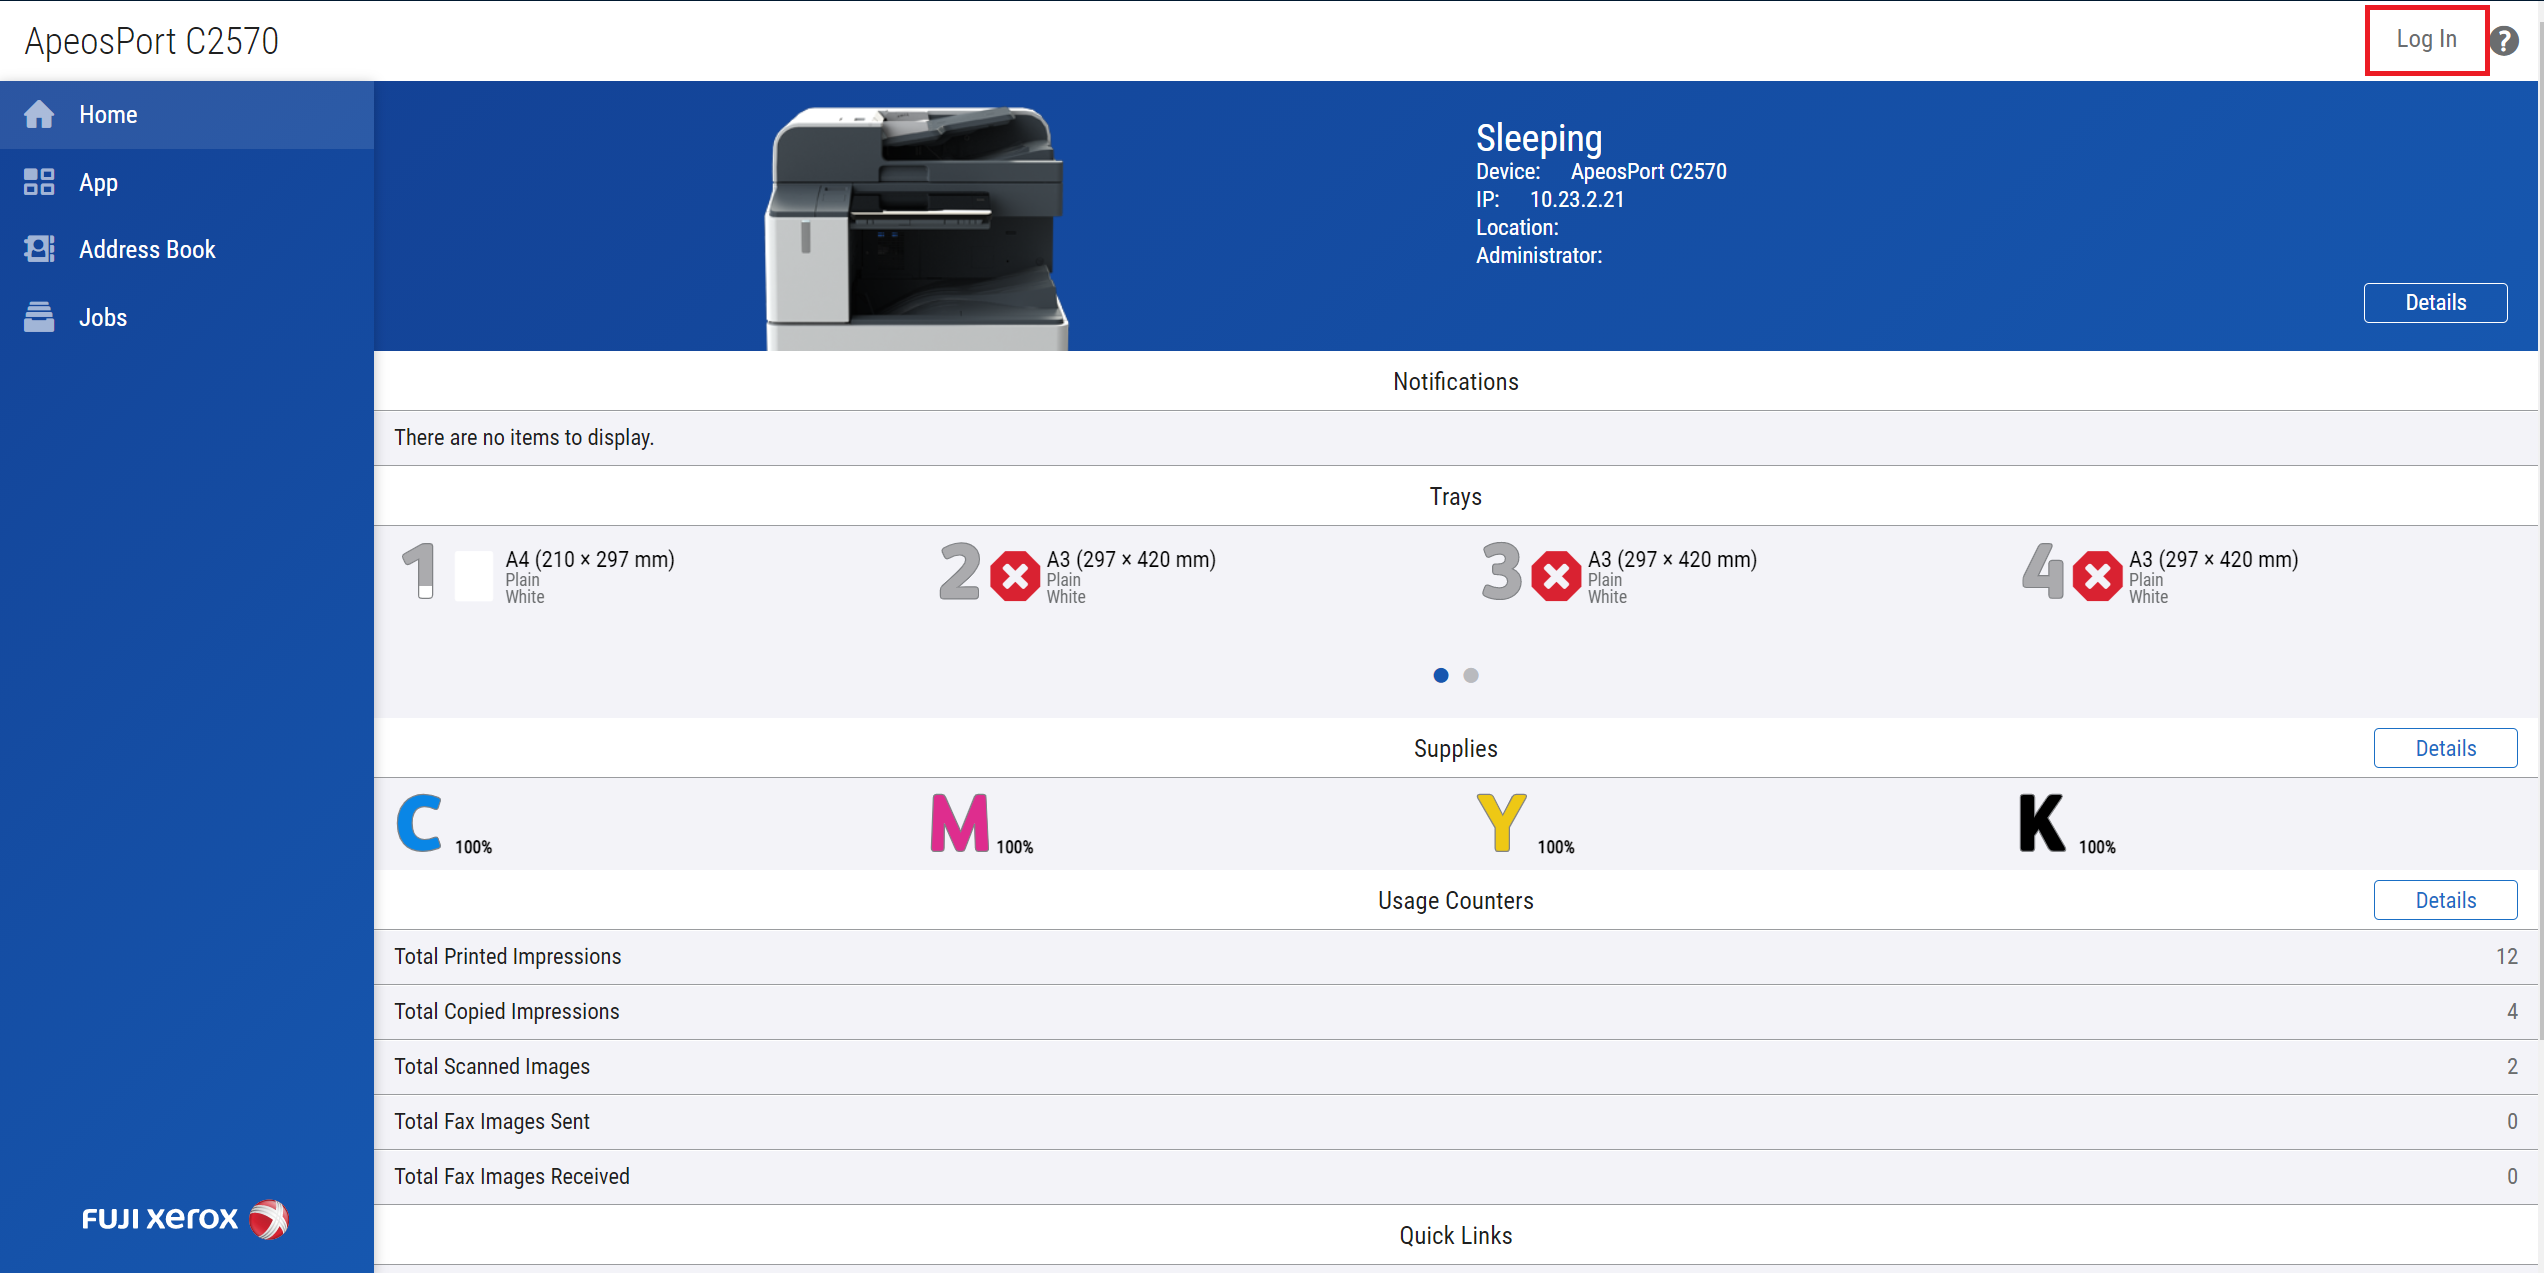
Access to MFD at http://MFP_IP_Address using Web Browser
Following screen will be displayed. Then click Log In. Authentication dialog pops up. Type in admin credentials. (Default credential is username: 11111, password: x-admin.)
Go to Administrator > Profile.
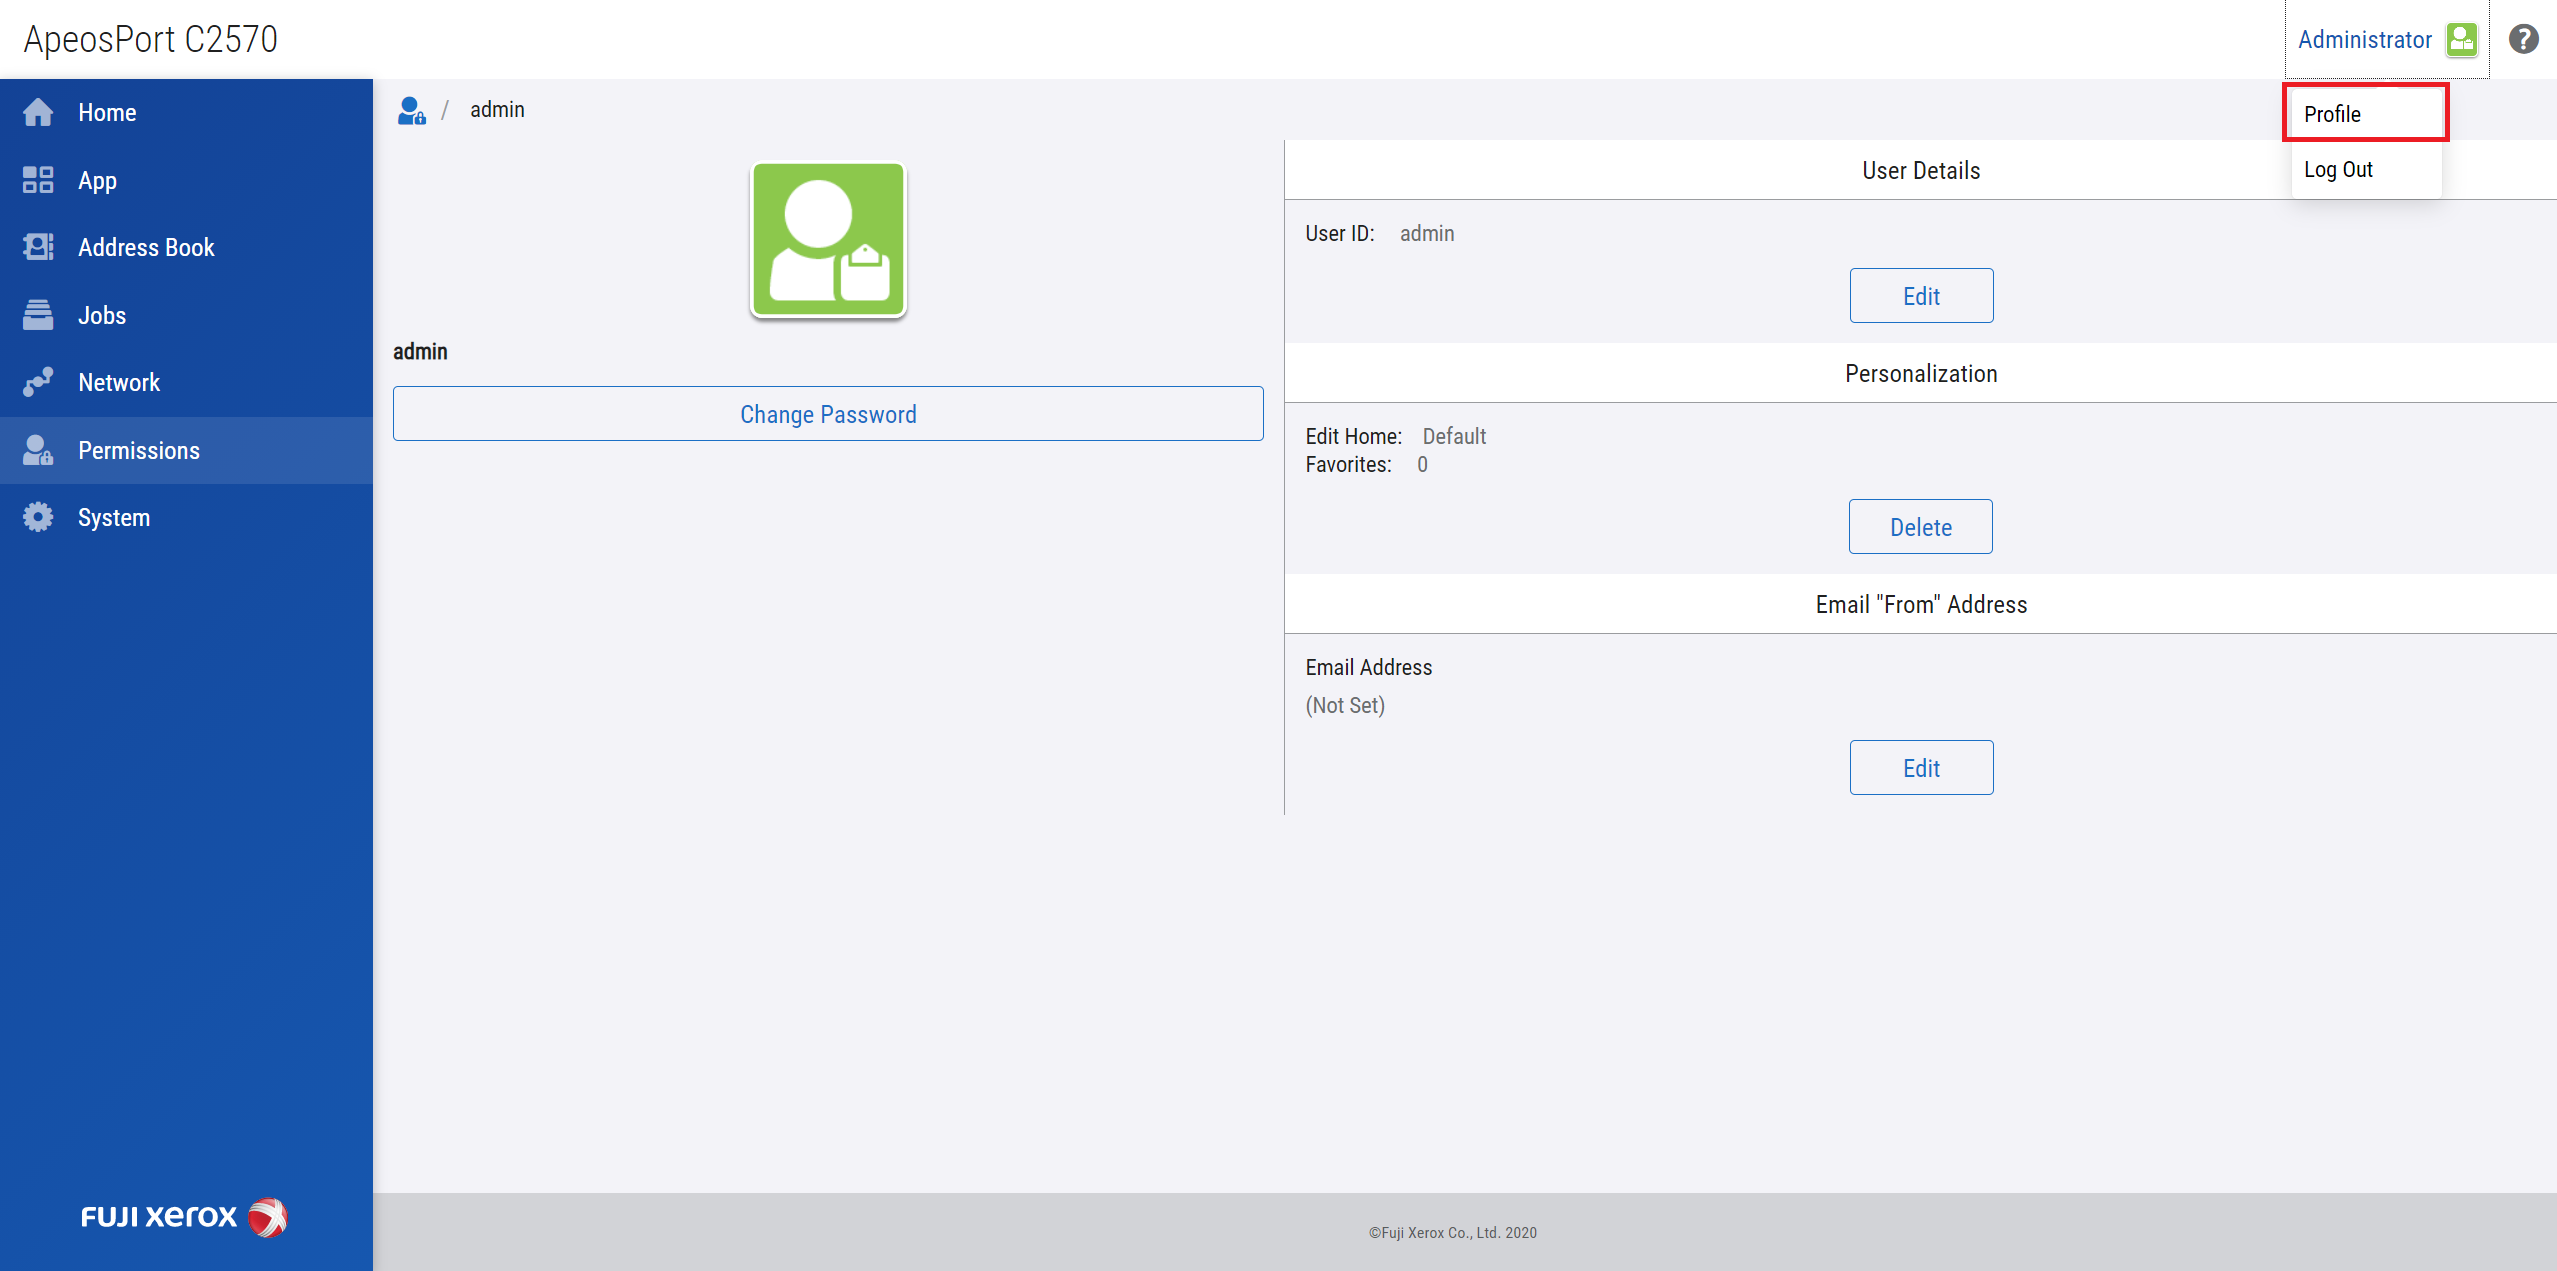
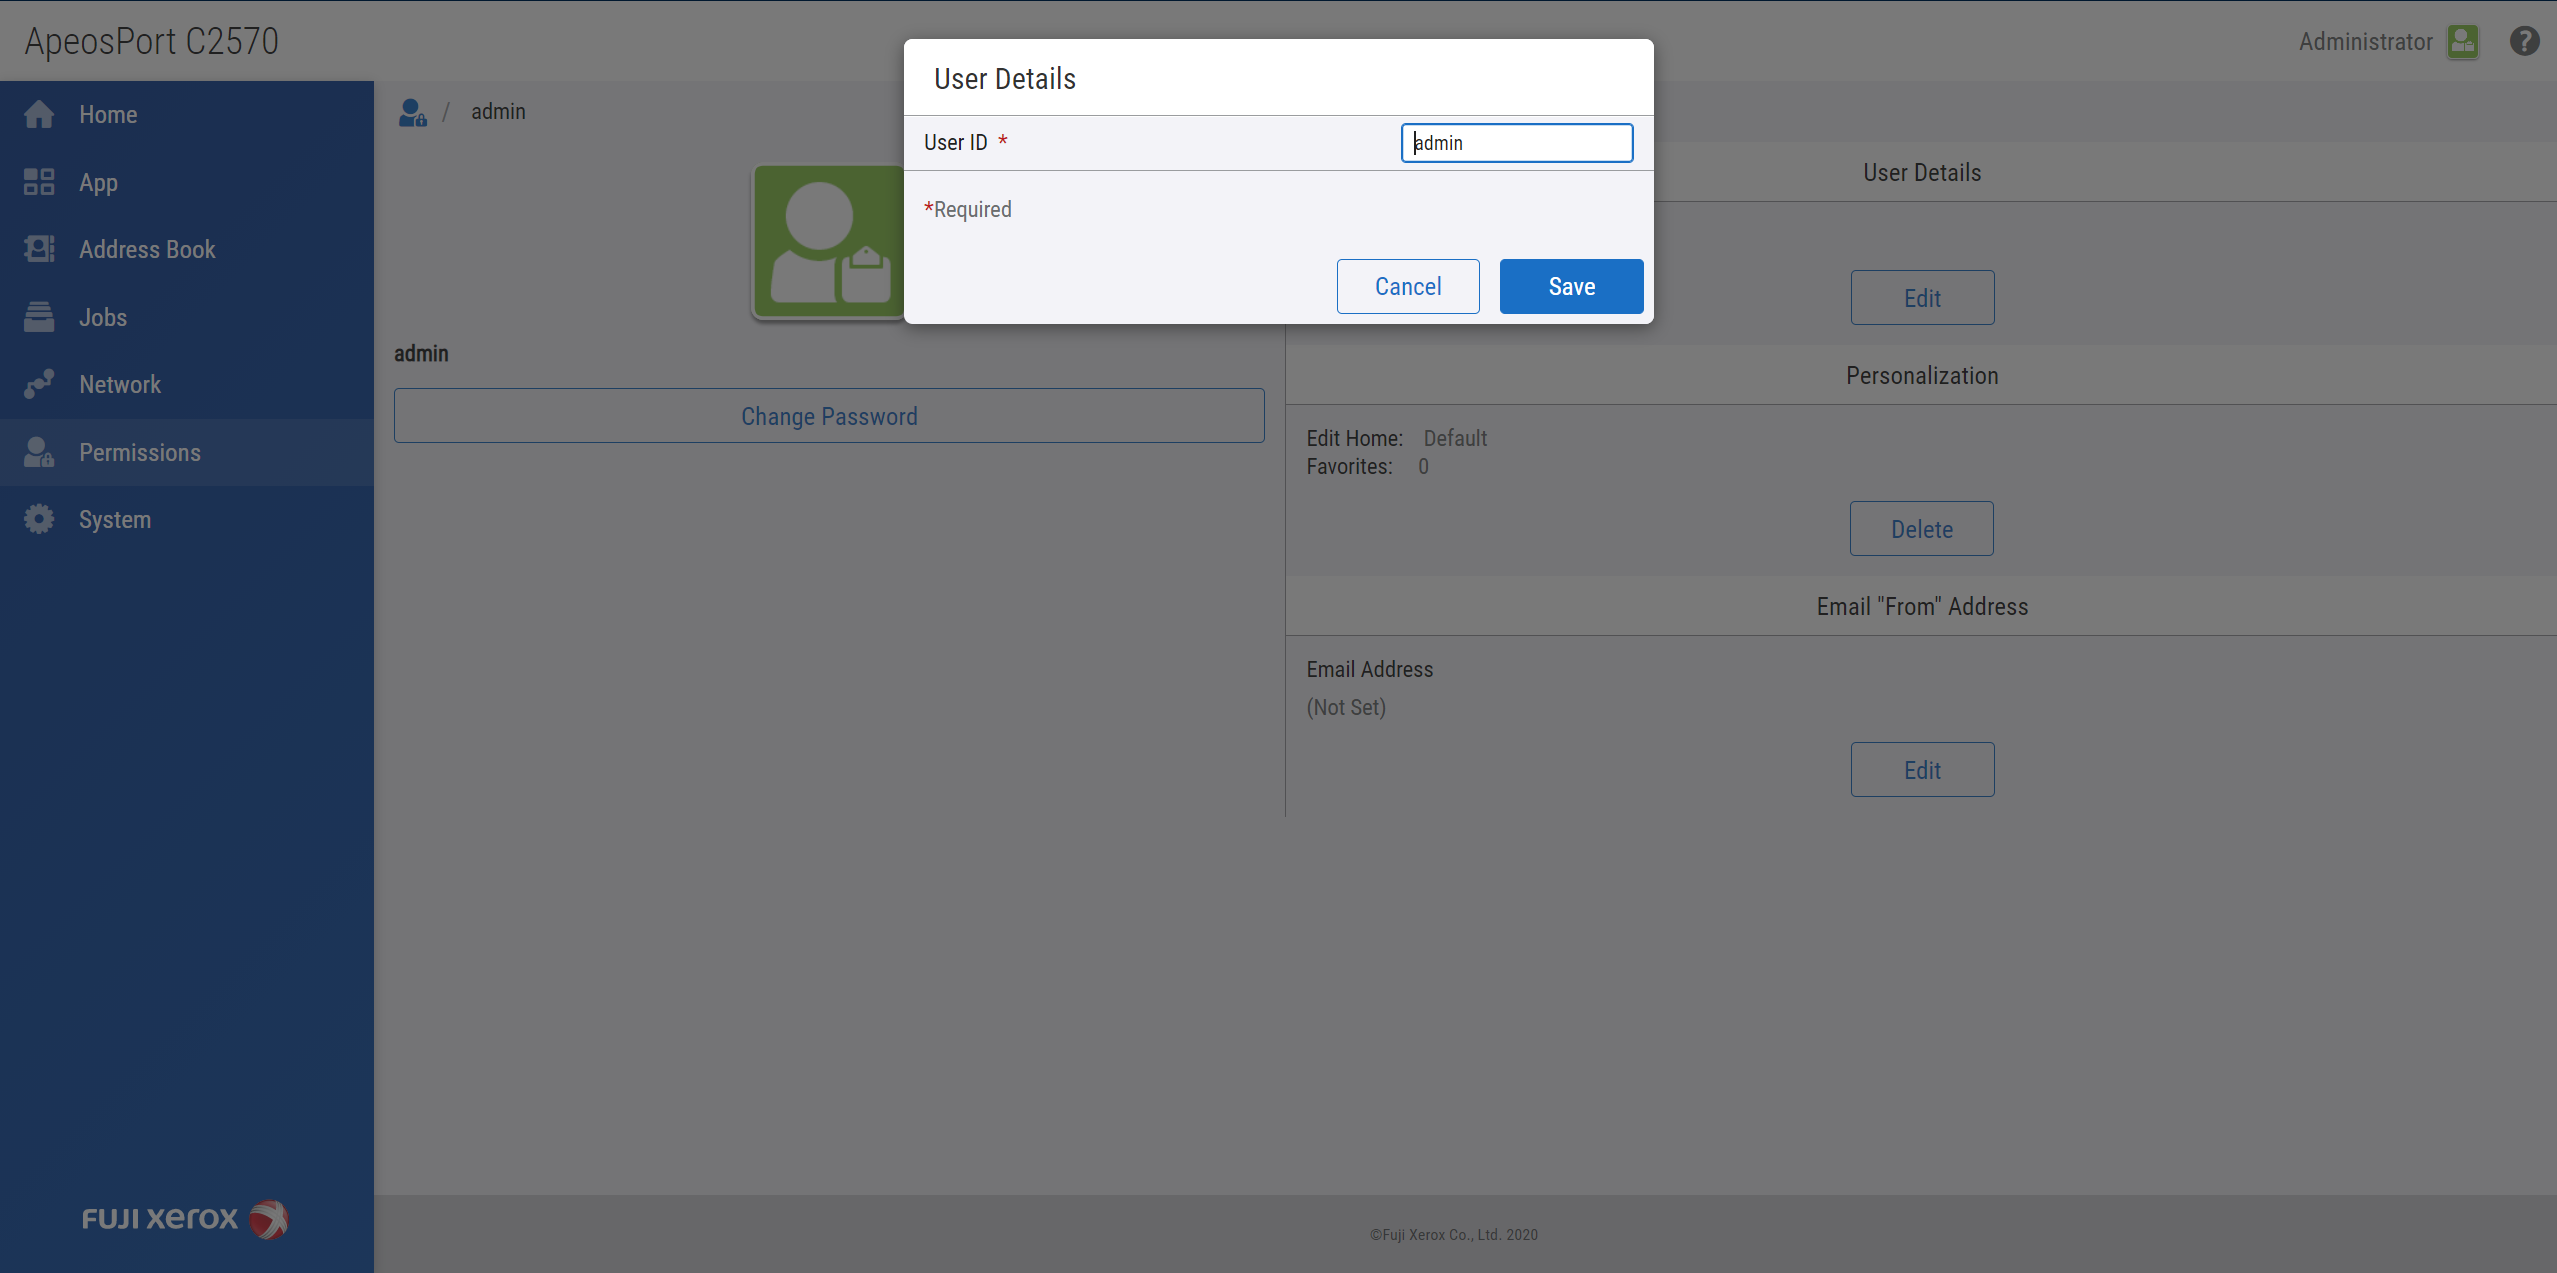
Press Edit button for User Details to change and insert new user ID name for Administrator.
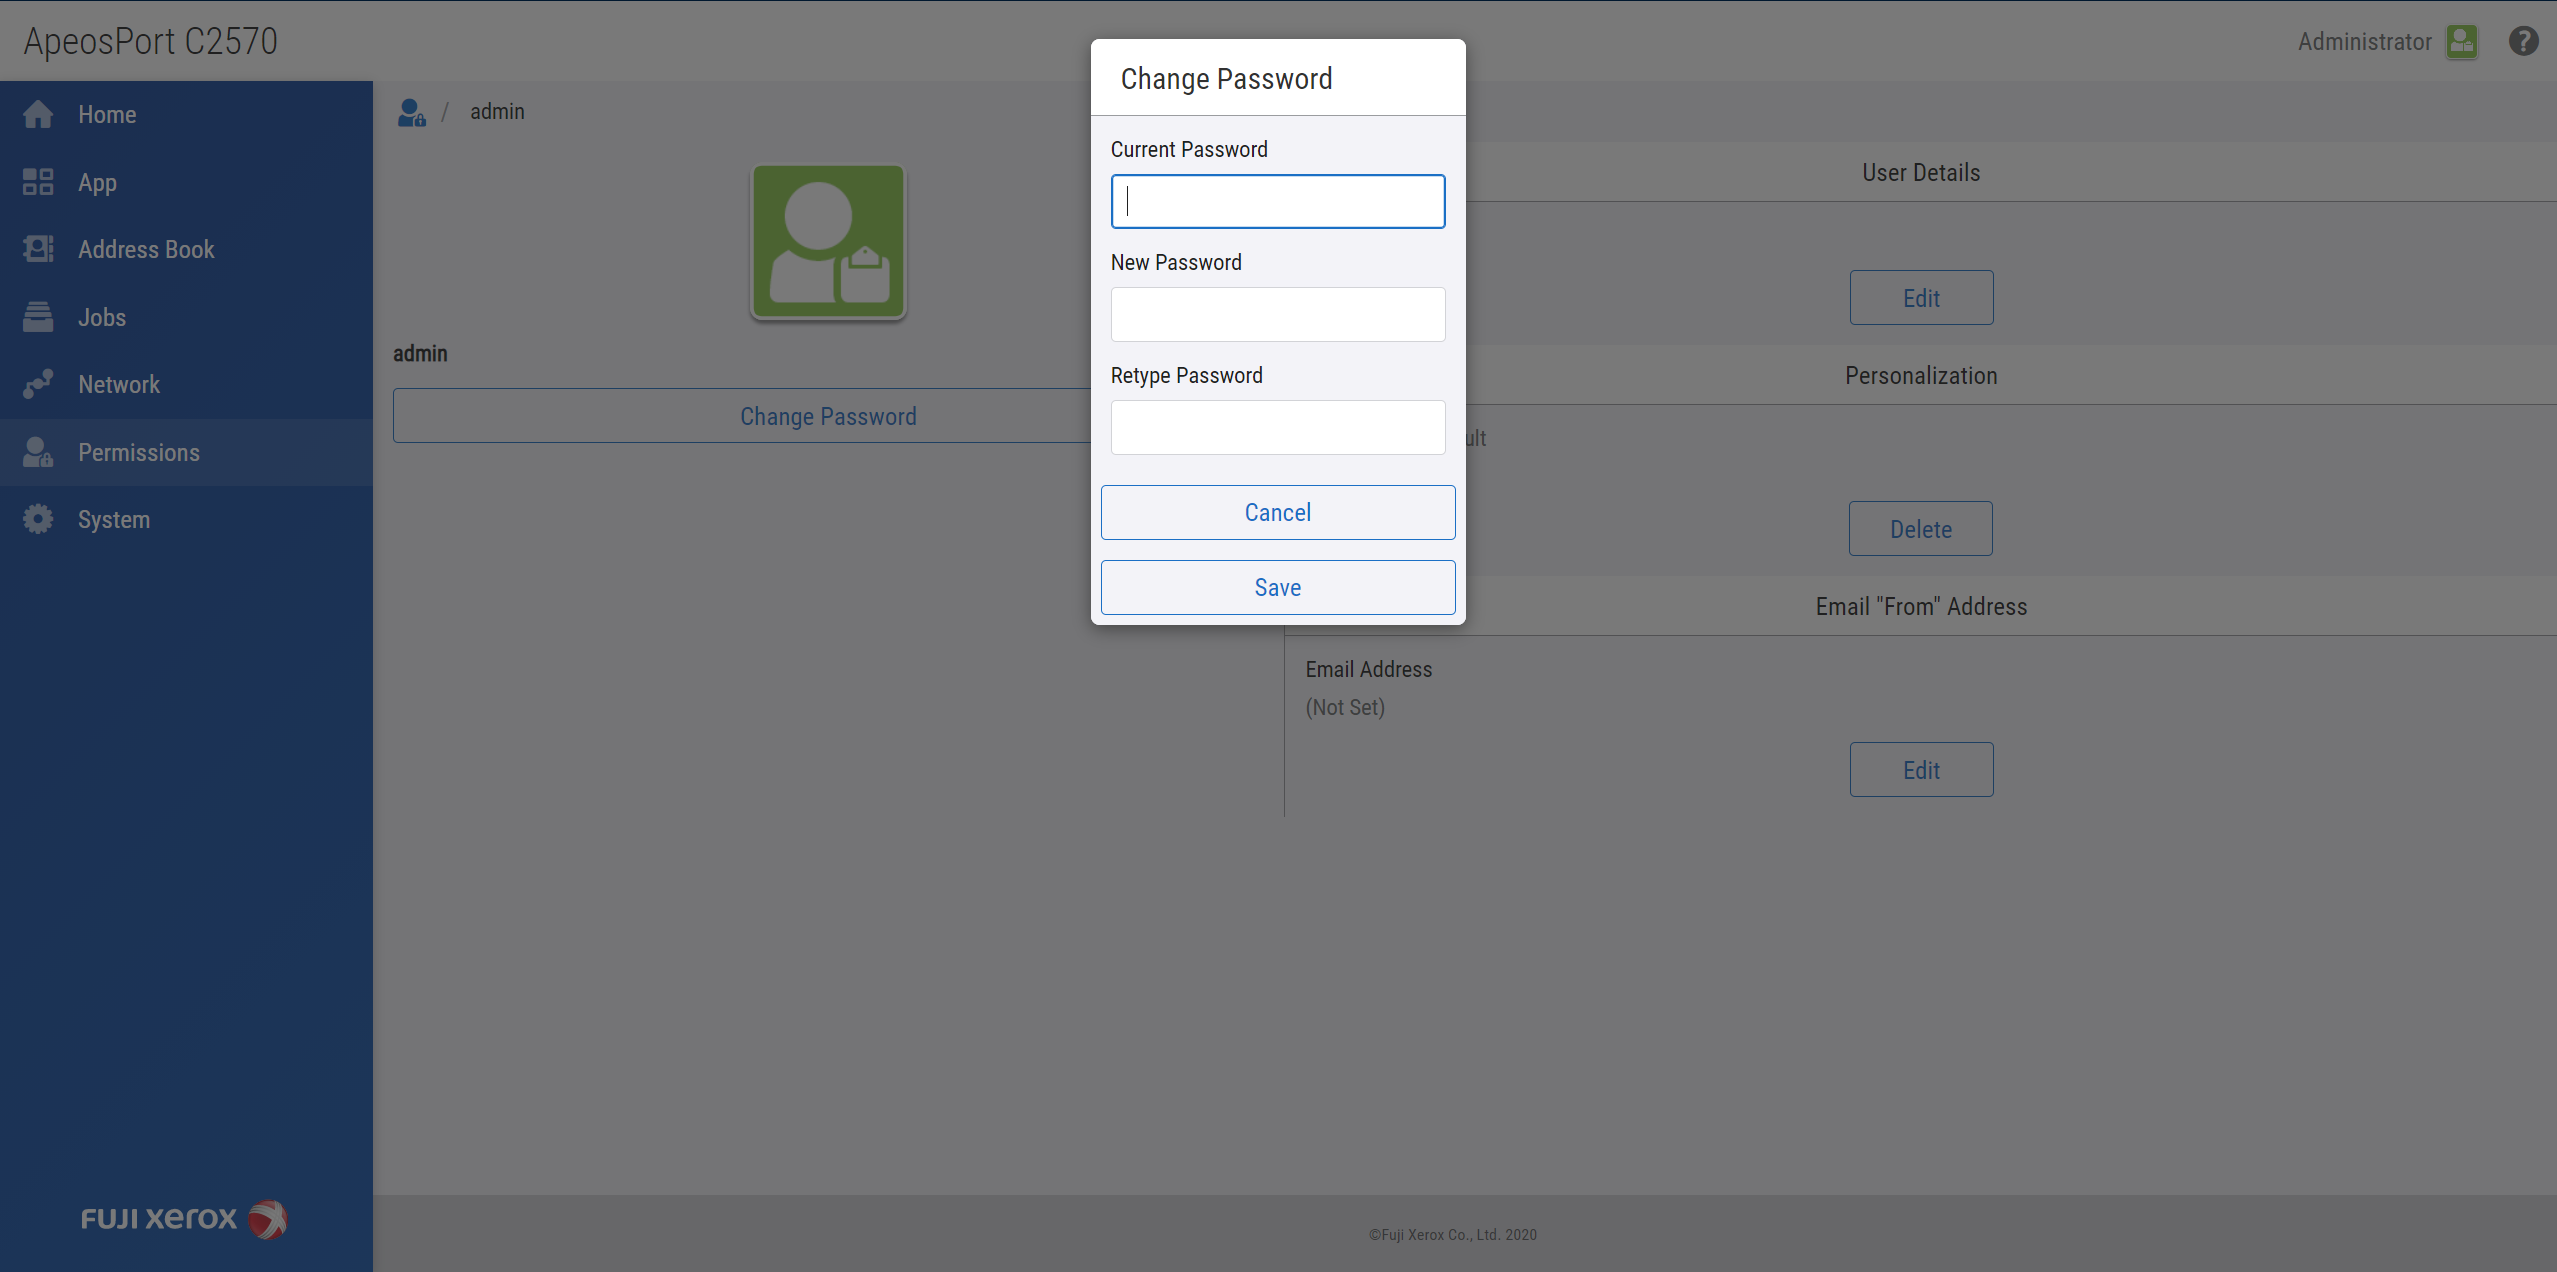
Press Change Password button and insert new administrator password.
Log in as Admin user for next steps.
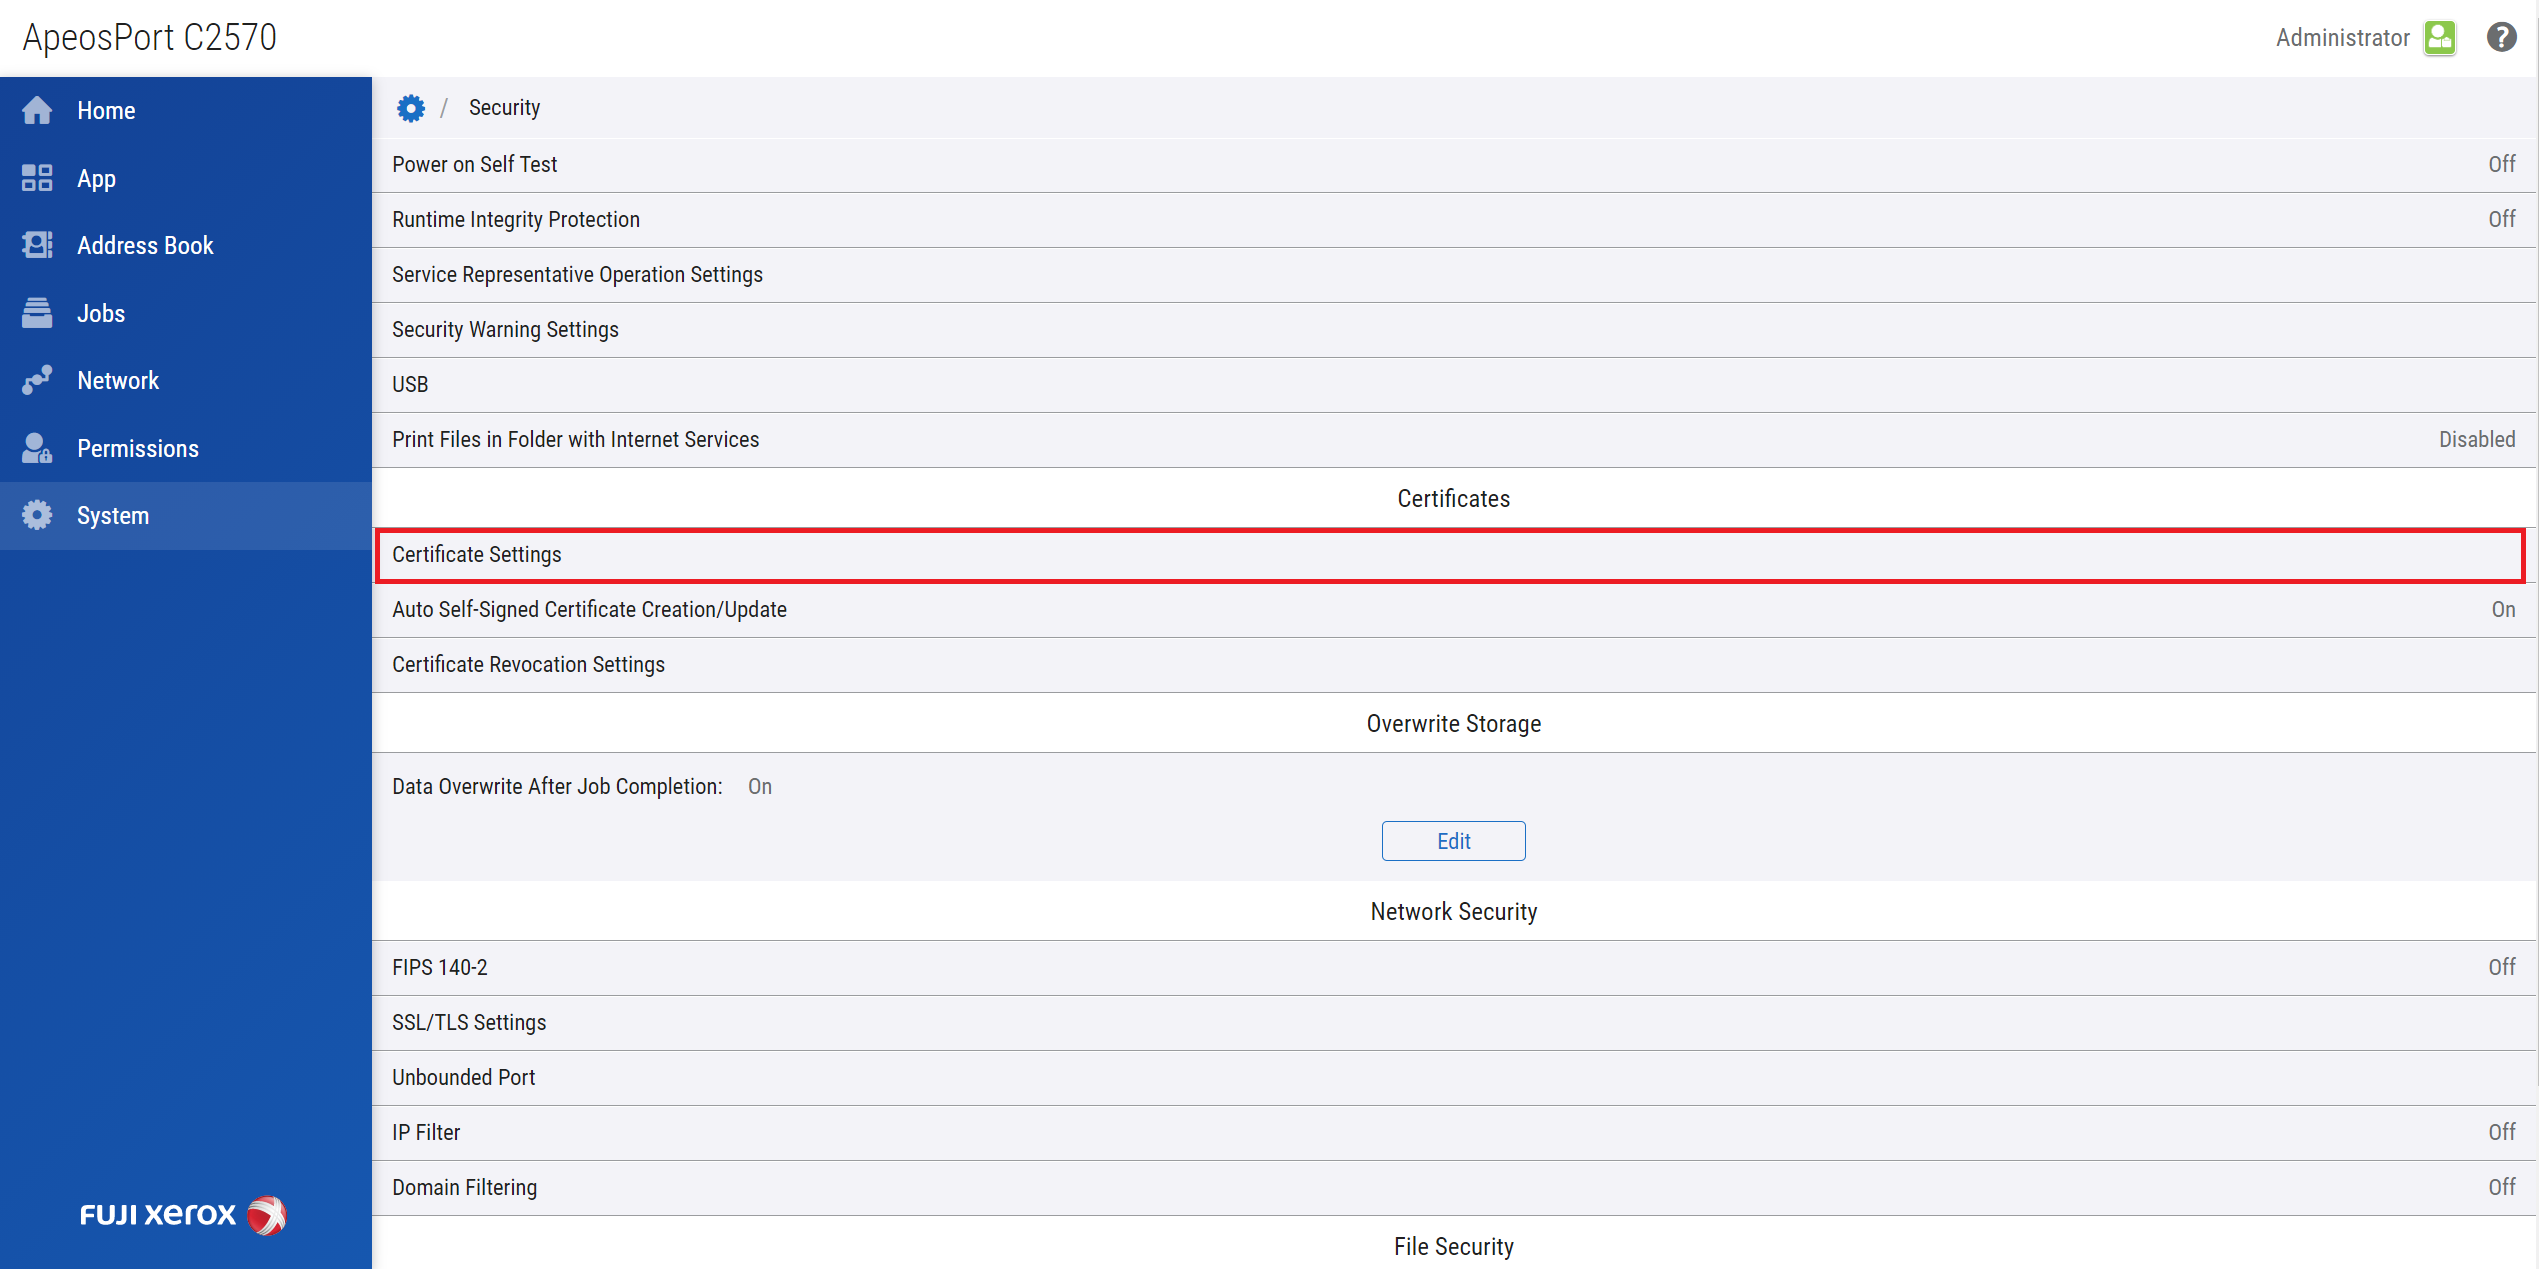
Machine Digital Certificate
Certificate is by default installed. It is not necessary to generate one unless otherwise you want.
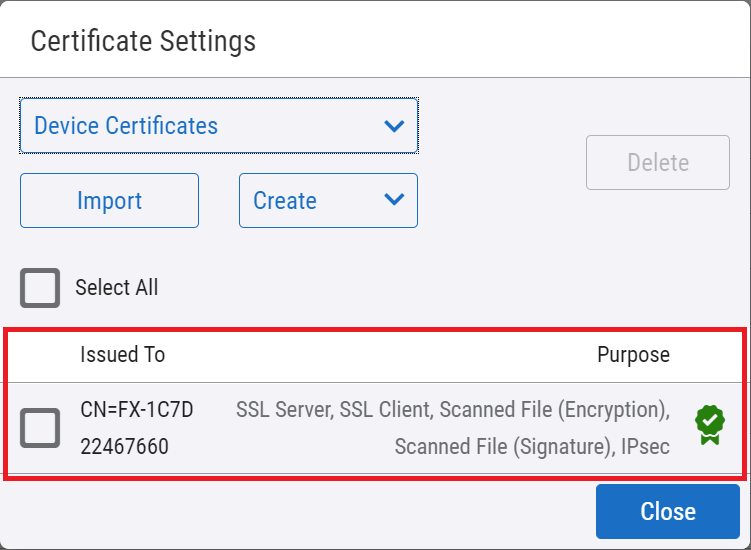
Go to System > Security > Certificate Settings
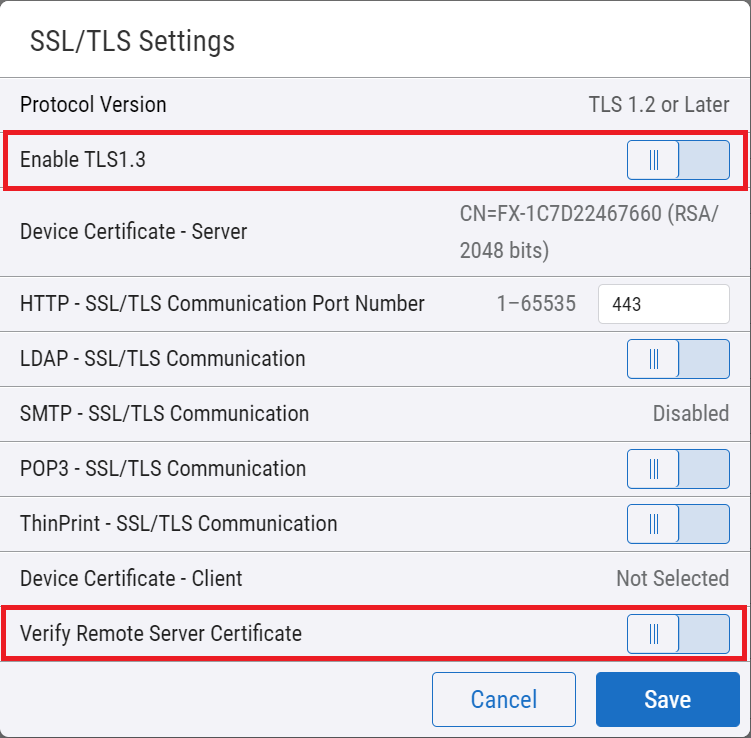
SSL/TLS
Go to System > Security > SSL/TLS settings
By default, ApeosPort has TLS 1.2 enabled. ApeosPort supports TLS1.3 as the image below, but SafeQ does not support it yet.
To enable the Verify Remote Server Certificate option on MFD, the Terminal Server certificate has to be manually uploaded to Trusted CA Root Certificates on MFD (Security - Certificates).
Manual certificate upload might not be supported on all devices.
Network settings
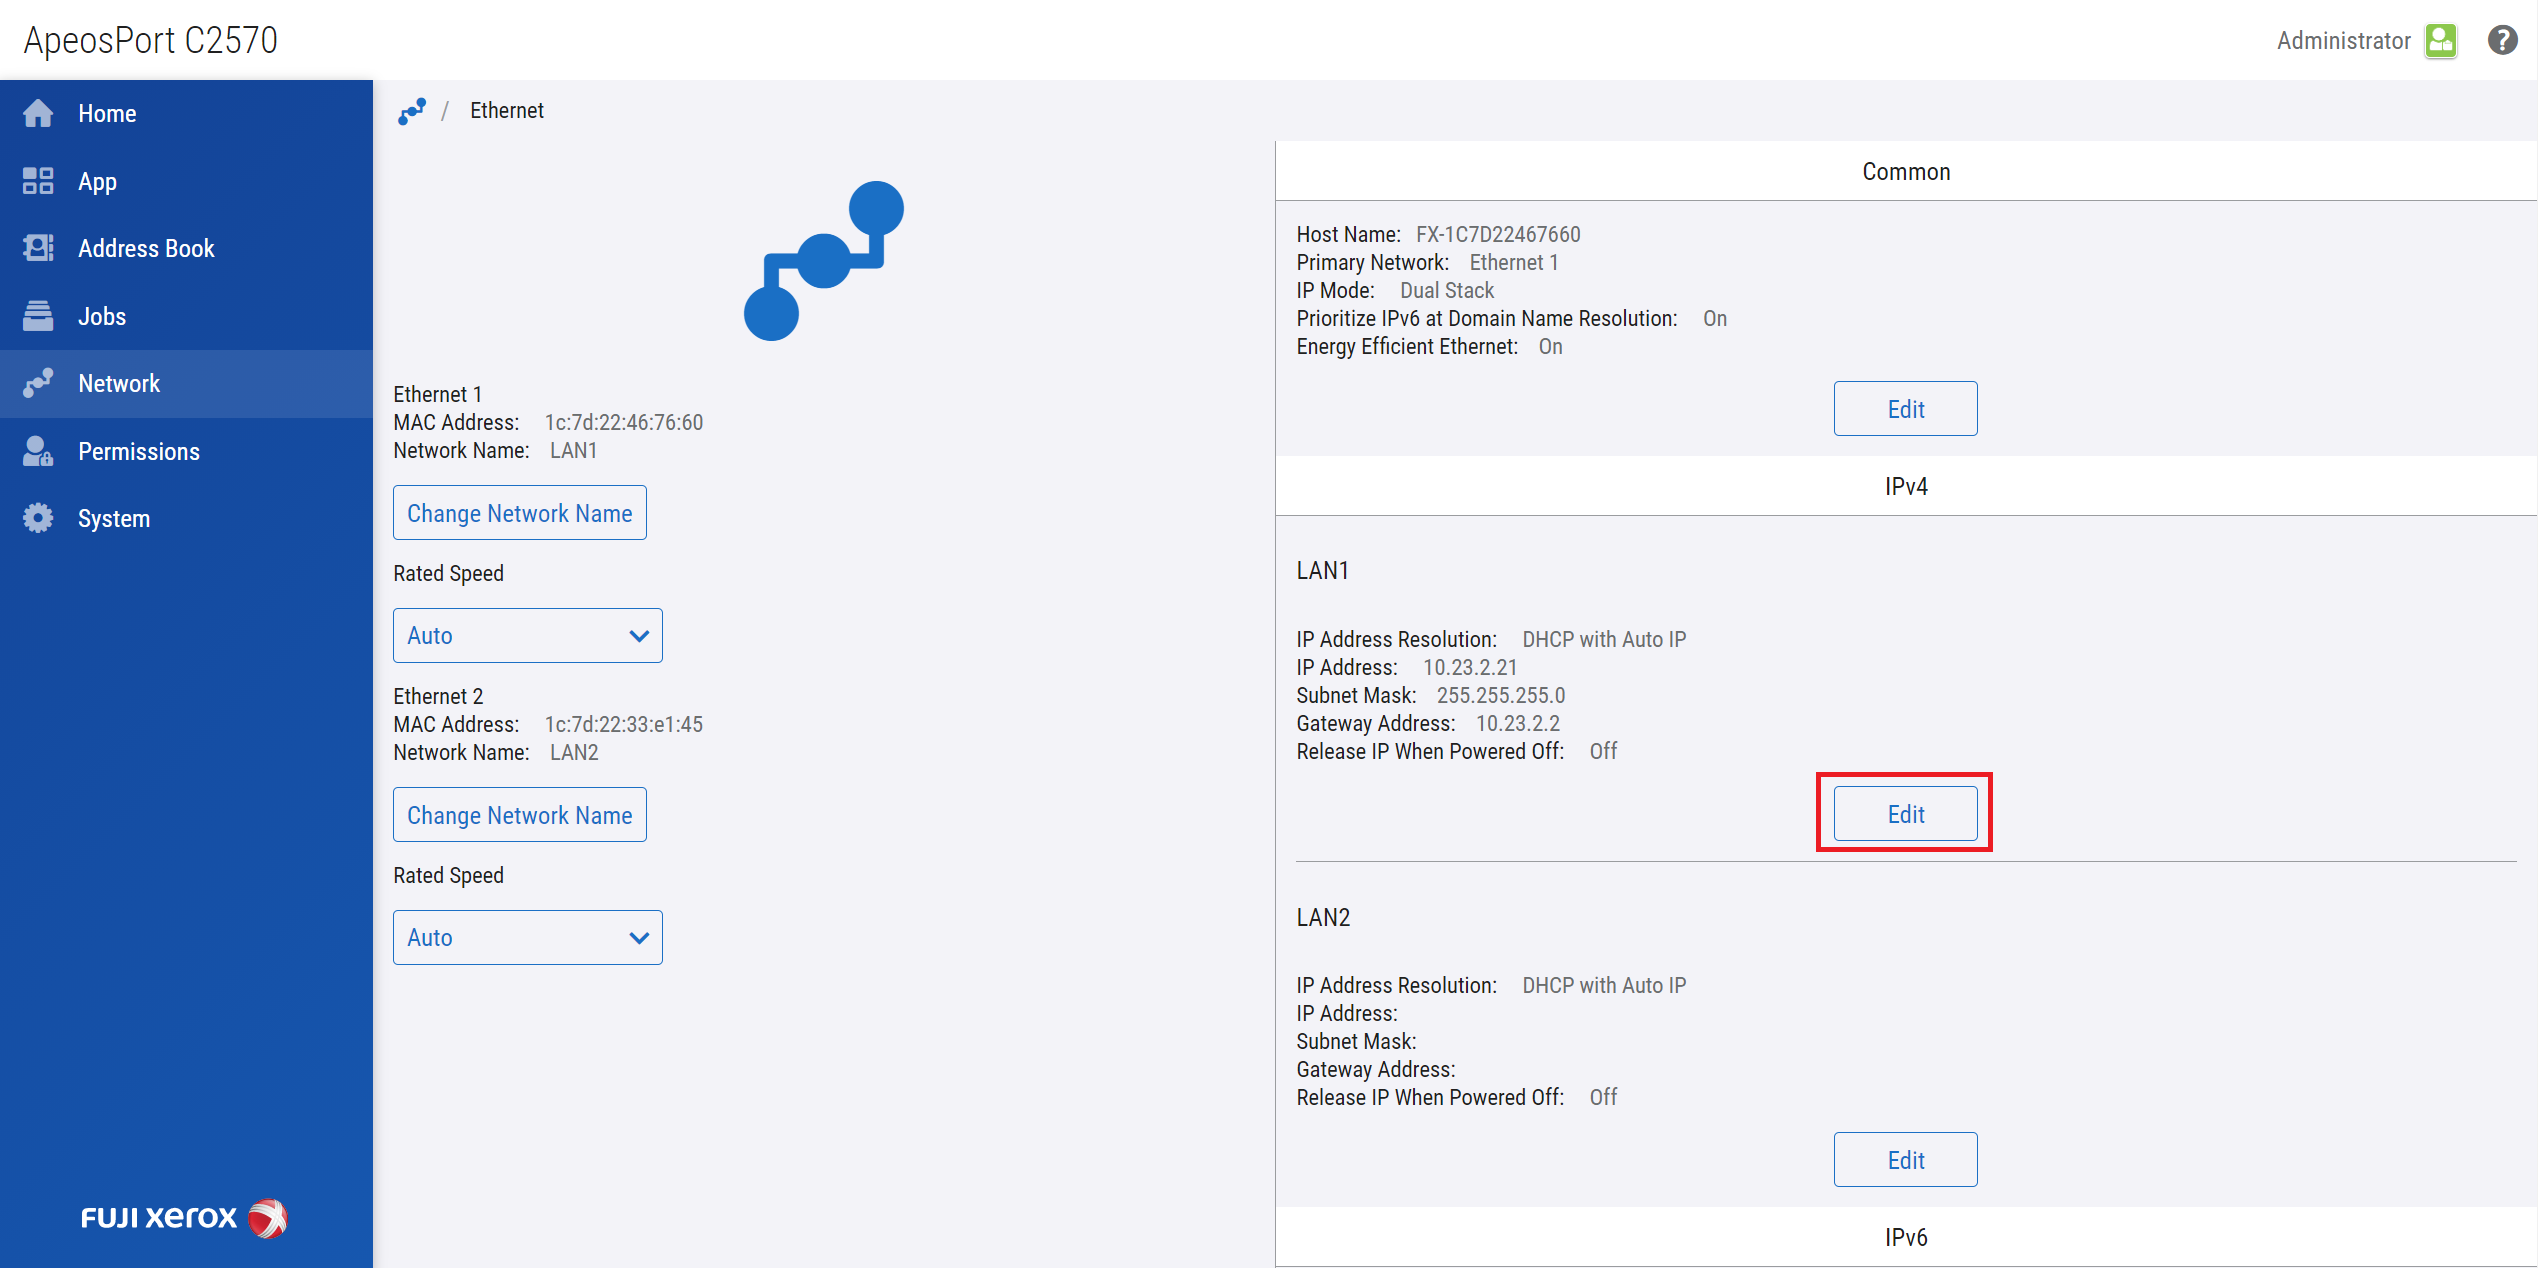
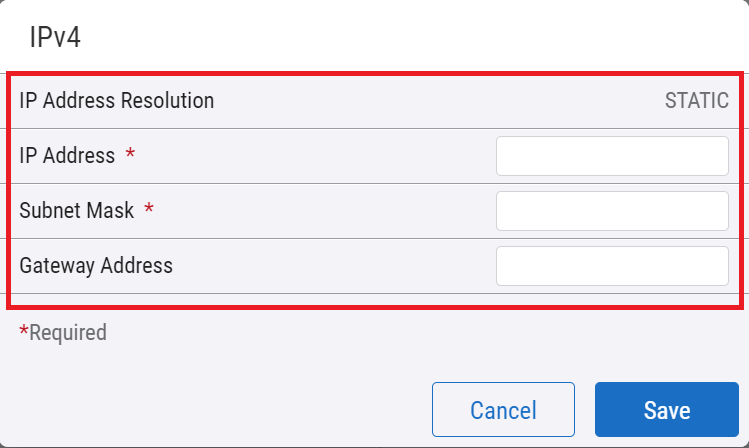
Configure static IPv4 address
Go to Network > Ethernet

Edit connected Ethernet, set IP Address Resolution to STATIC and fill all required fields according to your network and save.
Protocol settings
Go to Network and Verify protocols you would need are enabled.
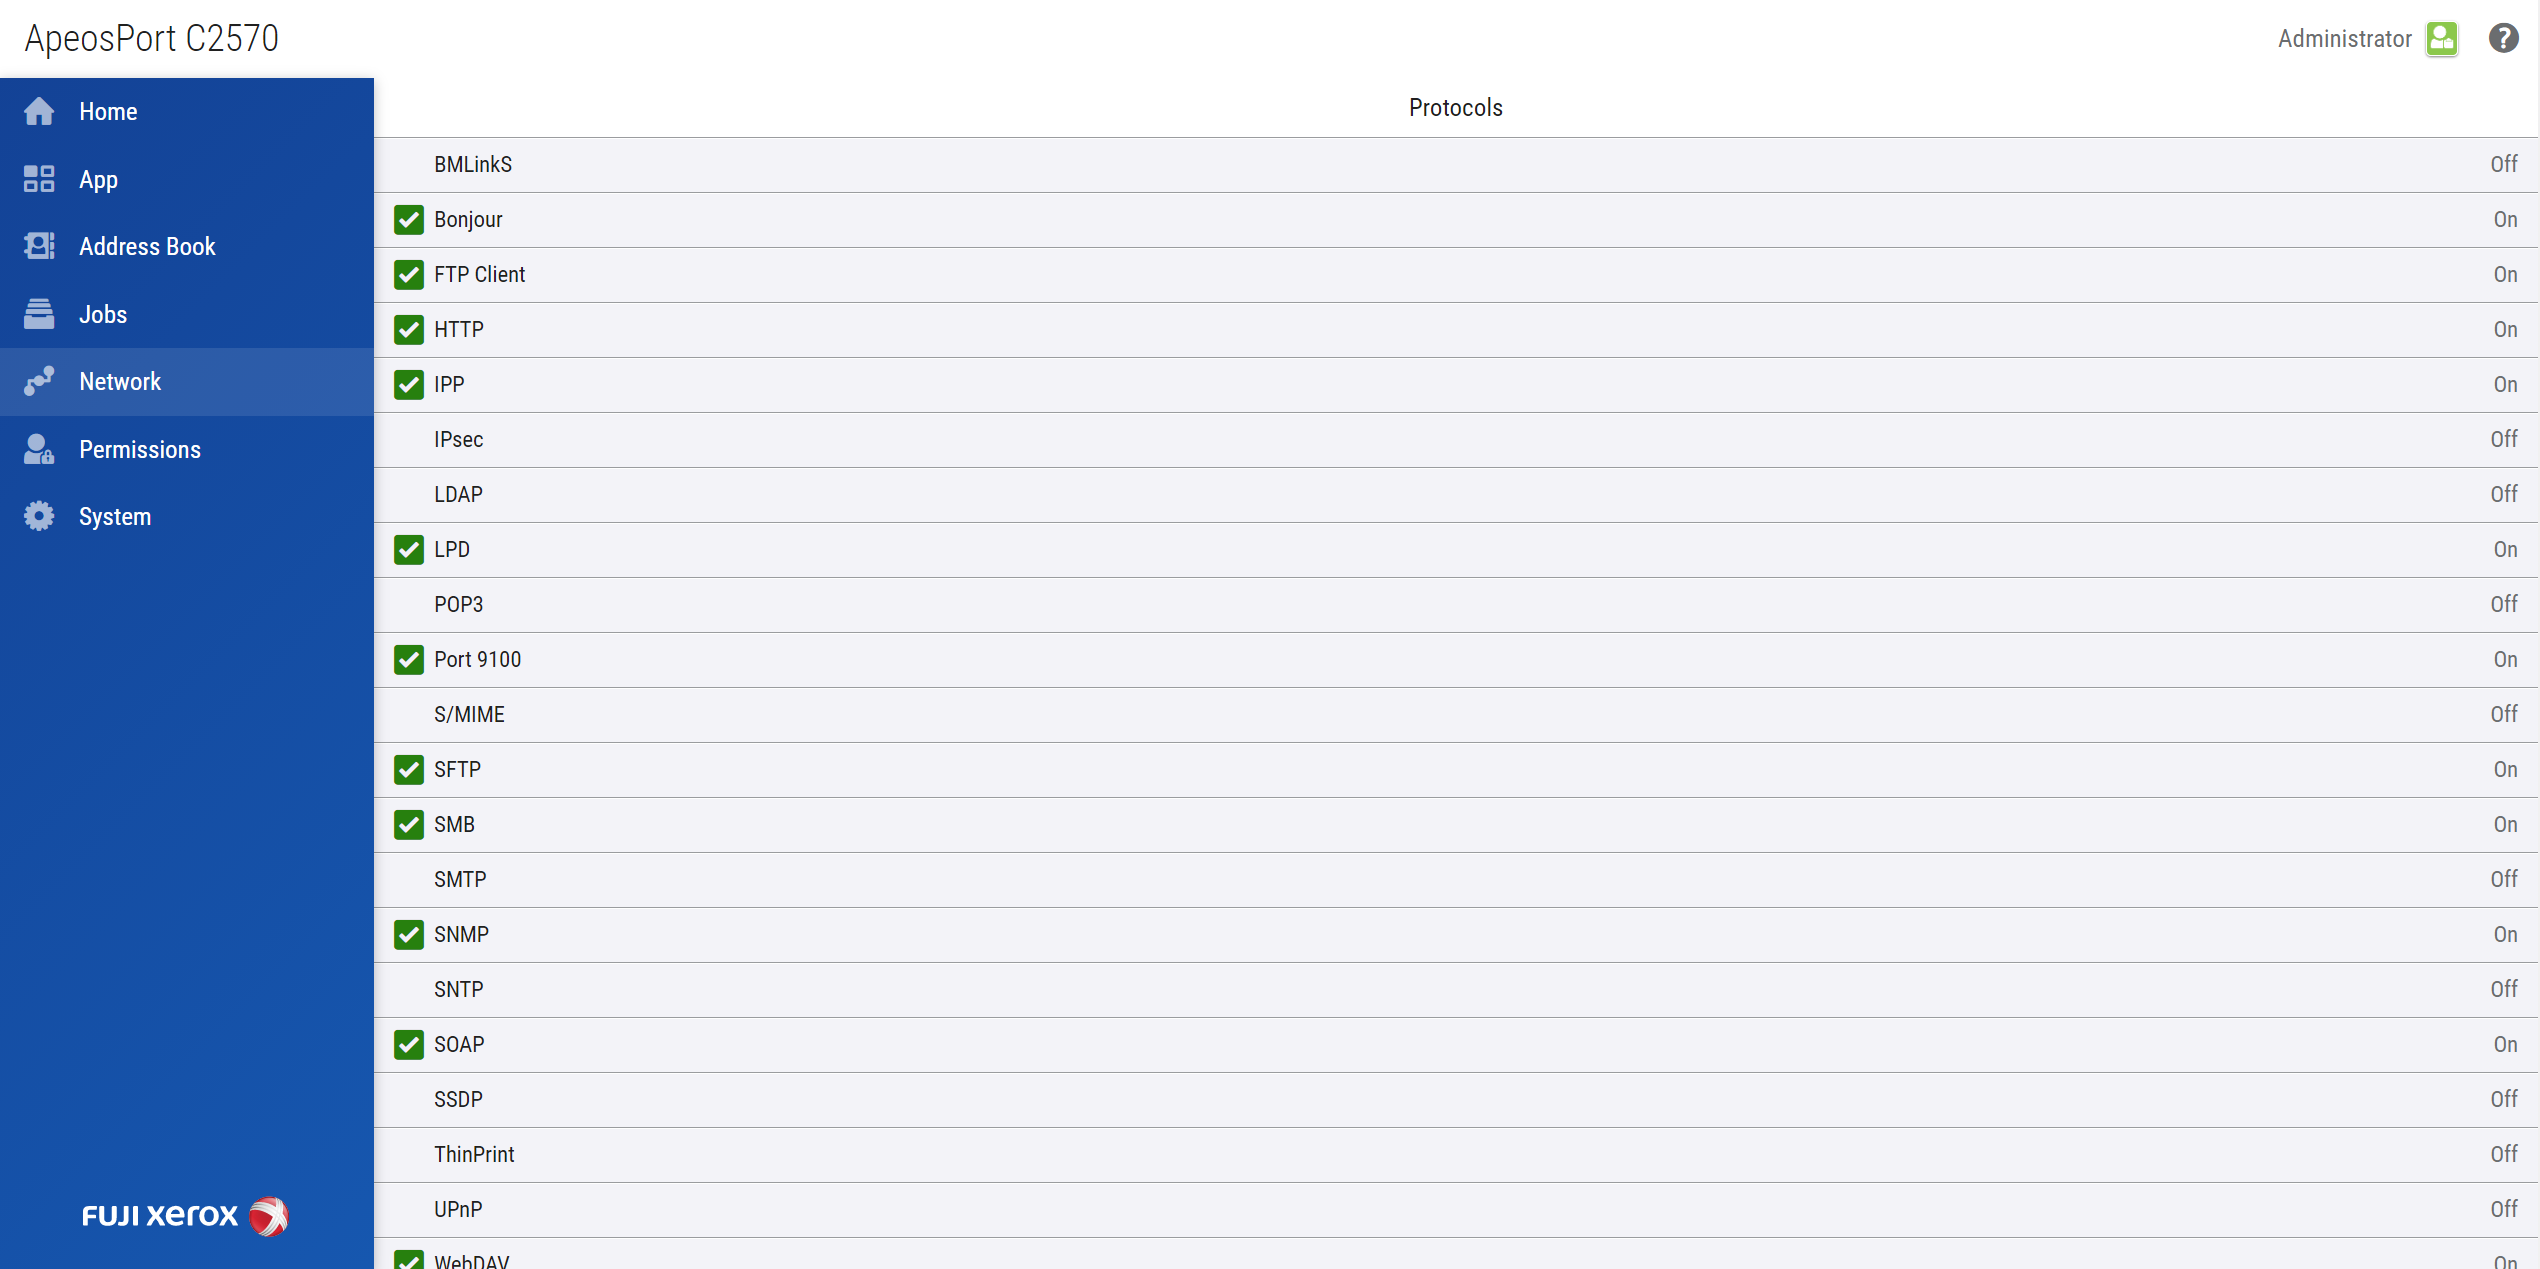
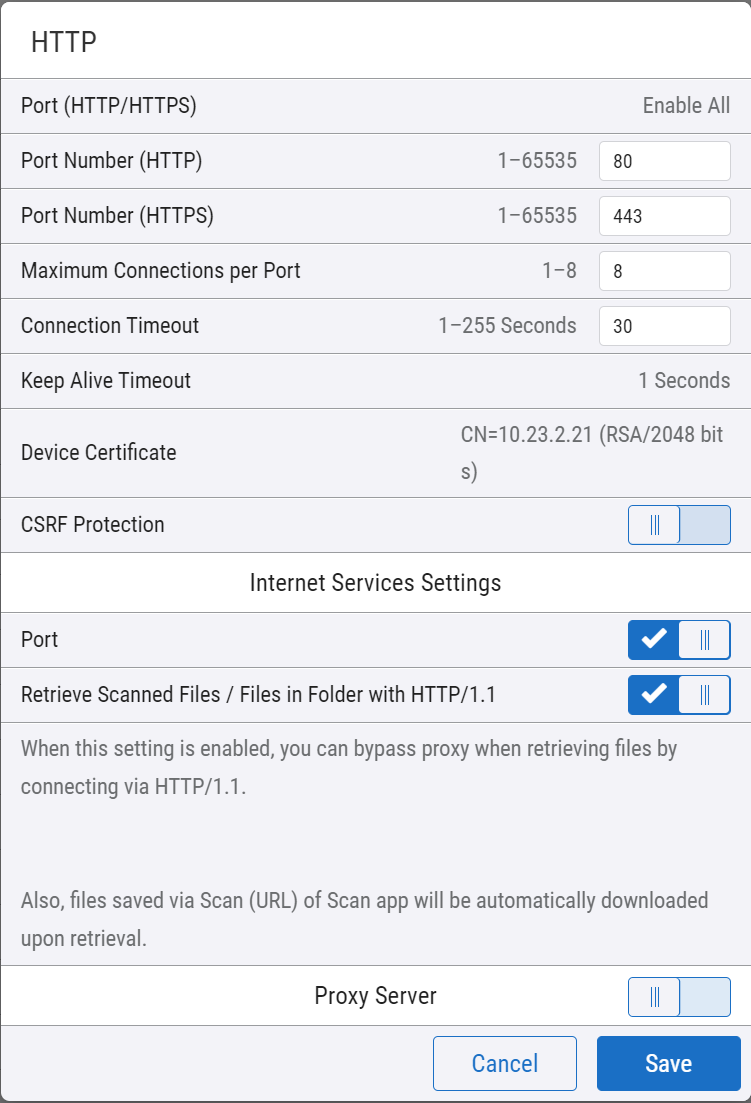
HTTP/S
Check that Port (HTTP/HTTPS) is set to Enable All. Can be changed to Enable HTTPS Only which disables the HTTP port.
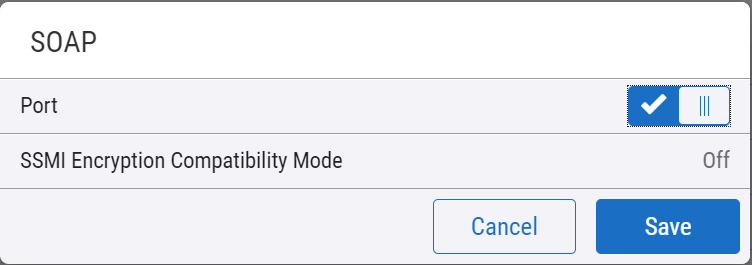
SOAP
If Scan workflow should upload Scan using SwA (SOAP with Attachments), SOAP should be enabled.
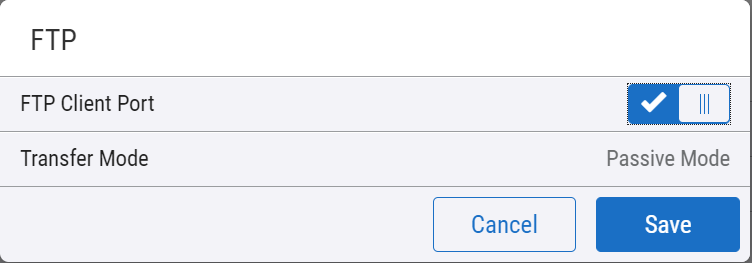
FTP Client
If Scan workflow should upload Scan using FTP protocol, FTP should be enabled.
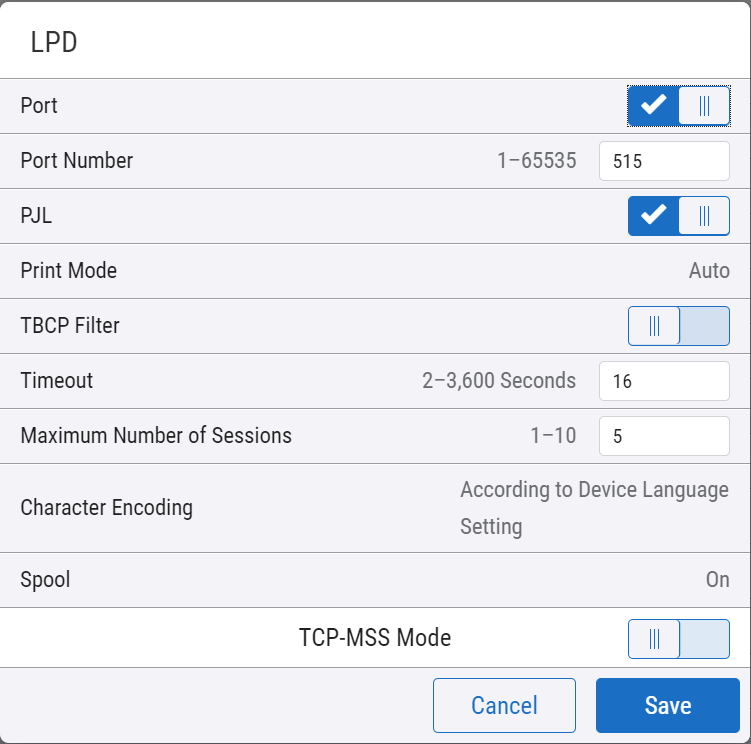
LPD
To receive print jobs via LPR, LPD should be enabled.
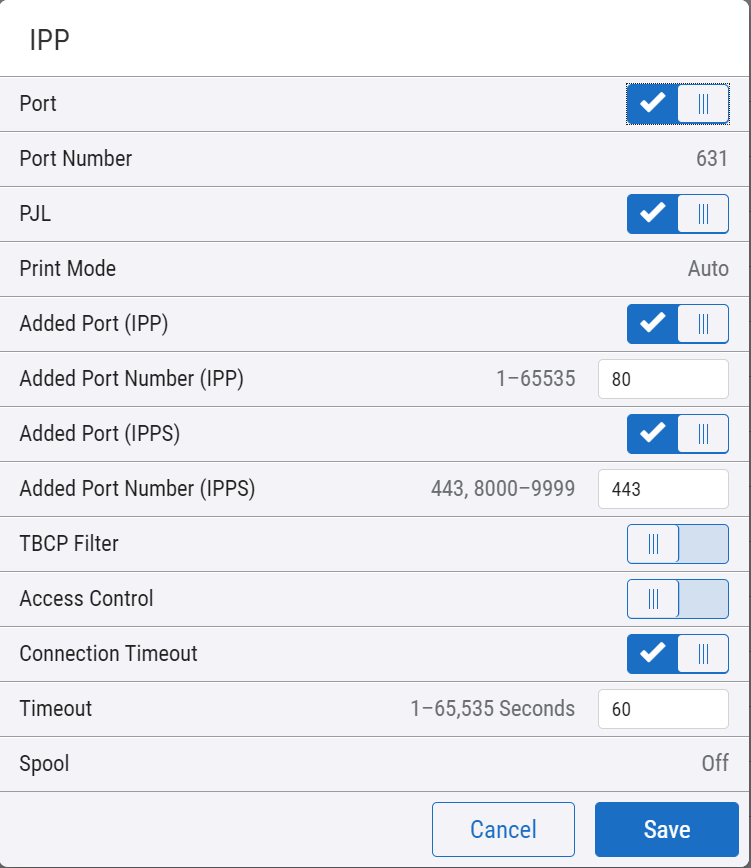
IPP
To receive print jobs via IPP/IPPS, IPP should be enabled.
Port 9100
To receive print jobs via TCP/IP RAW, Port 9100 should be enabled.
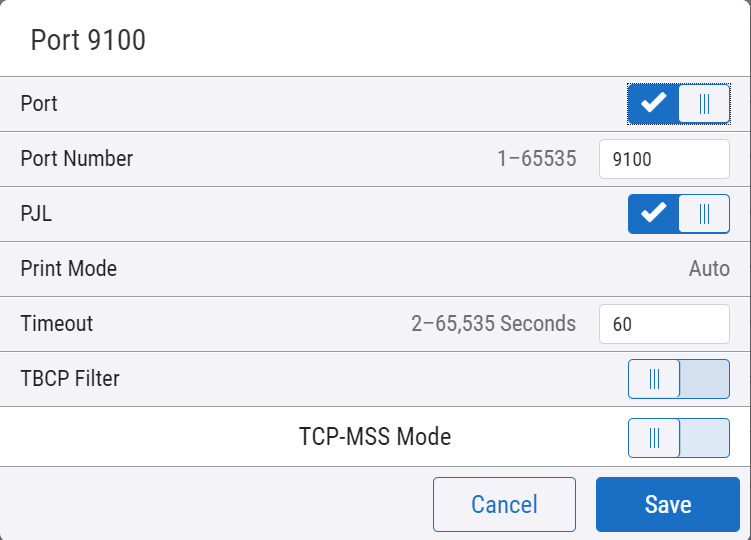
Port 9100 needs to be disabled only for improving security. You need to enable this port when performing a firmware upgrade.
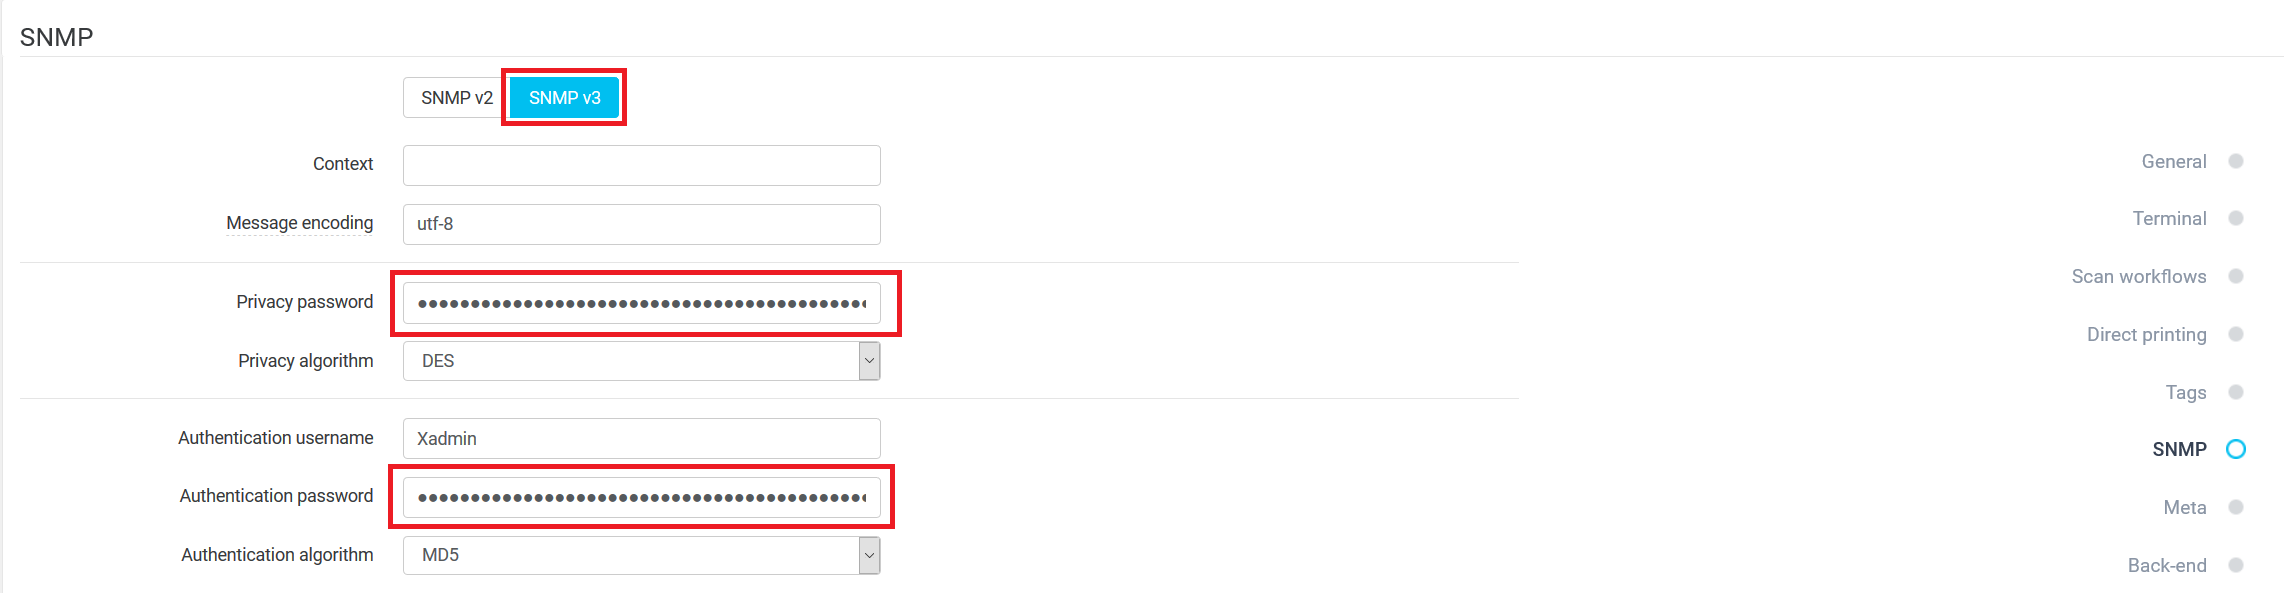
SNMP v3
Click on SNMP v3.
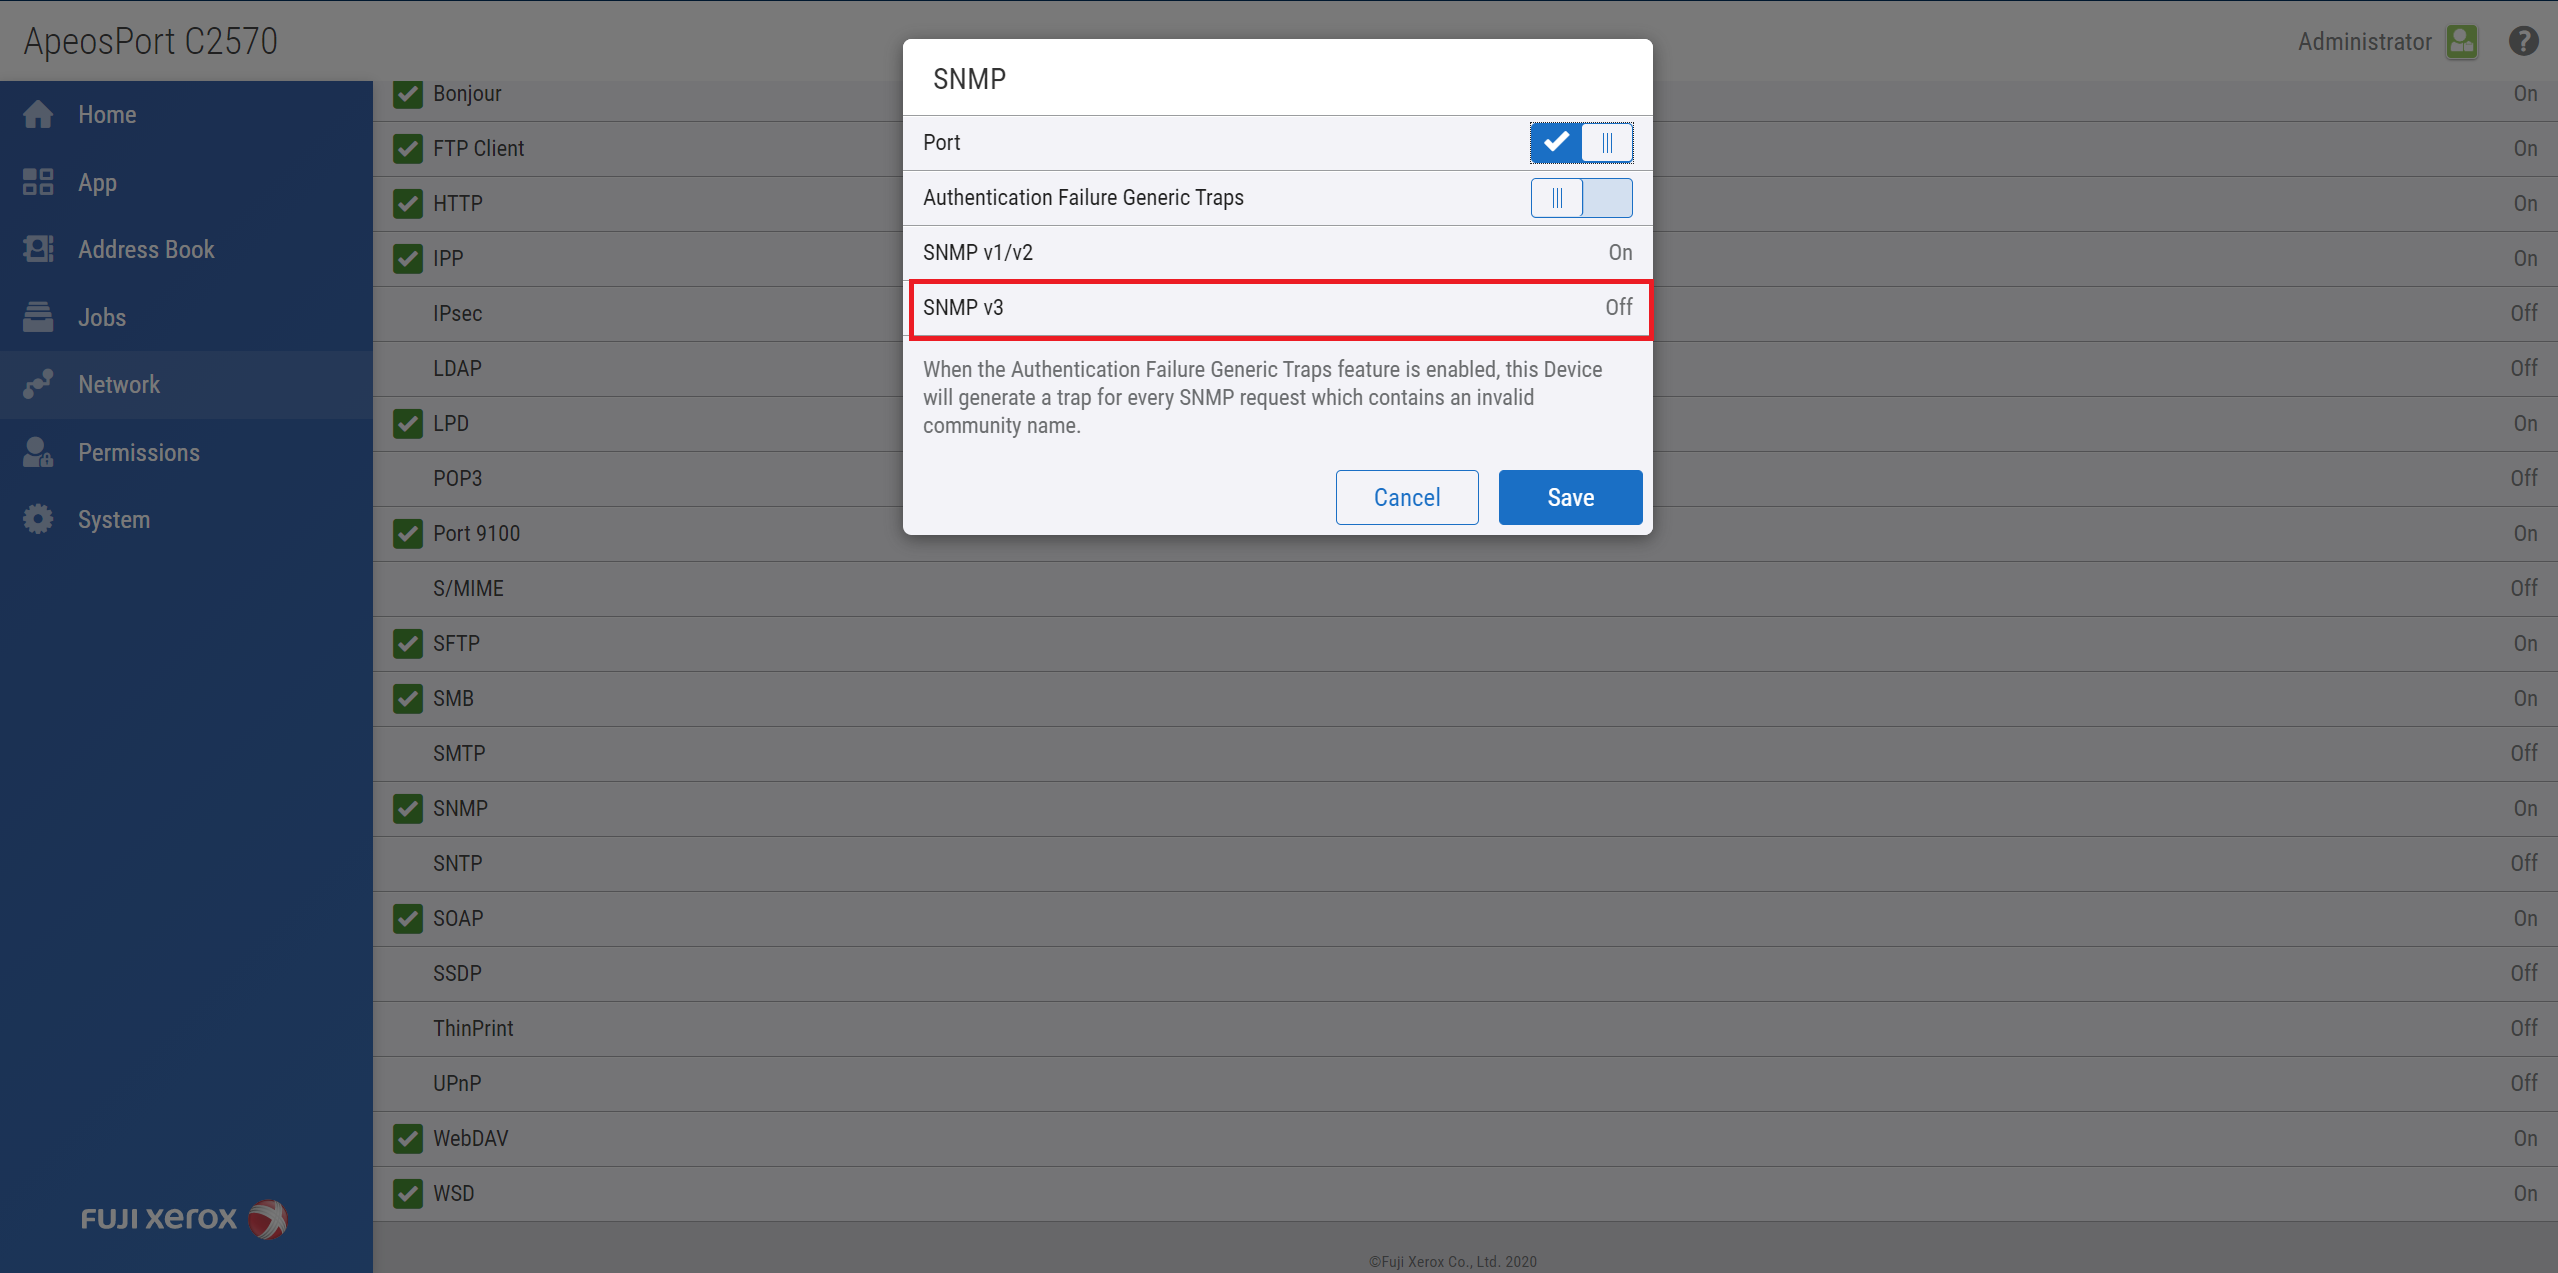
Enable SNMP v3 and Allow Write. Then enable System Administrator Account and fill Authentication Password and Encryption password used in your organization.
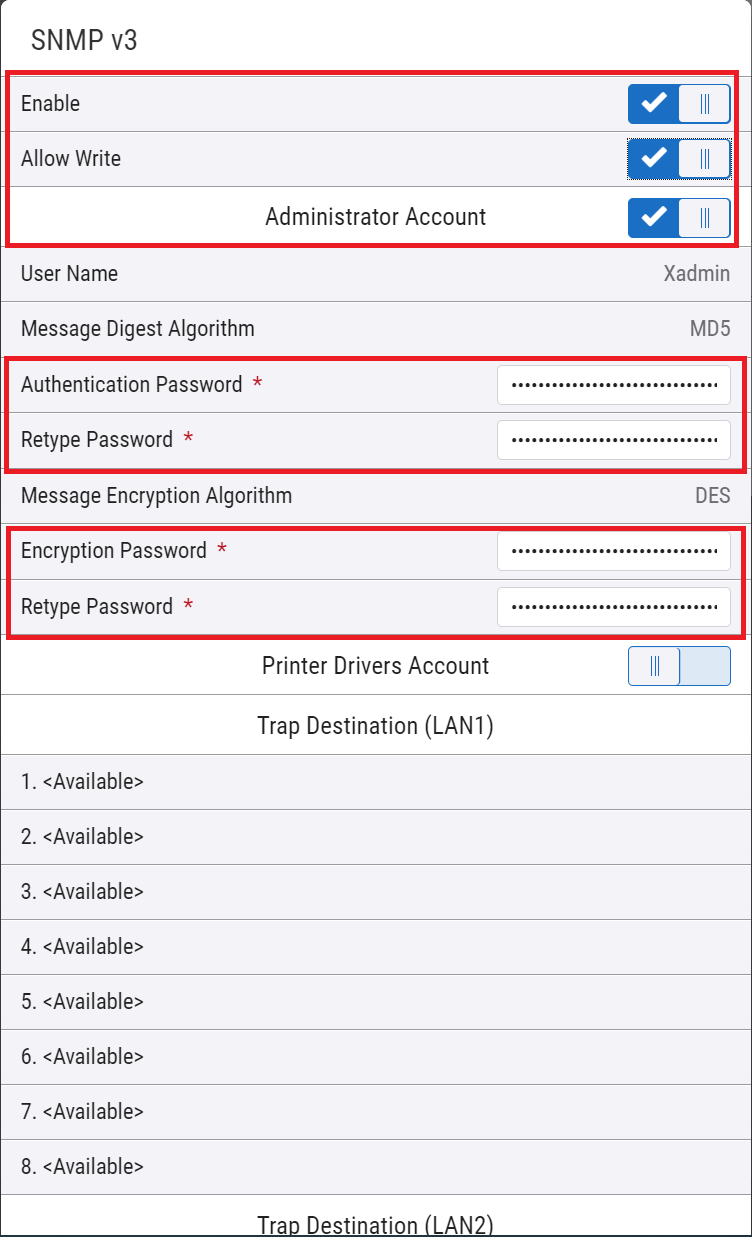
The same Authentication Password and Encryption password have to be used in device configuration in Dispatcher Paragon.
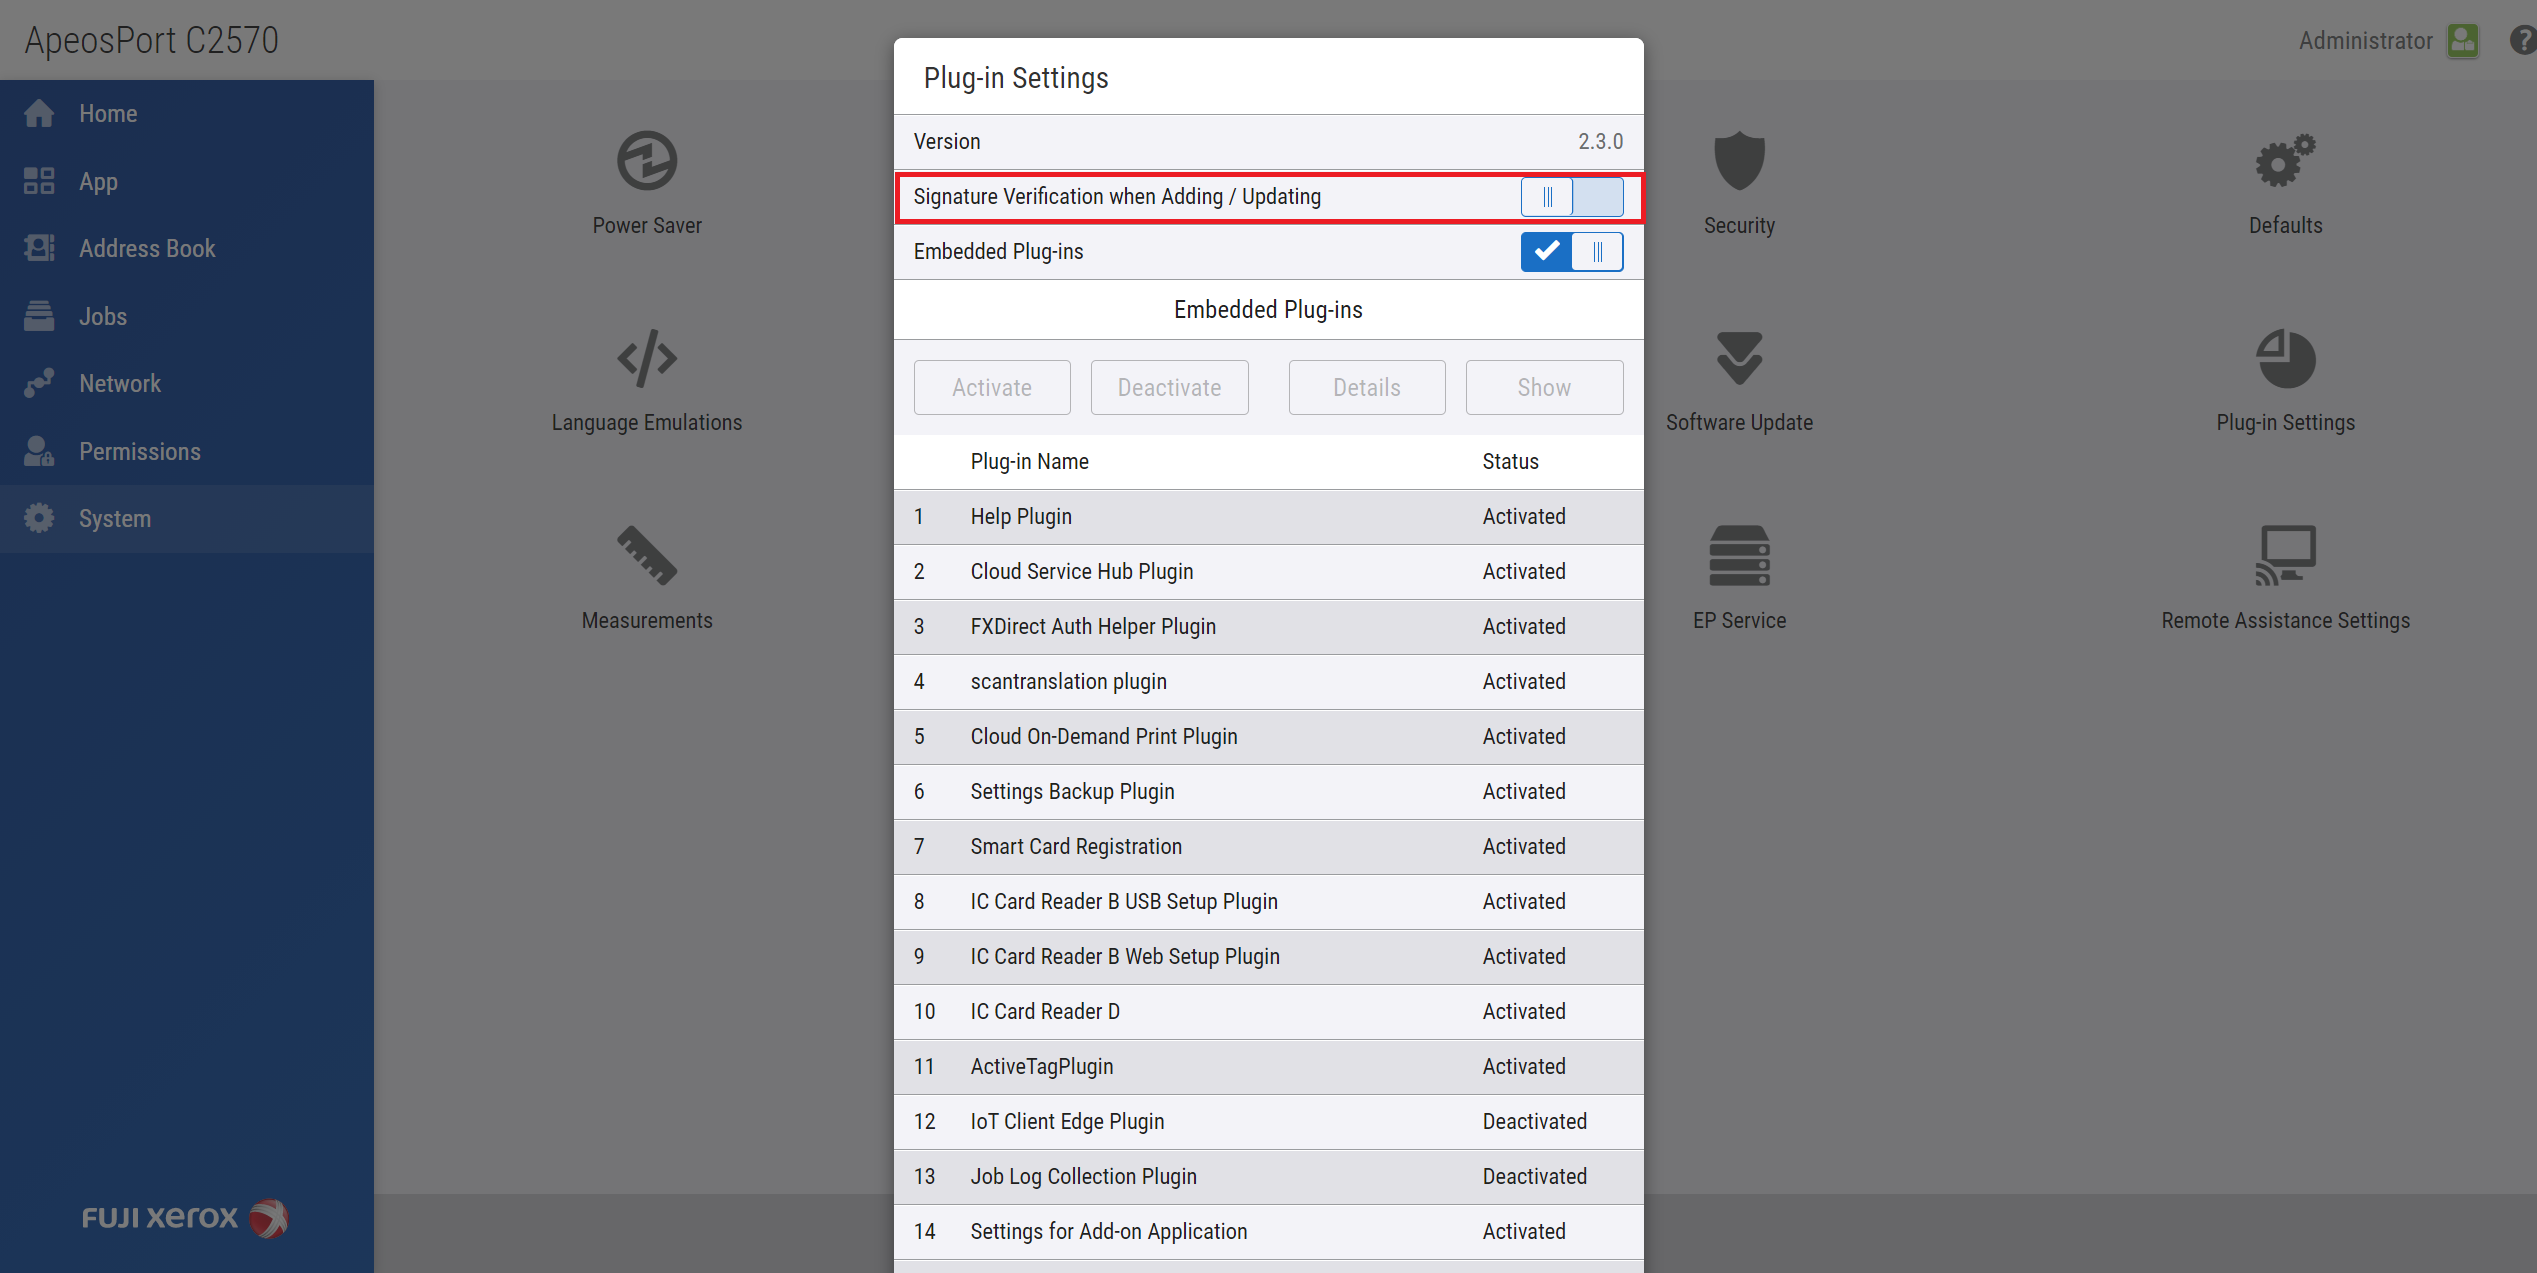
Plug-in settings
Go to System > Plug-in Settings
Enable Embedded Plug-ins
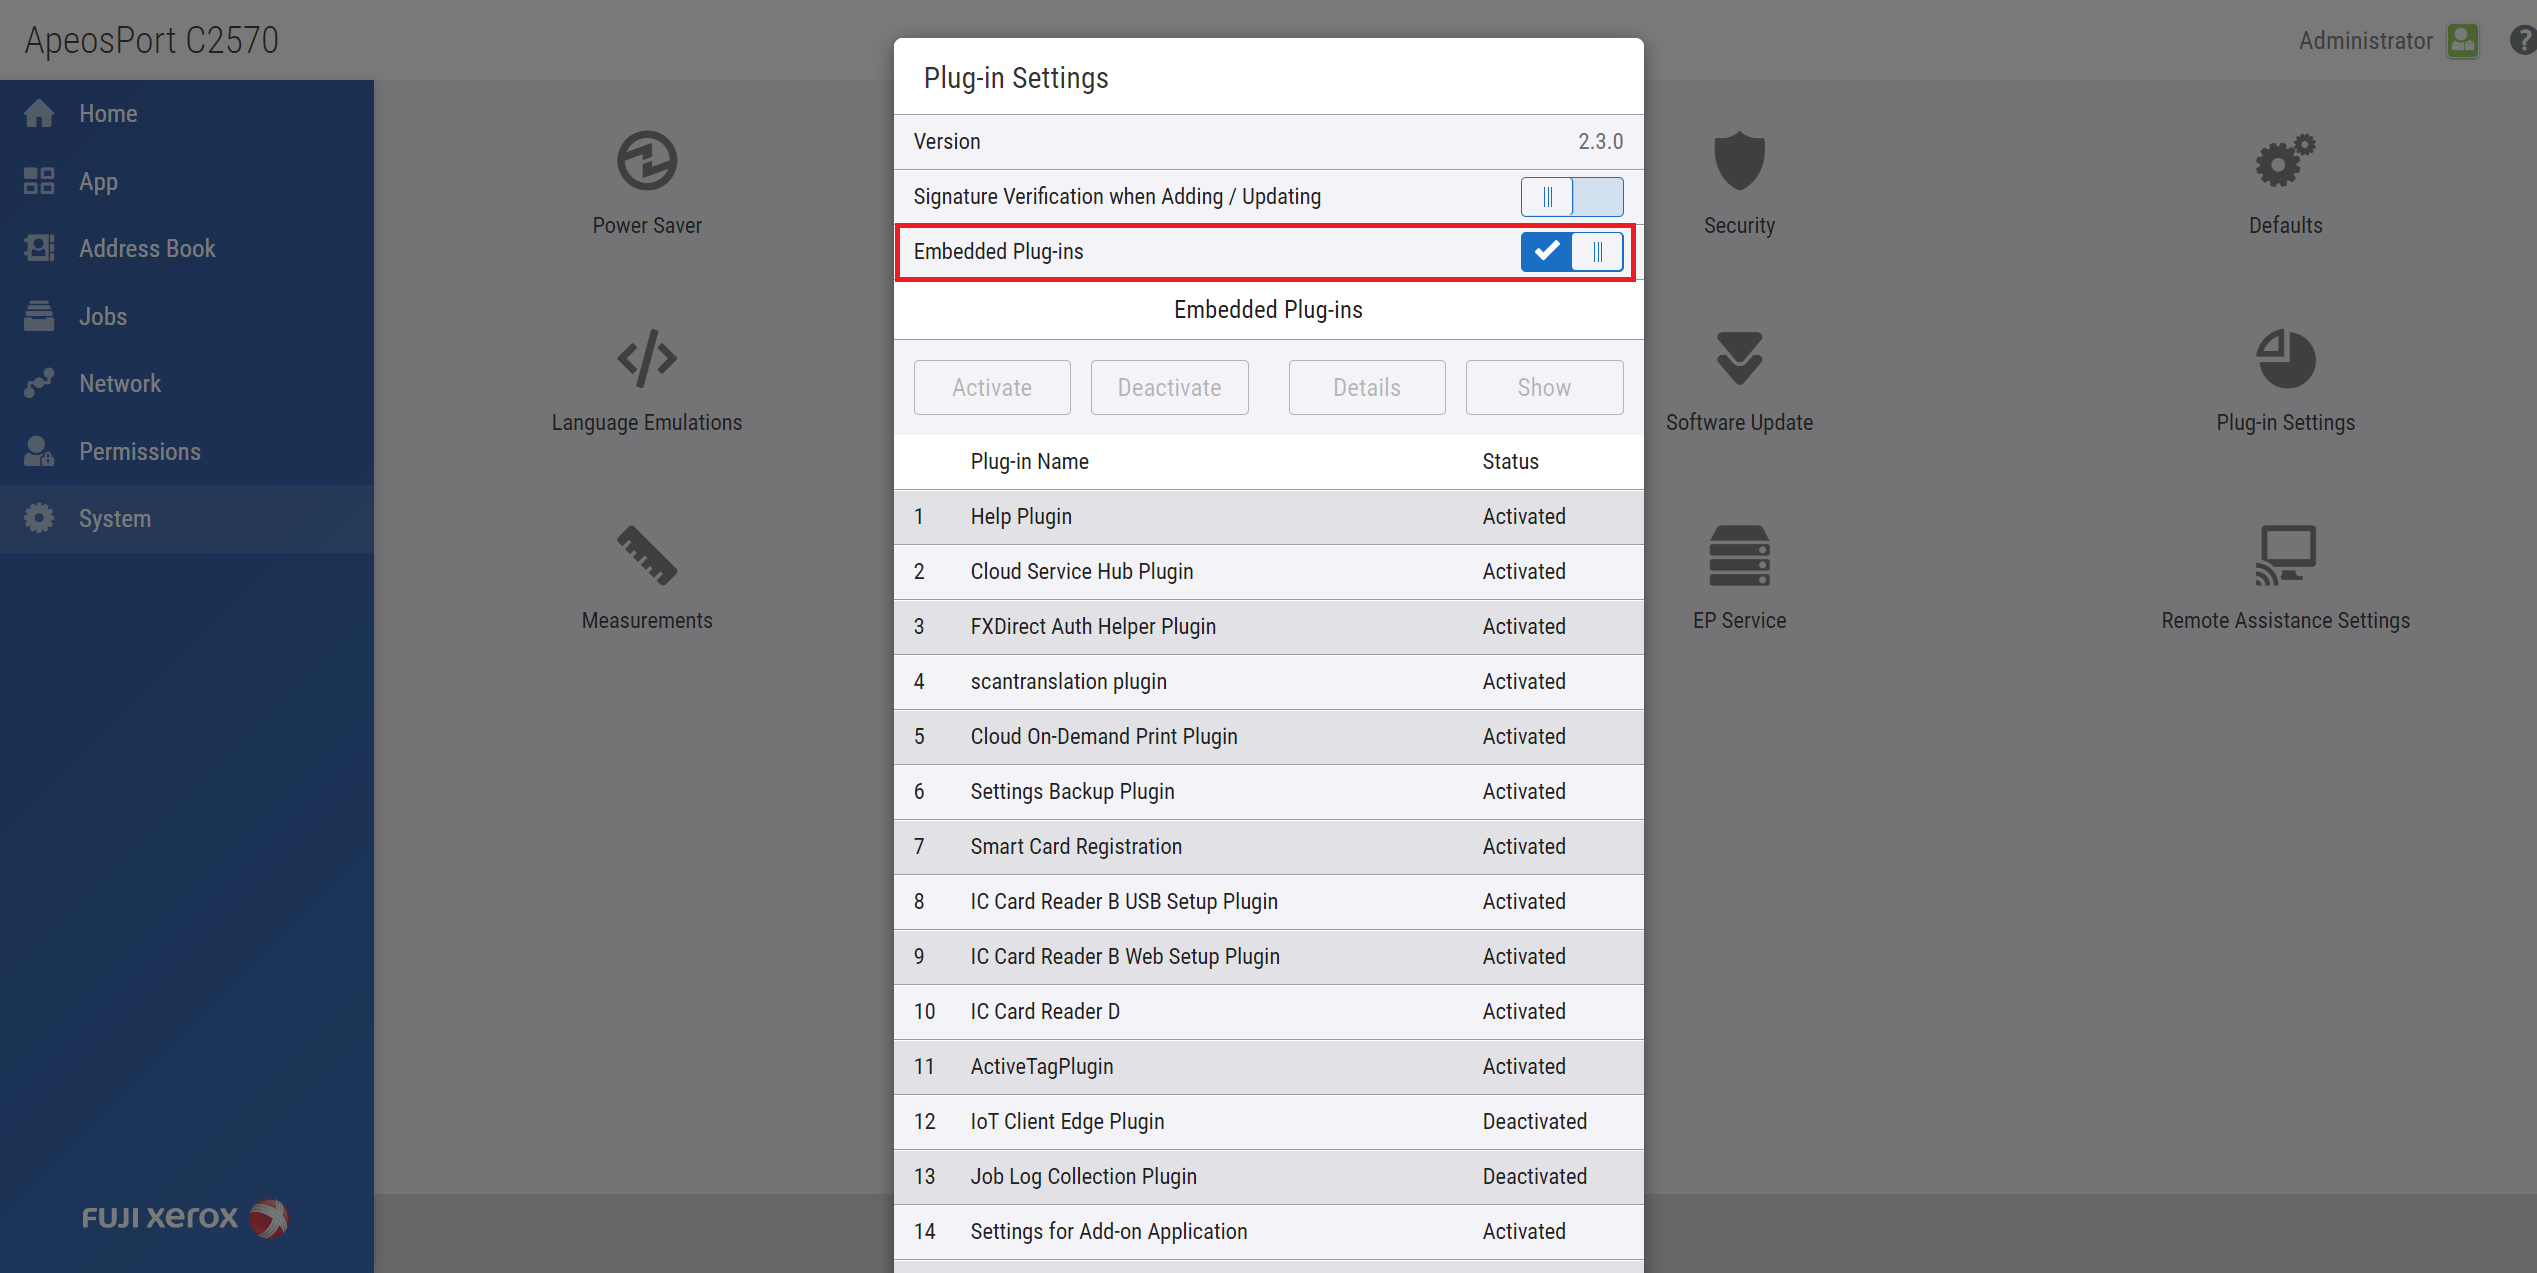
Disable Signature Verification when Adding/Updating (Default enabled)
Disabling Signature Verification when Adding/Updating is important, or XCP terminal installation fails.
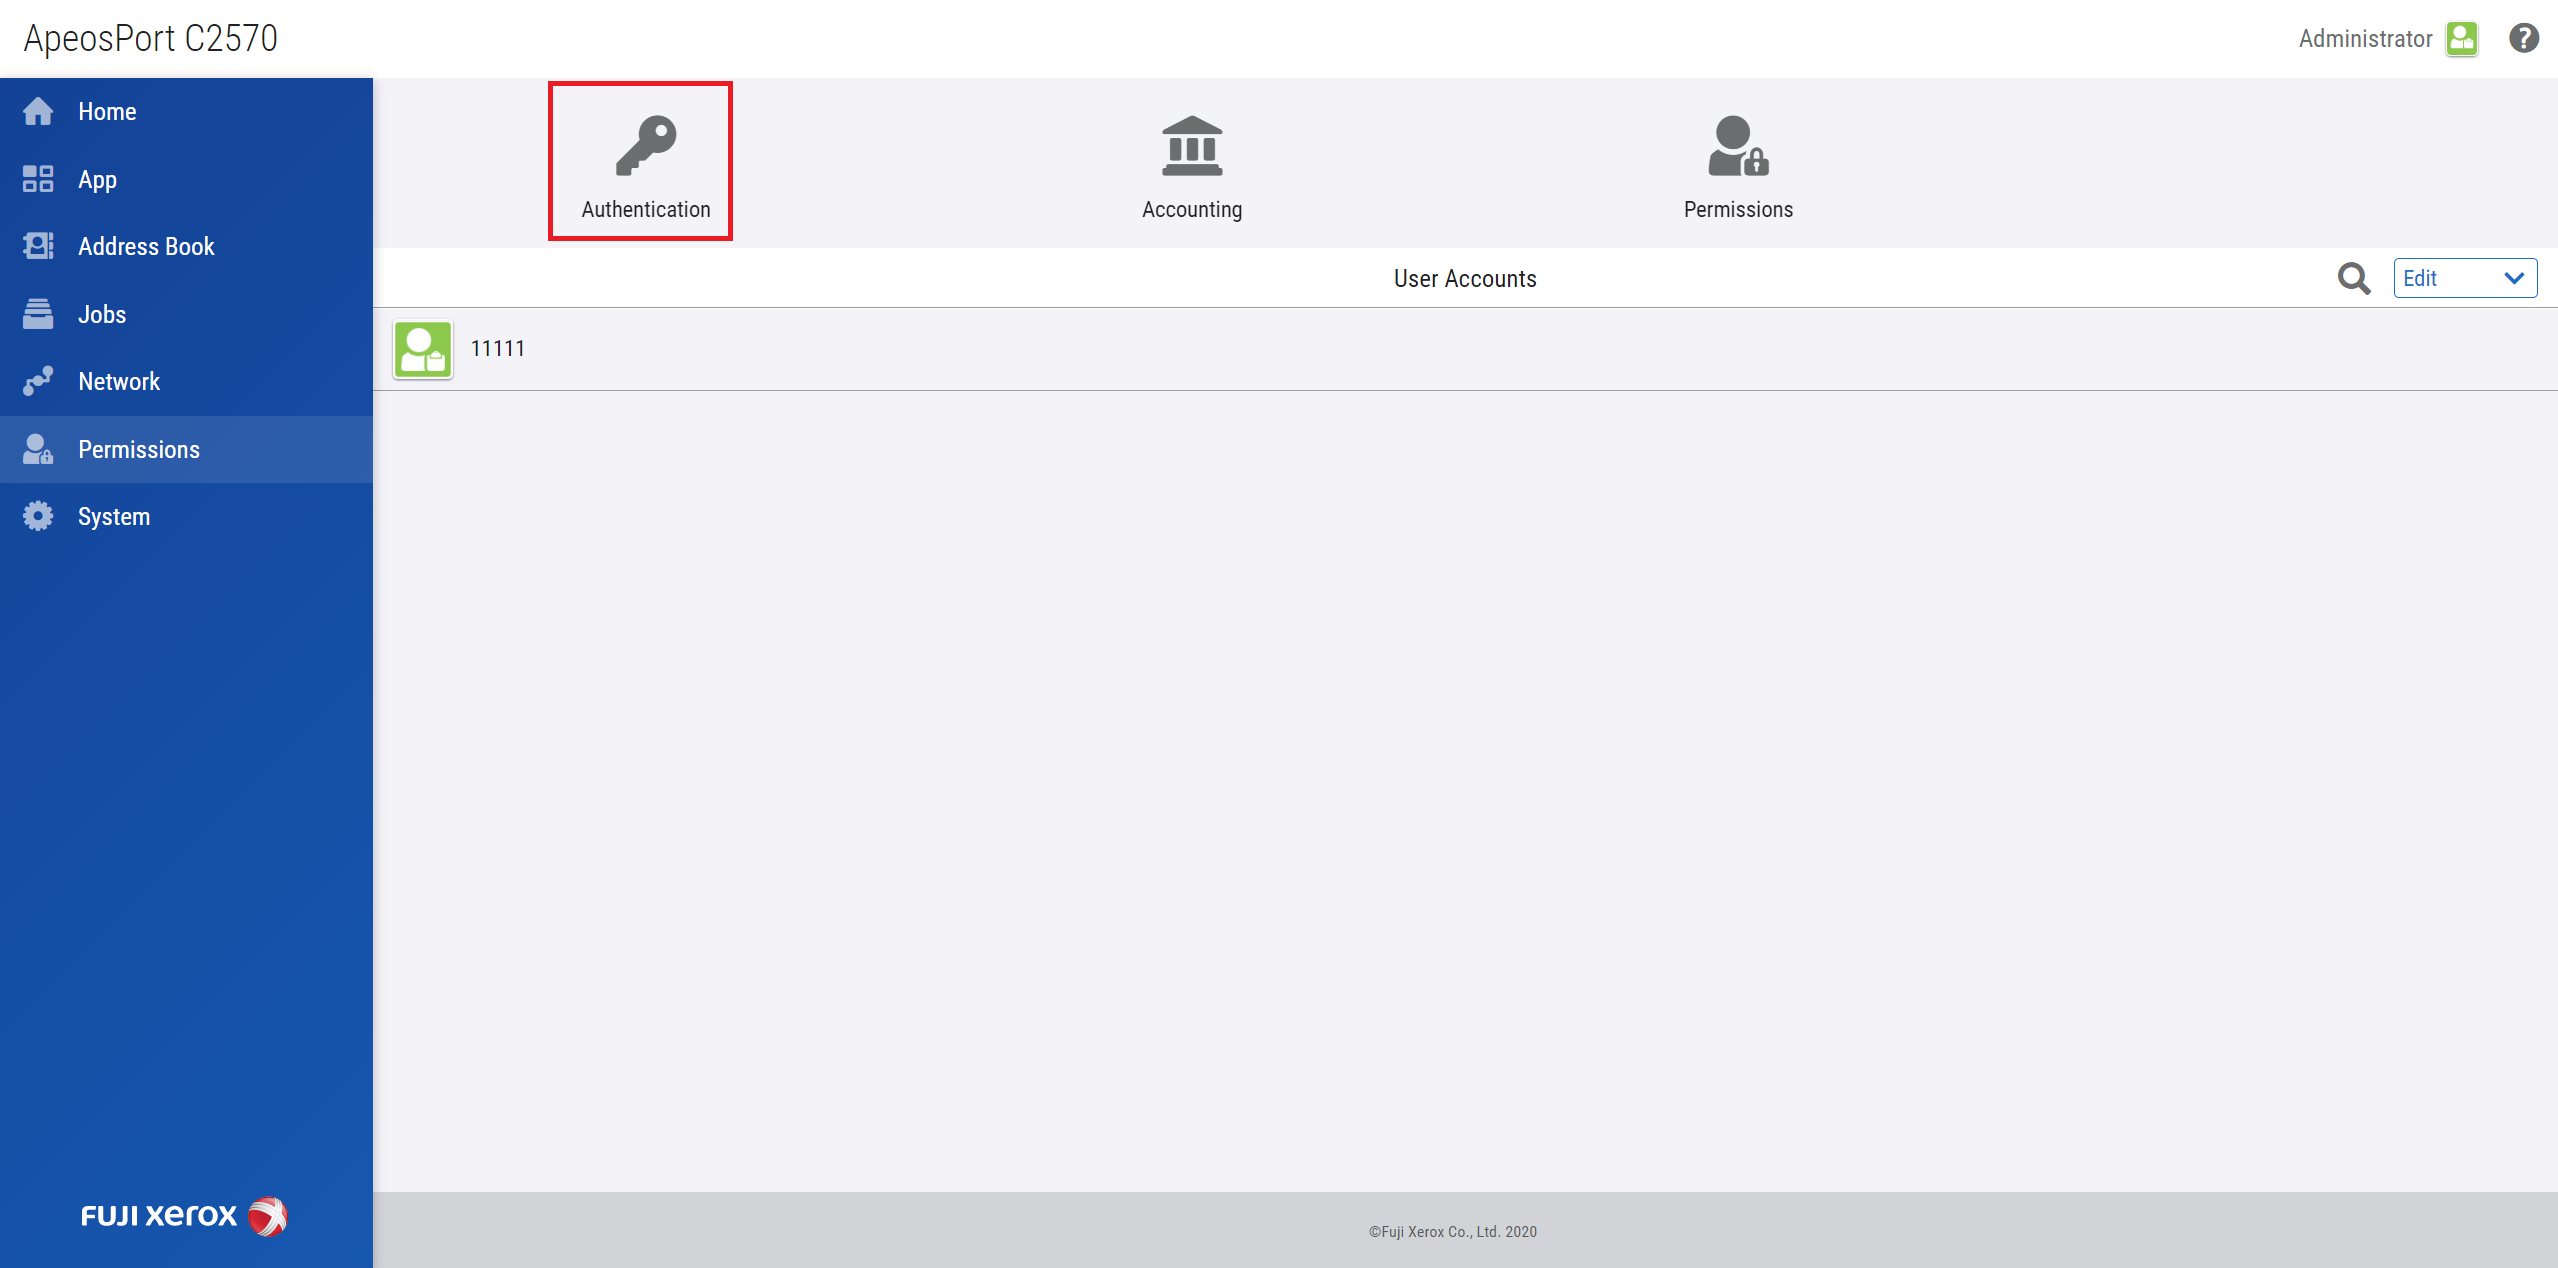
Card reader settings
Enable Card Reader support
Go to Permissions > Authentication > Advanced Settings
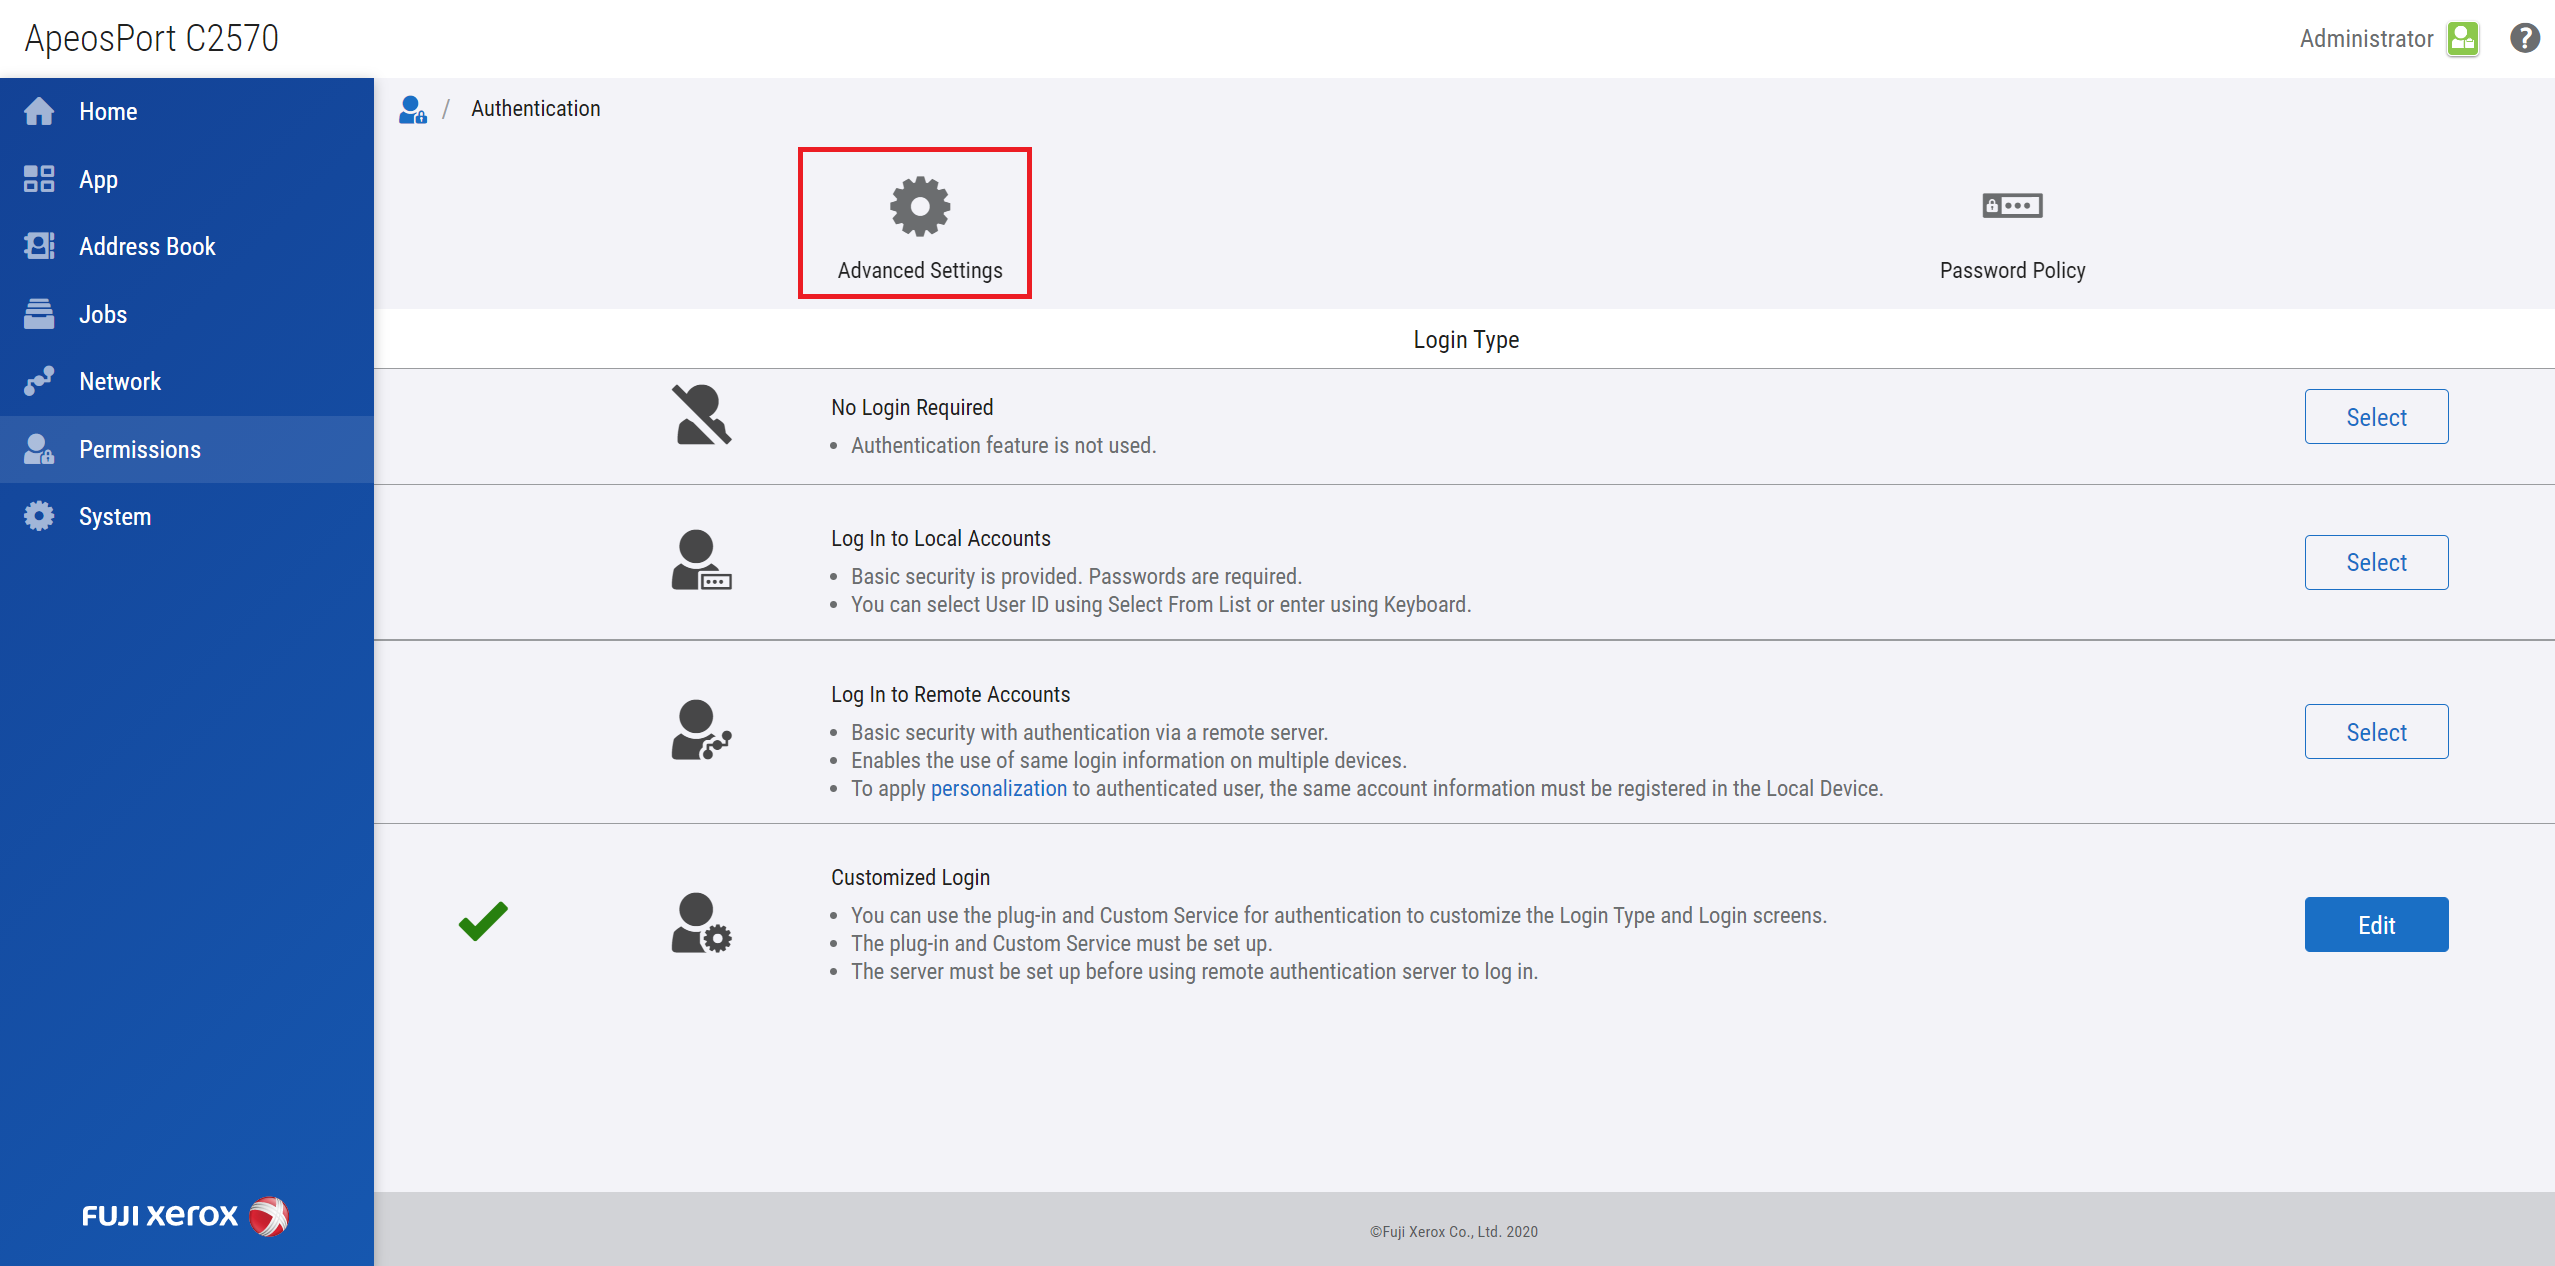
If you are planning on using authentication with card, set the following property to On, otherwise set it to Off.
Set Use of Smart Card to On,
Click on Save.
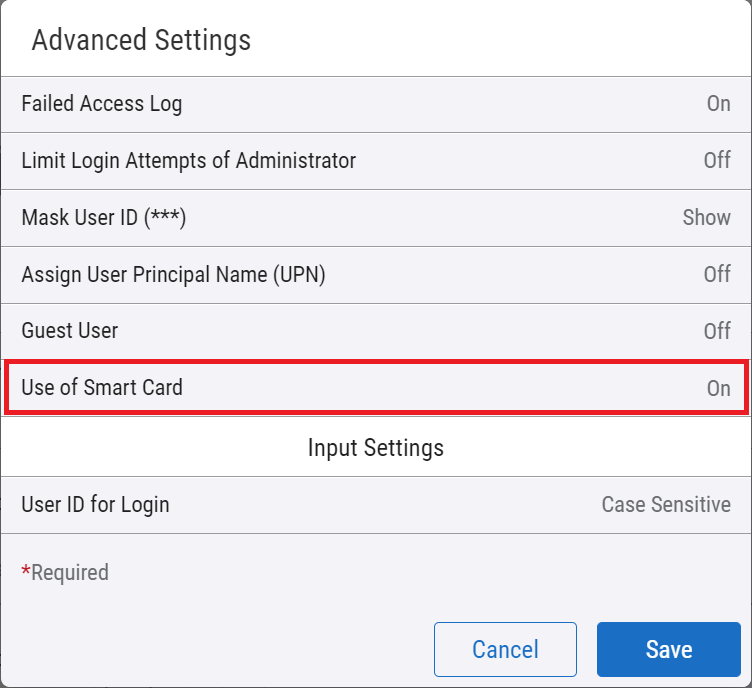
Do not enable Use of Smart Card when Card Reader is not connected or you will not be using authentication with card.
Scan related settings
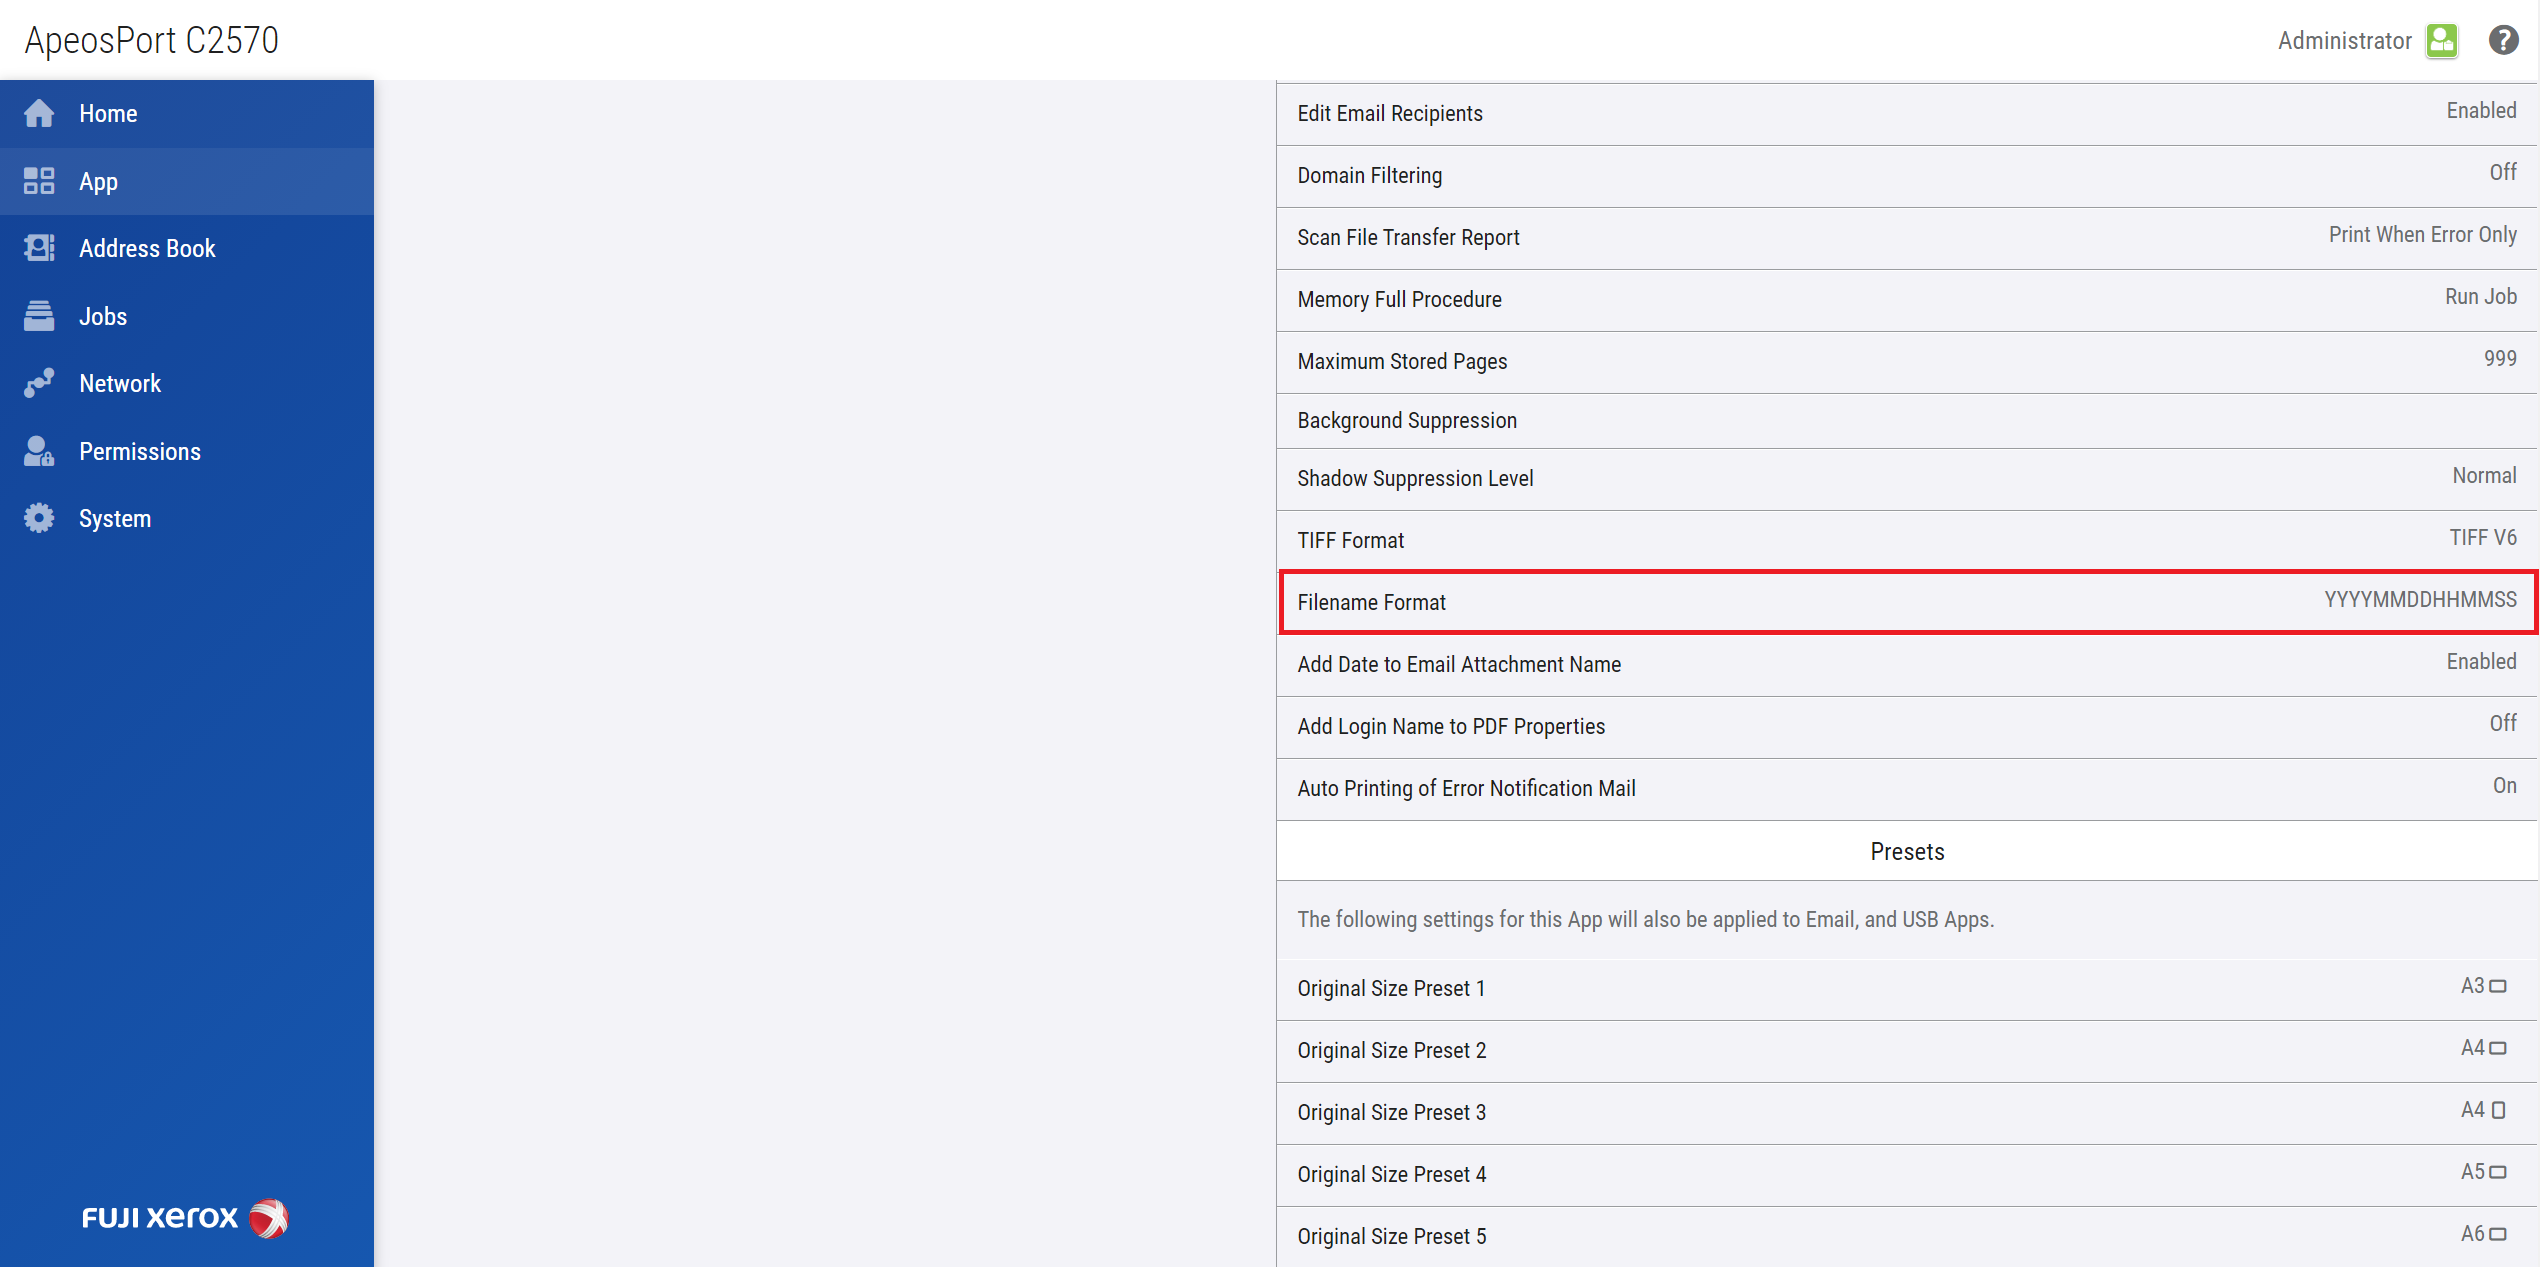
Change Scan Filename Format (only required for YSoft Terminal Aplication - Generation 1 Embedded Terminal)
In order to use scan workflow feature, perform following steps:
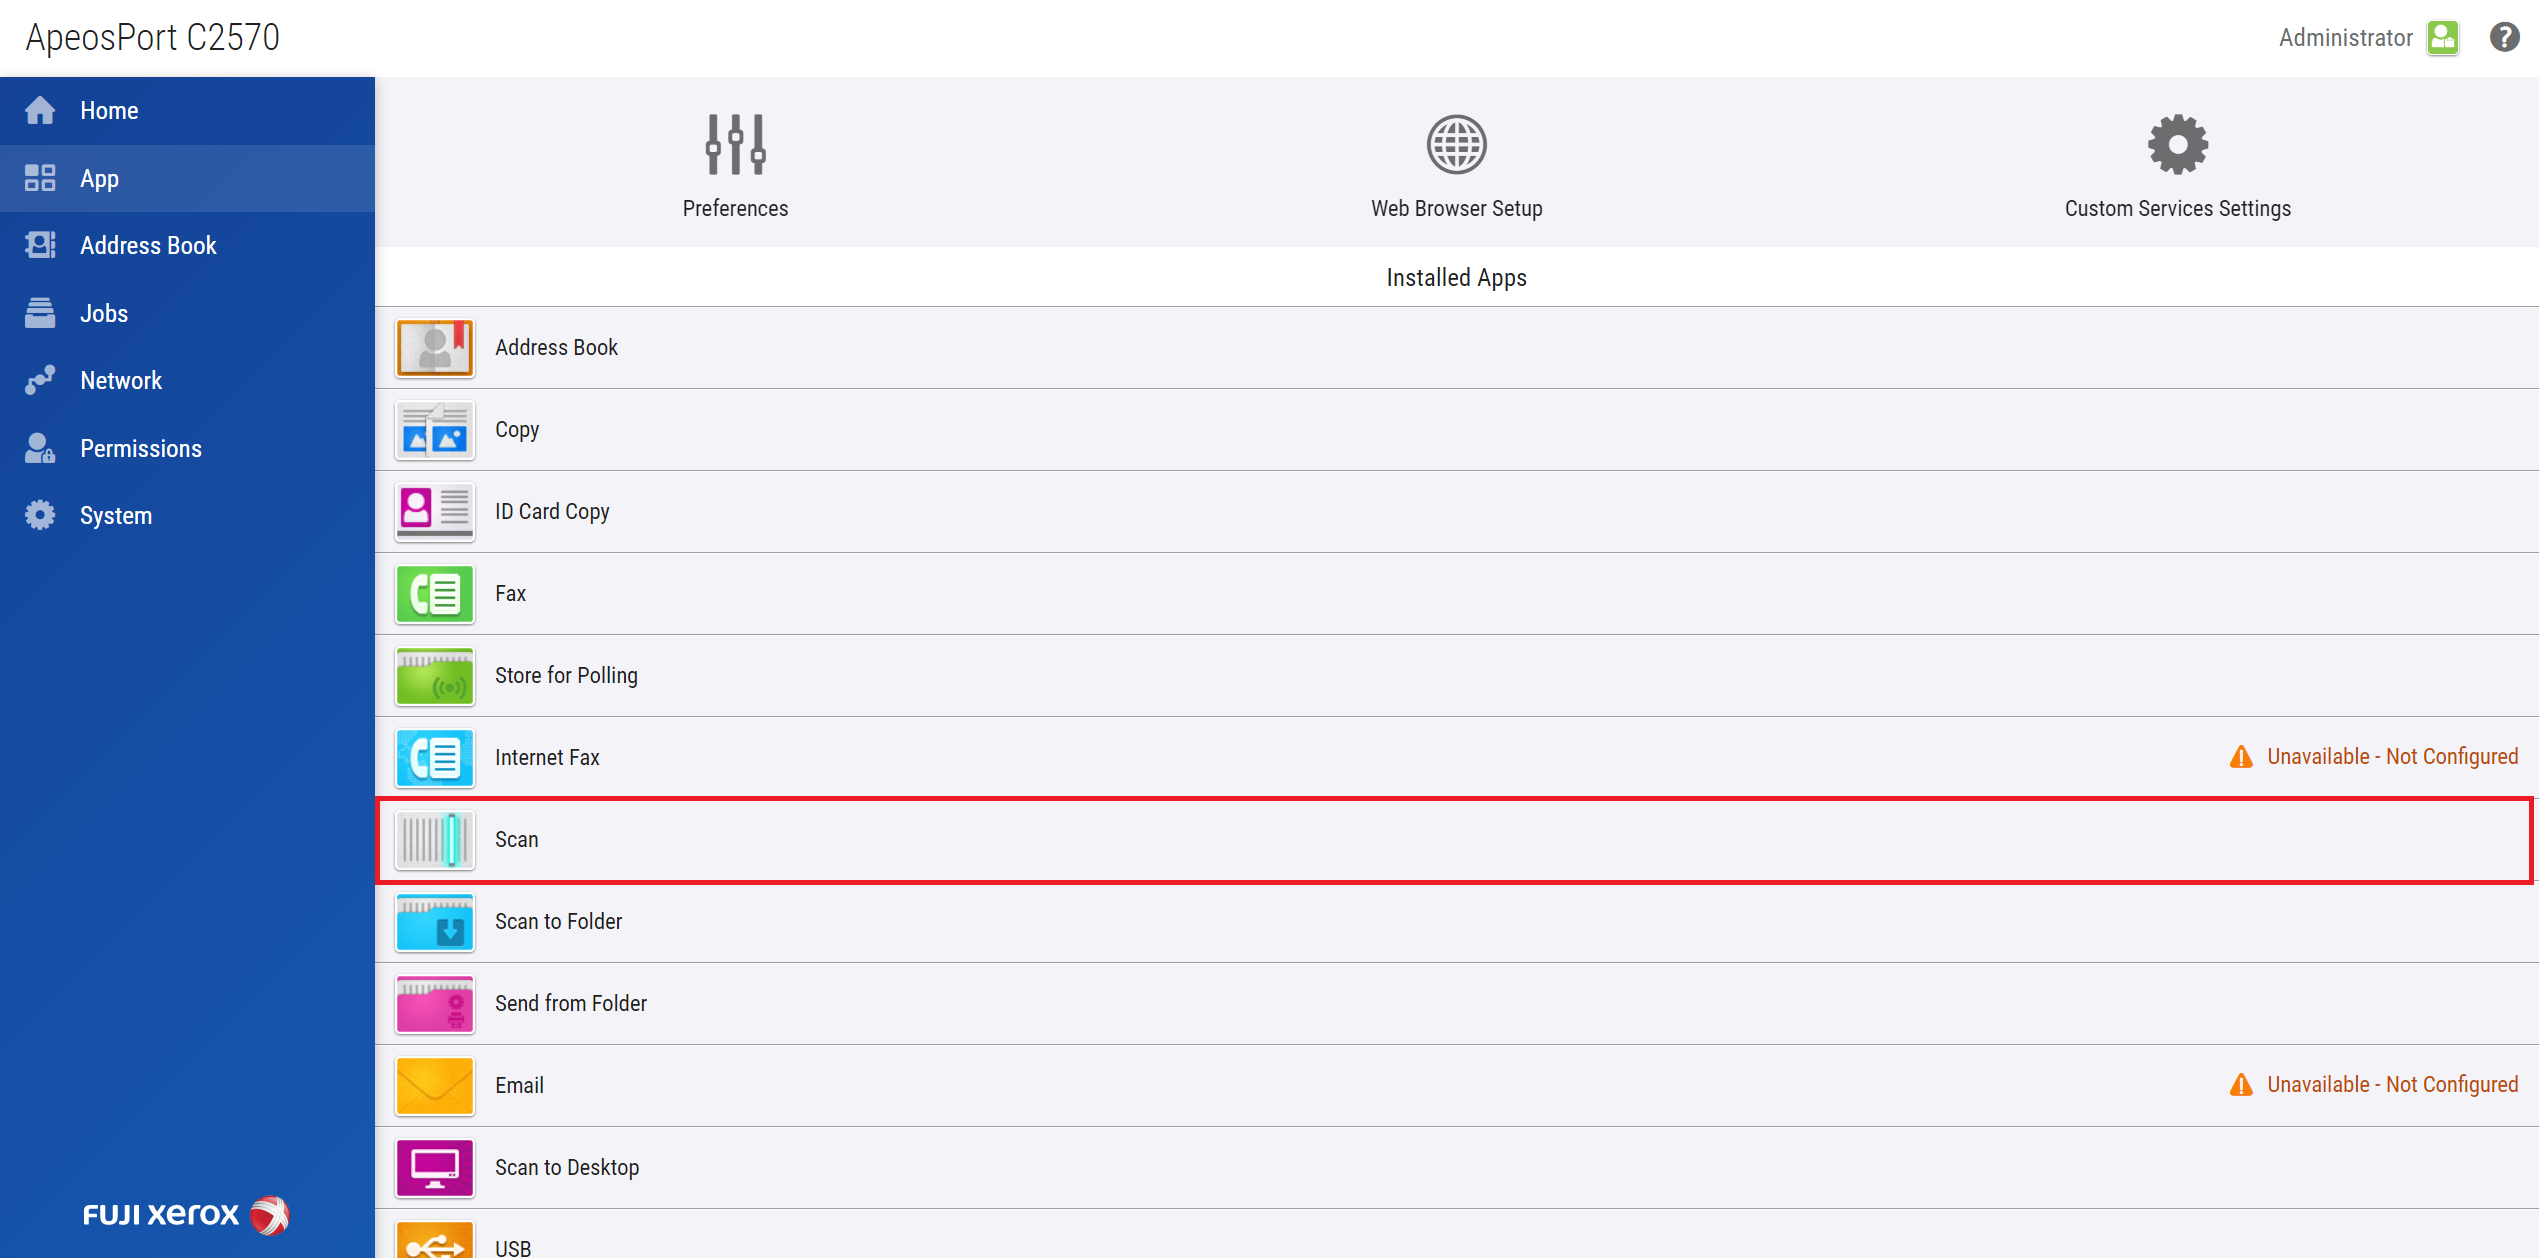
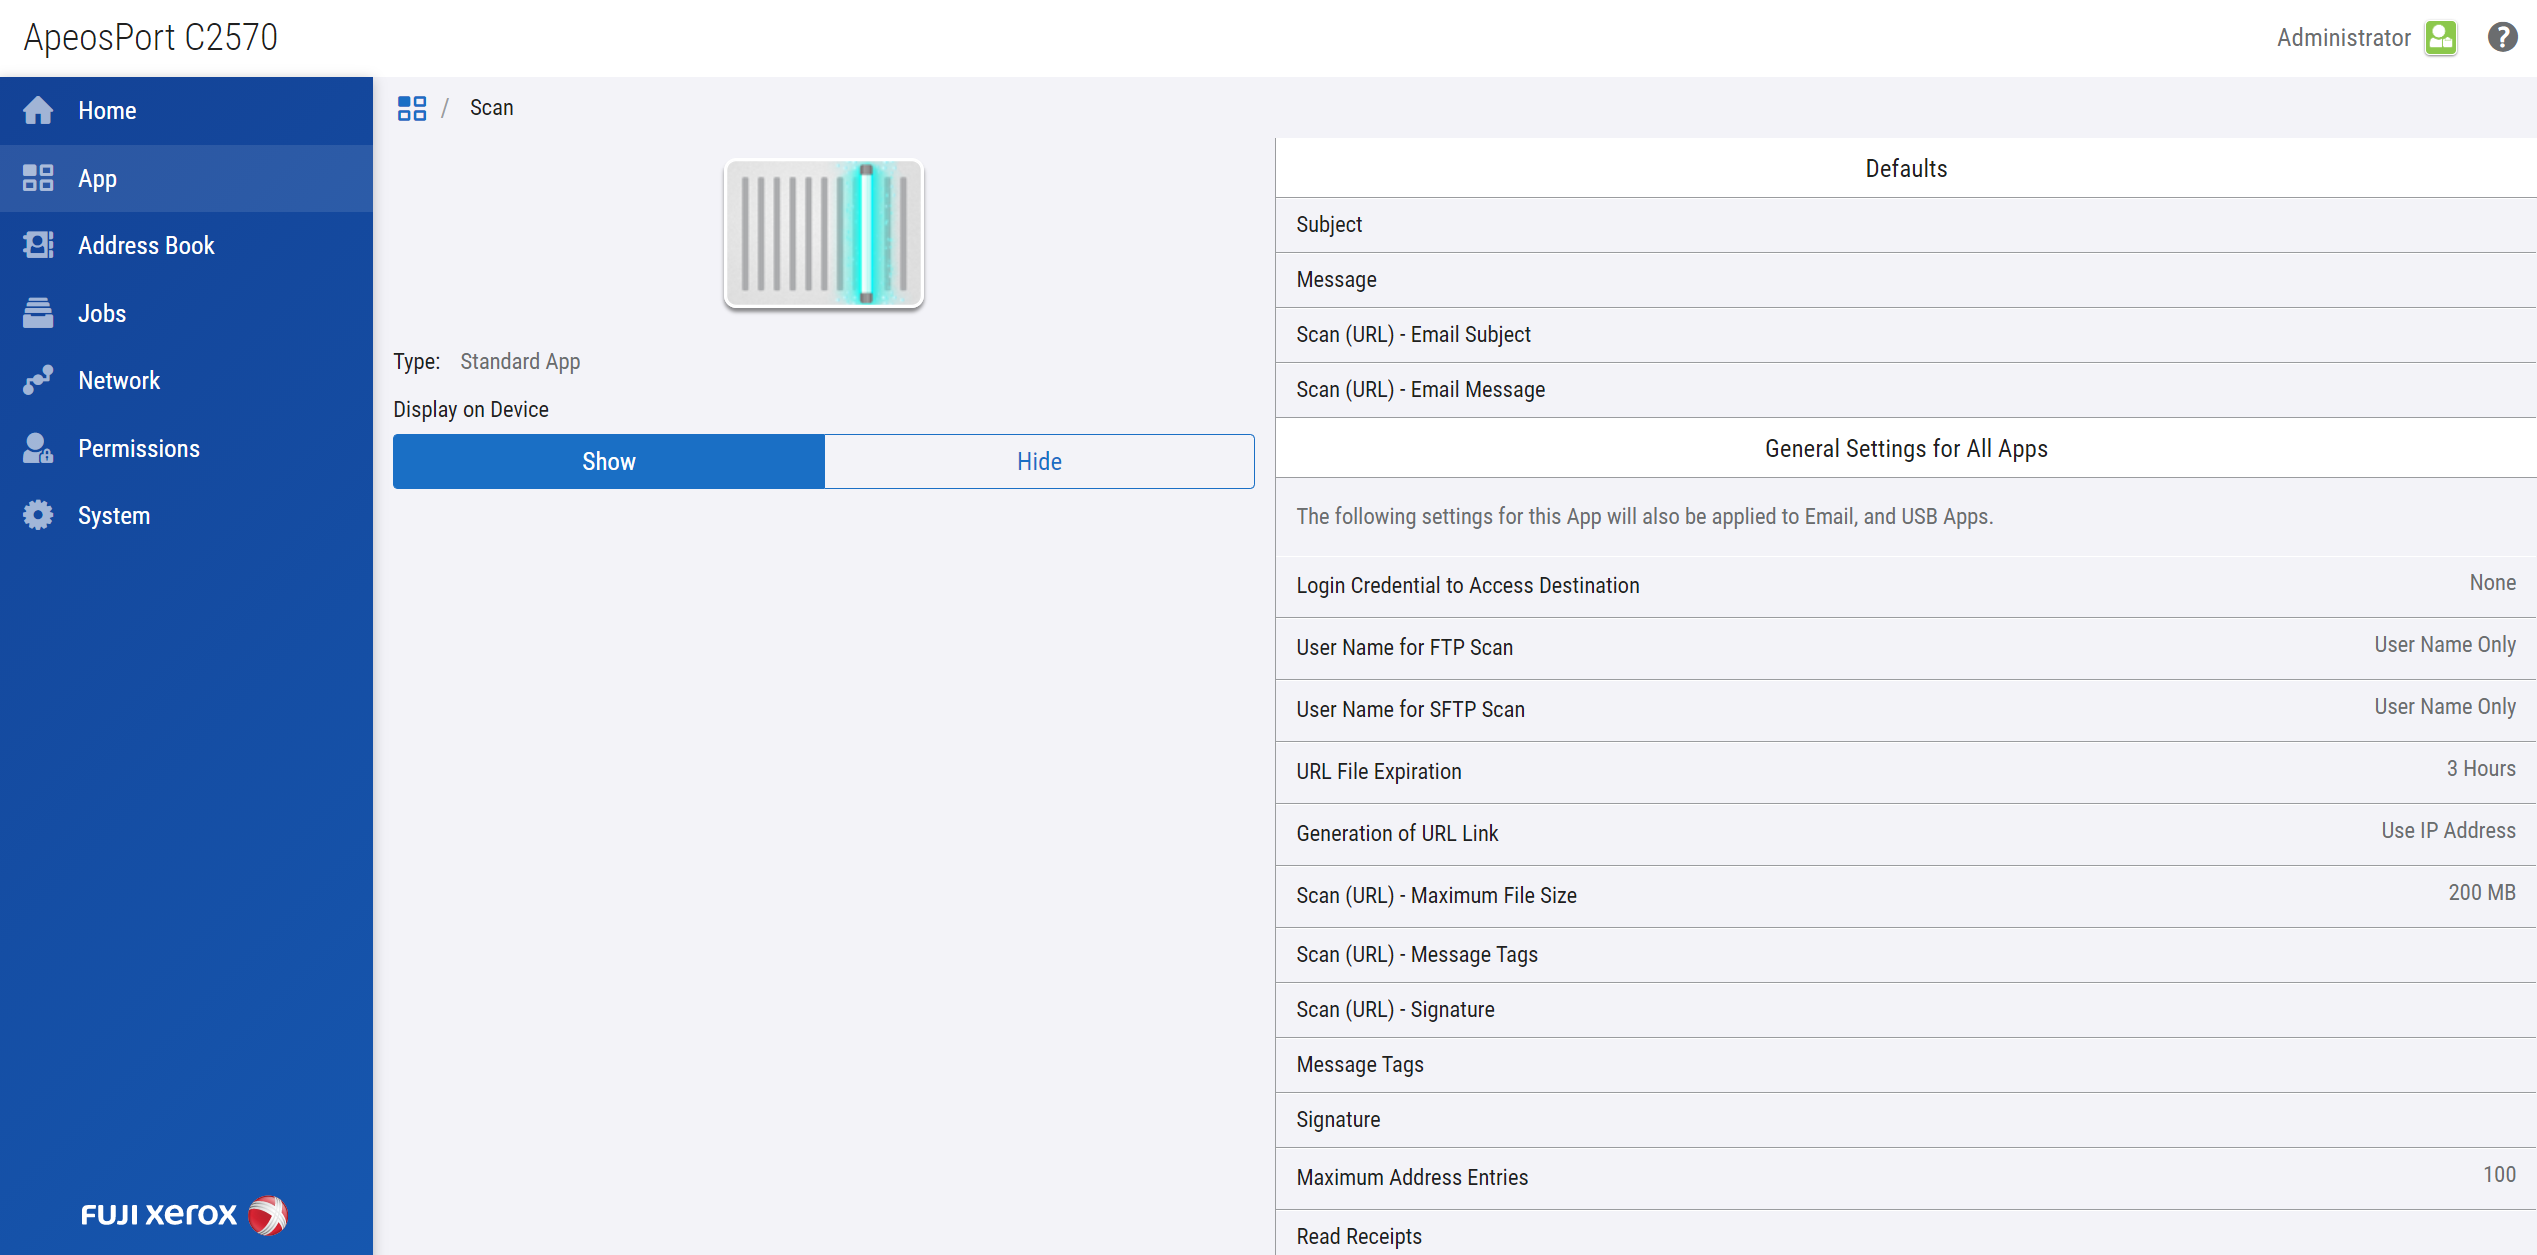
Go to App > Scan
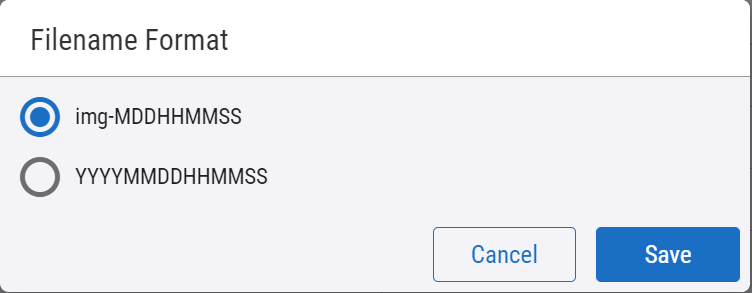
Change Filename Format option to img-MDDHHMMSS.
Click Save.
Enable auto completion of email address in native scanning application
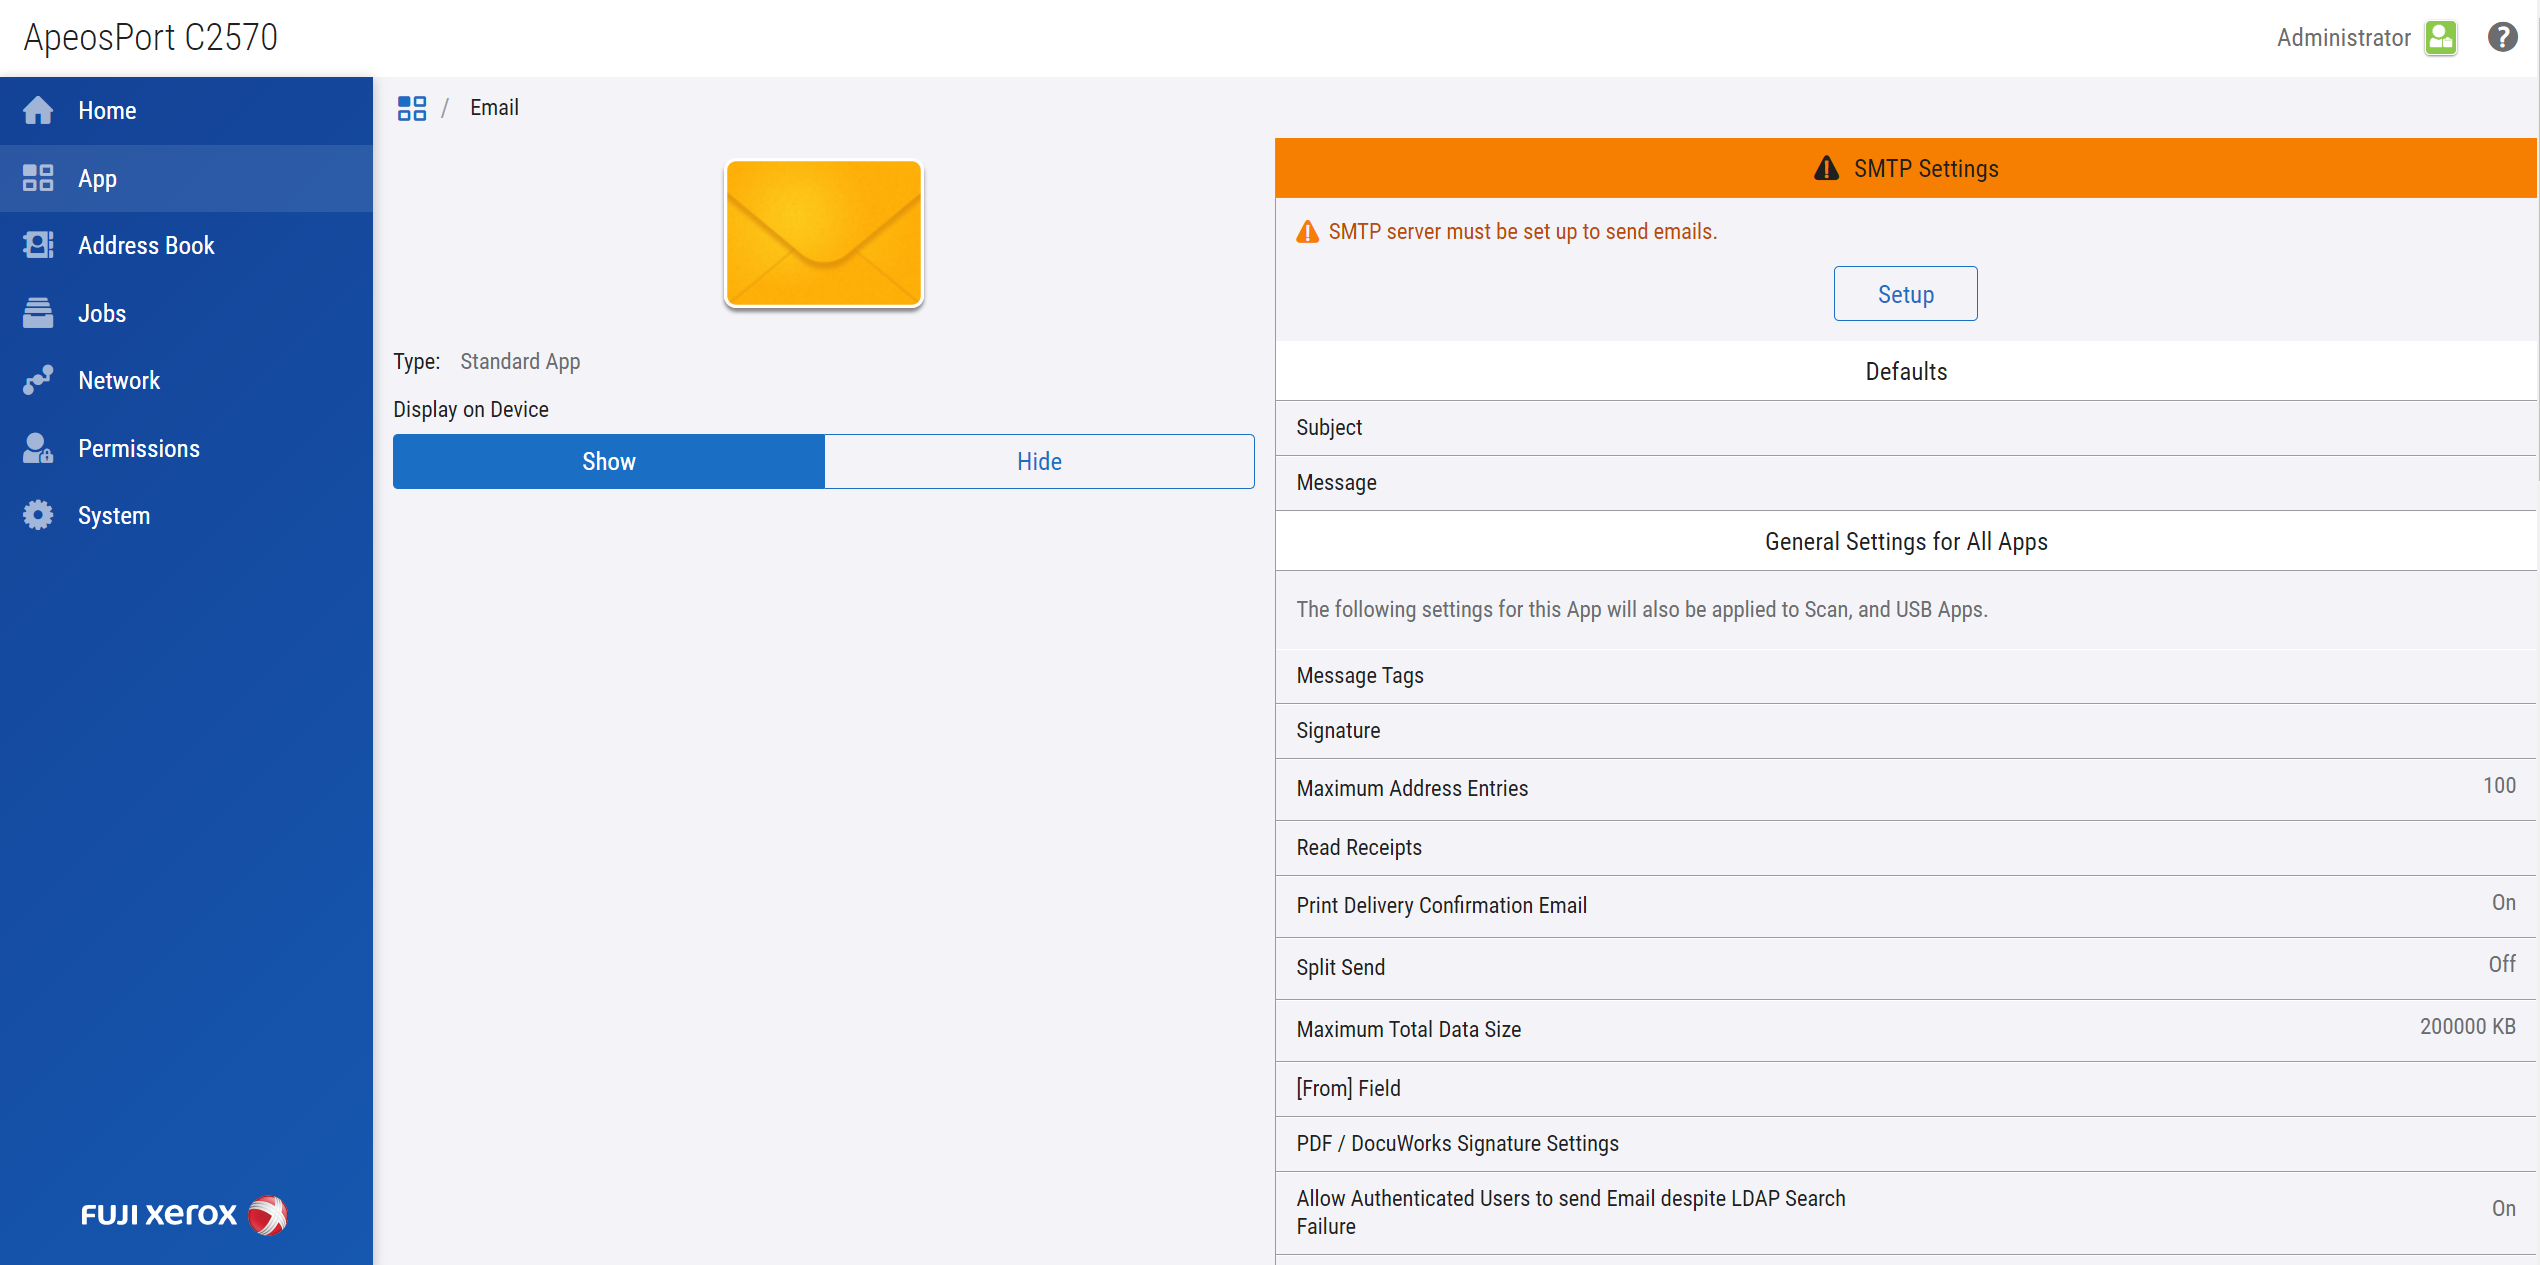
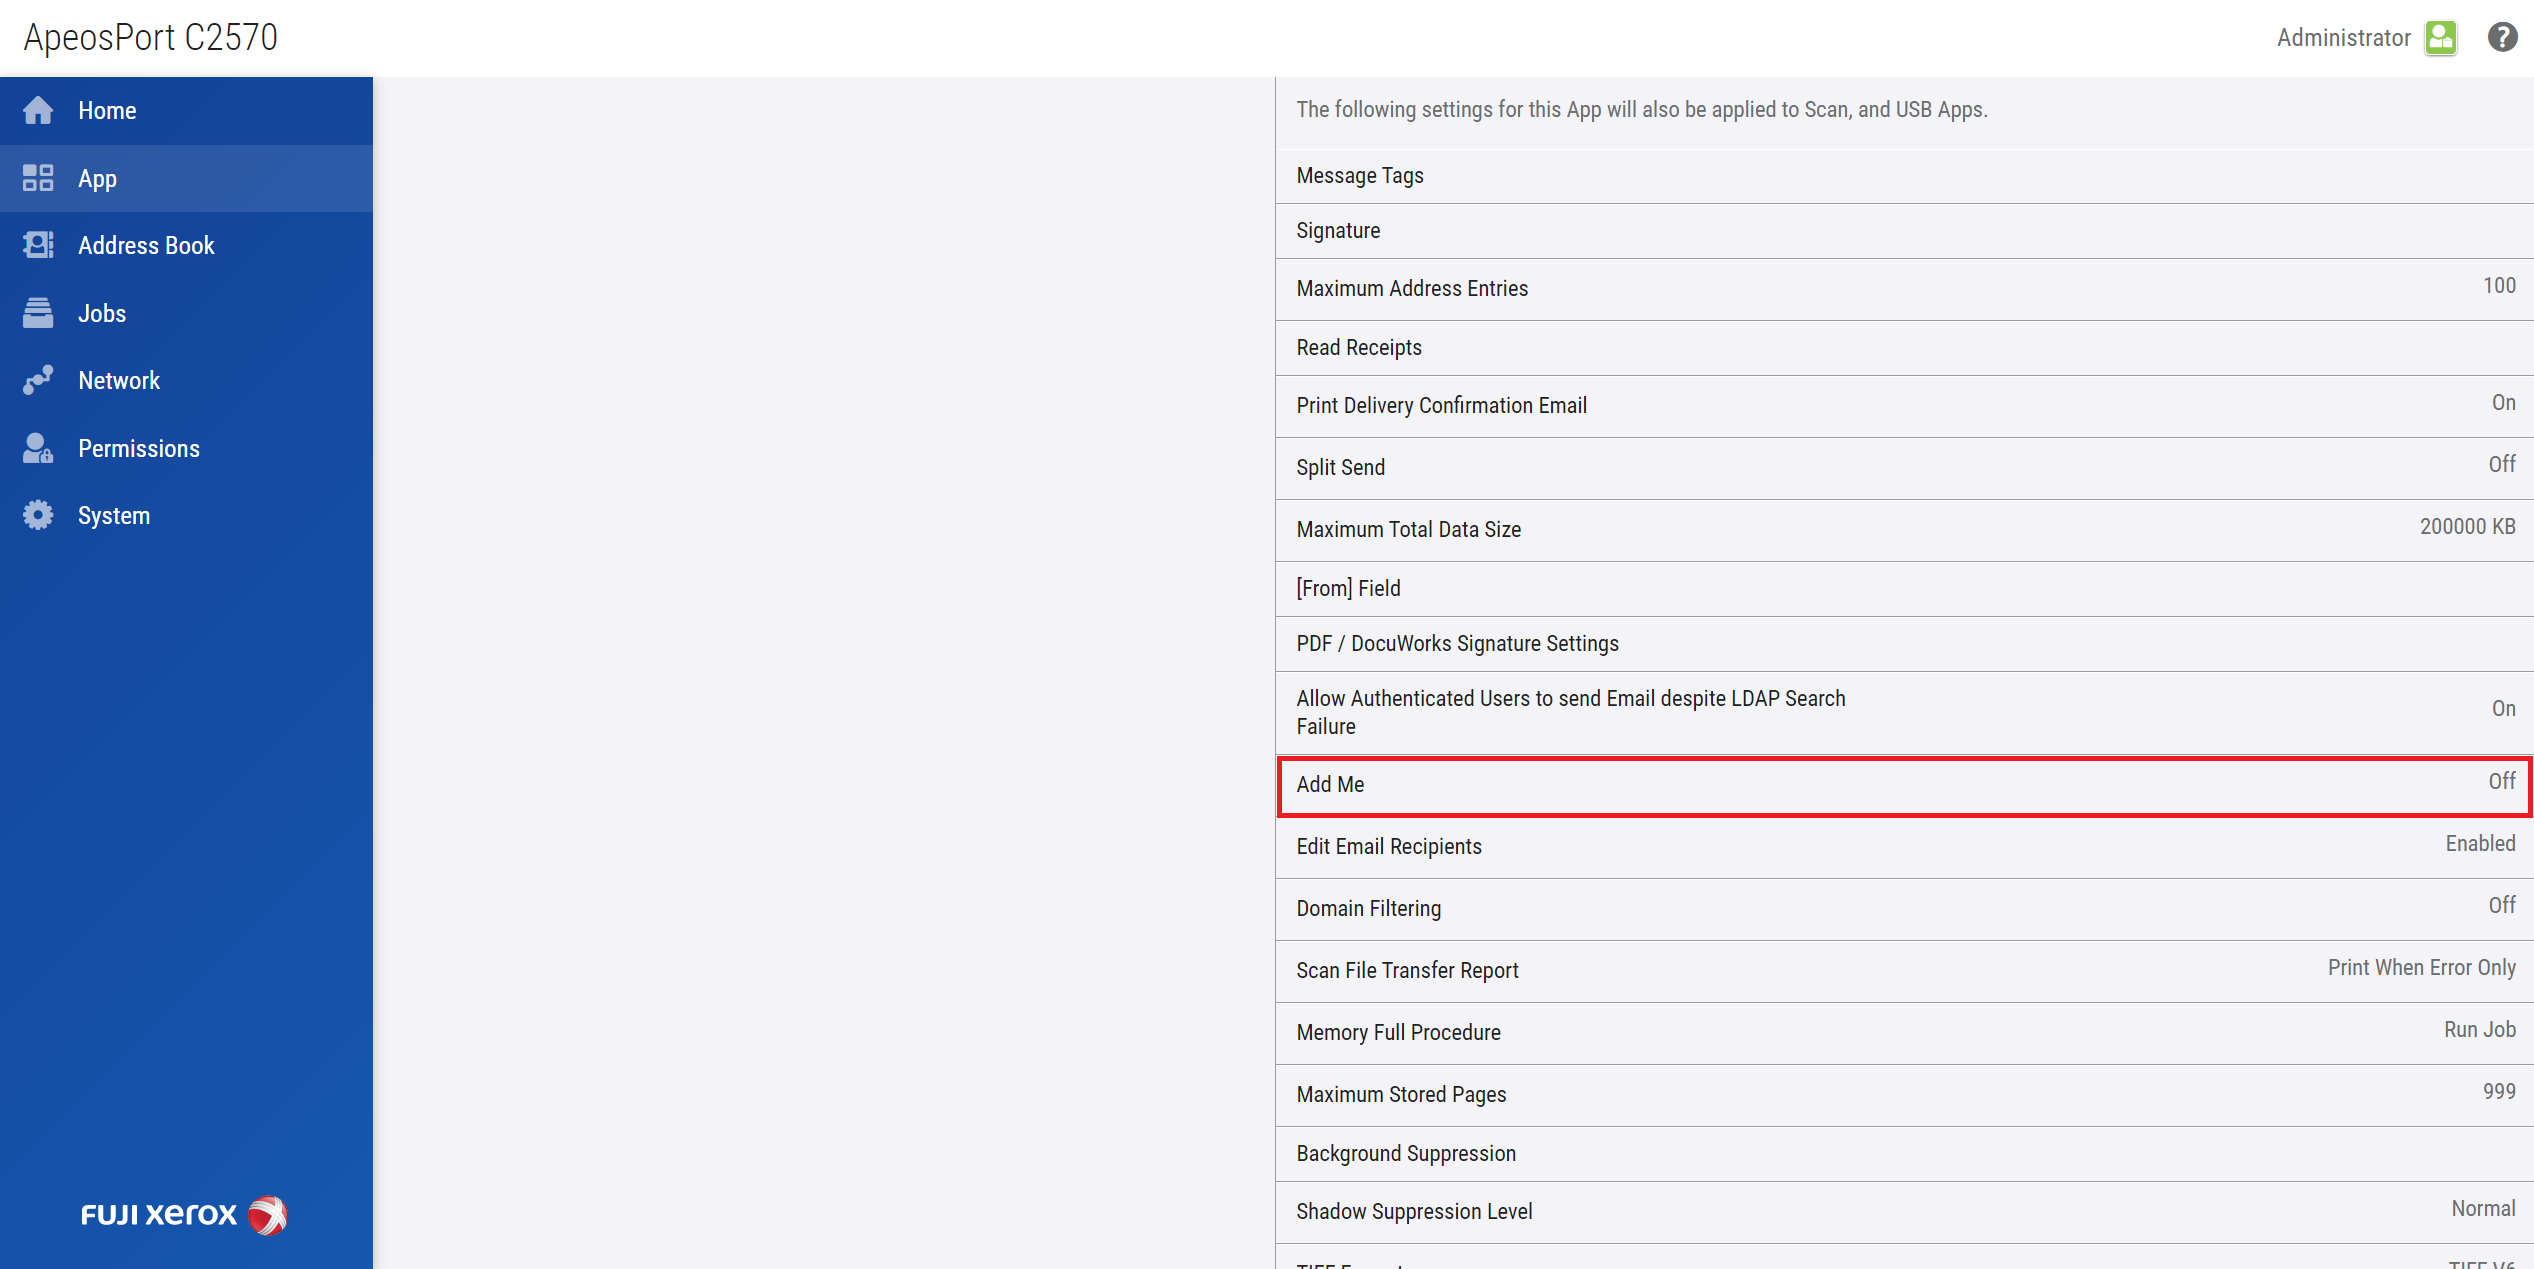
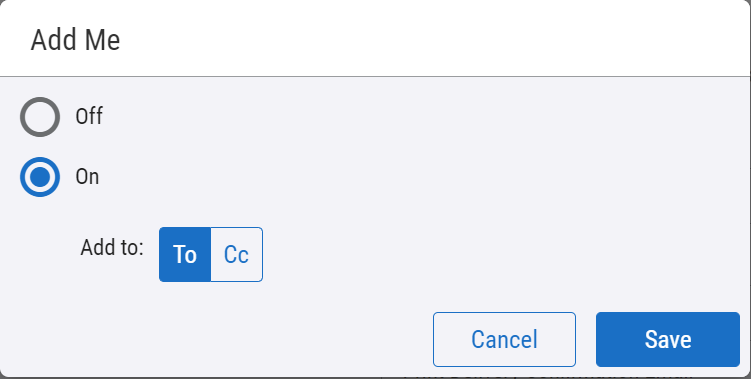
Go to App > Email
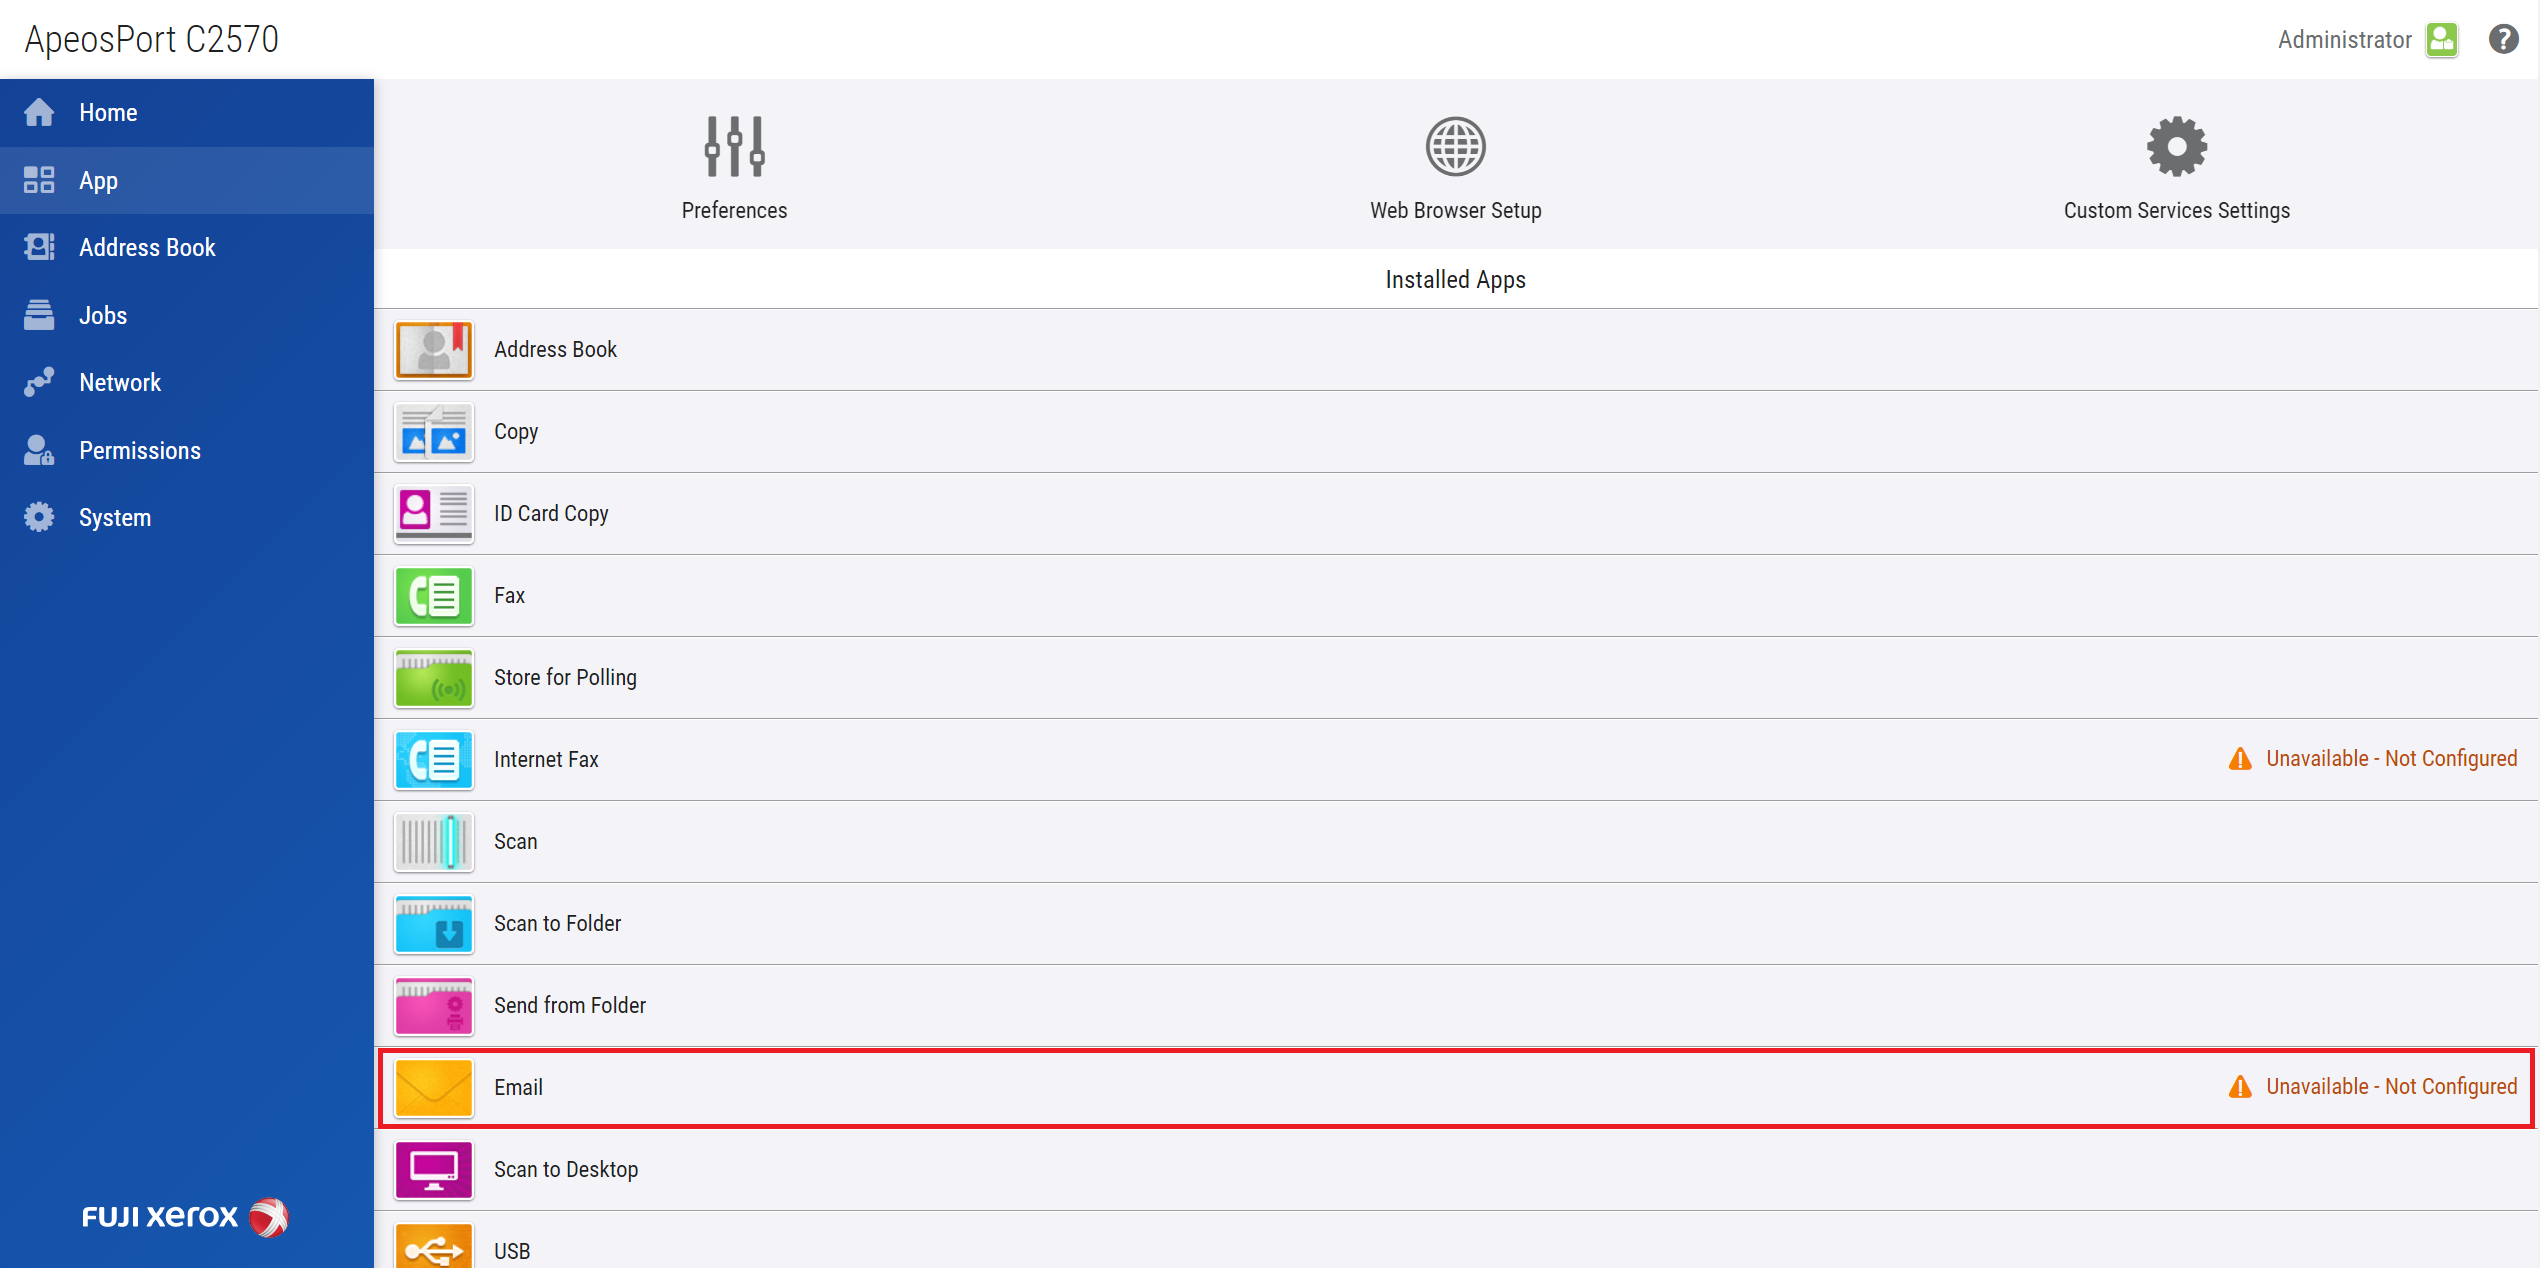
Turn On Add Me option and choose Add to "To" or "Cc".
Click Save.
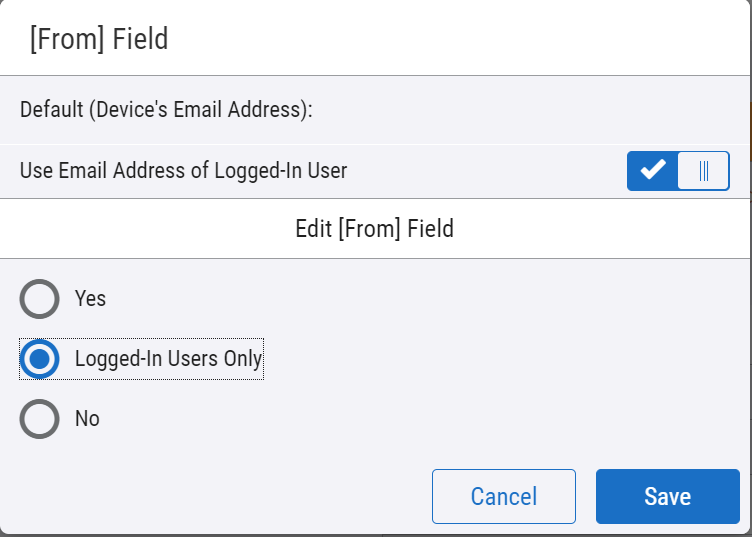
You may optionally configure "[From] Field".
Go to [From] Field

Change Edit [From] Field option to Logged-In Users Only.
Click Save.
Configuration after installation of Embedded Terminal
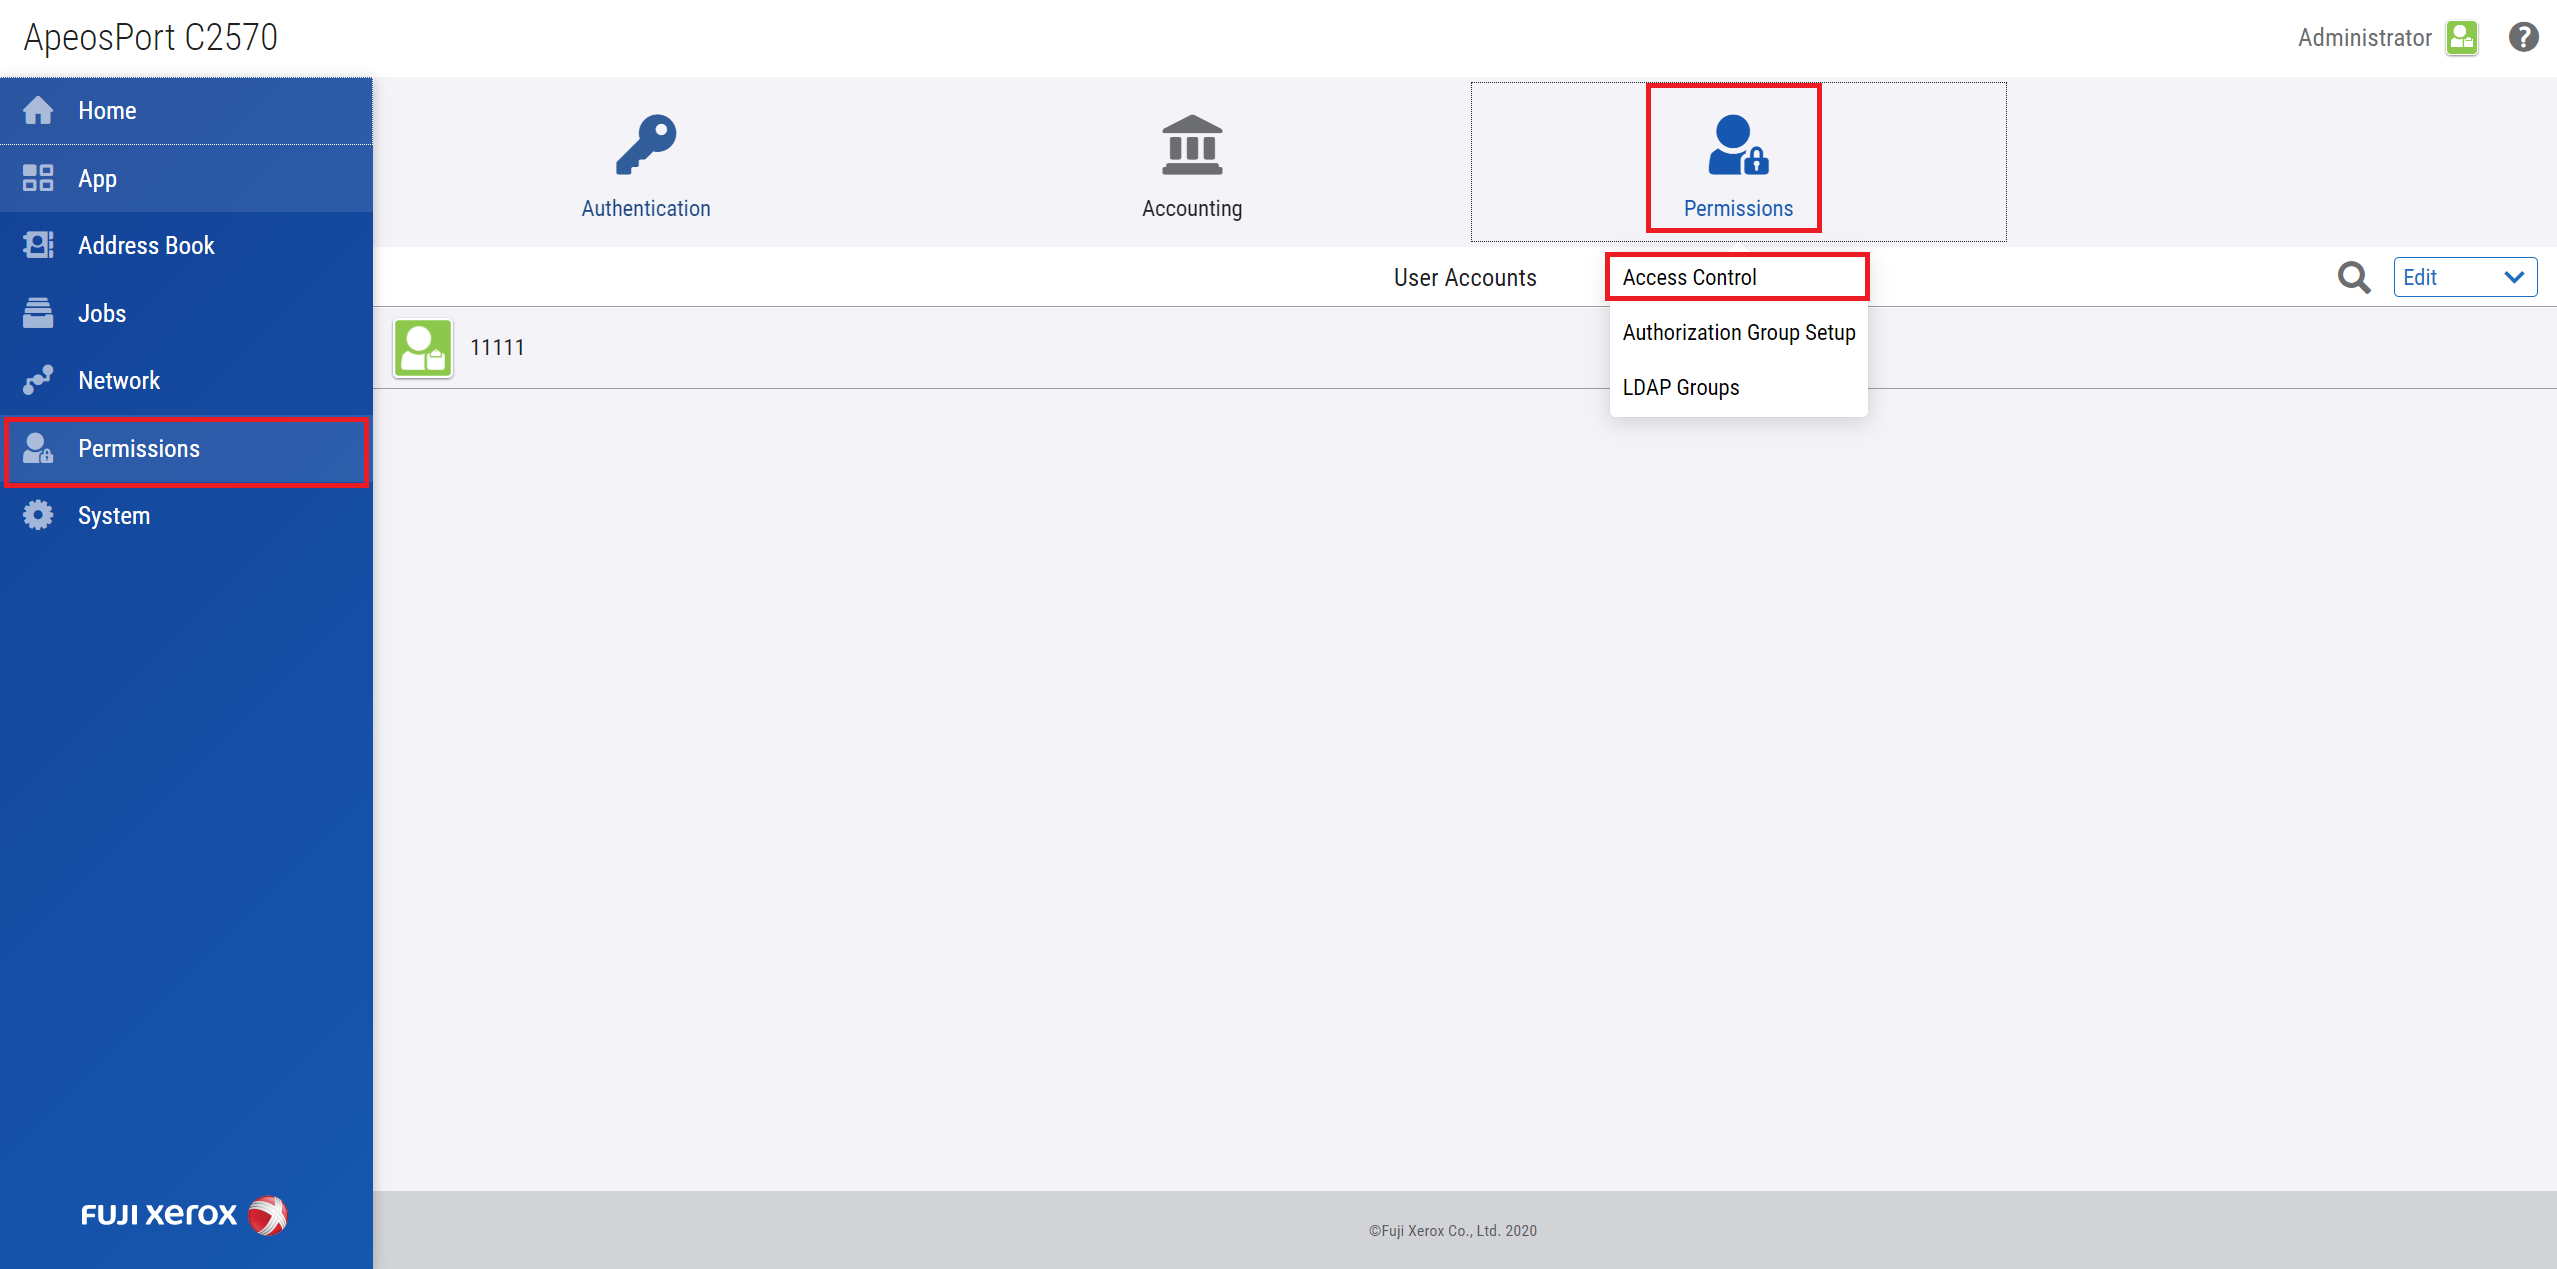
Configure access to device functions
To restrict access to walk up functions by Dispatcher Paragon user access right setting, the setting bellow need to be configured.
Go to Permissions > Permissions > Access Control and set Device Control Panel Access to Locked.
By configuring this, Dispatcher Paragon authentication screen becomes the home screen and the user need to authenticate to access to any functions.
If the administrator wants to define access to individual function separately, configure App Access instead of Device Control Panel Access.
After uninstallation of the Dispatcher Paragon Embedded Terminal from the MFD, these settings need to be set to Unlocked in order to allow access to the MFD's functions again.
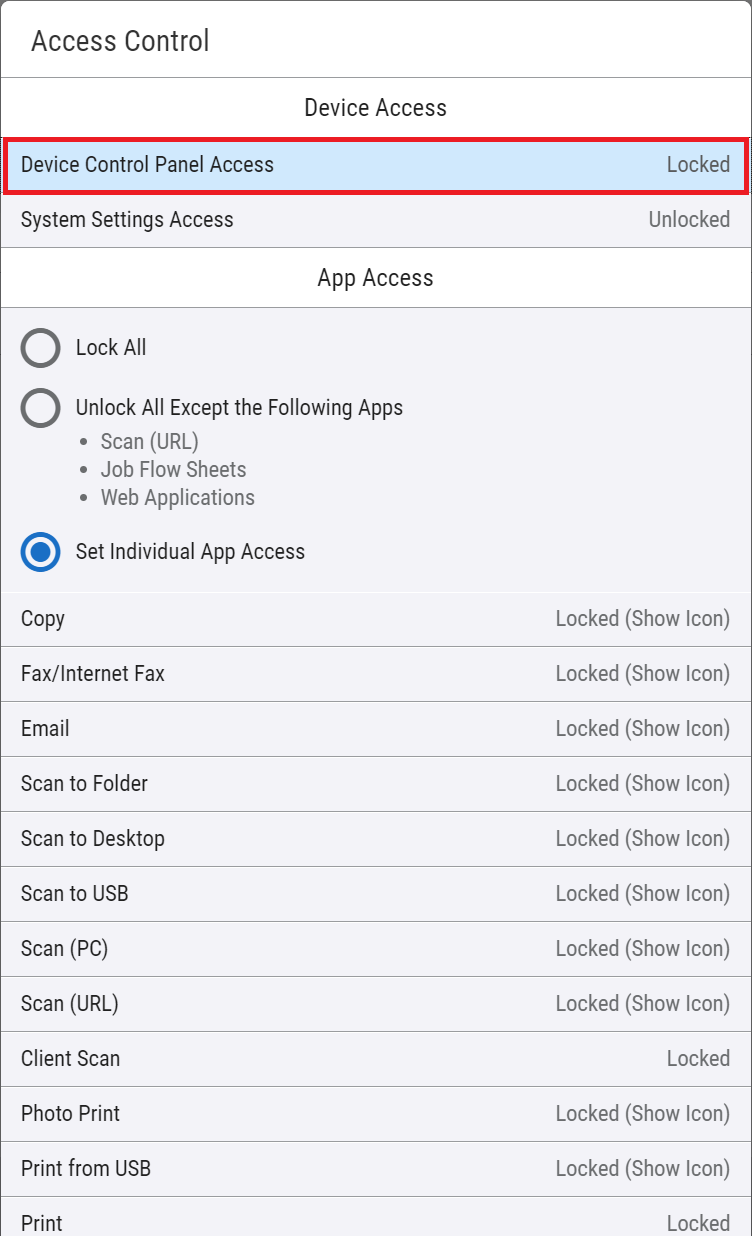
Configure color copy restriction
For XCP plugin terminal to restrict access to Full color copy by Dispatcher Paragon user access right setting, the setting bellow need to be configured.
Go to Permissions > Permissions > Access Control and set Color Copying to Locked.
Device NVM setup
Accounting settings
For ApeosPort to report accounting of print jobs to print jobs delivered by the Dispatcher Paragon system, this configuration is required. Also if this configuration is not done, ApeosPort requires authentication for print request and stores print jobs without authentication information to the internal storage.
This requires Fuji Xerox Customer Engineer do this onsite.
1 Input in Chain-Link and corresponding value as 701-436=0
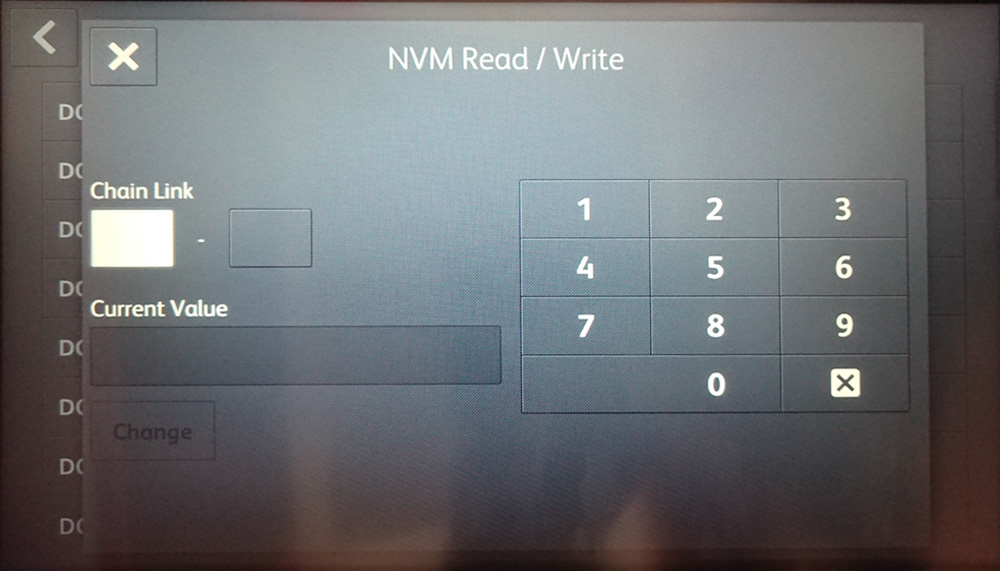
2 Reboot the machine if required.
Dispatcher Paragon Payment System settings
This configuration is required if SCAN should be also managed based on credit/quota via Payment System.
This requires Fuji Xerox Customer Engineer do this onsite.
The following settings is required to be done in order to make scan control (scan quota which limits number of scanning page) working on Fuji Xerox devices.
Set NVM 850-015 = 1 will enable the control. Set NVM 850-015 = 0 will disable the control.
1 Input in Chain-Link and corresponding value as 850-015=1
2 Reboot the machine if required.