This document describes how to authenticate at the MFD with the Konica Minolta Dispatcher Paragon Cloud Terminal.
Self Card Registration
Users can activate their cards at the MFD's terminal. After swiping an unactivated card, users will see the following screen: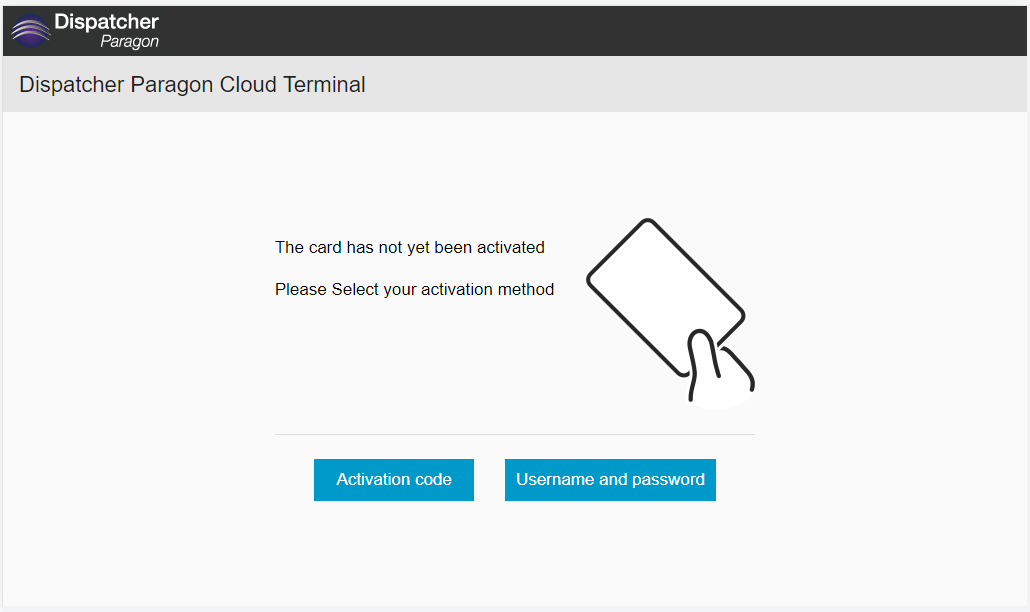 Users can tap one of the buttons to select between two scenarios:
- Activation code – Users obtain a Card Activation Code and enter the code on the terminal to activate their card.
- Username and password – Users log in to their account on the terminal and the card is activated.
Using an activation code
Obtaining the Card Activation Code
To activate a card using an activation code, the user needs a Card Activation Code. This code can be obtained in the following ways:
Administrator Generated Code
The administrator can assign card activation codes to user accounts and send the codes to users by email.
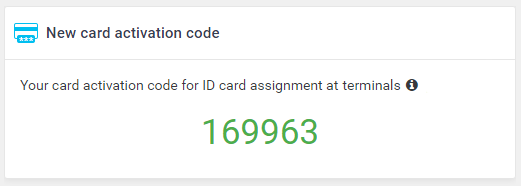
If the administrator has enabled the code displaying, users can see their card activation code on the Dashboard in the end user interface.
User Generated Code
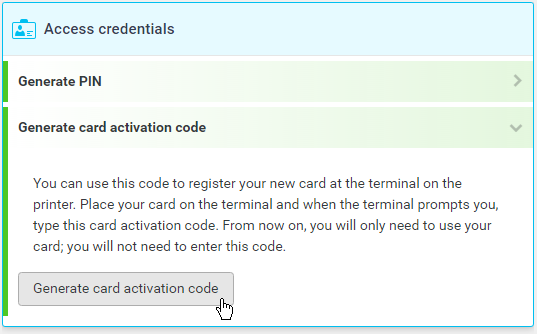
The administrator can enable users to generate their own card activation code in the end user interface.
To generate the card activation code, users must do the following:
- Log in to the end user interface. The Dashboard is displayed as default.
- On the Dashboard, navigate to the Access credentials widget and click Generate card activation code.
If the administrator has enabled the code displaying, users can see their card activation code on the Dashboard.
Card activation code provider
The administrator can enable users to generate their own card activation code on the Card activation code provider page. After sweeping an unactivated card at the terminal, the following screen is displayed: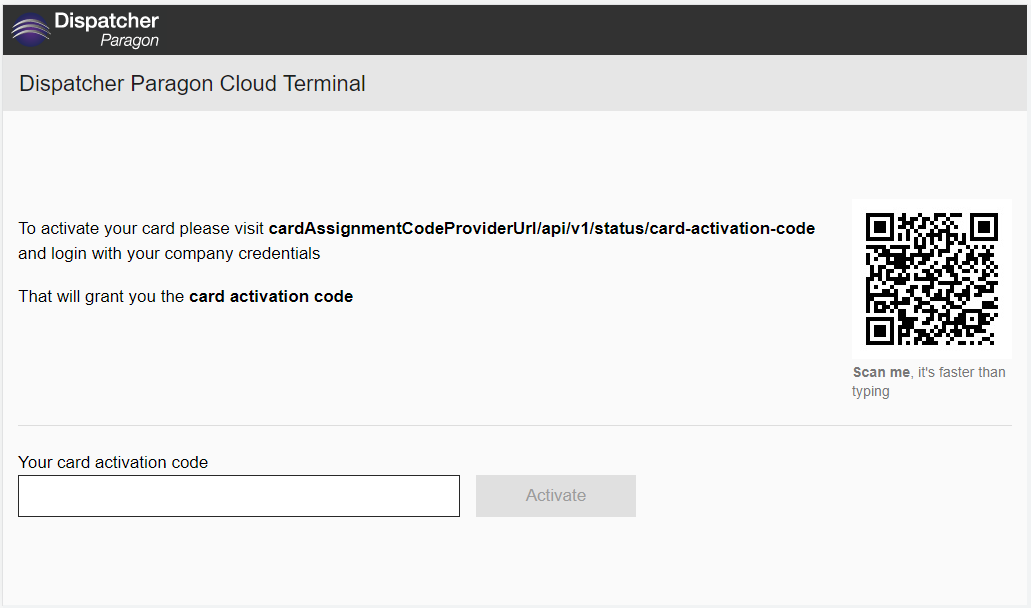
- Scan the QR code displayed to access the page or type the URL address, into your web browser and log in using your company credentials.
- Your card activation code will be generated.
Using Username and Password
After selecting the Username and password button, users enter credentials to their account and then select Activate. They are logged in and the card is activated.