Only devices based on the eSF 3.0, eSF 4.0, eSF 6.0 and eSF 7.0 platforms are supported so far.
Limitations can be found on page Requirements and known limitations of Dispatcher Paragon Embedded Terminal for Lexmark.
Differences in installation steps among Frameworks
There are differences among Lexmark Frameworks. Framework 3 and 4 are similar and do not require special configuration related to users and security settings during and after installation via Terminal Server. However, framework 6 (Android devices) do require special configuration of user access and security before installation and also after the installation of Dispatcher Paragon Embedded Terminal for Lexmark. Please ensure to which framework Dispatcher Paragon Embedded Terminal for Lexmark is to be installed and take appropriate steps described below.
How to find out version of framework in a devise has
Administrator can find out framework version on device's web interface. The procedure how to find out the framework version might differ per device and framework. Common steps are described below per framework versions.
Framework 3 and 4
To verify the version on devices having framework version 3 or 4 go to: Reports > Device Settings. In section Embedded Solutions there is an item Framework and version number starting with number 3 or 4. It might look like on the picture below:
![]()
Framework 6 and 7 (Android device)
To verify the version on devices having framework version 6 AND 7 go to: Settings > Reports > Device > Device Information. After clicking to Device Information there is a modal dialog where is an item Embedded Solutions and version number starting with number 6 or 7. It might look like below:
![]()
Embedded Solutions = 7.0.0
If Android device can be recognized by looking at User Interface it is very probably Framework 6 and 7. You can also find the information in device documentation.
Configuring the MFD (Framework 3 and 4)
Time Configuration
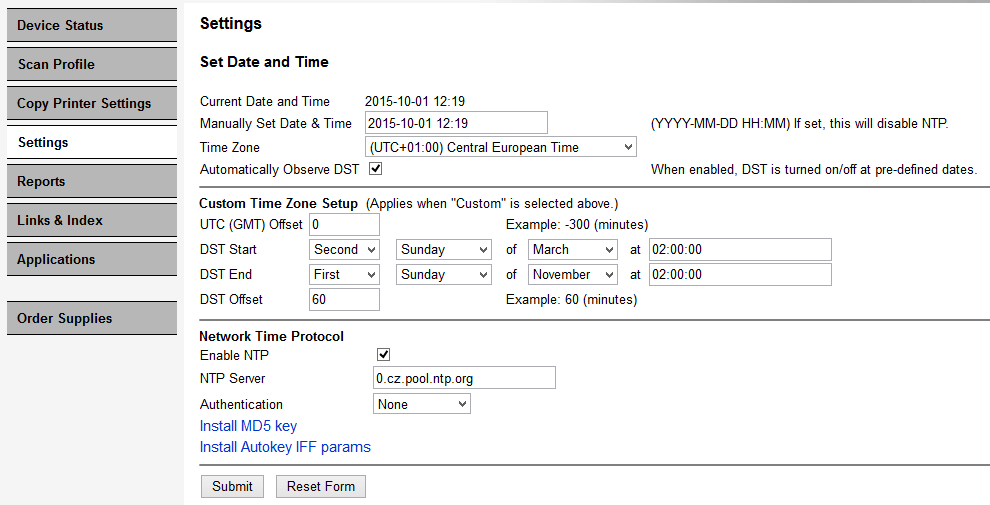
Time settings have to be configured for the proper accounting of jobs and the assignment of billing codes to these jobs.
Go to Web Administration > Settings > Security > Set Date and Time, and configure Daylight Saving Time Settings and Time Zone Settings to comply with the configuration of your server where Terminal Server is running.
Next, there are two options possible based on the availability of the NTP (time) server in your network:
- If an NTP server is available, set all the necessary details in the section Network Time Protocol, and tap Submit.
If an NTP server is not available, in the section Set Date and Time, set the timezone, date and time to the time of the server where Terminal Server is running, and tap Submit. If set, this will disable the NTP server.
WARNING: Be sure to set the time as precisely as possible (in means of seconds) to avoid errors in assigning billing codes to scan and copy jobs. It is better for the MFD to have the clock set slightly ahead, than behind.
Security Configuration
If you have installed Dispatcher Paragon Embedded Terminal in To each application mode (see Embedded Terminal installation), you might want to also configure other applications to be protected by Dispatcher Paragon authentication (note that Dispatcher Paragon Embedded Terminal is protected by default).
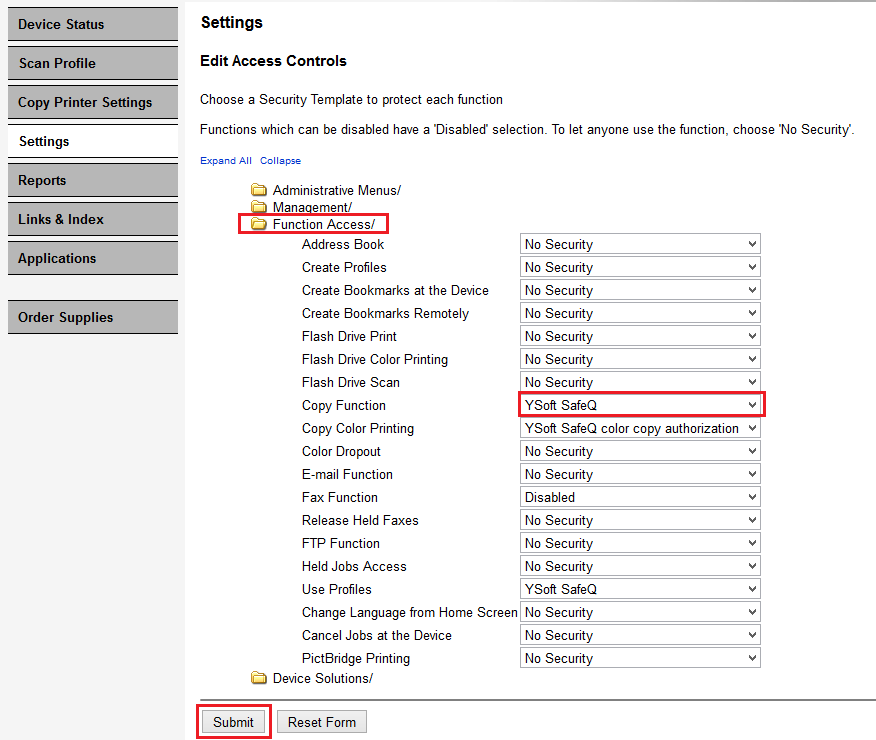
After Dispatcher Paragon Embedded Terminal installation, go to Web Administration > Settings > Security > Security Setup > Access Controls
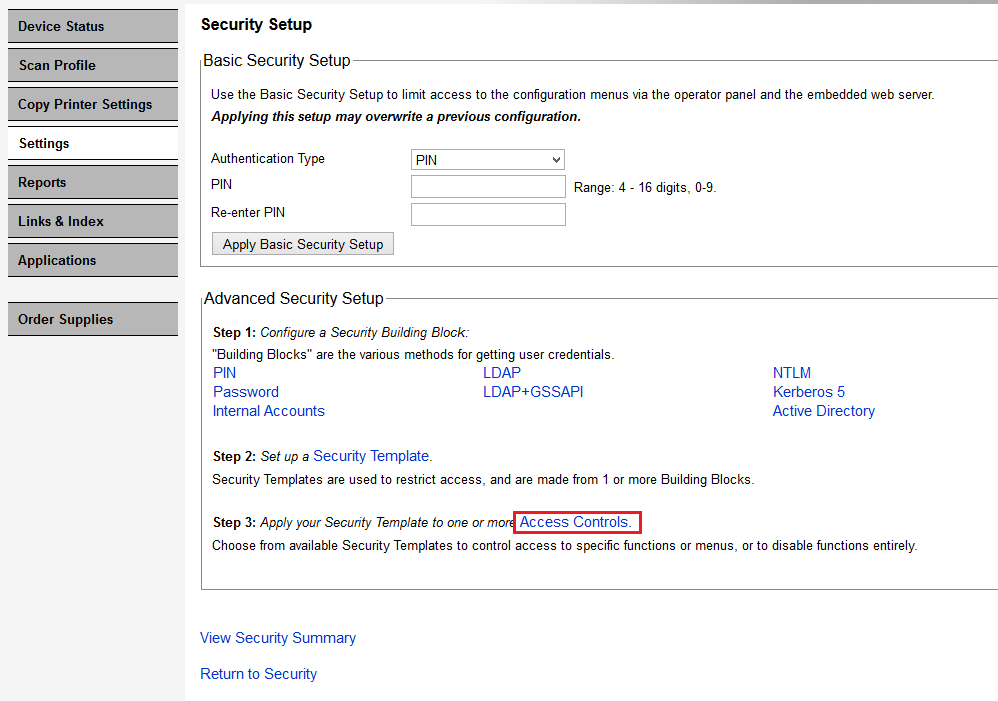
Then open, for instance, the Function Access folder and select the feature you want to protect with Dispatcher Paragon authentication by selecting the Dispatcher Paragon authentication profile and tapping Submit.
WARNING: If you have previously configured any application or feature to authenticate via Dispatcher Paragon, then reinstallation of the embedded terminal will cause such a configuration to be deleted. In this case, you should manually export the security settings of the printer before terminal reinstallation and then recover the device to its original state. To achieve that, go to Web Administration > Links&Index > Import/Export and pick whether you want to import or export the security settings via Import/Export Security Setups File.
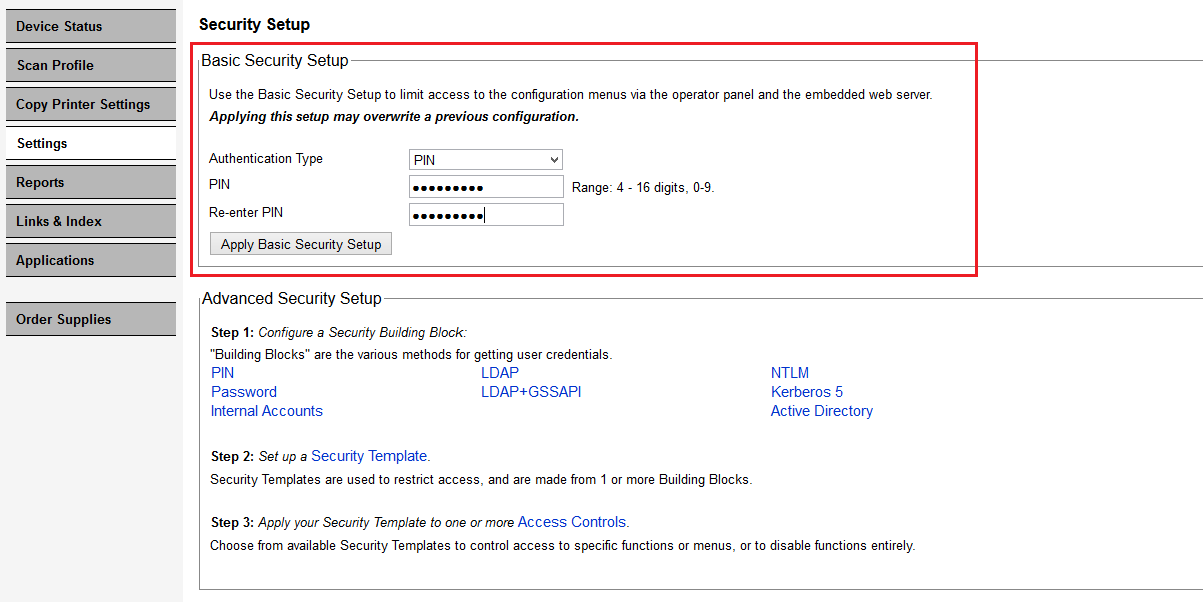
You might want to limit access to the web interface or configuration menu so that a non-administrator user will not be able to change device security settings. To achieve that, go to Web Administration > Settings > Security > Security Setup and enter the PIN, password or username/password combination into the Basic Security Setup section. Using this approach, the web administration and device configuration will always require the credentials you entered in this step. Note that Dispatcher Paragon Embedded Terminal installation might not work if basic security is configured.
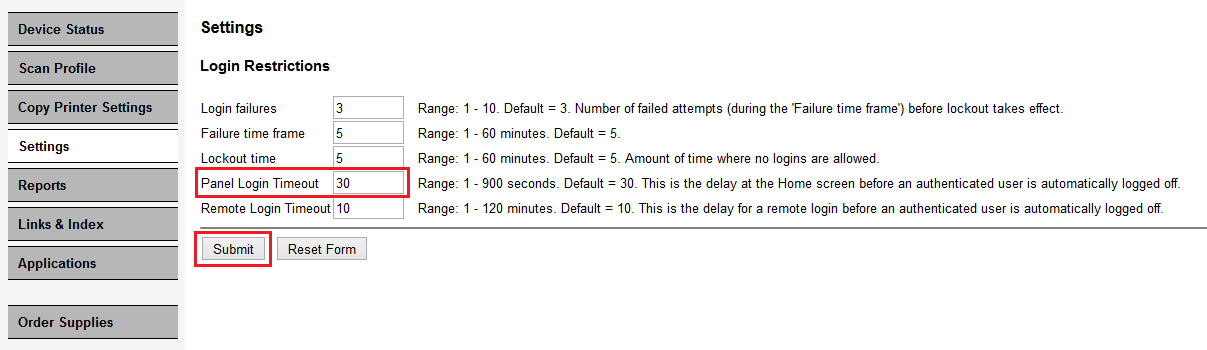
Panel Login Timeout
To configure the timeout after which a user is logged out from the Home screen, go to Web Administration > Settings > Security > Miscellaneous Security Settings > Login Restrictions and set up the timeout as required. The value is in seconds.
The timeout set in Dispatcher Paragon management interface cannot be used with a Lexmark device.
Framework 6 and 7 Installation Details (Android devices)
Ensure that Dispatcher Paragon Embedded Terminal is not present on the device before the installation. If it is the case then please remove it via device web's interface. It is recommended to restart the device before the installation.
Installation of Dispatcher Paragon Embedded Terminal for Lexmark consists of two sections. The first section relates to preparation steps of a device for installation of Dispatcher Paragon Embedded Terminal for Lexmark and the installation process itself. The second section relates to post installation configuration steps needed for allowing usage of Dispatcher Paragon Embedded Terminal for Lexmark.
Installation of Dispatcher Paragon Embedded Terminal for Lexmark
First of all, an administrator account has to created on a device to be able to configure permissions of Public user. This step is important since most permissions of public user will be taken away after the installation of Dispatcher Paragon Embedded Terminal for Lexmark and administrator still needs to have access to device web interface. Once Public user has all permissions granted an administrator can install Dispatcher Paragon Embedded Terminal for Lexmark via Dispatcher Paragon management interface. After the successful installation the user permissions will be changed via device web interface. This step is described in the second section.
- Go to device web interface.
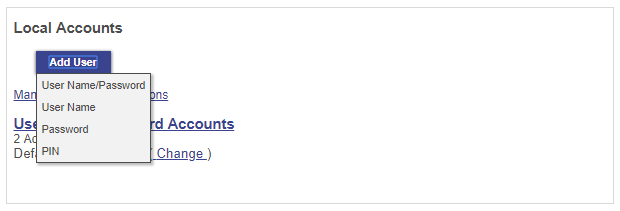
- Go to Setting > Security > Local Accounts and press Add User button.
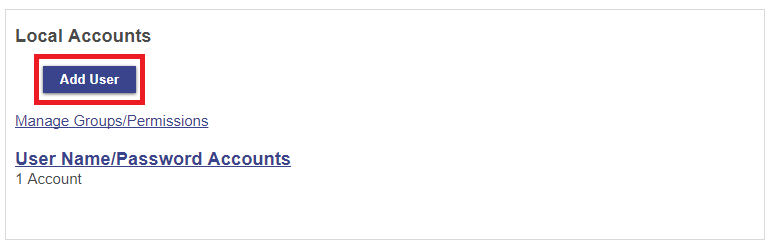
- Select User Name > Password.
- Then create the admin account by selection of Admin or All checkbox in Permission Groups section. At the and click to Save button.
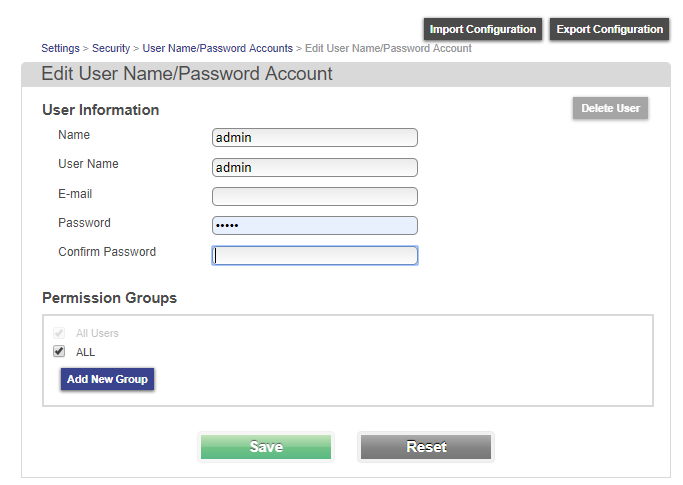
- Now you have created an administrator account which can always change configuration after login to device web interface.
- To be able to install or reinstall Dispatcher Paragon Embedded Terminal for Lexmark an administrator has to grant all permissions to Public user. Public user is used by the Terminal Server for the installation and without permissions the
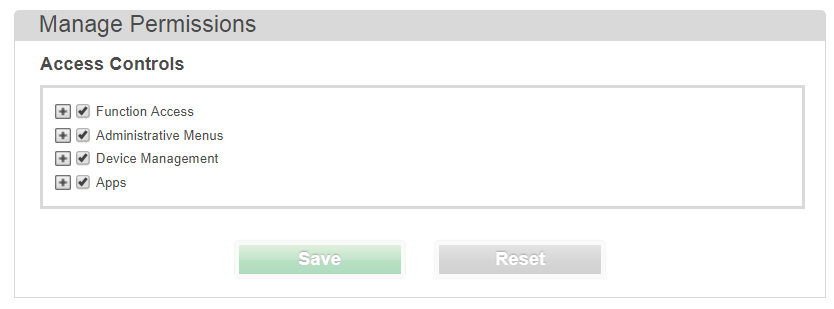
installation fails. Go to Setting > Security > Manage Permissions.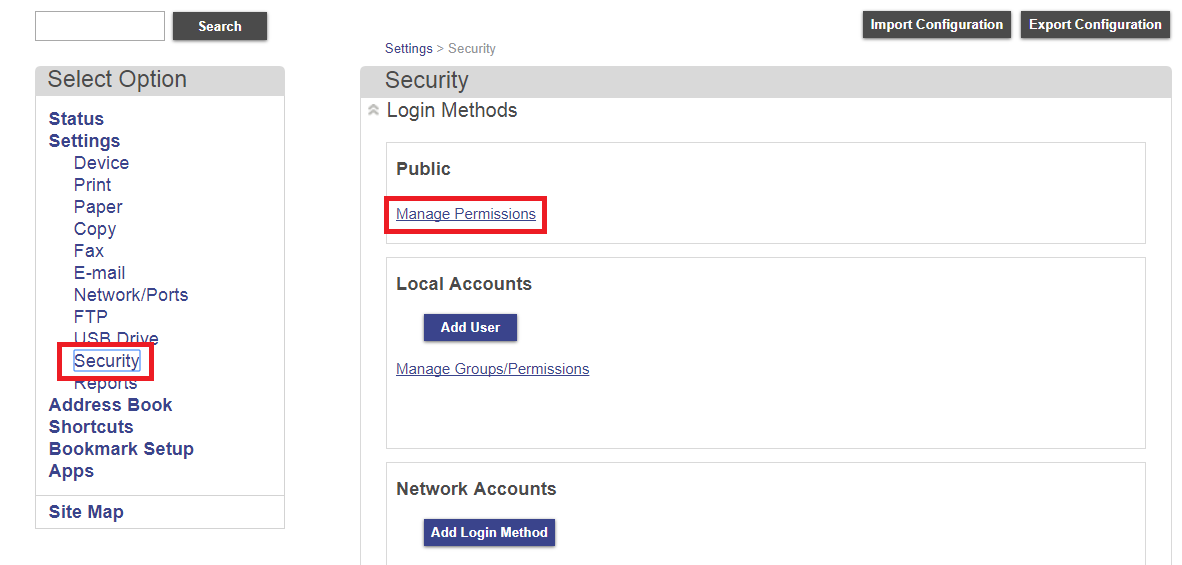
- In the Manage Permissions page grant all permissions and click to Save button.
- Go to Dispatcher Paragon management interface and add new Lexmark device. You can select Authentication mode To device or To Application. Based on this option authentication screen will be displayed either once when user wants to use a device or when user wants to use any device application.
- Authentication mode To device:
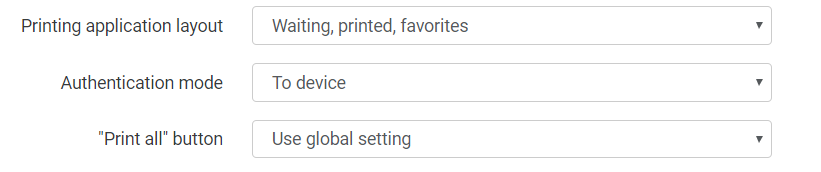
- Authentication mode To each application:

- Authentication mode To device:
- Finish the installation. If the installation succeeds then continue with post installation configuration steps described below.
Post installation configuration of a device for Dispatcher Paragon Embedded Terminal for Lexmark
This section describes how to configure a device after successful installation of Dispatcher Paragon Embedded Terminal for Lexmark. It is about setting permissions and setting Dispatcher Paragon Embedded Terminal for Lexmark as authentication method for a device.
- Login as an administrator to device web interface.
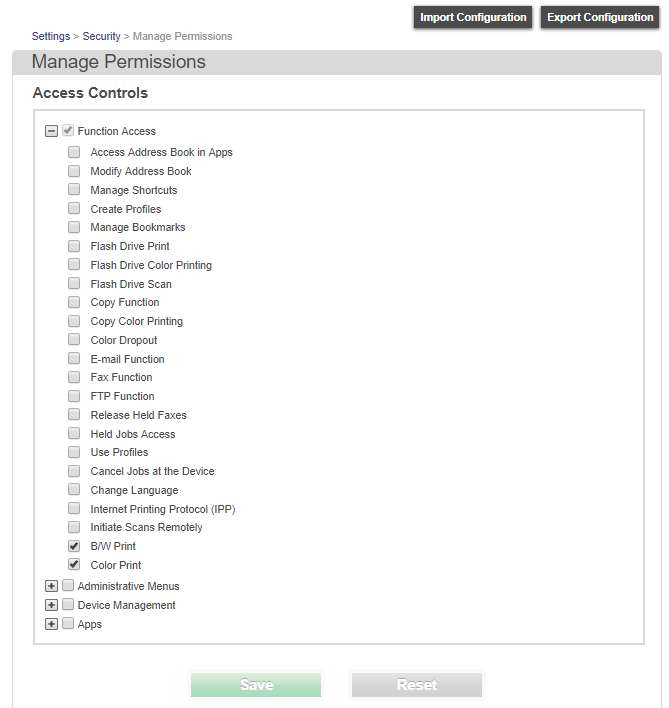
- Manage permissions of Public user. Go to Setting > Security > Public section > Manage Permissions.
- Take away all permissions except BW print and Color Print which are in Function Access. These permissions are necessary for print and copy functions. Administrator might consider keeping more permissions to users.
- Setup Dispatcher Paragon Login screen as authentication method. Go to Settings > Security > Local Accounts section > Default Browser Login (Change) and click to button Change.
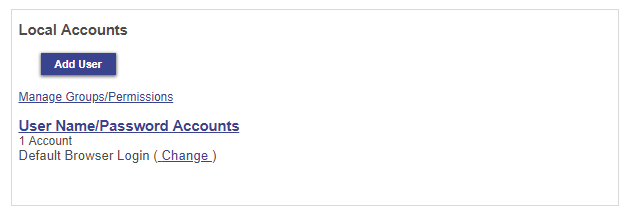
- Set Dispatcher Paragon Authentication Module as a default login option for Control Panel and click to Save button.

- Go to device. Login as an user and ensure that it is possible to print and copy.