Support for this type of terminal will end on 1st January 2025.
Limitations can be found on page Requirements and Known Limitations of Dispatcher Paragon Embedded Terminal for Ricoh.
Follow these steps to configure the MFD to allow installation of Dispatcher Paragon Embedded Terminal:
Enable external accounting features of the MFD
If the Java VM card is not a built-in part of the MFD's hardware, insert the card into the MFD's lowest SD slot.
Turn off the MFD before proceeding, to avoid damaging the Java VM card or the MFD.
The MFD includes as many as three SD card slots. The lowest slot is reserved for the Java VM card and firmware update cards. The slot may be covered with a metal or plastic cover, which you must remove.
- Turn on the MFD. Wait 2 or 3 minutes while Java VM and the default version of the embedded terminal are installed.
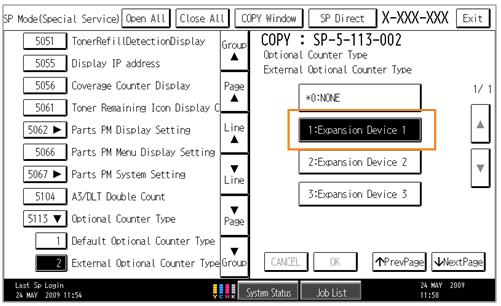
- On the MFD panel, select the options shown below to activate support for enhanced external charge unit management: SP mode 5-113-002 to 1.
- Check that the SP mode 5-113-001 is set to 0 (default value). If not, change it to the default value.
- Check that the SP mode 5-401-230 is set to 00000000 (default value). If not, change it to the default value.
- Check that the SP mode 5-401-240 is set to 00000000 (default value). If not, change it to the default value.
- Perform a soft restart of the MFD (on the keypad, press and hold * and # for 10 seconds).
- Select System Settings > Administrator Tools > Enhanced External Charge Unit Management; then select/deselect options as shown below to enable enhanced external charge unit management to block Copier, Printer, Document Server, Facsimile and Scanner.
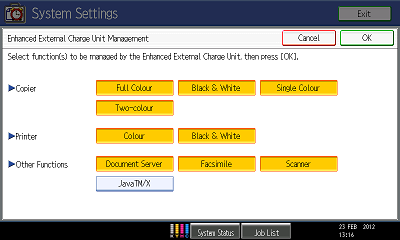
WARNING: Java™/X must not be blocked.
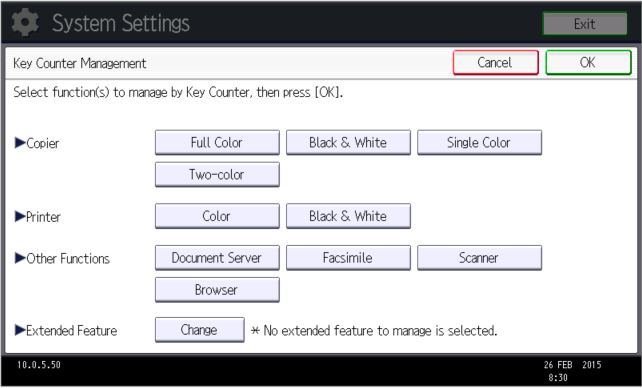
Setup Key Counter Management
Select System Settings > Administrator Tools > Key Counter Management; then deselect all options as shown bellow to disable device blocking with blocking cable.
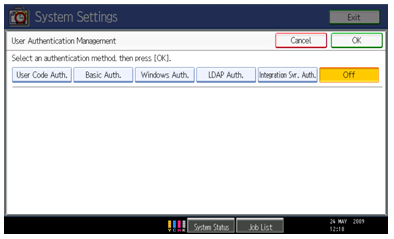
Setup user authentication management
Select System Settings > Administrator Tools > User Authentication Management; then turn off User Authentication Management.
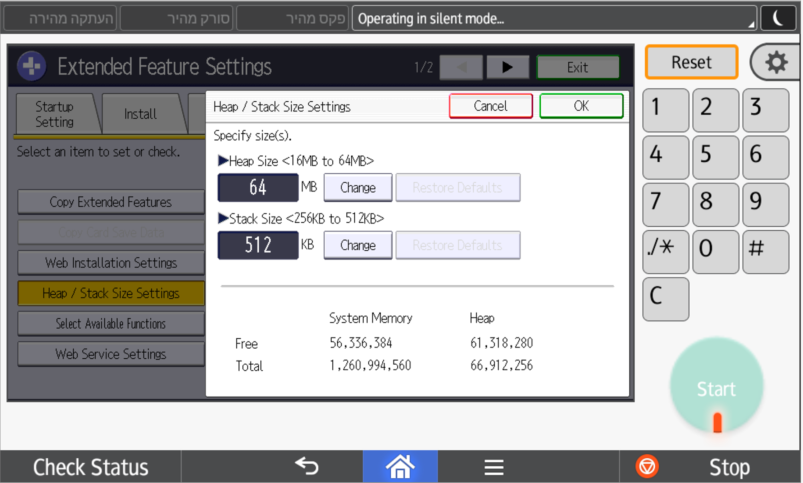
Set the Heap and Stack size to the maximum available
1. Go to the Ricoh MFD web interface (Web Image Monitor)
2. Login as the Machine Administrator
3. Go to Configuration > Extended Feature Settings > Administrator Tools
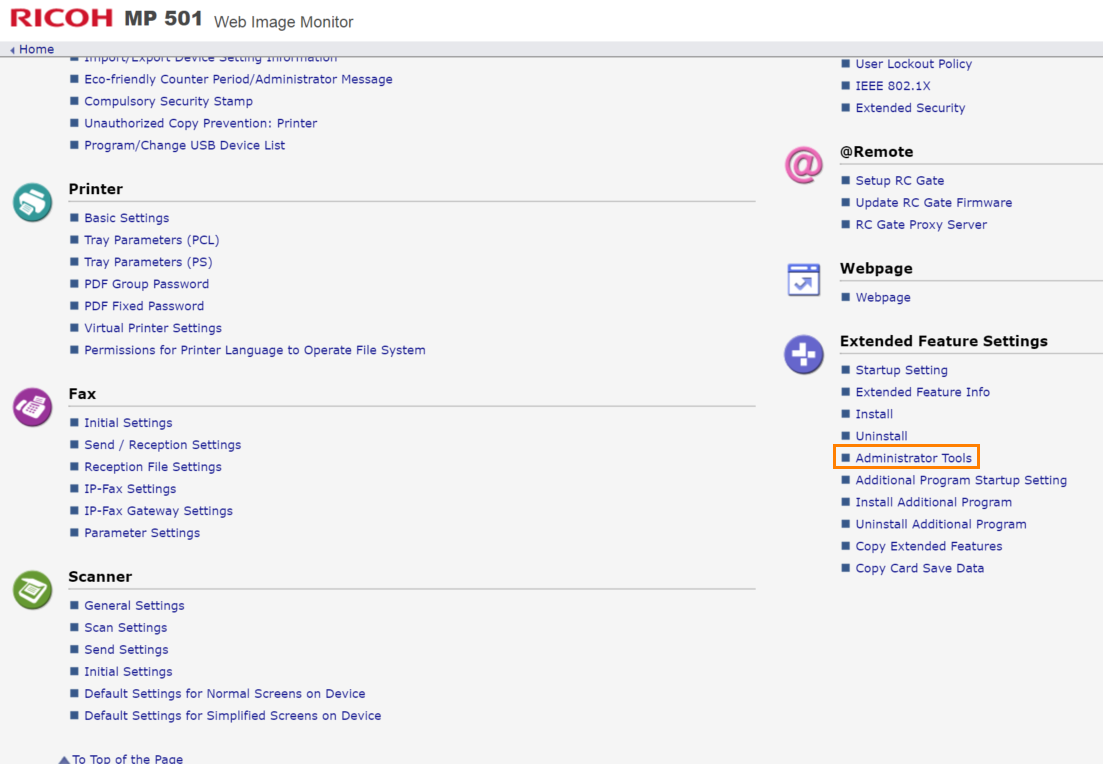
4. Change the Heap and Stack size to the maximum available amount, for example:

Same setting can be done on the device panel, go to: User tools > Extended Feature Settings > Extended Feature Settings > Administrator Tools
Time settings
1. Go to the Ricoh MFD web interface (Web Image Monitor).
2. Login as the Machine Administrator.
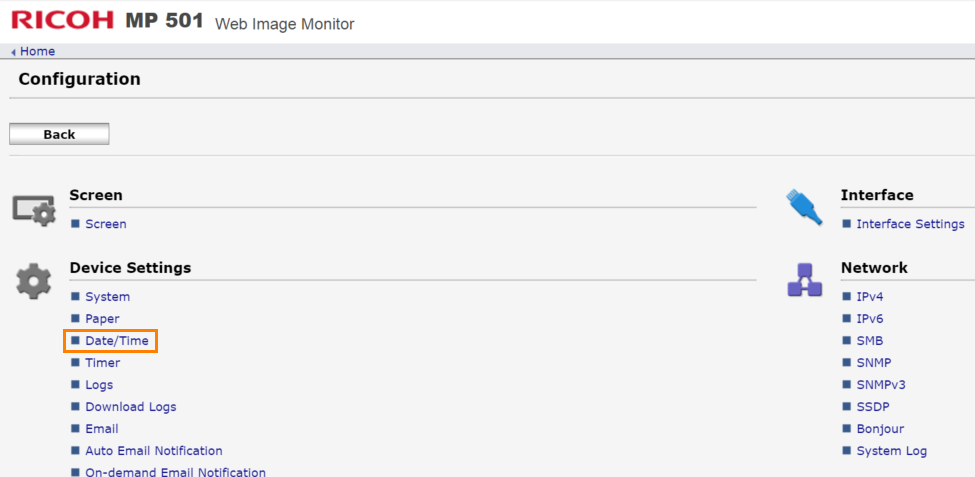
3. Go to Configuration > Date/Time.
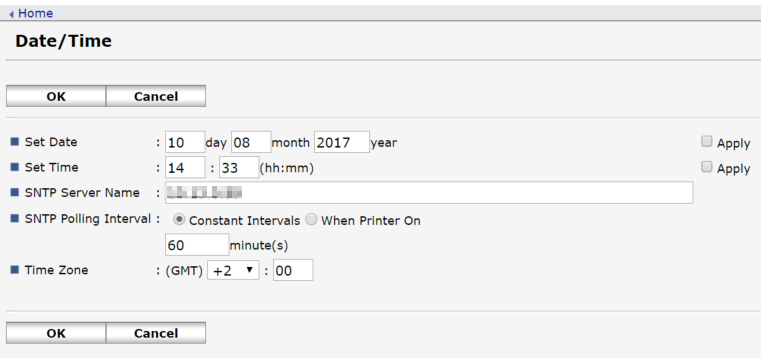
4. Set the time to match the Dispatcher Paragon server time or specify automatic time configuration via NTP server.
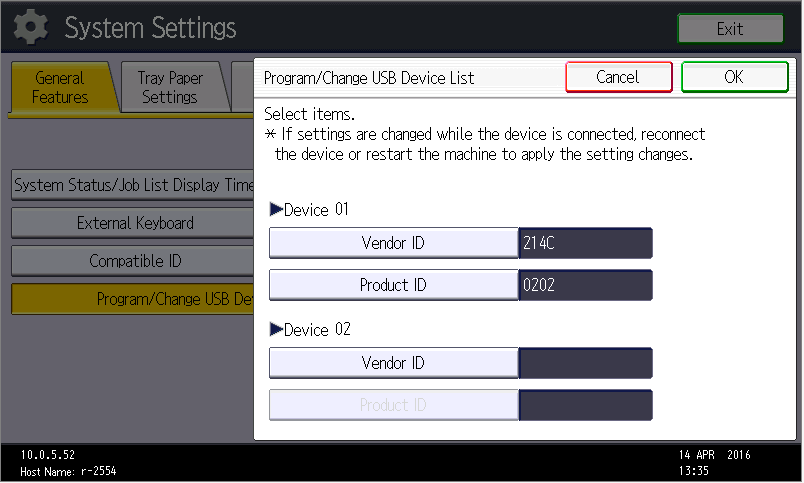
Configuring USB Card Reader on 12.x Java devices
Select System Settings > General Features > Program/Change USB Device List; then enter values for Vendor ID - 214C and Product ID - 0202 for Device 01
Configuring MFD to print with watermarks in Rule Base Engine
- Go to the Ricoh MFD web interface (Web Image Monitor)
- Login as the Machine Administrator
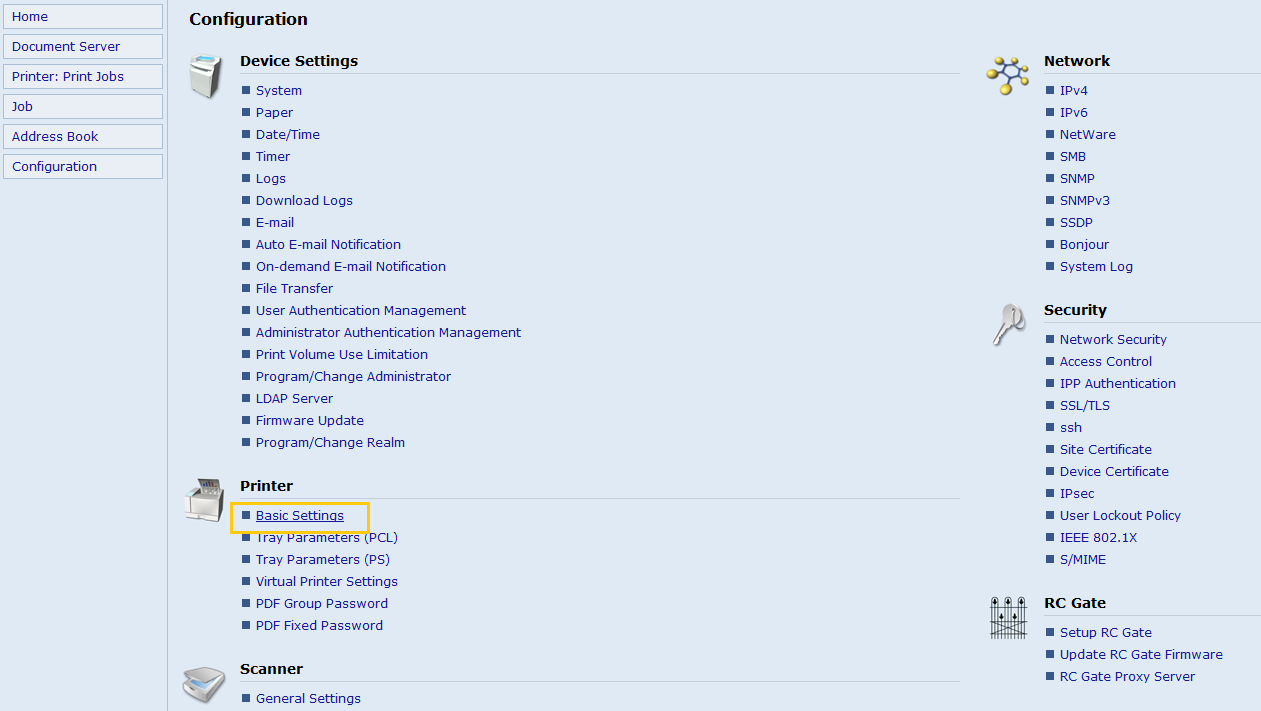
- Go to Configuration > Printer > Basic Settings
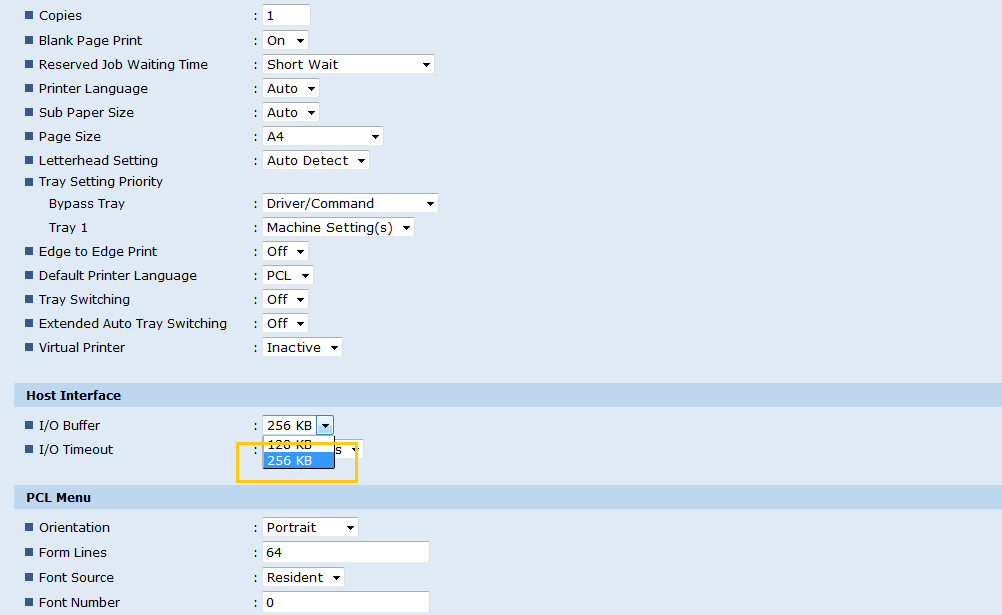
- Change Host Interface > I/O Buffer to 256 KB
WARNING: RBE Watermark feature is only supported with PCL drivers and font size 6-72.
Create a MFD certificate on Ricoh devices
Before Build 36 strongly recommended. For Build 36 and higher it is mandatory.
- Go to device web interface (accessible via device IP address)
- Log in as an administrator
- Default credentials admin/keep password field empty
- Navigate through Device Management → Configuration → Device Certificate
- Certificate setup
- If you have your own certificate
- Click Upload button
- Fill up the form
- Click Upload button
- If you don´t have your own
- Click on Create button
- Fill up the certificate details
- Recommended to prolong validity period
- Click OK button
- If you have your own certificate
- Machine will restart itself and certificate will be ready to be used
Recommended configuration of shared Windows printer used for secure and direct print queue
When you are configuring shared printer for secure print, follow the the recommendations bellow to increase performance of the driver installed in environment when it is used for printing on printers with a different feature configuration. The same recommendations can be applied for direct print as well since there is no direct access between the driver and the printer and feature configuration has to be selected manually.
- Printer properties - Accessories are configured to support all possible features (Punch unit, Finisher, etc.)
- Printer properties - Accessories - Disable automatically update printer Information
- Printer properties - Ports - Disable bidirectional settings
- Printer properties - Ports - Enable printer pooling to remove Windows print job spooling bottleneck