Limitations can be found on page Requirements and Known Limitations of Dispatcher Paragon Embedded Terminal for OKI and OKI sXP2.
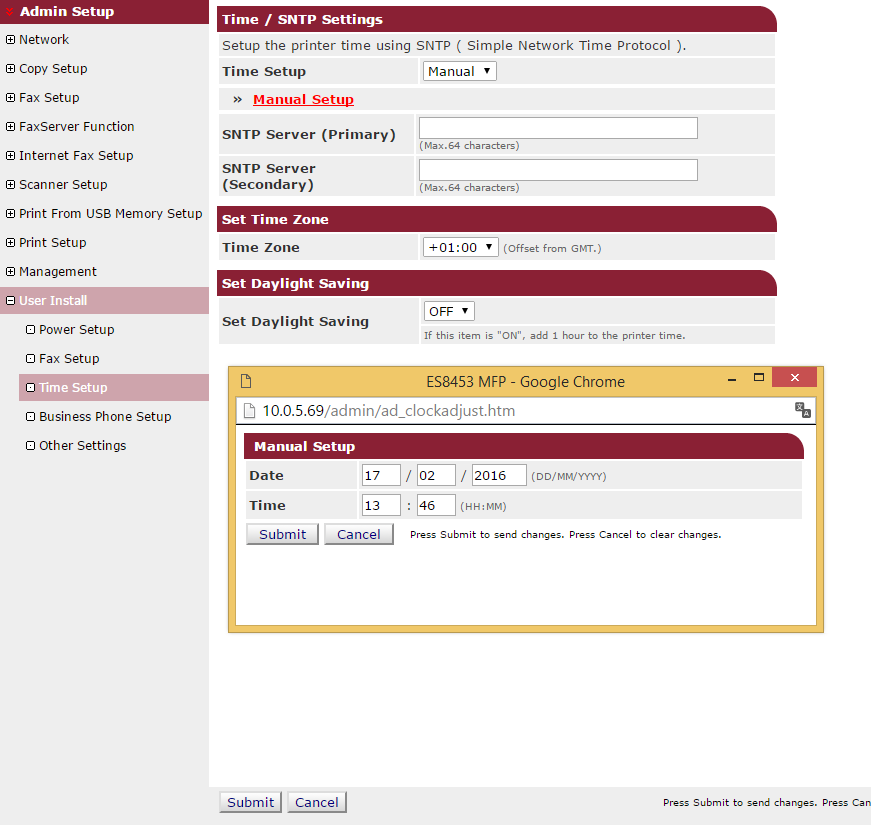
Time Configuration
Time settings have to be configured for proper accounting of jobs and assignment of billing codes to these jobs.
Go to Web Administration > Admin Setup > User Install > Time Setup and configure Time Zone Settings and Daylight Saving Time Settings to comply with configuration of your server, where Terminal Server is running.
Next, there are two options possible, based on availability of SNTP (time) server in your network:
- If SNTP server is available, set all necessary details in section Network Time Protocol and press Submit.
If SNTP is not available, in section Manual Setup set date and time to the time of the server where Terminal Server is running and press Submit.
Be sure to set the time as precisely as possible (in means of seconds) to avoid errors in assigning billing codes to scan jobs and copy jobs. It is better for the MFD to have the clock set slightly forward, than backward.
Application Configuration
After application installation to the printer ensure, that Dispatcher Paragon application is permitted on the device.
Go to Web Administration > User Management > Role List.
Open installed roles and ensure that Dispatcher Paragon is permitted in Role Information:

Application startup after login
If you want to start Dispatcher Paragon application on the device right after login, you have to perform the following actions:
- Login to SafeQ web application
Go to System > Configuration > Terminal UI
- Change Initial screen displayed when a user logs in at the terminal value to 'sq'.

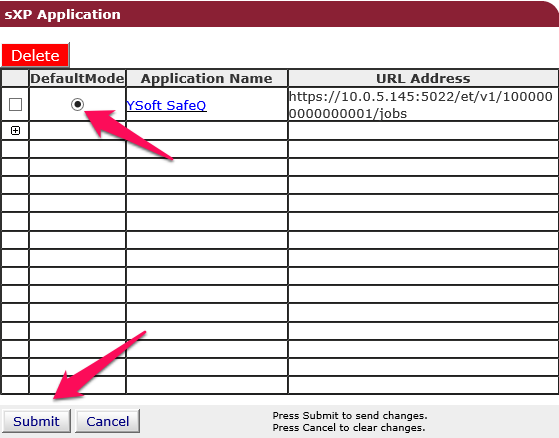
- Open MFD Web interface
Go to Web Administration > sXP Application.
- Select Default Mode for Dispatcher Paragon application and click Submit.
- Login to MFD using local administrator account
Go to Device Settings > Admin Setup > Manage Unit > Default Mode (path can be slightly different on different MFDs).
- Select Web Browser from the list.
LDAP Configuration
Automatic setup of LDAP connection settings is currently not supported. Please follow the steps below to configure LDAP manually. To find out how to setup a secure LDAP connection for your device, please contact the supplier. In other case, in SafeQ system settings, enable the property internalLdapAllowNonsecureProtocol to enable usage of plain LDAP, which is not encrypted.
LDAP settings have to be configured for proper user authentication, using SafeQ internal LDAP server.
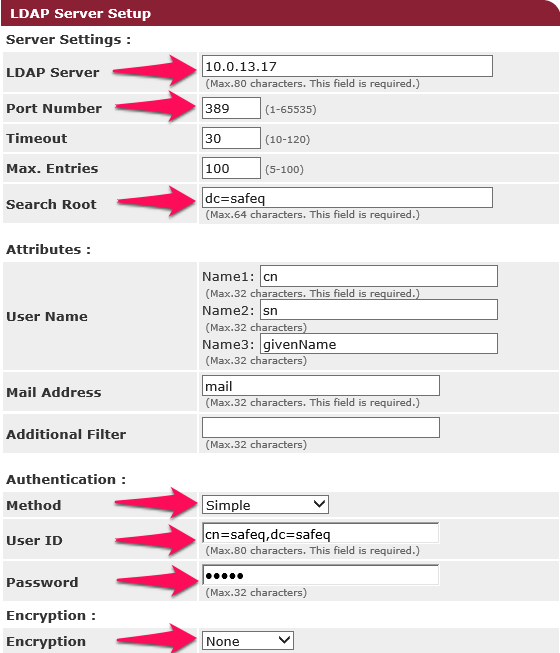
- Go to Web Administration > Admin Setup > Network > LDAP.
- Change the following settings:
- Server Settings:
- LDAP Server to your SpoC IP address
- Port Number to 389 (defualt configuration)
- in case the port 389 is already in use by other service the port for internal LDAP can be configured in Management System configuration → Terminal Administration → internalLdapPort property.
Search Root to dc=safeq
Authentication:
- Method to Simple
- User ID to cn=safeq,dc=safeq
- Password to safeq
- Encryption:
- Encryption to None
Output Management Configuration
The MFD supports communication via HTTP or HTTPS.
Go to Web Administration > Output Management and configure Communication Protocol.
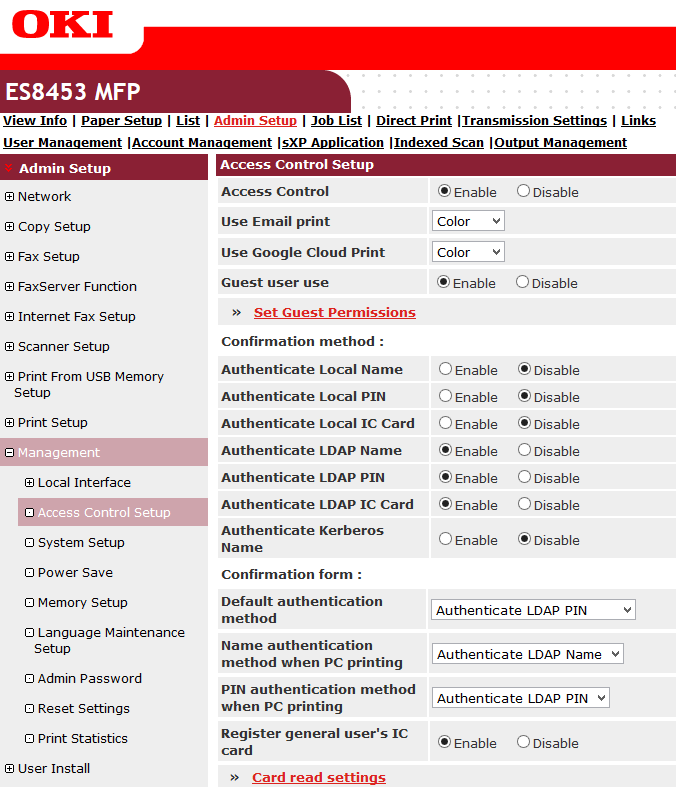
Security Configuration
- Go to Web Administration > Admin Setup > Management > Access Control Setup
- Change the following settings:
- Confirmation method:
- Enable LDAP authentication
- Disable Local authentication
- Guest user use Enable