This manual was created based on Xerox WorkCentre 7835, and should be applicable to most MFDs built on ConnectKey™, although slight differences may occur.
Before Installing Dispatcher Paragon Embedded Terminal
Time settings
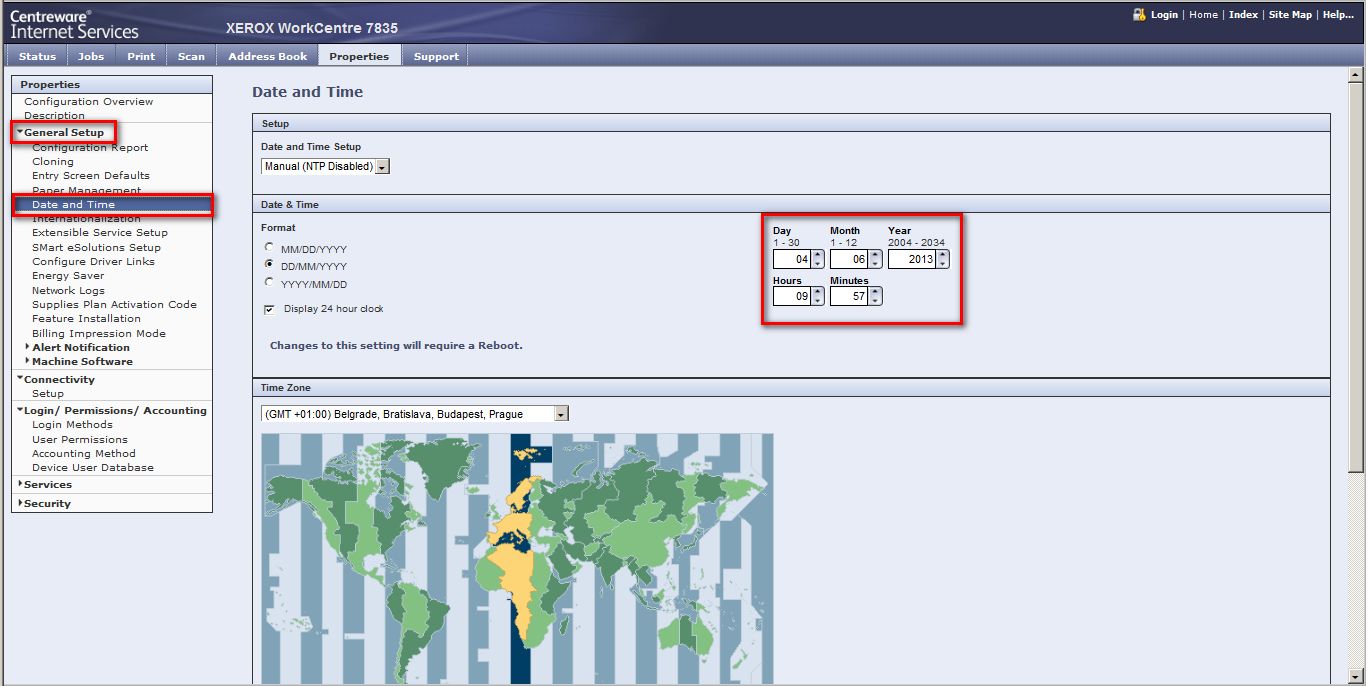
Go to the Properties tab > General Setup > Date and Time.
Make sure you set the time to match the Dispatcher Paragon Server time or specify automatic time configuration via an NTP server.
FTP mode
Go to the Properties tab > Connectivity > Setup. Click Edit in the FTP/SFTP Filling row, and then set the Mode to Active.

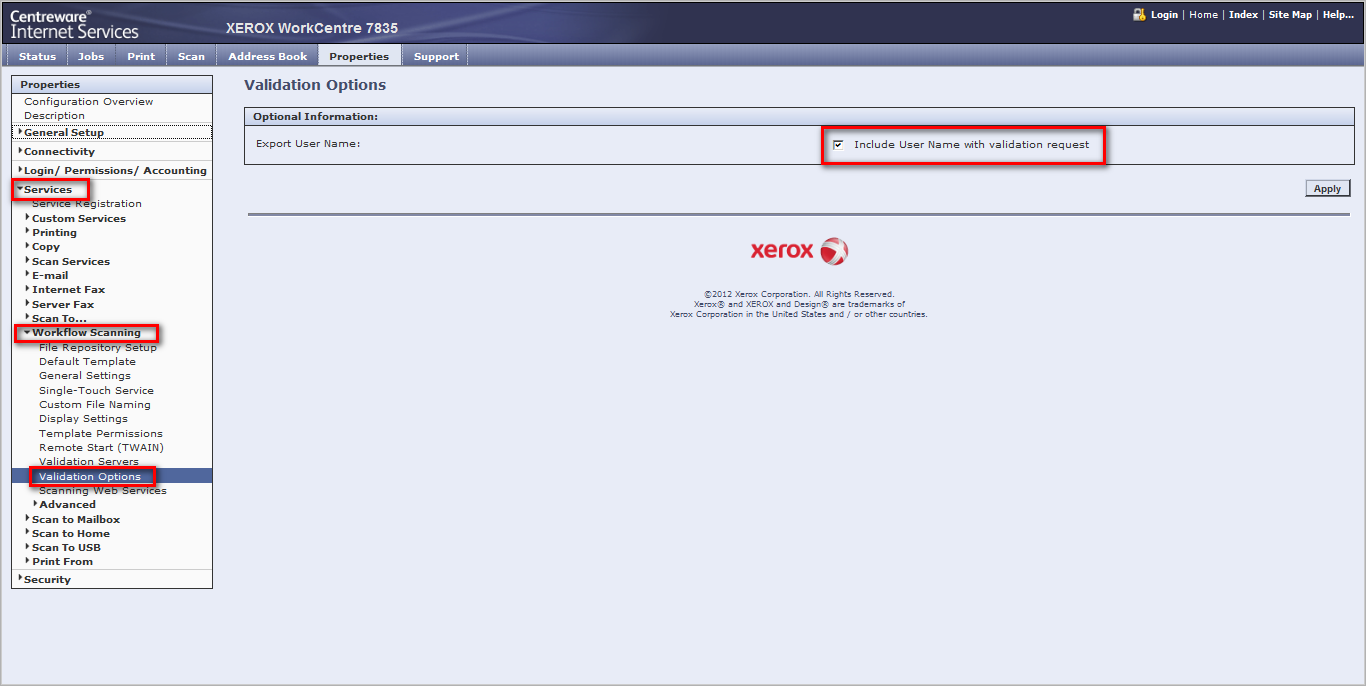
Include User Name with validation request
Go to the Properties tab > Services > Workflow Scanning > Validation Options. Enable the Include User Name with validation request option.
Scan services for scanning with workflows
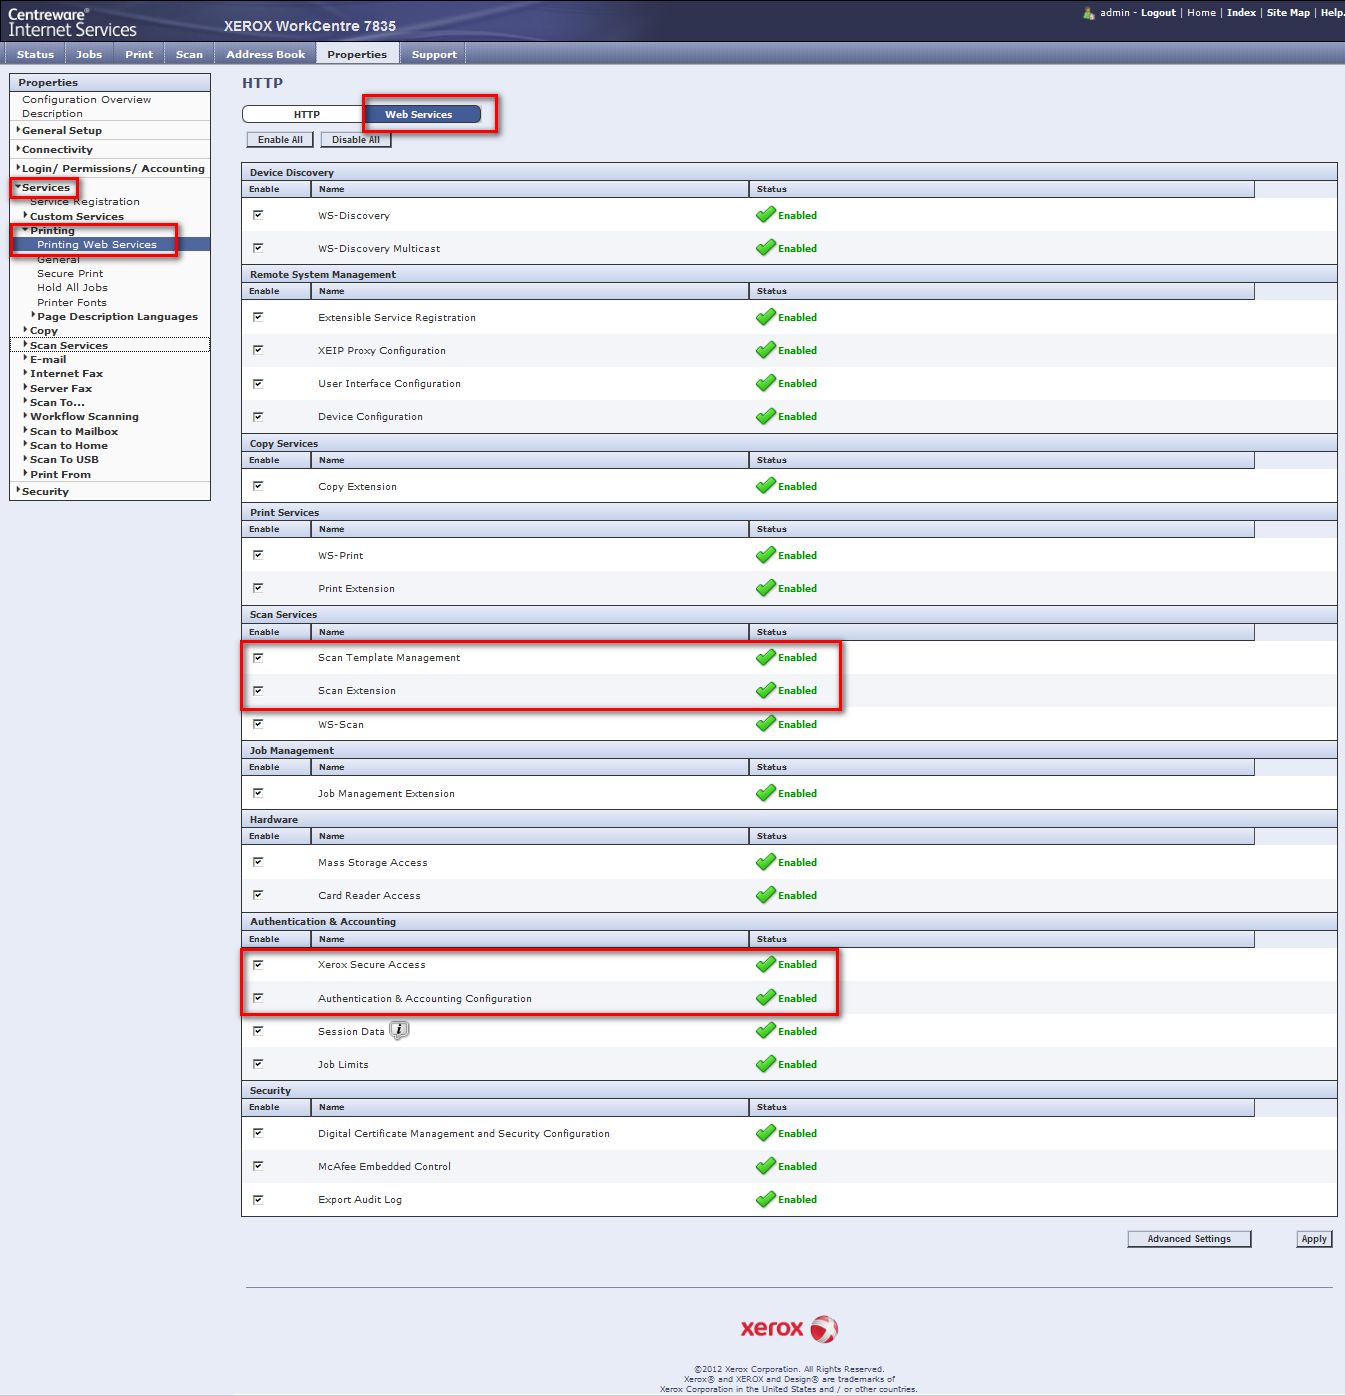
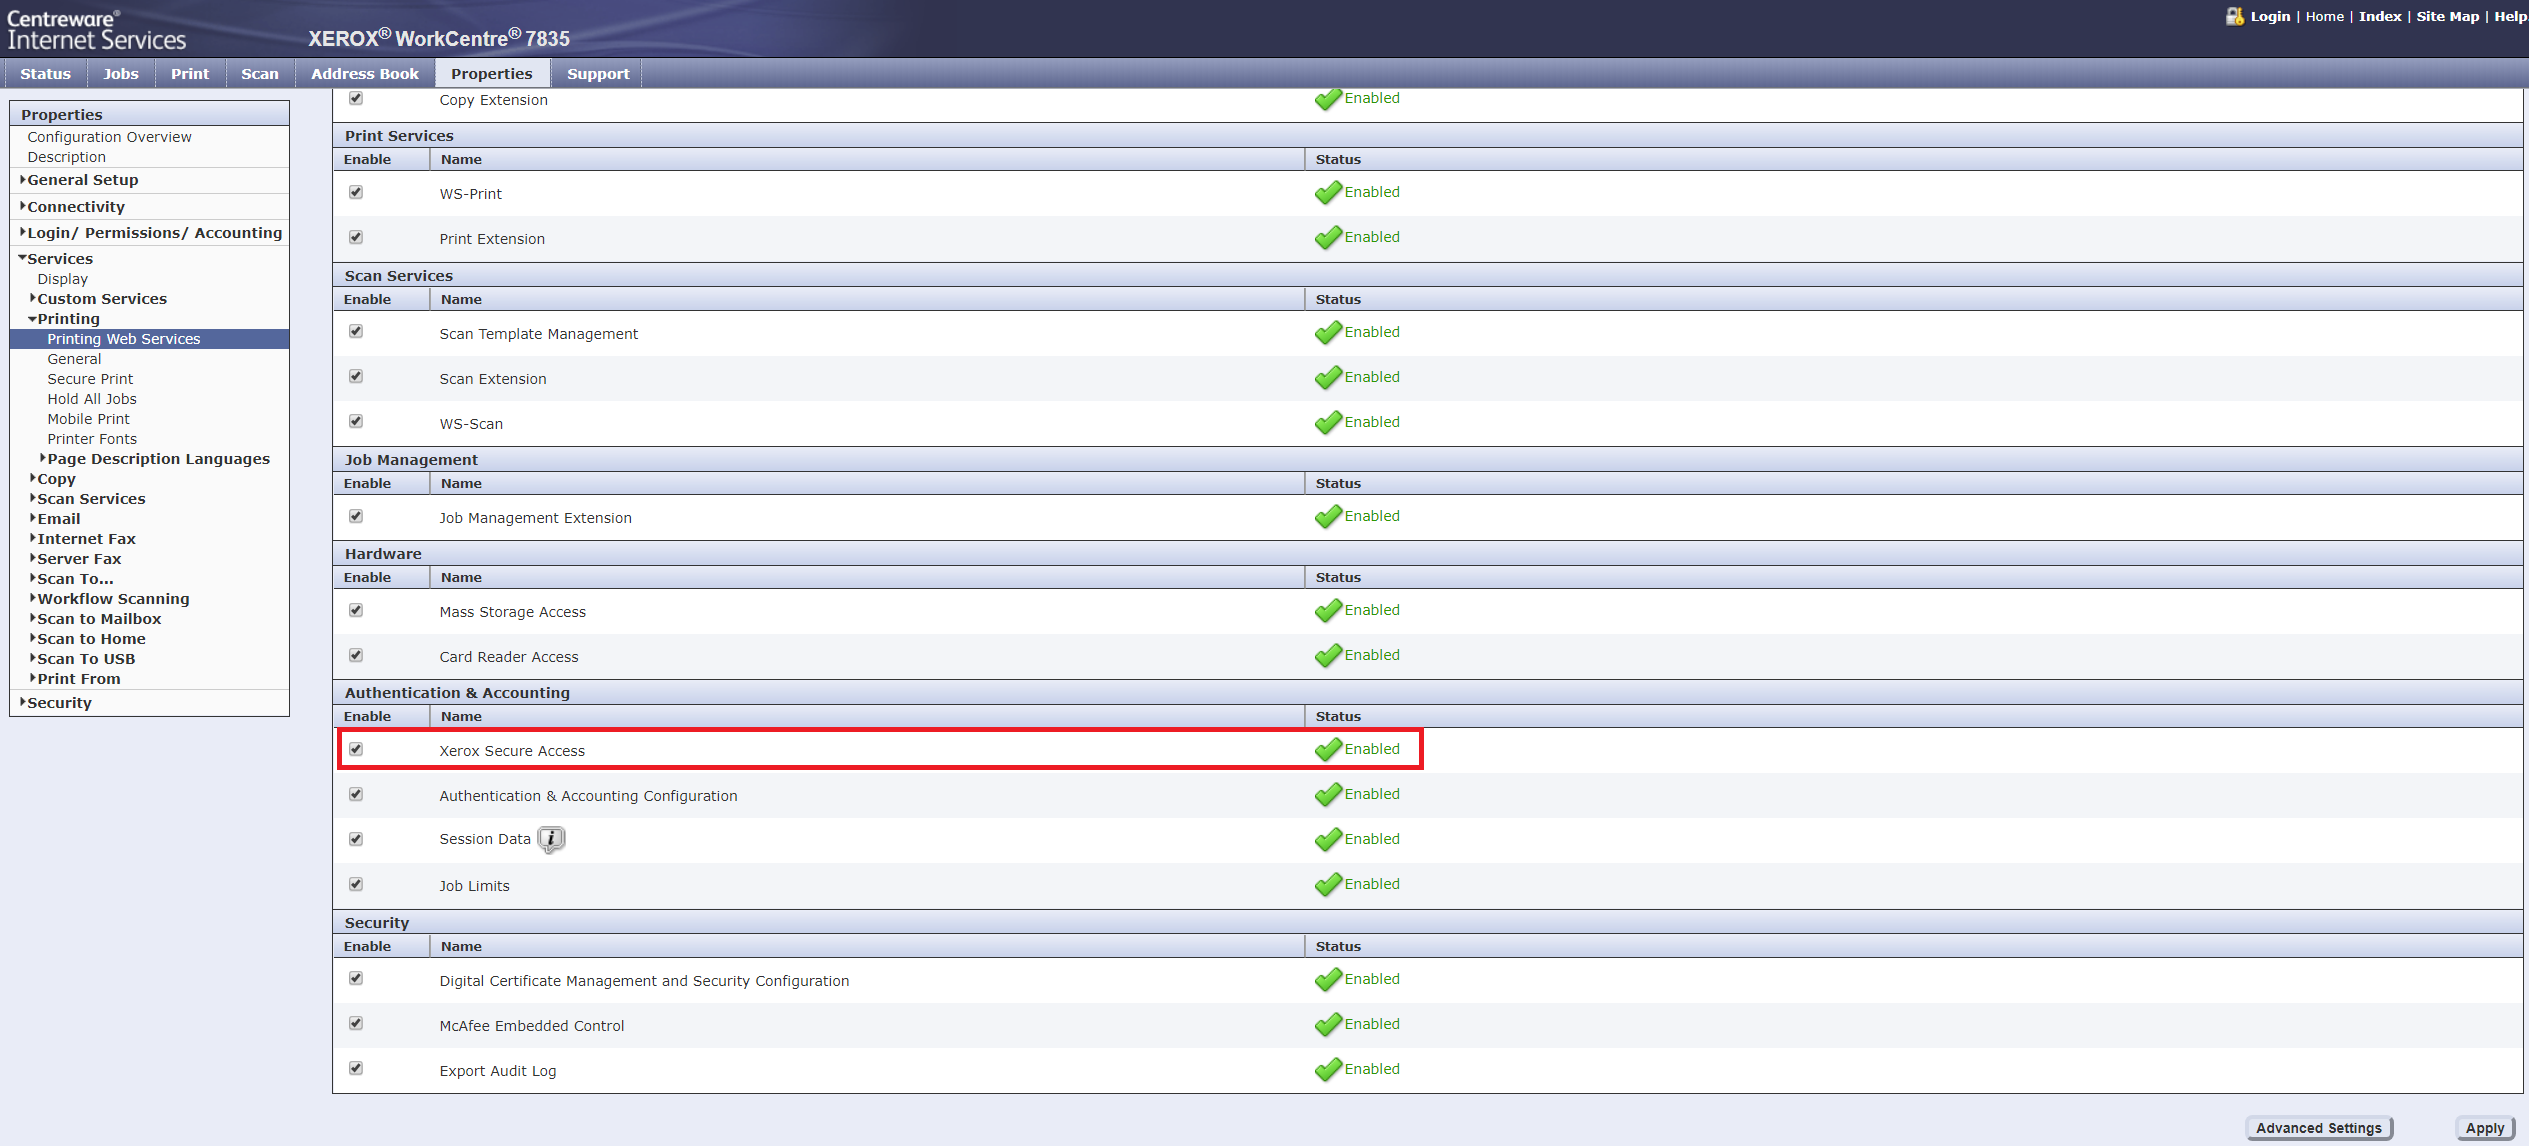
You will need to enable Scan Template Management in device configuration for scanning with workflows later.
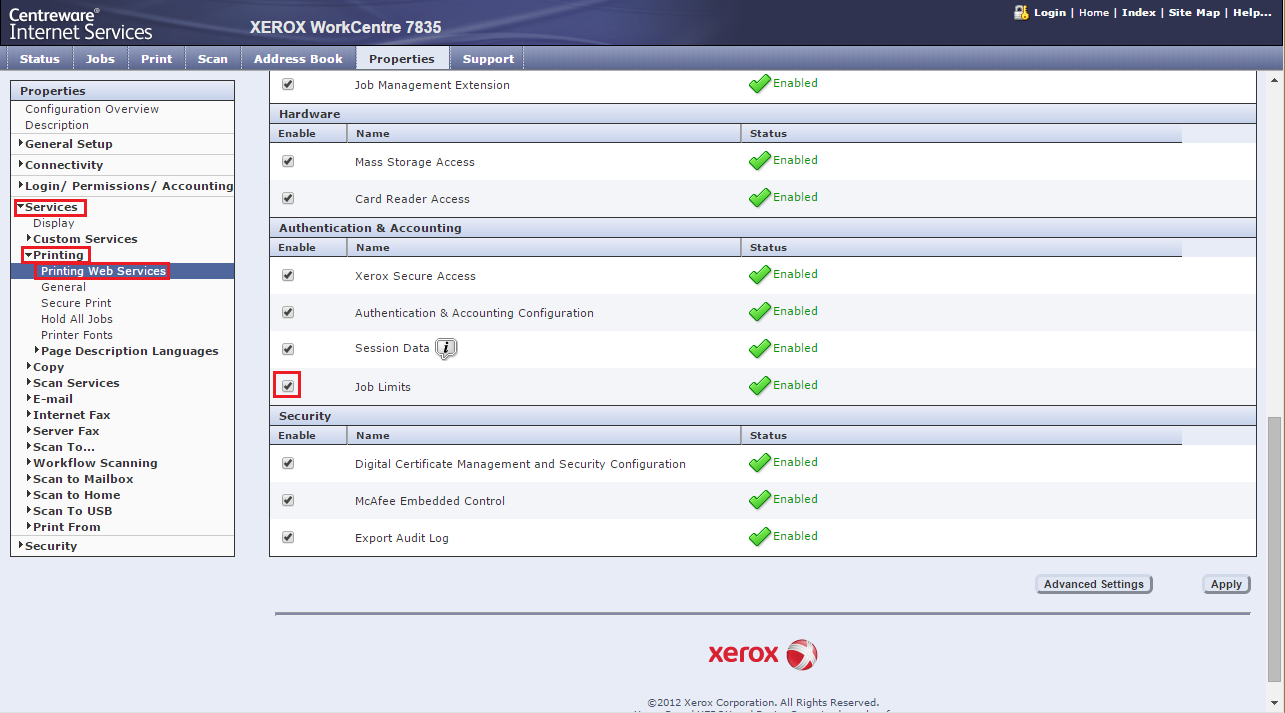
Go to the Properties tab > Services > Printing > Printing Web Services, and then enable the options Scan Template Management and Scan Extensions. Also make sure that Xerox Secure Access and Authentication & Accouting configuration are enabled:
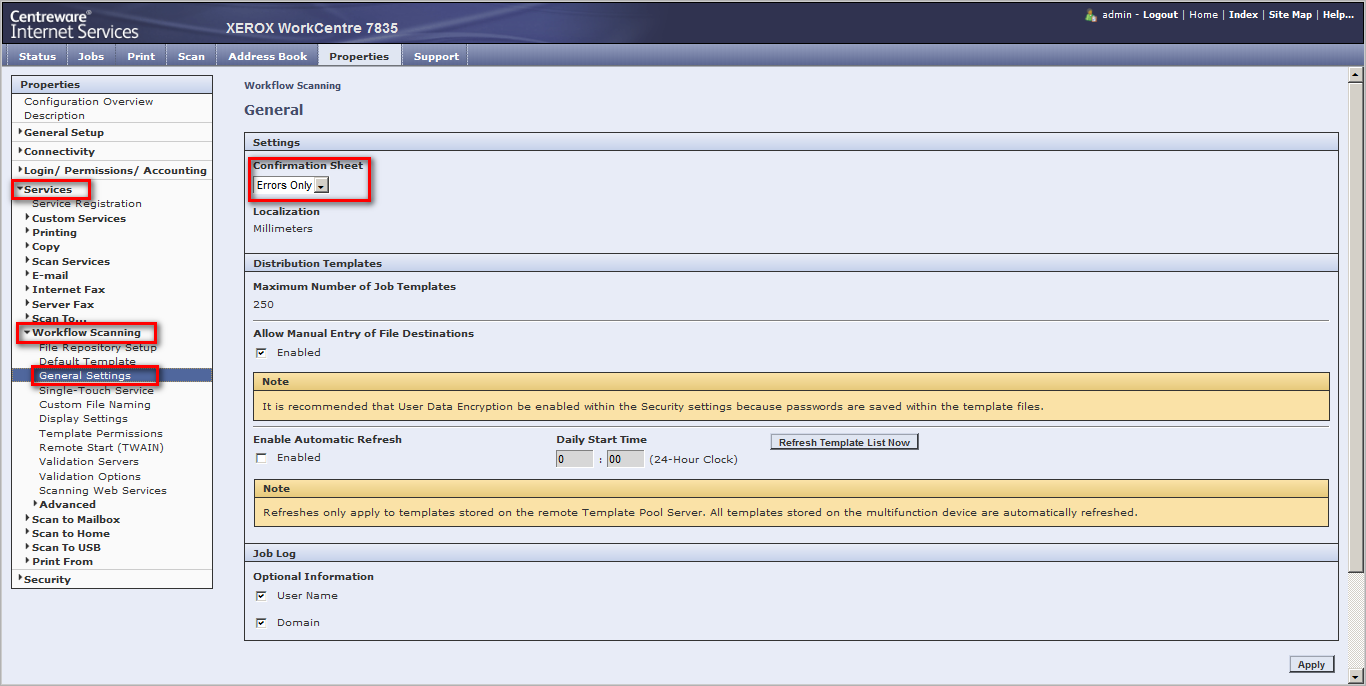
You might also want to check that the Confirmation Sheets for Scanning Workflows are set to print only in case of an error. Otherwise, there might be a page printed every time someone uses the Scan option in the Dispatcher Paragon terminal.
Go to the Properties tab > Services > Workflow Scanning > General Settings. Set Confirmation Sheet to Errors Only.
SNMP settings
Go to the Properties tab > Connectivity > Setup. Click Edit in the SNMP row, and then enable the option Enable SNMP v1/v2c Protocols.
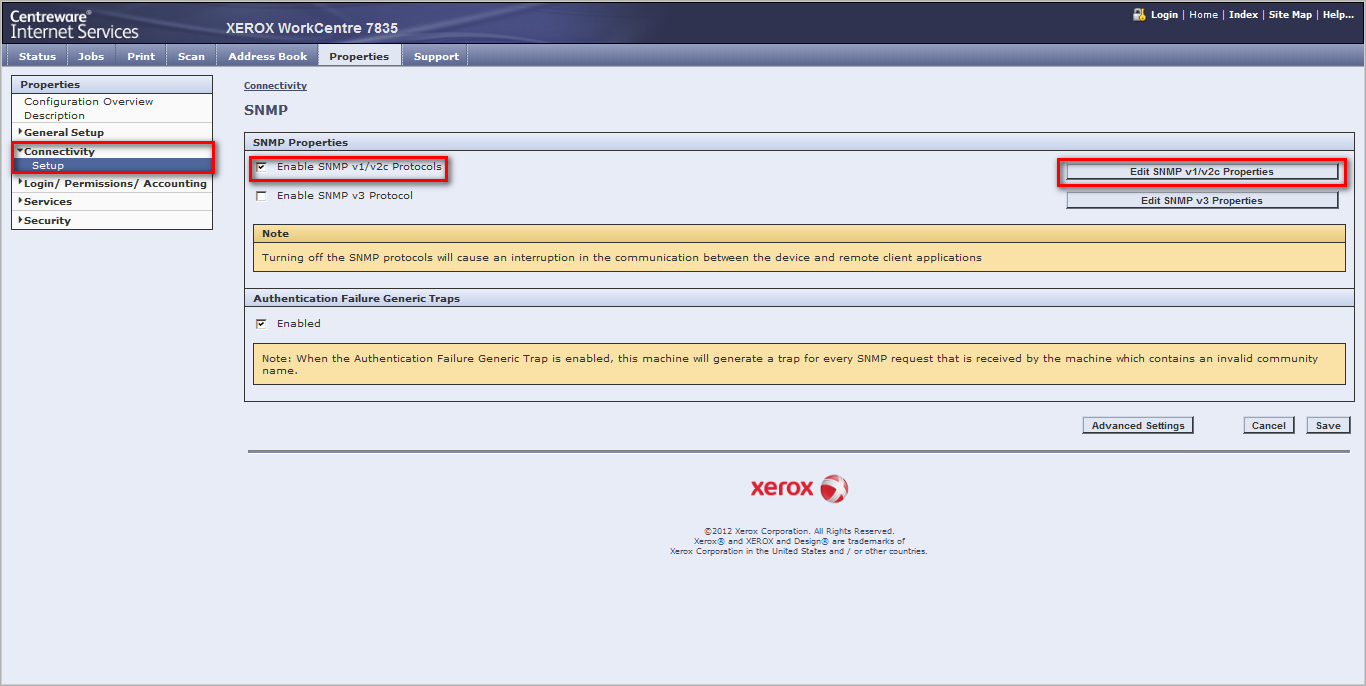
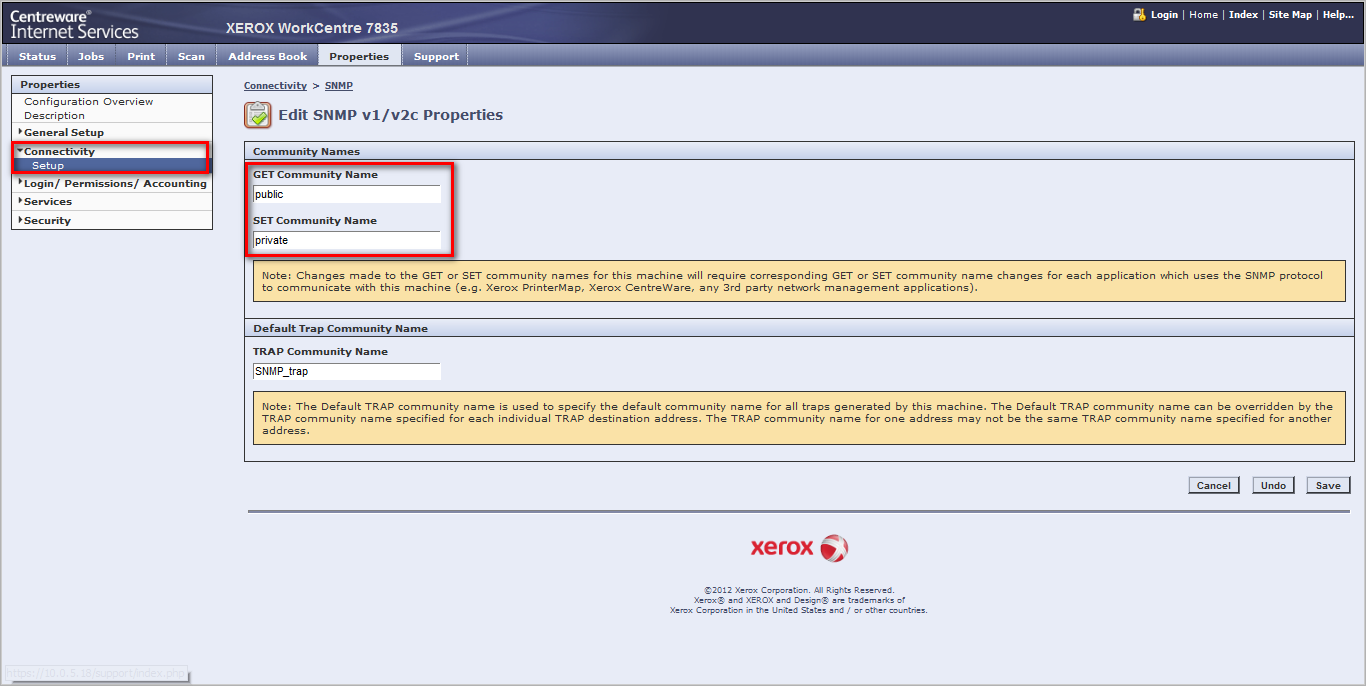
On the same page, click Edit SNMP v1/v2c Properties. Set the Community Name (Read/Write) accordingly:
Proceed with the MFD installation in Dispatcher Paragon to complete the installation of Dispatcher Paragon Embedded Terminal. Check the installation status and installation steps.
If there some warnings appear during the installation, you will need to do some further settings of the MFD based on the messages you see. In that case, the following information should help you with configuring your Xerox MFD.
After the Installation of Dispatcher Paragon Embedded Terminal
These settings are necessary only if requested by the Dispatcher Paragon Embedded Terminal installation or if customization of the configuration is requested.
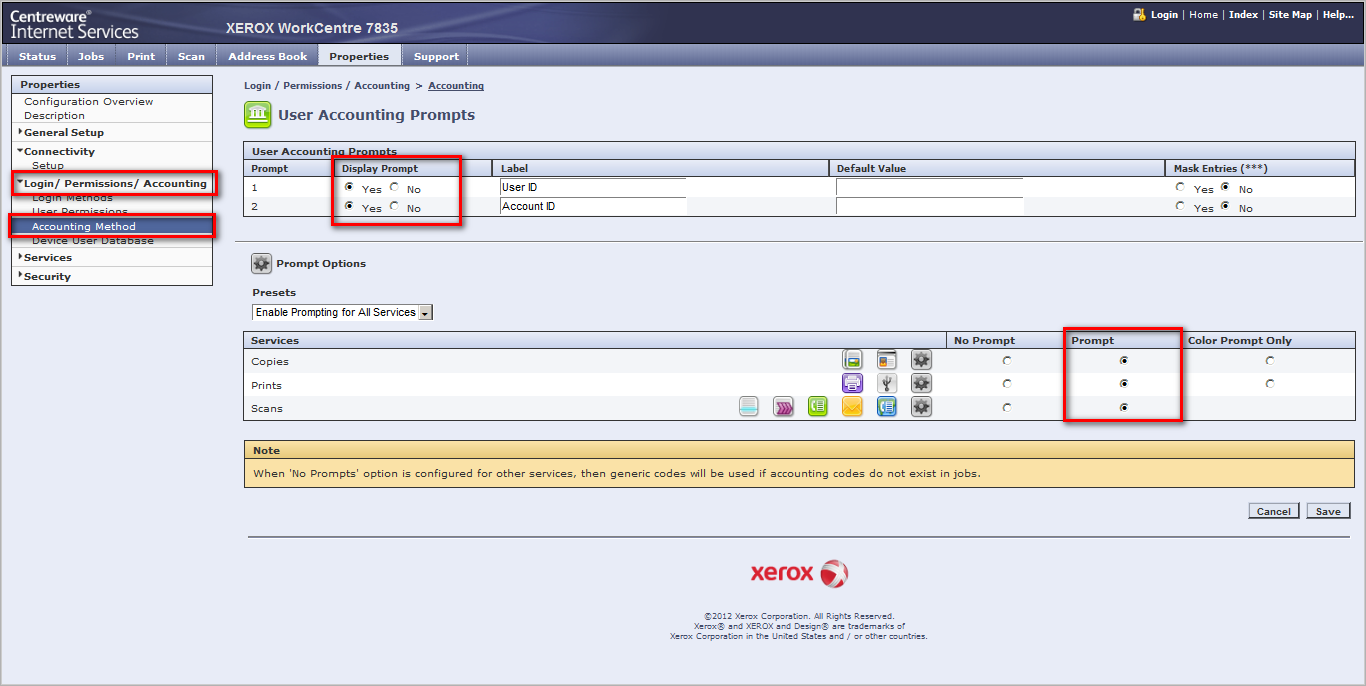
Accounting Workflow, User Accounting Prompts, Validation for Accounting Codes
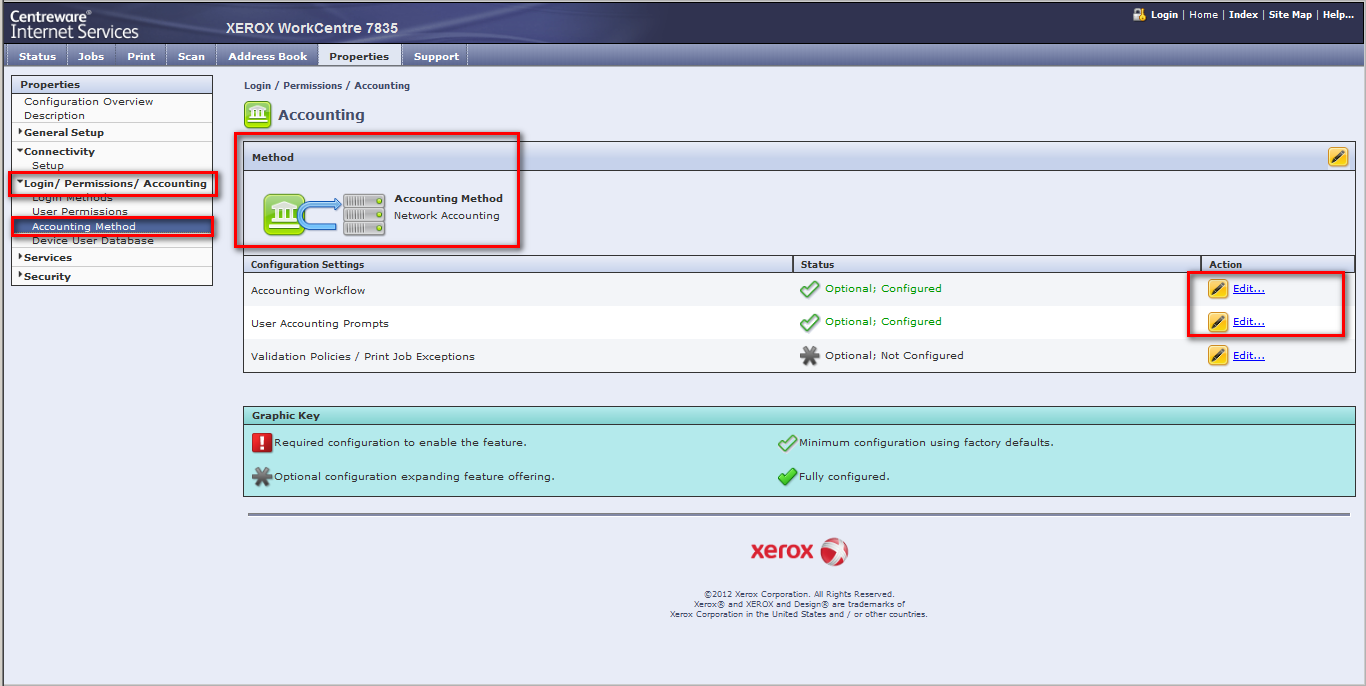
Go to the Properties tab > Login / Permissions / Accounting > Accounting Method
Then, configure the Accounting Workflow, User Accounting Prompts and Validation for Accounting Codes. Click the respective Edit buttons.
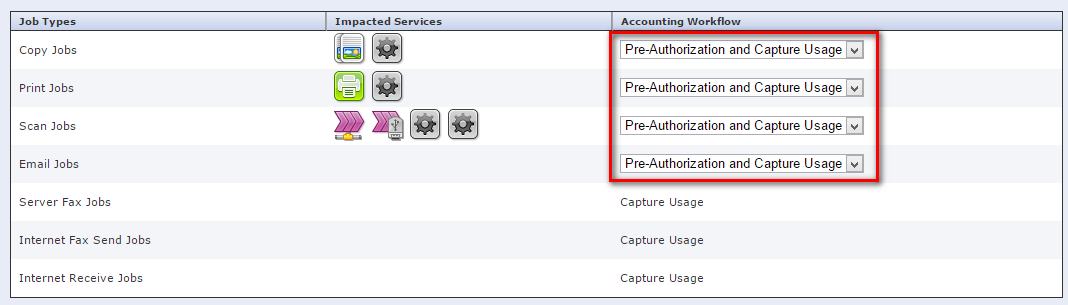
Accounting Workflows:
Please note that there are two possible configurations depending on the selected features. When payments are used, Pre-Authorization and Capture Usage must be used. In other cases, Capture Usage must be used. (Please note that without payments, the Pre-Authorization will cause a malfunction. For example, selecting the copy function and starting copying will perform the scanning part of the process, but then the MFD will wait for user verification.)
- Payments are used
- Standard configuration

User Accounting Prompts:
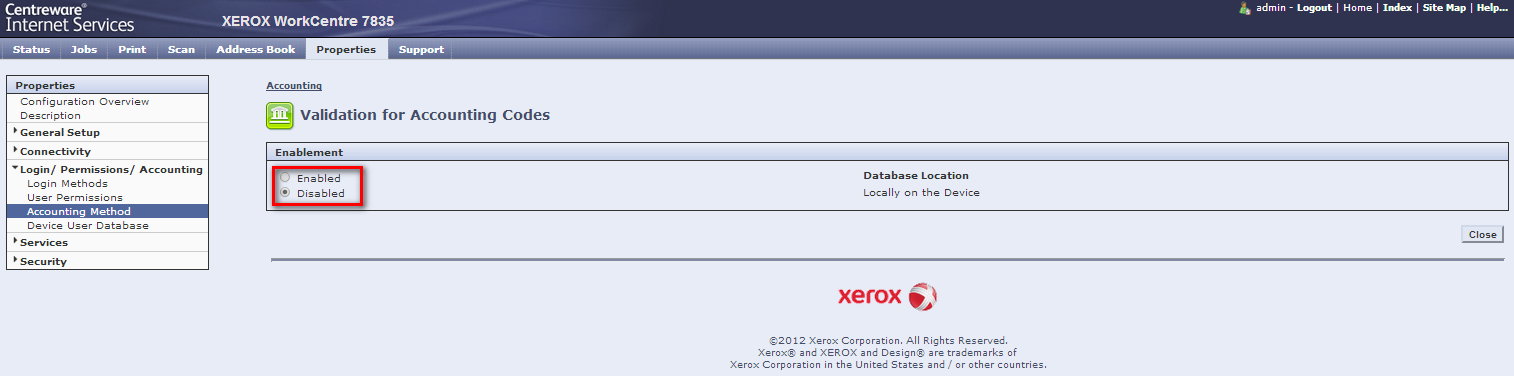
Validation for Accounting Codes:
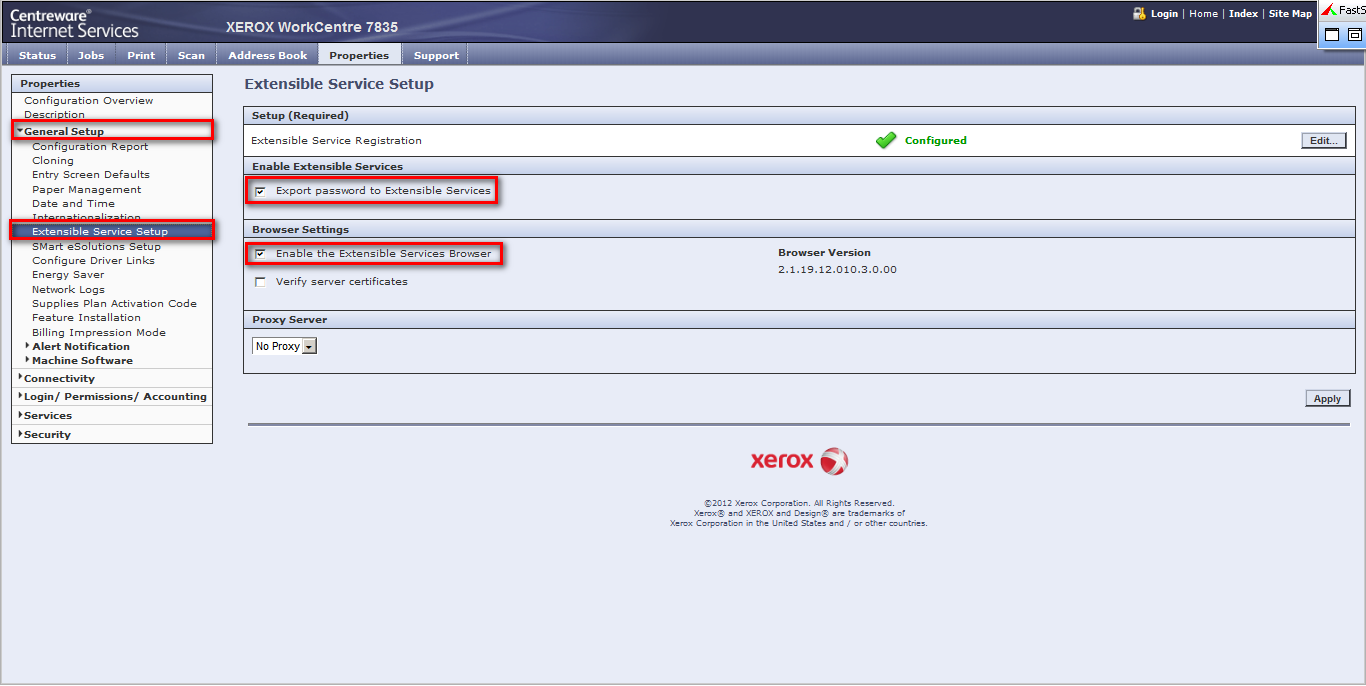
Extensible Service Browser
Go to the Properties tab > General Setup > Extensible Service Setup. Enable the Extensible Services Browser option and the Export password to Extensible Services option.
Xerox Secure Access
Properties tab > Services > Printing > Printing Web Services. Enable the Xerox Secure Access option.
User Permissions Roles
Go to the Properties tab > Login/Permissions/Accounting > User Permissions. In the User Permissions Roles row, click Edit
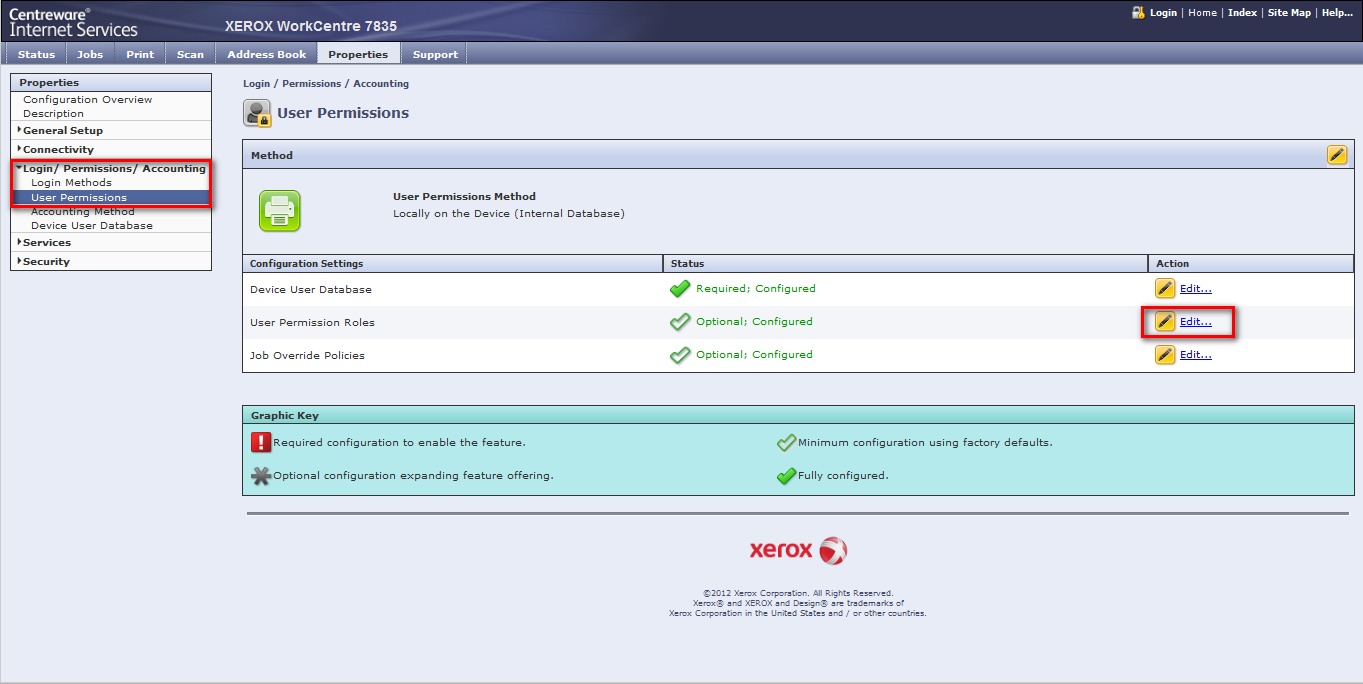
On the Non-Logged-In Users tab, click Edit to edit the Non-Logged-In User role.
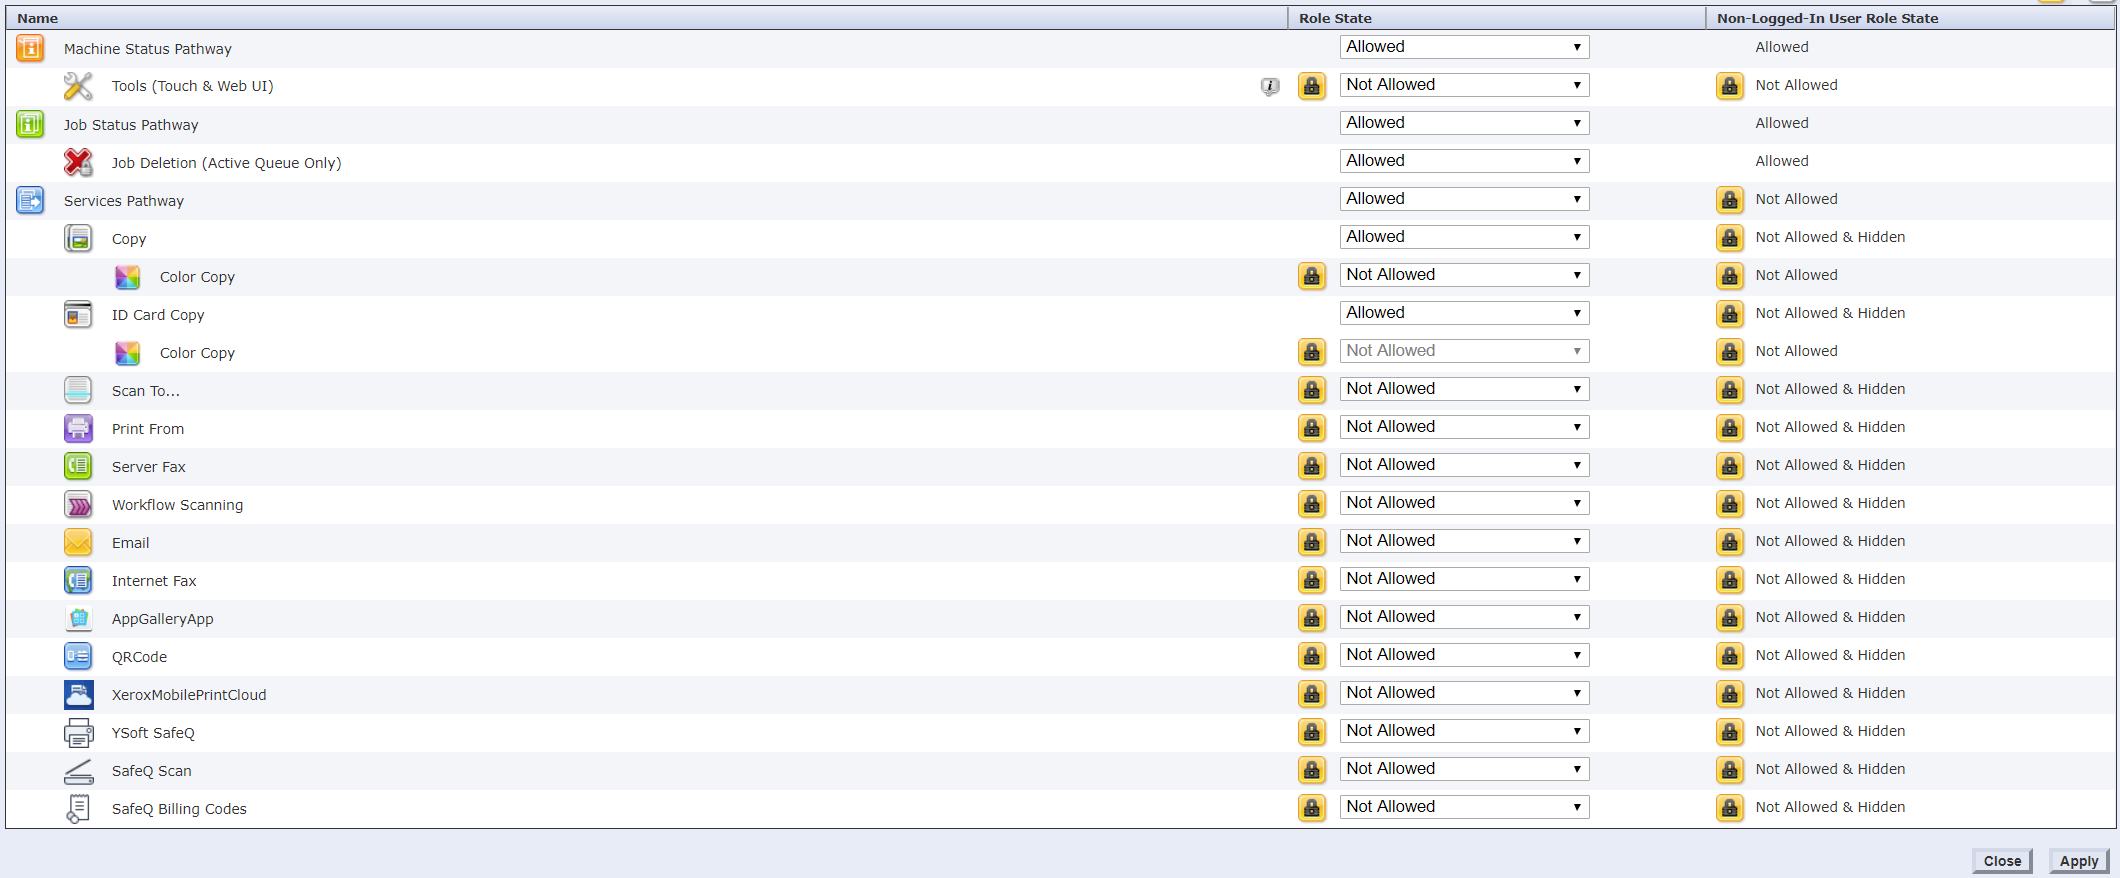
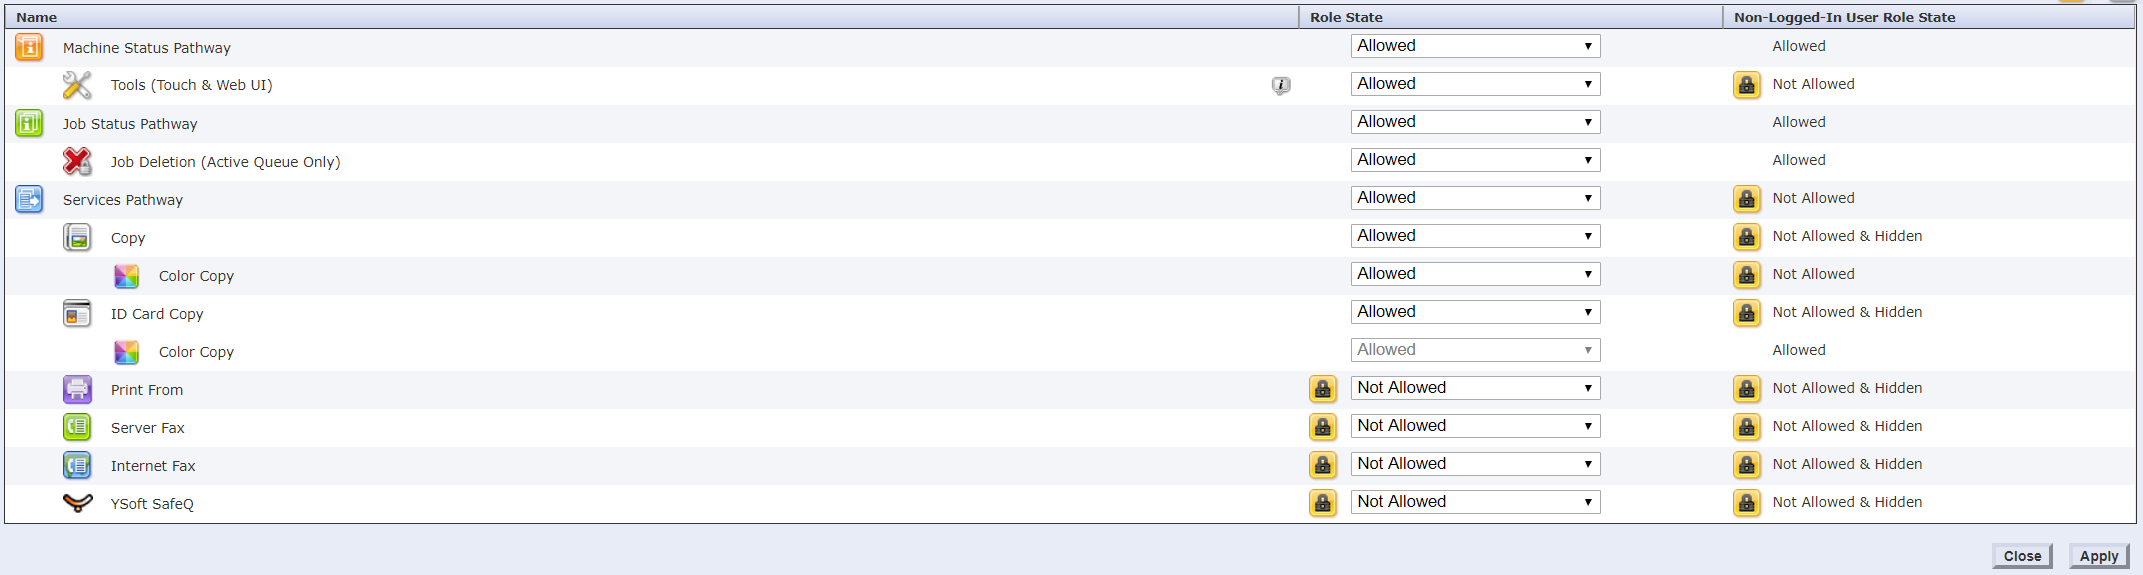
If you use the device authentication mode To device, on the Services & Tools tab, check that the Role State of the Services Pathway is set to Not Allowed.
You can configure the Machine Status Pathway and Job Status Pathway locks freely.
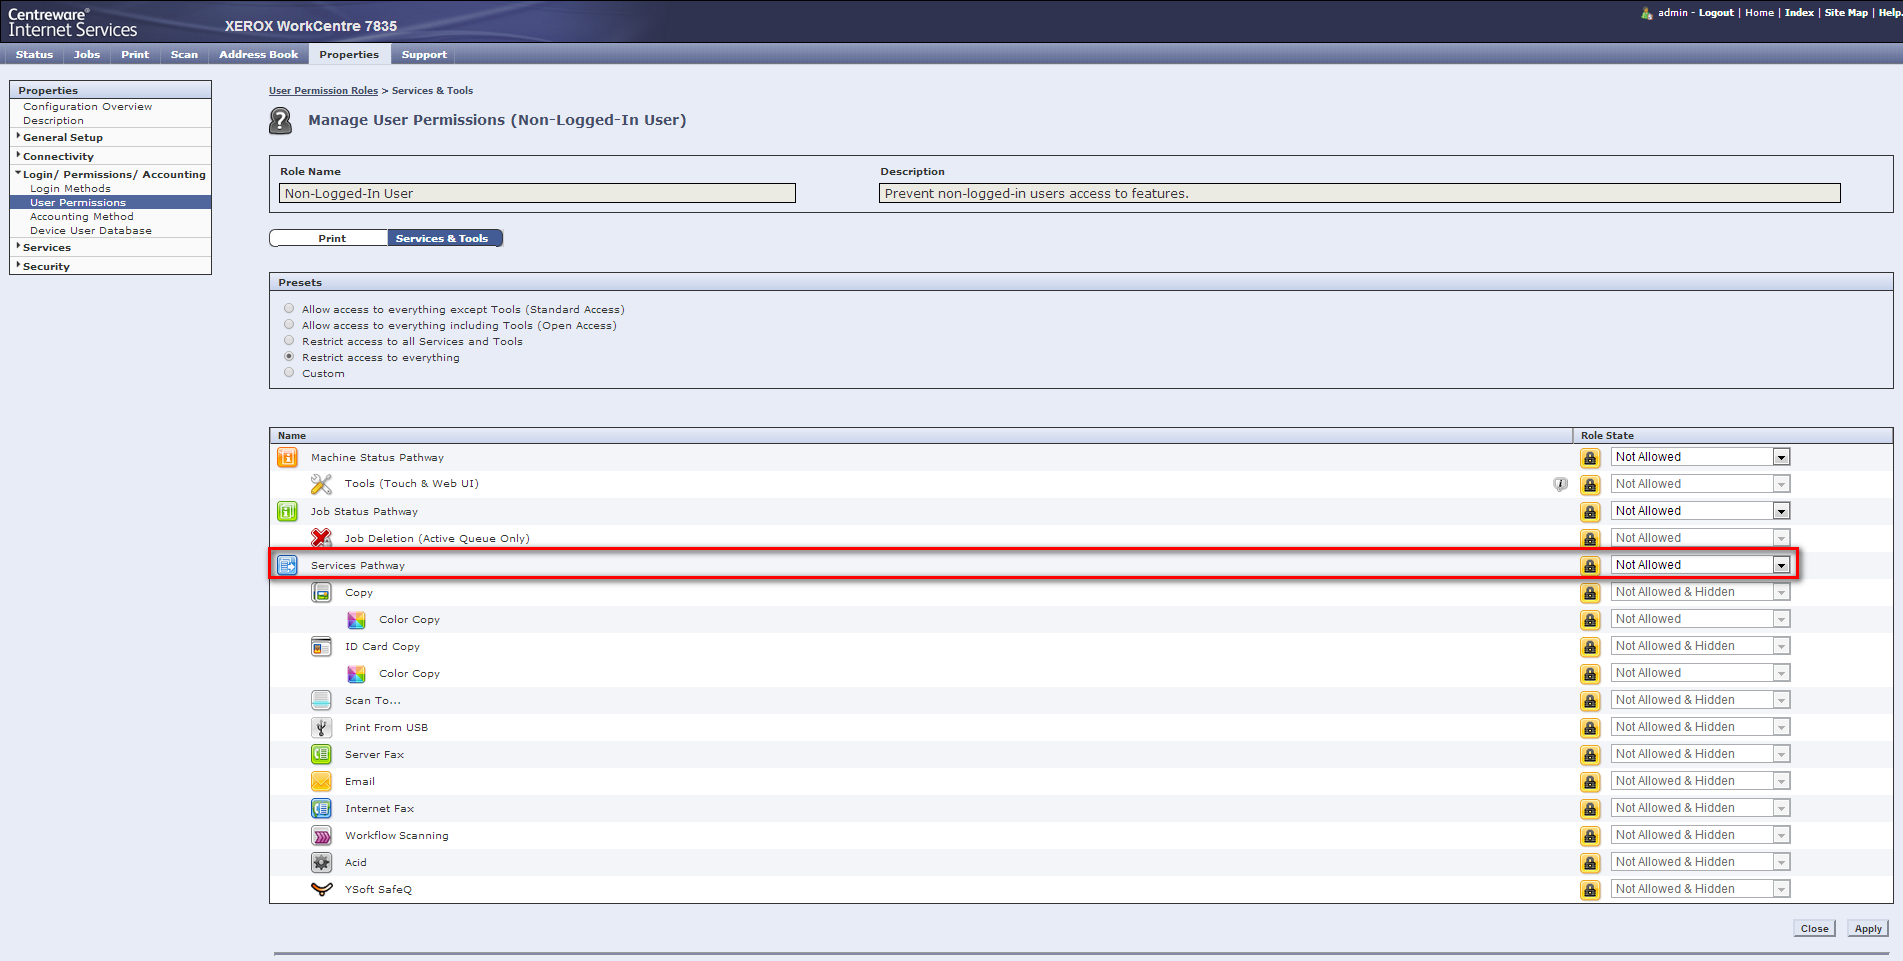
If you use the device authentication mode To each application, set the options accordingly. Note that for some WorkCentre models, it is necessary to use only Per application settings for proper functionality.
Convenience Authentication Setup
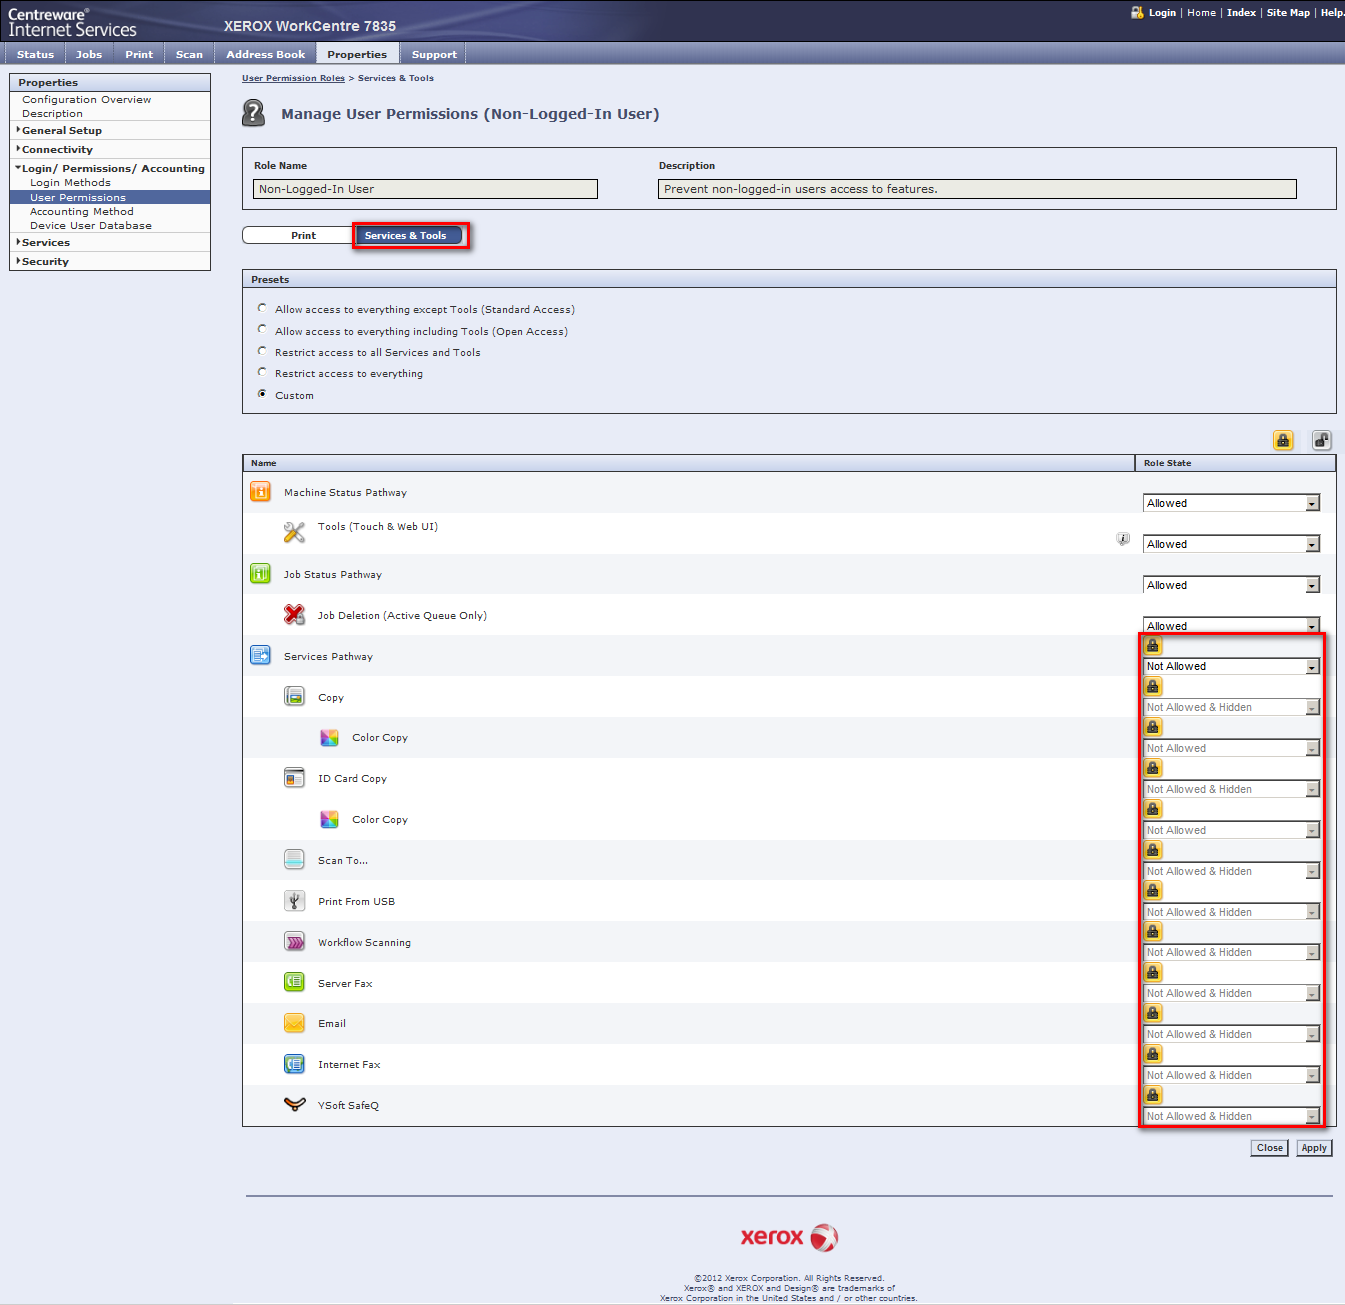
Go to the Properties tab > Login/Permissions/Accounting > Login Methods. Then click Edit next to Convenience Authentication Setup.

On the Convenience Authentication Setup page, check that Accounting Information is applied automatically. It can be modified by selecting Automatically apply Accounting Codes from the server.
Job Limits
To enable the Job Limits service, go to the Properties tab > Services > Printing > Printing Web Services, and select the check box for Job Limits. Click Apply.
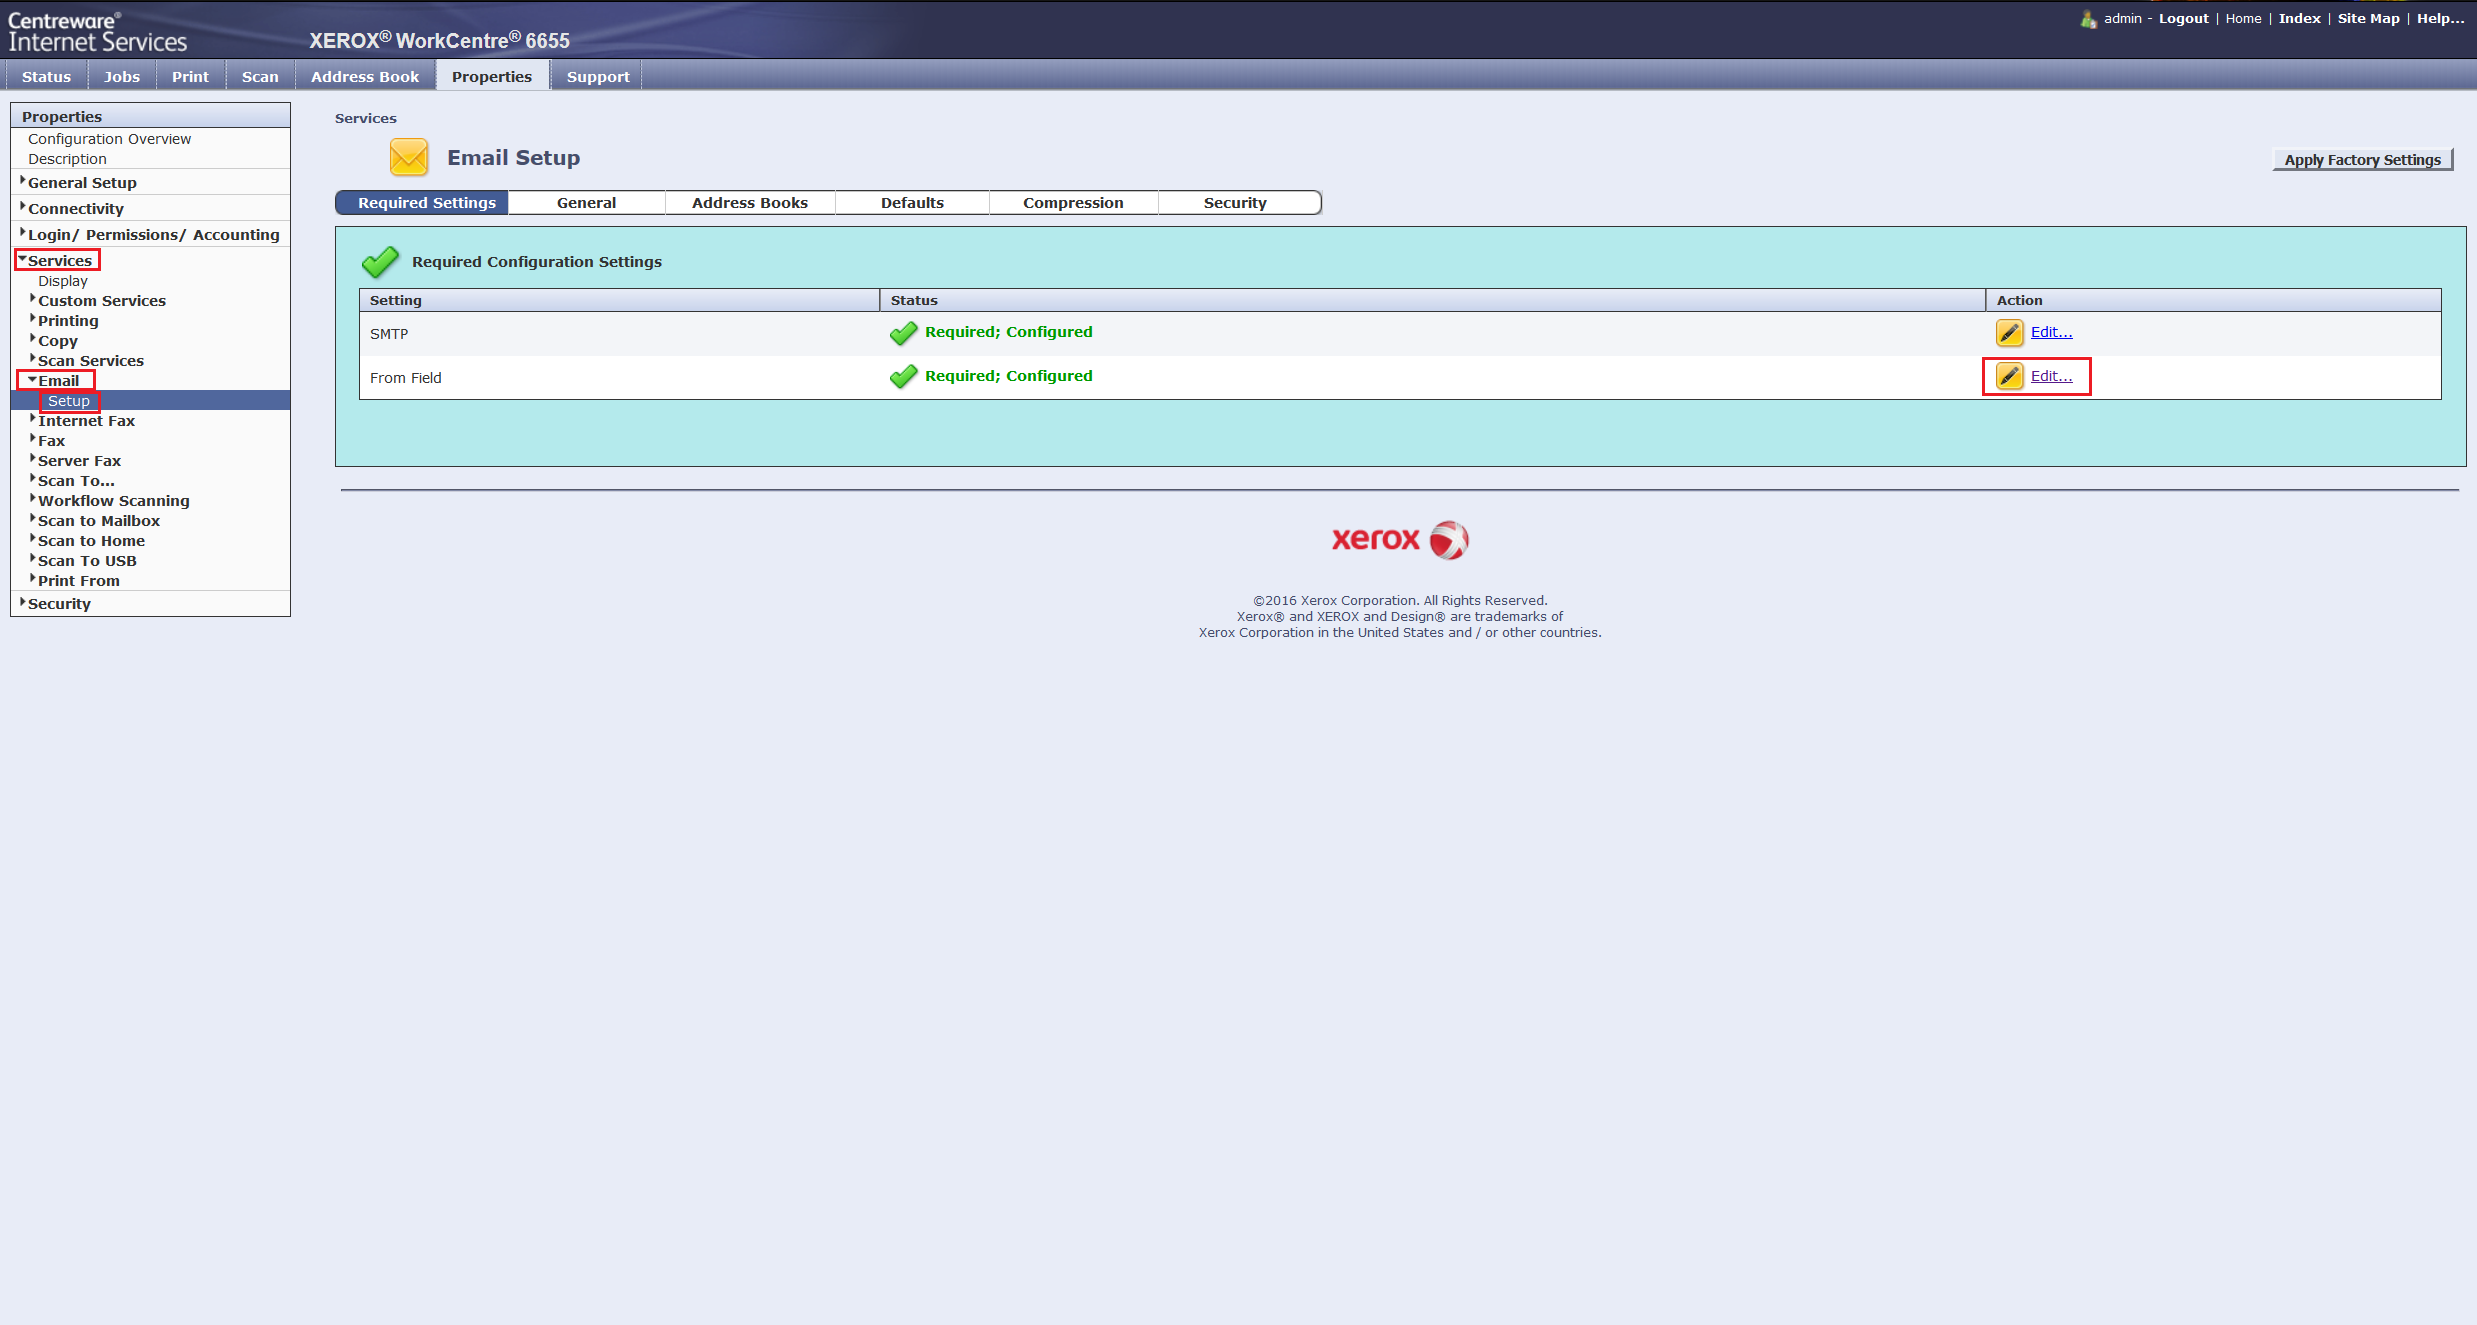
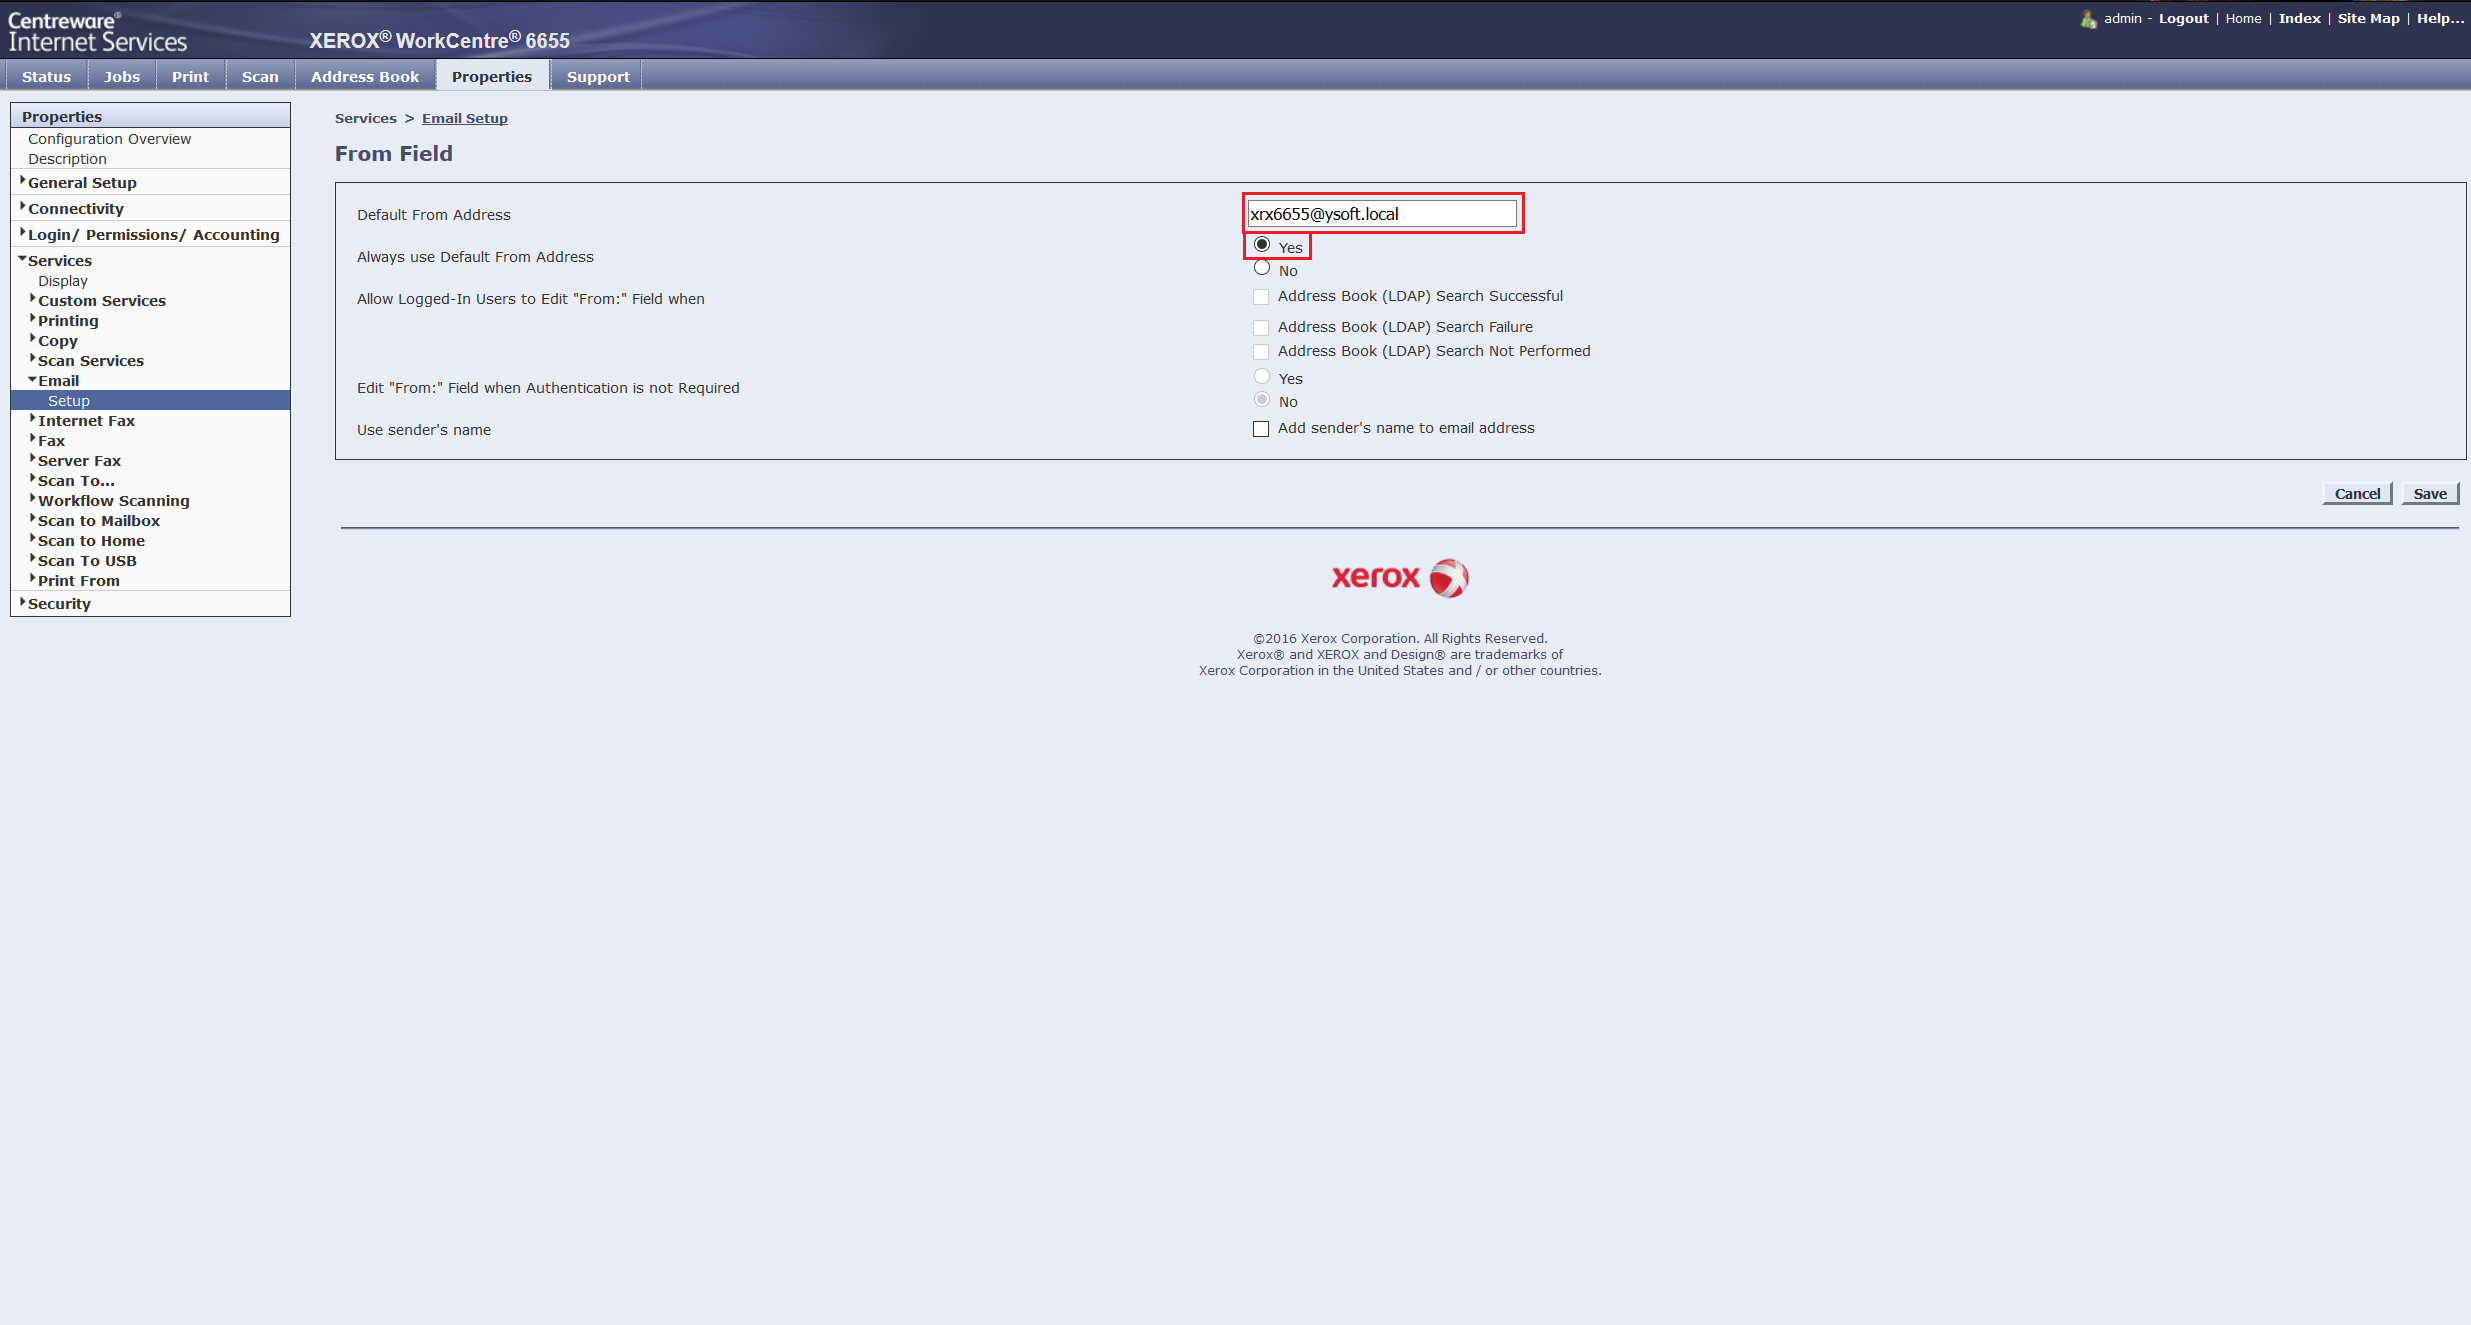
For the proper functioning of the native scan to email (E-mail application) on the MFD, you need to disable the possibility to change the "From" address.
Go to the Properties tab > Services > Email > Setup. Then click Edit next to From Field.
Fill in Default From Address and select Yes next to Always use Default From Address.
Card Reader Policies
Its function is to determine whether a USB card reader needs to be plugged in for authentication to take place. For example, if this is set to yes and there is no USB Card Reader attached, you can not use pin only authentication.
Go to the Properties tab > Login/Permissions/Accounting > Login methods

Creating color copy rule
Color copy restriction rules documented below are used only when property xeroxAccessDefinitionMethod is set to LDAP and property enableXeroxAccessDefinition is set to Enabled. Rules for application restriction are created during product installation.
Go to Properties > Login/Permissions/Accounting > User Permissions and then edit User Permission Roles. Then change tab to Logged-In User.
- Deleting generated copy rule
- Ask Xerox field technician for assistance. Generated Copy rule assigned to Copy application(s) has to be deleted. This action can be done using Access configuration client contained in Xerox EIP.
- Creating Copy rule
- Click on button Make Your Own Permission Roles.
- Fill role name (e.g. copy) and press Create.
In tab Assign Groups to Role into Find / Add Groups input copy and press Add. In list of Assigned Groups should be visible item copy.
Inserted group name in this step has to be set to copy.

- In tab choose Services & tools and then set all applications except Copy and ID Card Copy to Not Allowed. Copy and ID Card Copy should be set to Allowed if not. Color Copy should be set to Not al lowed.
- Press Apply and then Close.
- Creating Copy color rule
- Fill role name (e.g. copycolor) and press Create
In tab Assign Groups to Role into Find / Add Groups input copycolor and press Add. In list of Assigned Groups should be visible item copycolor .
Inserted group name in this step has to be set to copycolor .

In tab choose Services & tools and then set all applications except Copy and ID Card Copy to Not Allowed. Copy and ID Card Copy should be set to Allowed if not.
Press Apply and then Close
Install Certificate Authority certificate
Go to Properties > Security > Certificates > Security Certificates.
Select tab Root/Intermediate Trusted Certificate(s).
Press Install Certificate.

Choose a certificate file path. Enter decryption password. Press Next and follow instructions to complete installation process.
Secured LDAP
By default secured LDAP (without server certificate validation) is configured during installation of the device. You can disable it by enabling property internalLdapAllowNonsecureProtocol and manually disable secured LDAP on device. But you can allow an attacker to bypass access restrictions for operations on Xerox devices.
Enable server certificate validation for secured LDAP
Issuer of server certificate (CA certificate) has to be uploaded at first.
Go to Properties > Login/Permissions/Accounting > Login Methods. and edit LDAP Servers.

Press Edit... on selected LDAP server.

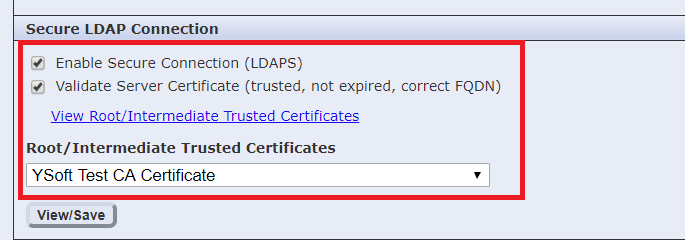
Scroll to section Secure LDAP Connection.
- Enable Secure Connection (LDAPS)
- Enable Validate Server Certificate (trusted, not expired, correct FQDN).
- Select issuer of the server certificate from dropdown menu Root/I ntermediate Trusted Certificates.
LDAP server certificate is the same which is configured in Terminal Server for secured connection with devices. Follow these instructions Configuring secured connection between terminals and Terminal Server.
Press Apply.
Some devices need reboot. If notification appears on the screen then press OK.