This manual was created based on Xerox Phaser 3635 and should be applicable to most MFDs with Samsung controller, although slight differences may occur.
Before installation of Dispatcher Paragon Embedded Terminal
Time configuration
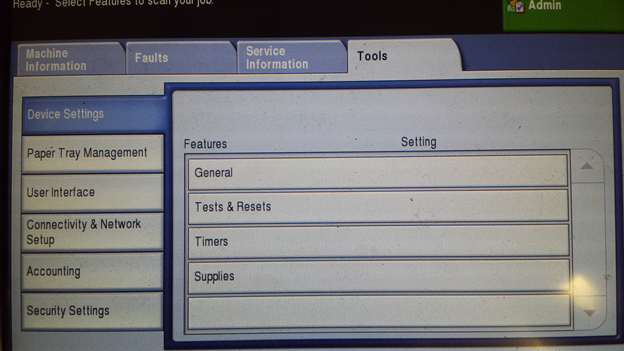
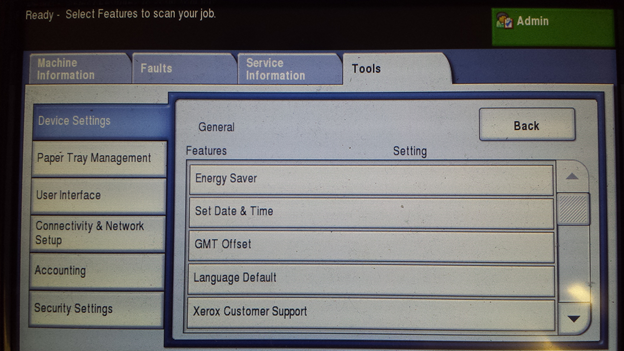
At the printer control panel, press the Machine Status button and switch to the Tools tab.
You may need to be logged on as the devise Admin account to perform these settings. Then touch Device Settings > Common Service Settings > Machine Clock/Timers.
Custom Services
Go to the Properties tab > Services > Custom Services and do the following settings: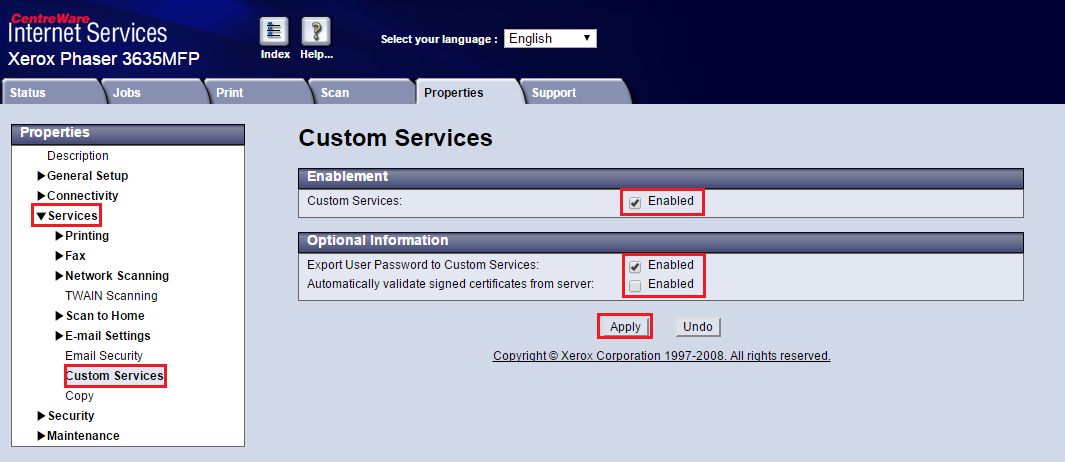
SSL
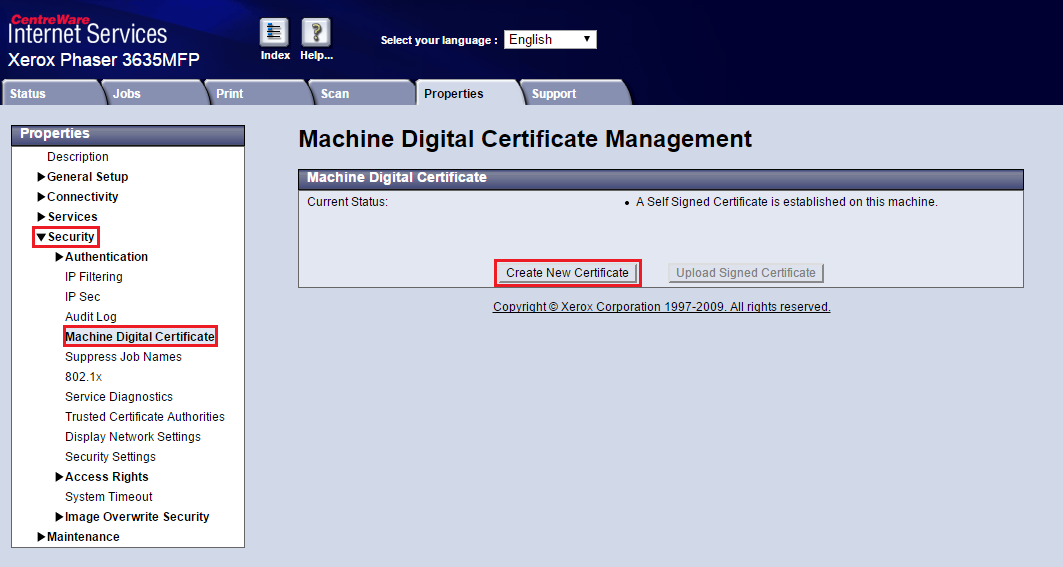
Create a new secure certificate and enable SSL.
Go to the Properties tab > Security > Machine Digital Certificate and check Installed Certificates. When a certificate is not created, create new Self signed certificate.
Then go to Connectivity > Protocols > HTTP and enable the SSL.
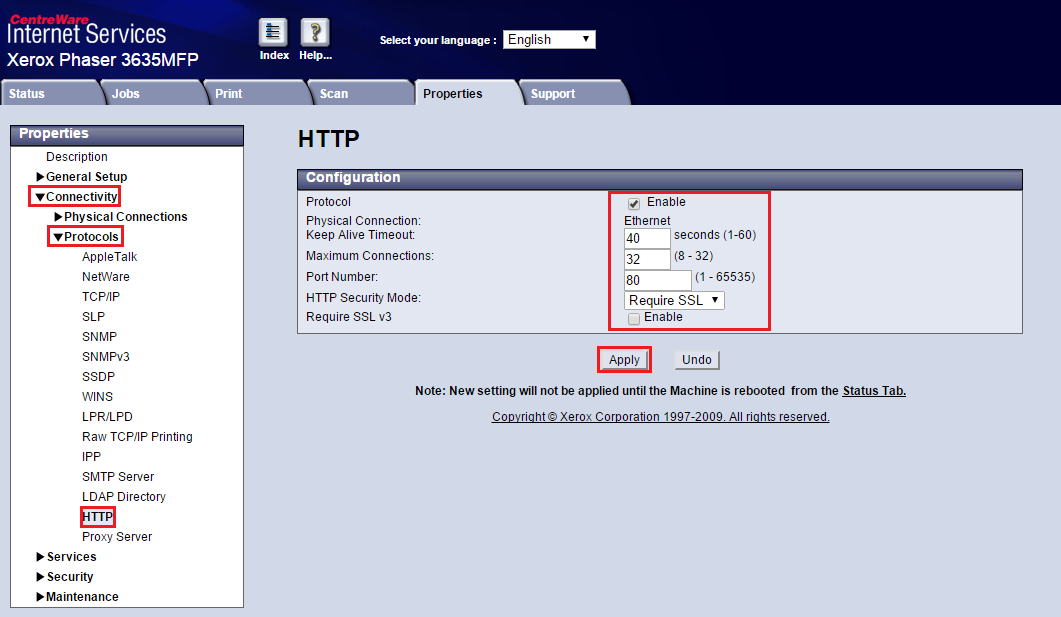
That you have to reload the page after you enable SSL if it was disabled before. Next time, you will be redirected to secured page (https). Also remember you have to recreate the certificate if you change the IP address of the device, as the certificate is IP-relative.
Network Accounting
Go to MFD panel and log in as admin, then go to Tools > Accounting > Accounting Enablement > Authentication Mode, choose Network Accounting and save the settings.
Then go to Network Accounting Setup > Network Accounting Authentication and Disable authentication.
Save all values and log out from the menu.
Authentication
Go to the Properties tab > Security > Authentication > Authentication > and choose Require Network Authentication and other required options:
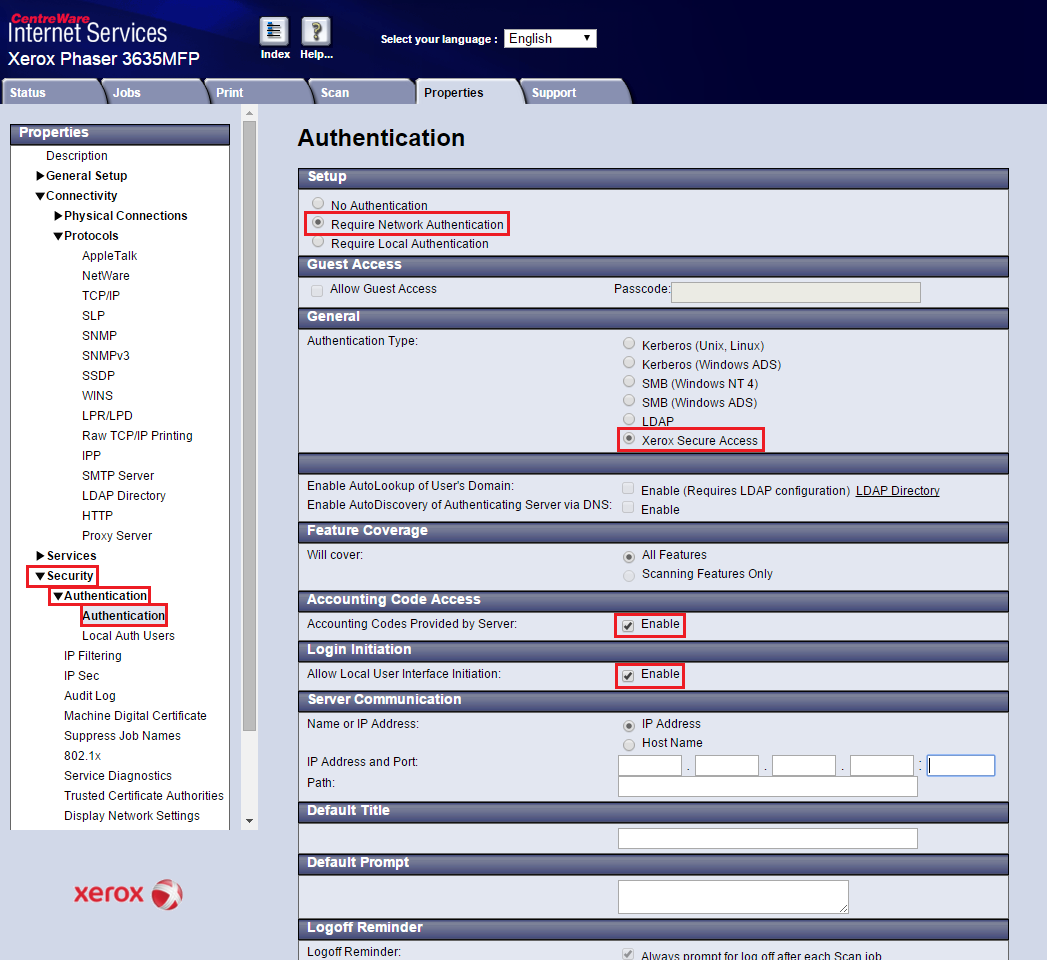
You may need to set the "Default From" address, so go to Services > E-mail Settings > Defaults and set From Address to any e-mail value, e.g. test@safeq.com
SNMP
You will later need to fill proper SNMP community in device configuration. You can check current MFD setting under the Properties tab > Connectivity > Protocols > SNMP.
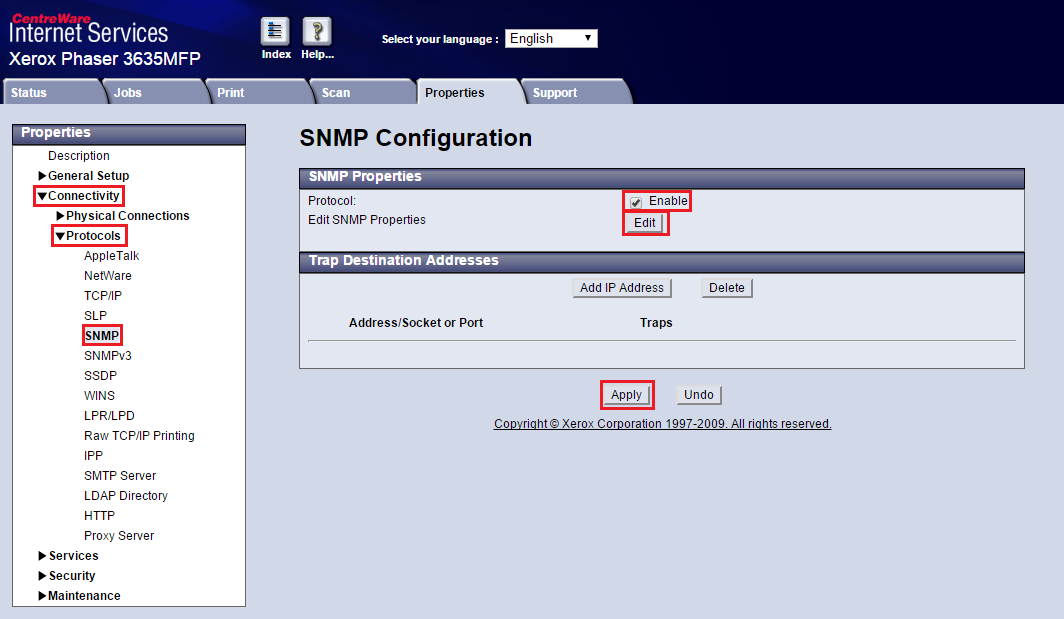
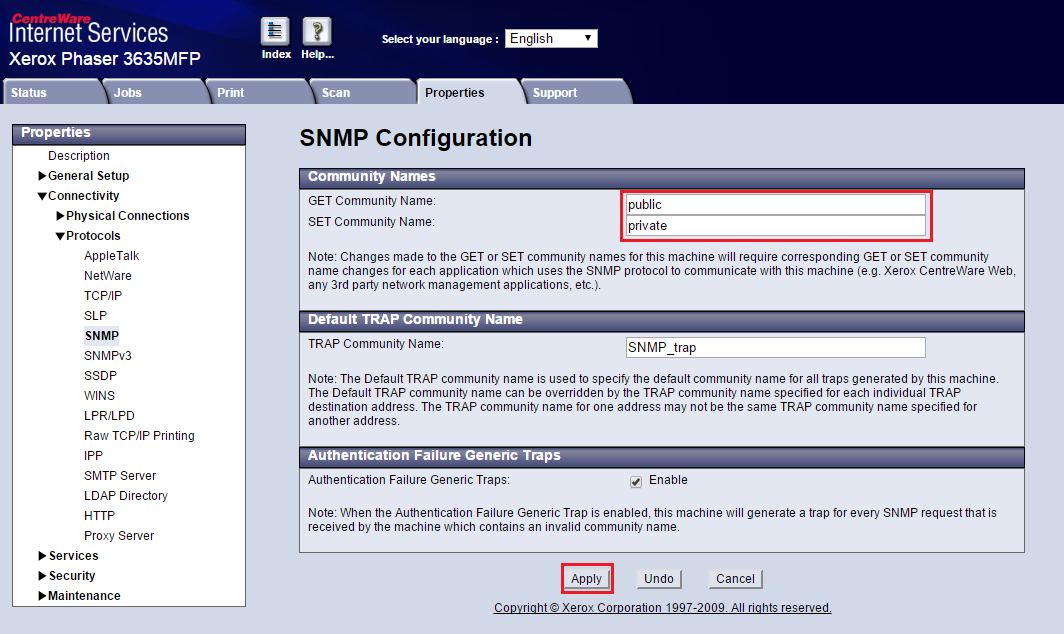
Click Edit and set community names accordingly:
Scan Services
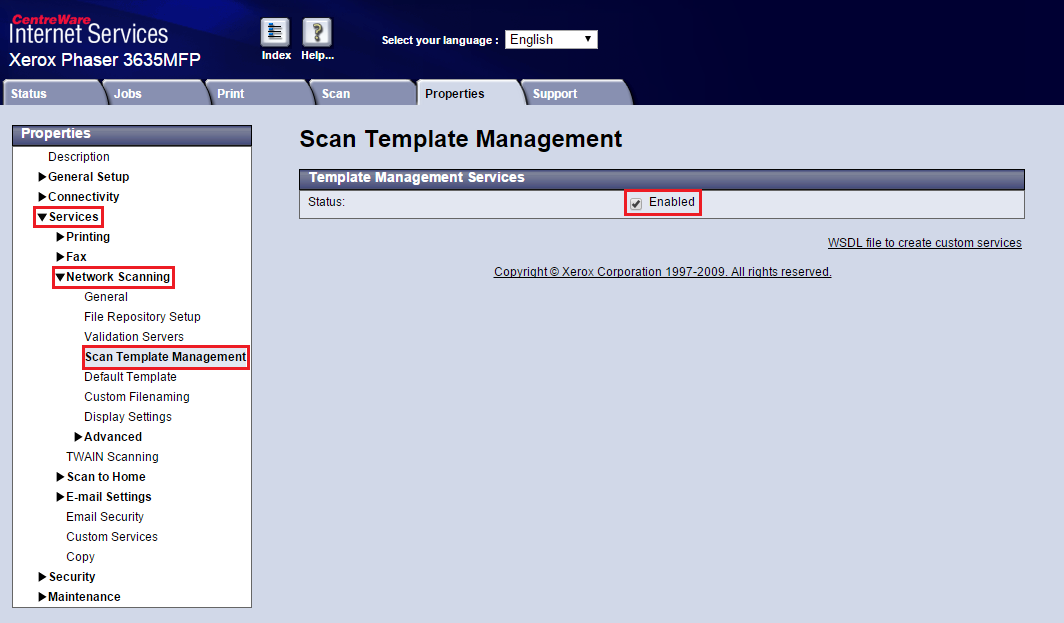
Go to the Properties tab > Services > Network Scanning > Scan Template Management and select the enabled check-box.
USB Card Reader
Go to the MFD panel and log in as admin, then go to Tools > User Interface > General > SFO and enable 35 and save.
If there are some warnings present during the installation, you will need to do some further settings based on the messages.
After installation of Dispatcher Paragon Embedded Terminal
Device and Service Access
This feature is unavailable on this MFD.