- Open your Web browser and enter the MFD's IP address. The Public user web interface opens.
- Press the Logout button in the upper right corner and confirm the logout.
Select User Type Administrator, insert password and press Login in the bottom right corner.

Administrator web interface opens, navigate to Security, PKI Settings, Device Certificate Setting and press New Registration.

If the device already has a factory default settings certificate, delete it first and then create a new one.
- Select Create and install a self-signed Certificate and click OK.
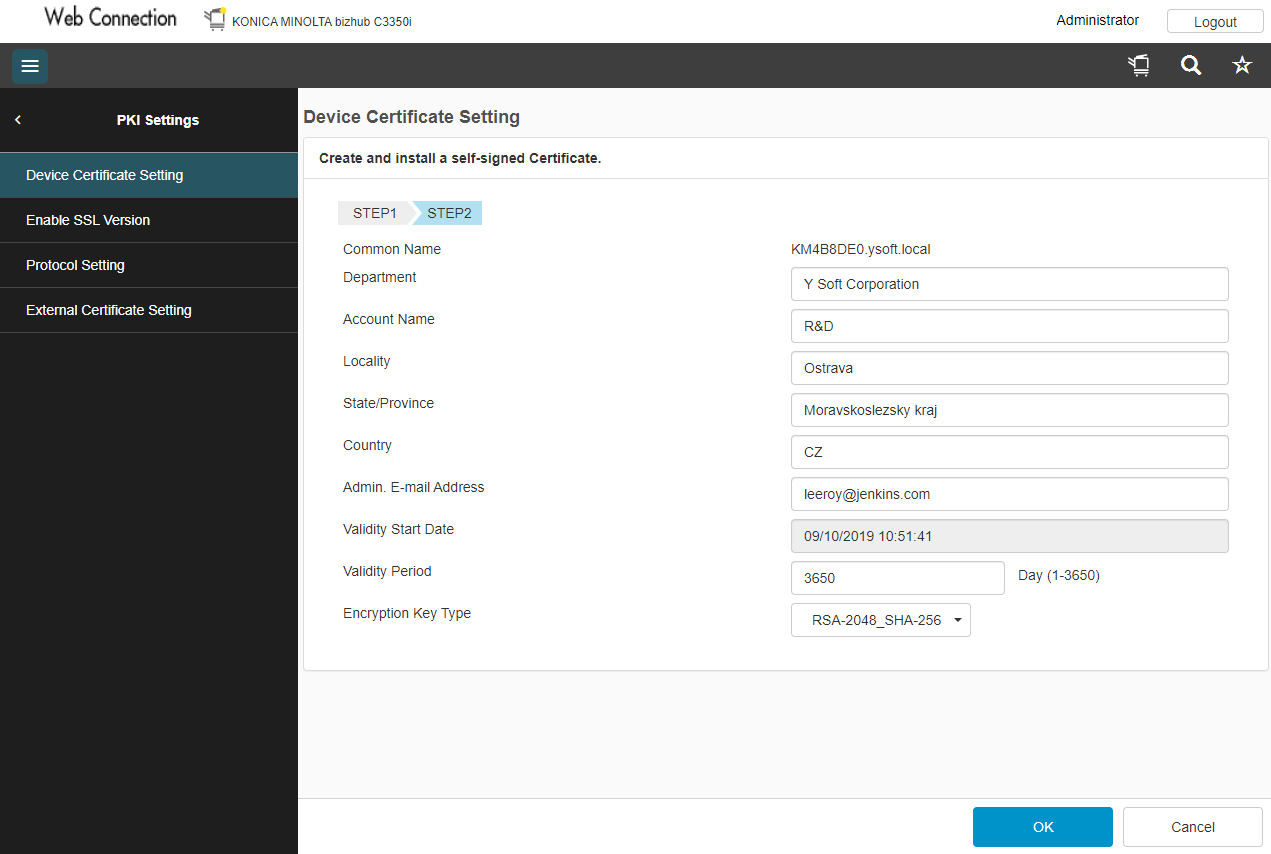
Enter information for the SSL certificate; then click OK.
- When the message "Certificate has been successfully created" appears, click OK.
Log out of the session. If a message appears saying that it is necessary to reboot, reboot the MFD.
If the MFD does not request a reboot, you must log out of the Web interface before continuing the terminal installation.