When attempting to authorize a Microsoft Azure application that allows our services to use their APIs, you will be asked to accept some permissions, grant consent to the user who is authenticated, etc. This guide should help you find different ways how to achieve this authorization, given the different issues you may encounter.
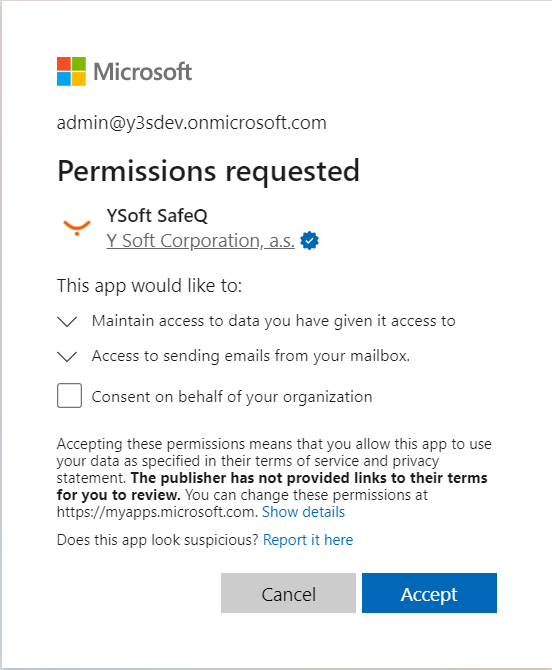
This is the screen where you are informed about the permissions requested for an application:
Quick tips
Logout before initiating the authorization
It is recommended to log out from Microsoft services before attempting to authorize an application to use your credentials. In this way, you will make sure that you are using the right account.
You can do that easily by going to this link: https://login.microsoftonline.com/logout.srf
Granting admin consent
Depending on the configuration of your tenant in Azure and the permissions of the account which is authenticating, you might be asked to request an administrator to approve your access to the application.
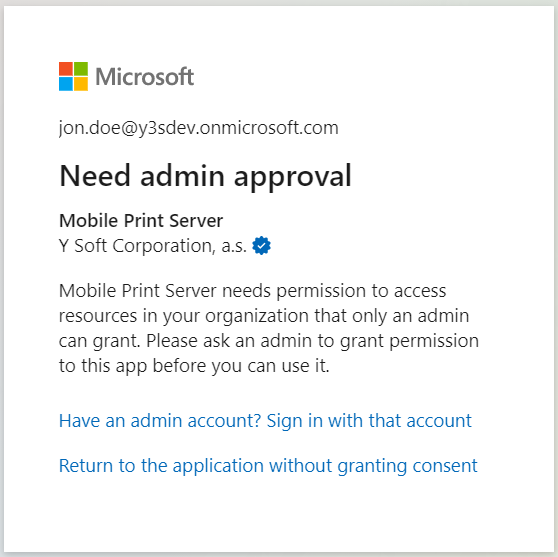
In that case, you will see the following screen after authenticating:
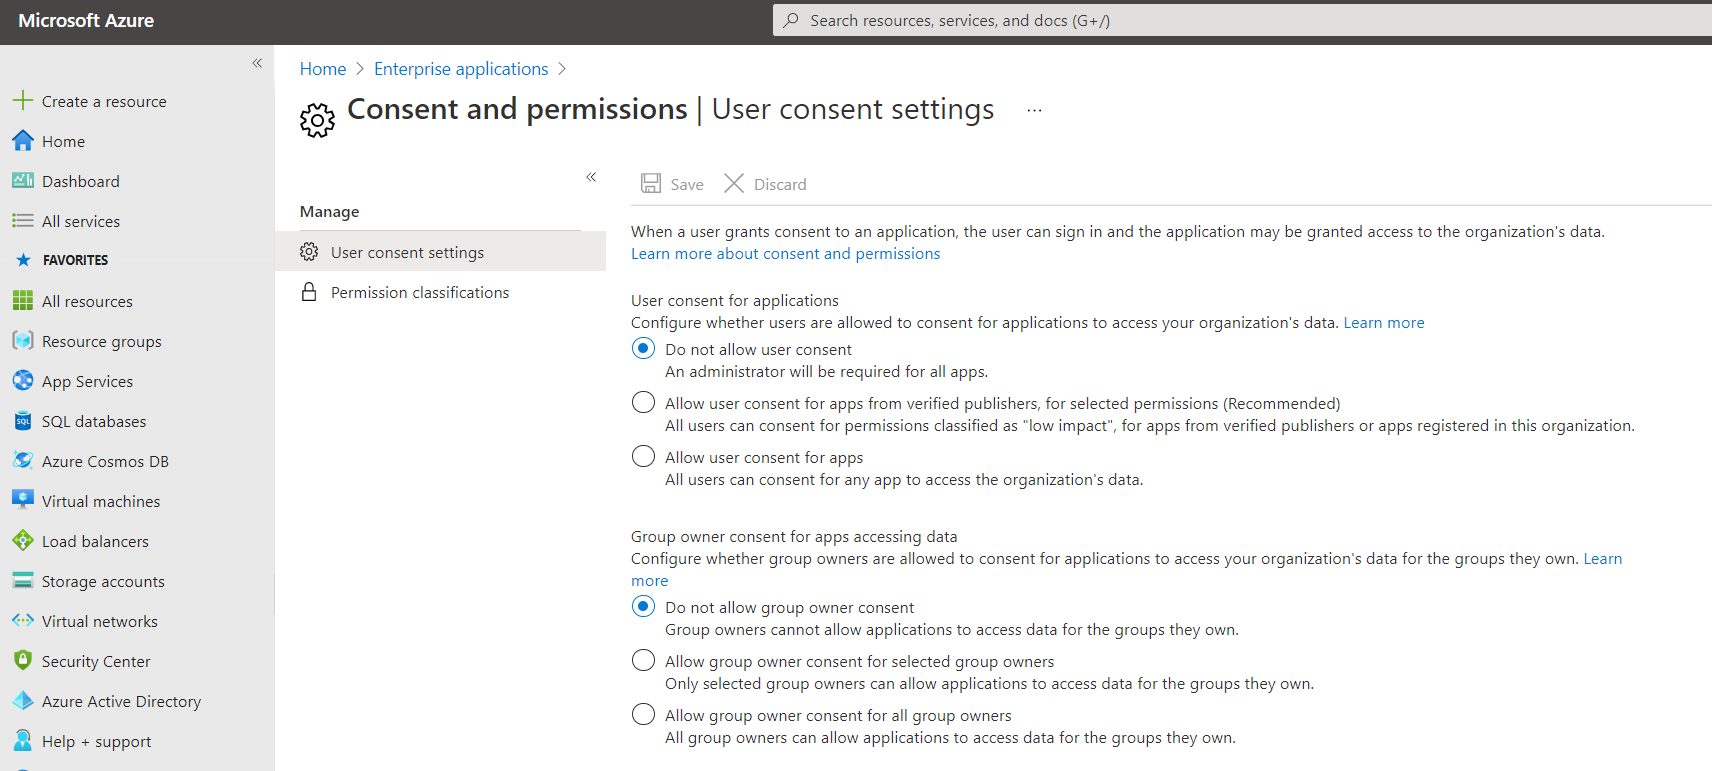
This window prevents the authenticated user to grant permissions to the application in their tenant. This usually happens when the tenant is configured to "Do not allow user consent" under the Consent and permission settings in the Enterprise applications in the Azure portal.
There are three possibilities to grant this access, which are described below:
1. Use an account with an Azure Administrator role to allow consent for all the tenants
Azure Administrators can consent to the application on behalf of the whole organization. This can be done in few steps:
- When the "Needs admin approval" screen appears, go to the link "Have an admin account? Sign in with that account".
- Authenticate with the Administrator account
- Check the option "Consent on behalf of your organization".
- Accept the permissions requested.
- You will be redirected with a successful message, although at this moment the authorization is finished using the administrator account.
- Start again the authorization, this time using the account which didn't have access before.
2. Grant the user with an Azure Administrator role
The following roles have elevated permissions, which allow the user to successfully authorize the APIs which are restricted to normal users:
- Application Administrator
- Global Administrator
As mentioned before, Administrator roles can grant consent to the whole organization, so other users which attempt to authorize in the application won't require consent anymore.
3. Configure "Admin consent request" workflow
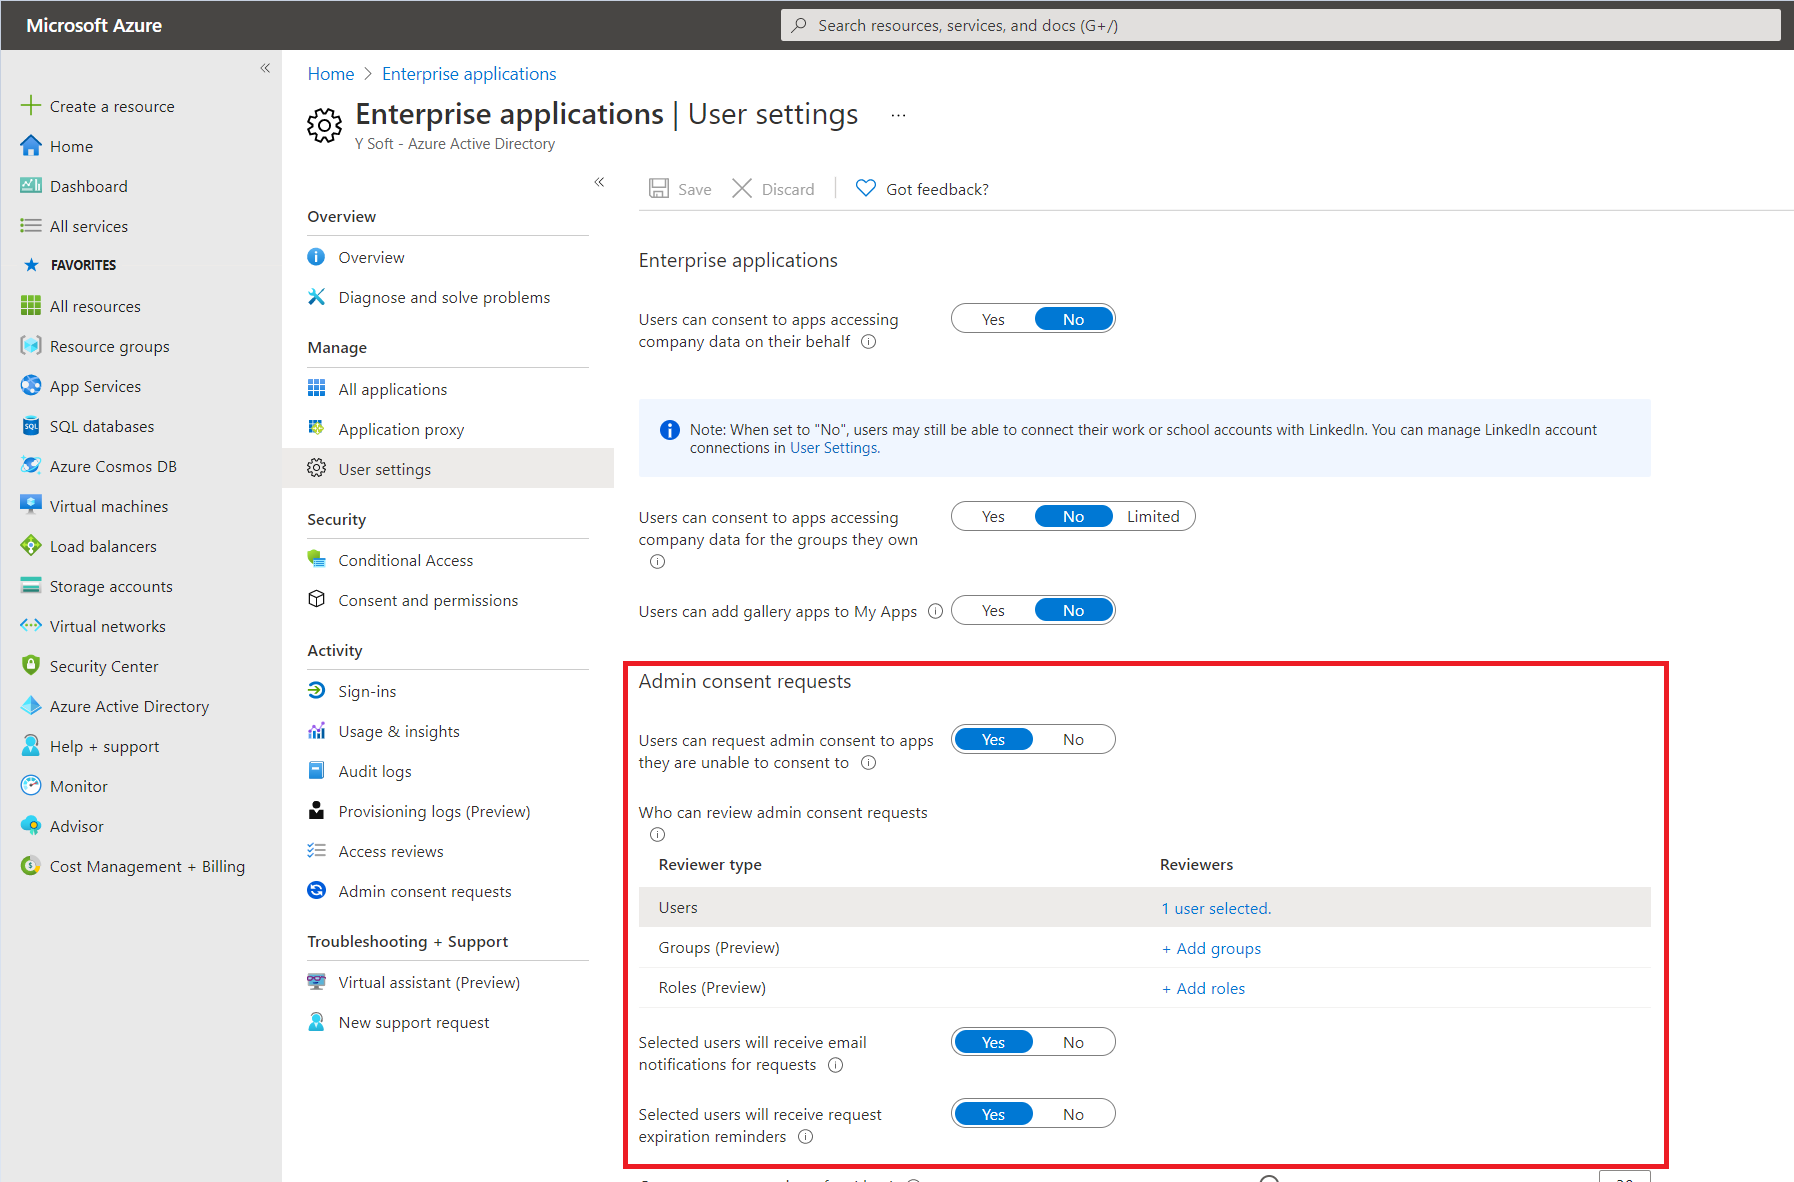
Azure has a feature called "Admin consent request", which allows users to request Administrator consent, so they can authorize applications that they do not have access to. This can be done in the User settings inside Enterprise applications:
First, you have to enable the "Admin consent request" feature and then add Users, Groups, or Roles that will approve those requests. It is mandatory to add at least one.
Admin consent workflow explanation
The flow is the following:
1. Users sends a request for approval:
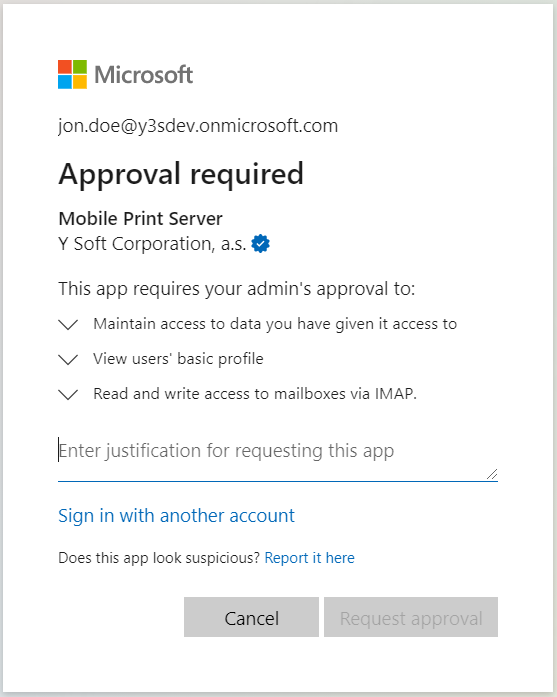
When the Admin Consent Request is enabled (it might take few minutes to be propagated after enabling it), the users who do not have enough permissions will see the following screen:
Now the user can provide a justification to the request and send it for review. Once the user sends the request, he will be asked to return to the application by clicking on the Back to app button.
Important
At this point, the authorization was not configured yet. Follow the next steps to continue with the configuration of the authorization.
2. Admin reviews the requests
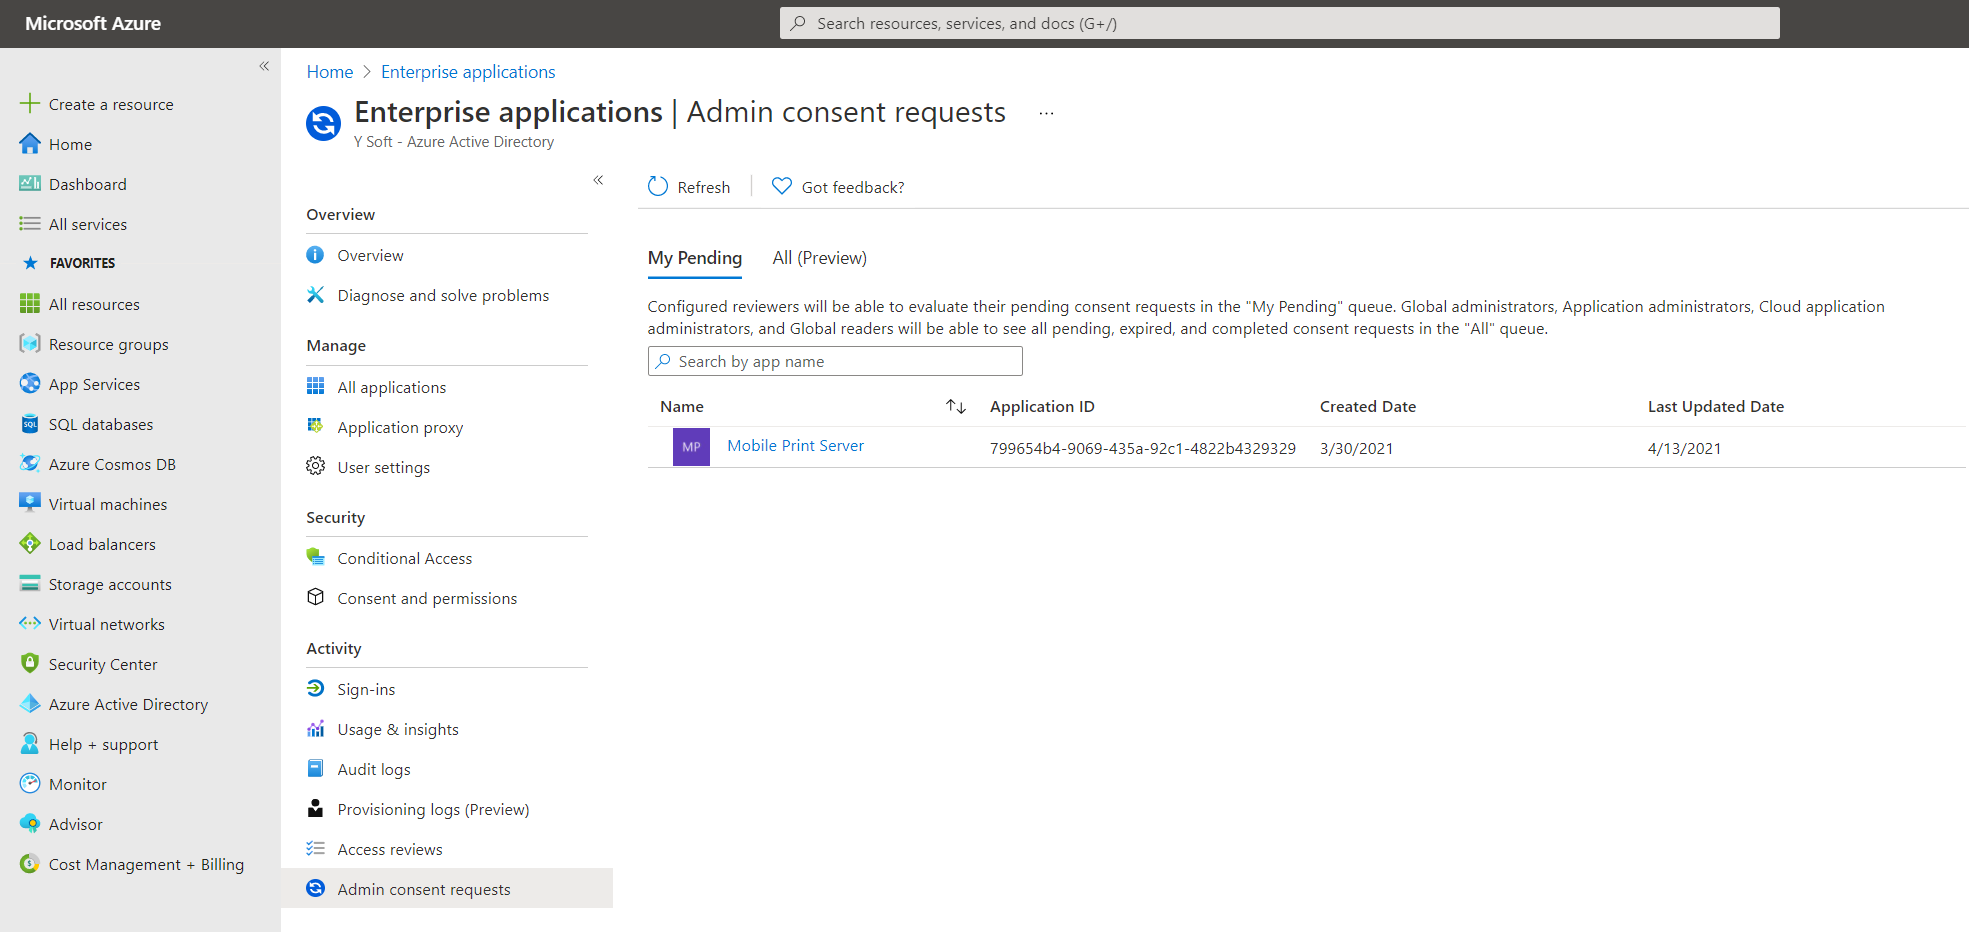
The administrator can review the requests in the Admin consent requests screen, inside Enterprise Applications:
3. User authenticates in the application
Once the consent was approved by the Administrator, the user should be able to proceed with the authorization.
