Creating color copy rule
Color copy restriction rules documented below are used only when property XeroxAccessDefinitionMethod is set to LDAP and property enableXeroxAccessDefinition is set to Enabled. Rules for application restriction are created during Dispatcher Paragon installation.
Go to Properties > Login/Permissions/Accounting > User Permissions and then edit User Permission Roles. Then change tab to Logged-In Users.
1) Restrict color copy for user with copy rights:
a) Press Edit user mapping for __EIP__Copy and __EIP__ID Card Copy (application names are generated by MFD)
b) In tab choose Apps & tools and change Color copy to Not allowed
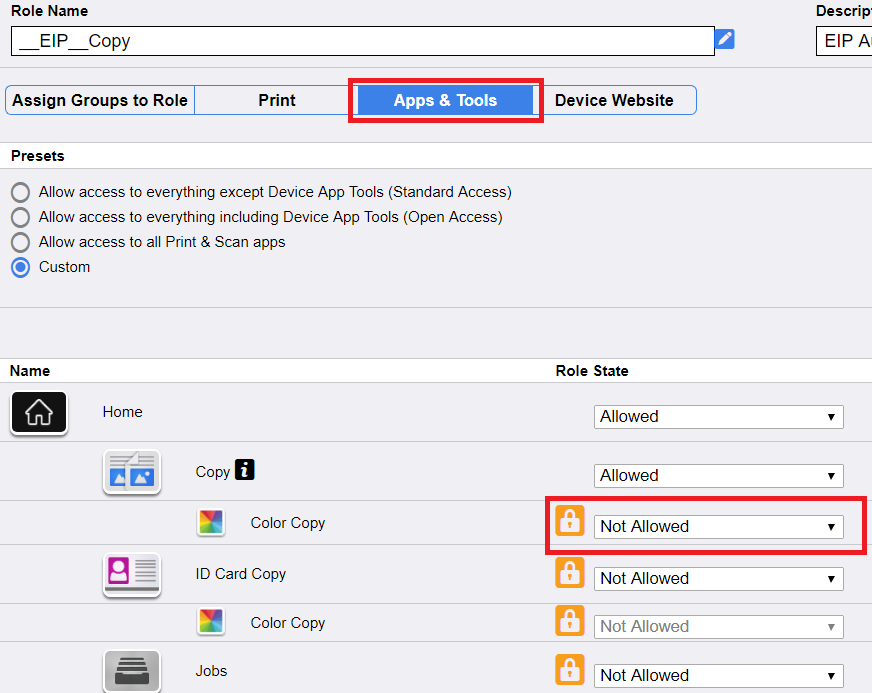
c) Press Apply and then Close
2) Create new rule for user with allowed color copy:
a) Press Add new Role. Fill role name (e.g. copycolor) and press Create.
b) In tab Assign Groups to Role into Find / Add Groups input copycolor and press Add. In list of Assigned Groups should be visible item copycolor.
Inserted group name in this step has to be set to copycolor.

c) In tab choose Apps & tools and then set all applications except Copy and ID Card Copy to Not Allowed. Copy and ID Card Copy should be set to Allowed if not.
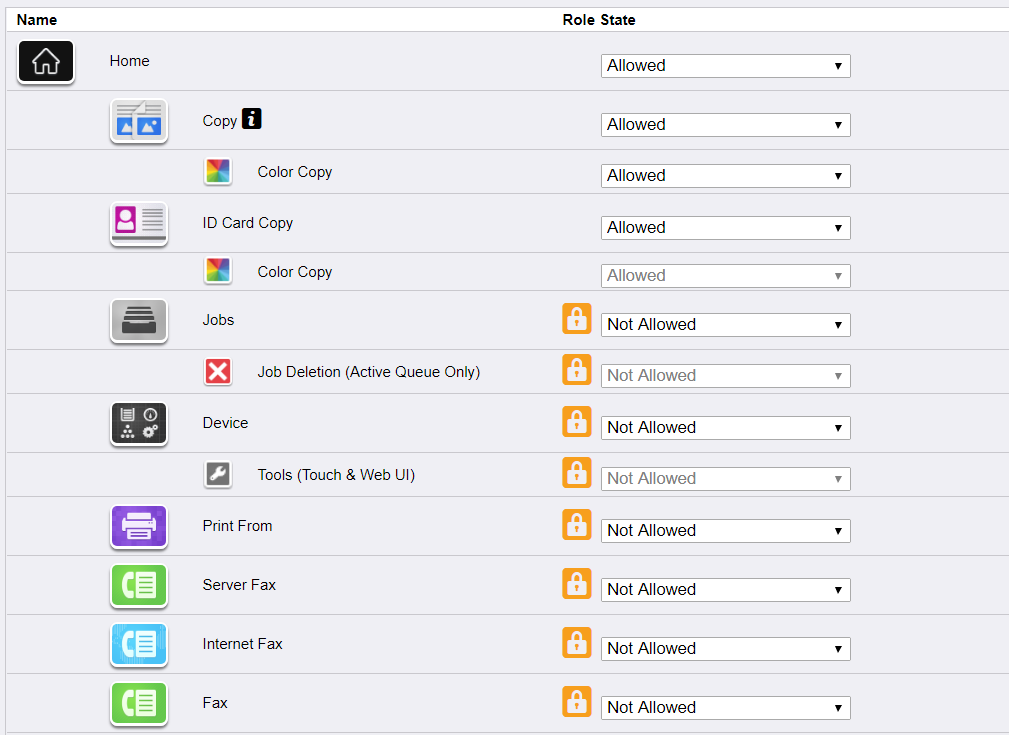
d) Press Apply and then Close
Install Certificate Authority certificate
Go to Properties > Security > Certificates > Security Certificates.
Select tab Root/Intermediate Trusted Certificate(s).
Press Install Certificate.
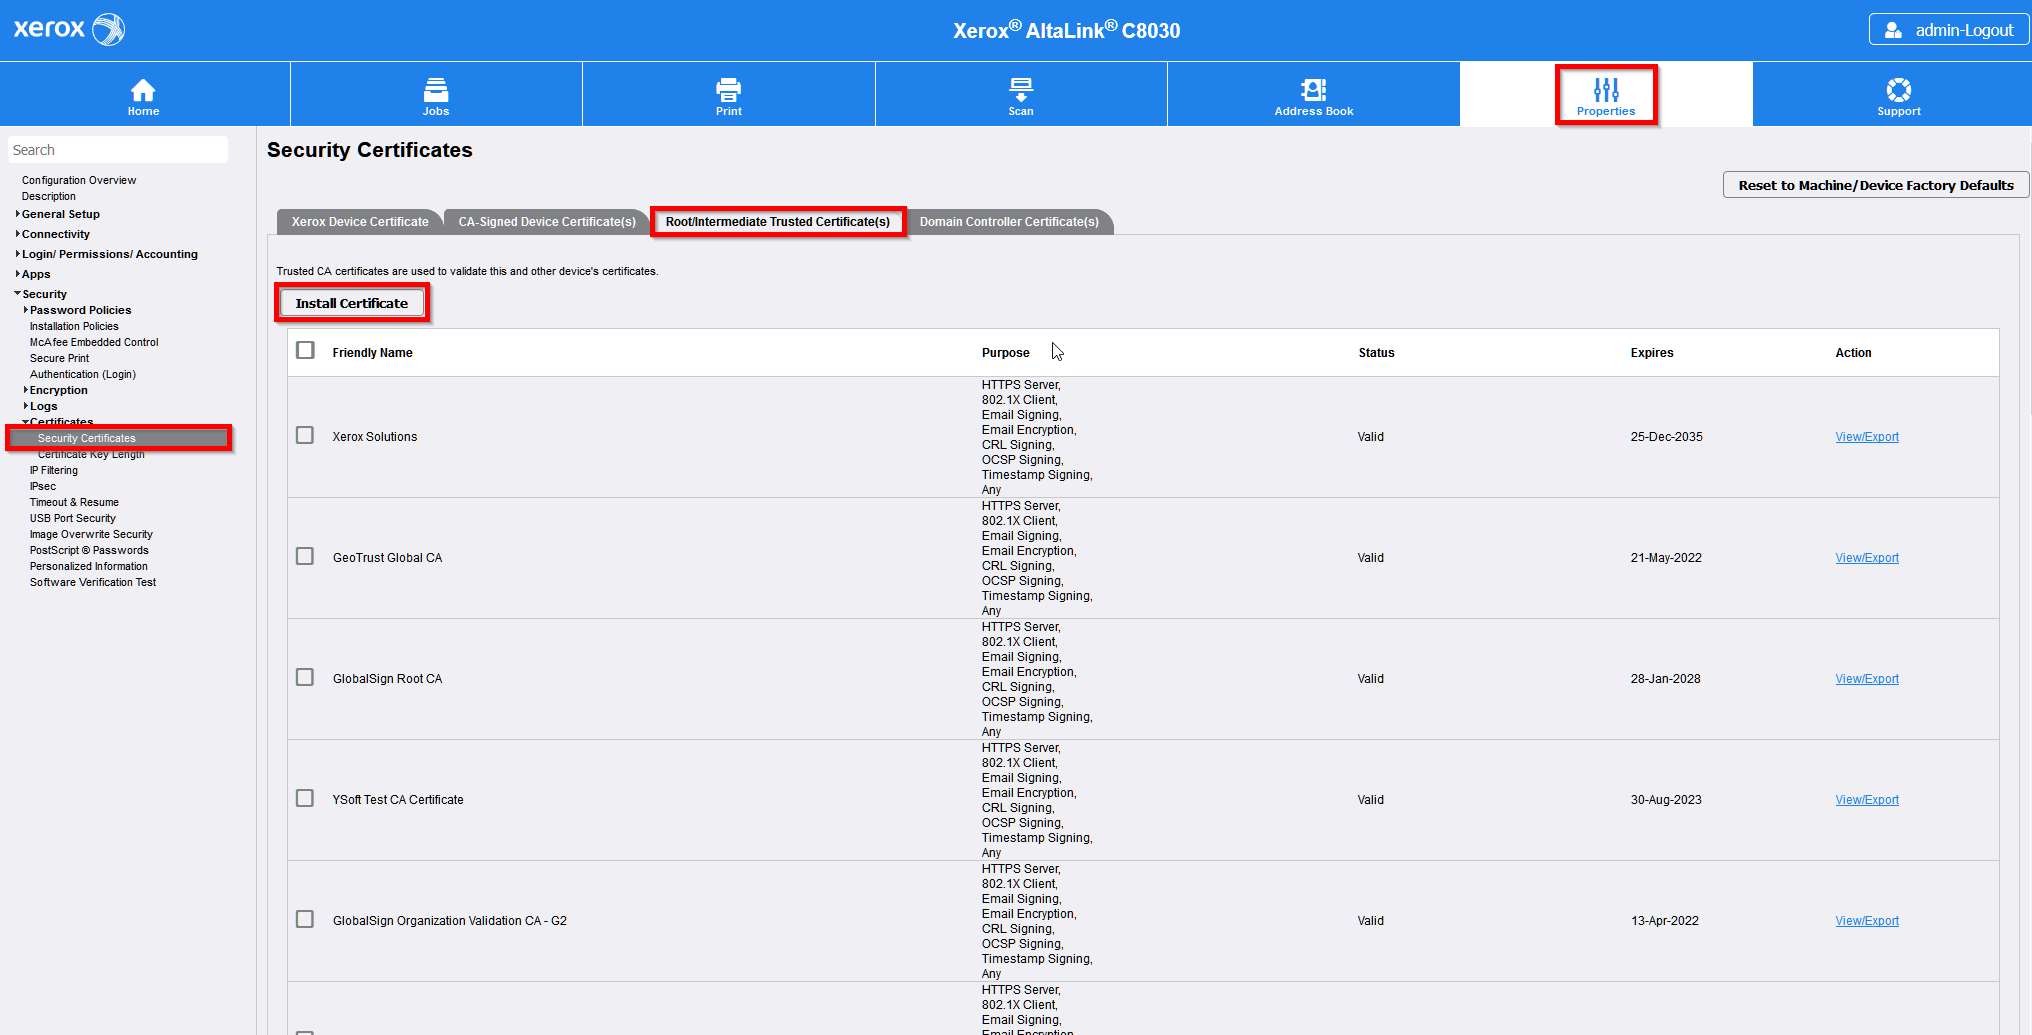
Choose a certificate file path. Enter decryption password. Press Next and follow instructions to complete installation process.

Secured LDAP
By default secured LDAP (without server certificate validation) is configured during installation of the device. You can disable it by enabling property internalLdapAllowNonsecureProtocol and manually disable secured LDAP on device. But you can allow an attacker to bypass access restrictions for operations on Xerox devices.
Enable server certificate validation for secured LDAP
Issuer of server certificate (CA certificate) has to be uploaded at first.
Go to Properties > Login/Permissions/Accounting > Login Methods. and edit LDAP Servers.
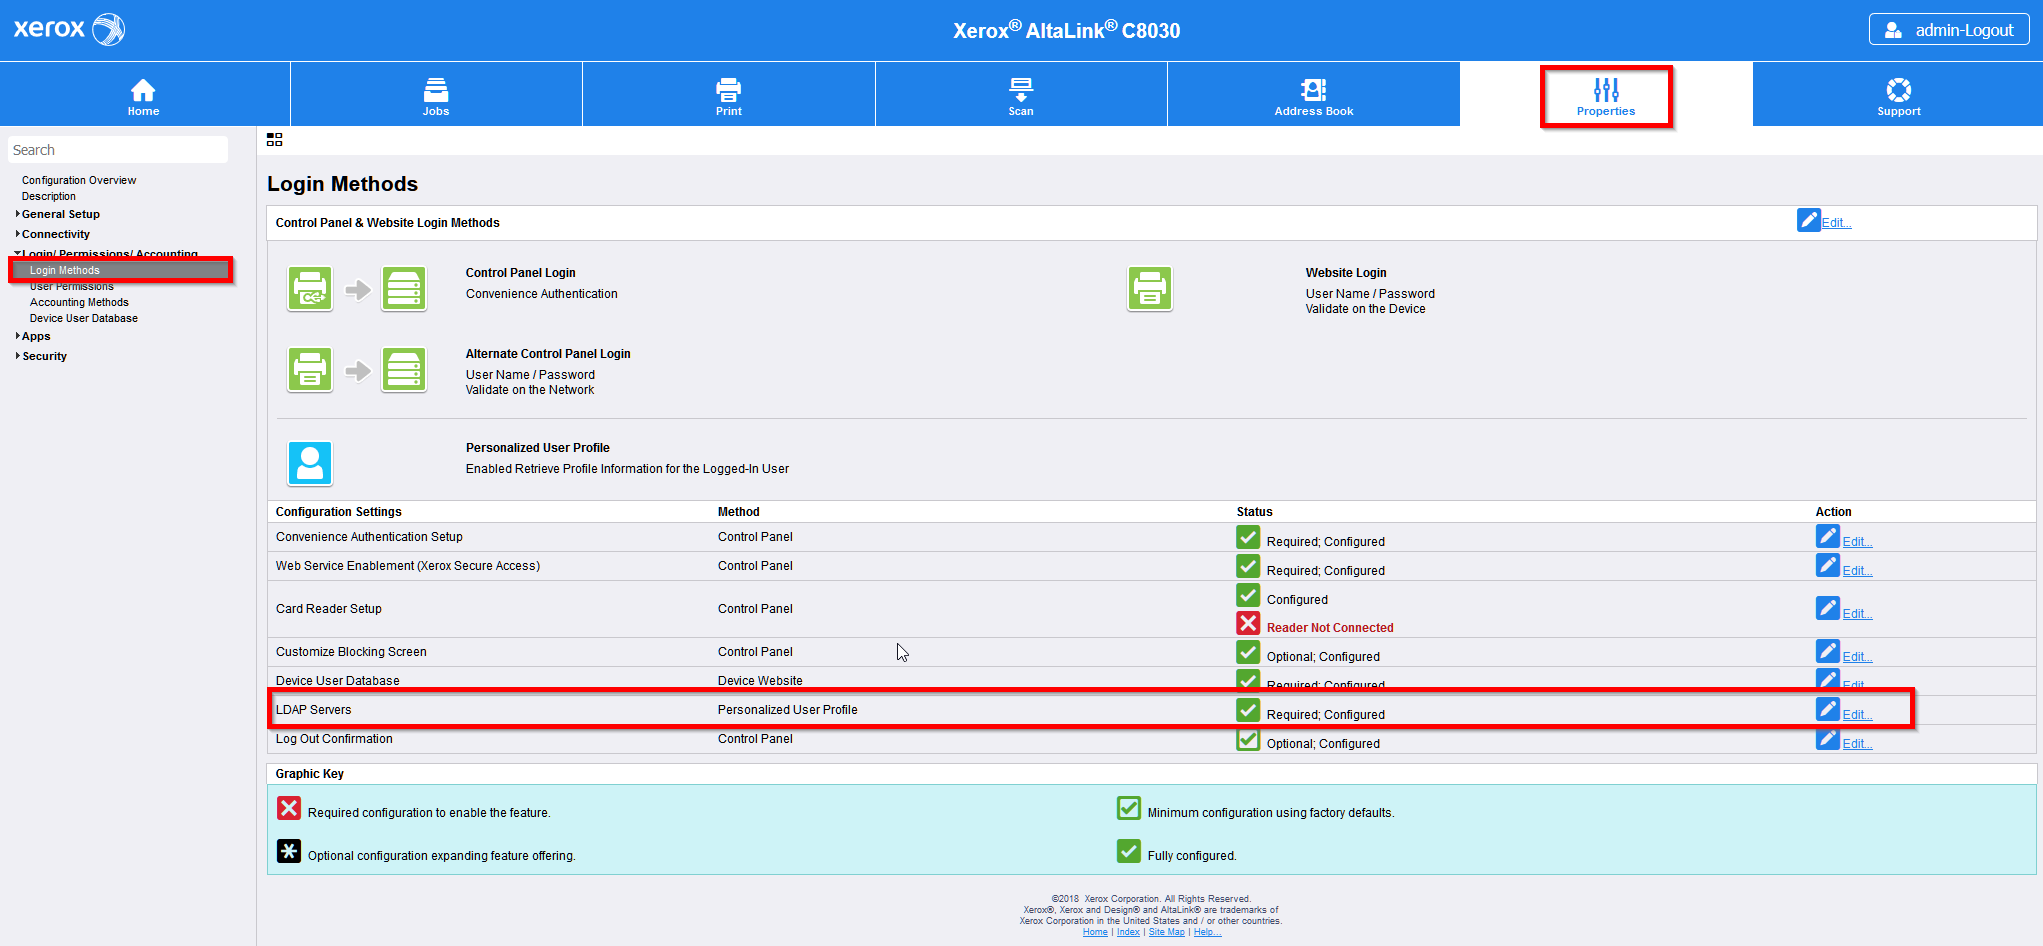
Press Edit... on selected LDAP server.
Only LDAP server with ![]() is used for authentication or access restrictions control.
is used for authentication or access restrictions control.

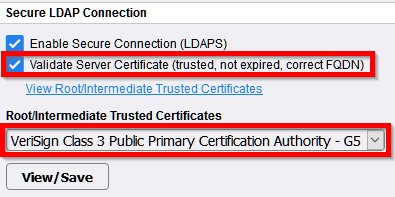
Scroll to section Secure LDAP Connection.
Enable Validate Server Certificate (trusted, not expired, correct FQDN).
Select issuer of the server certificate from dropdown menu Root/Intermediate Trusted Certificates.
LDAP server certificate is the same which is configured in Terminal Server for secured connection with devices. Follow these instructions Configuring secured connection between terminals and Terminal Server.
Press Apply.
Some devices need reboot. If notification appears on the screen then press OK.