Xerox WorkCentre 56xx configuration differences

This document has been created based on Xerox WorkCentre 5655 (FW 025.054.060.00035)

Setting Date and time (on the 56xx series this is set form the local UI).

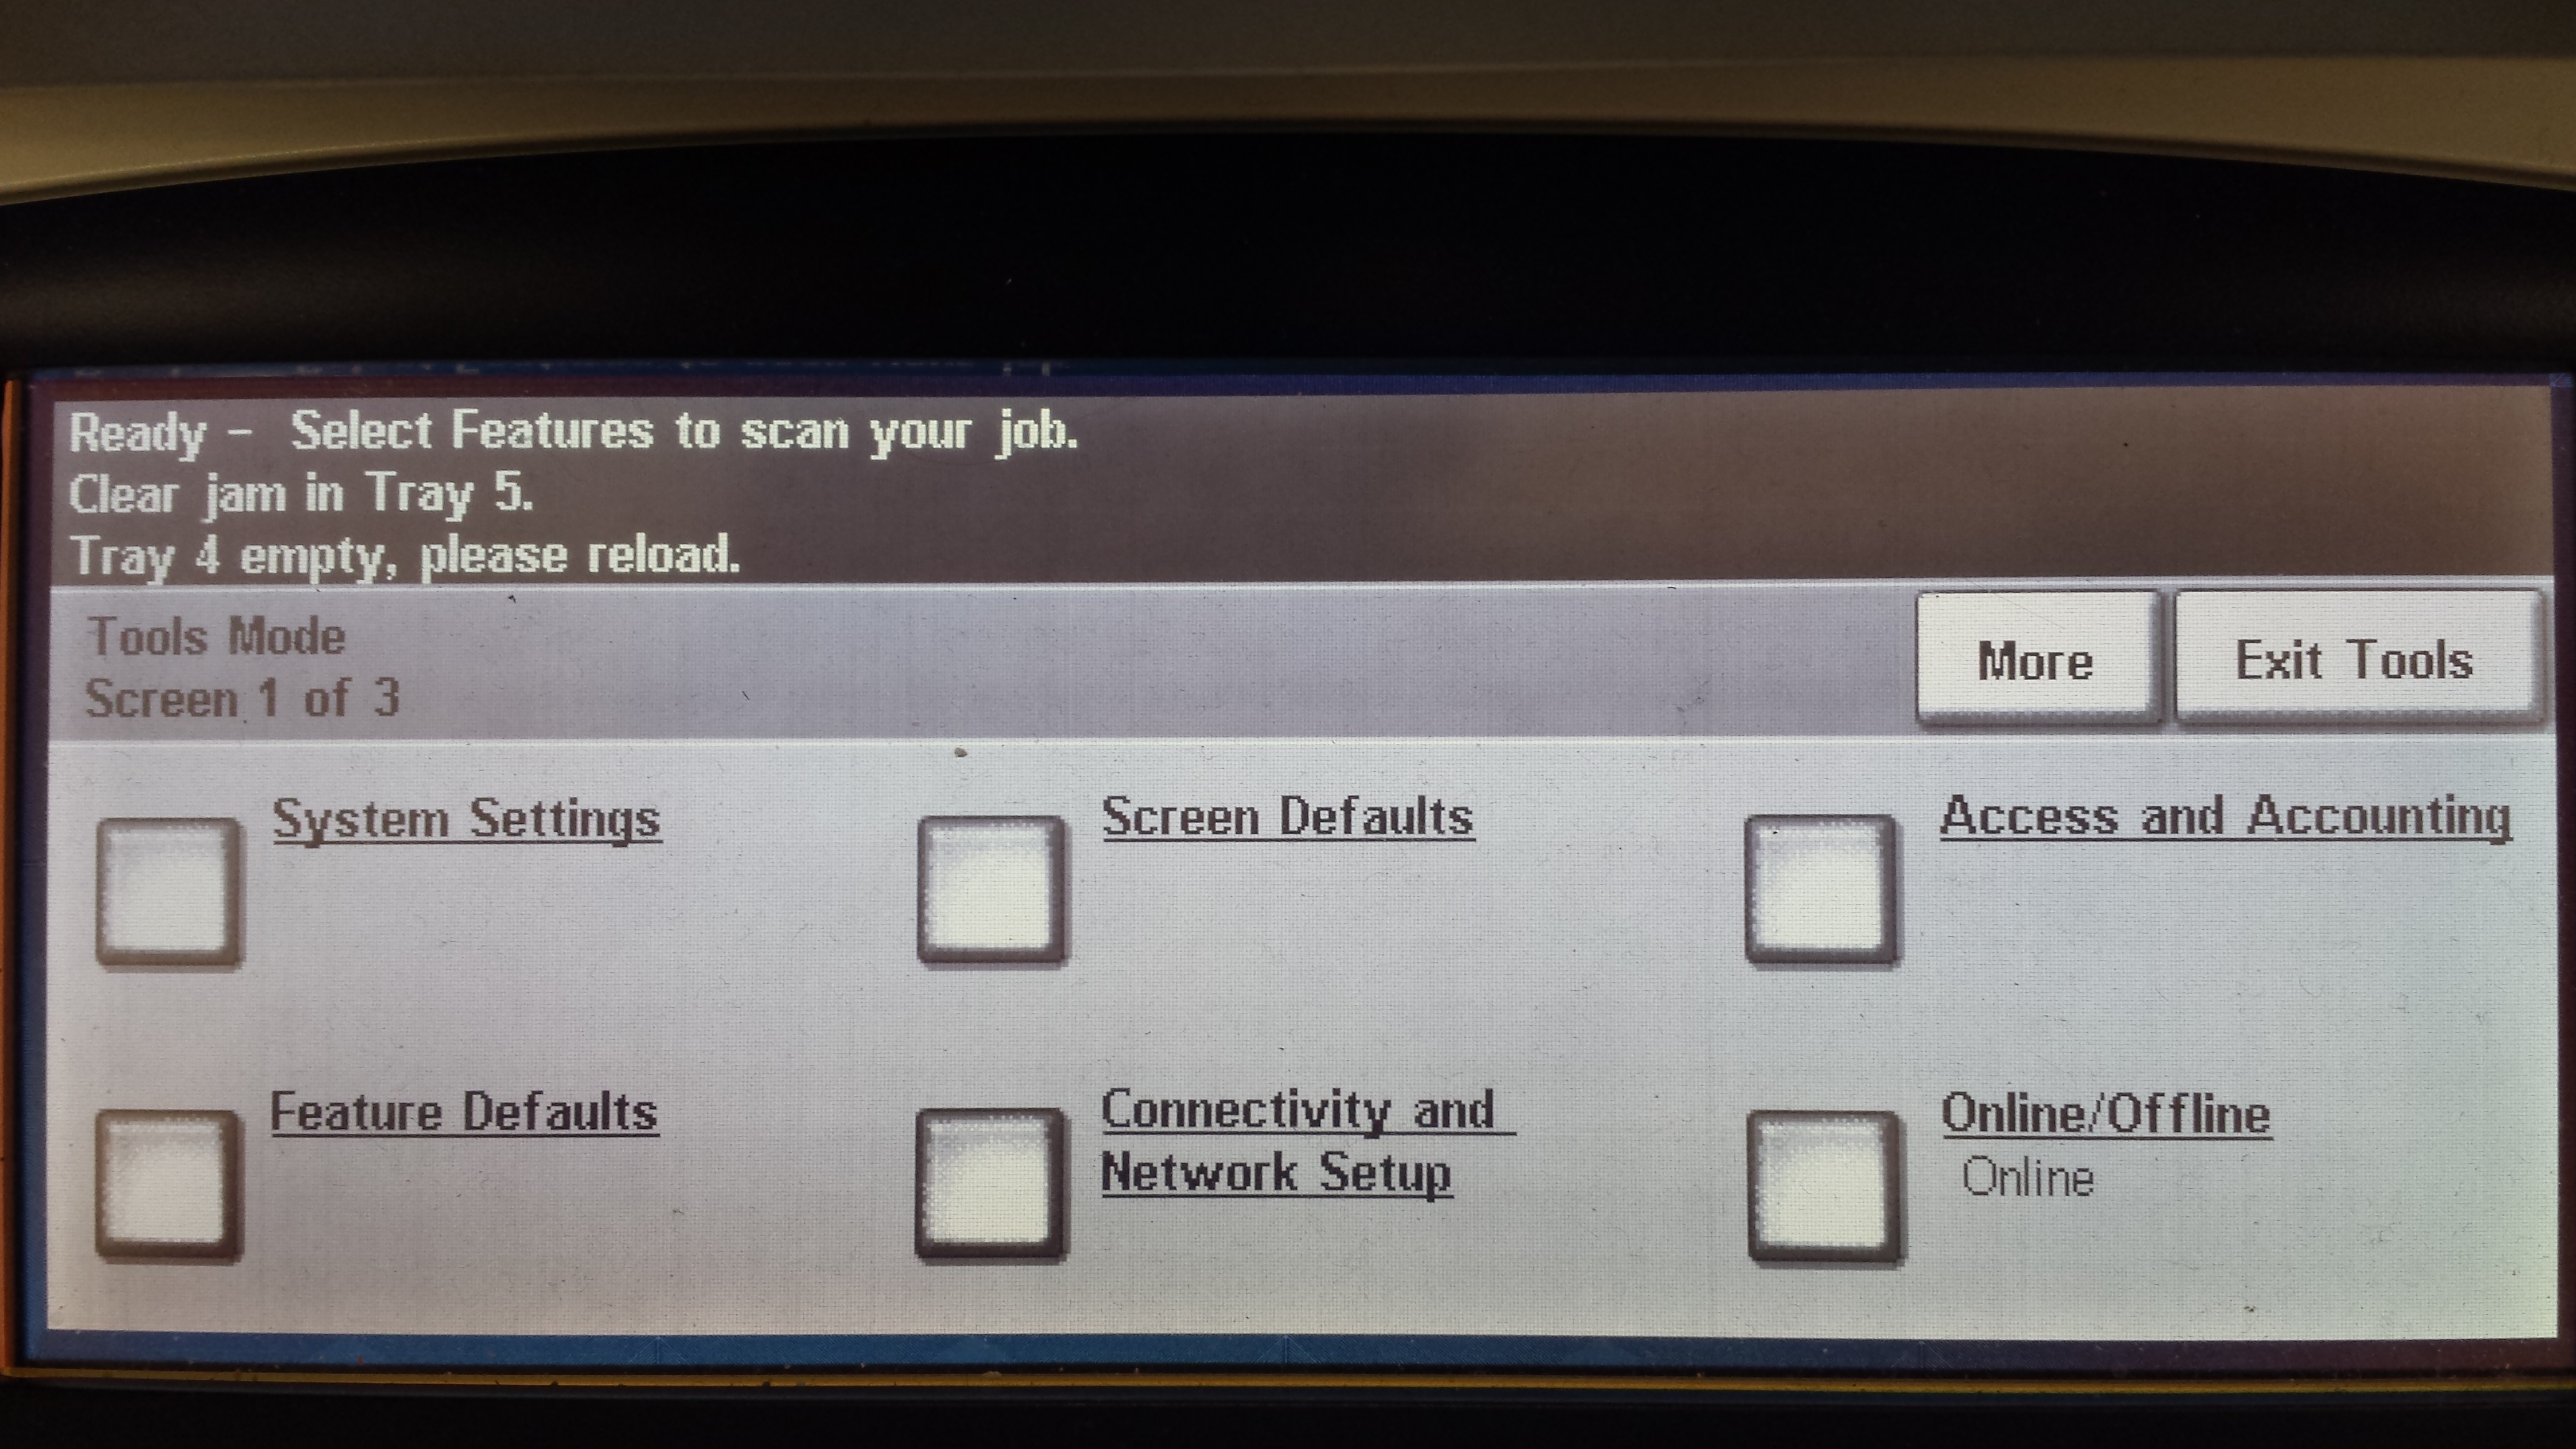
  1. Log on the device as admin and access the tools menu. Select System Settings.

    images/download/attachments/284929443/20150604_050512-version-1-modificationdate-1511705867667-api-v2.jpg
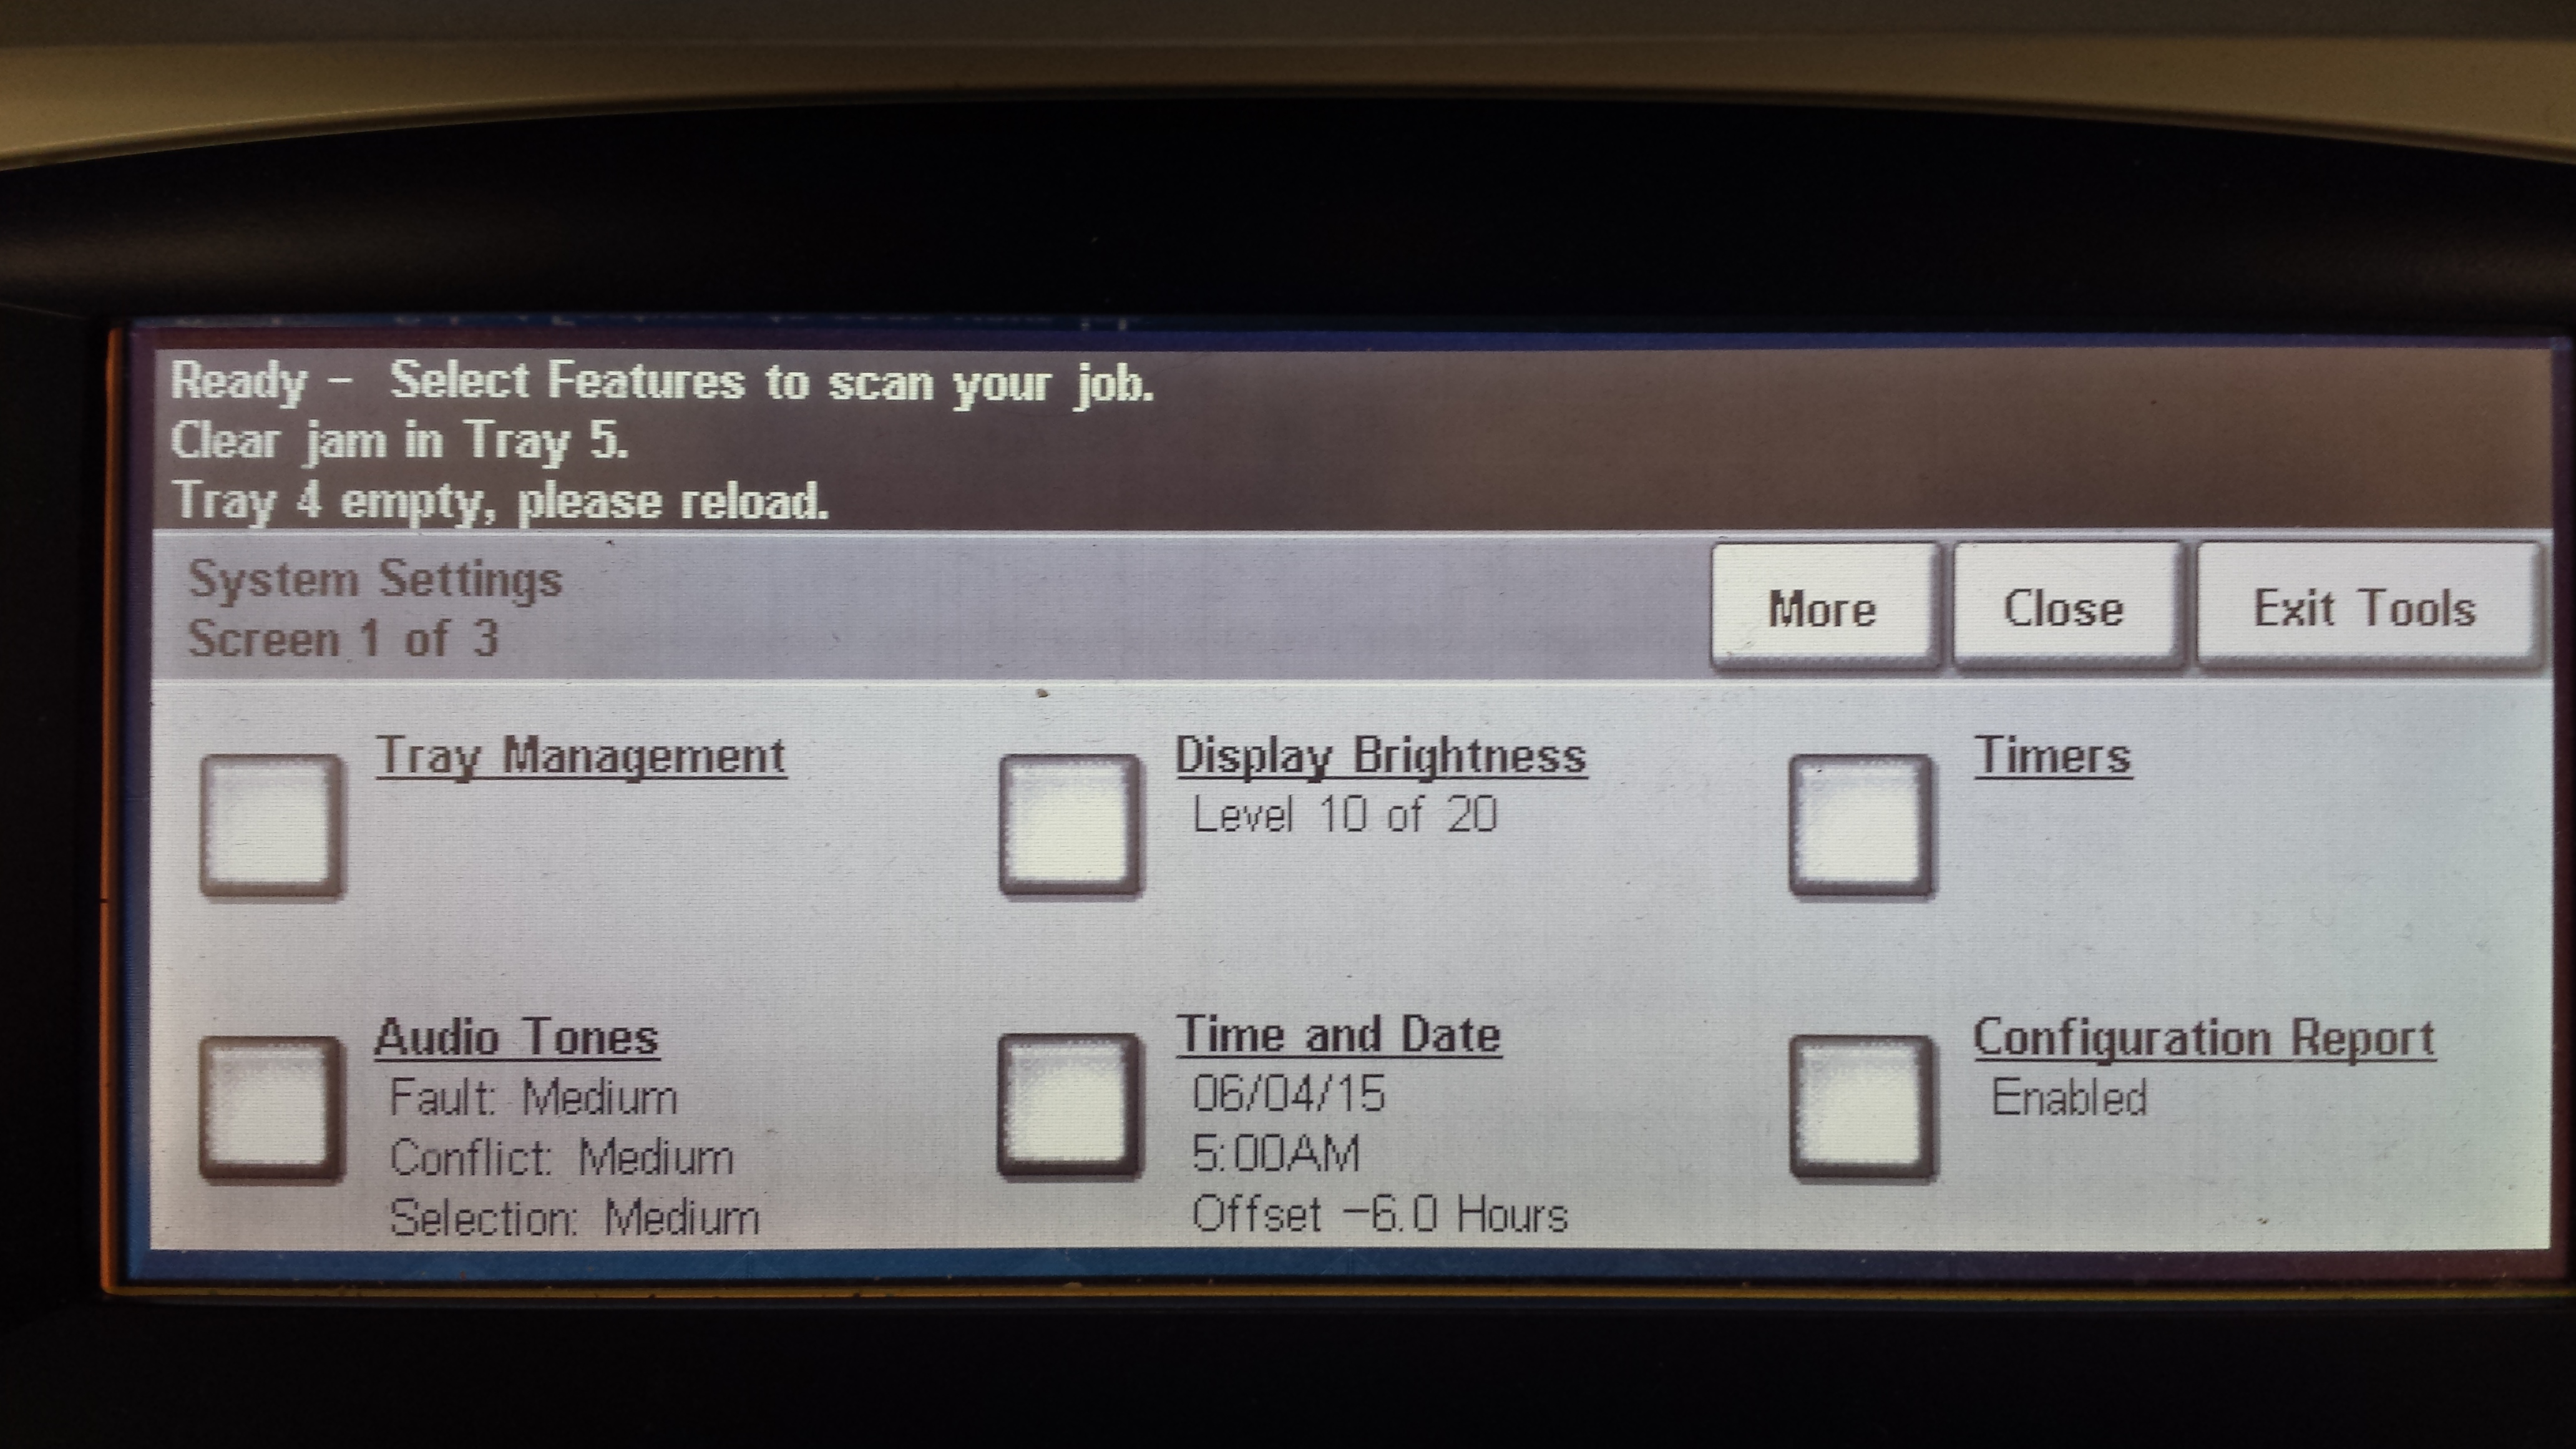
  2. Select Time and Date.

    images/download/attachments/284929443/20150604_050521-version-1-modificationdate-1511705867600-api-v2.jpg

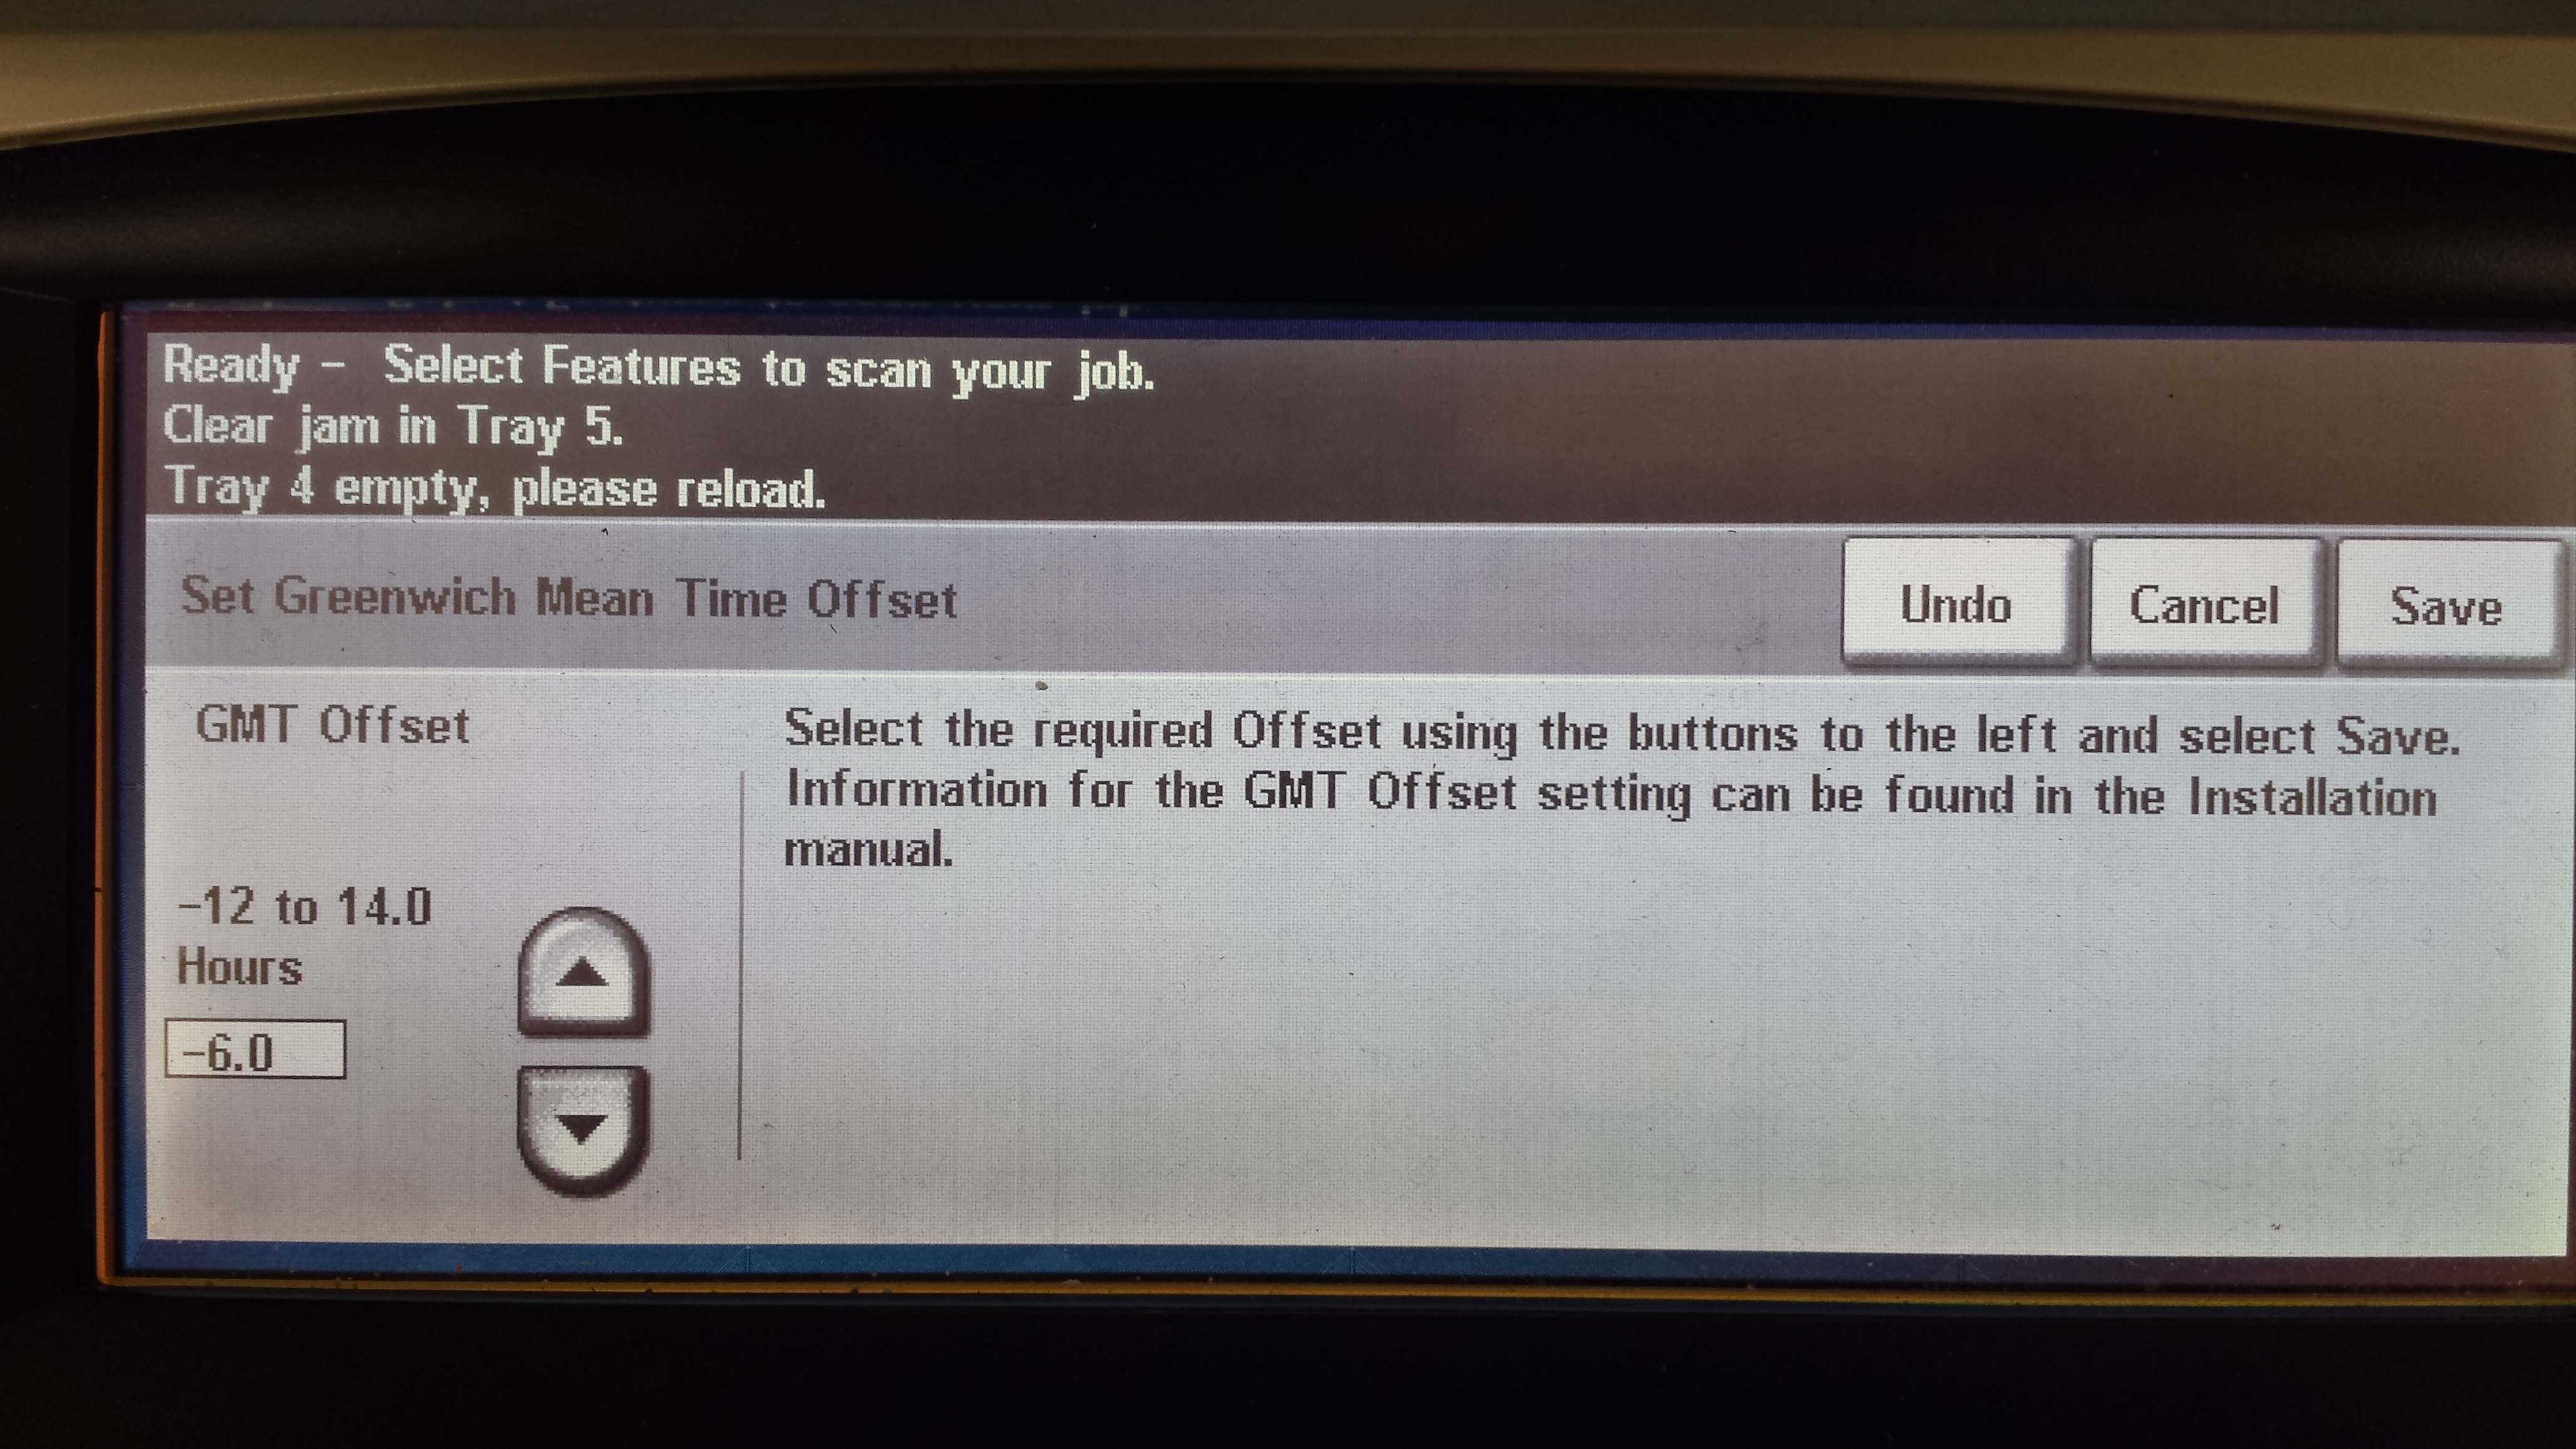
  3. Select Greenwich Mean Time Offset and set the time zone.

    images/download/attachments/284929443/20150604_050531-version-1-modificationdate-1511705867533-api-v2.jpg images/download/attachments/284929443/20150604_050608-version-1-modificationdate-1511705867447-api-v2.jpg

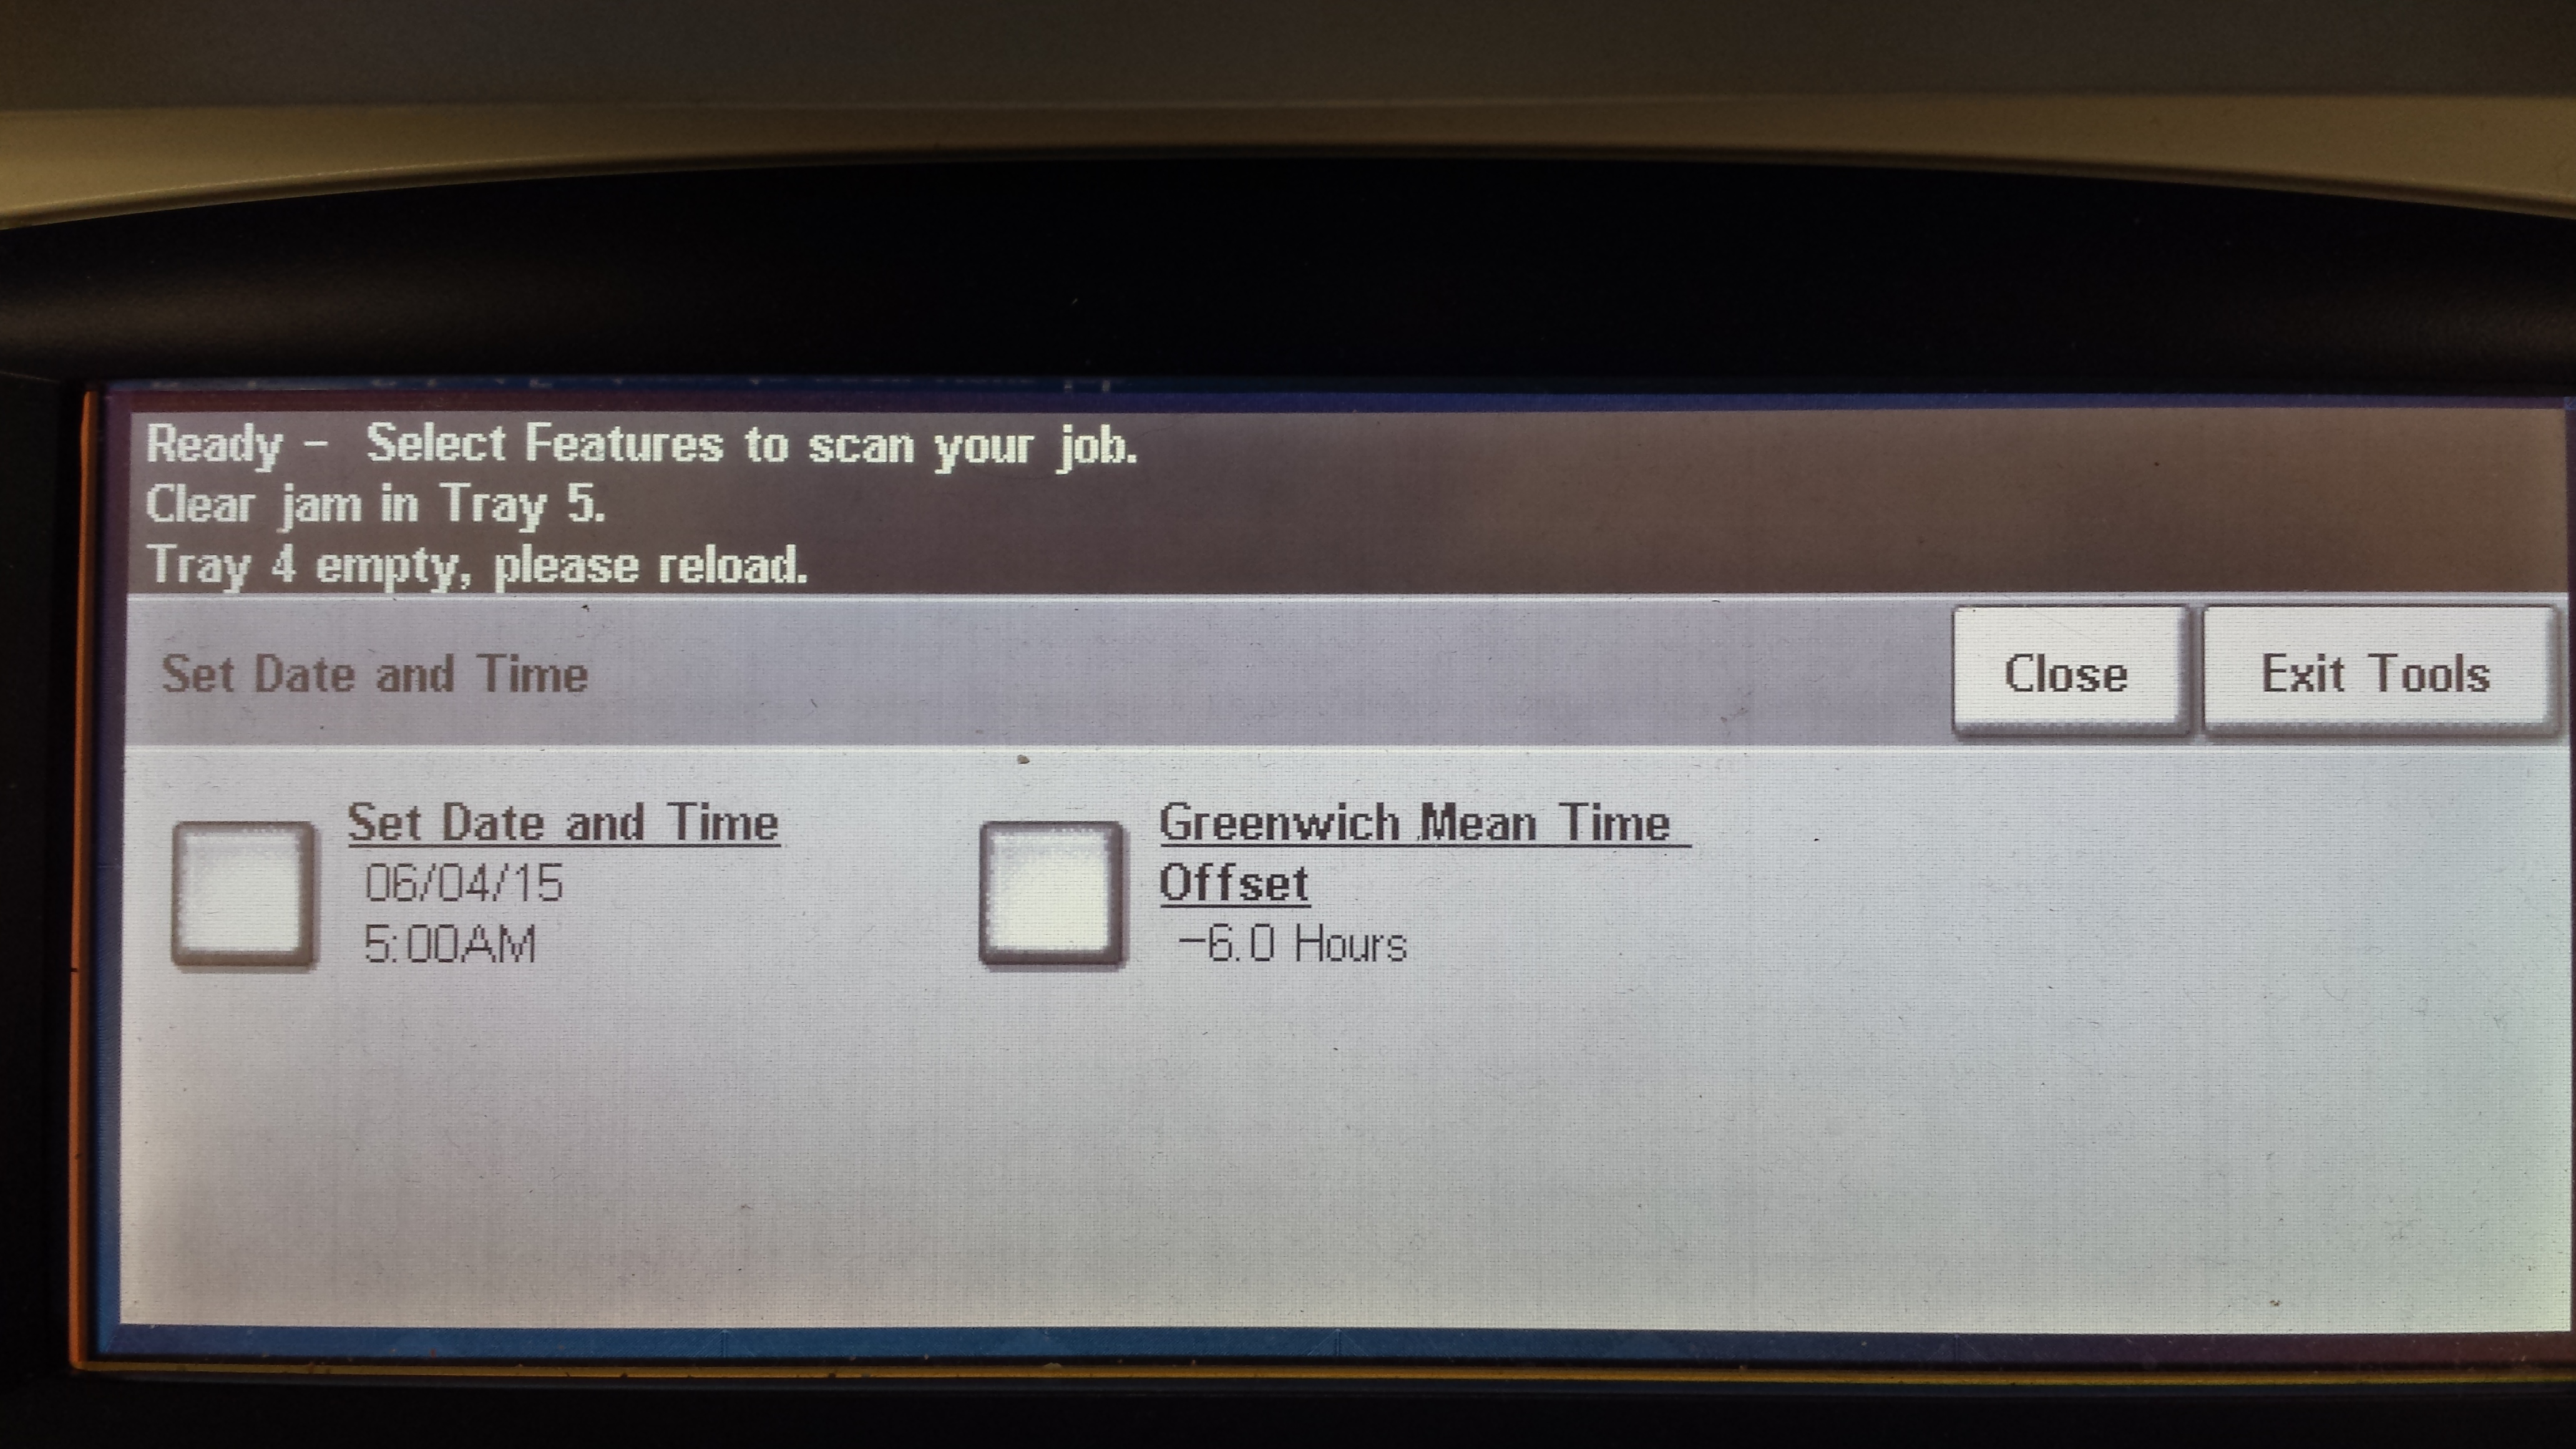
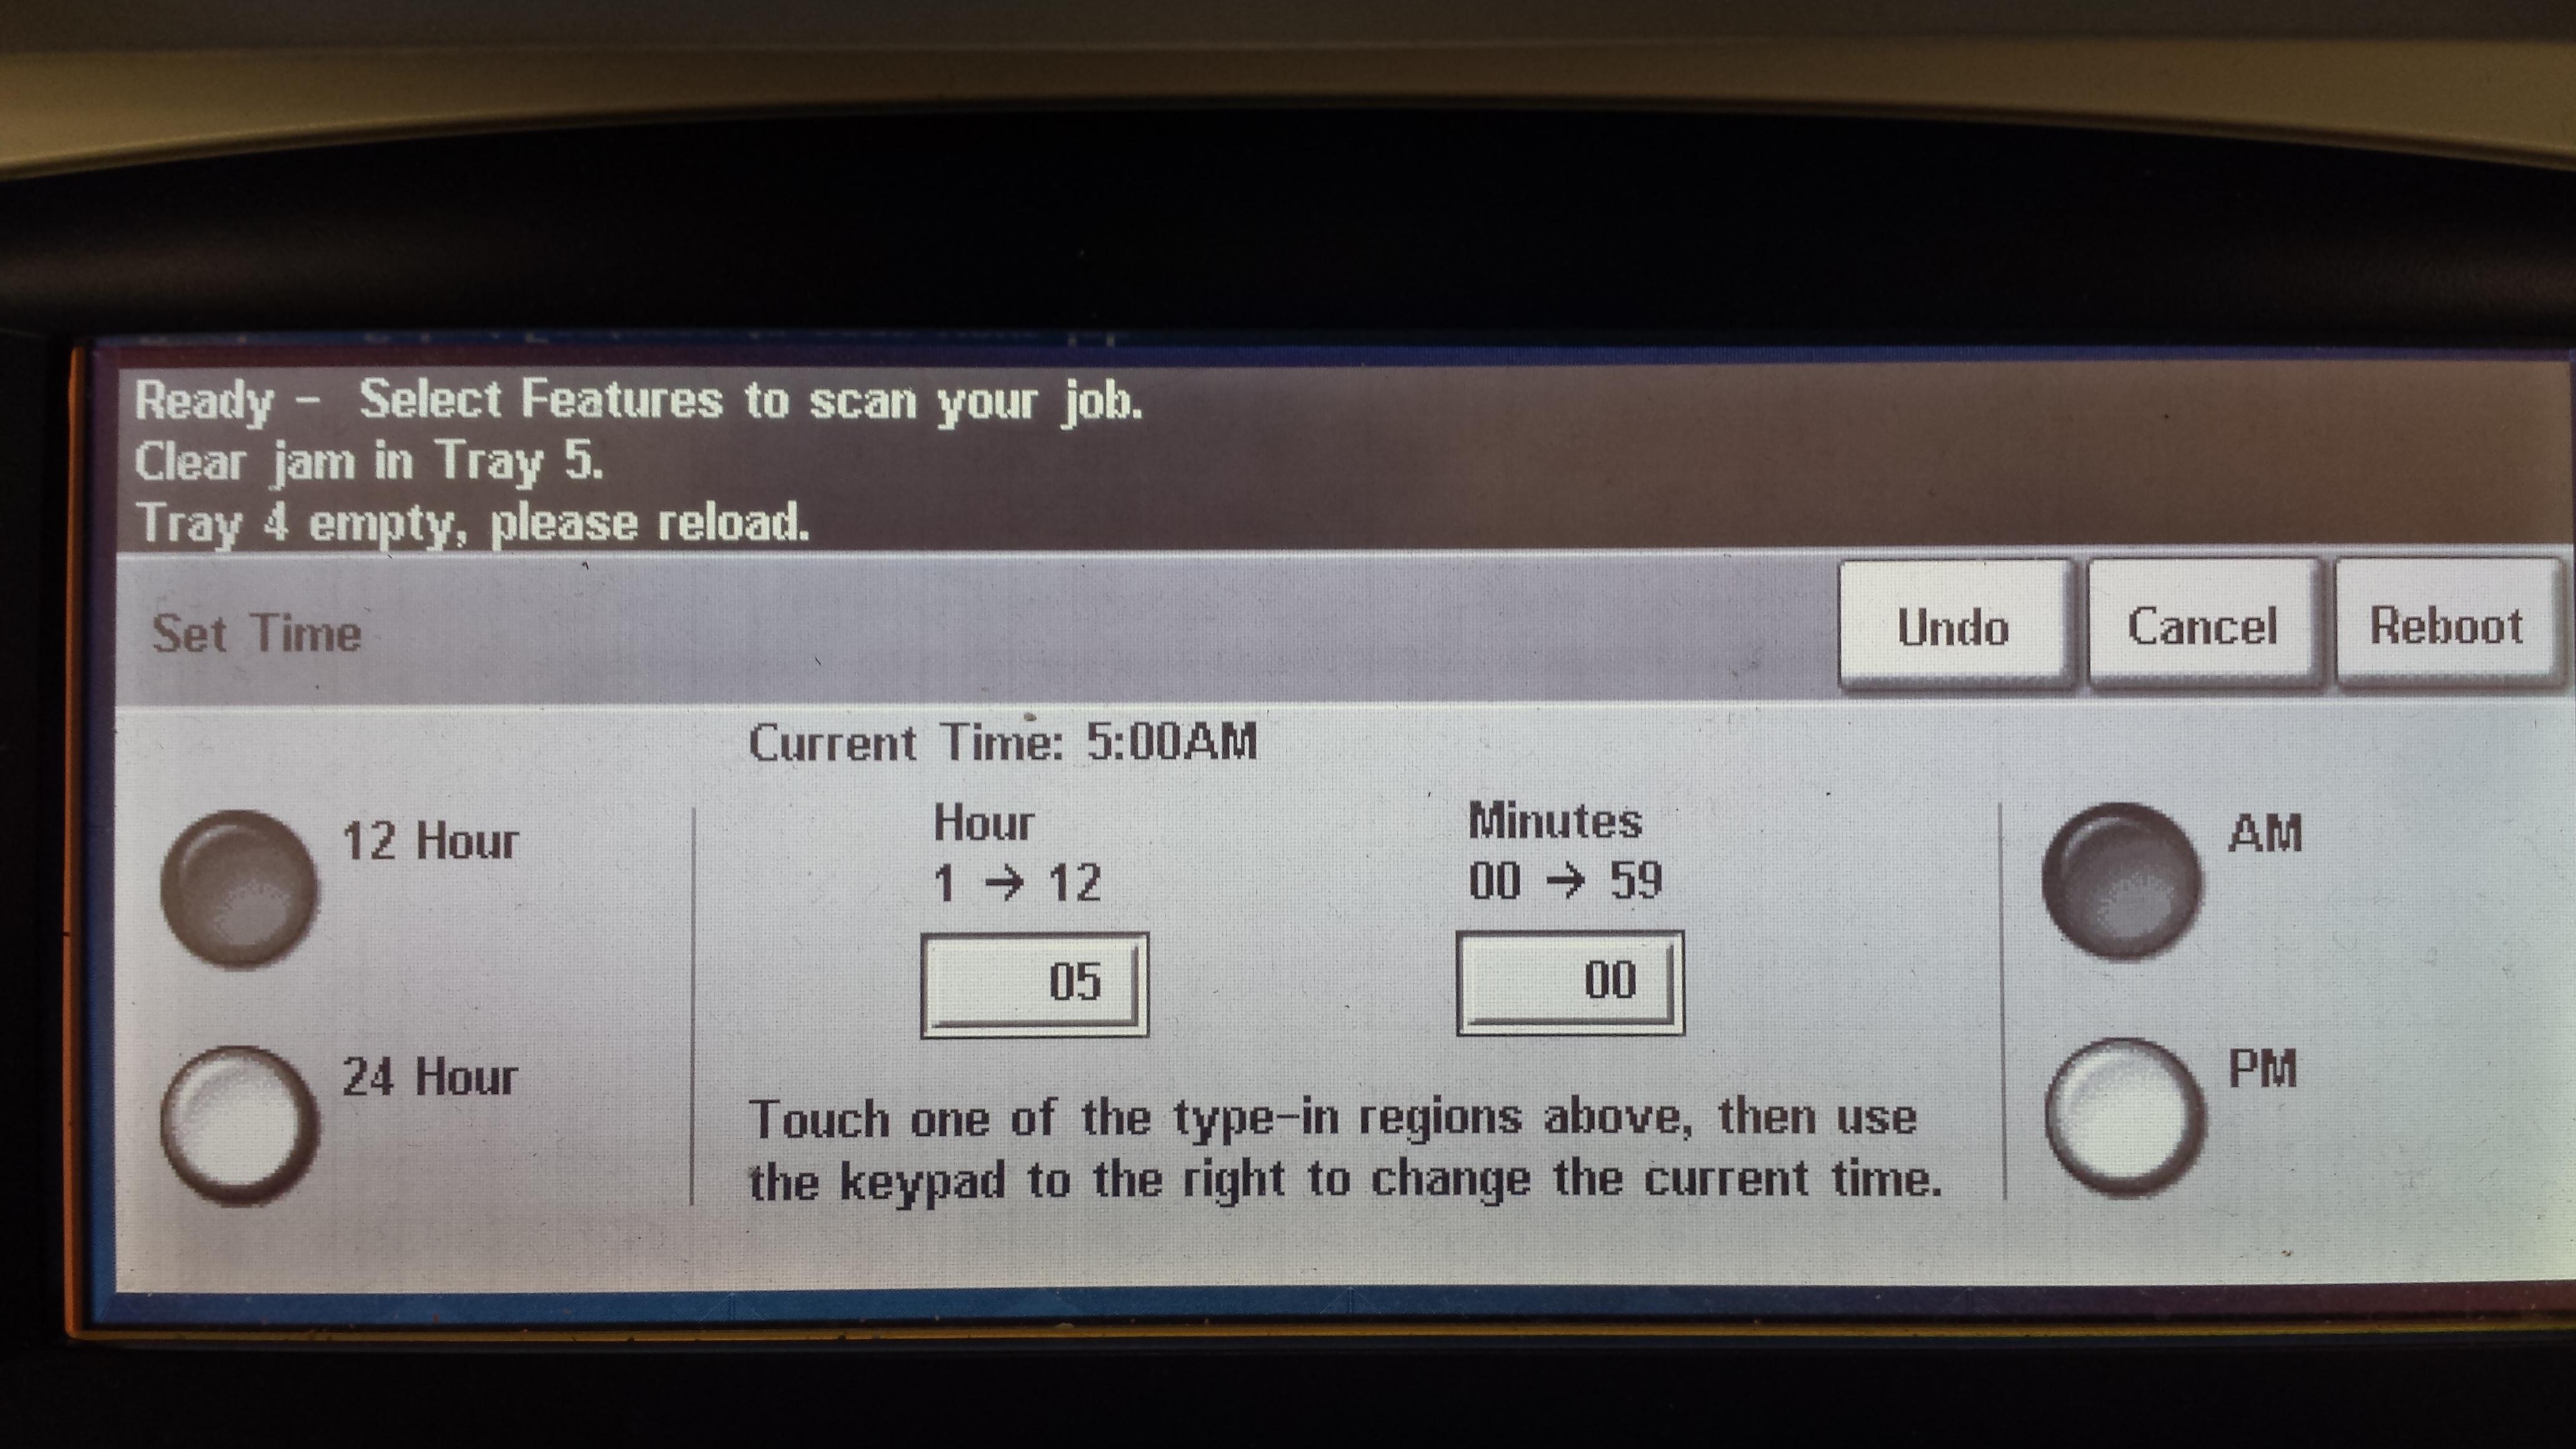
  4. Select Date and Time and set the values.

  5. Make sure that you set both date and time before selecting reboot.

    images/download/attachments/284929443/20150604_050540-version-1-modificationdate-1511705867367-api-v2.jpg images/download/attachments/284929443/20150604_050547-version-1-modificationdate-1511705867283-api-v2.jpg

  6. Once all values are set, select the Reboot button

Enabling Network accounting

  1. Disable Xerox Standard Accounting: Properties > Accounting > Xerox Standard Accounting > Enablement.

    images/download/attachments/284929443/worddavdb8082600f82804755c1dda275ced44c-version-1-modificationdate-1511705868647-api-v2.png

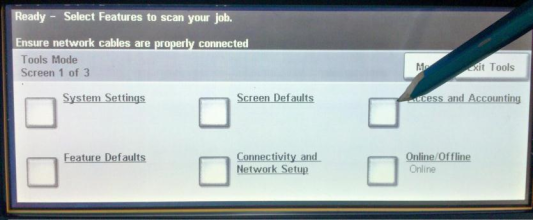
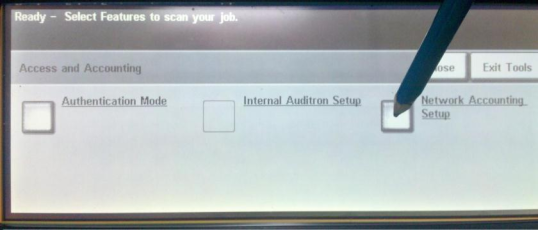
  2. Go to Service menu on the embedded terminal Access and Accounting.

    images/download/attachments/284929443/worddav4a00853f550888841249fe6ad112717c-version-1-modificationdate-1511705868683-api-v2.png

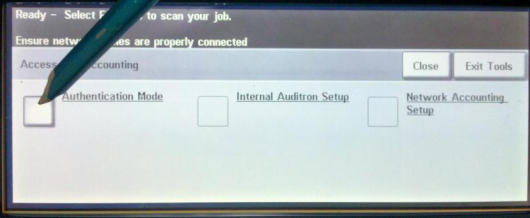
  3. Go to the Authentication Mode.

    images/download/attachments/284929443/worddav103f91a2ec274b60202d5f34c6ce404a-version-1-modificationdate-1511705868717-api-v2.png

  4. Set Network Accounting on.

    images/download/attachments/284929443/worddavbfe25a084b2c9536a3acf288f9f1fad0-version-1-modificationdate-1511705868757-api-v2.png

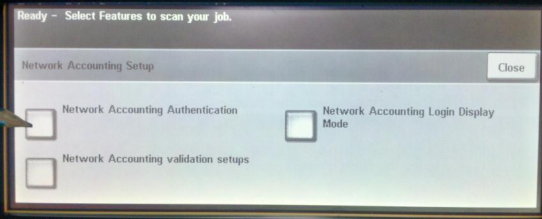
  5. Go to the Network Accounting Setup.

    images/download/attachments/284929443/worddav4a178a57479341289e542fa6b6af1c43-version-1-modificationdate-1511705868793-api-v2.png

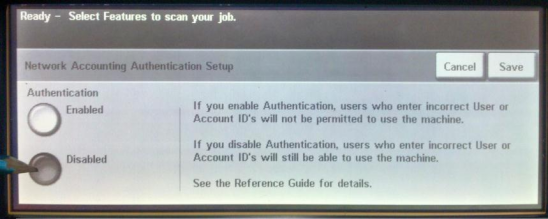
  6. Go back and use Network Accounting Authentication.

    images/download/attachments/284929443/worddav16d165608cbde7f27c3985db237f5731-version-1-modificationdate-1511705868833-api-v2.png

  7. Disable Network Accounting Authentication Setup.

    images/download/attachments/284929443/worddav7bd23202d85746655470a202880209ad-version-1-modificationdate-1511705868880-api-v2.png

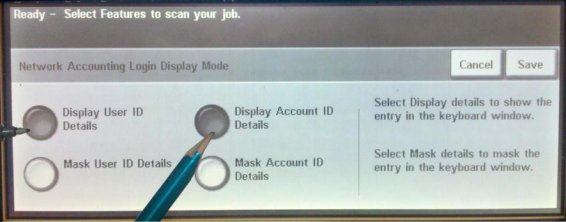
  8. Go back and use Network Accounting Login Display Mode.

    images/download/attachments/284929443/worddav6e3a9fba8d1582af6d4a18cf1f26ef81-version-1-modificationdate-1511705868920-api-v2.png

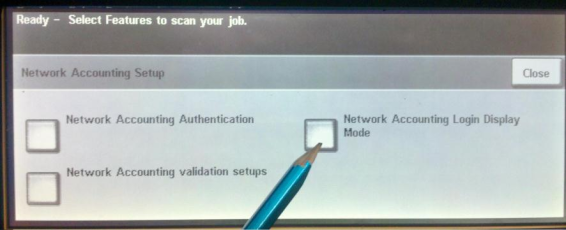
  9. Set Network Accounting Login Display Mode to Display User ID Details and Display Account ID Details.

    images/download/attachments/284929443/worddav7f2d6e053050f59002428857da183bbc-version-1-modificationdate-1511705868957-api-v2.png