After configuring the Cloud fax connector (see Edit Connector - Configuration), perform the following steps to configure a Cloud fax workflow.
- On the Workflows tab, click ADD WORKFLOW.
In the General section, enter the workflow name (maximum of 64 characters) and description (maximum of 300 characters).
In the Destination section, select the destination connector you created for Cloud fax.
- In the Output format, select PDF. PDF is the only supported format for Cloud Fax.
- In Sides, select either Simplex or Duplex, and check the Can be modified by the user on the terminal checkbox.
- In Konica Minolta Advanced scan settings, make sure that the File type is set to PDF as well.
- Configure the User input fields. The users can enter fax numbers either by a phonebook entry or manual entry. If you wish both methods to be available to the users, you must create a separate workflow for each method.
- Configuring Manual entry:
- Click + Add user input.
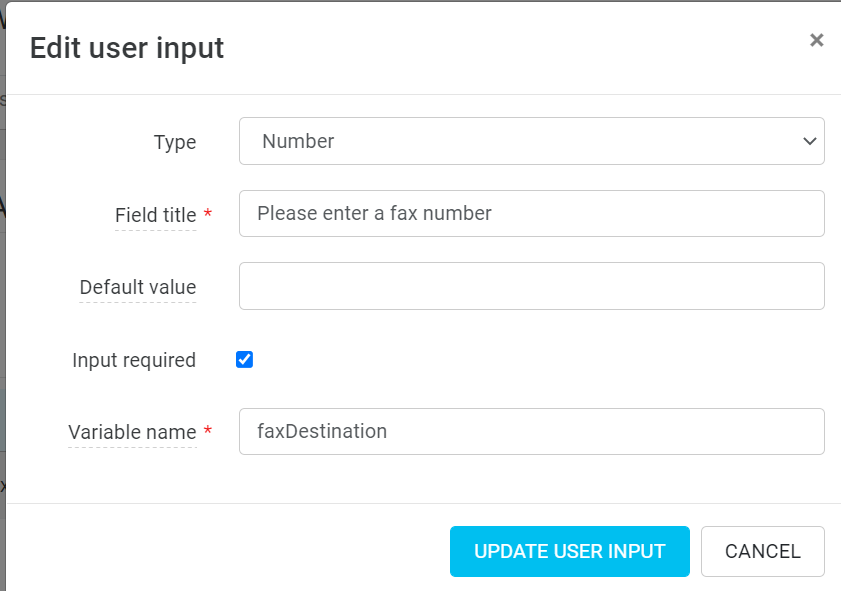
- In Type, select Number.
- Fill in the Field title. The title should make it clear to the users that they must fill in a fax number.
- Select the Input required checkbox.
- In Variable name, fill in faxDestination.
- Configuring Phonebook entry:
- Click + Add user input.
- In Type, select List.
- Fill in the Field title, for example, Fax Phonebook.
- Select the Input required checkbox.
- In Variable name, fill in faxDestination.
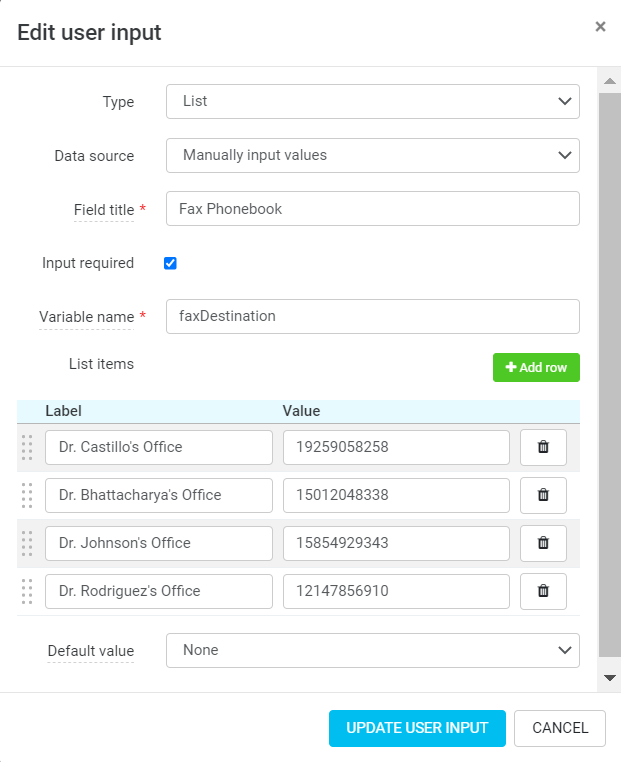
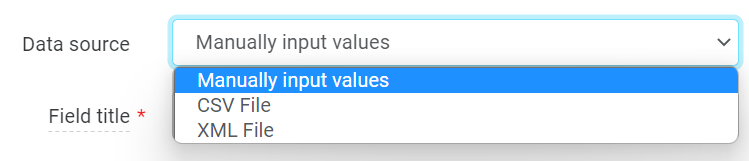
- Select the Data source method. You can input the values manually or upload a CSV or XML file.
- Configuring Manual entry:
- Click + Assign access to roles to define who will have access to the workflow. If you don't specify any role, the workflow will not be available to any users.
- Click SAVE CHANGES.