Devices based on Epson Open Platform Version 1.0+ are supported. No special settings of Epson devices are required for being used with the Dispatcher Paragon Embedded Terminal.
Limitations can be found on page Requirements and Known Limitations of Dispatcher Paragon Embedded Terminal for Epson.
Configuration of MFD
Enabling Epson Open Platform
It is required to enable Epson Open Platform of the printer before executing the Application. To enable that function, access Webconfig of the printer using the PC browser and enter the product key on it as described in the following sections.
- Access the following URL of the printer using the PC browser in the same network segment.
http://[IP address of the printer]/
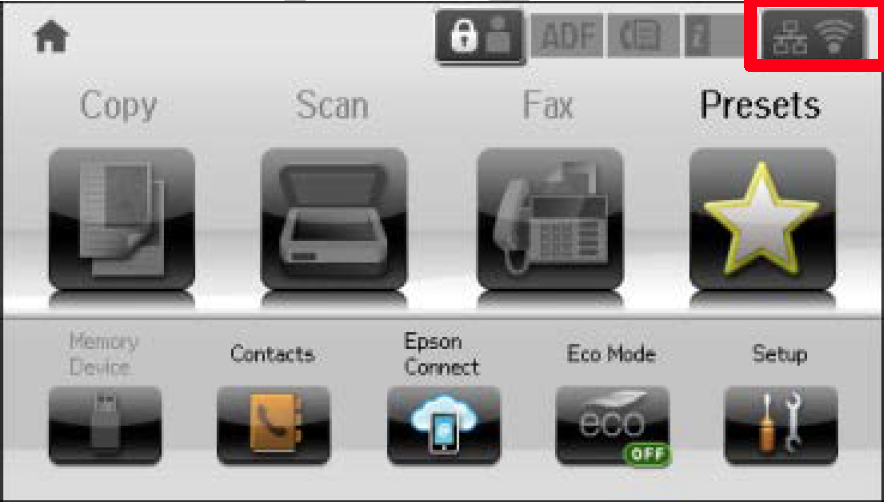
Note: How to confirm the IP address of your printer
The current IP address of the printer can be retrieved by pressing the upper right corner of the button on the Printer’s home menu as described below.
2. You will see the following Webconfig page when you access the printer. Please click [Epson Open Platform Settings] -> [Product Key].
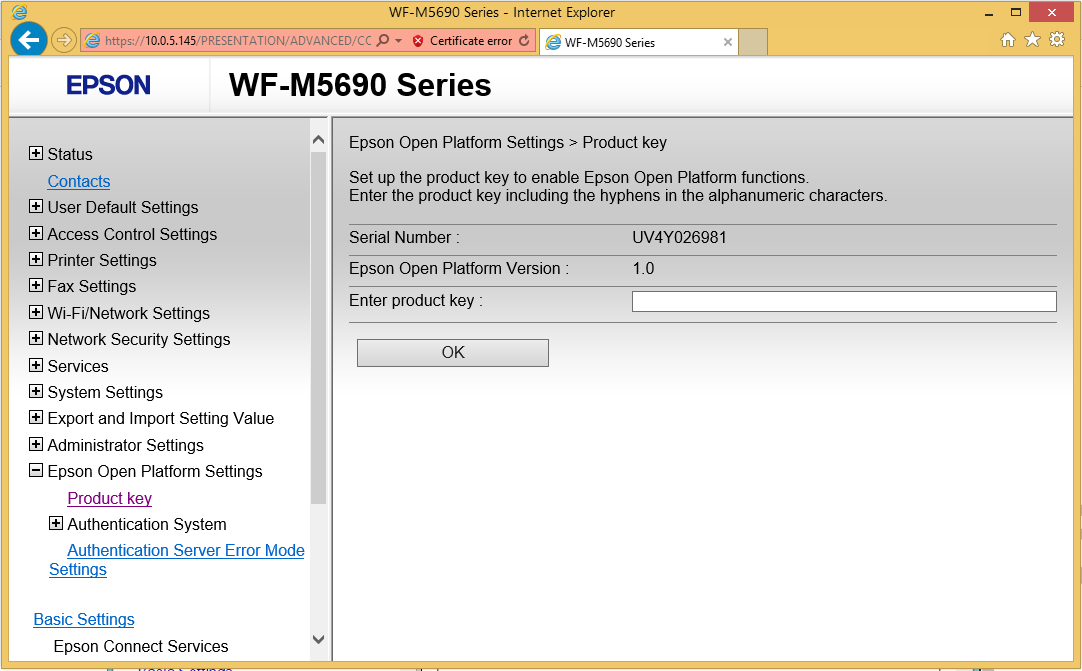
3. Enter the product key and click [OK].
Certificate validation configuration
In order to proper functioning of Dispatcher Paragon application with default Terminal Server certificate you have to disable Certificate Validation on Browser.
- Access the http://[IP address of the printer]/
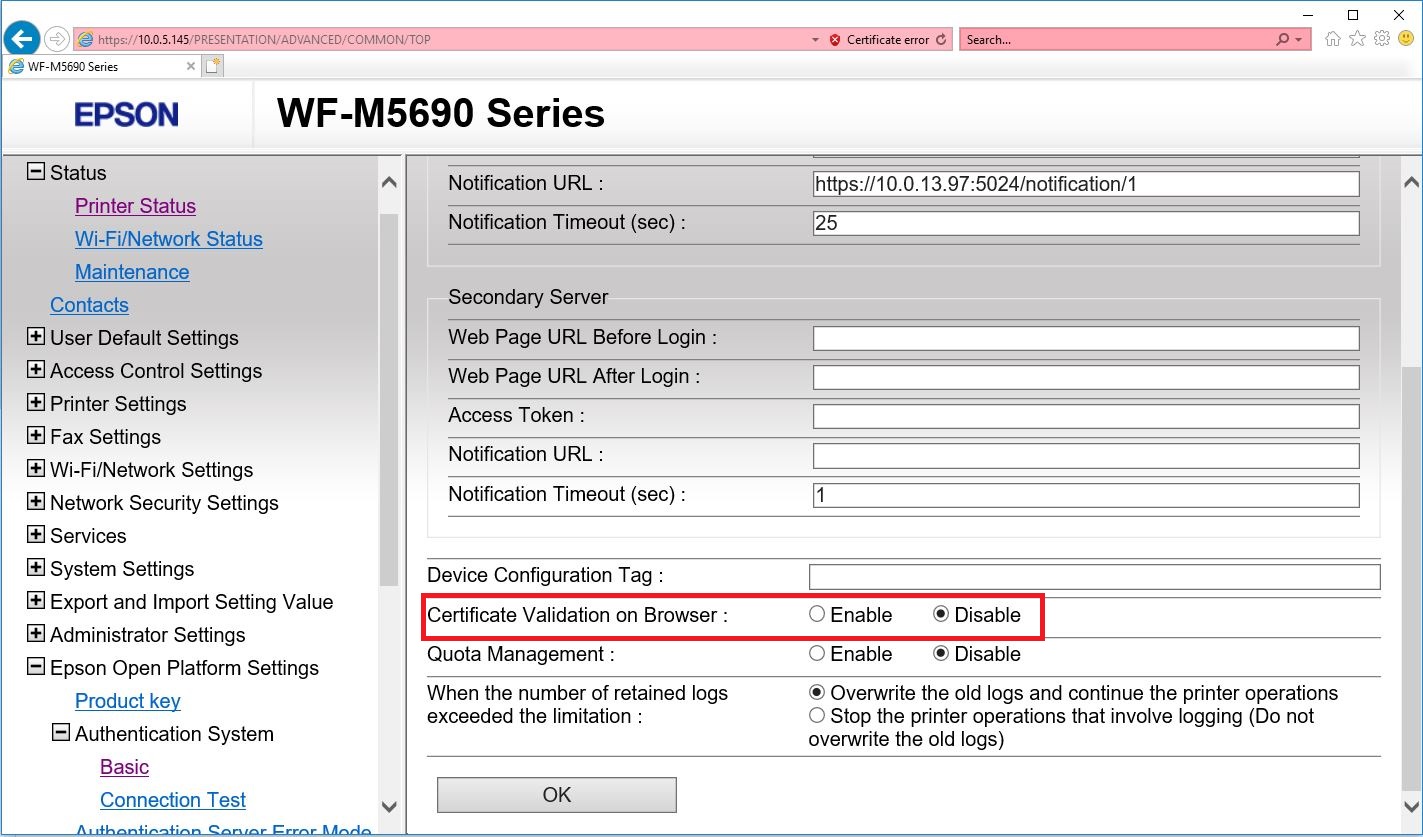
- Go to [Epson Open Platform Settings] → [Authentication System] → [Basic]
- Change Certificate Validation on Browser to Disable
Initial screen setup
- Log into Dispatcher Paragon management interface as an administrator.
- Go to System > Configuration.
- Make sure Expert view is enabled, and you are in the tenant configuration.
- Search initial-screen.
- Set either sqprint or sqscan, Other options are not supported for Epson devices.
- Save changes.
- Reinstall the Epson embedded terminal to apply changes.
Card reader configuration
- In YSoft Card Reader Tool, configure your Card reader, and set values as follows:
- USB mode set to "USB keyboard emulation"
Keyboard layout set to "1 - US"
- Connect the USB reader to Service USB port of the device.
- On A4 devices the Service USB port is usually located on backside of the device covered by thick sticker.
- On A3 devices the Service USB port is usually located inside Card reader slot near the display.
- (optional) Set the VID/PID of the USB reader via web interface of the device.
- Log in as administrator, and navigate to Card Reader settings.
- Set Vendor ID to 0000 and Product ID to 0000 to disable whitelisting of USB readers. This is default configuration.
- Set Vendor ID to 214C and Product ID to 0202 to accept only YSoft USB readers.