Xerox WorkCentre 76xx configuration differences

This document has been created based on Xerox WorkCentre 7665 (FW 040.033.53375)

Setting Date and time (on the 76xx series this is set form the local UI).

  1. Log on the device as admin and access the tools menu. Select Device Settings > General.

    images/download/attachments/284929468/image2015-7-23_5_29_21-version-1-modificationdate-1592305446483-api-v2.png

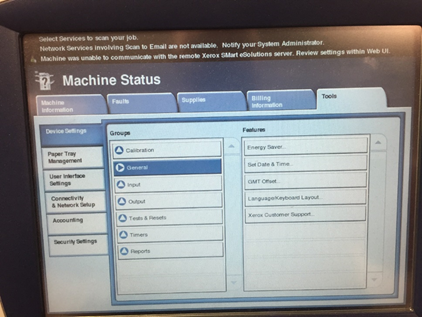
  2. Select Date and Time.

    images/download/attachments/284929468/image2015-7-23_5_38_53-version-1-modificationdate-1592305446610-api-v2.png

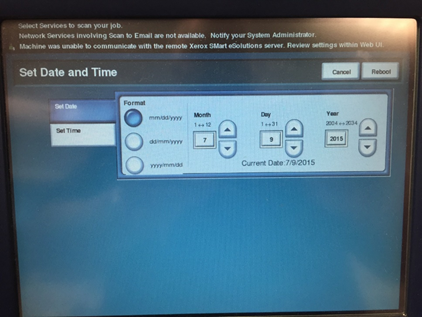
  3. Enter the Date and select Set Time.

    images/download/attachments/284929468/image2015-7-23_5_40_52-version-1-modificationdate-1592305446640-api-v2.png

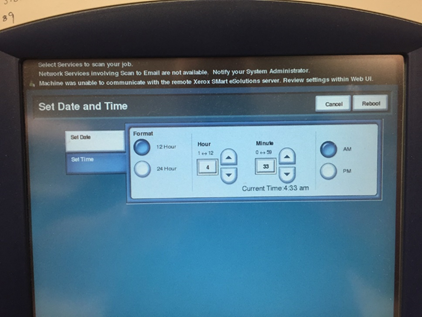
  4. Make sure that you set both date and time before selecting reboot.

  5. Once the device is back online, log back on the device as admin and access the tools menu. Select Device Settings > General.

    images/download/attachments/284929468/image2015-7-23_5_42_22-version-1-modificationdate-1592305446807-api-v2.png

Enabling Network accounting

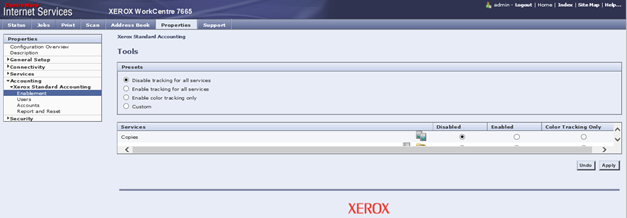
  1. Disable Xerox Standard Accounting: Got to Properties > Accounting > Xerox Standard Accounting > Enablement.

    images/download/attachments/284929468/image2015-7-23_5_44_43-version-1-modificationdate-1592305446830-api-v2.png

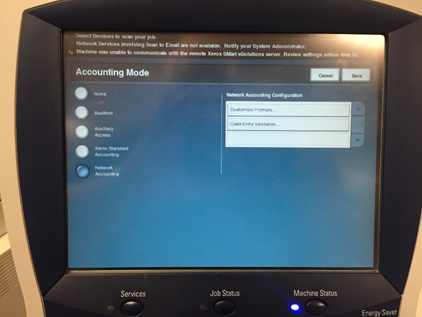
  2. Go to Service menu on the Device UI, login and access Accounting.

    images/download/attachments/284929468/image2015-7-23_6_16_52-version-1-modificationdate-1592305446857-api-v2.png

  3. Go to the Accounting Mode.

  4. Set Network Accounting on.

    images/download/attachments/284929468/image2015-7-23_6_18_8-version-1-modificationdate-1592305446883-api-v2.png

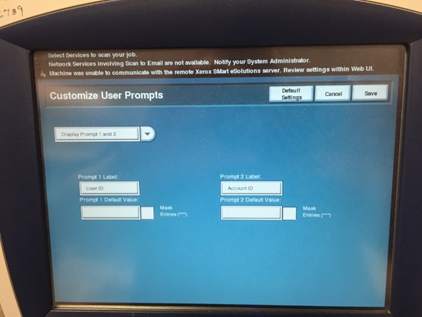
  5. Go to the Customize Prompts.

  6. Select Display Prompt 1 and 2.

  7. Enter any string for the defaults.

    images/download/attachments/284929468/image2015-7-23_6_19_12-version-1-modificationdate-1592305446907-api-v2.png

  8. Save, go back and use Code Entry Validation and select Disable.
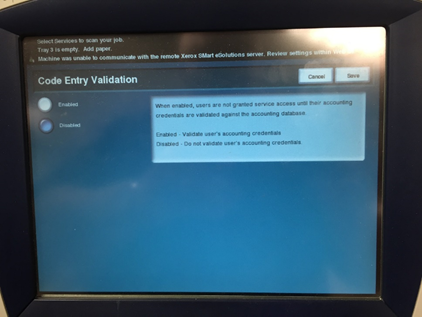
    images/download/attachments/284929468/image2015-7-23_6_20_31-version-1-modificationdate-1592305446937-api-v2.png

  9. Select Save.

Configuring device SSL Certificate

  1. Select Connectivity > Protocols > HTTP.

  2. Depending on the customers environment you can either create a self signed certificate or work with their IT to load their device certificate.

  3. Select the link Configure Machine Digital Certificate and follow choices.

    images/download/attachments/284929468/image2015-7-23_6_23_5-version-1-modificationdate-1592305446973-api-v2.png

  4. Enable both ports 80 and 443 as below. Select Save.

    images/download/attachments/284929468/image2015-7-23_6_24_38-version-1-modificationdate-1592305447000-api-v2.png

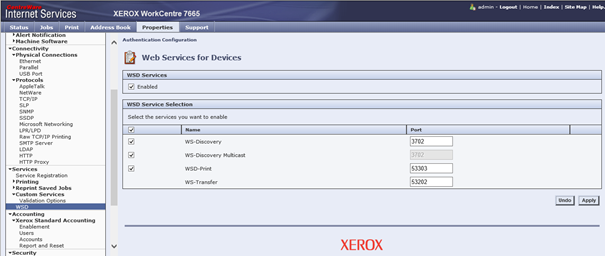
  5. Go to services WSD and enable as below.

    images/download/attachments/284929468/image2015-7-23_6_25_35-version-1-modificationdate-1592305447023-api-v2.png

  6. Go to Properties > Accounting > Xerox Standard Accounting > Enablement and disable Xerox Standard Accounting.
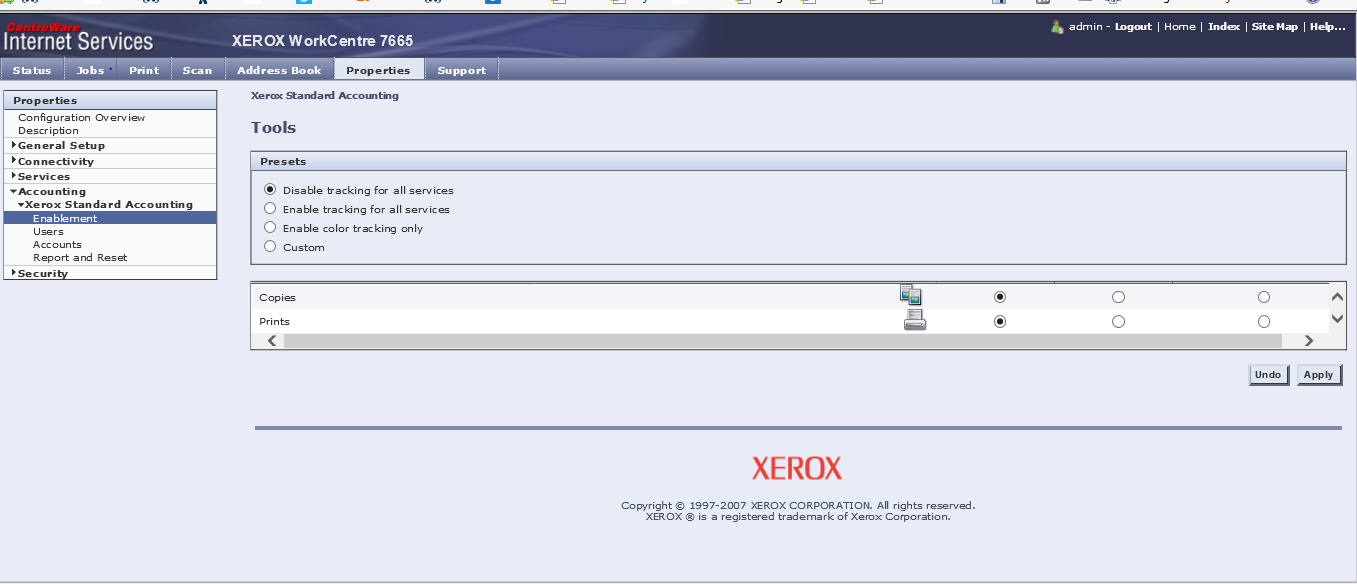
    images/download/attachments/284929468/image2015-7-23_6_43_34-version-1-modificationdate-1592305447050-api-v2.png

  7. Select Save.

Set Include username with validation request

Go to the Properties tab > Services > Custom Services > Validation Options. Enable the Include User Name with validation request option.

images/download/attachments/284929468/image2015-7-23_6_50_28-version-1-modificationdate-1592305447077-api-v2.png

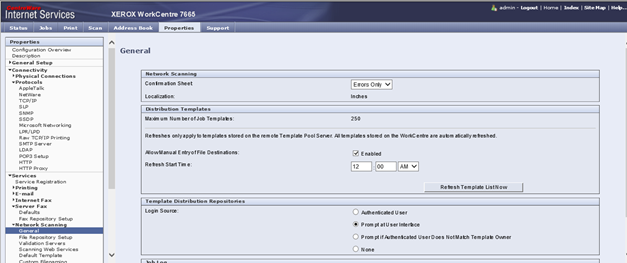
Set scan reports to errors only

Go to Properties > Services > Network Scanning > General and set confirmation sheet to Errors Only.

images/download/attachments/284929468/image2015-7-23_6_51_44-version-1-modificationdate-1592305447107-api-v2-effects-drop-shadow.png

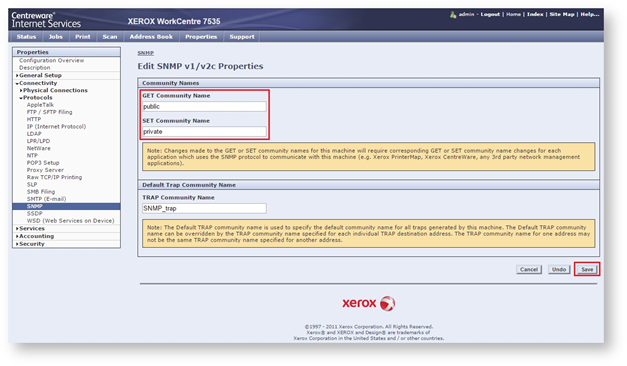
Configure SNMP Settings

  1. Go to the Properties tab > Connectivity > Protocols > SNMP. Enable the option Enable SNMP v1/v2c Protocols. Click Apply and continue to Edit SNMP v1/v2c Properties.

    images/download/attachments/284929468/image2015-7-23_6_52_58-version-1-modificationdate-1592305447130-api-v2.png

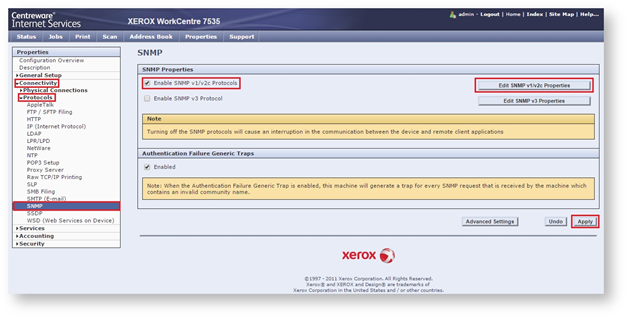
  2. Configure the Community Name (Read/Write) accordingly:
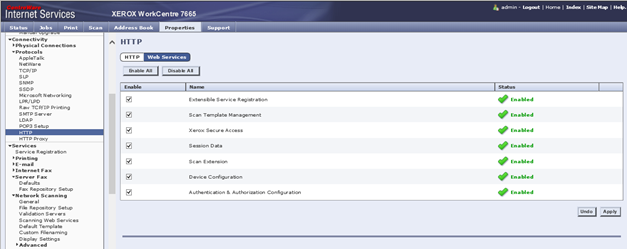
    images/download/attachments/284929468/image2015-7-23_6_54_58-version-1-modificationdate-1592305447157-api-v2.png

Enable Web Services

  1. Go to Properties > Connectivity > Protocols > HTTP.

  2. Select Web Services.

  3. Enable all.

    images/download/attachments/284929468/image2015-7-23_6_56_19-version-1-modificationdate-1592305447180-api-v2-effects-drop-shadow.png