Purpose of this document
This document is an installation guide for partner technician on how to unbox and install the eDee printer at customer's.
Only a trained technician is allowed to unbox and install the eDee printer on site!
More detailed information regarding the eDee printer can be found in the YSoft be3D eDee Administrator Guide.
Hardware overview
The eDee solution contains 2 HW components:
- YSoft be3D eDee printer
- YSoft card reader (optional)
Instructional safeguard

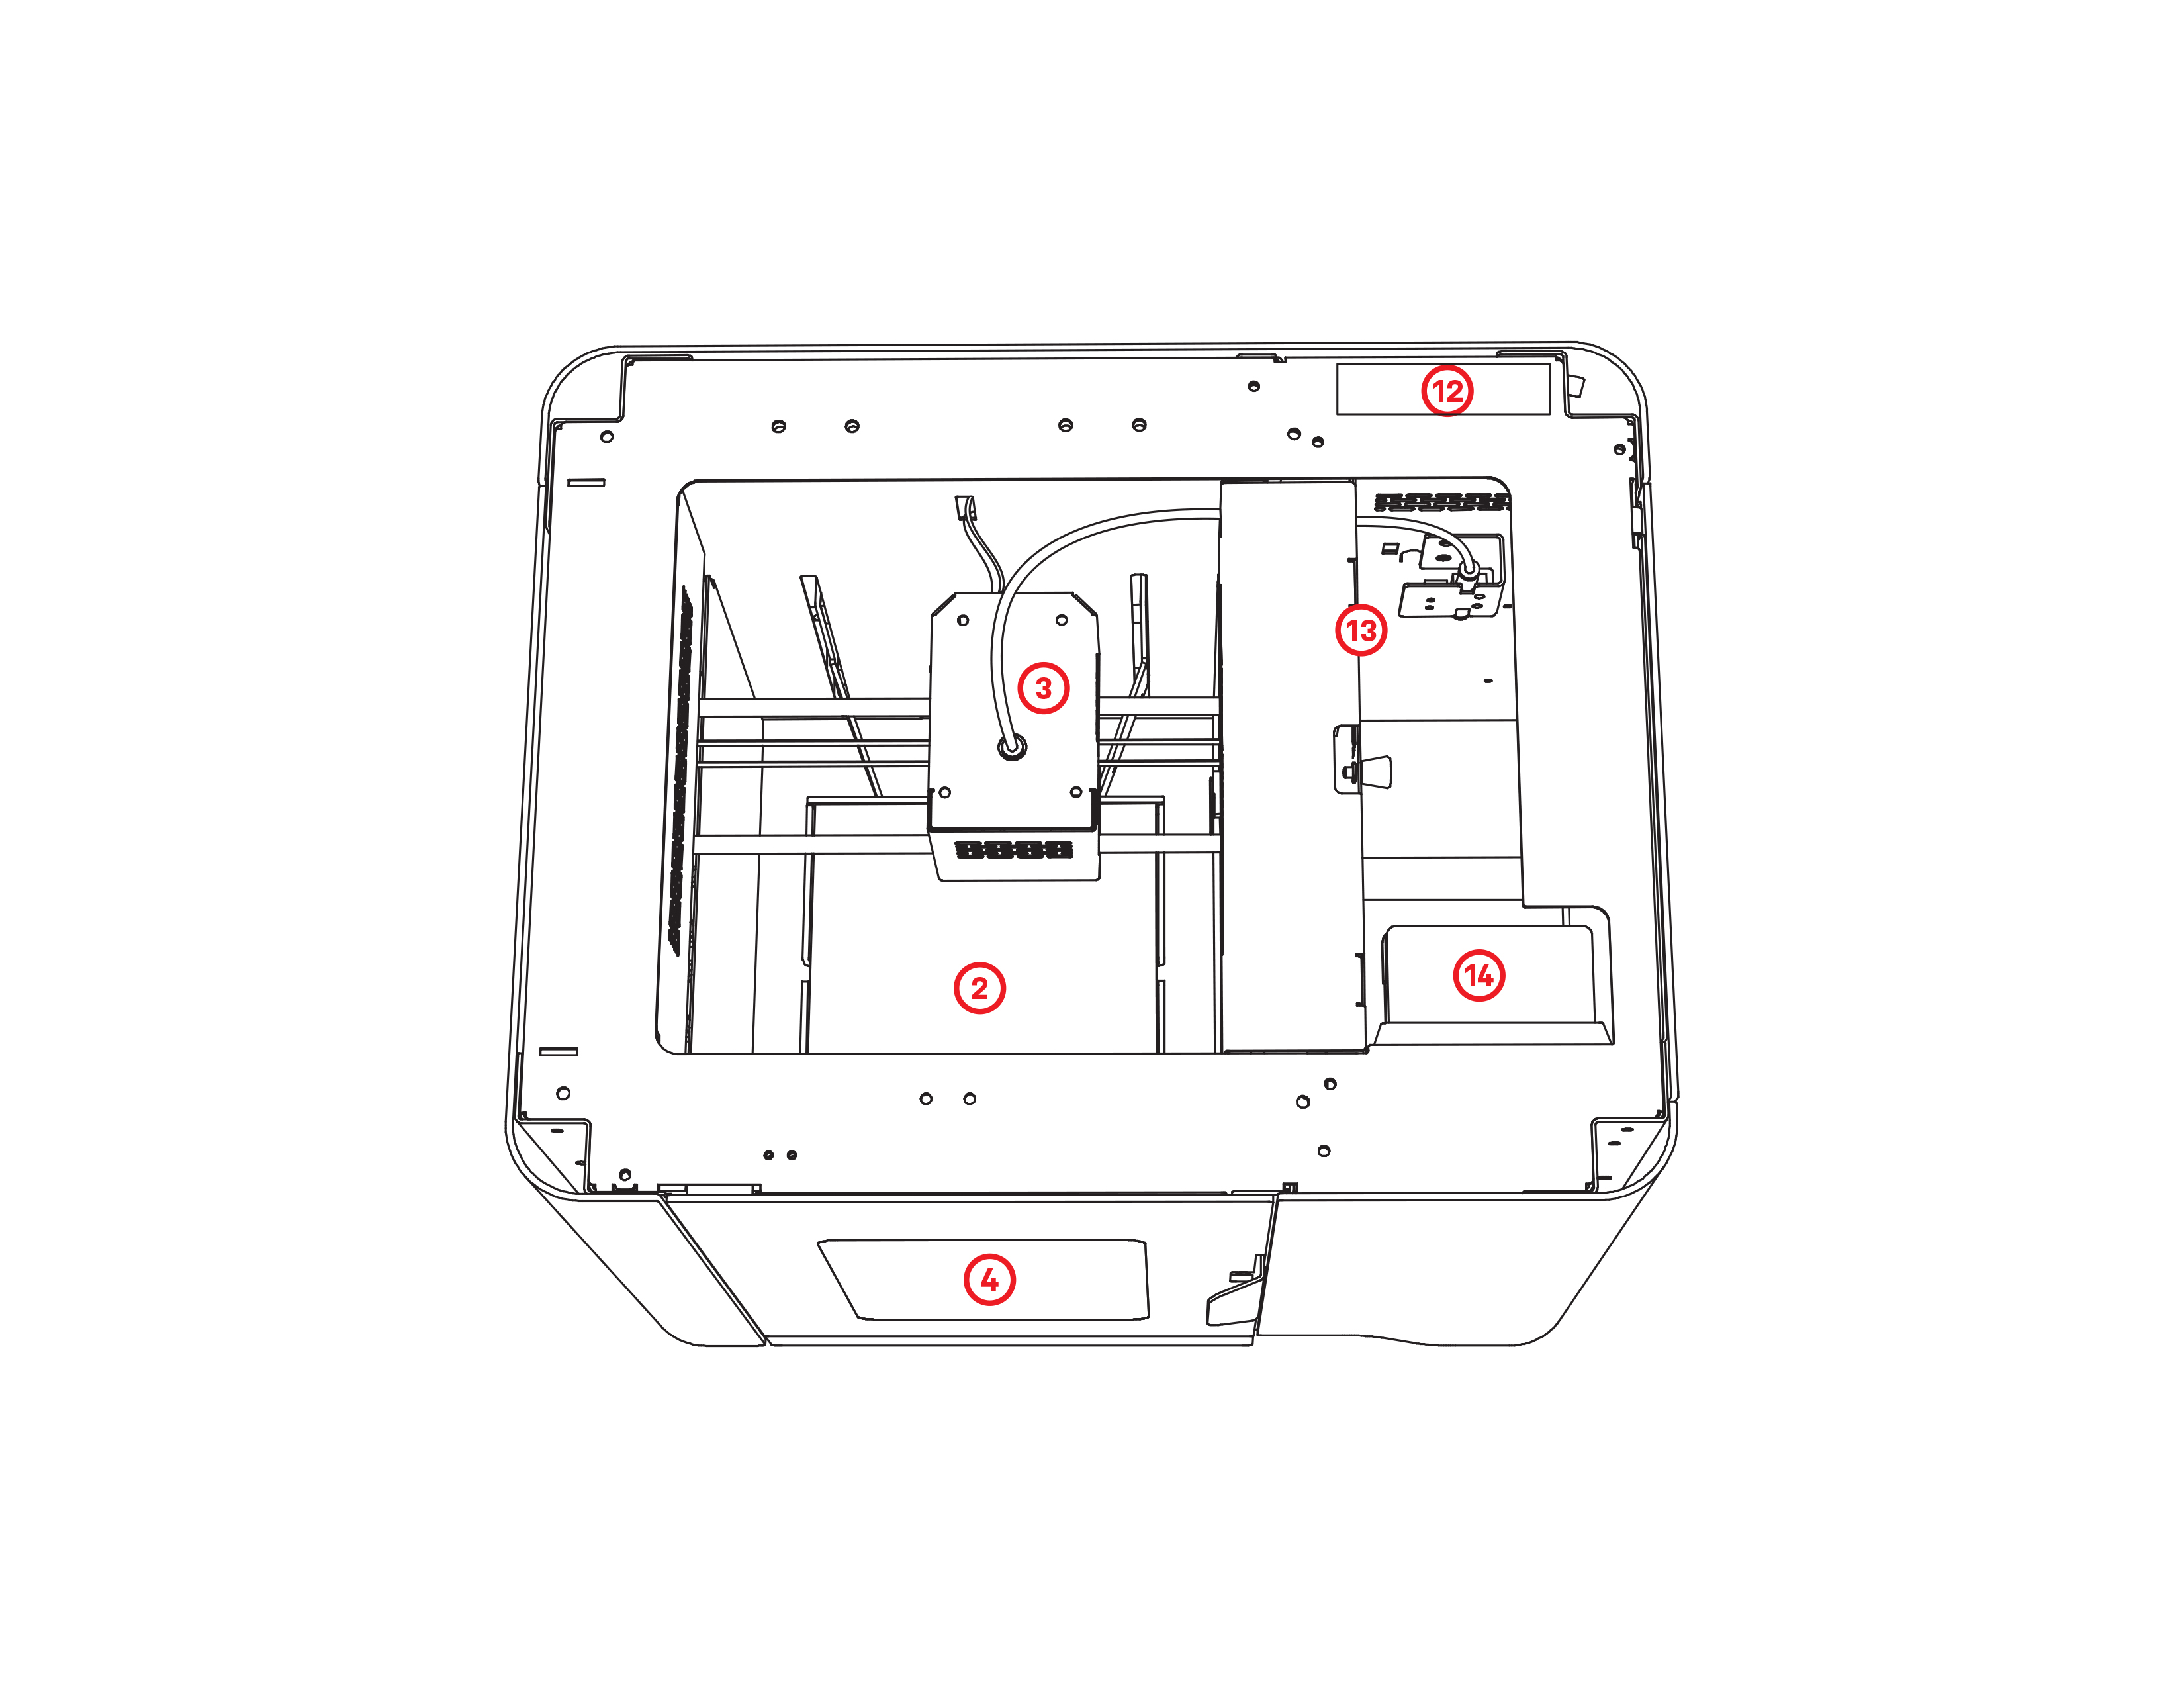
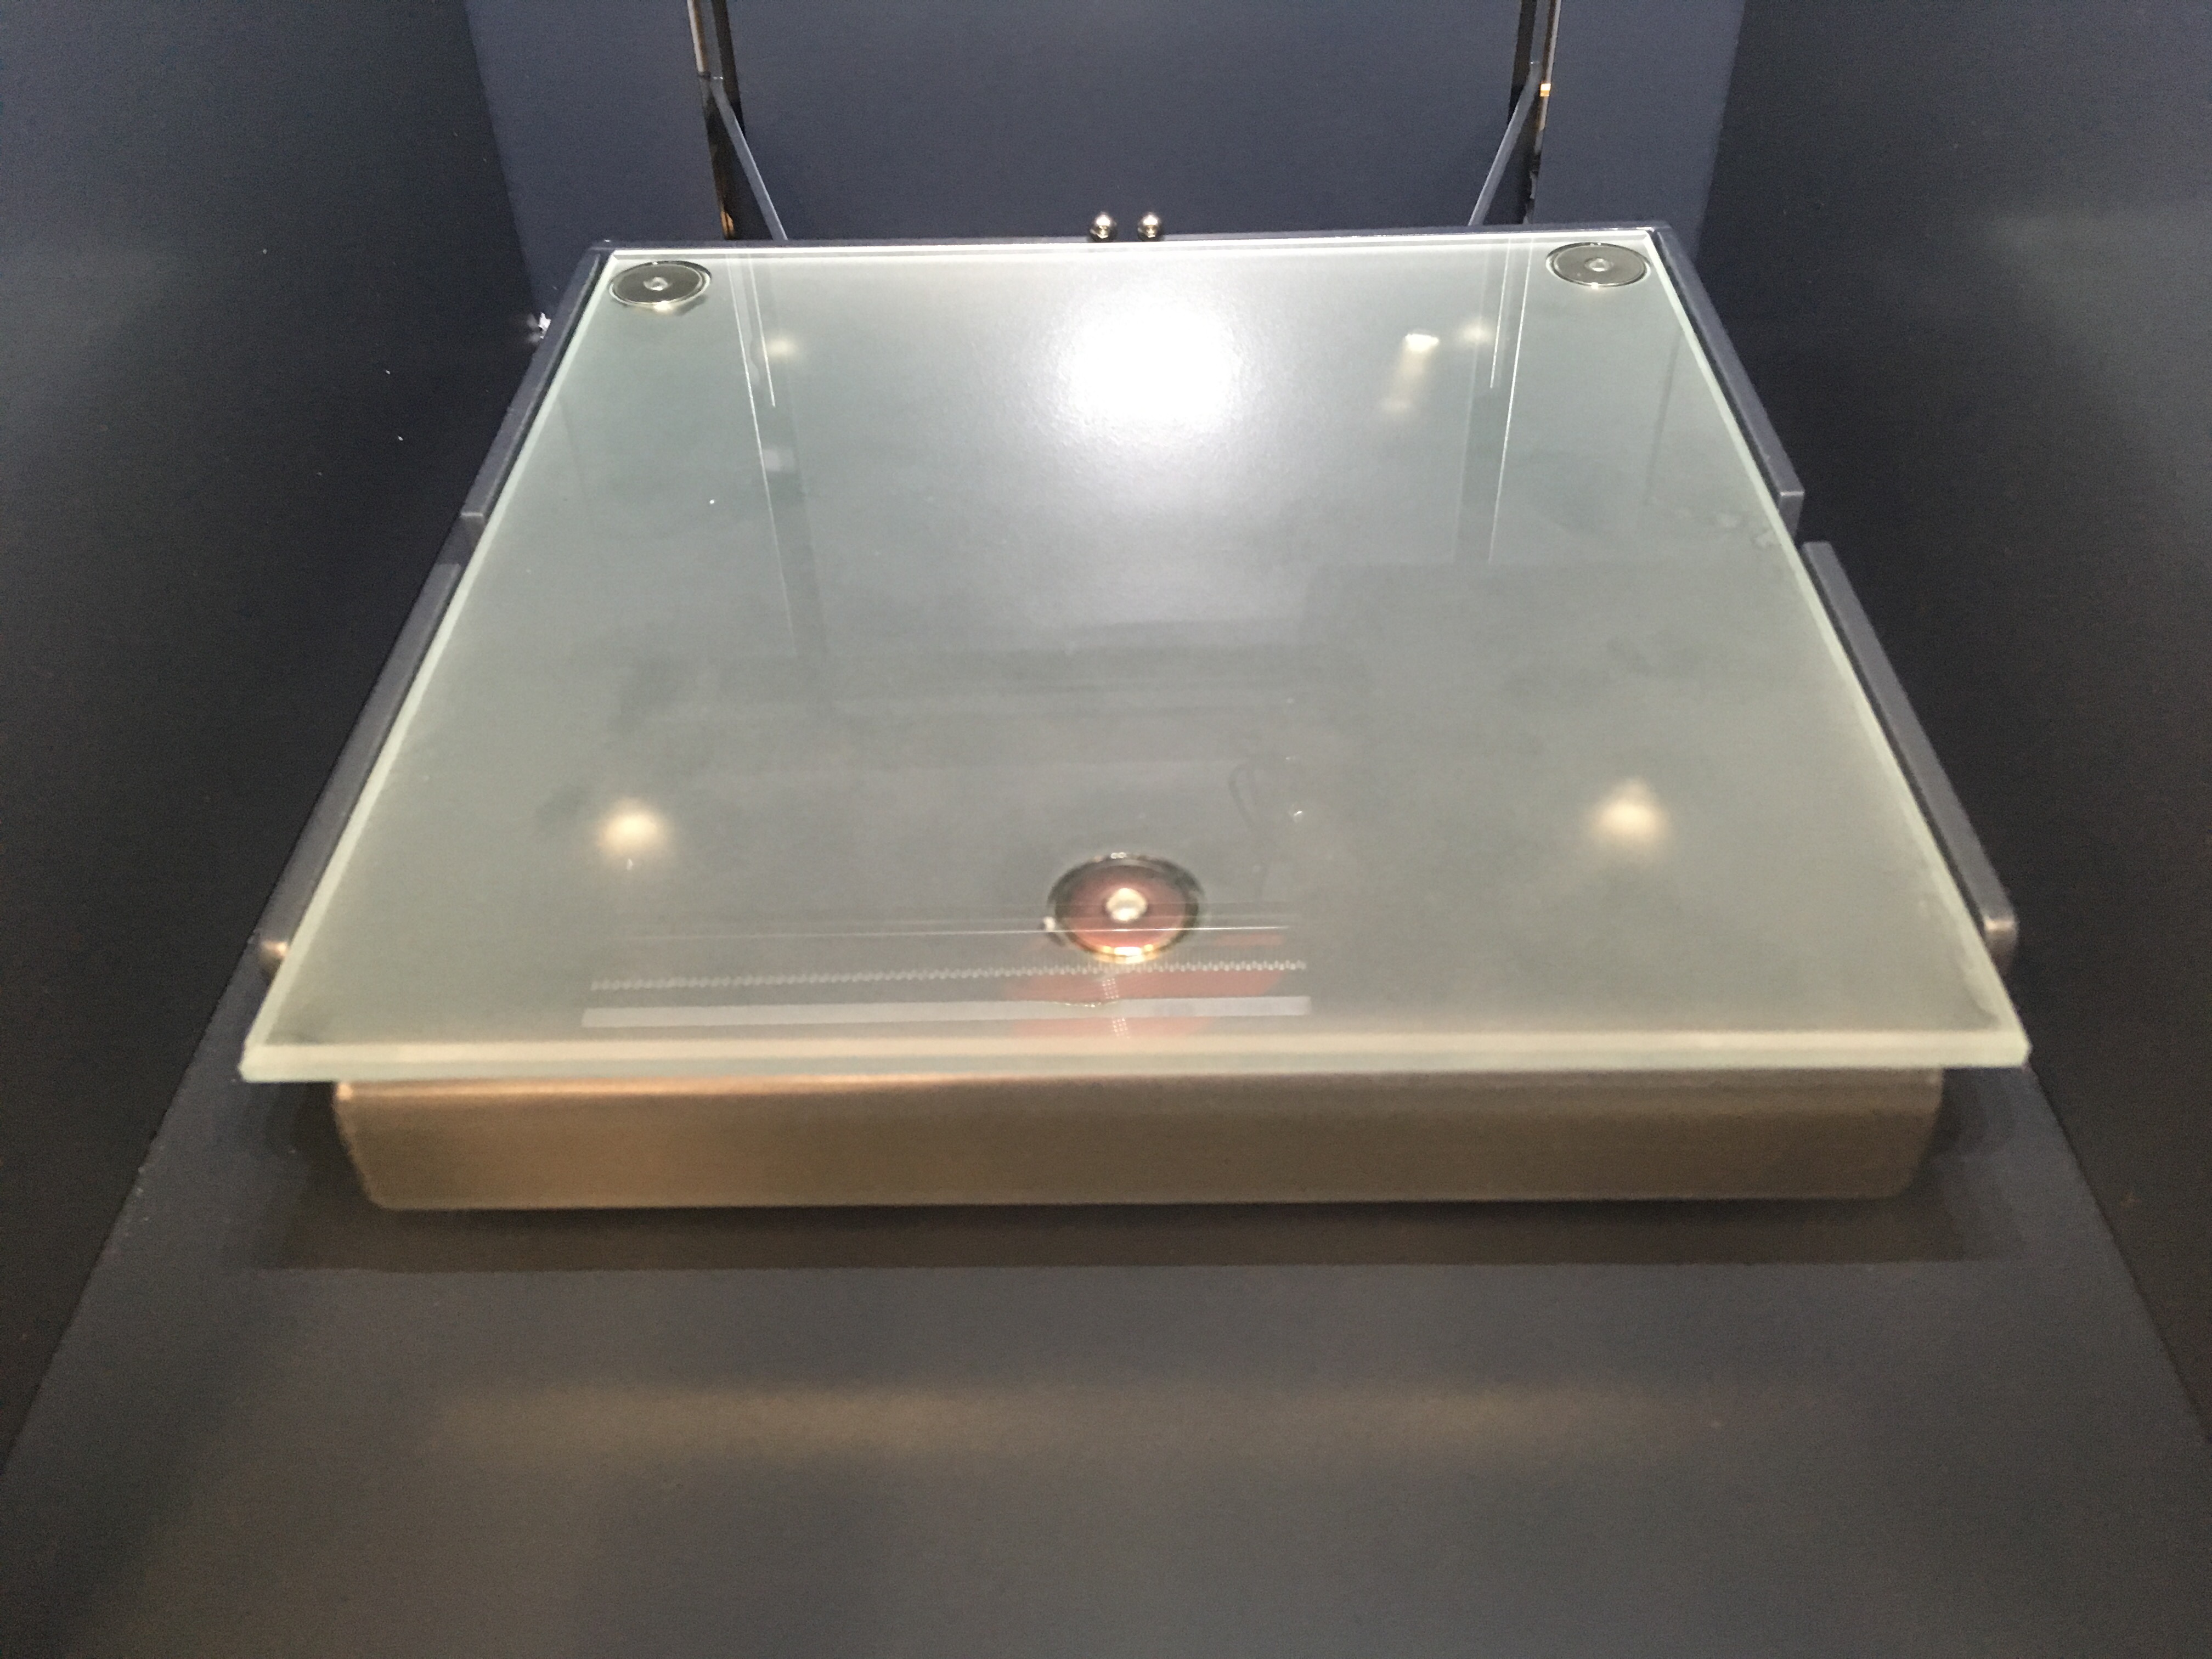
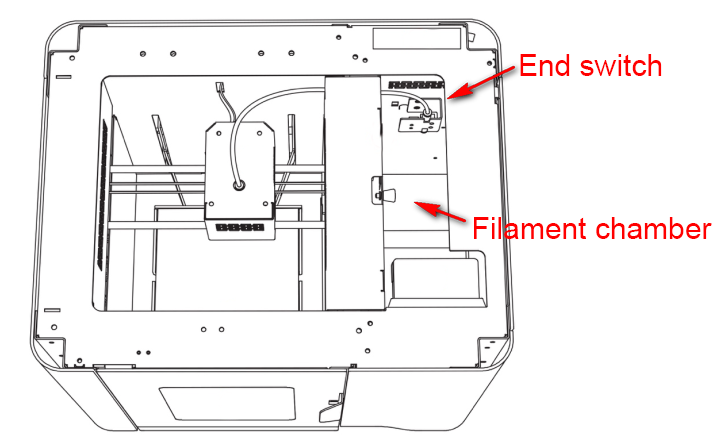
YSoft be3D eDee printer
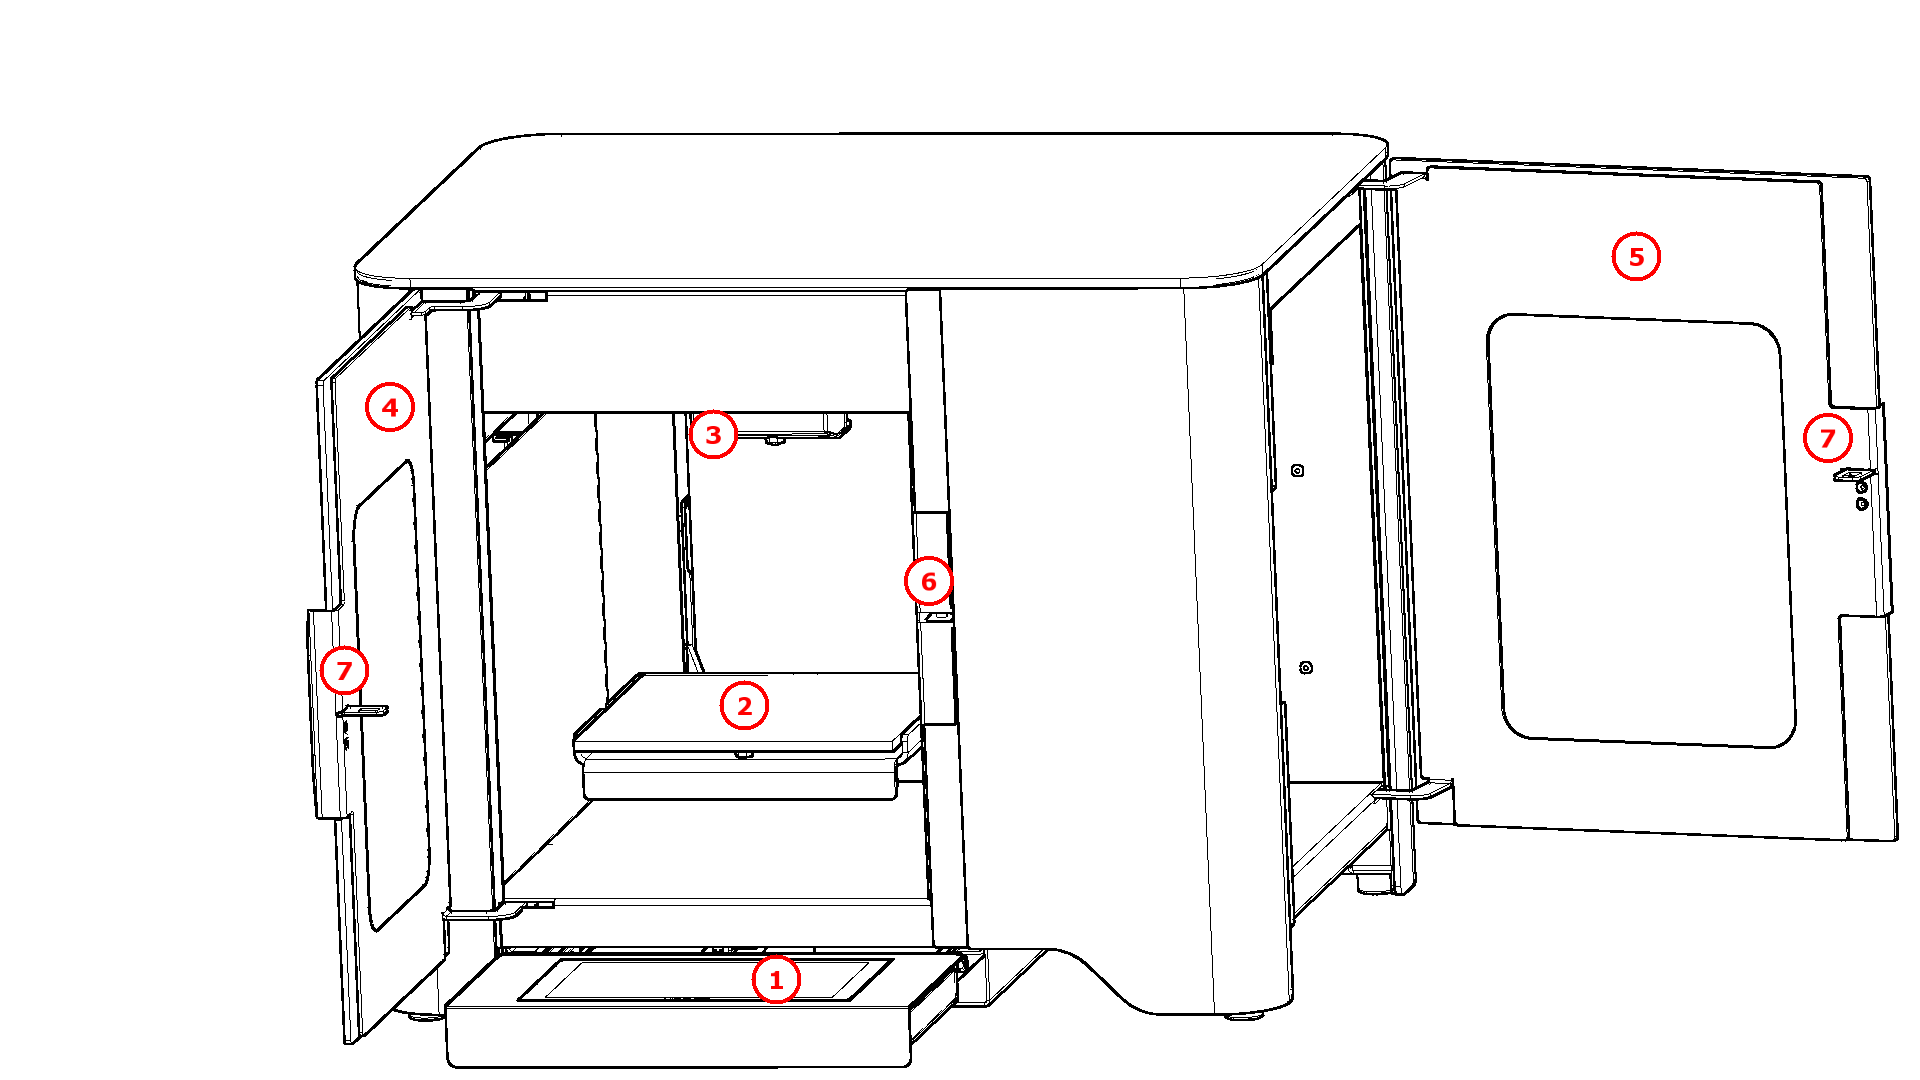
1 – Display
2 – Print pad holder
3 – Print head
4 – Front (main) door
5 – Side (spool chamber) door
6 – Electro-mechanical lock
7 – Counterpart of electro-mechanical lock
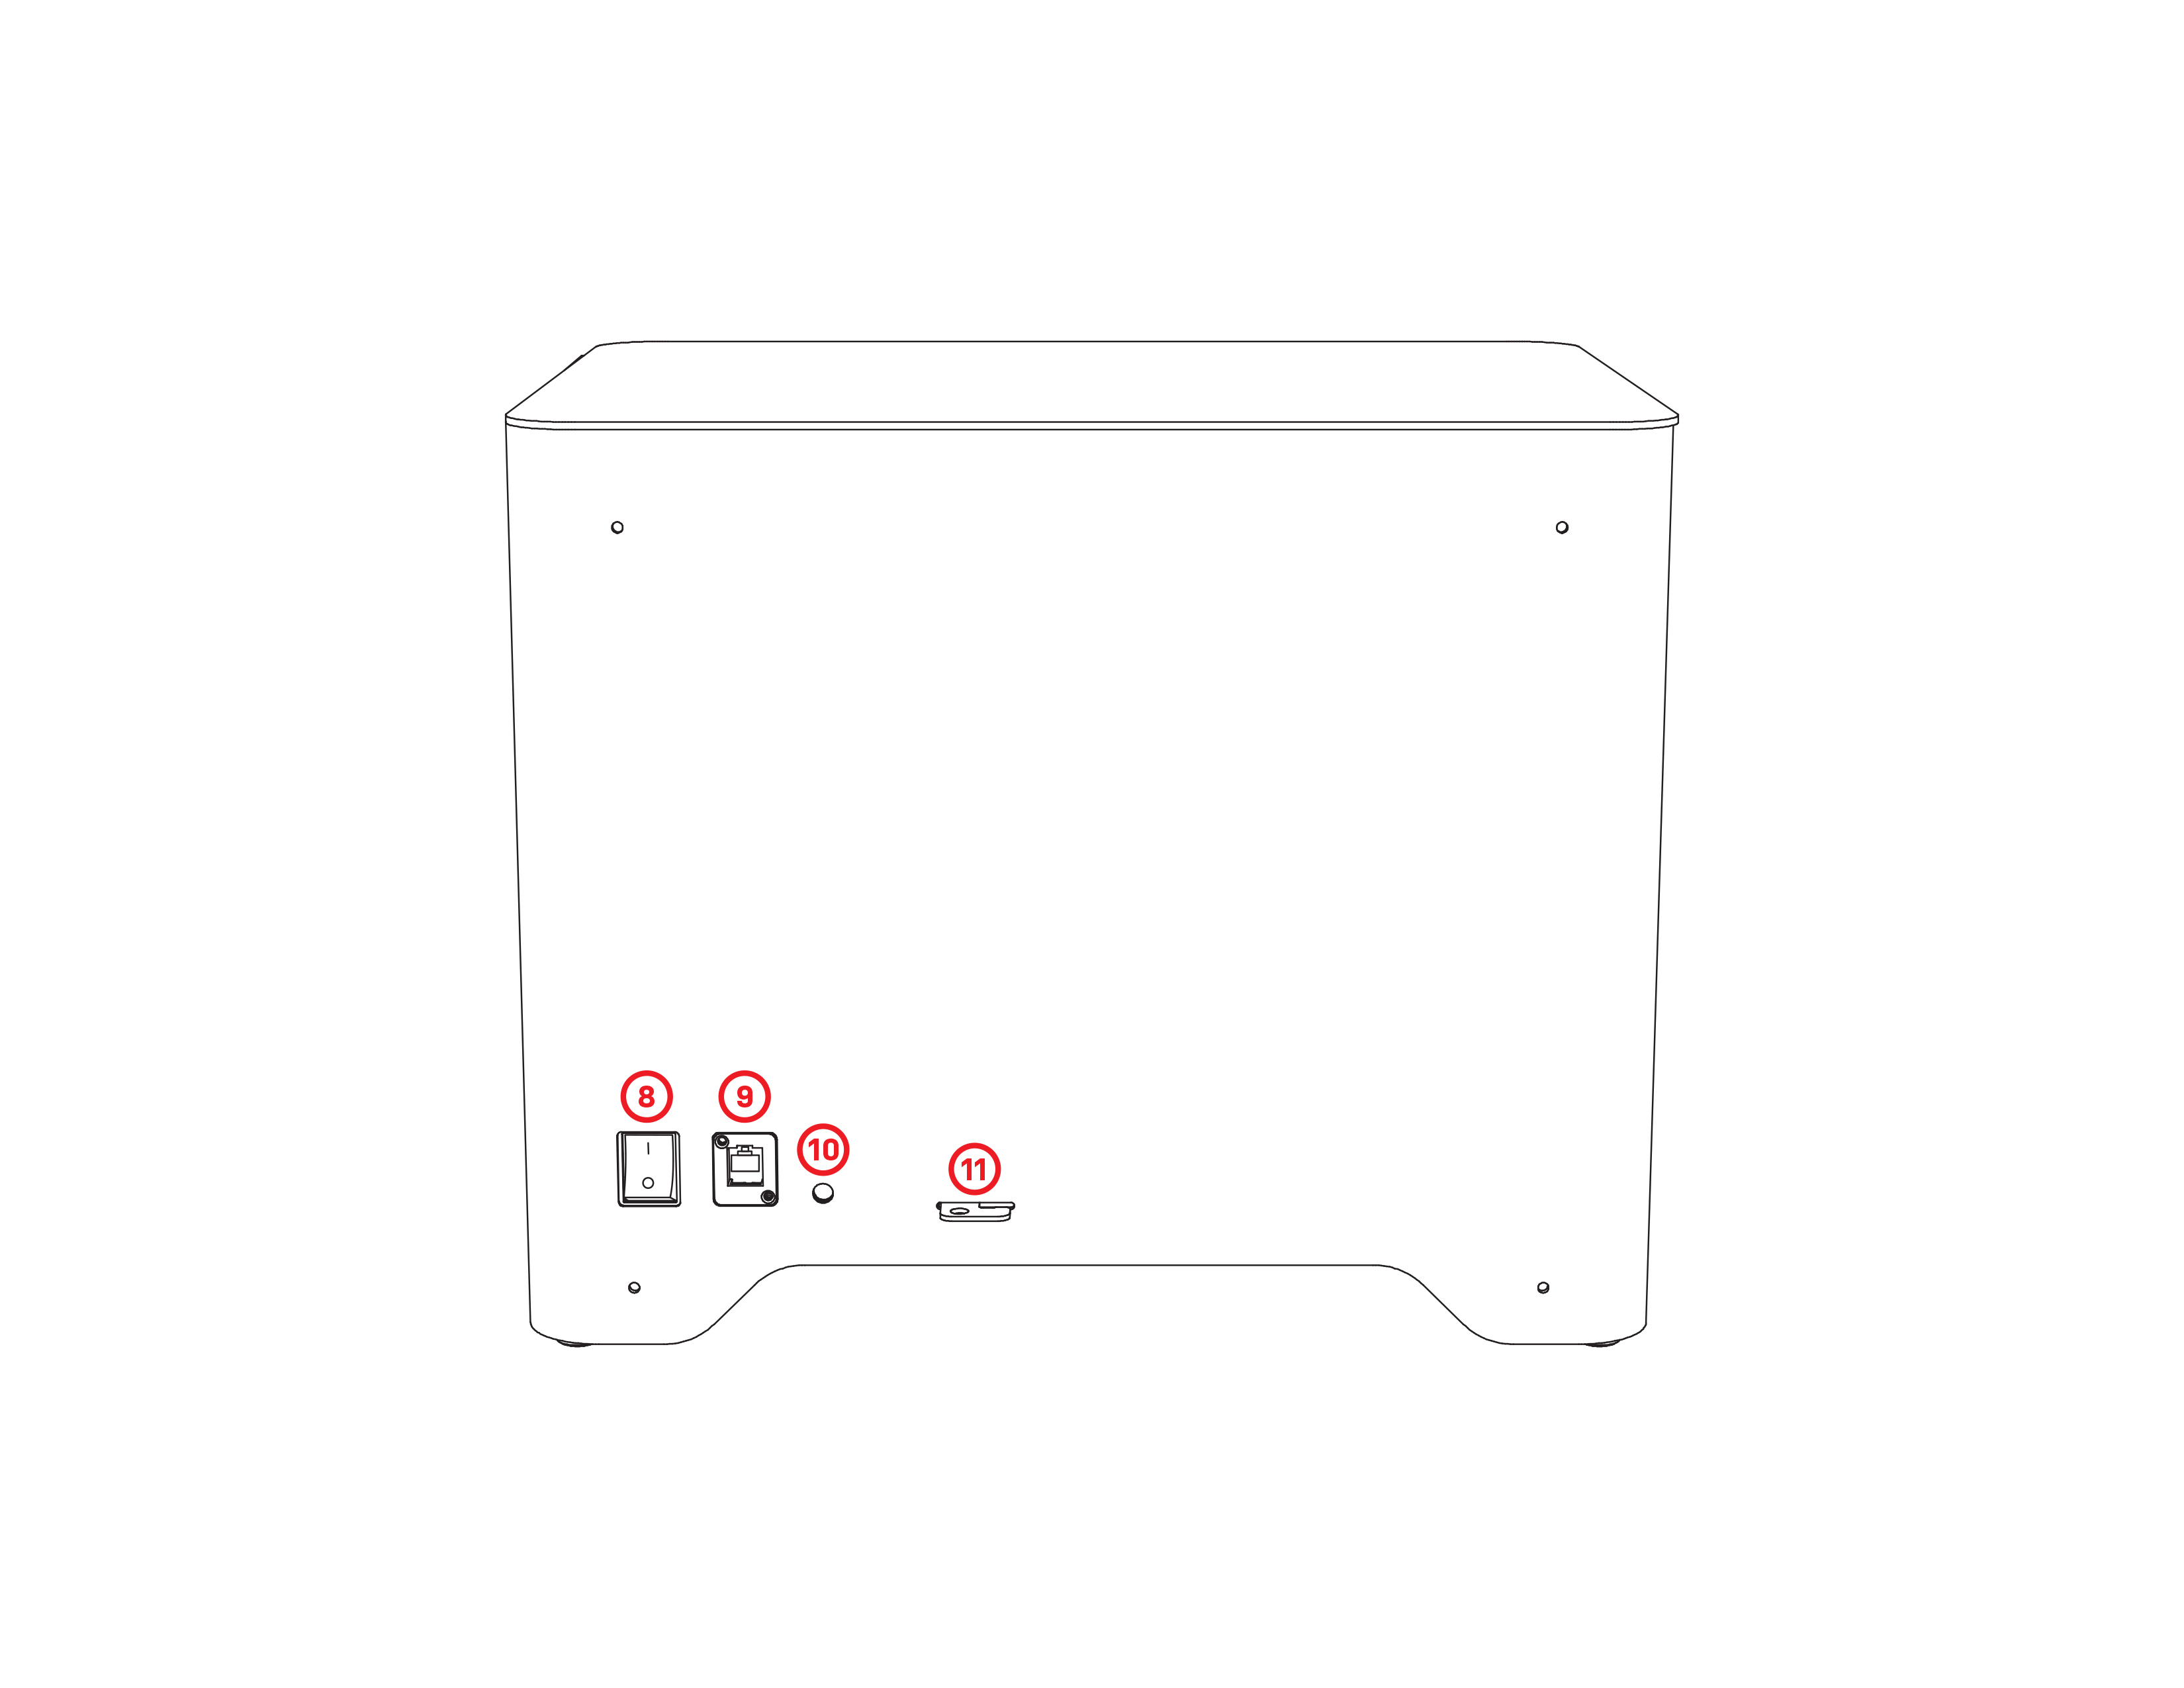
8 – Power switch
9 – Slot for LAN connection
10 – Power slot
11 – Power cable holder/Kensington lock slot
12 – Manufacture label
13 – Filament entrance/filament detector
14 – Card reader mount
SW overview
The eDee solution uses 2 software components:
- Dispatcher Paragon - which is a Workflow Solutions Platform, for more information see About Dispatcher Paragon.
- YSoft be3D DeeControl - 3D job slicing software. For more information see Using YSoft be3D DeeControl.
Unboxing
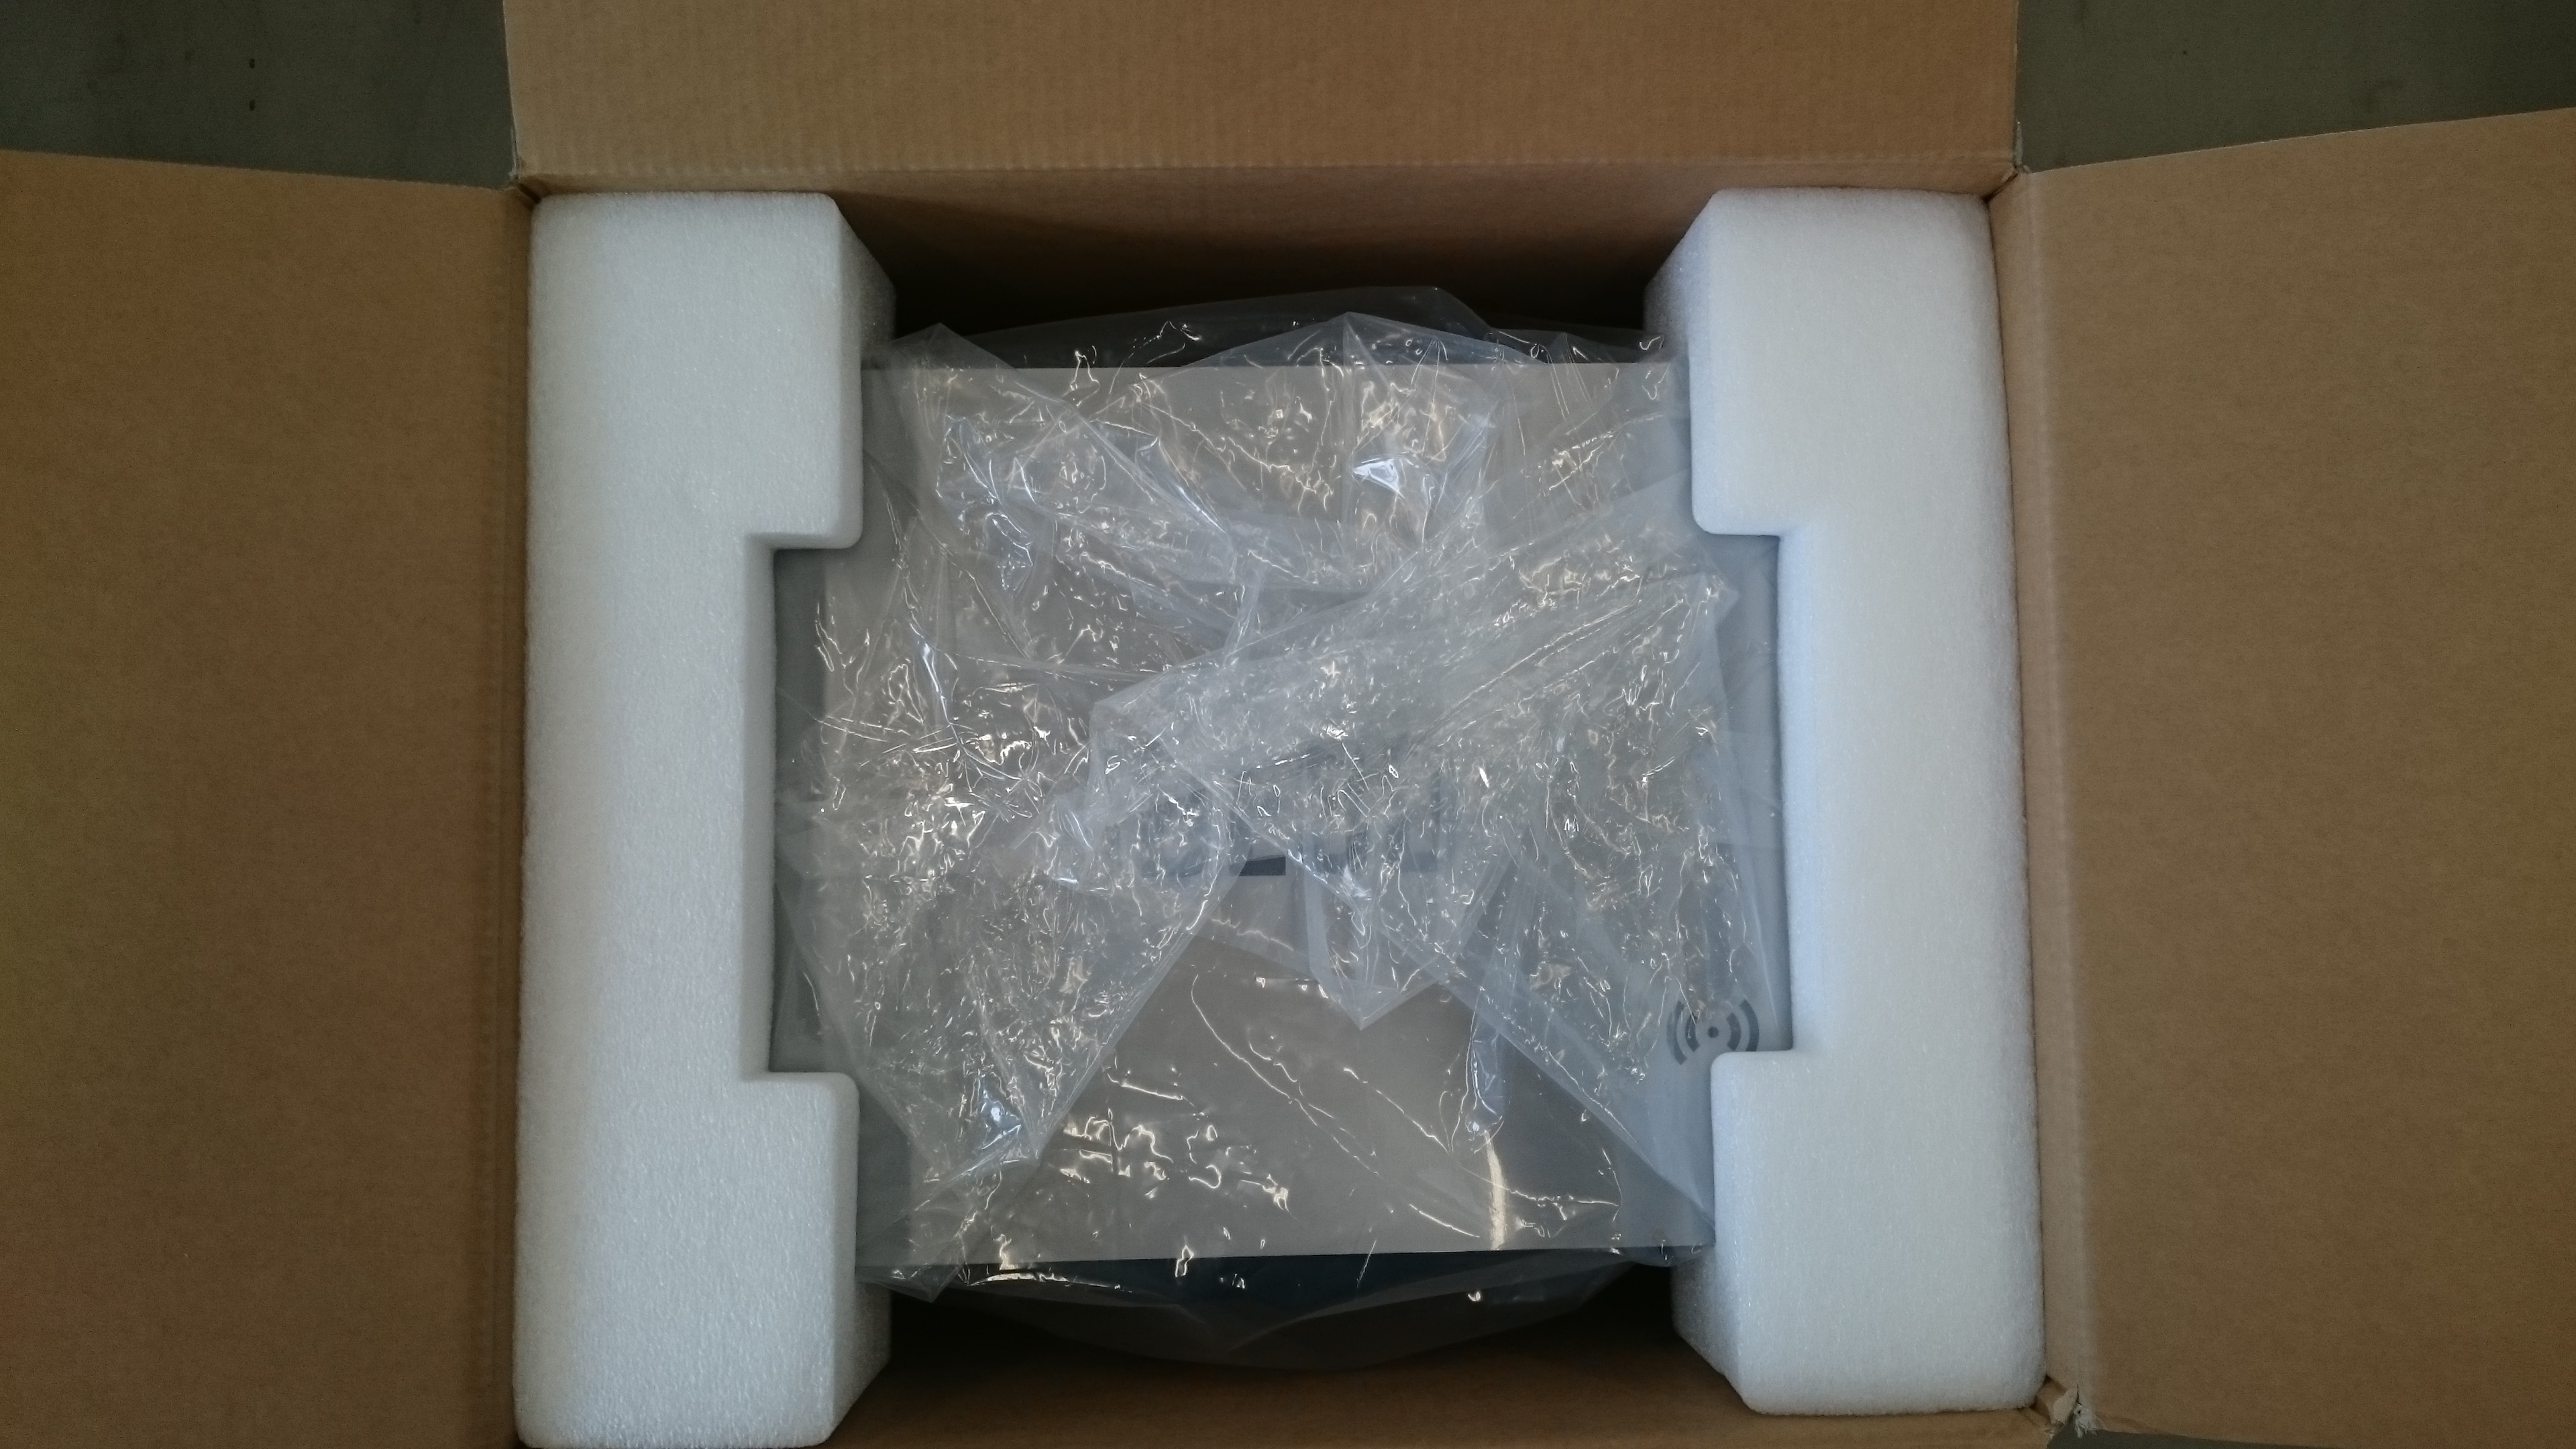
Cut the tape on the box.
>>>>Packaging version 1:
Packaging version2:
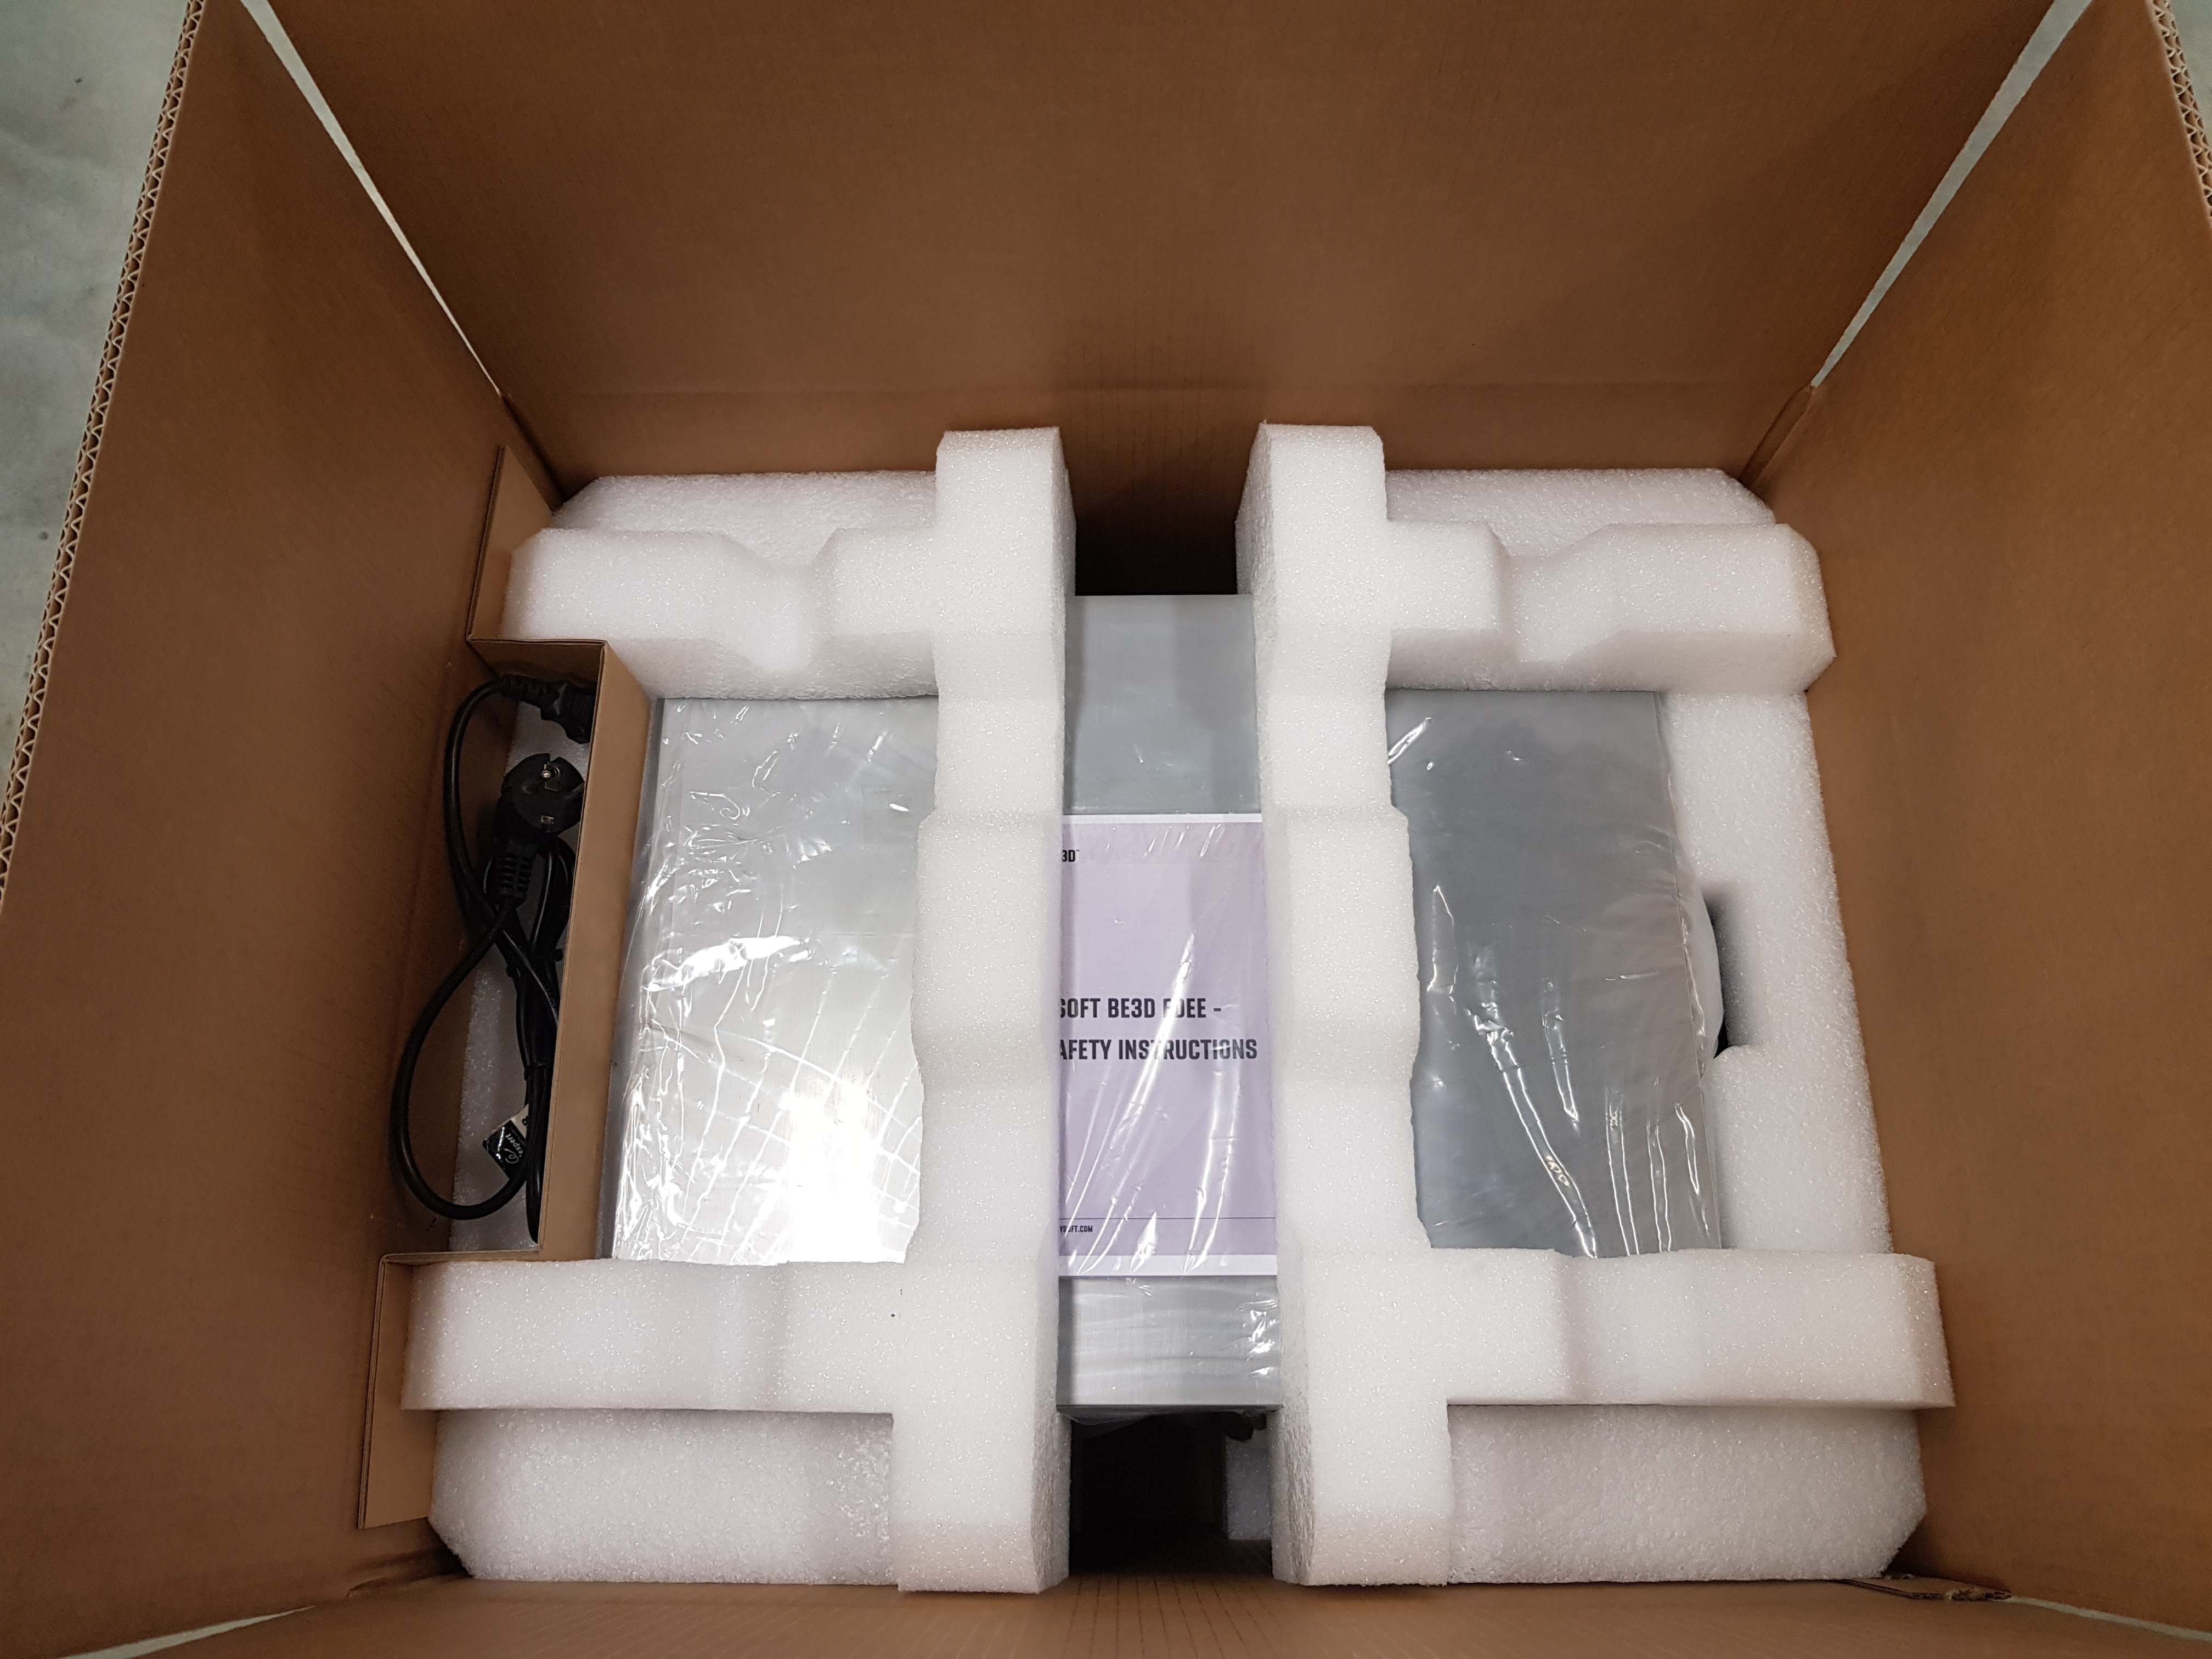
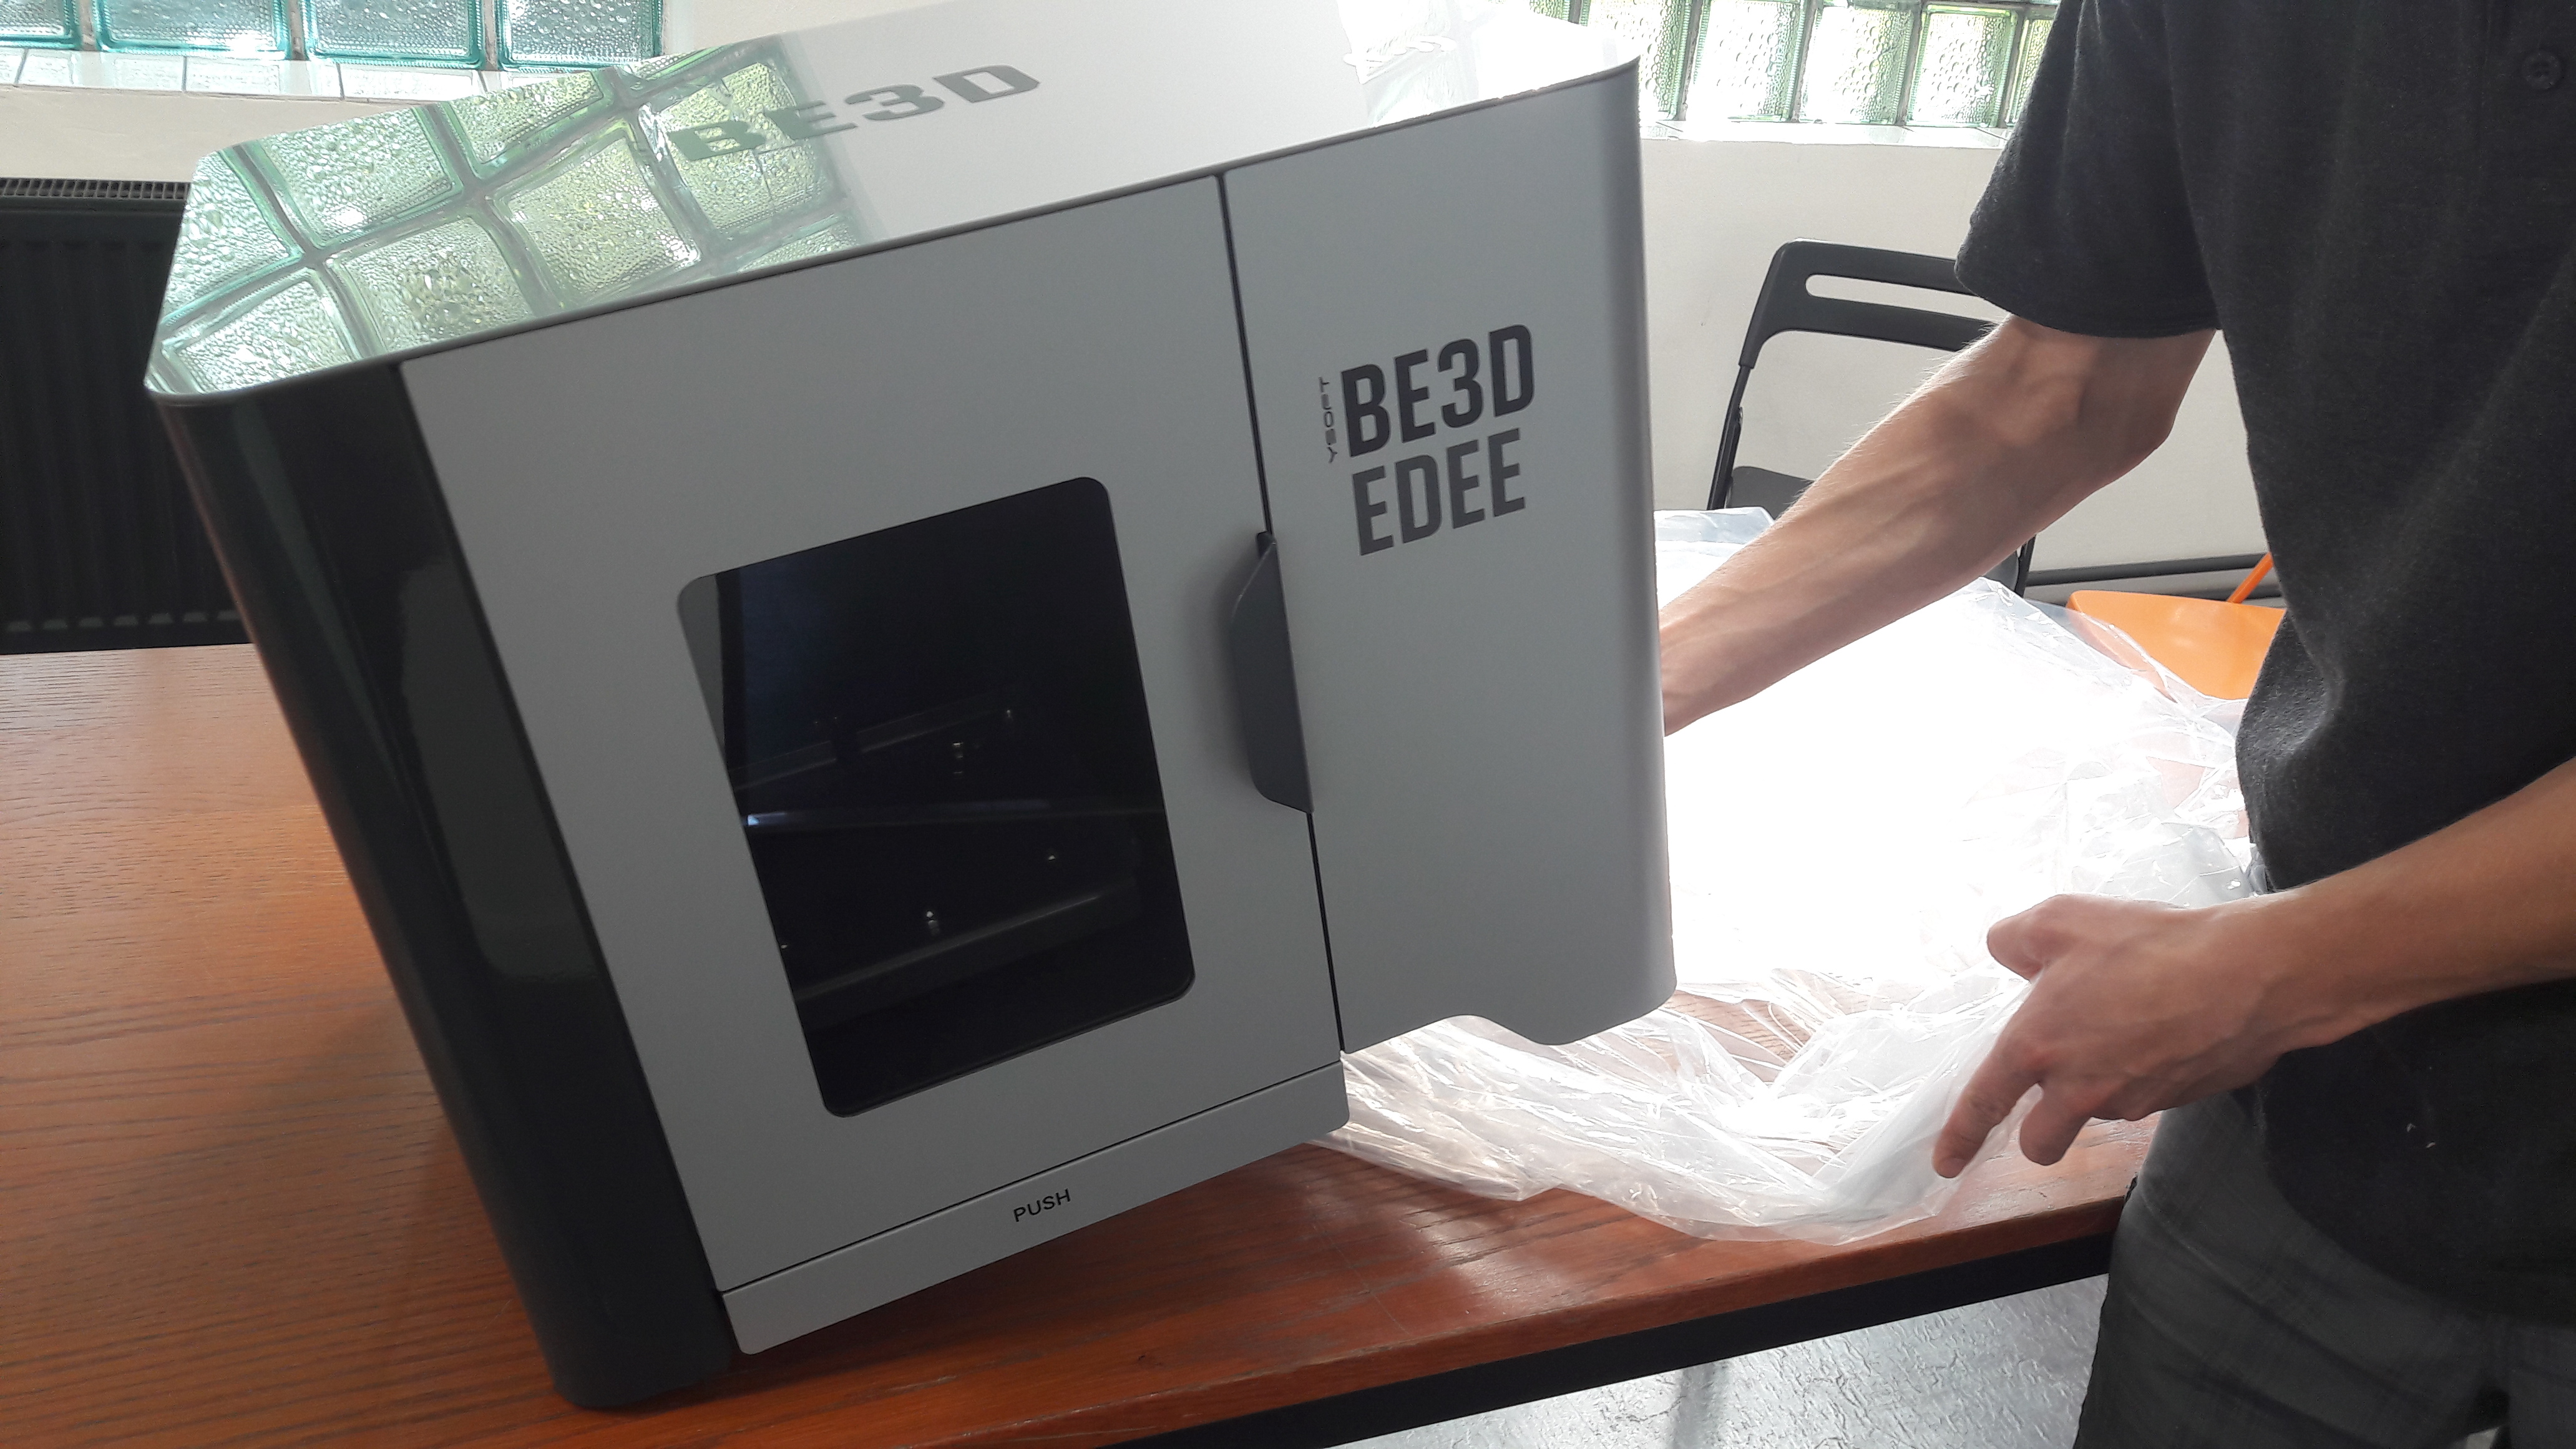
Remove the printer from the box and from a plastic bag.
Be careful, when lifting the printer from the box due to its weight (28,5 kg)!
Network and power cord connection
- Pull up the top lid and remove it.

- Remove the red blind plug from Top lid sheathing.
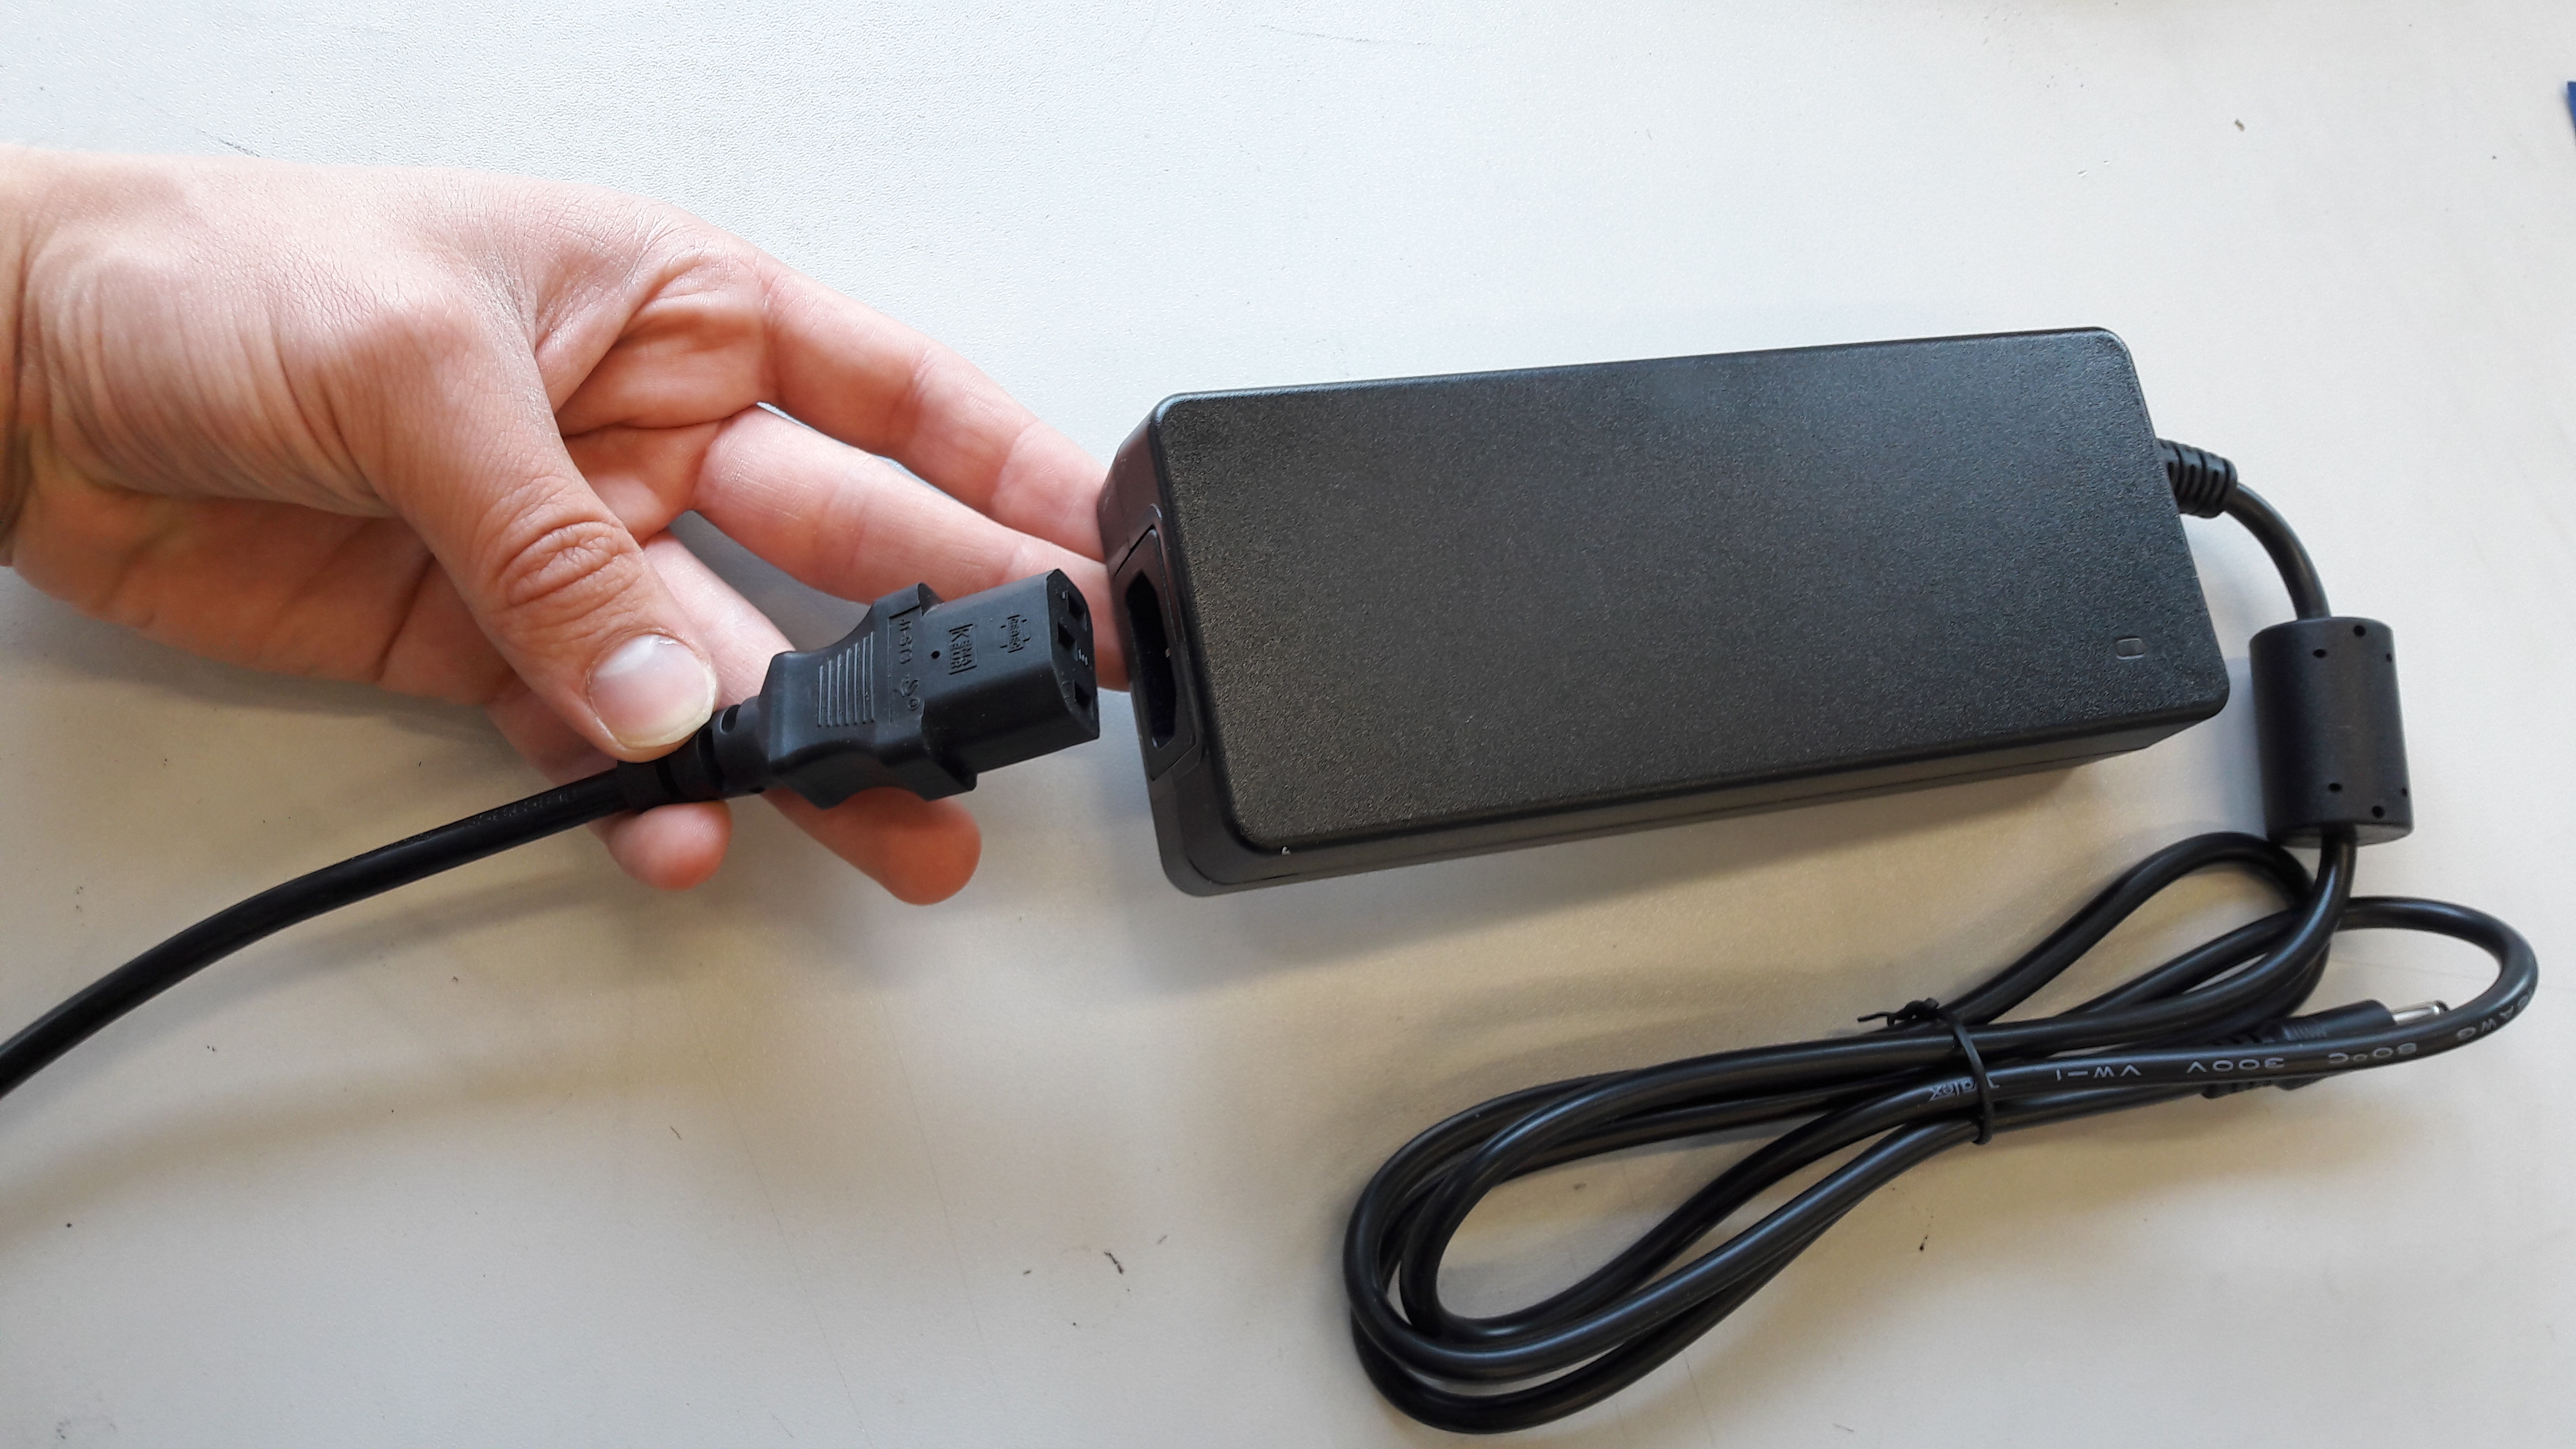
- Unpack the power cable from printer´s box and the power cord from the spool chamber.
- Connect the power cable to power cord.
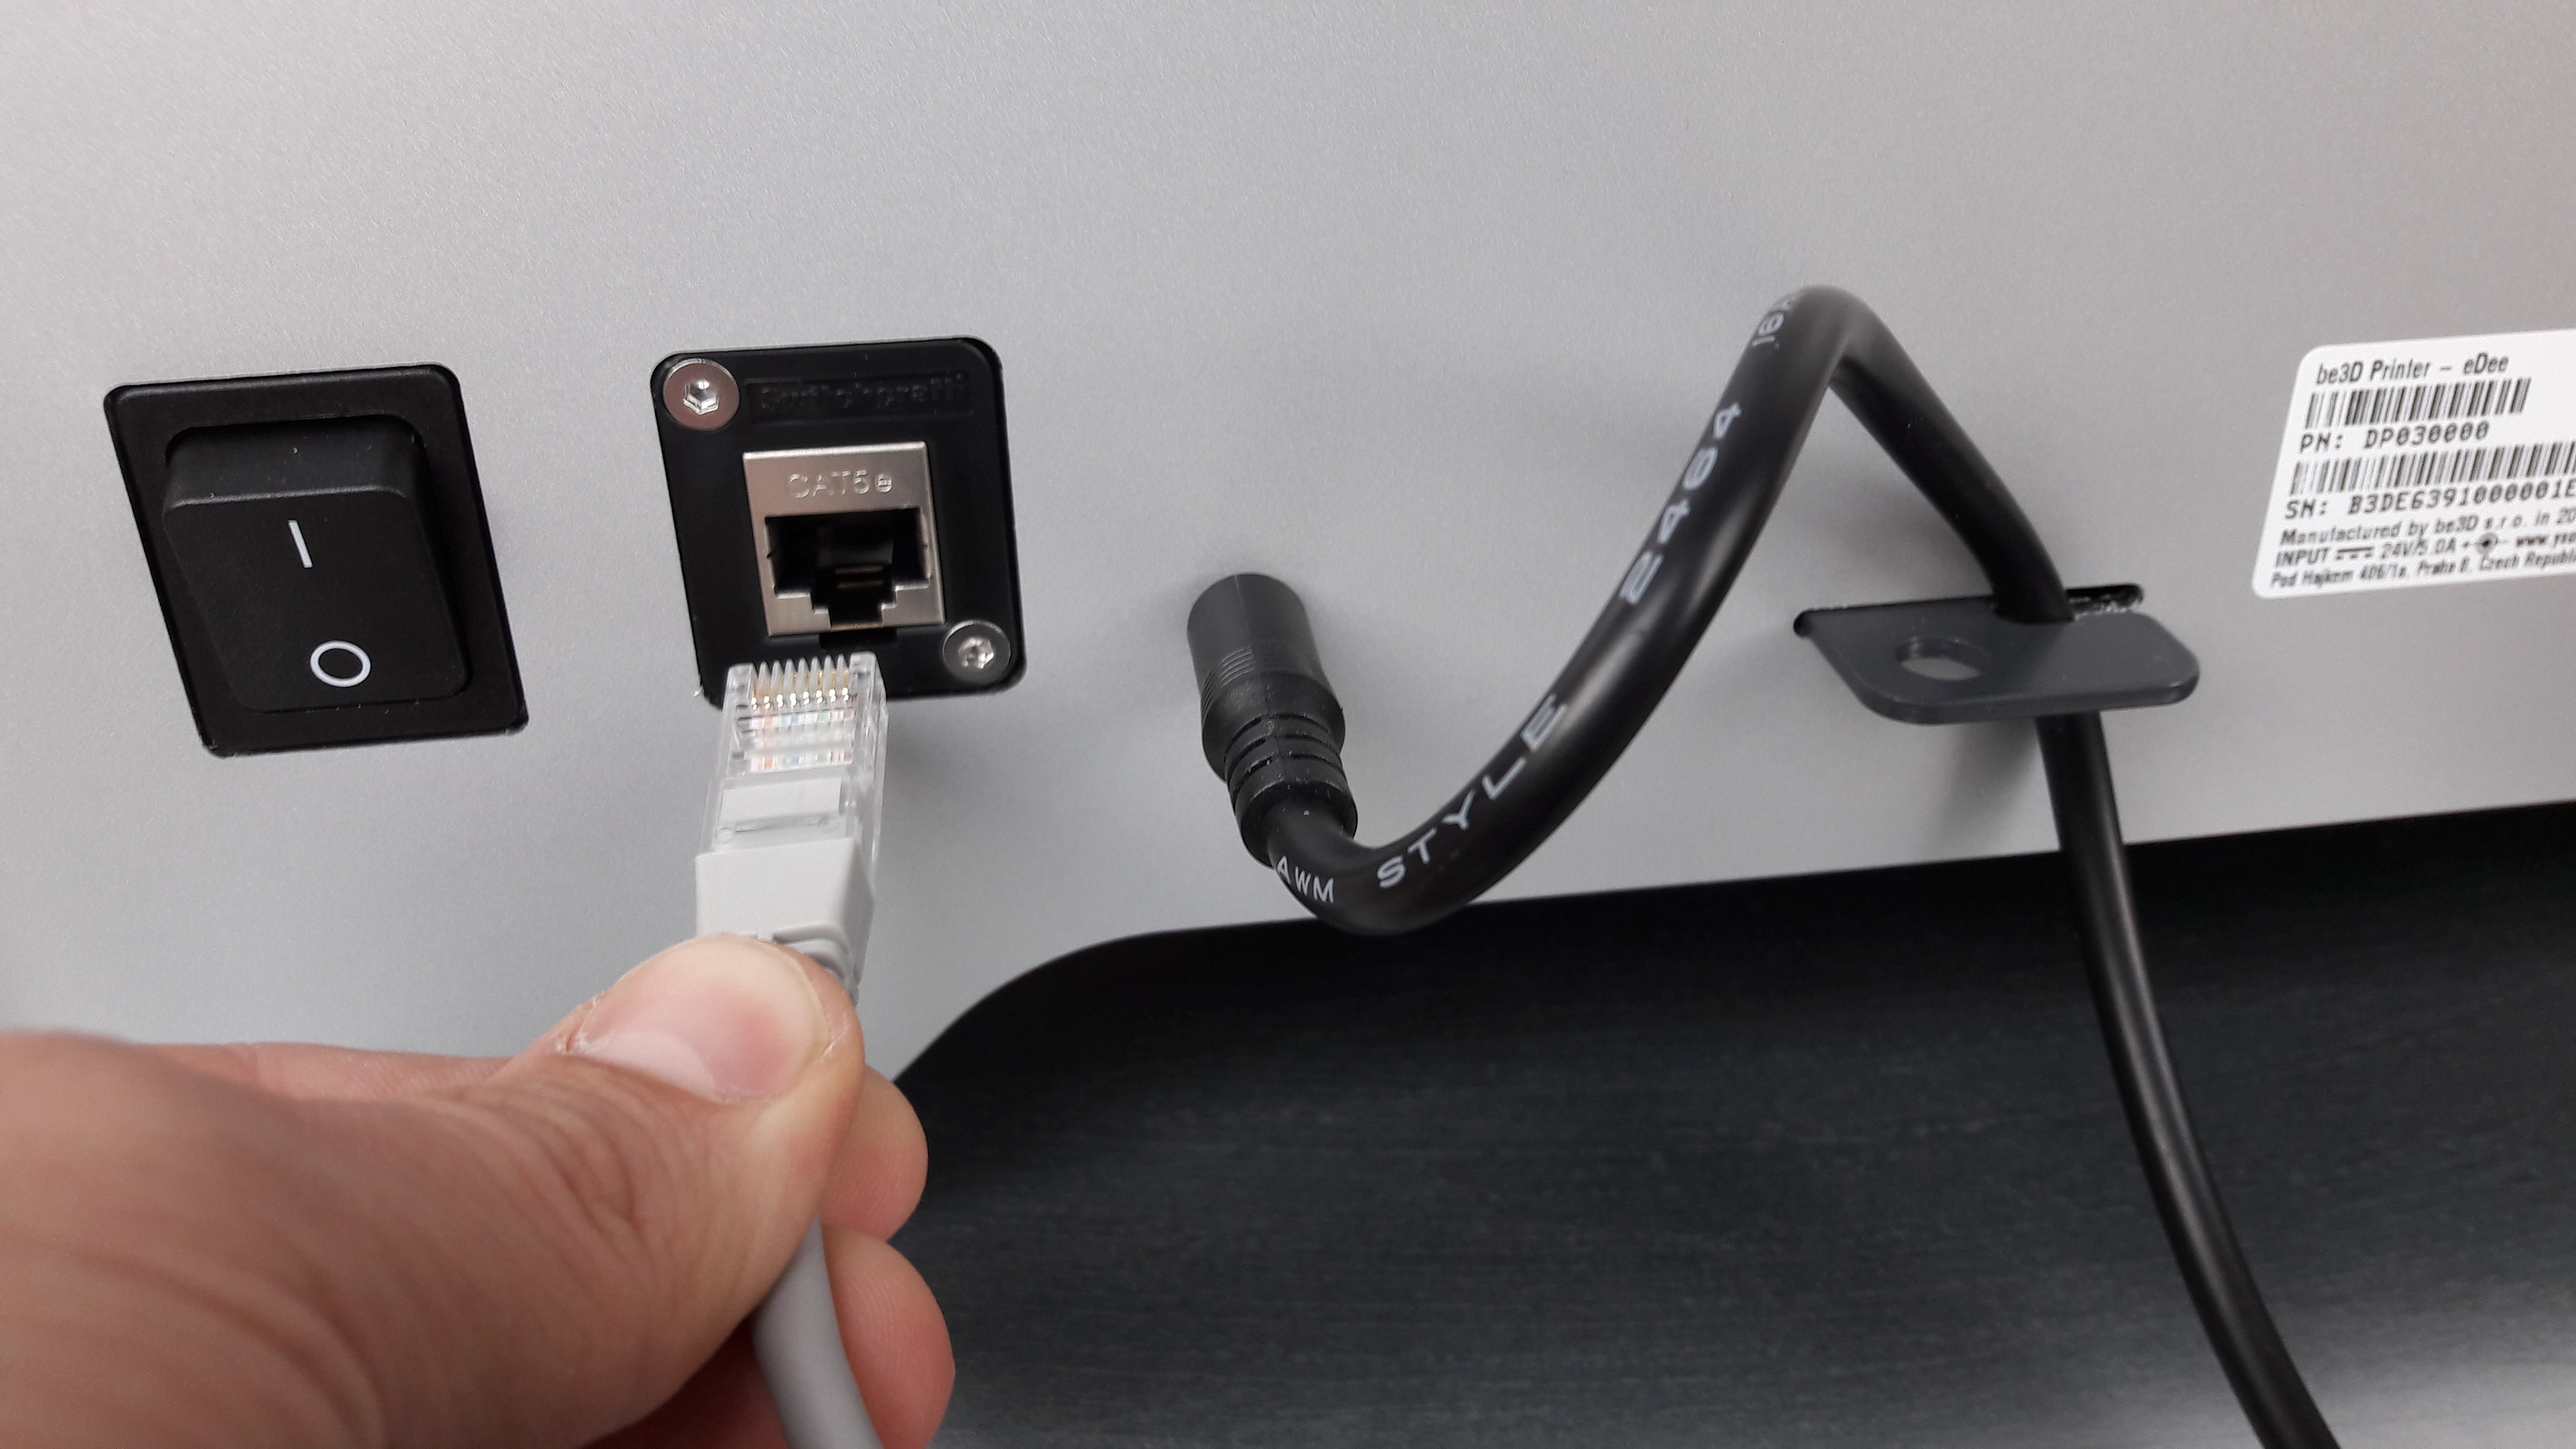
- Connect the Power cord and Ethernet cable to the appropriate socket on the back side of the printer as displayed in the following picture.
Terminal extraction
Open the terminal by pushing it gently and then let go.
Once the device is plugged into the electricity, turn it on using the power switch at the back side of the printer.
YSoft be3D eDee starts by booting up the system:

Once the system is initialized, the device will start the terminal application:

When YSoft be3D eDee first starts up, the eDee Service menu screen is displayed:
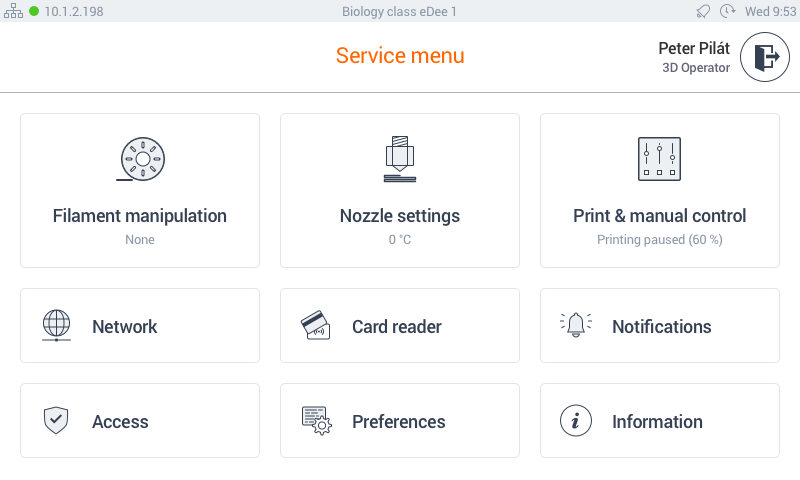
Login to service menu
Use the predefined authorization PIN code: 7777 to access the service menu. The administrator can change the PIN afterwards (see YSoft be3D eDee Administrator Guide).
Once you are logged in, following menu is displayed.
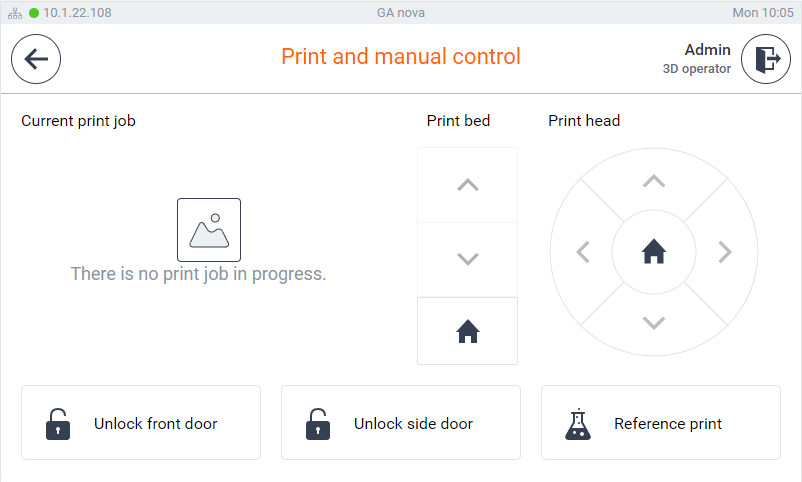
Open all doors
Select the Print & manual control and then press on the Unlock front door and Unlock side door.
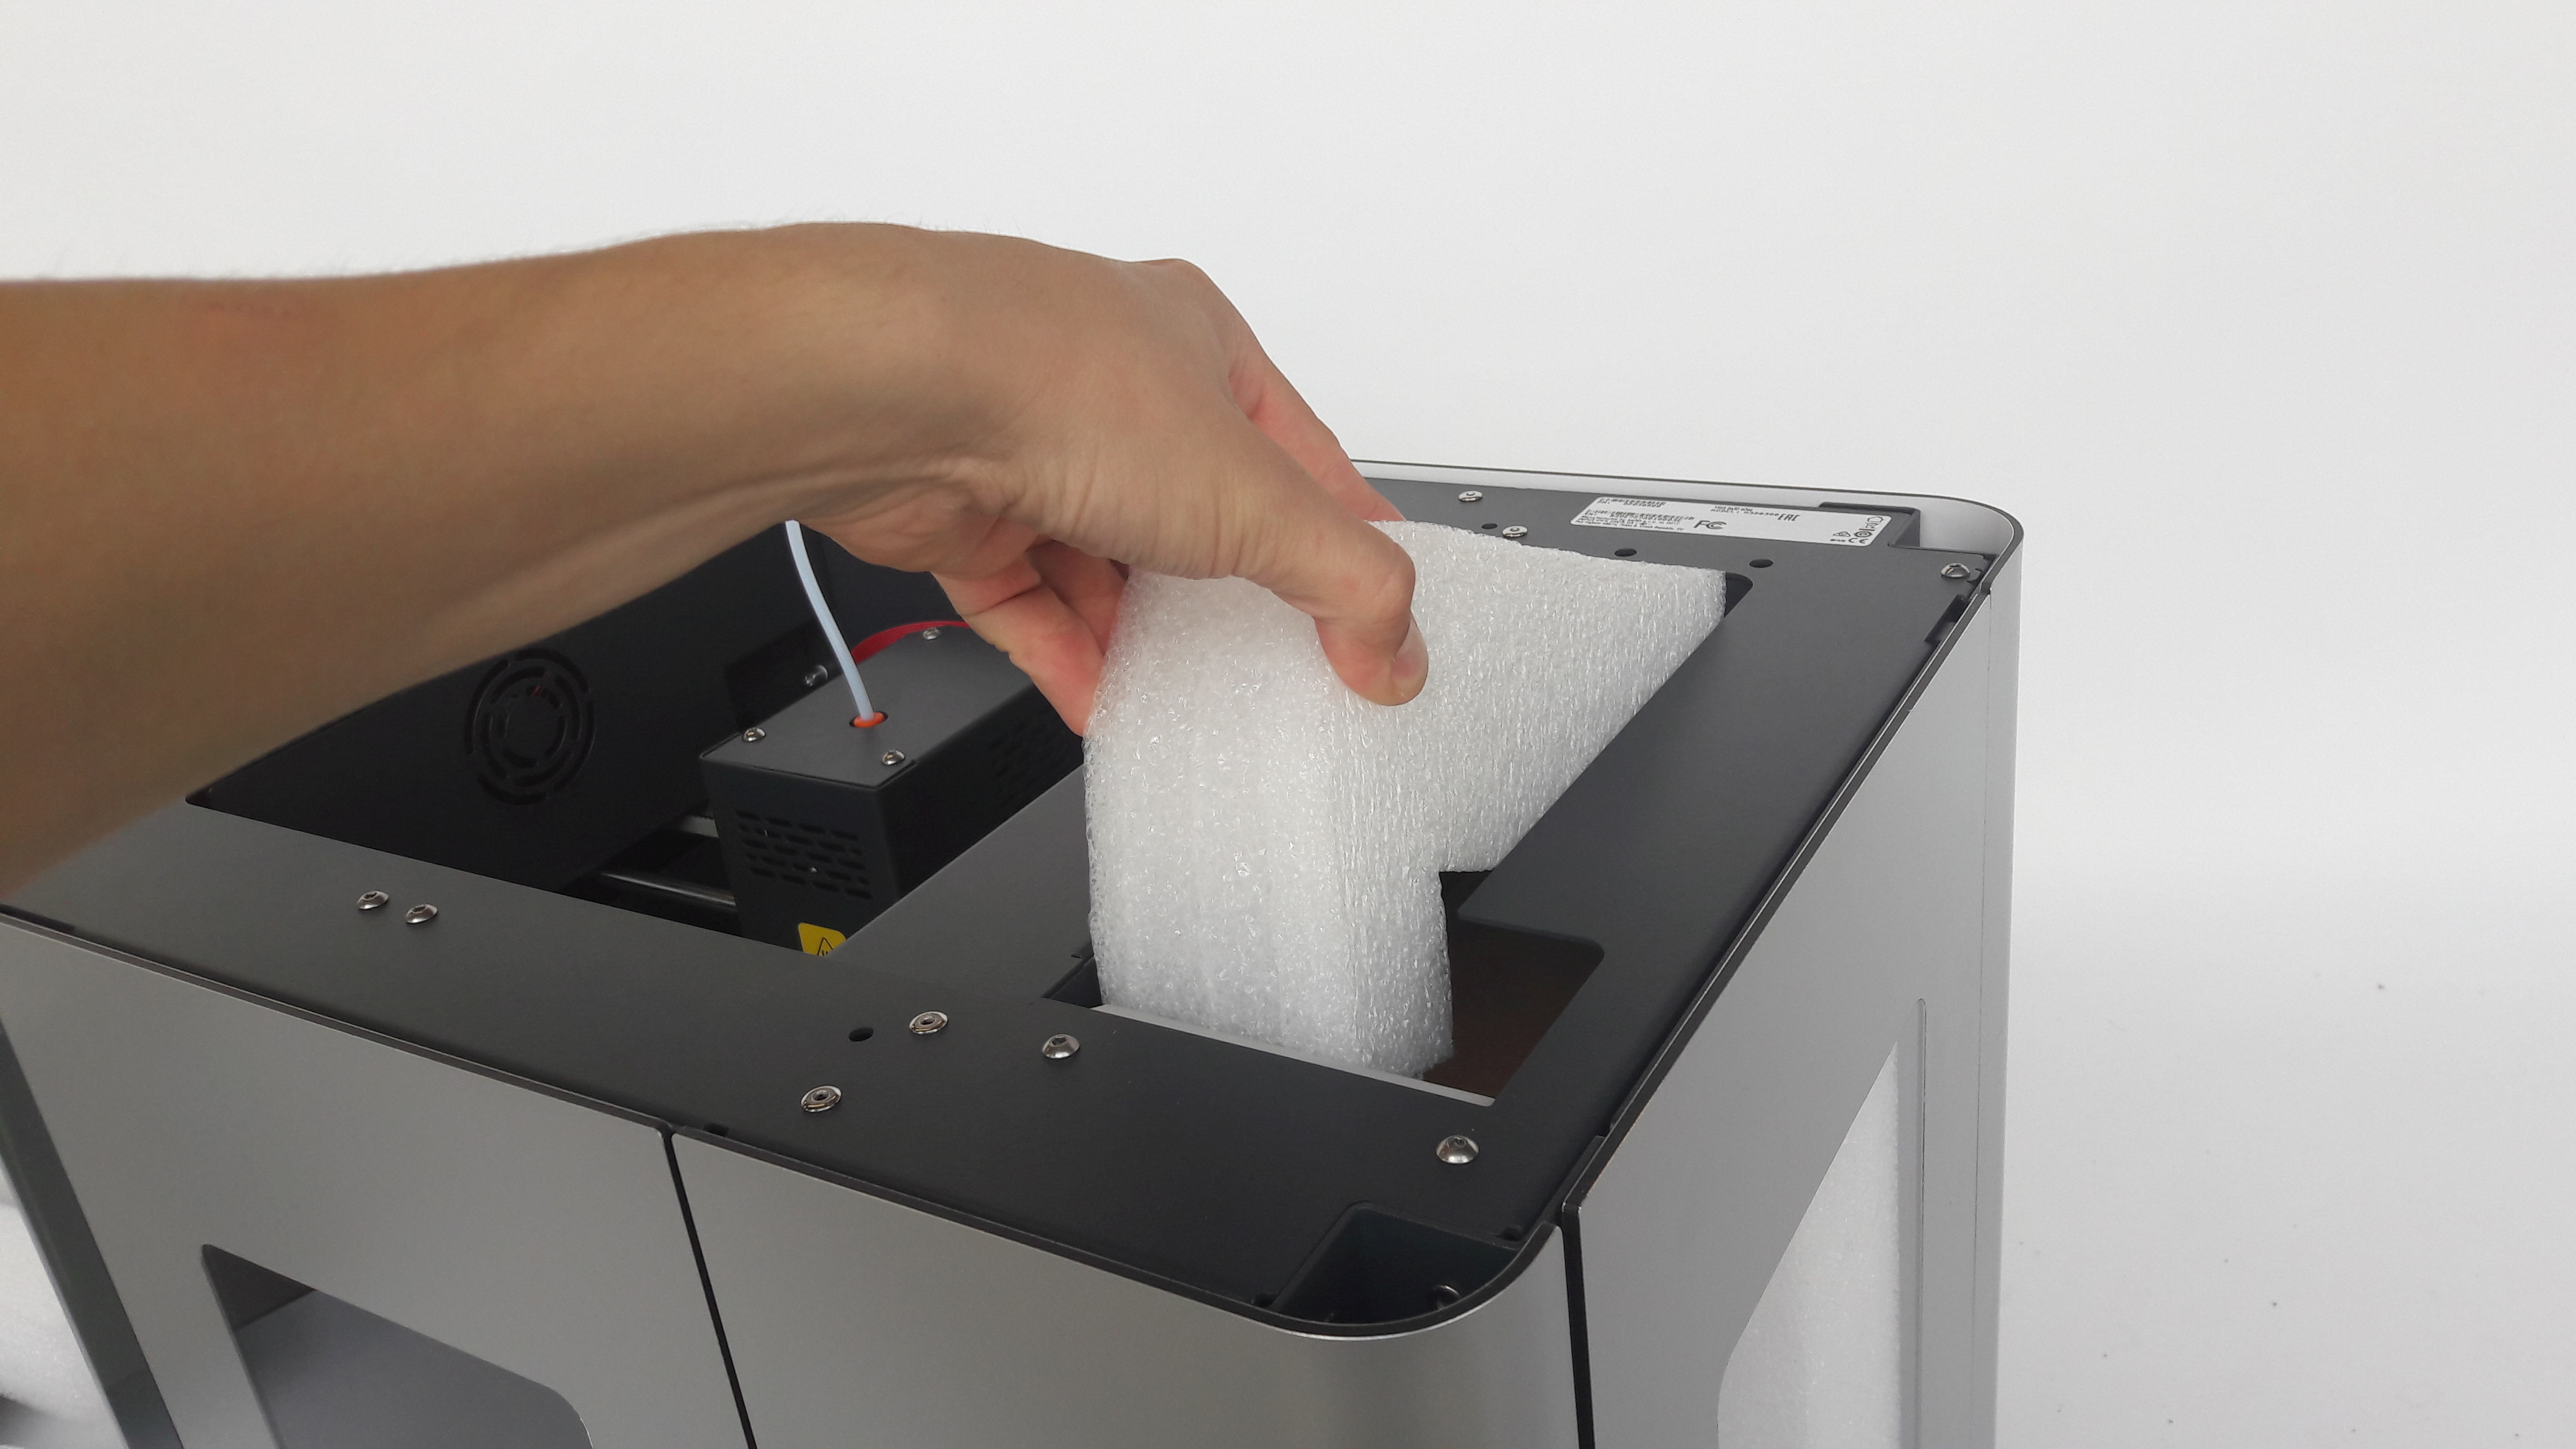
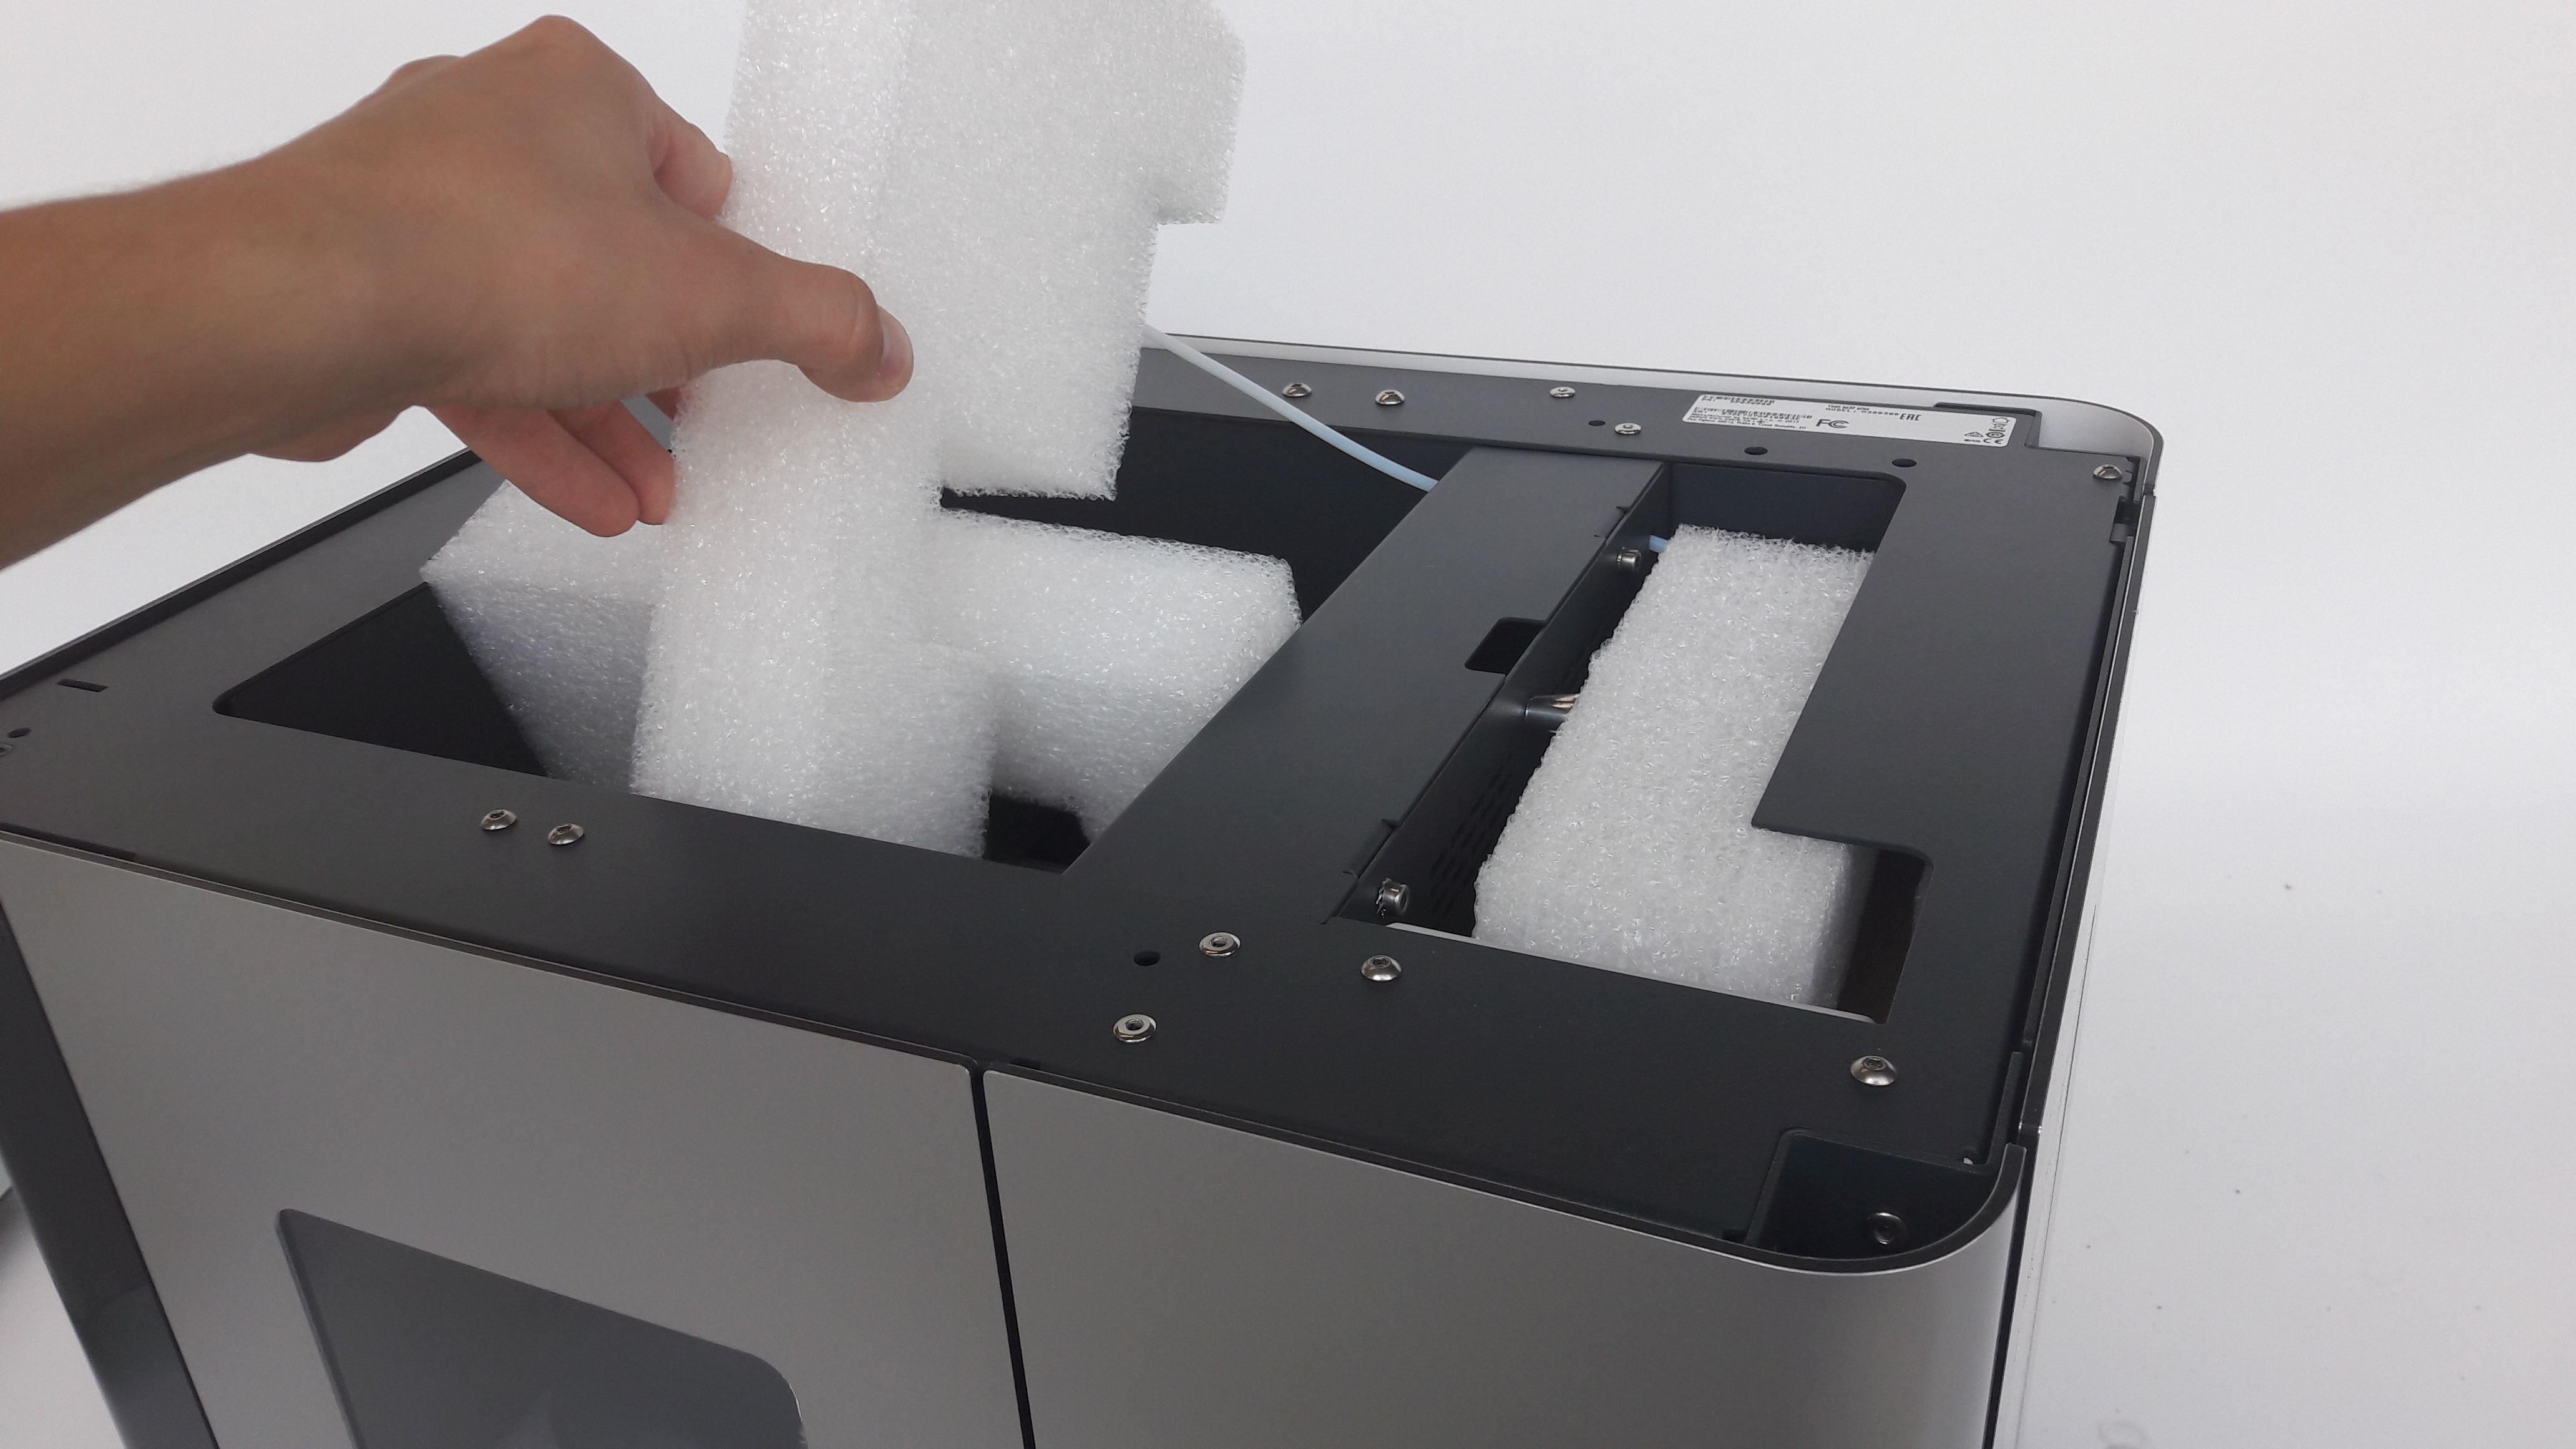
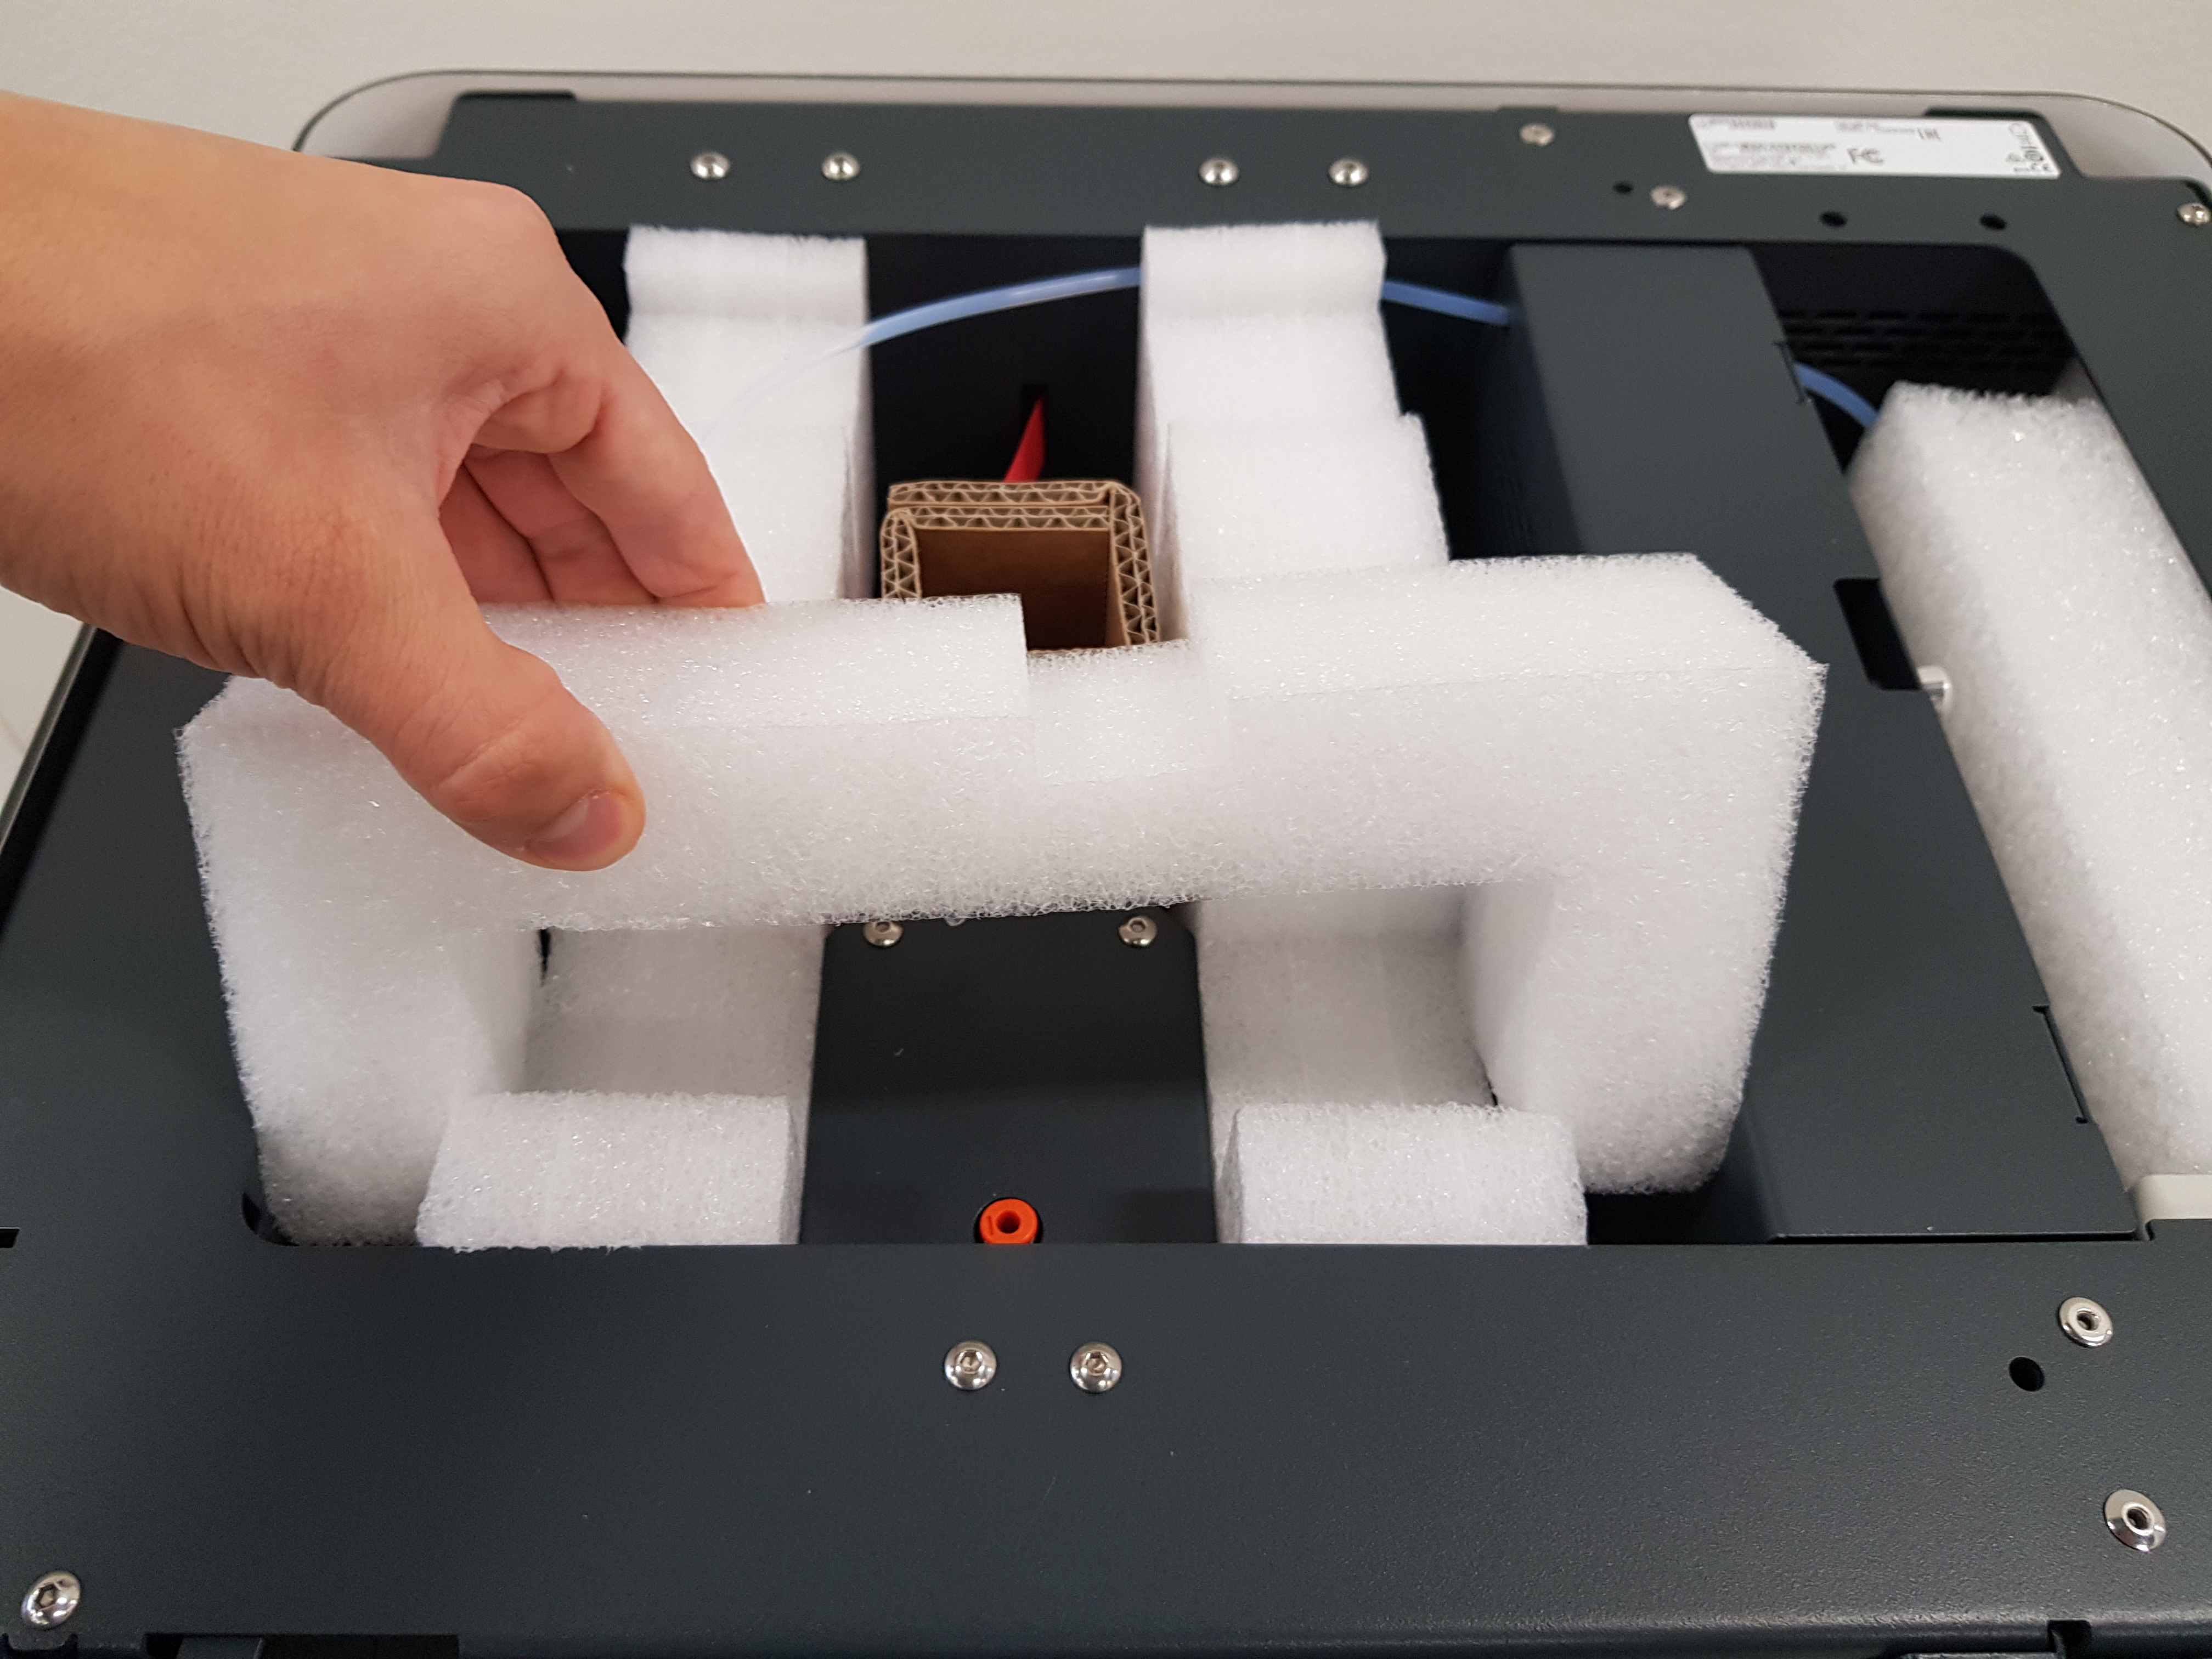
Remove fixing foams and accessory box
Remove protective foams from the print chamber and take out the filament box.
>>Packaging version 1: |
|---|
|
2. Also the filament can be removed now.
|

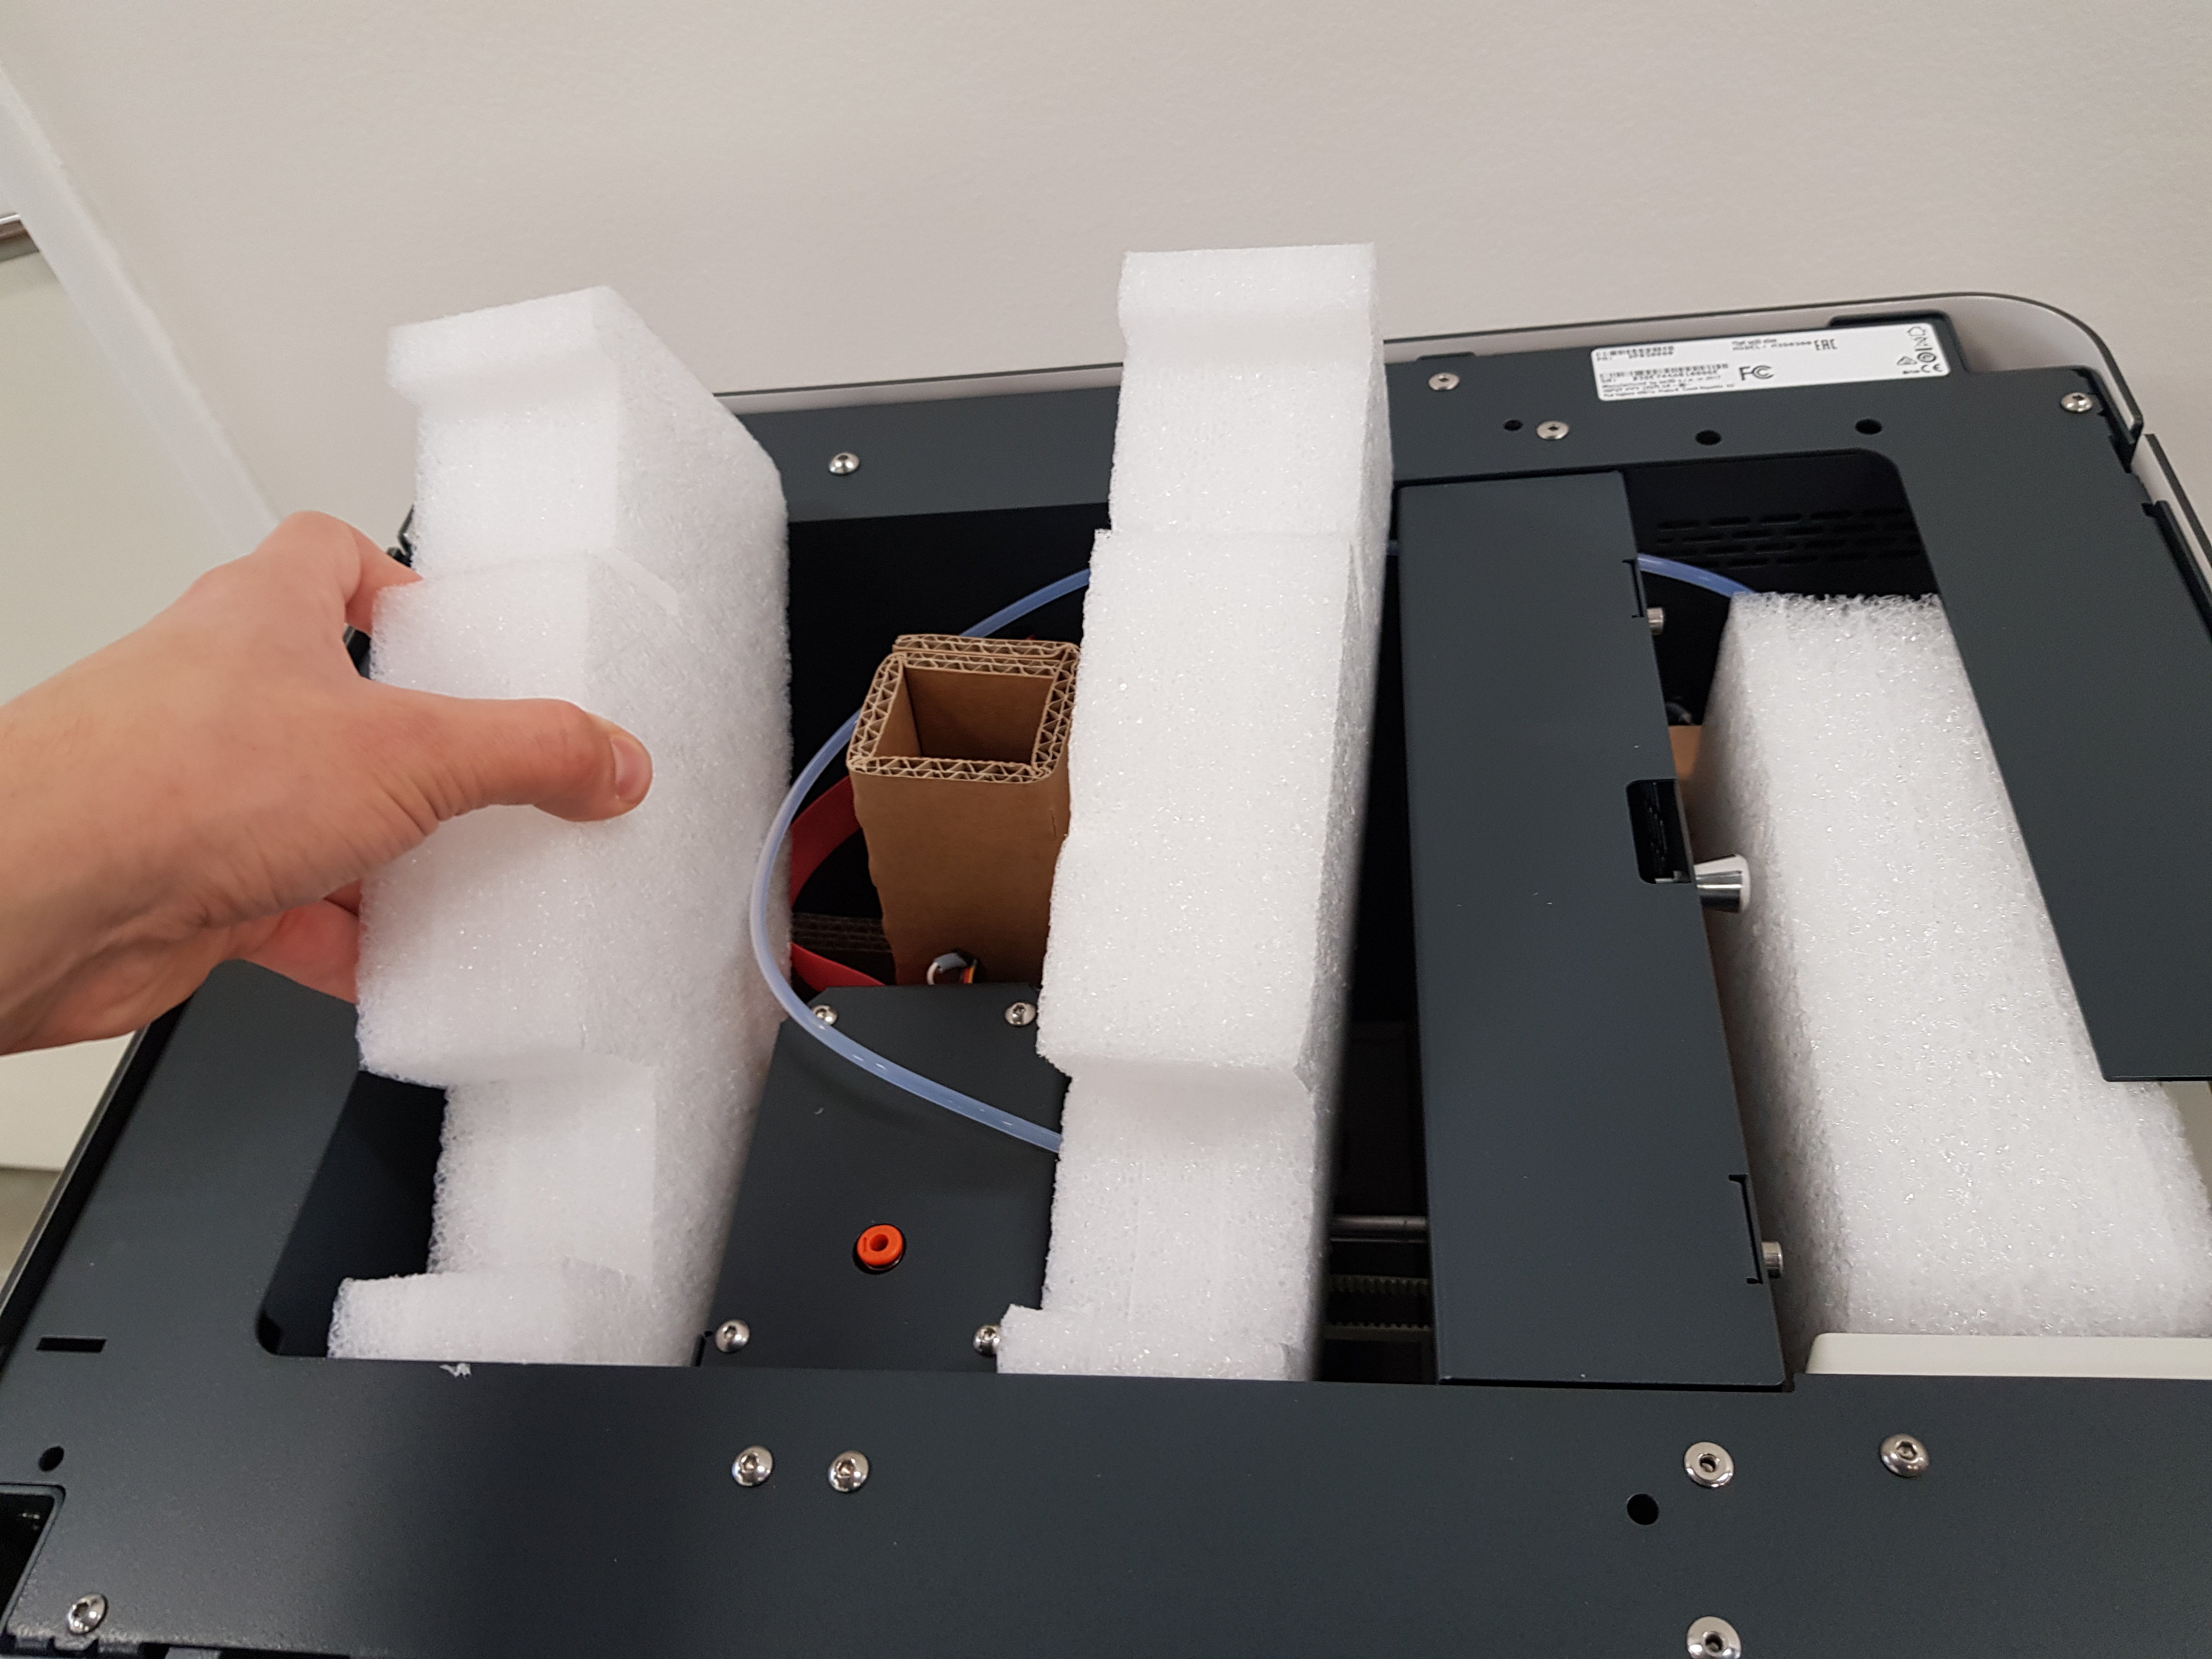
Packaging version 2: |
|---|
|
2. Now pull both REAR ends of foams. Then remove them completely. After that pull out the remaining cardboard through the front door. |
3. Plug the PTFE tube to the printhead (simply push in). Also filament can be removed now. |
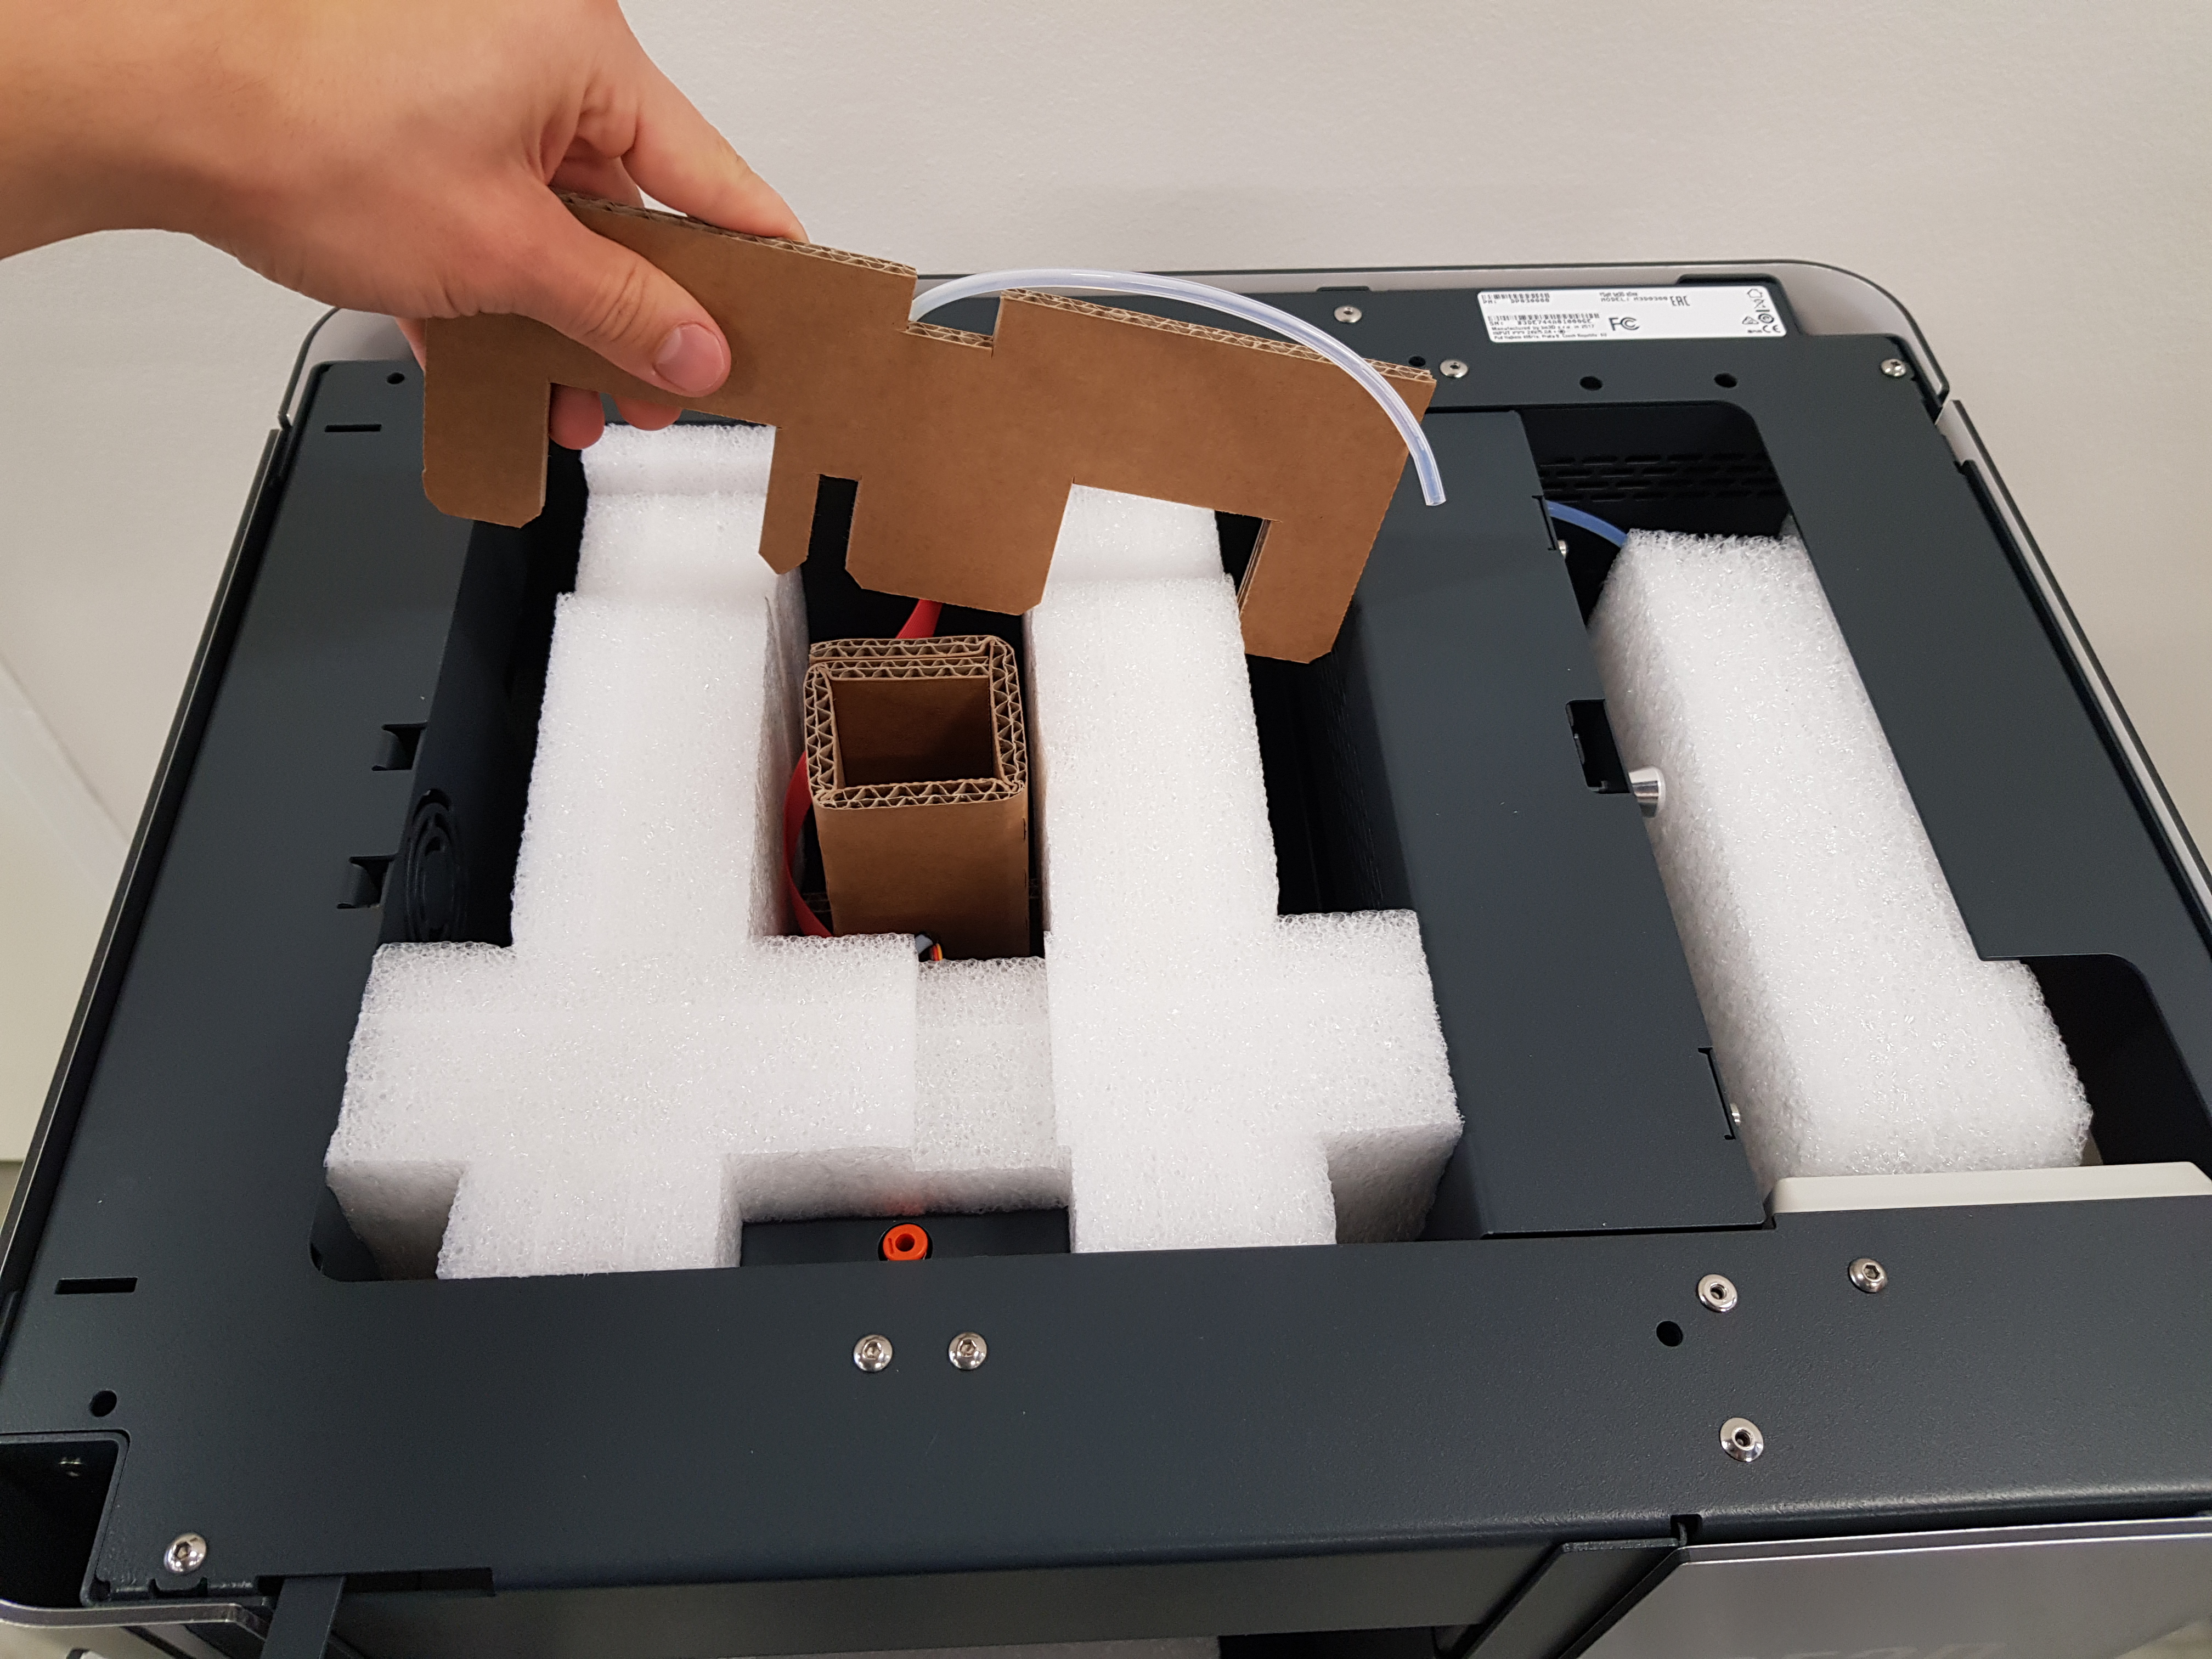
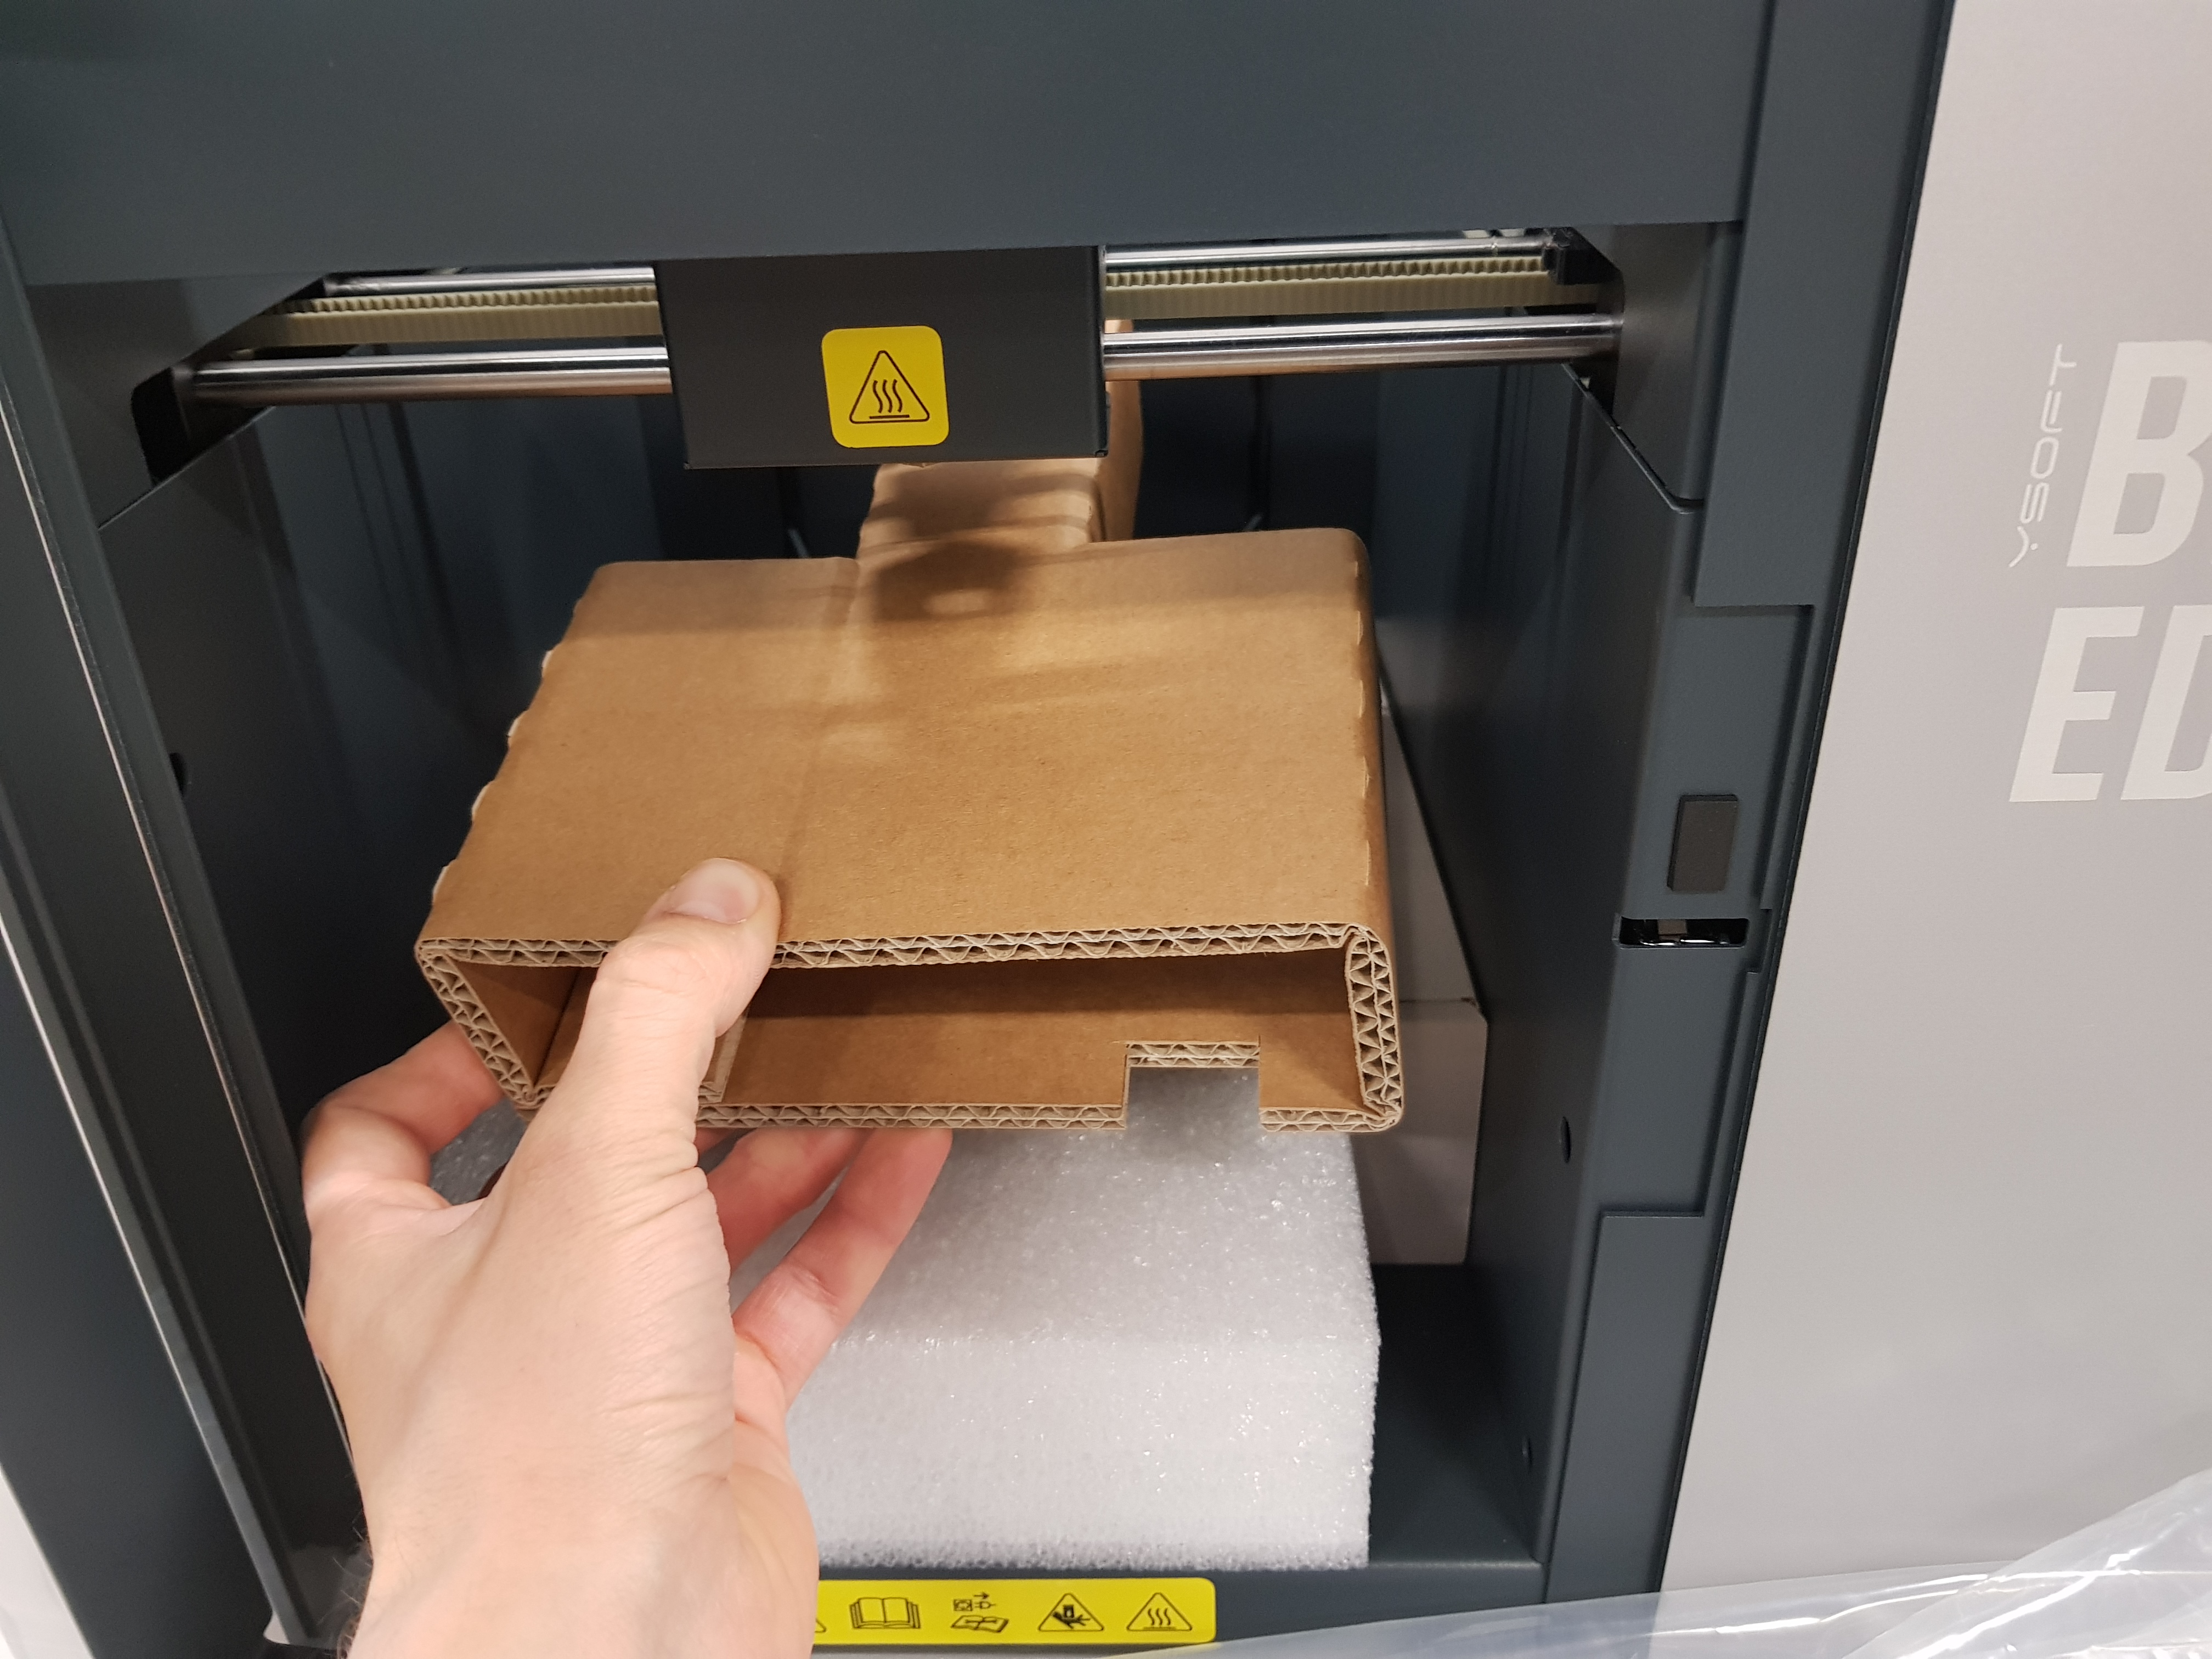

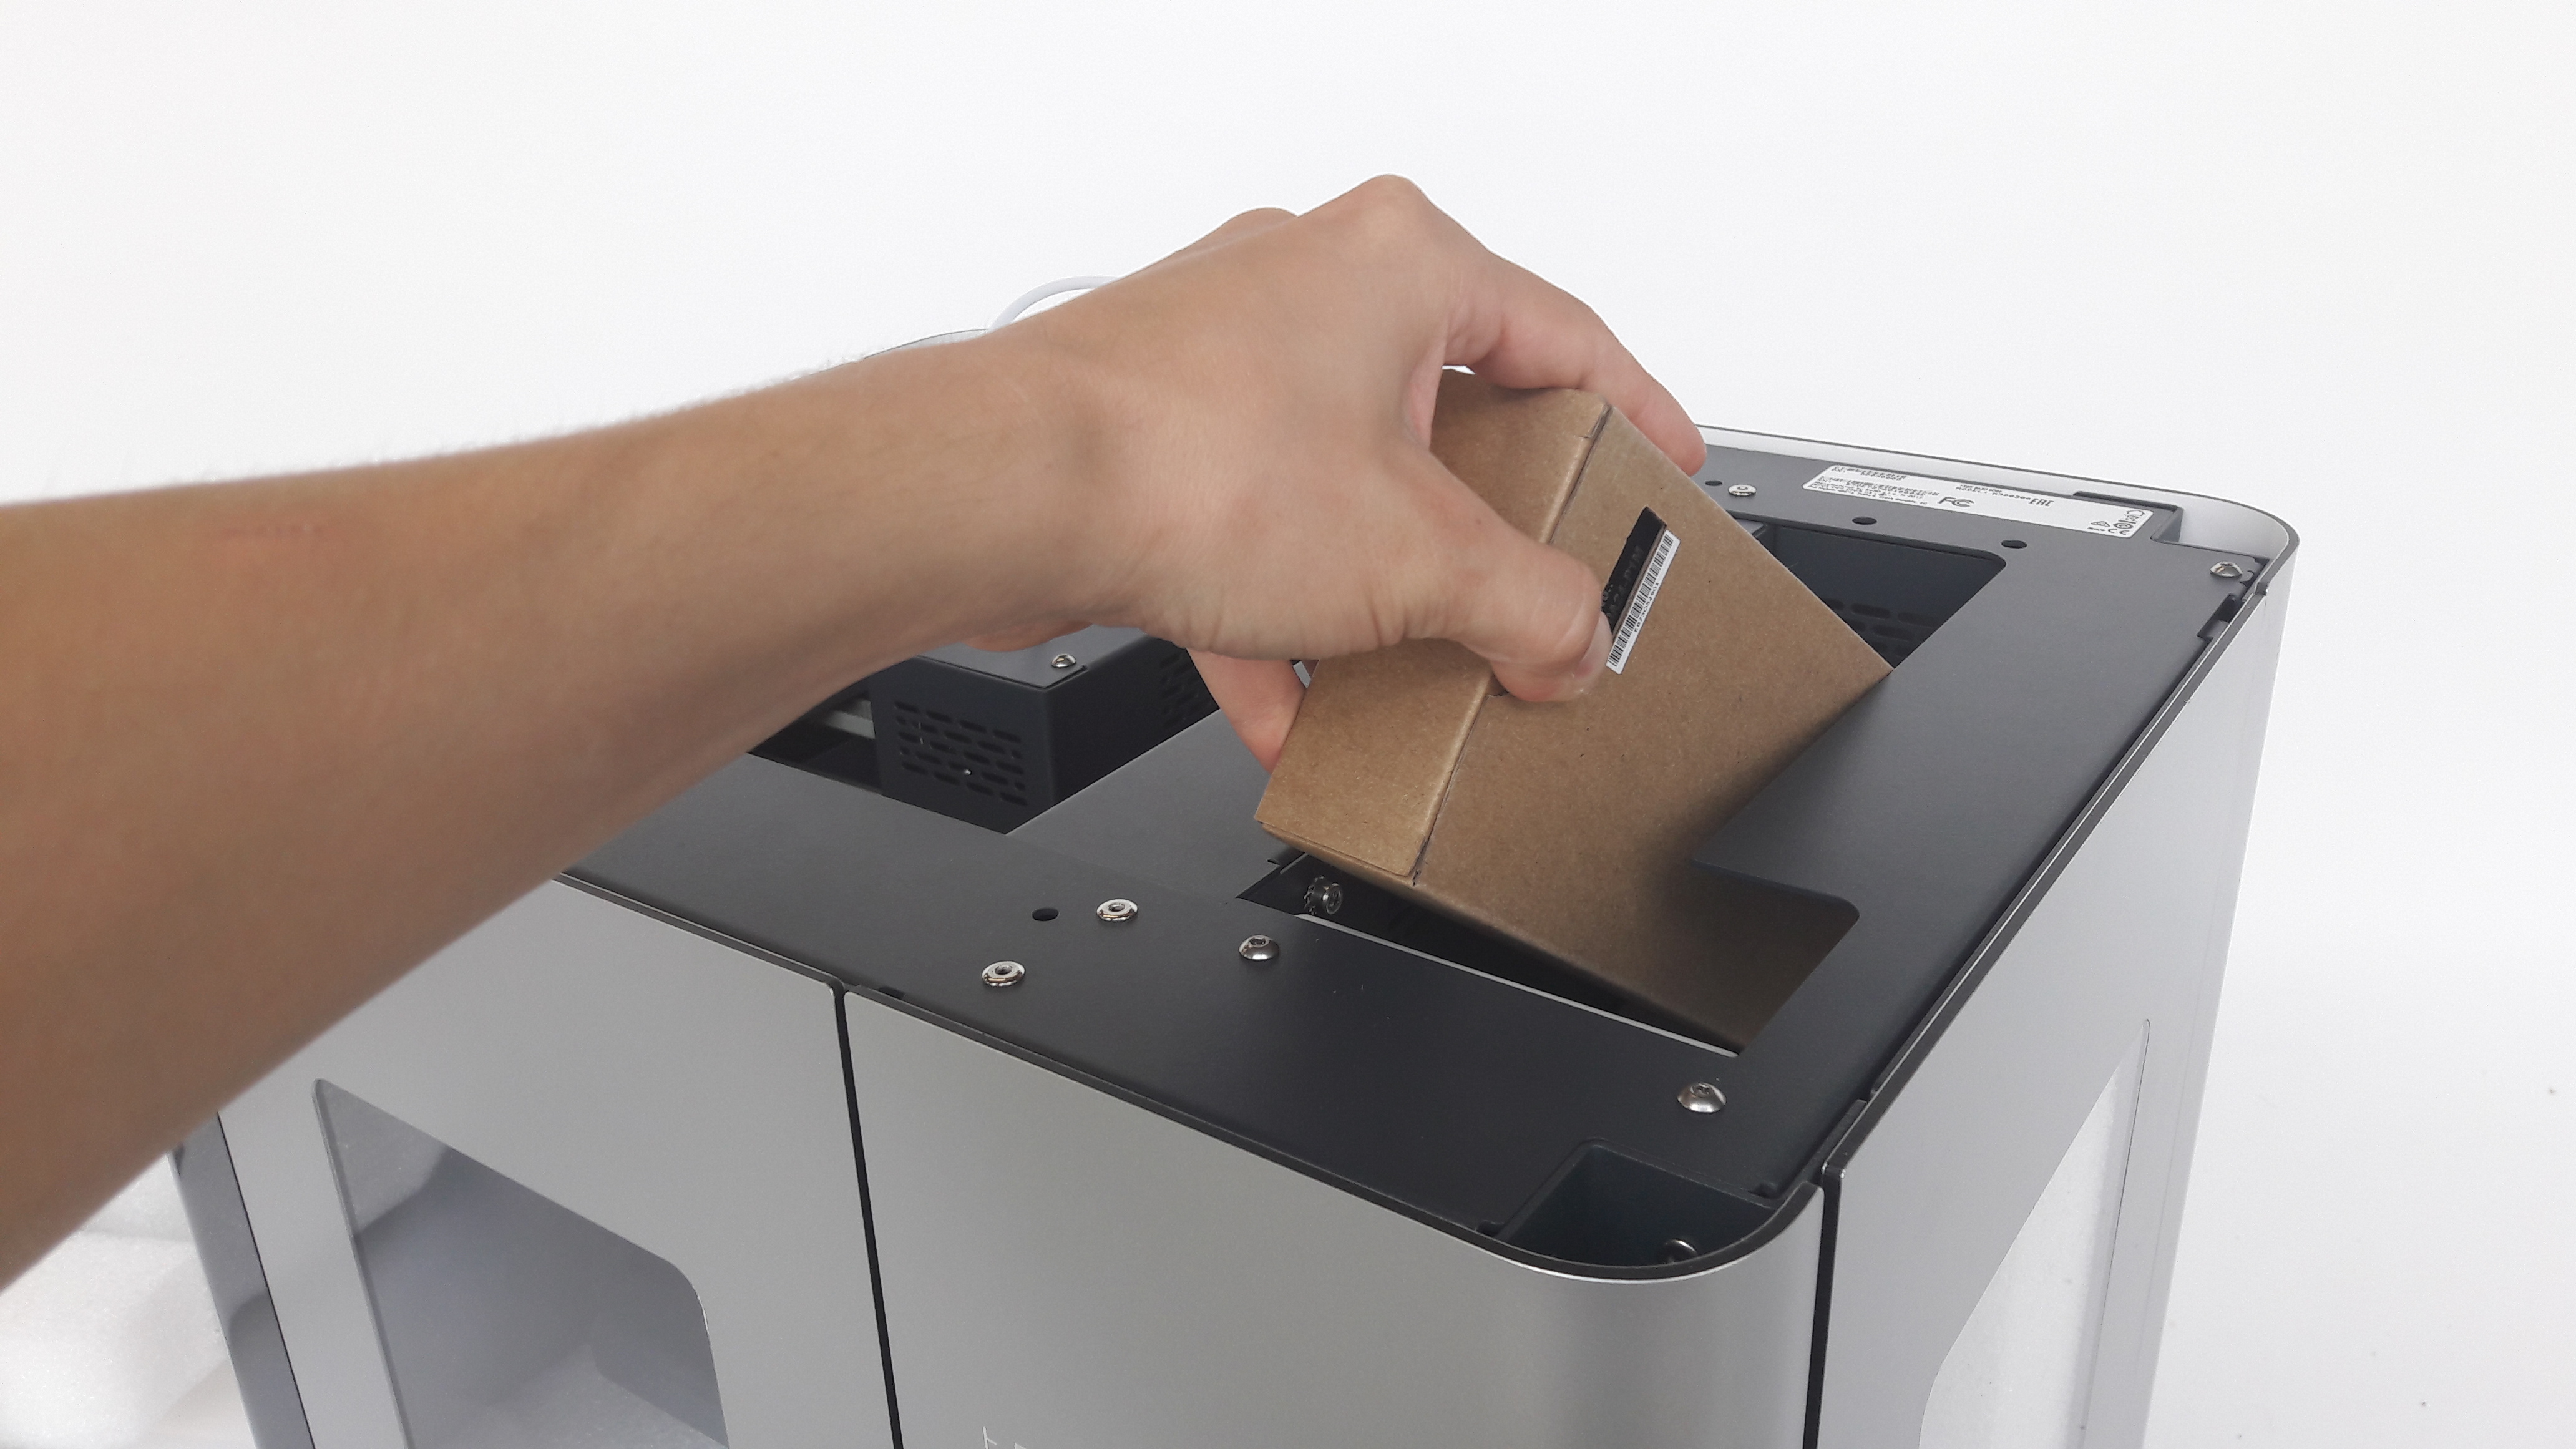
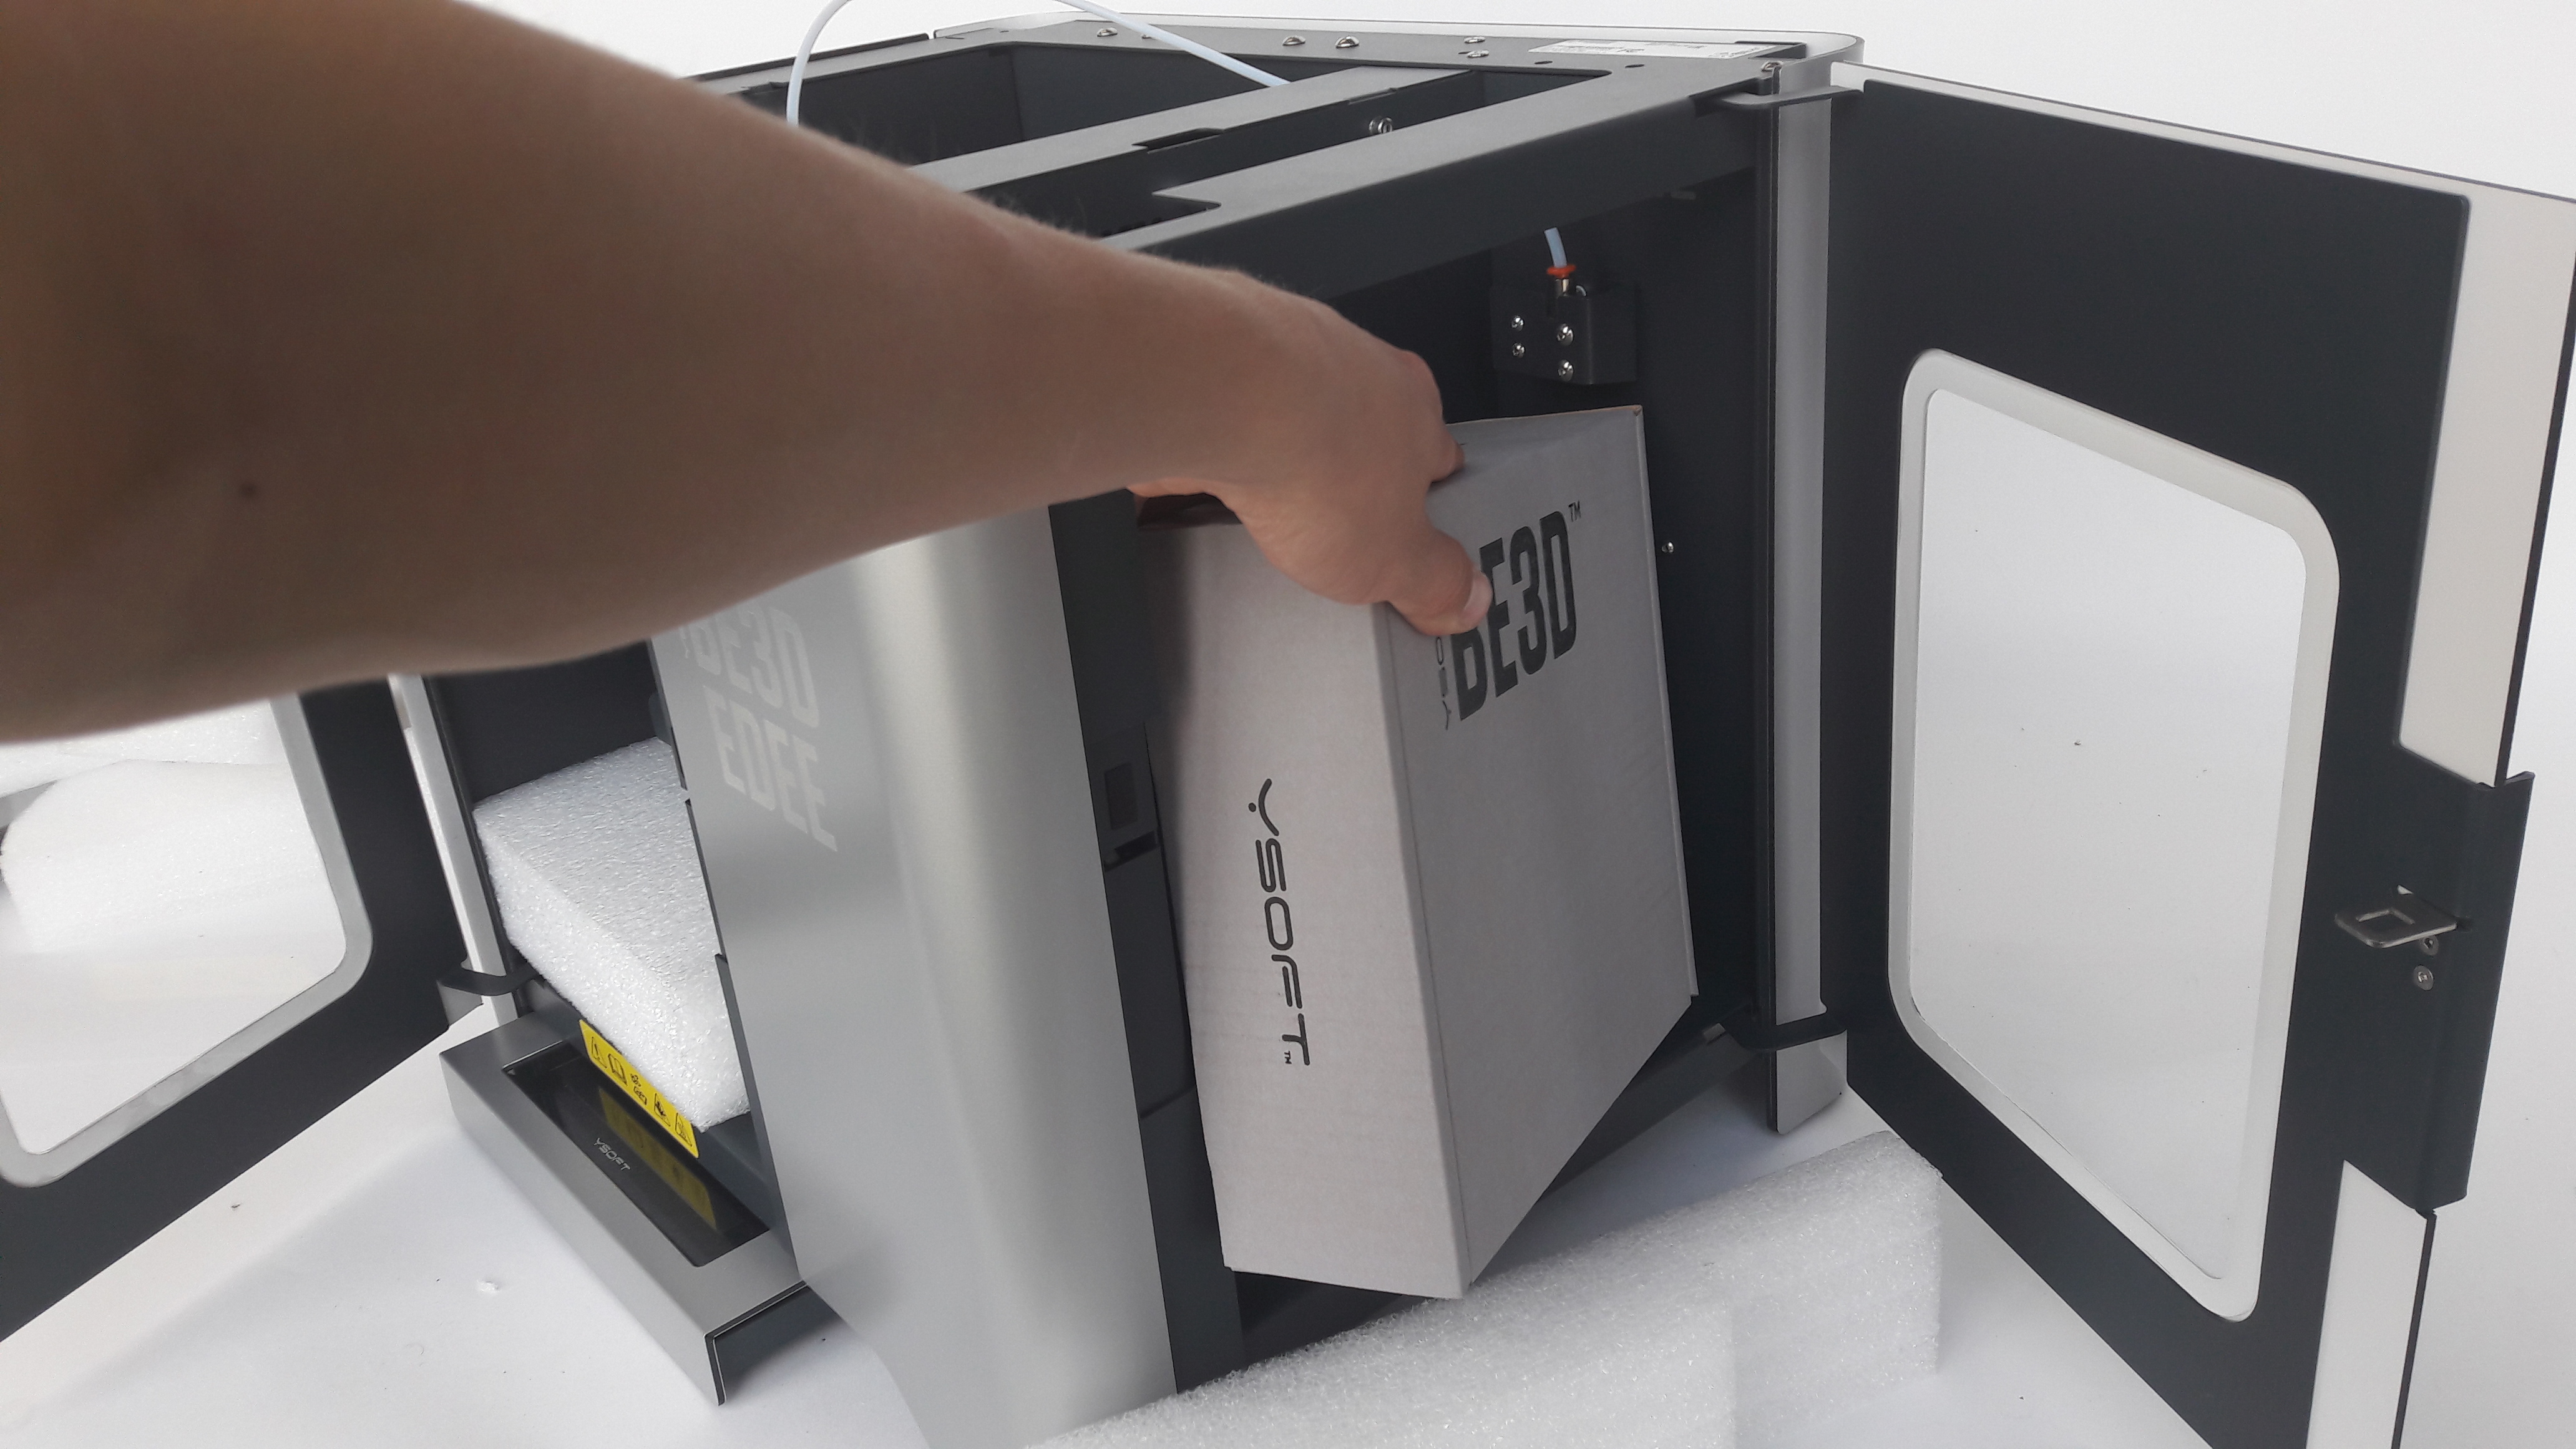
Once the side door is open, take out the accessory box from the spool chamber:
KEEP THIS FOAMS WITH PACKAGE FOR FUTURE PACKING. The head should be secured for any transportation, otherwise, there might be a damage to the print head or the printer insides.
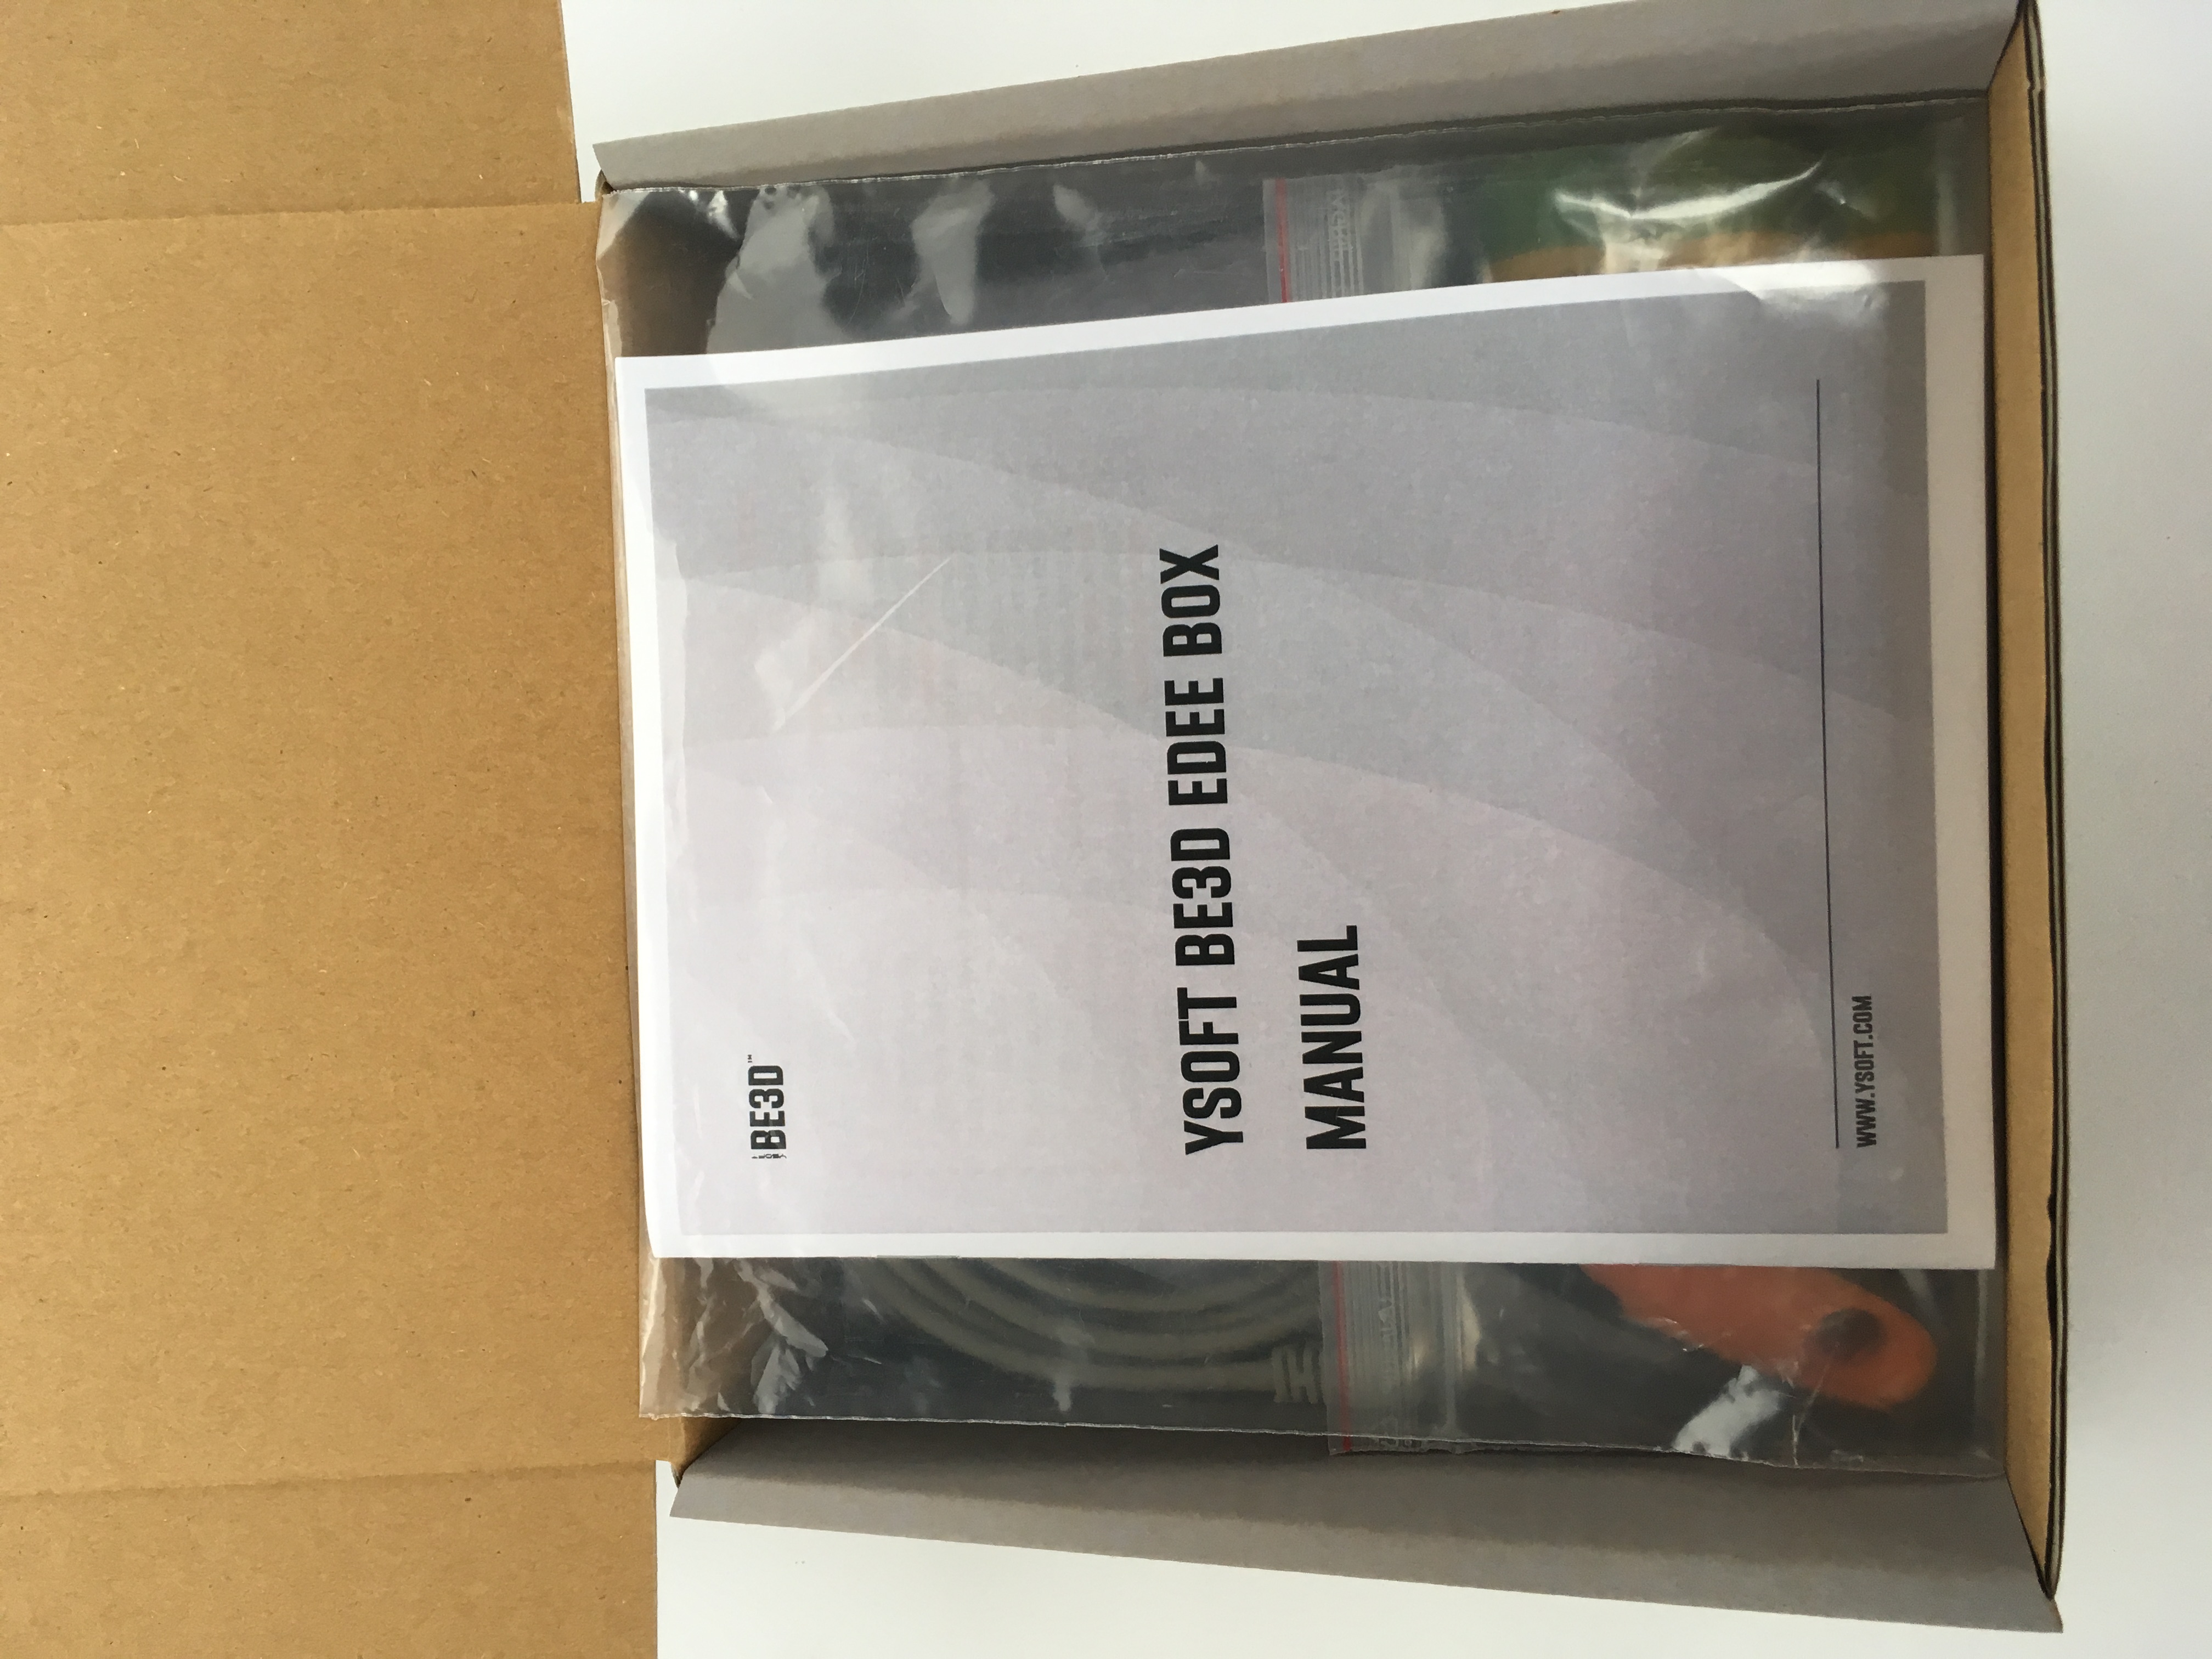
Unpack accessory box
Open the accessory box:
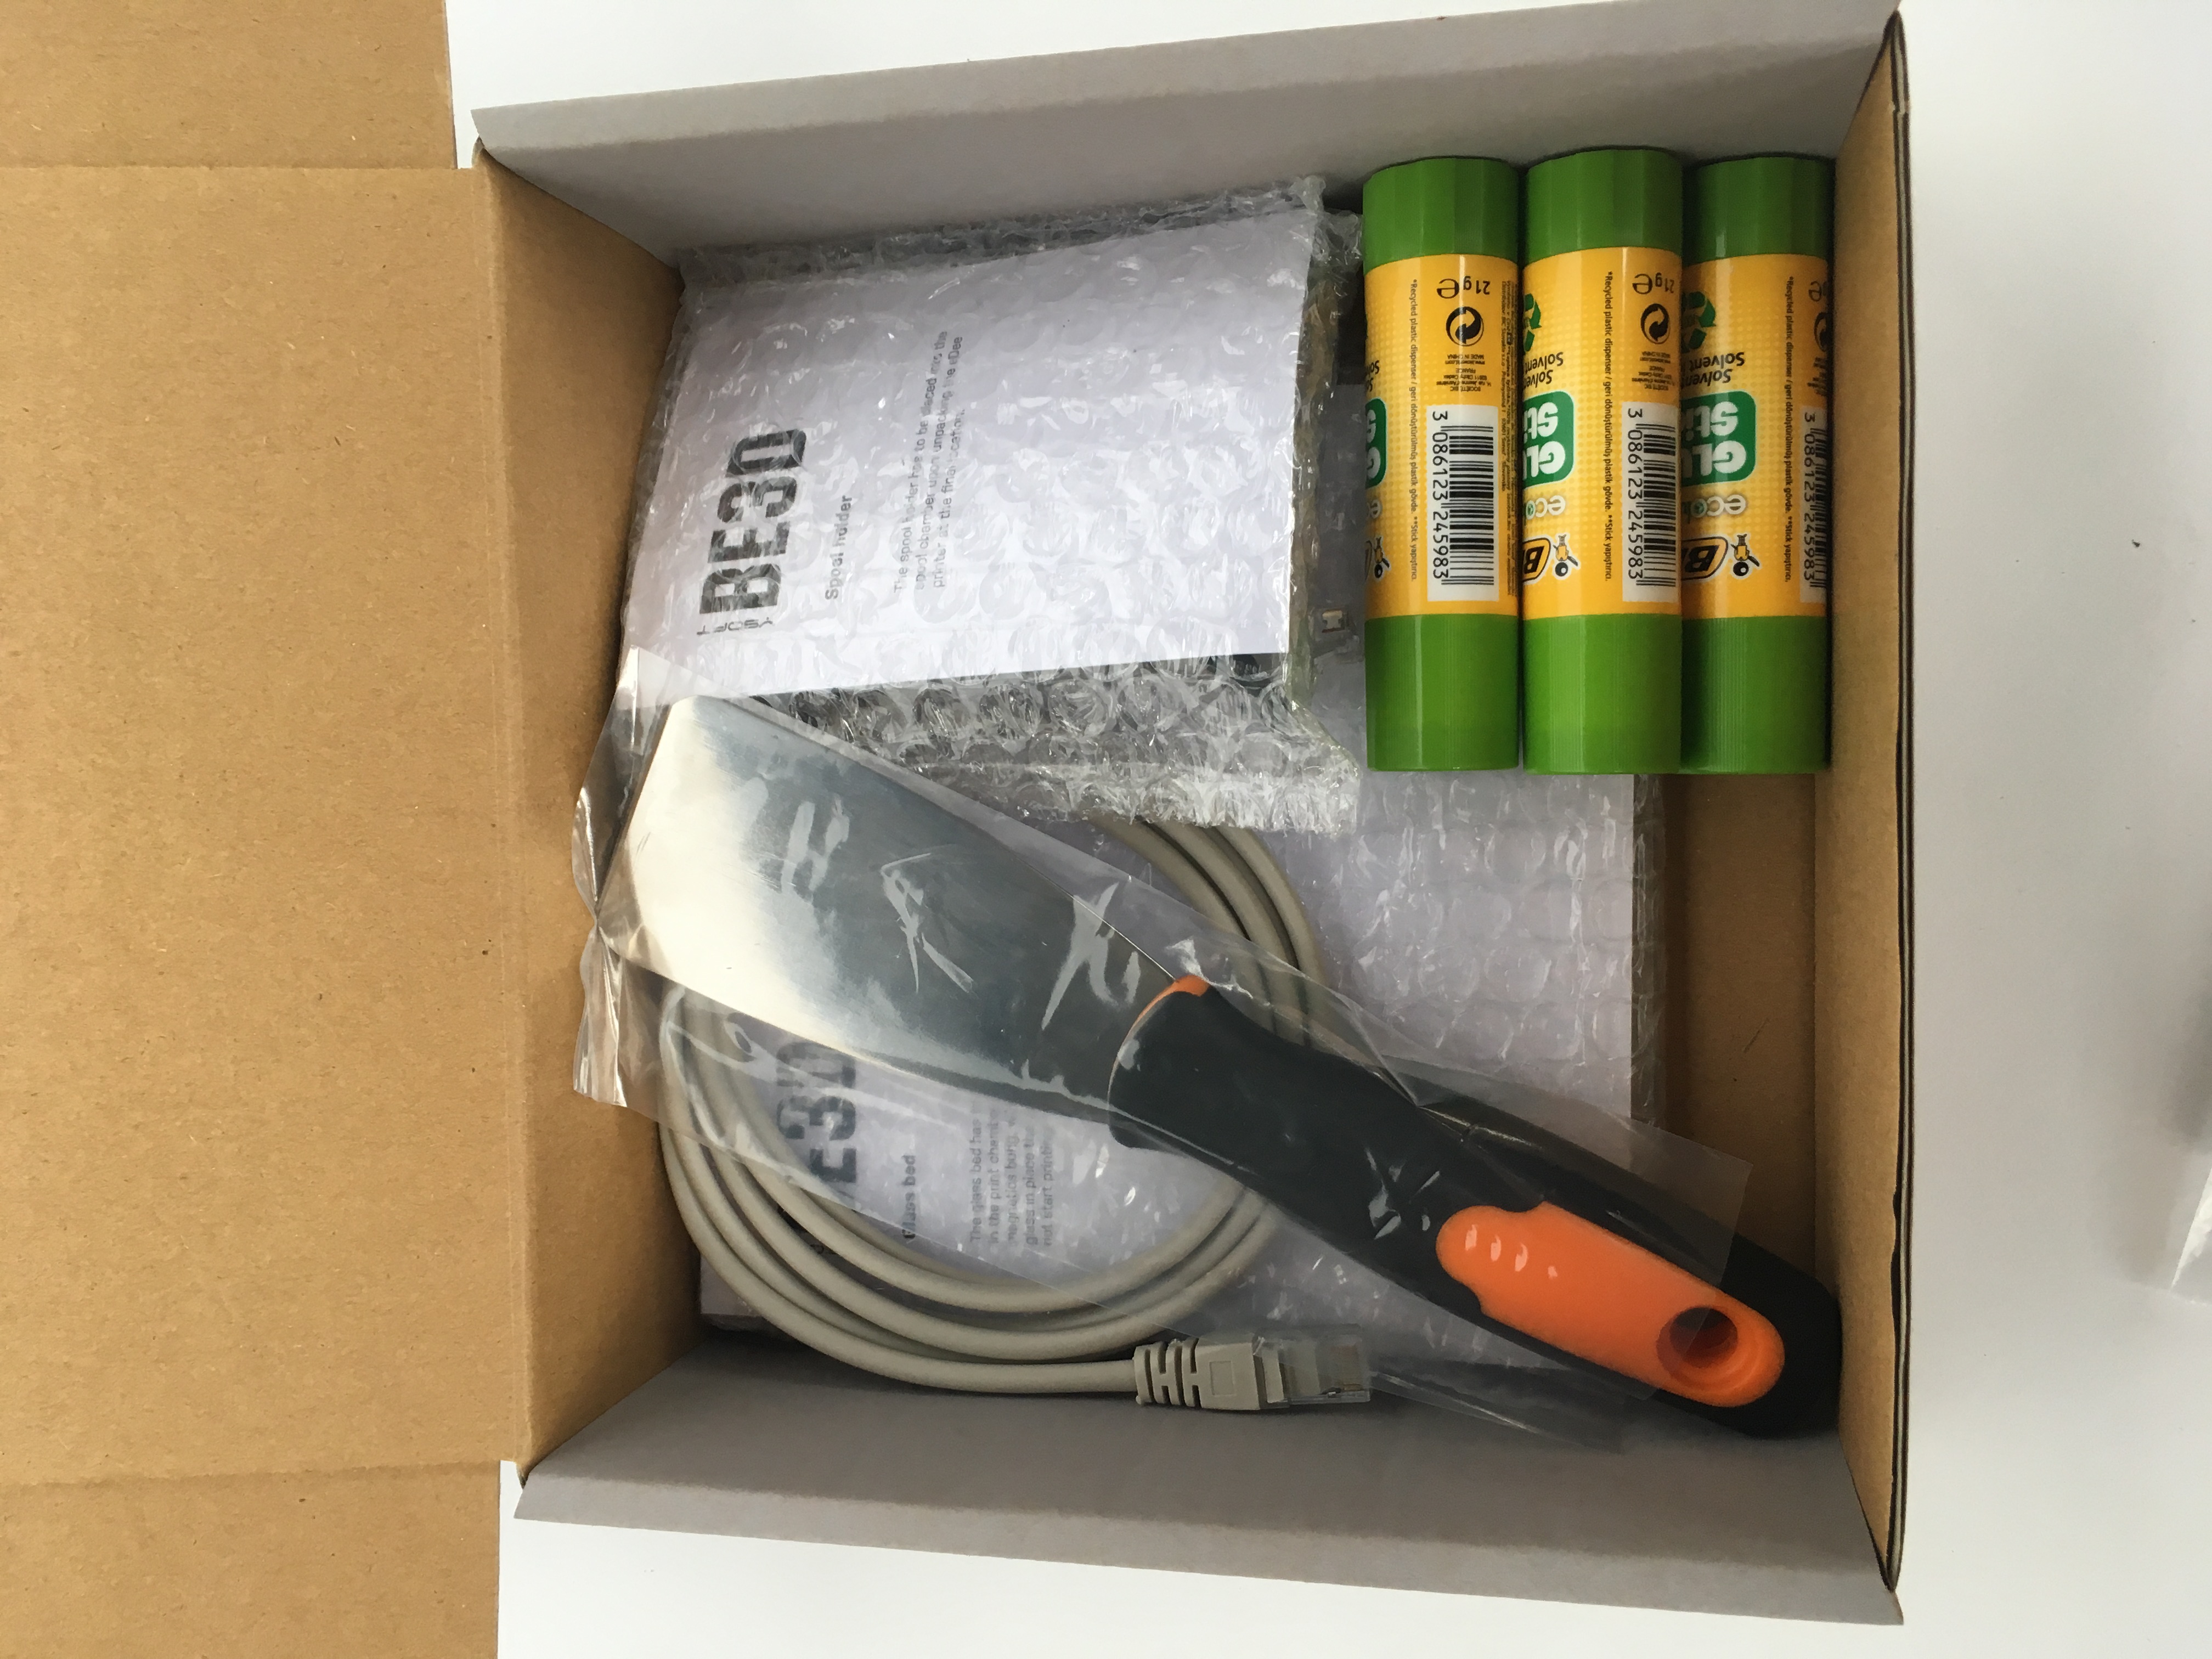
Make sure it contains all the following:
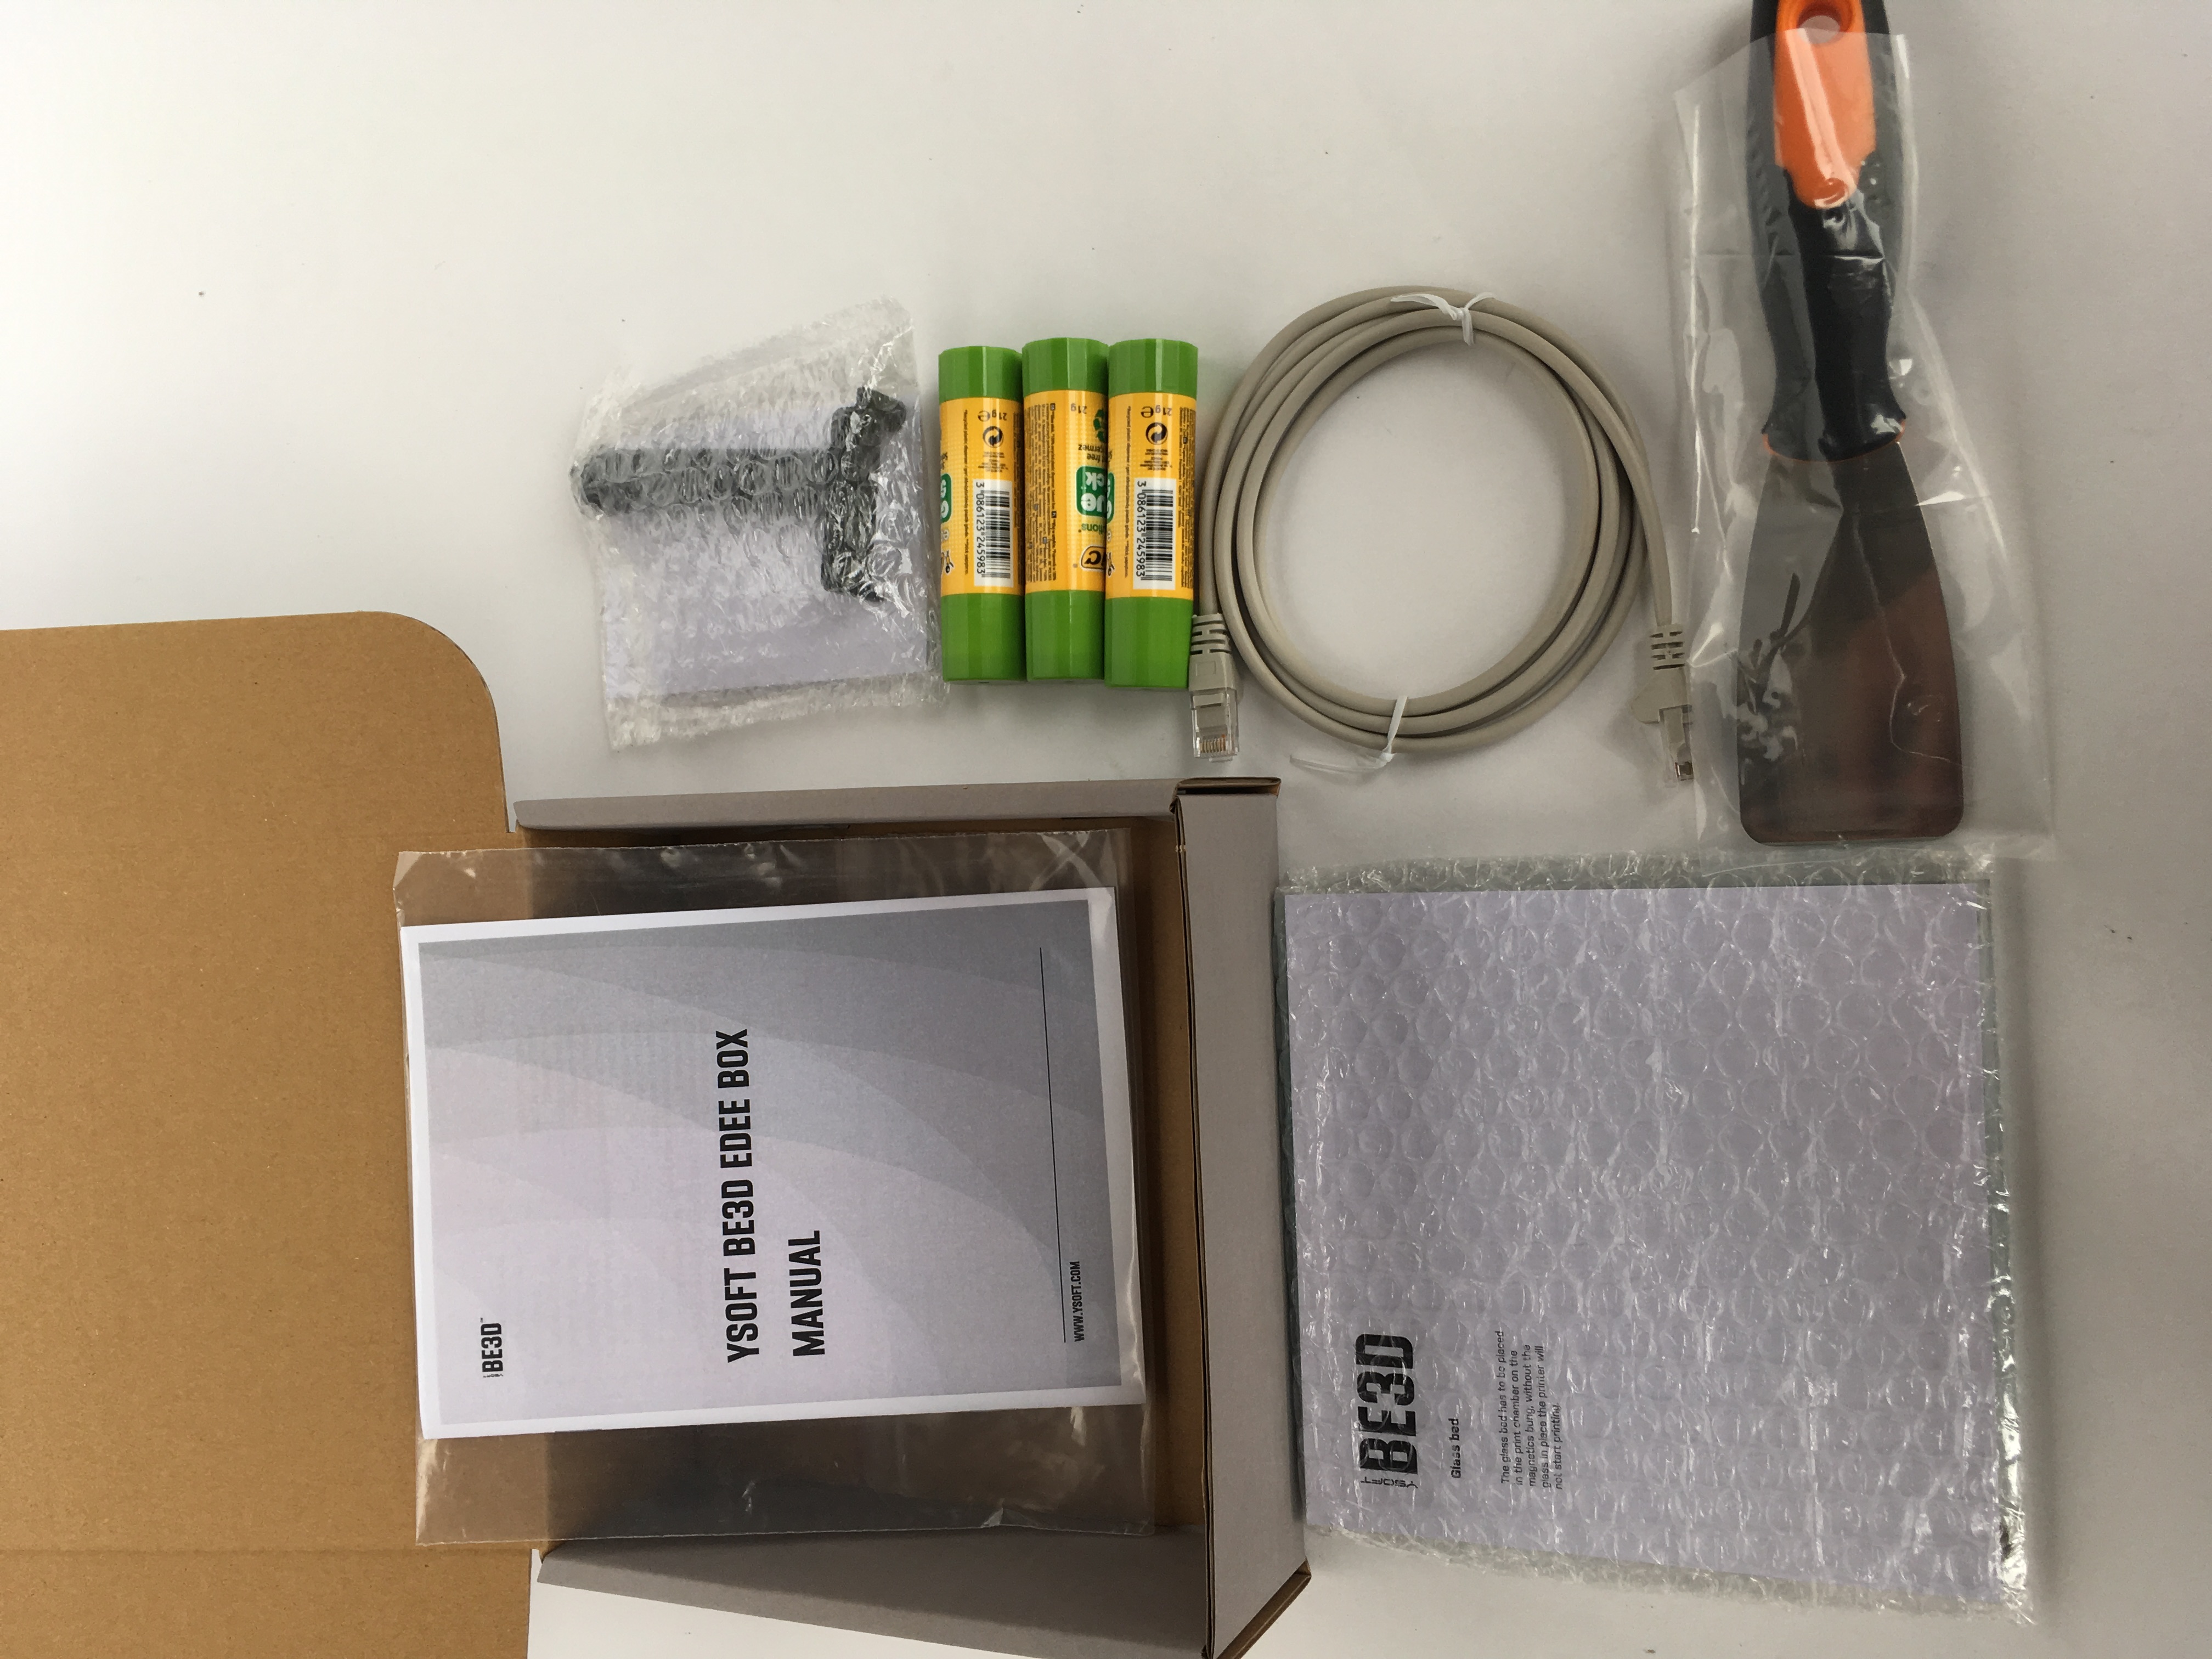
- Spool holder
- Glass pad
- Spatula with rounded corners
- Glue stick - 3 pieces
- LAN cable
- 8mm spanner
- 2,5mm hex key
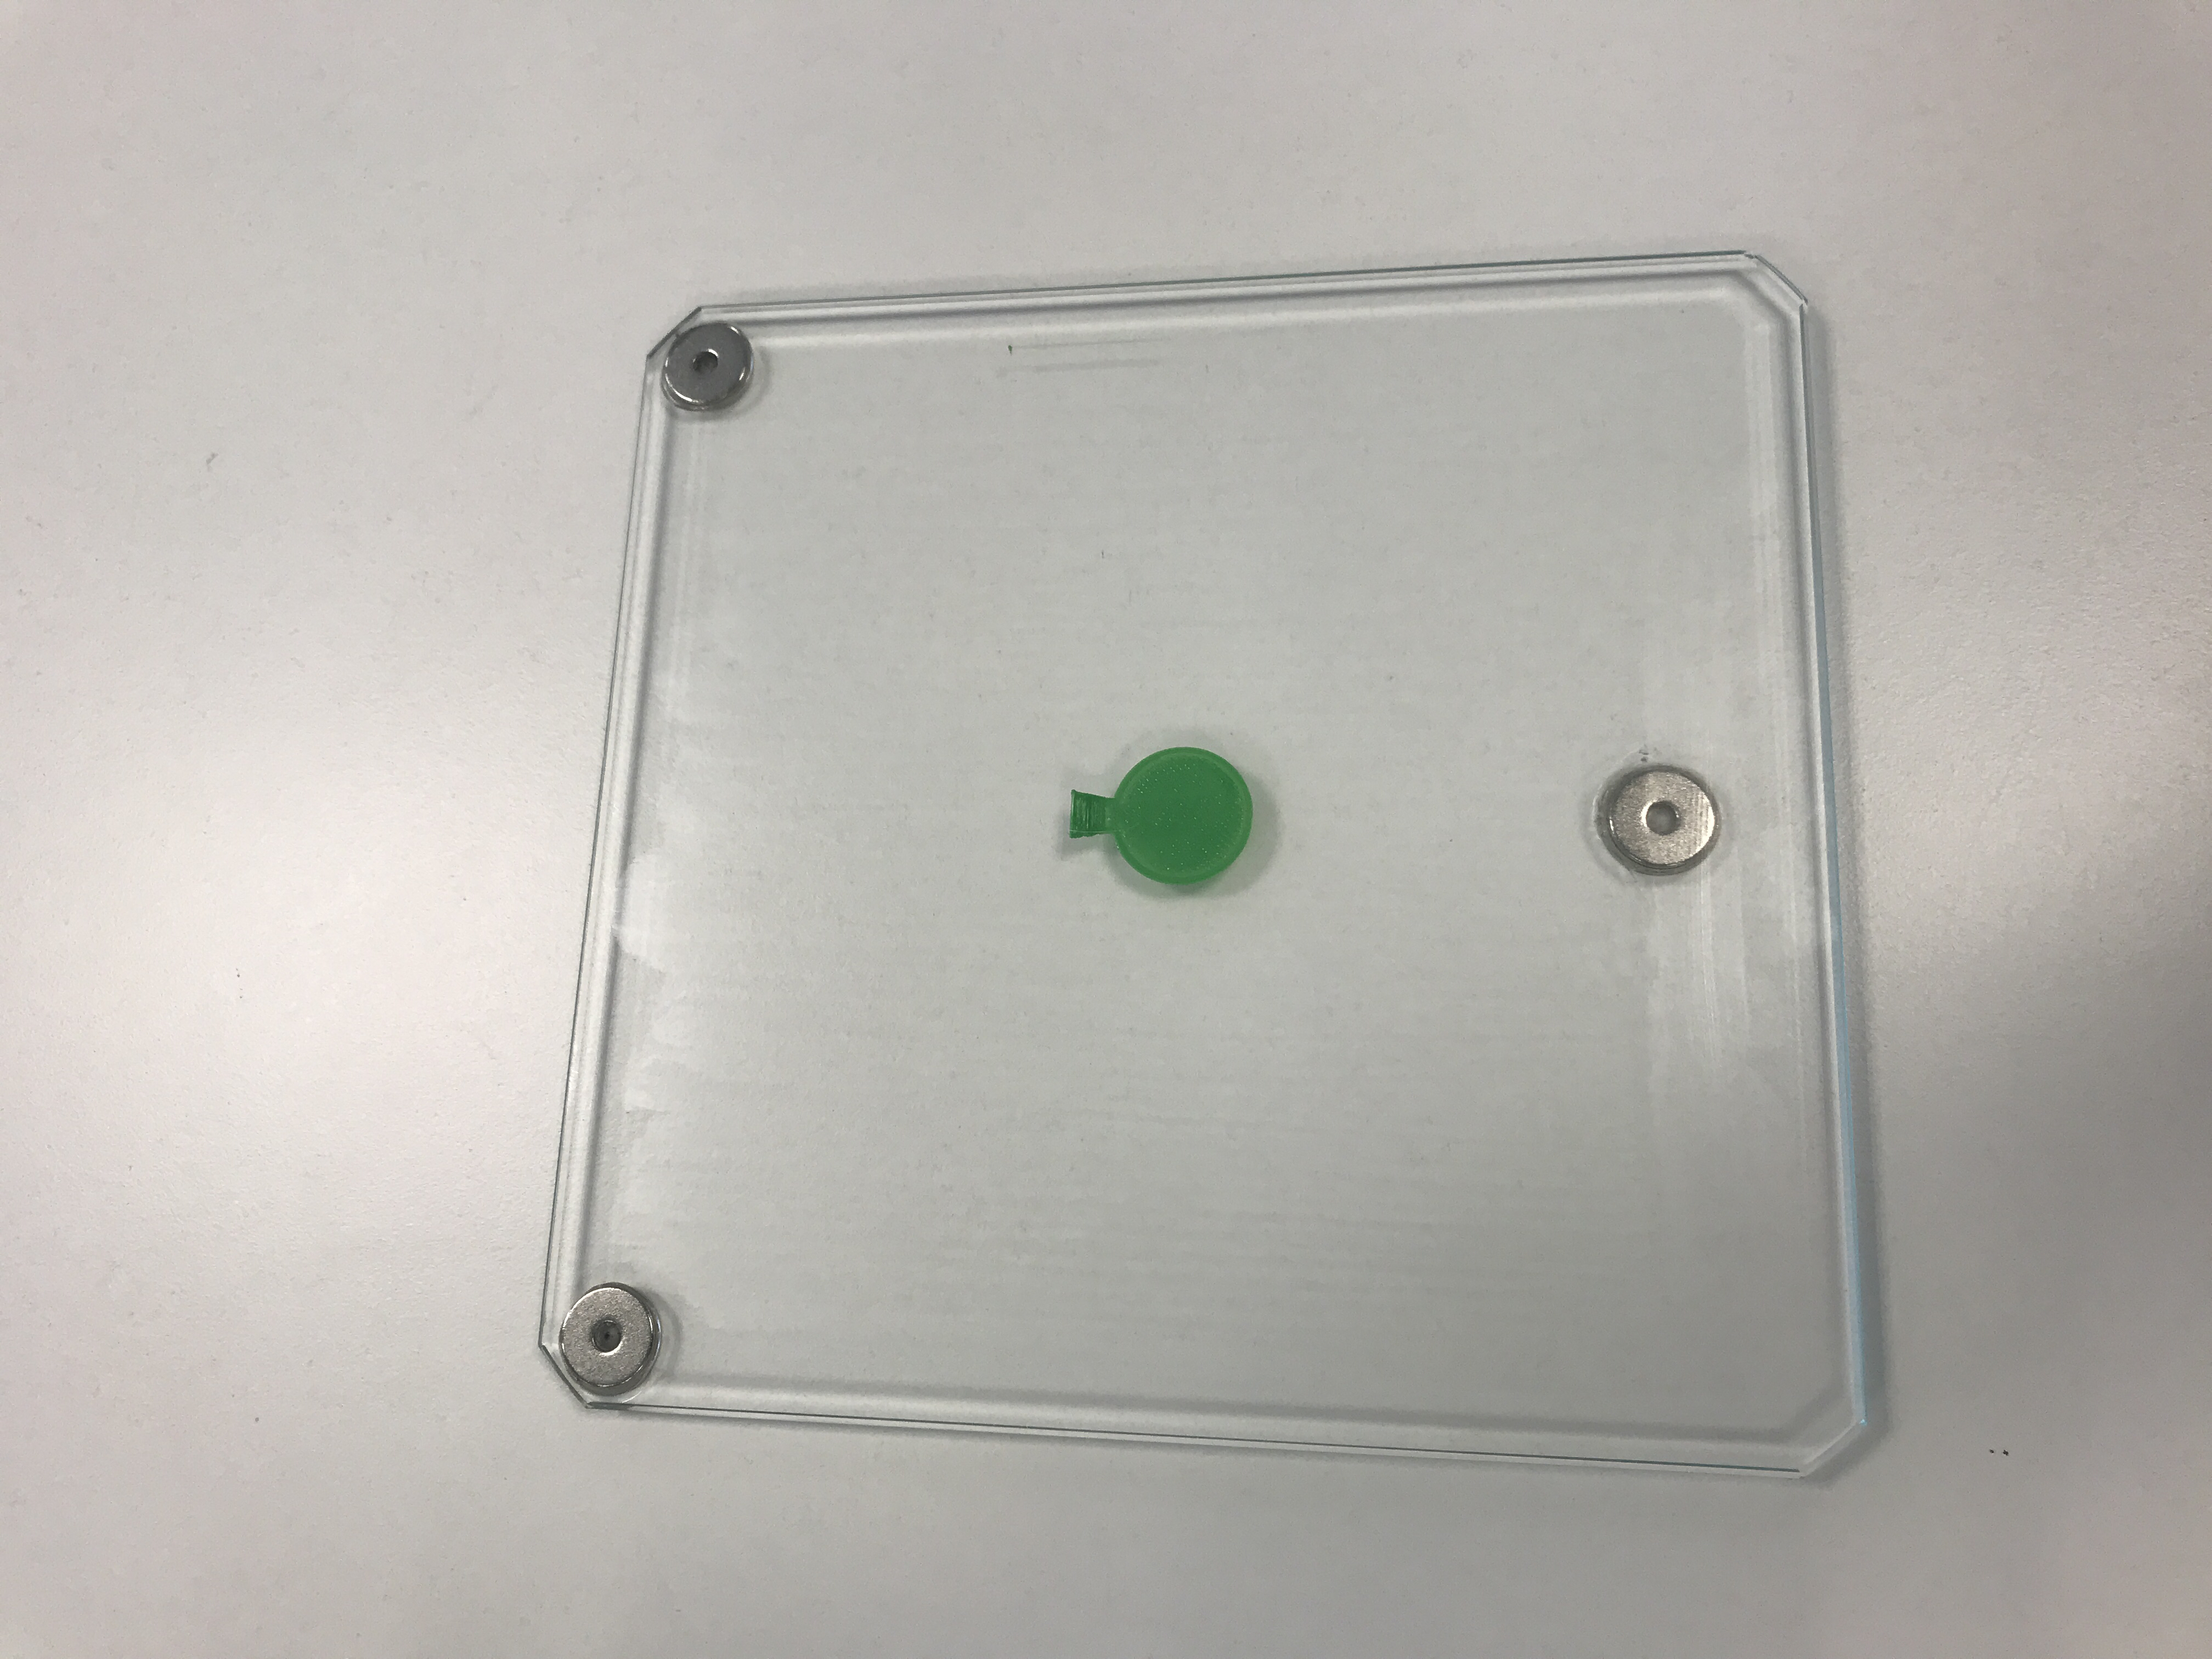
Place the glass print bed into the printing chamber
Take out the glass from the bag and place it carefully into the printing chamber.
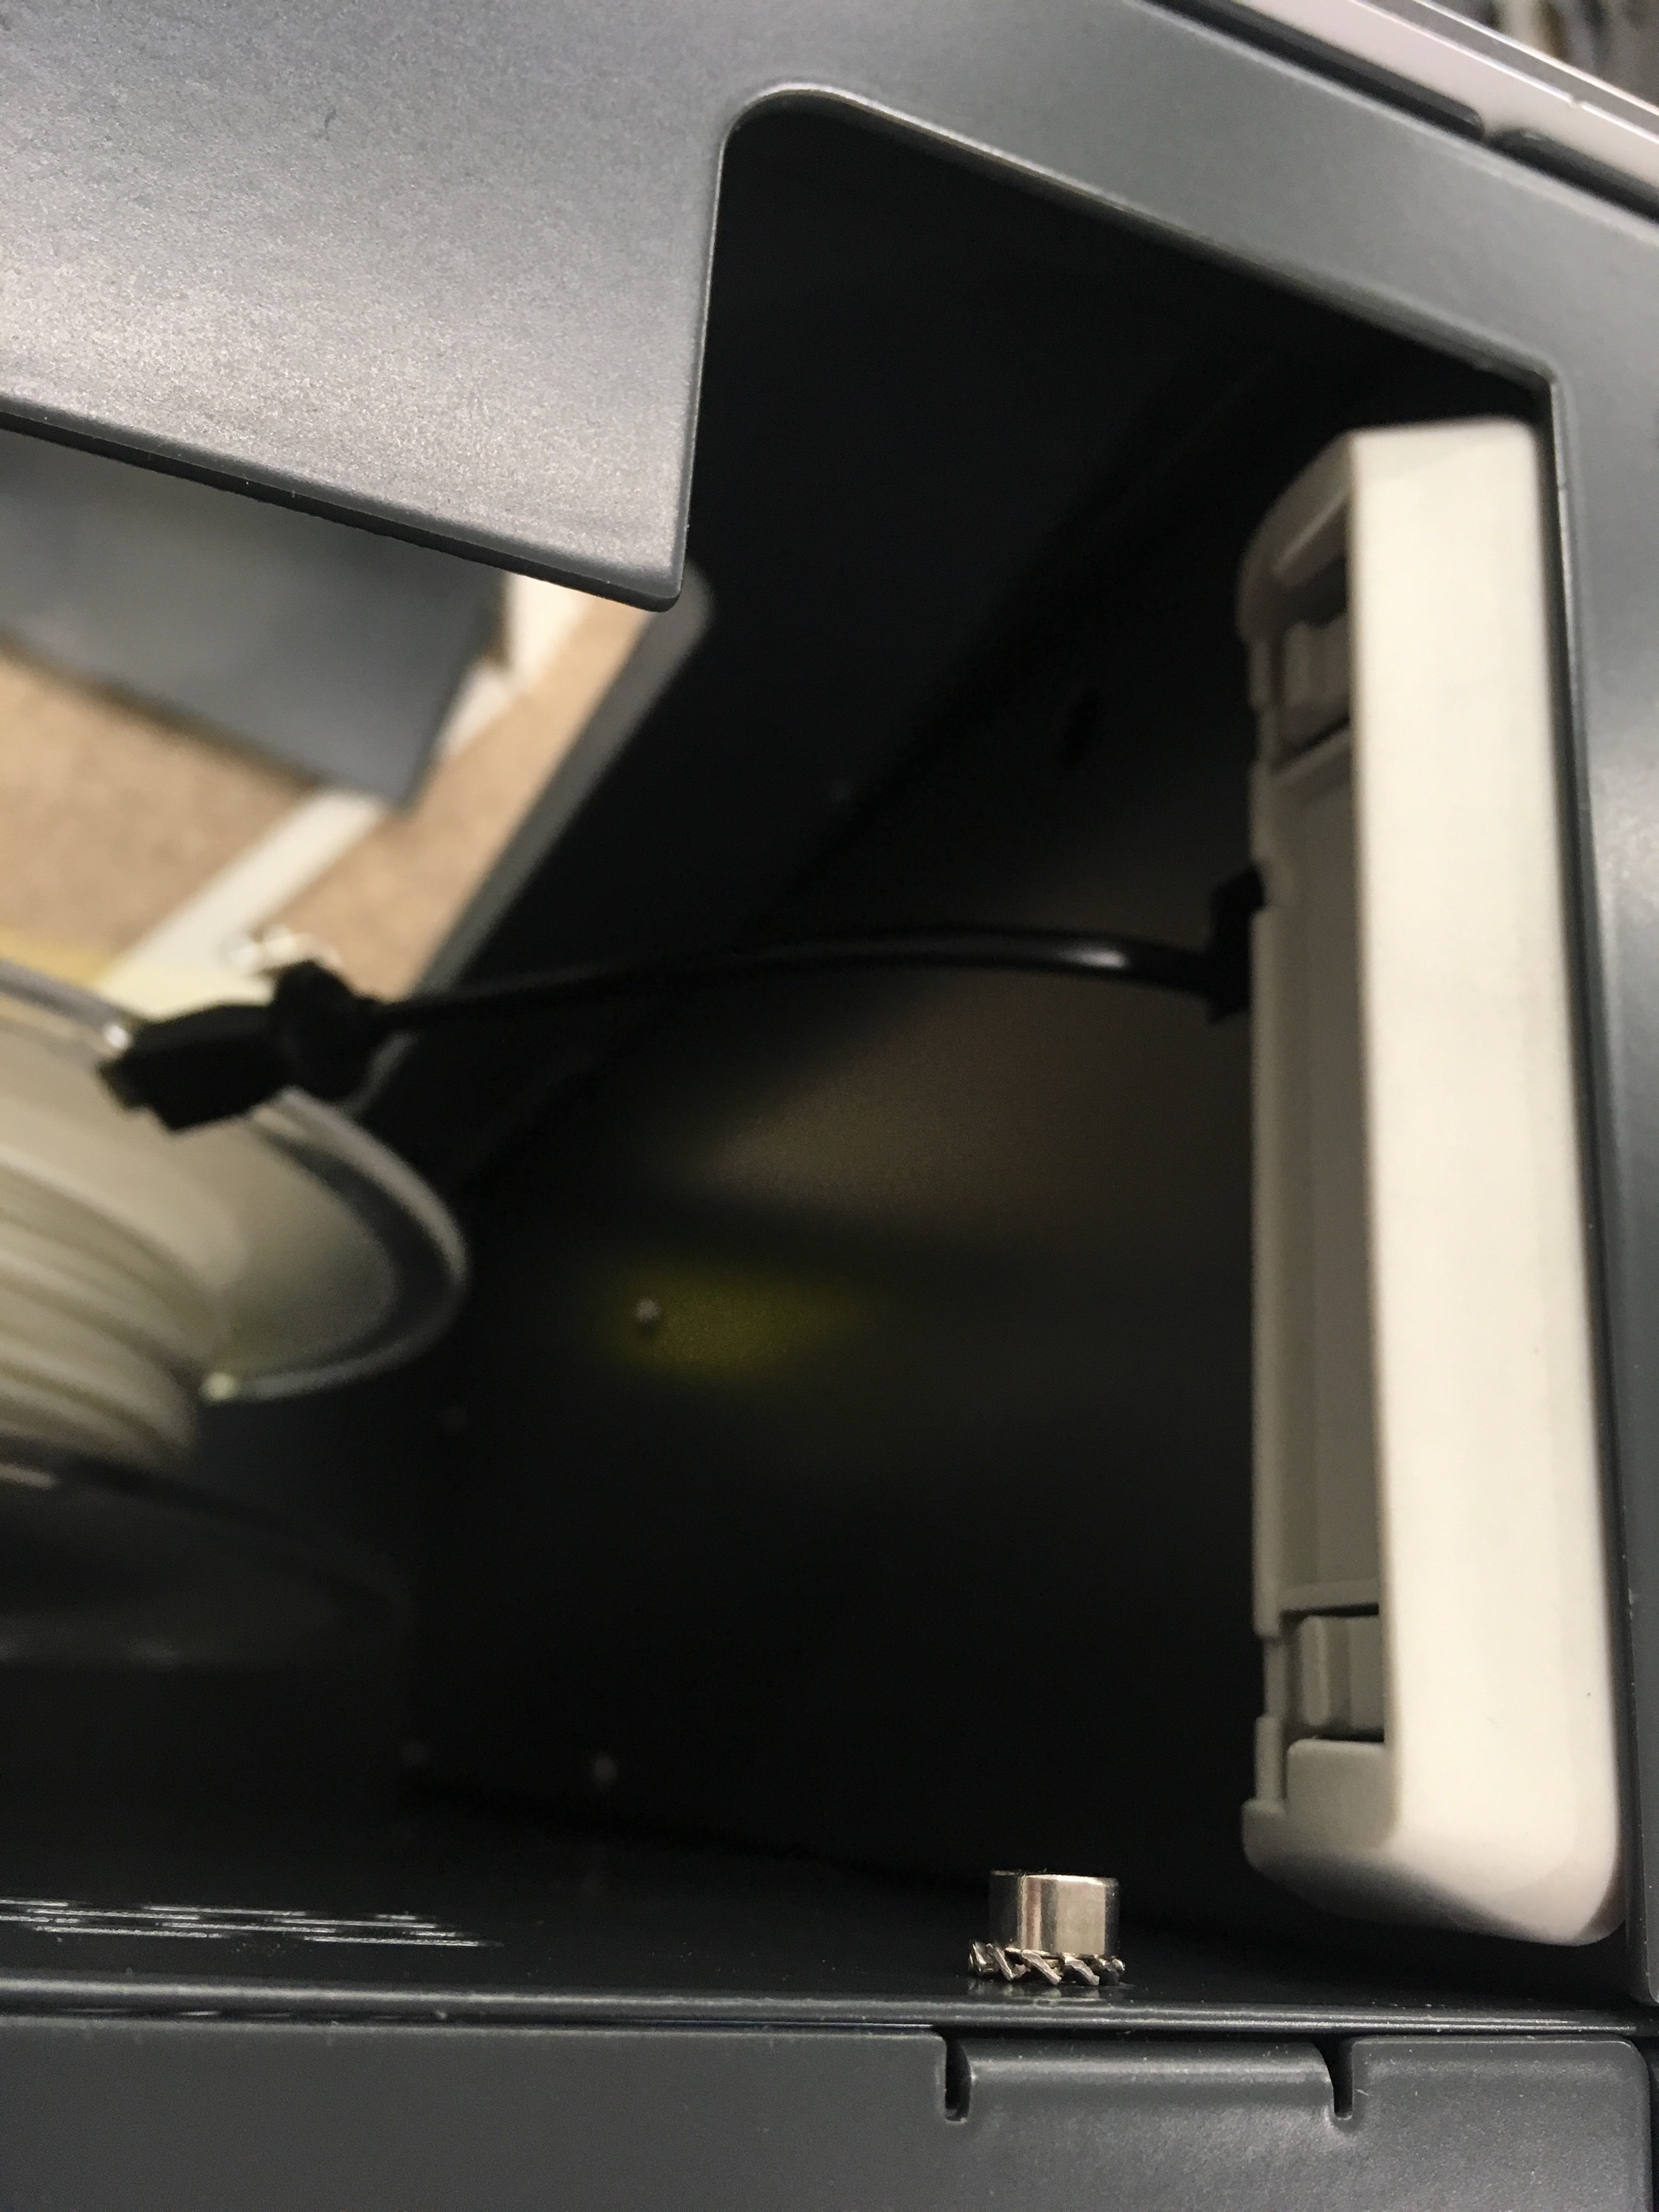
Attach the card reader - optional
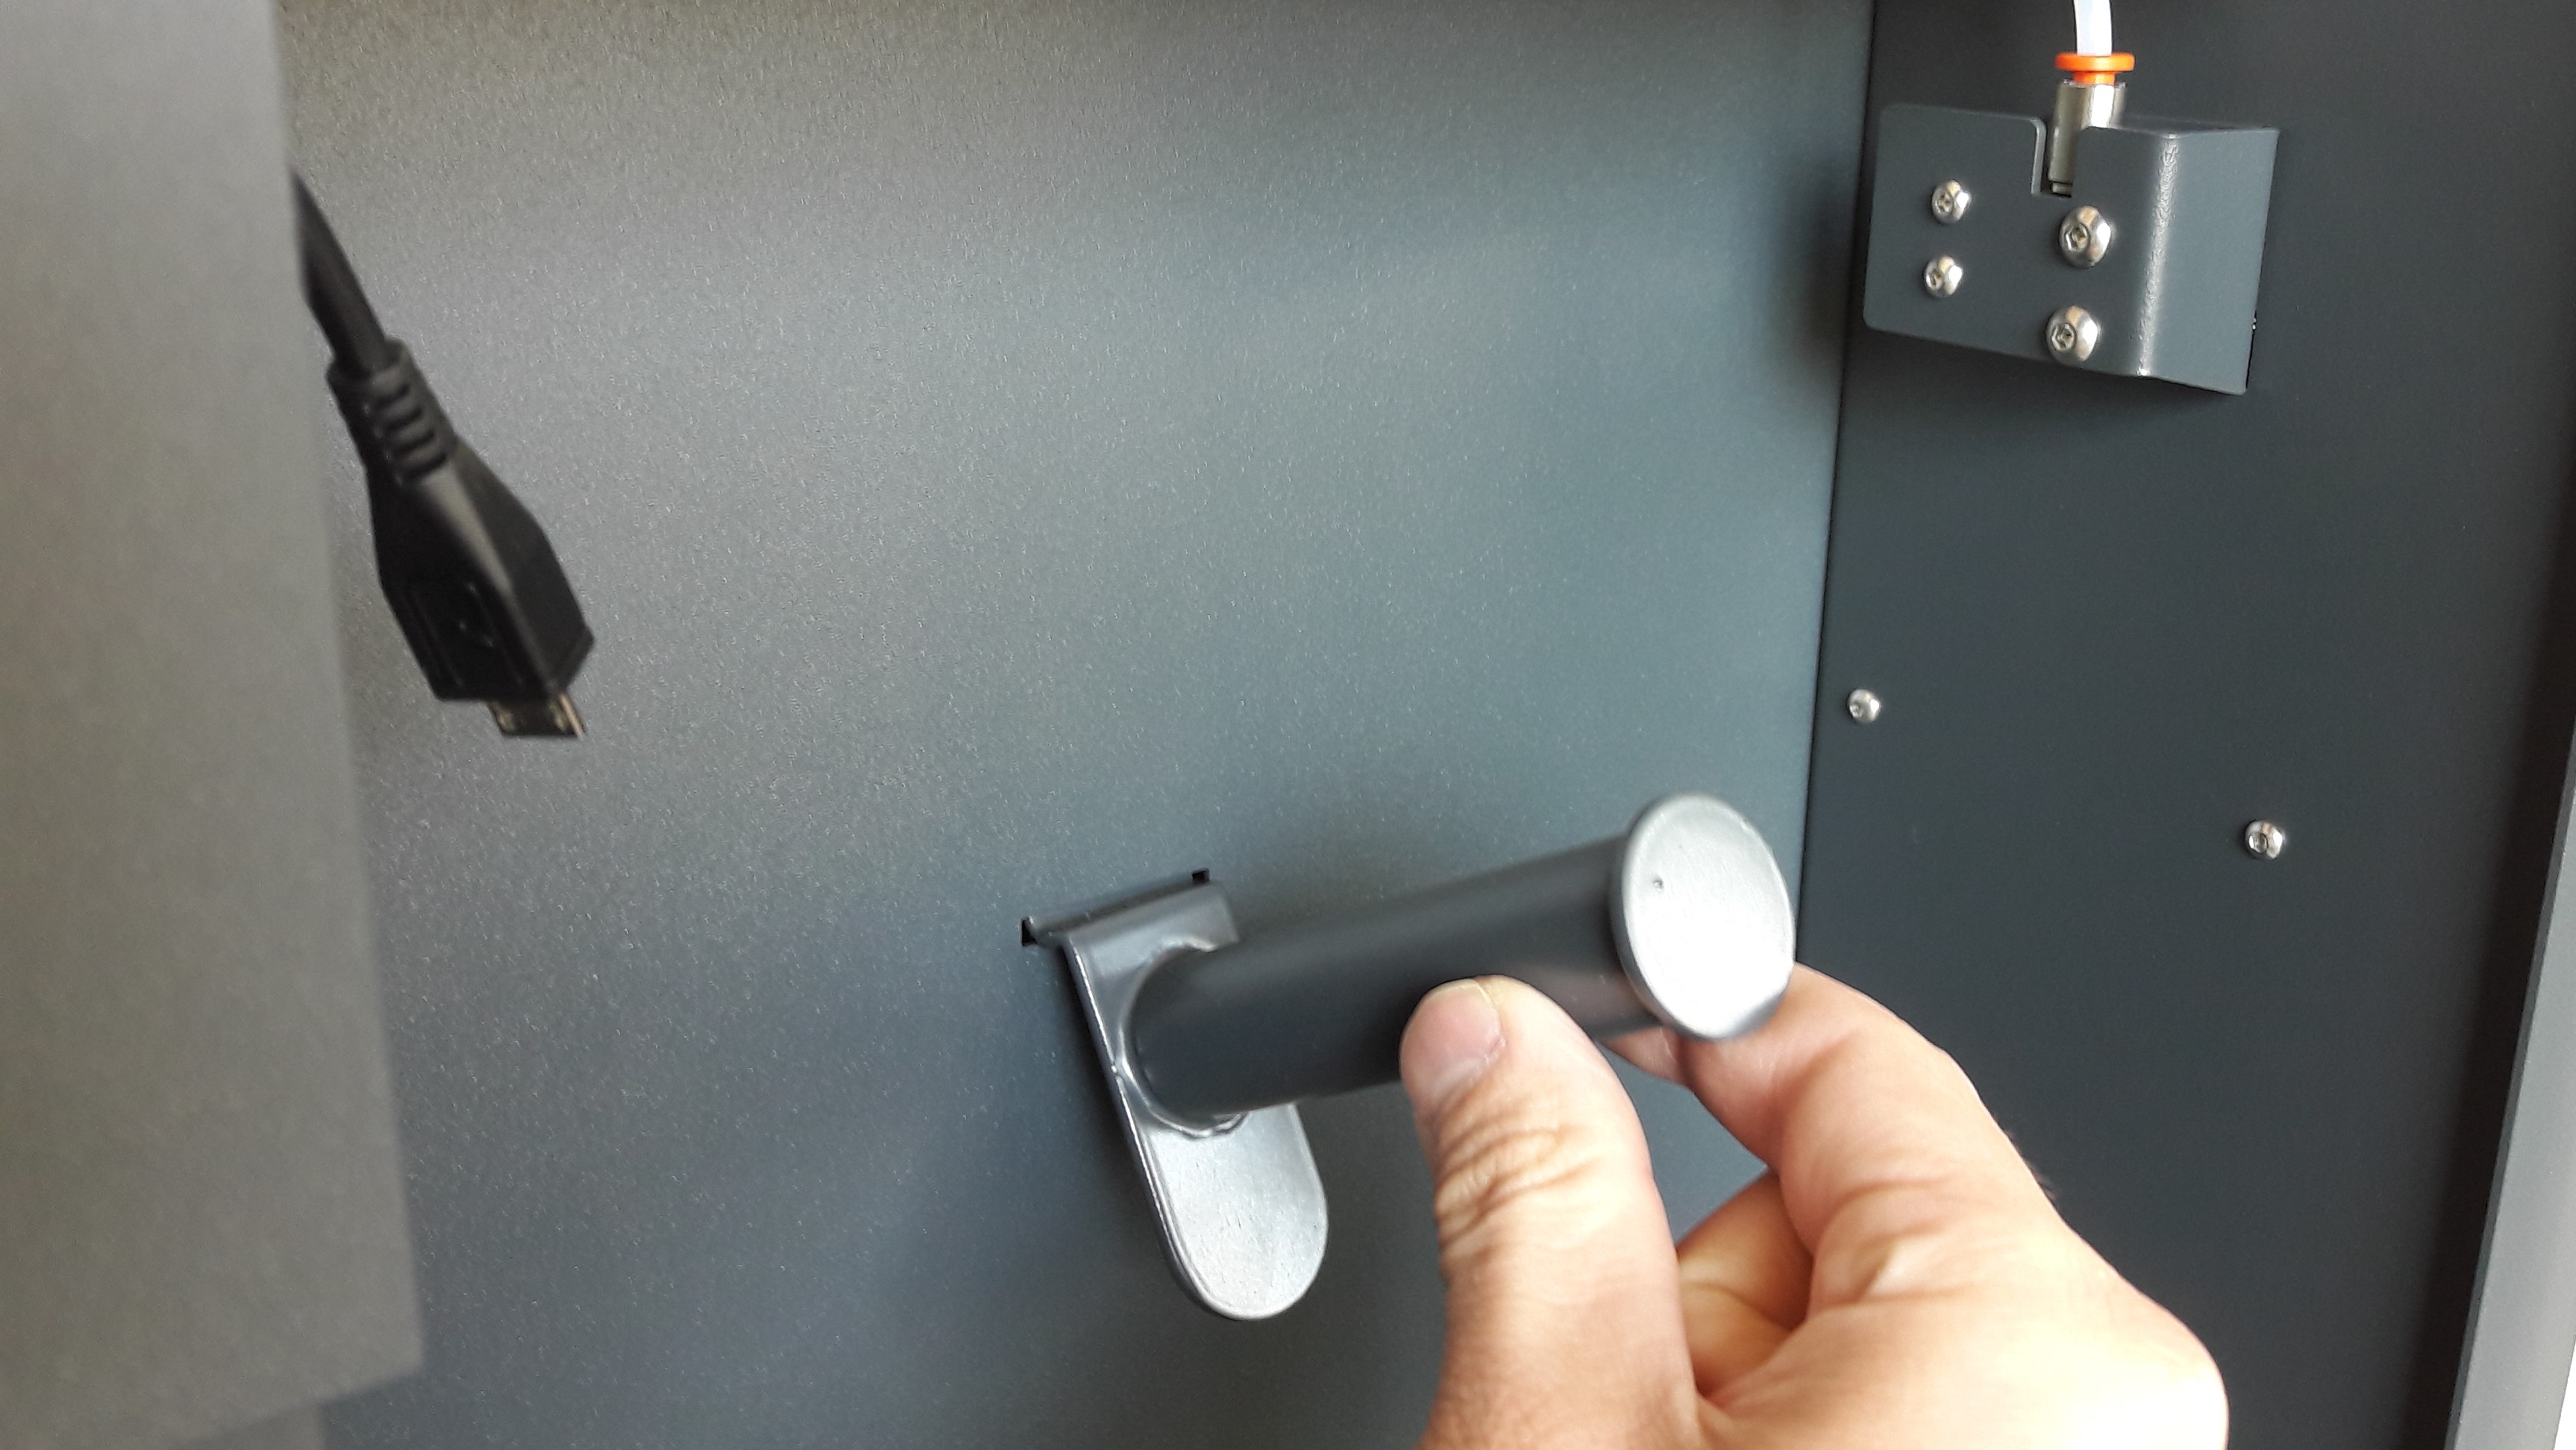
If the customer ordered a card reader for the eDee printer, unbox it and locate the card reader connector inside the spool chamber:
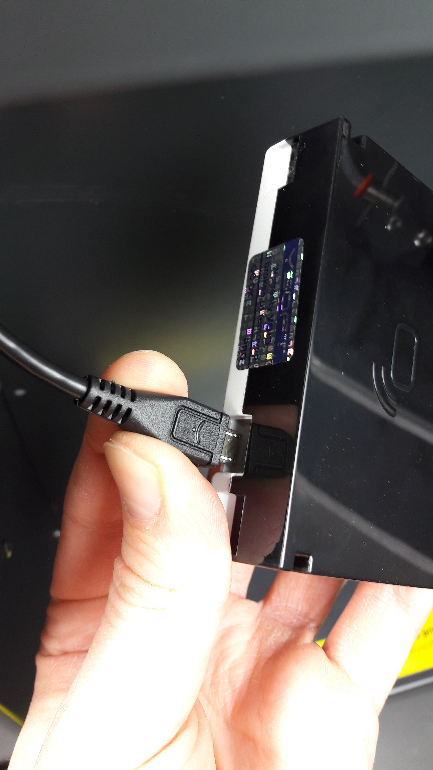
Plug the micro USB cable to its socket and attach the card reader to the connector:
Once the card reader is connected and mounted enter the Card reader menu from the service menu.
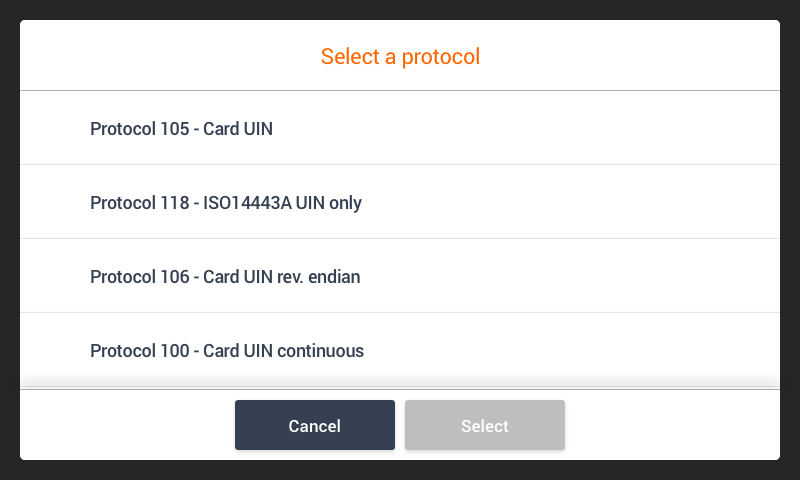
The card reader protocol will be displayed:
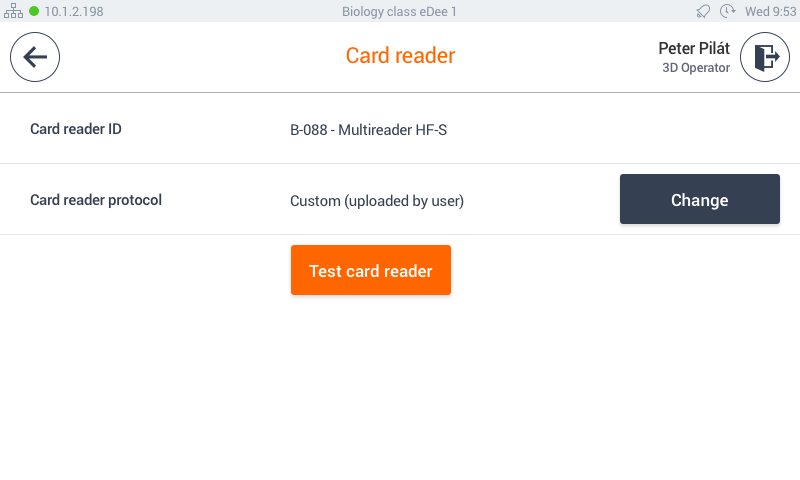
If needed you could select the different card reader protocol by pressing the Change button, selecting the appropriate protocol from the list and pressing the Select button.
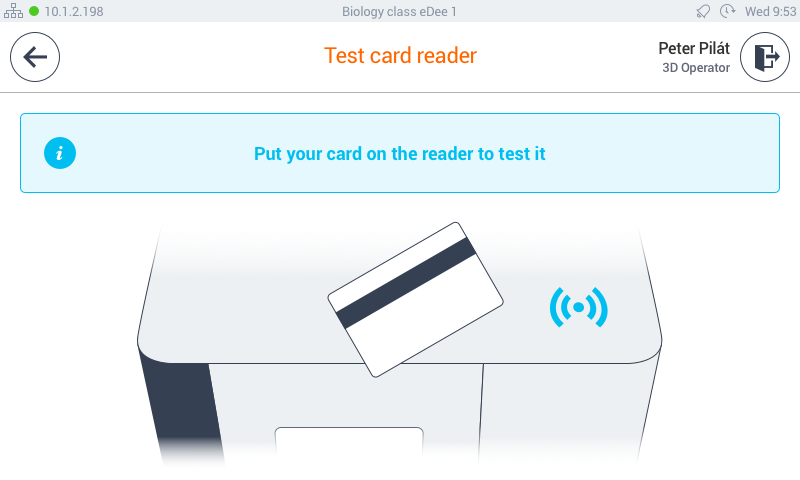
Once the protocol is selected you can test it using the test card reader and put the customer's card on the reader.
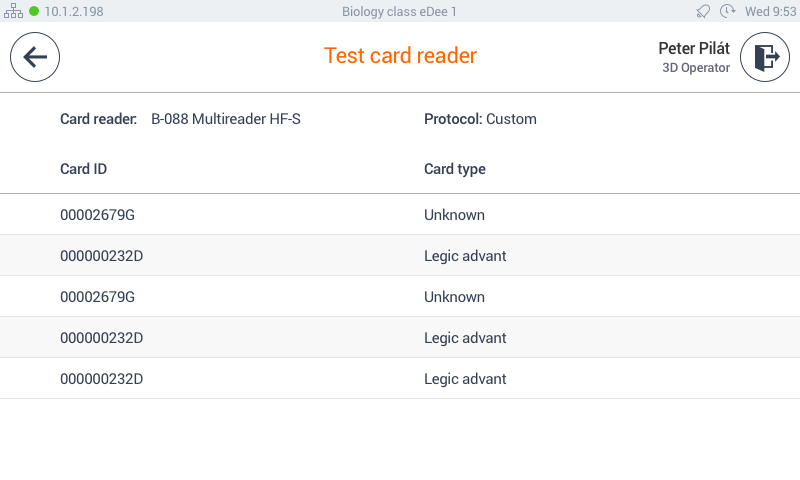
All the reads from the tested cards will be displayed in a table.
Load filament
Unpack the filament from the box and remove it from the plastic bag.
Insert only PolyMaker filament approved by YSoft for eDee printers. If you load a filament not suitable for eDee and its full metal nozzle, you will damage the print head (the nozzle will get clogged immediately) and lose the warranty on this part.
Mount the spool holder (part of the accessory kit) to the spool chamber.
When manipulating with the filament keep it constantly under pressure so that it will not loosen up. If it gets loose, it might get tangled during printing and the print job will not be successful.
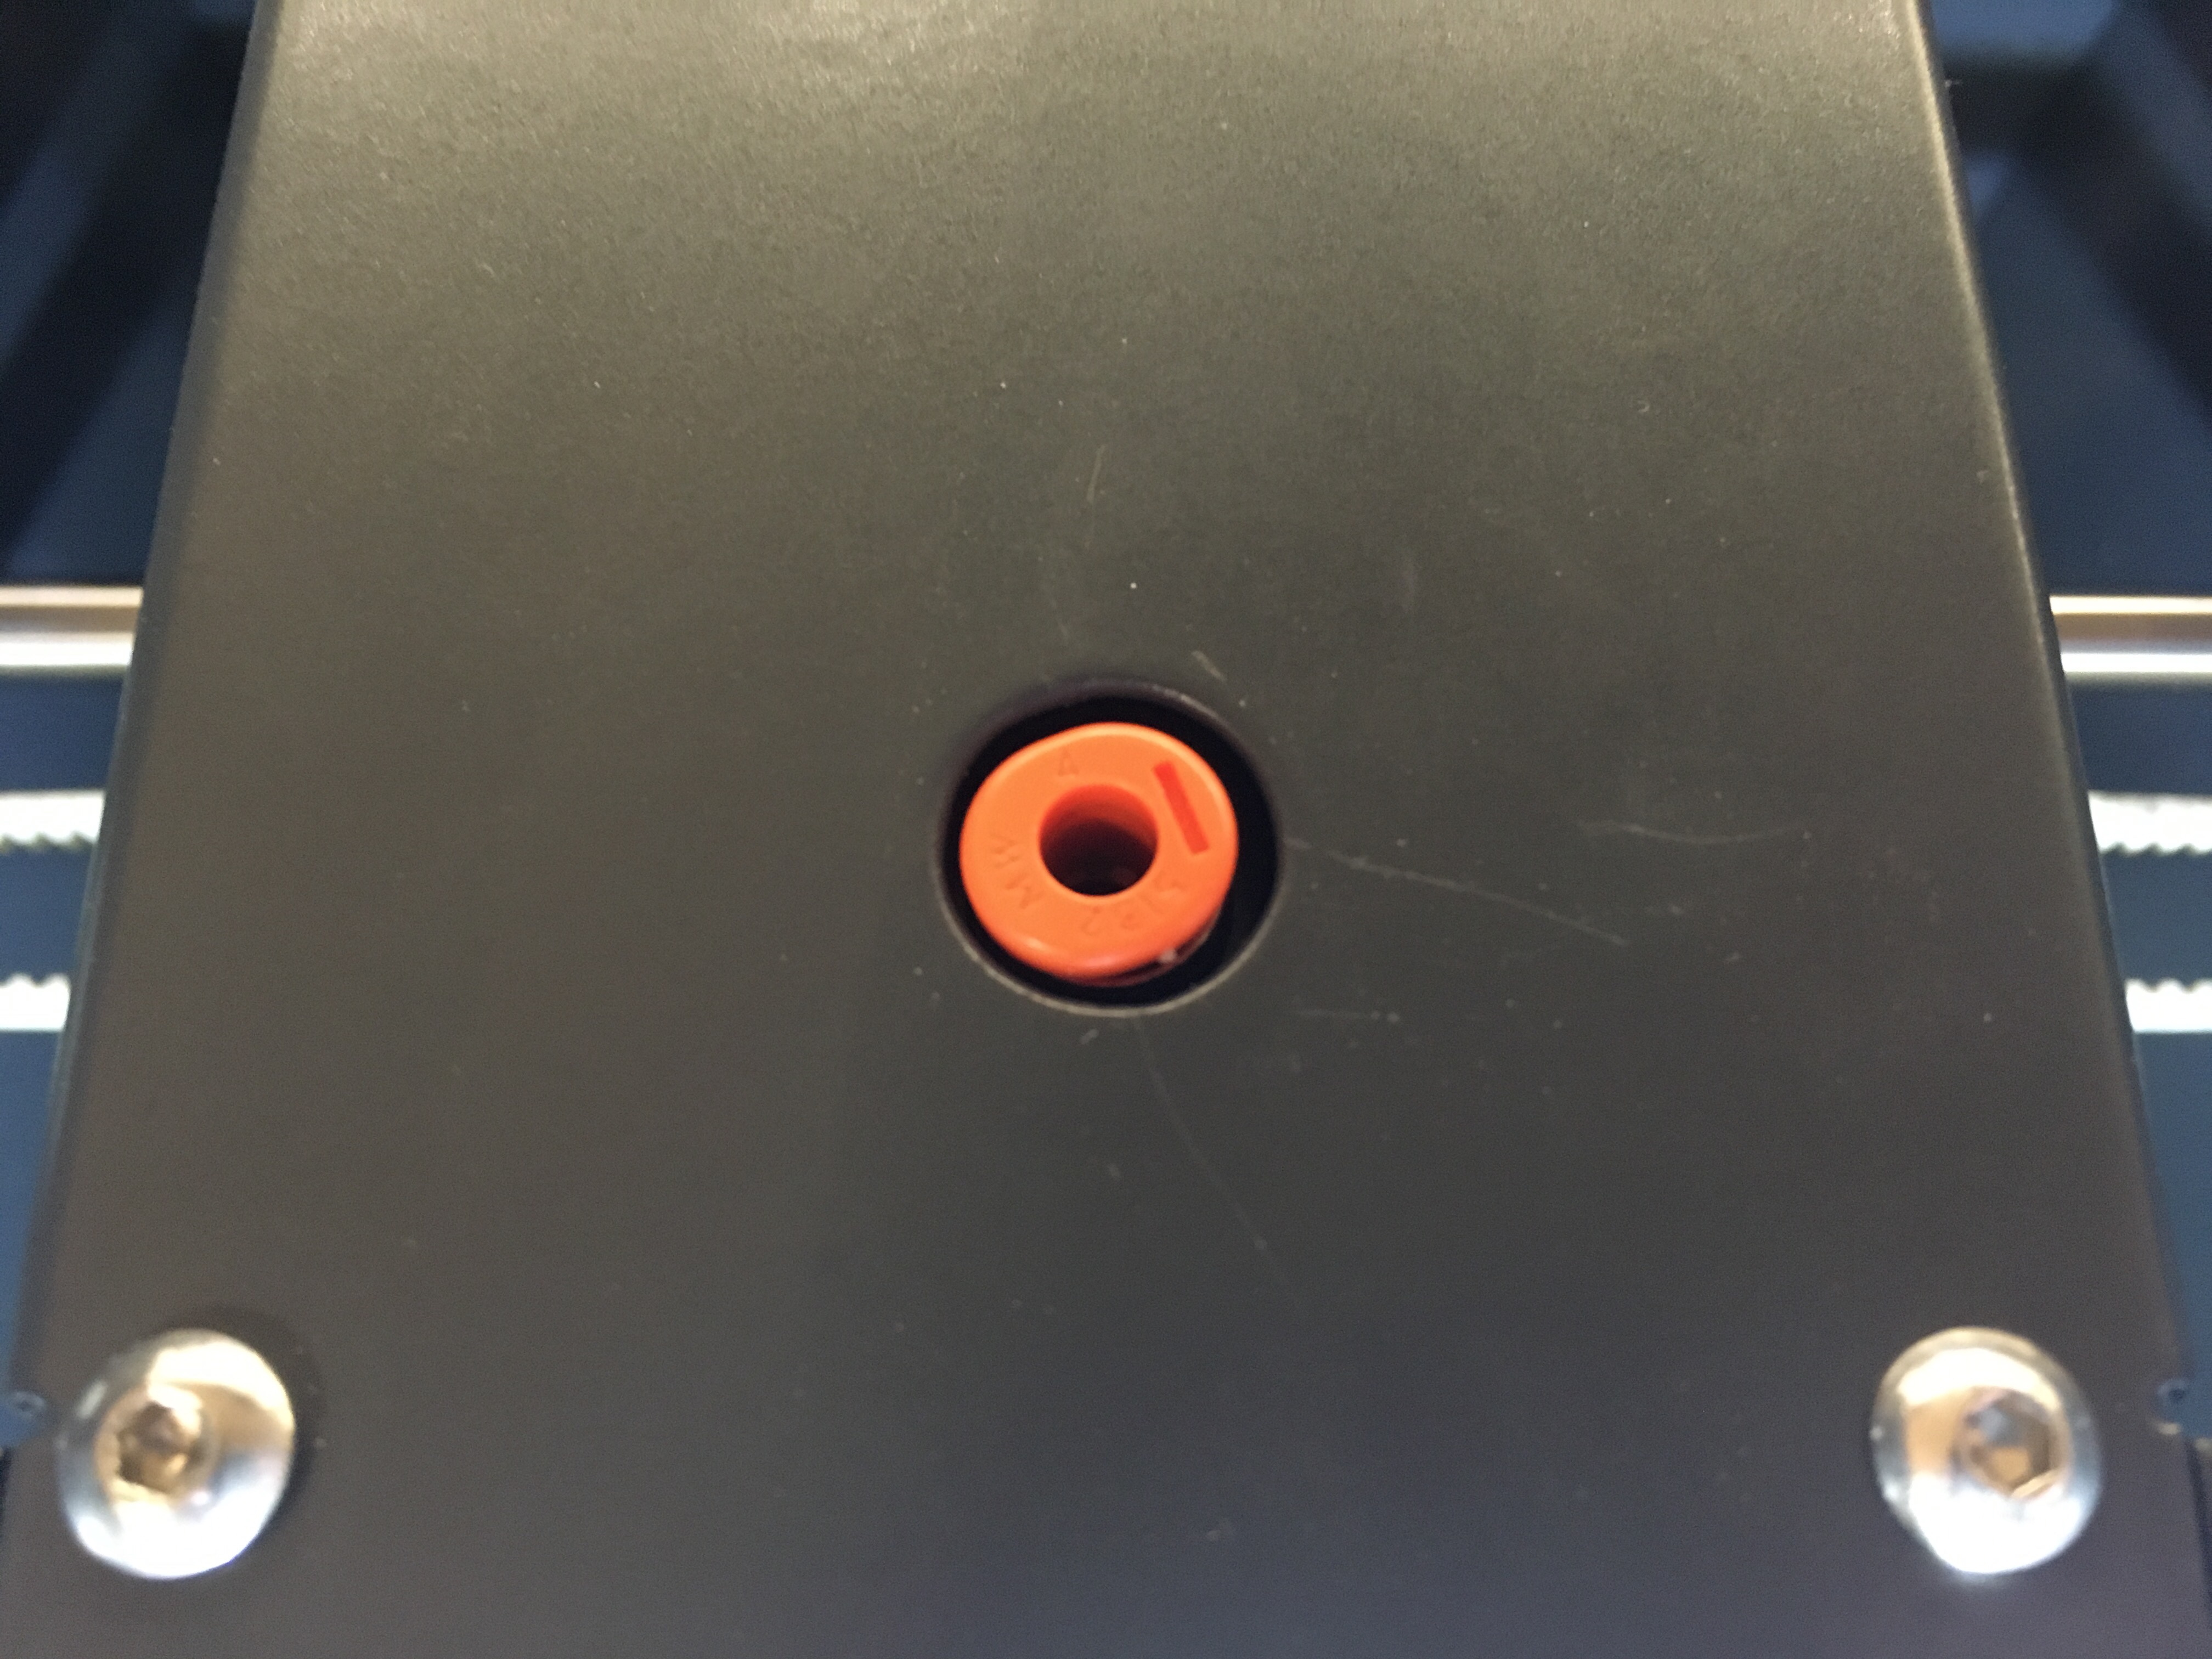
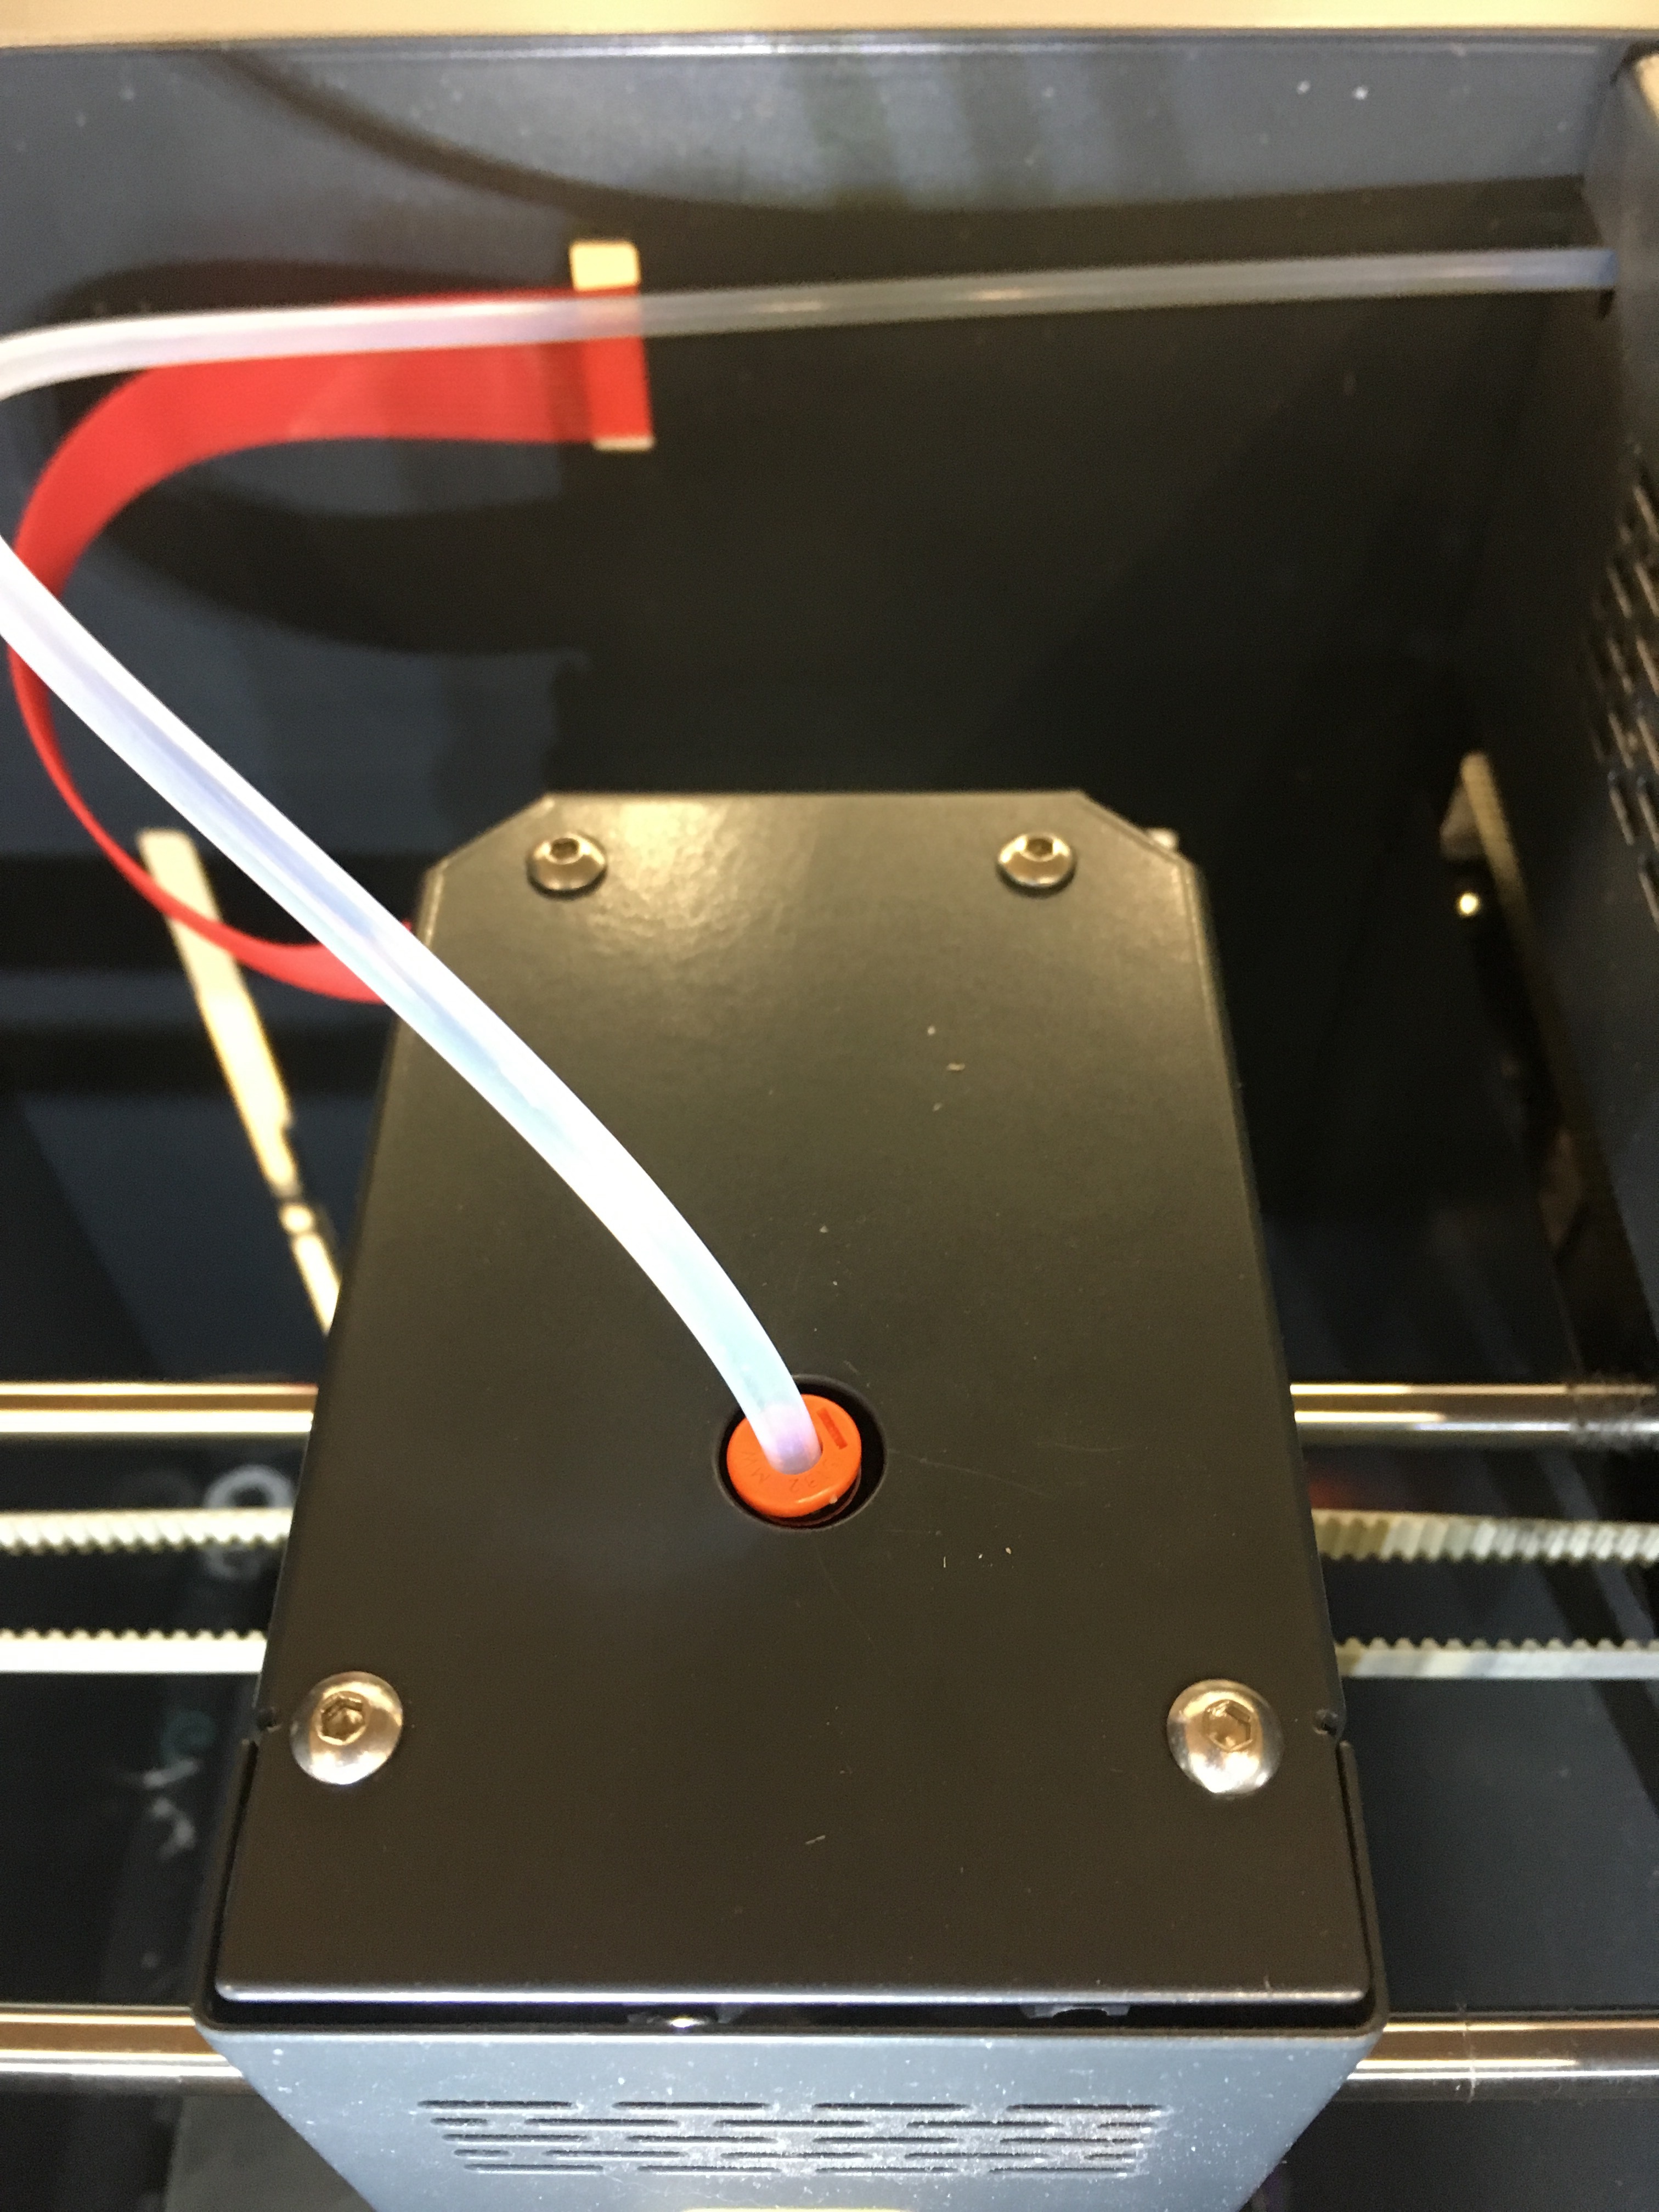
Take the loose end of the filament and push it gently into the Filament limit switch in the spool chamber (the entry point is depicted as an end switch in the following image), push it through until it reaches the print head, there should be slight resistance and with a slight pressure you should feel as the printhead starts to pull the filament itself.
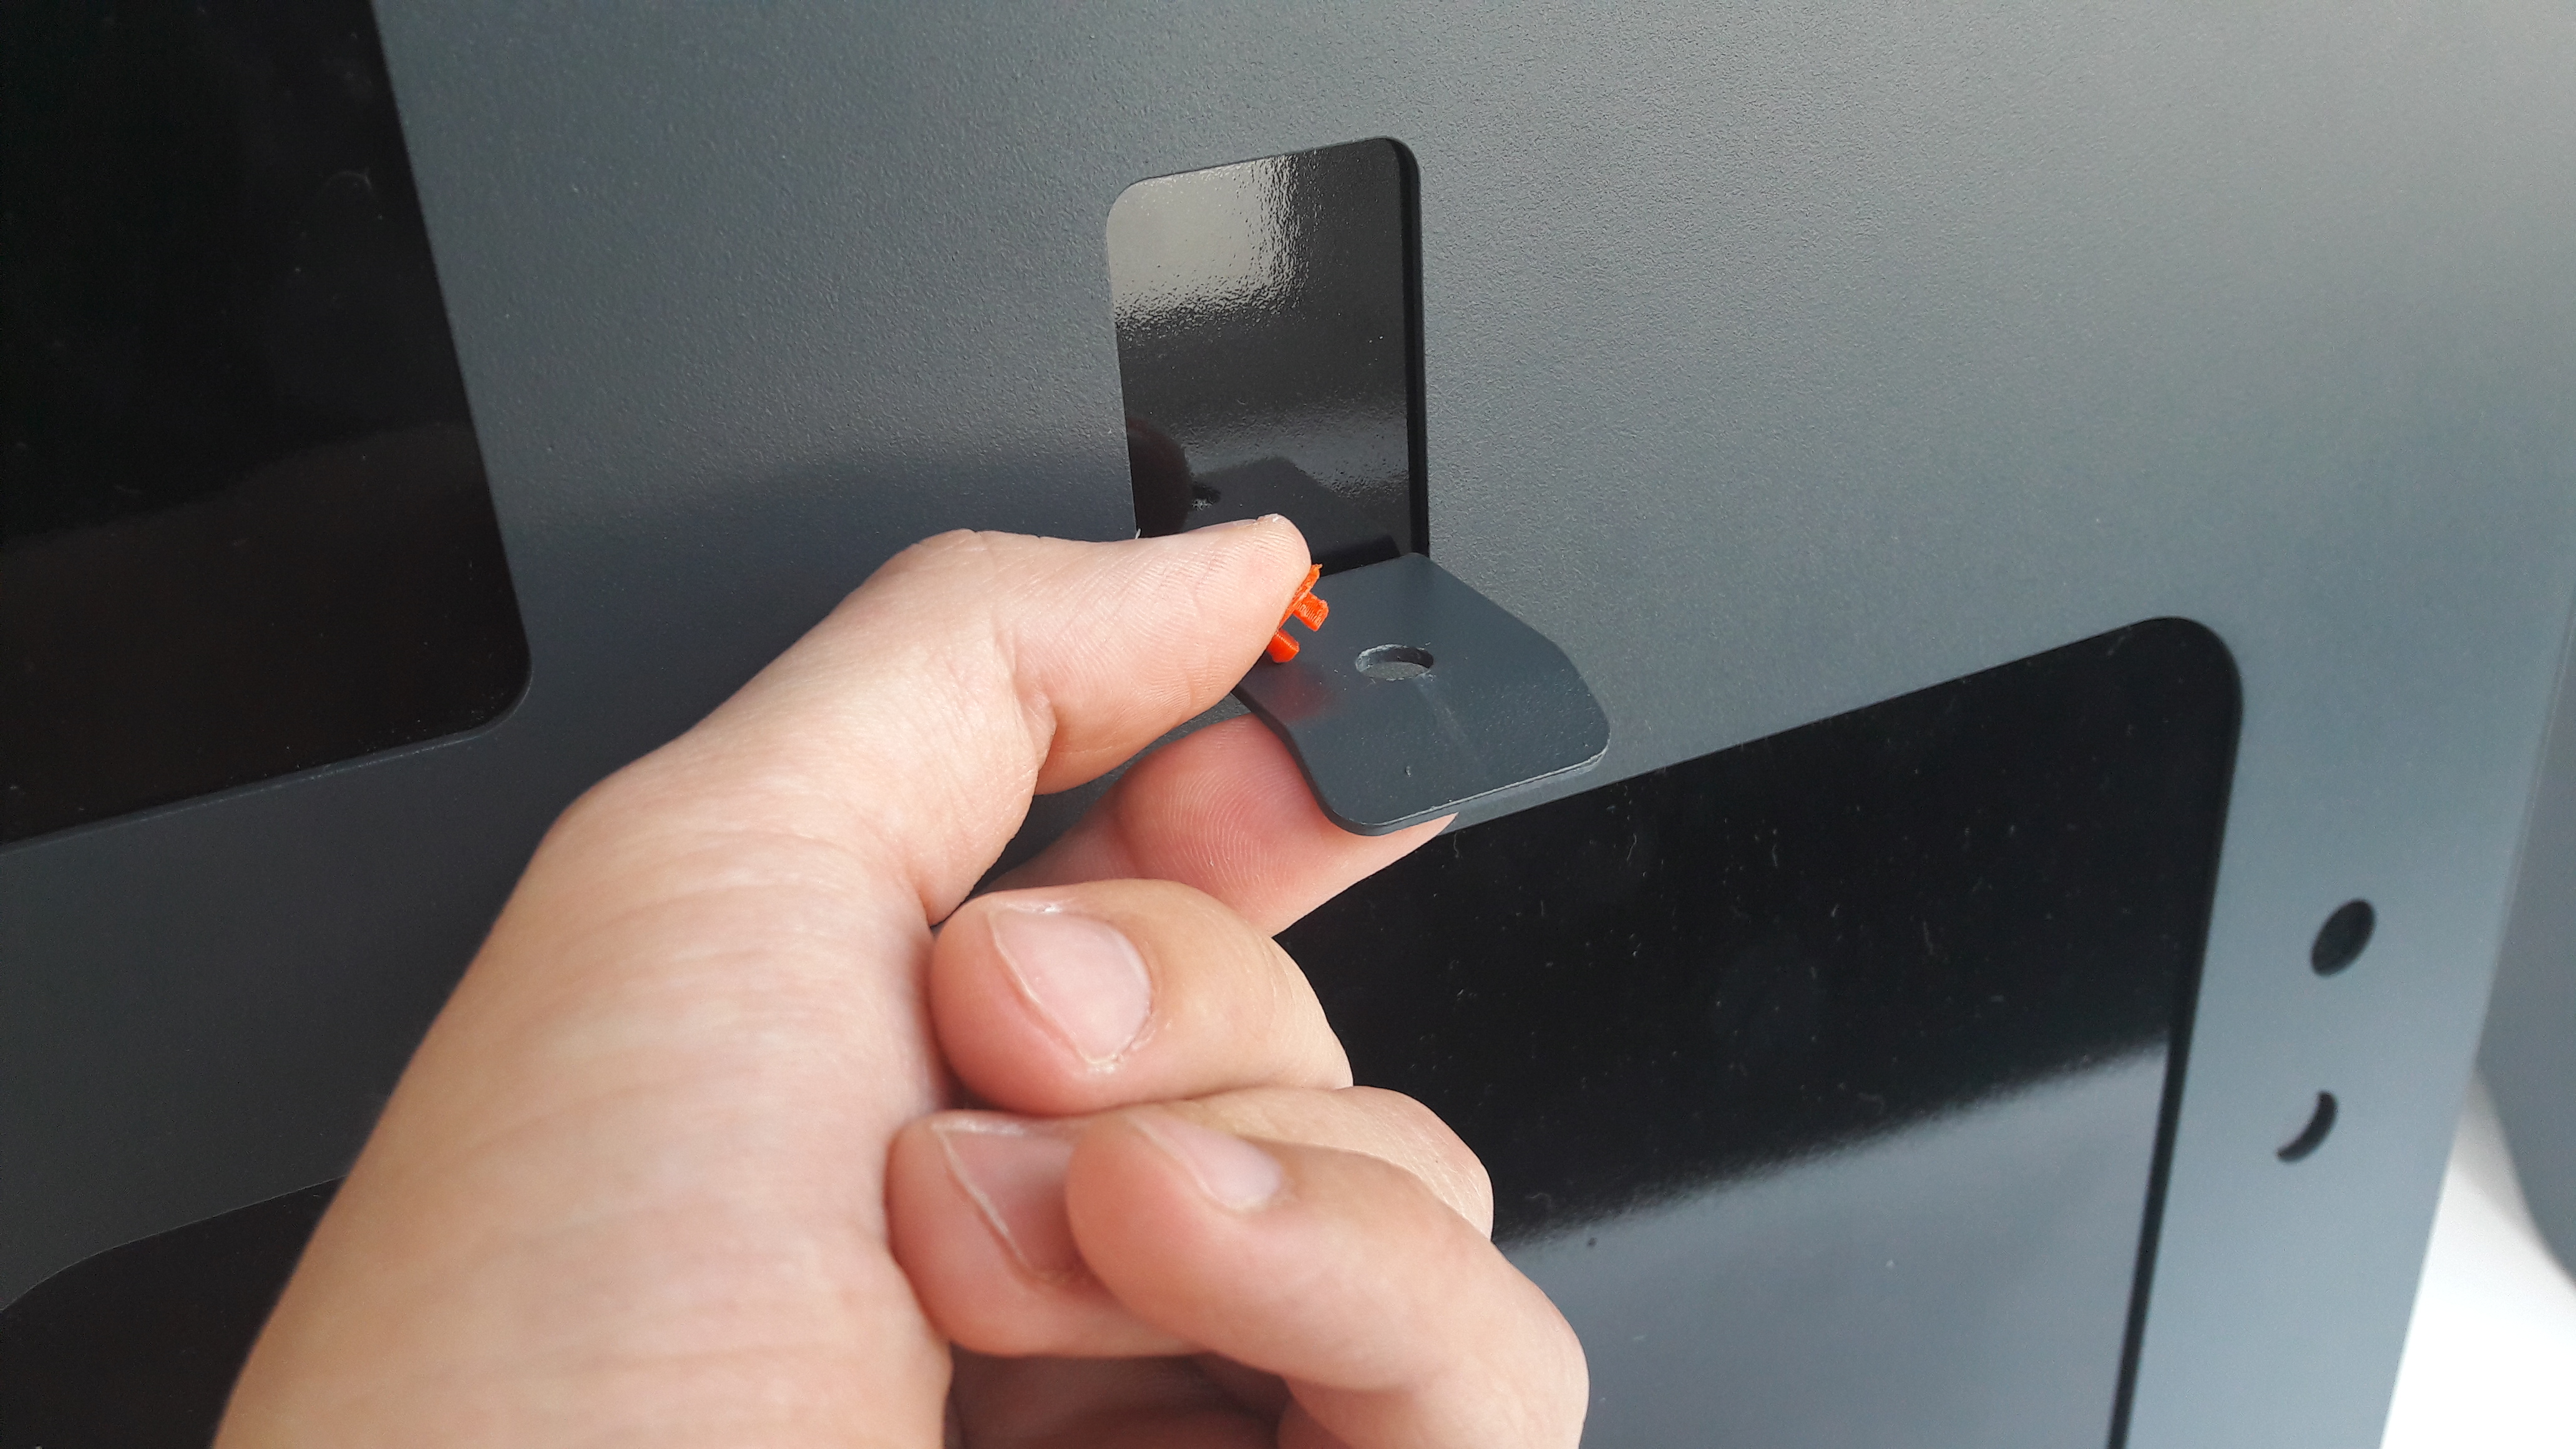
In case it is not possible to push it through to the head completely, you can detach the silicon tube from print head by pressing the orange tube joint.
You can then guide the filament through the tube, so you have few centimetres out of the tube and guide those to the head manually.
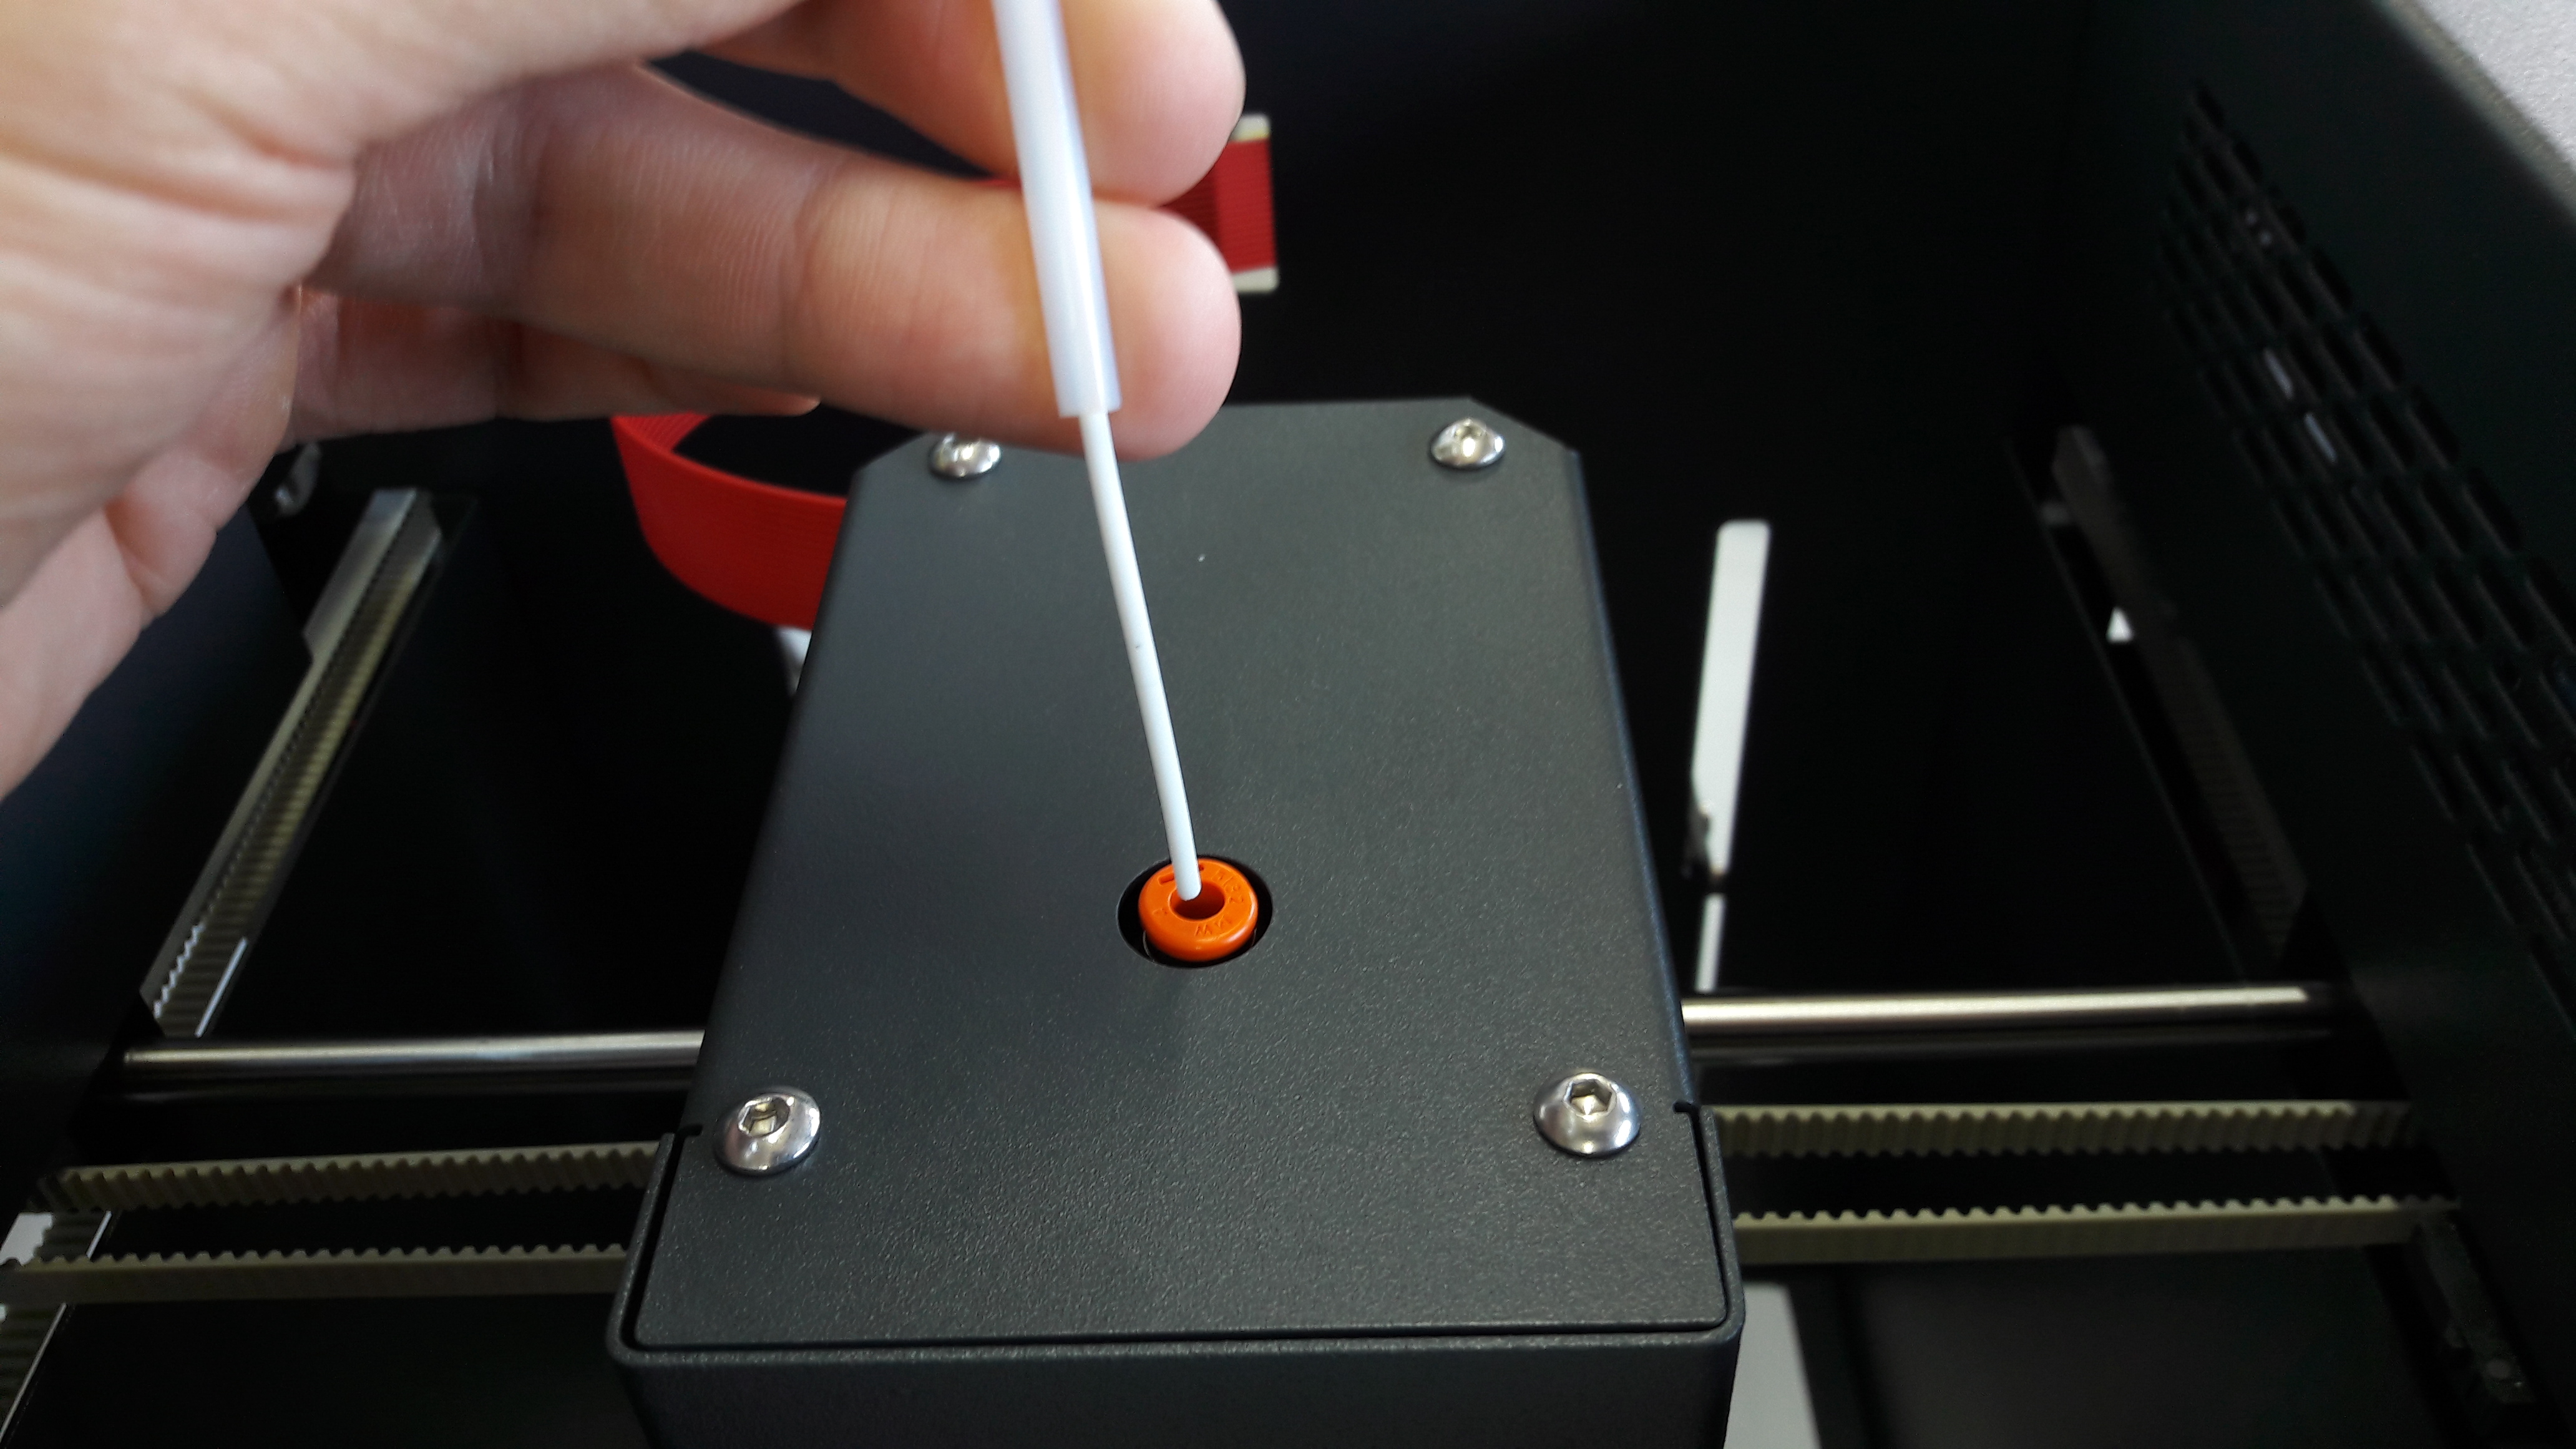
Once you cannot push through, slide in the silicon tube again, until it is locked in the orange holder again. Place the spool onto the spool holder in the chamber.
Select the Filament manipulation menu from the Service menu.
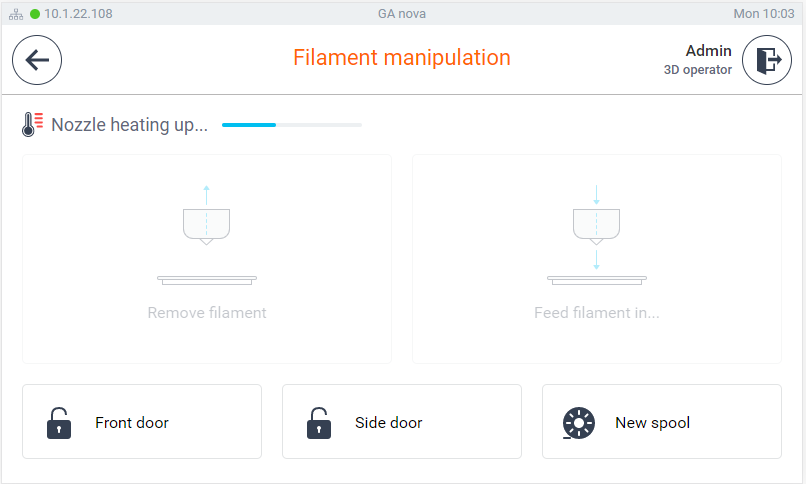
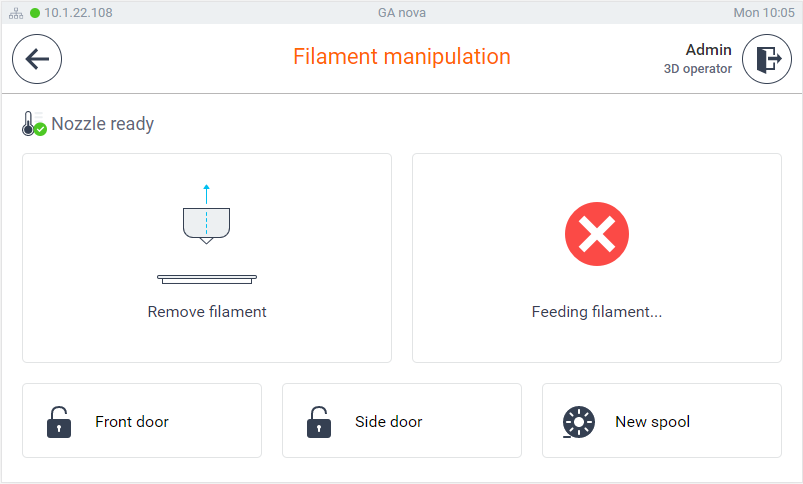
Once the nozzle is heated the feed filament option becomes available, go ahead and press the Feed filament in button.
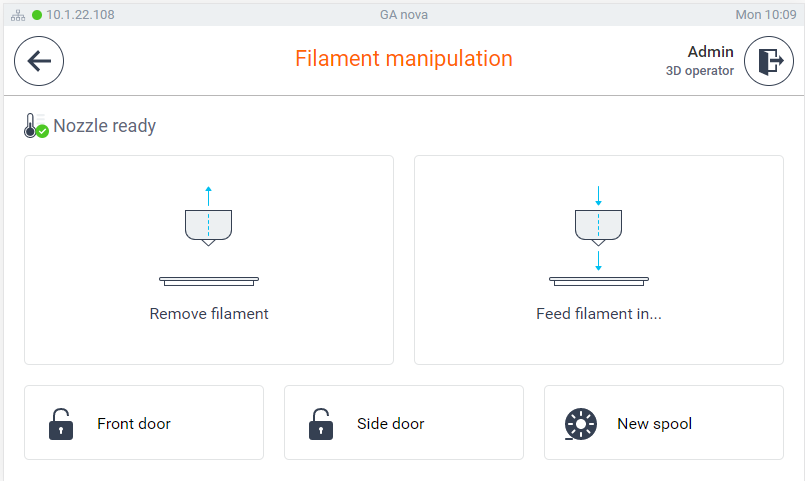
Once the feeding in starts, you should see the filament moving in the spool chamber, if not try to push it gently from the filament chamber until you feel that the filament is being pulled by the printer. You can stop feeding in filament once you are satisfied by pressing the red cross.
You should always select the recently loaded filament type, color, spool size and remaining filament on the spool, so that the eDee administrator/user will be able to know which filament type and color is loaded in the eDee printers.

Motion test
You should test the print head and print bed movement before the first use, select the Print & manual control menu from the service menu.
You can move the head and the print bed by simply clicking on the arrows. Once you are sure both are moving correctly, you can send both to the home position by clicking the home icon.
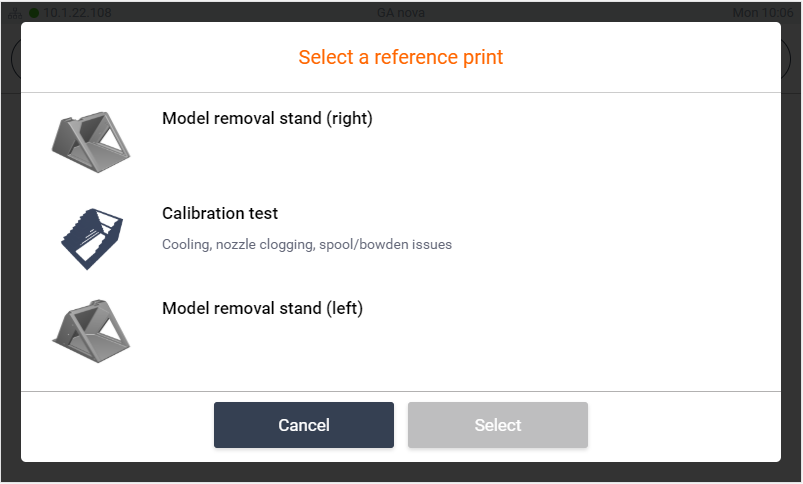
In case you would like to make sure everything is setup correctly, you can perform a diagnostic print, select the Diagnostic print from the Print & manual control menu.
You can then select any of the diagnostic print jobs:
Once the print job is selected, the administrator is walked through the standard printing procedure (see Using YSoft be3D eDee for more information):
- cleaning up the bed
- application of the glue
- printing
Print test diagnostic print job - basic evaluation, whether the offset is correct and the nozzle is extruding as it should. See in Service manual: 7.3 Running the Diagnostic print after repairment
Calibration test is used for advanced evaluation, here is the outcome guidance:
>>>Defect | Image |
|---|---|
No Issues | 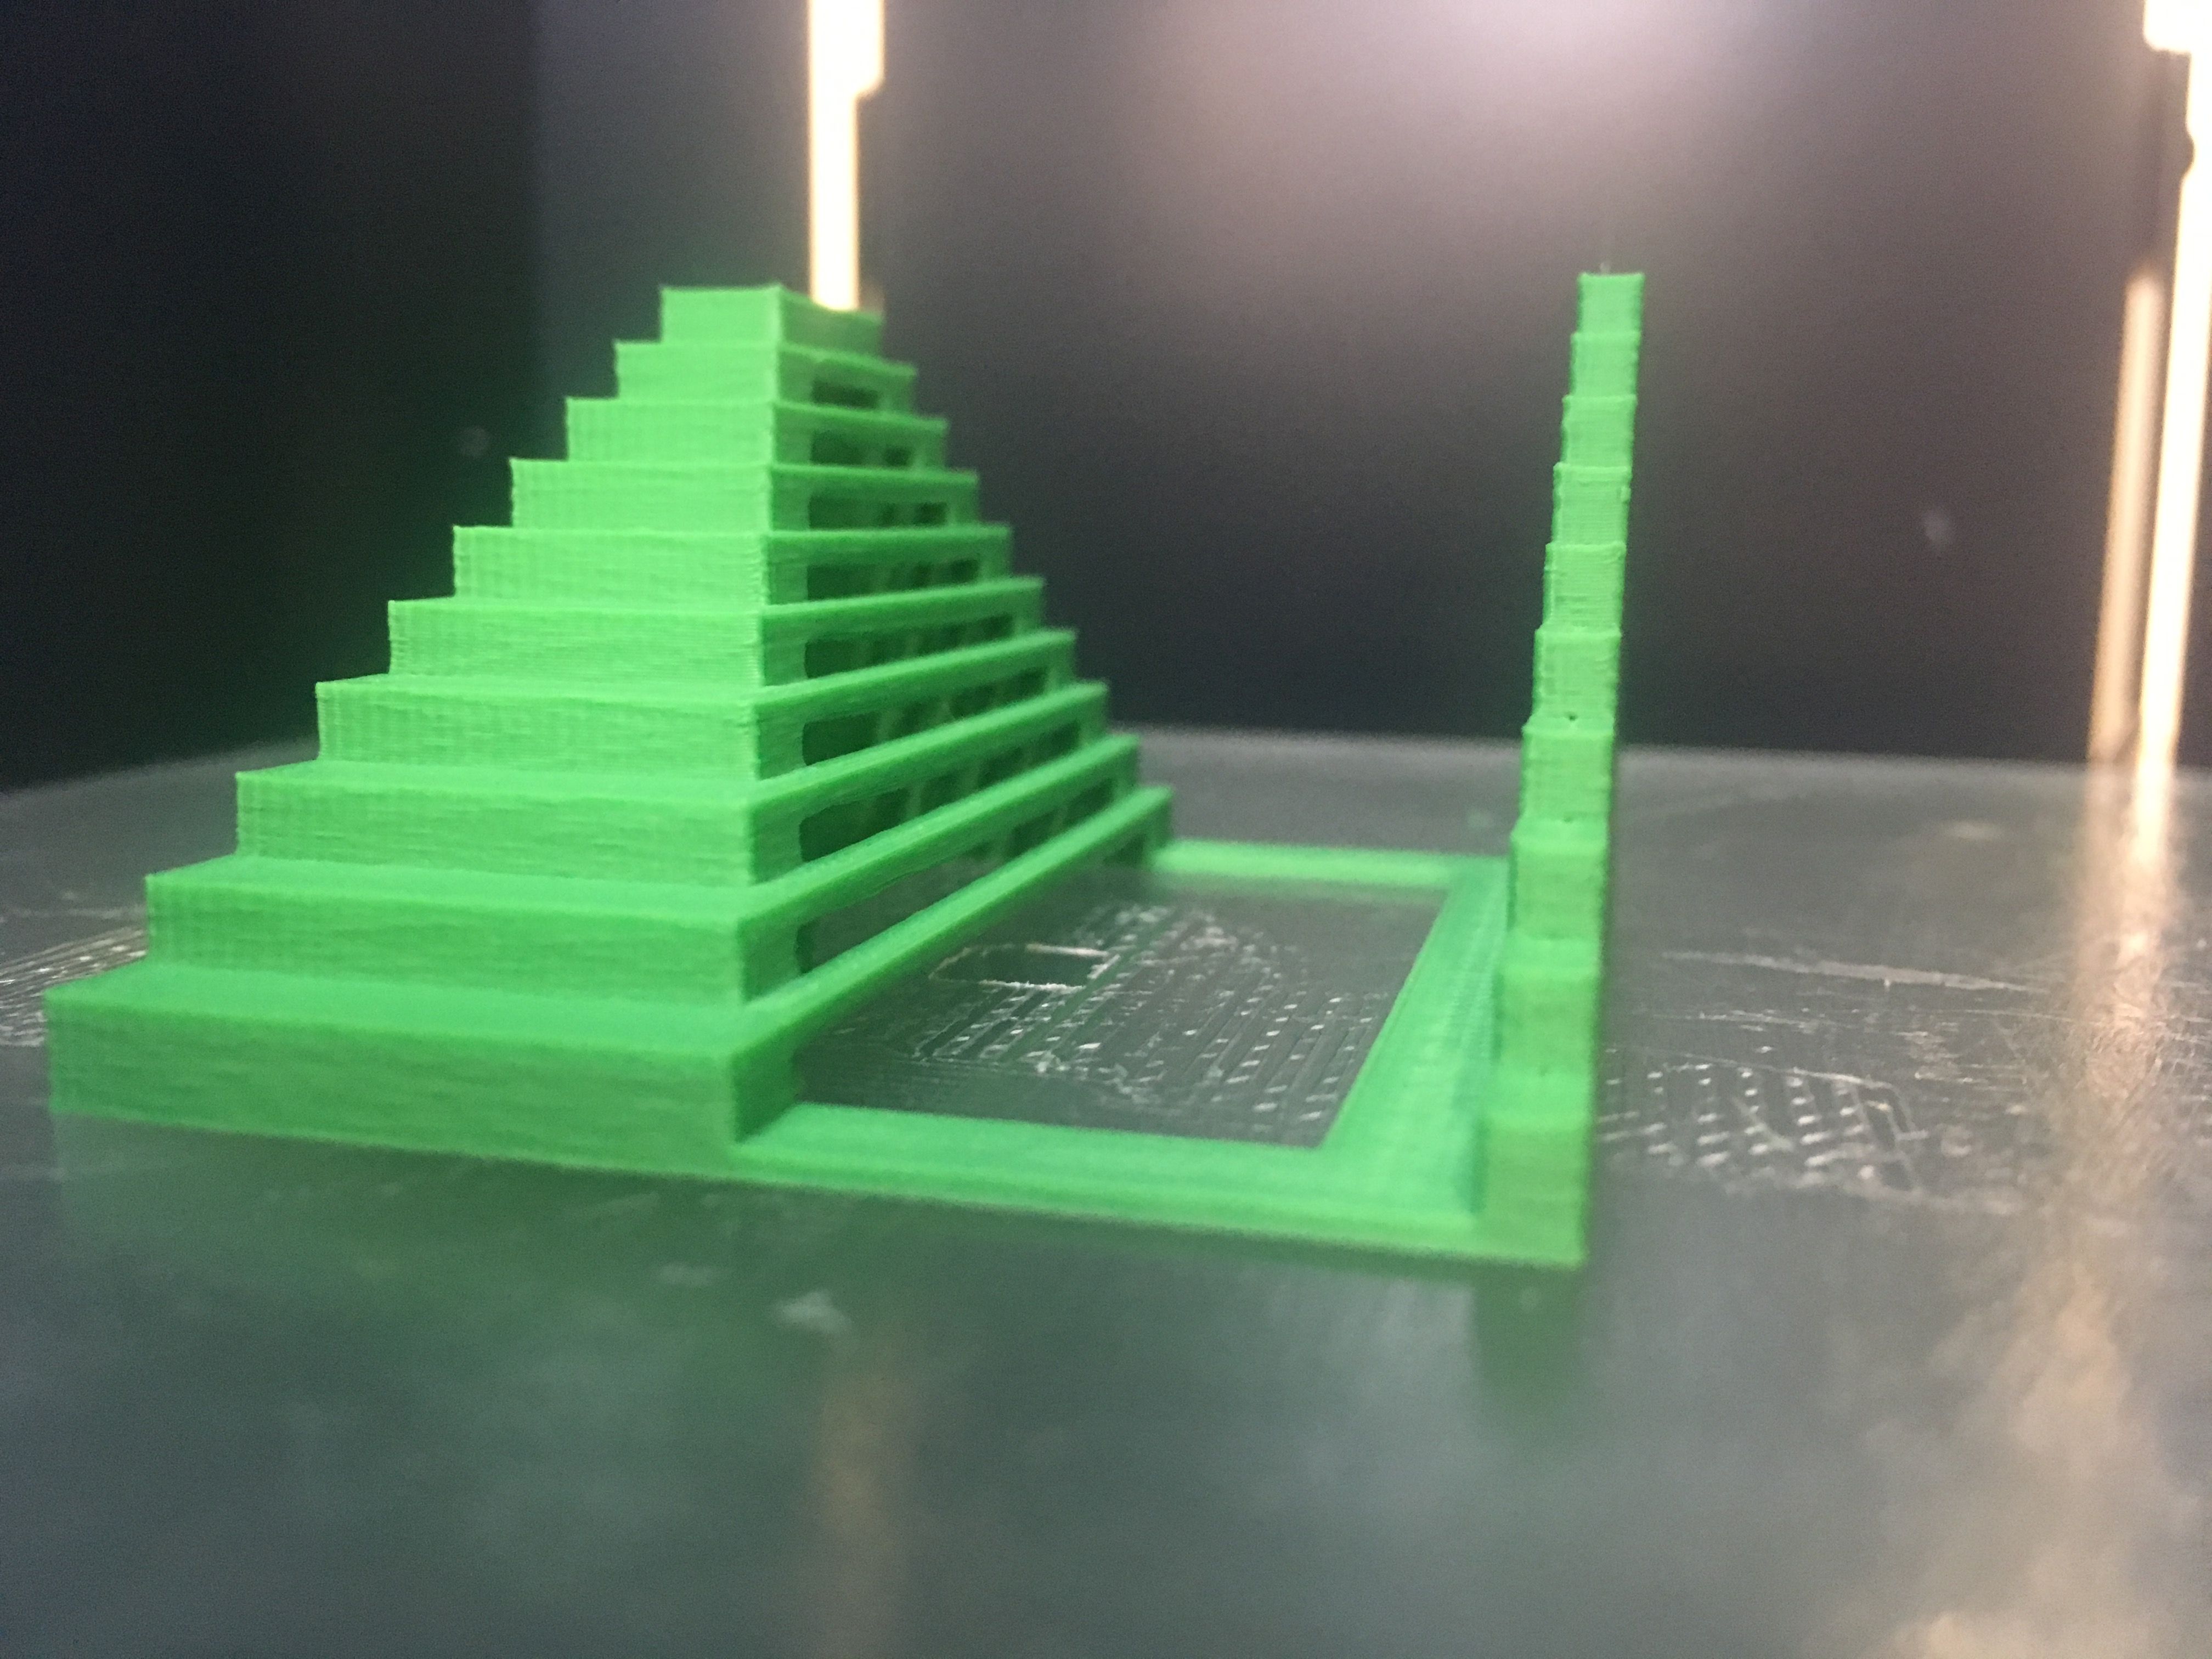 |
Cooling issue |  |
Bowden issue/ clogged nozzle |   |
Blocked spool, bowden issue | 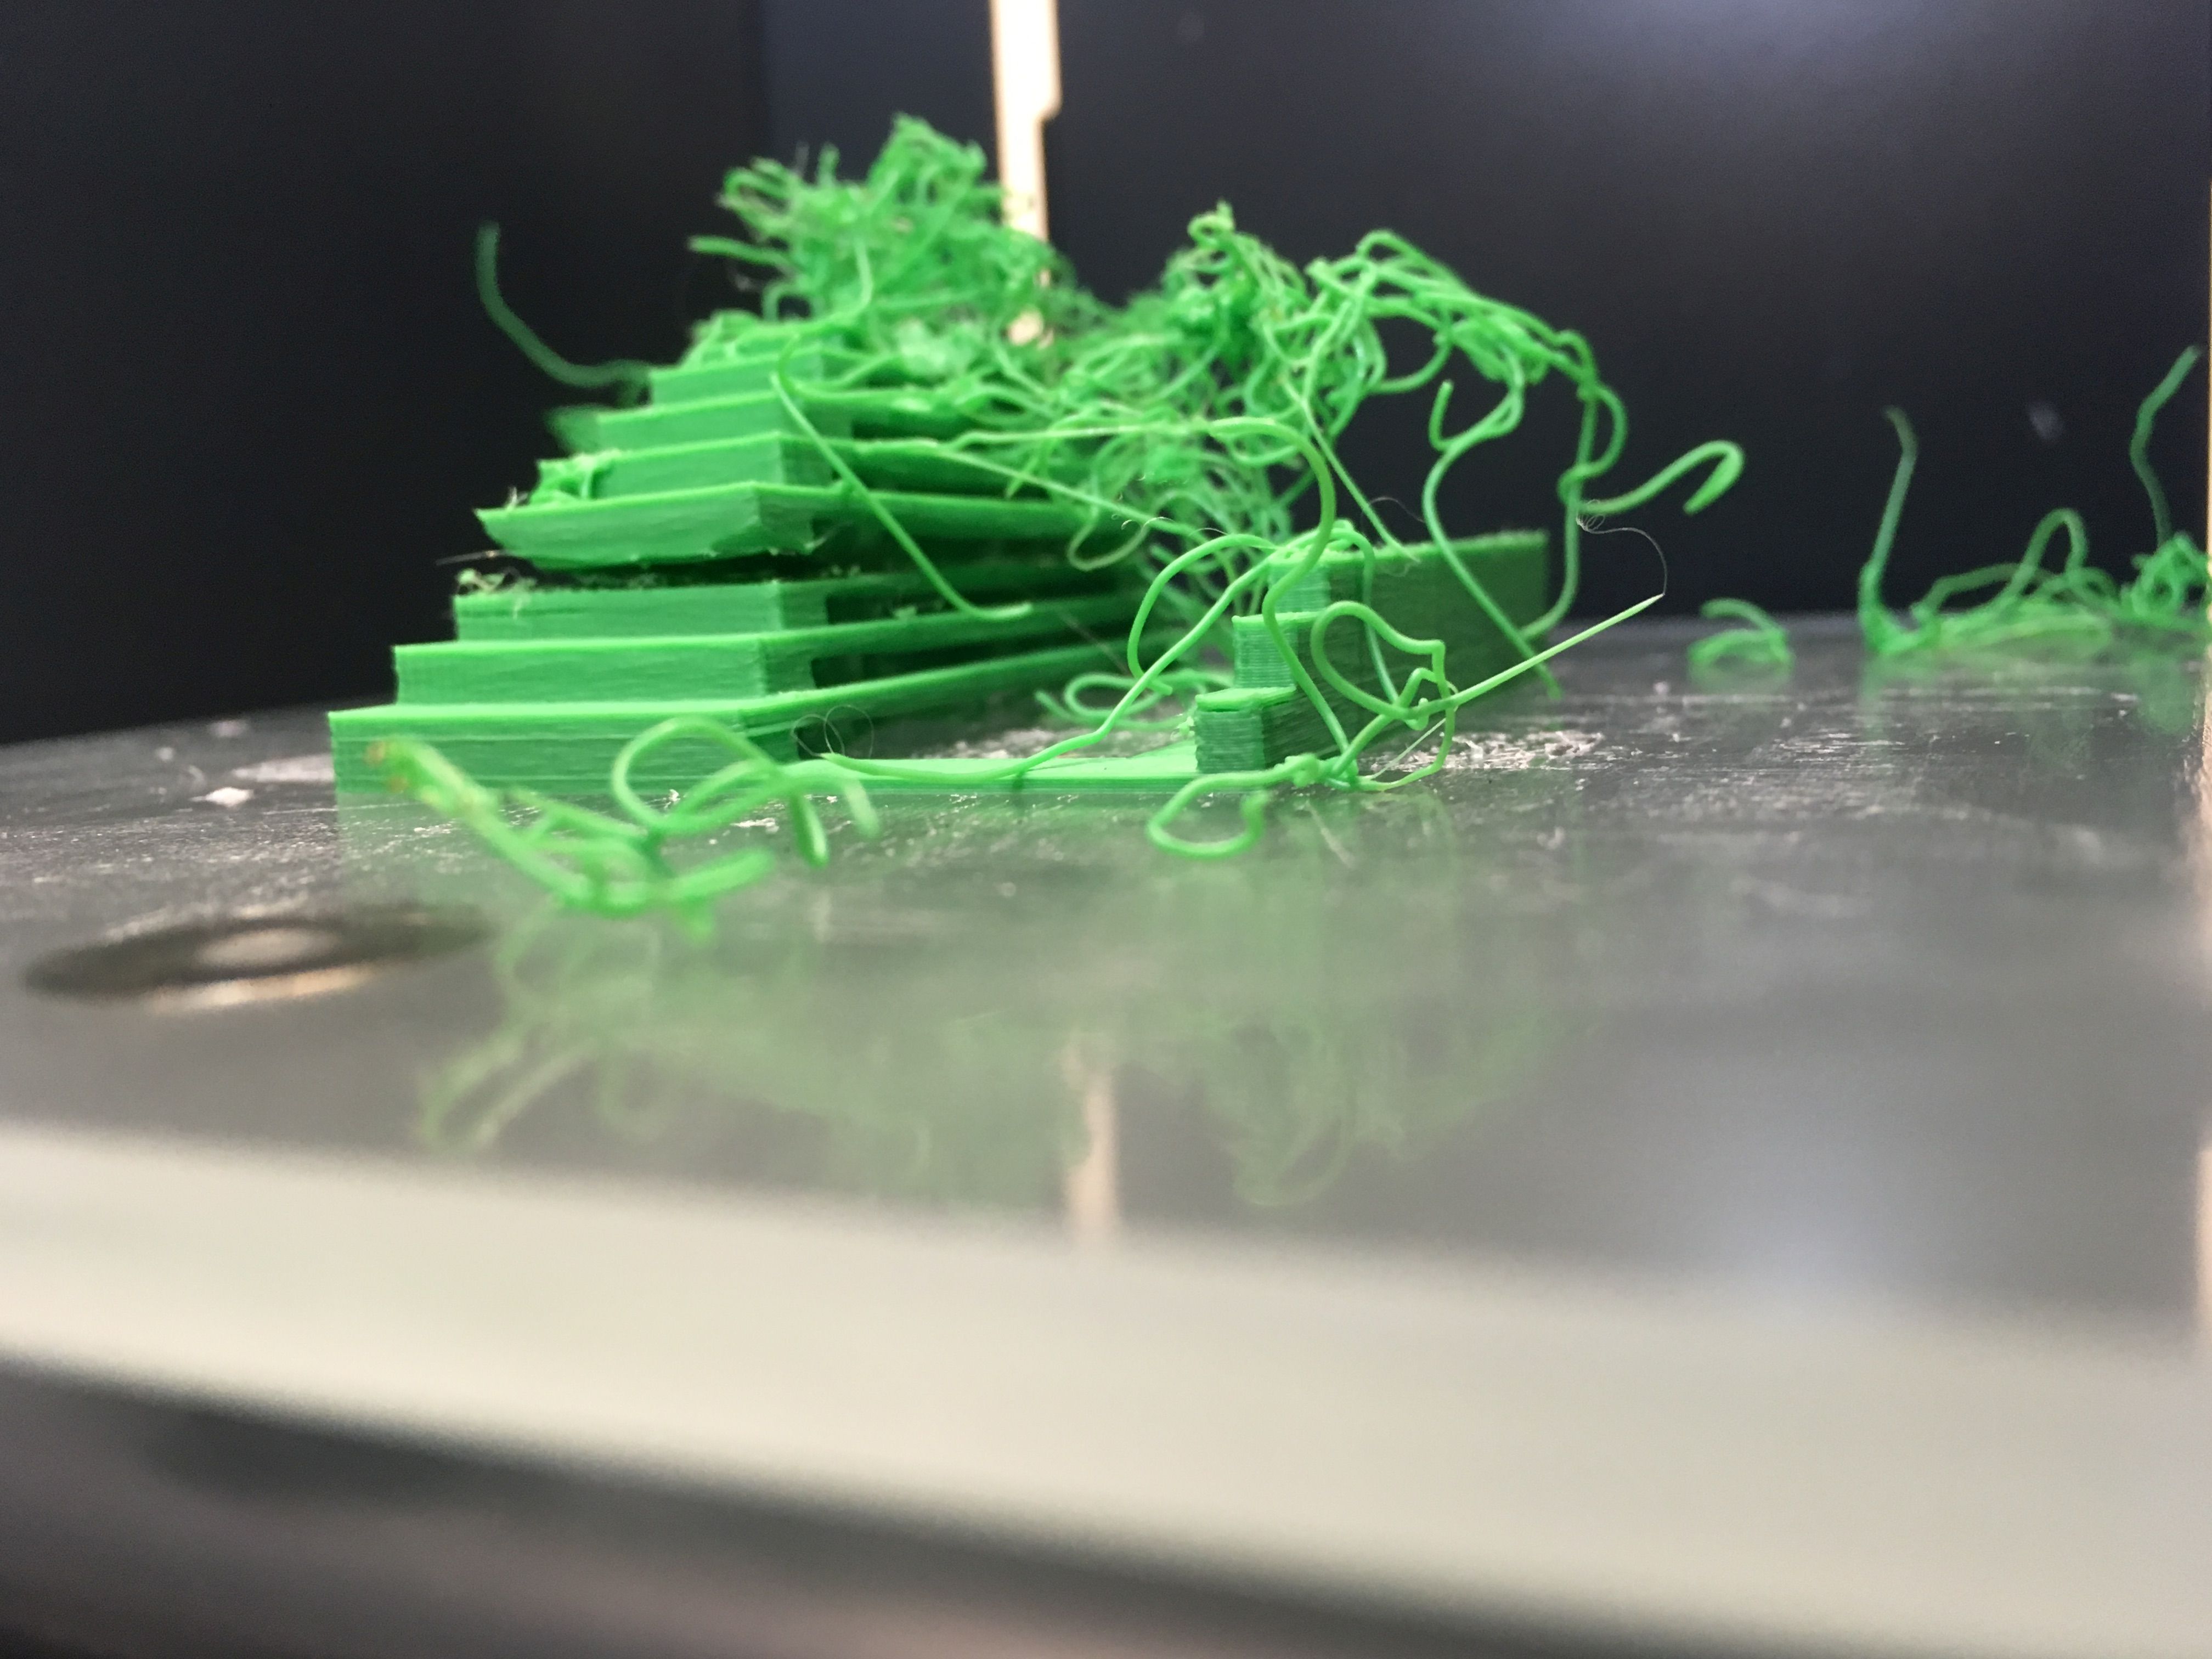 |
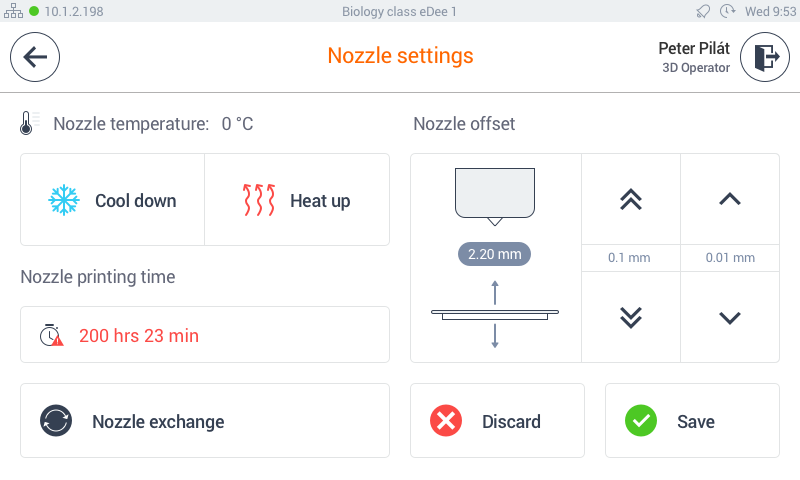
Offset test
After transporting the eDee printer, you should always perform an offset test and fix the offset if needed, make sure to prepare the print bed in advance, apply glue around all the glass and make a diagonal cross on it.
To perform the test go to the Nozzle setting menu.
Select Test offset to perform the test.
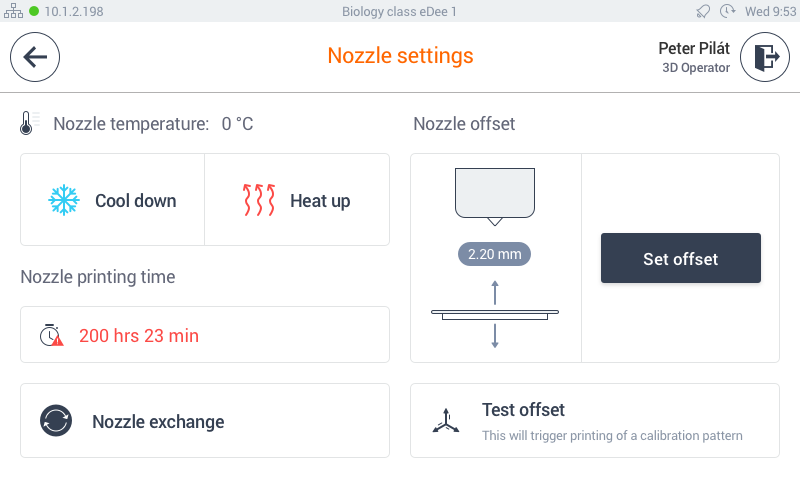
The test will begin automatically after the Nozzle is heated.
The resulted print out should look like this, with solid lines without any gaps:
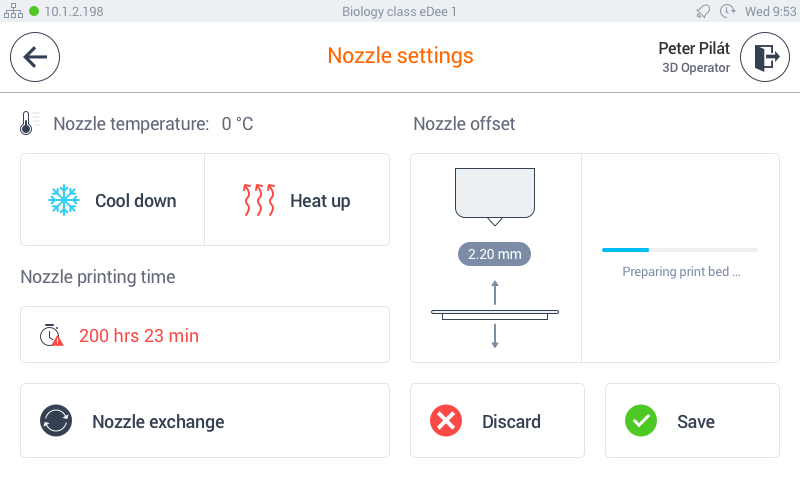
In case you need to adjust the offset, use the set offset option.
You must remove the plastic print pad prior to the "set offset" setting the offset with the plastic print pad in the printer may result in permanent damage to the print pad
Insert a sheet of paper (office paper - 80g/m ²) between the nozzle and print bed.
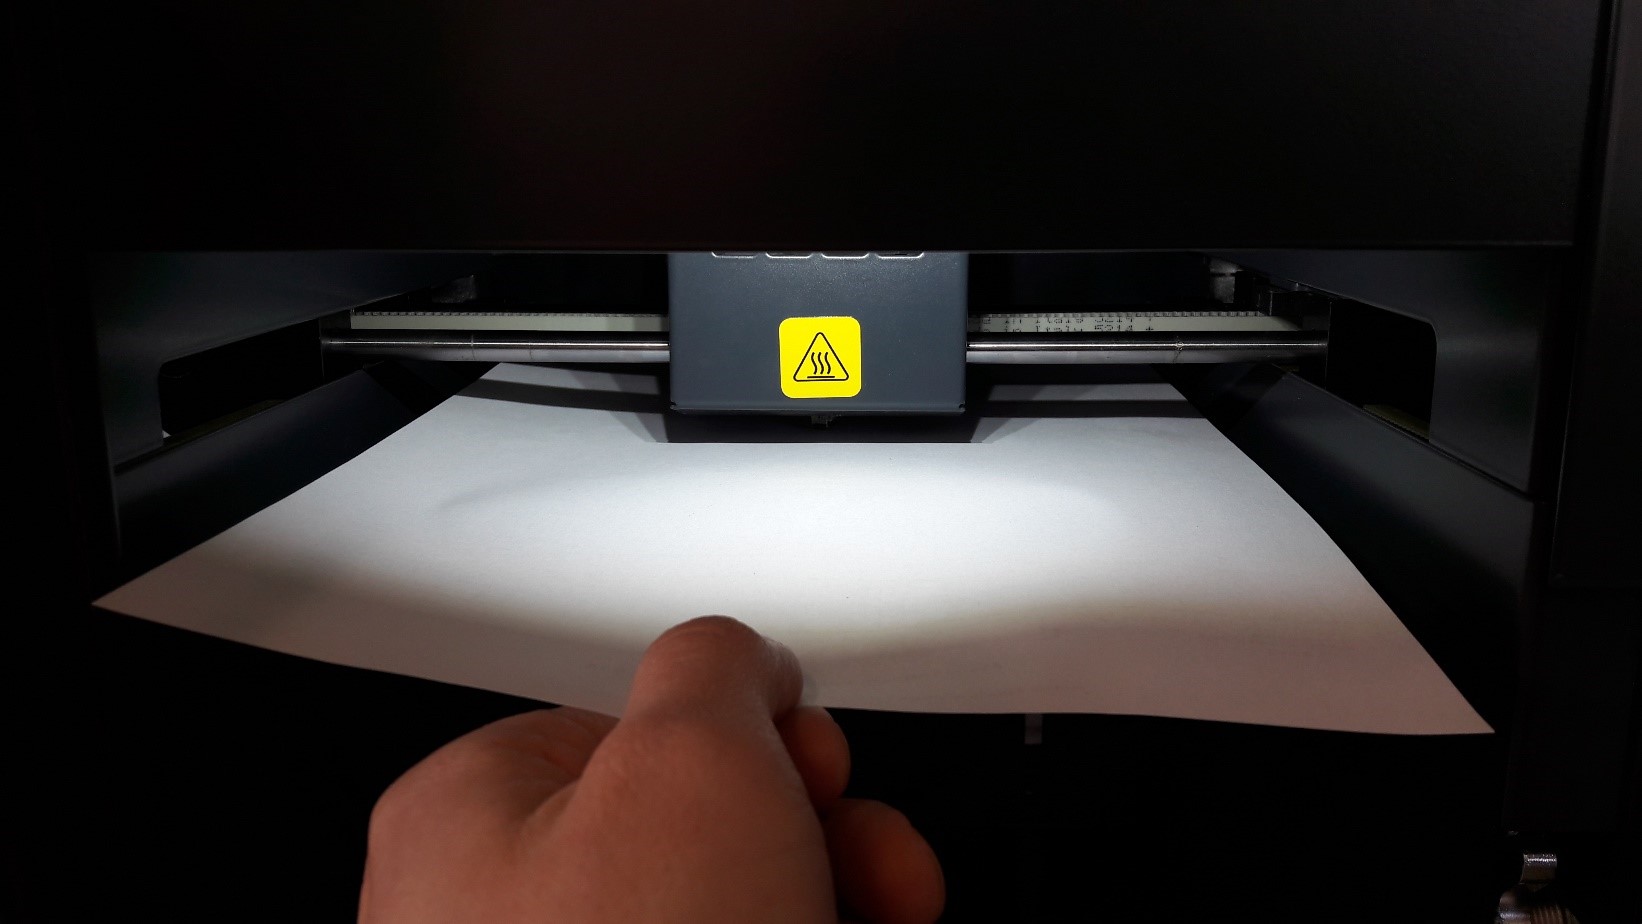
If you cannot insert a paper you have to move the print bed down by tapping “down 0,1mm” button. Once you have inserted the sheet of paper move the print bed up by tapping “up 0,1mm” until you feel that you cannot move the paper.
Then tap “down 0,01mm” and you should be able to move the paper but feel a little resistance. Then click to Save button and test the offset again.
Closing the eDee printer
Once all the previous steps are completed successfully, you can place back the eDee printer top lid followed by the spool and printing chamber.
Configure the network address
By default, the network address is obtained by the DHCP and it is shown at the top left corner of the service menu. If you wish to change it please select the Network button from the service menu.
Turn off the DHCP and configure the network setting manually.
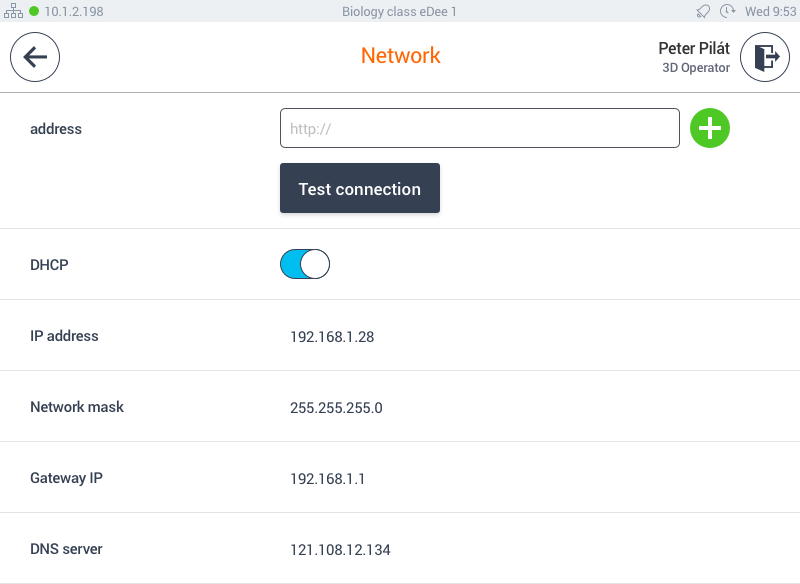
The SafeQ address will be configured automatically by the Dispatcher Paragon server installation.
Adding eDee device to Dispatcher Paragon
Prerequisite: Dispatcher Paragon Server is correctly installed and configured. For more information, please see the article Installing Dispatcher Paragon Server.
Follow the procedure below to connect eDee device with Dispatcher Paragon (more information can be found at Updating YSoft be3D eDee).
- Make sure that the Infrastructure Service is running. Since build 59, this service is installed with Manual start mode and thus may need to be started. It is recommended to stop the service again after all the installations have finished. Note that if the Infrastructure Service is not running then the Dispatcher Paragon user interface will display the following message when accessing the Devices > Hardware page:

- Go to Tenant management in Dispatcher Paragon and select Devices.
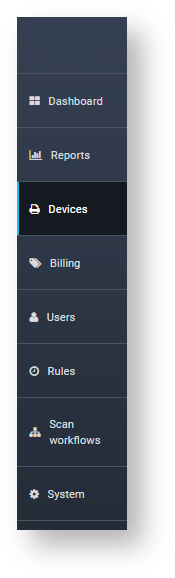
Picture: Dispatcher Paragon6 menu
- Press Add device button.

Picture: Button ADD DEVICE to add new device into Dispatcher Paragon.
Fill in all required fields: Name, Device group, Network address (eDee device IP address), and Spooler Controller group.
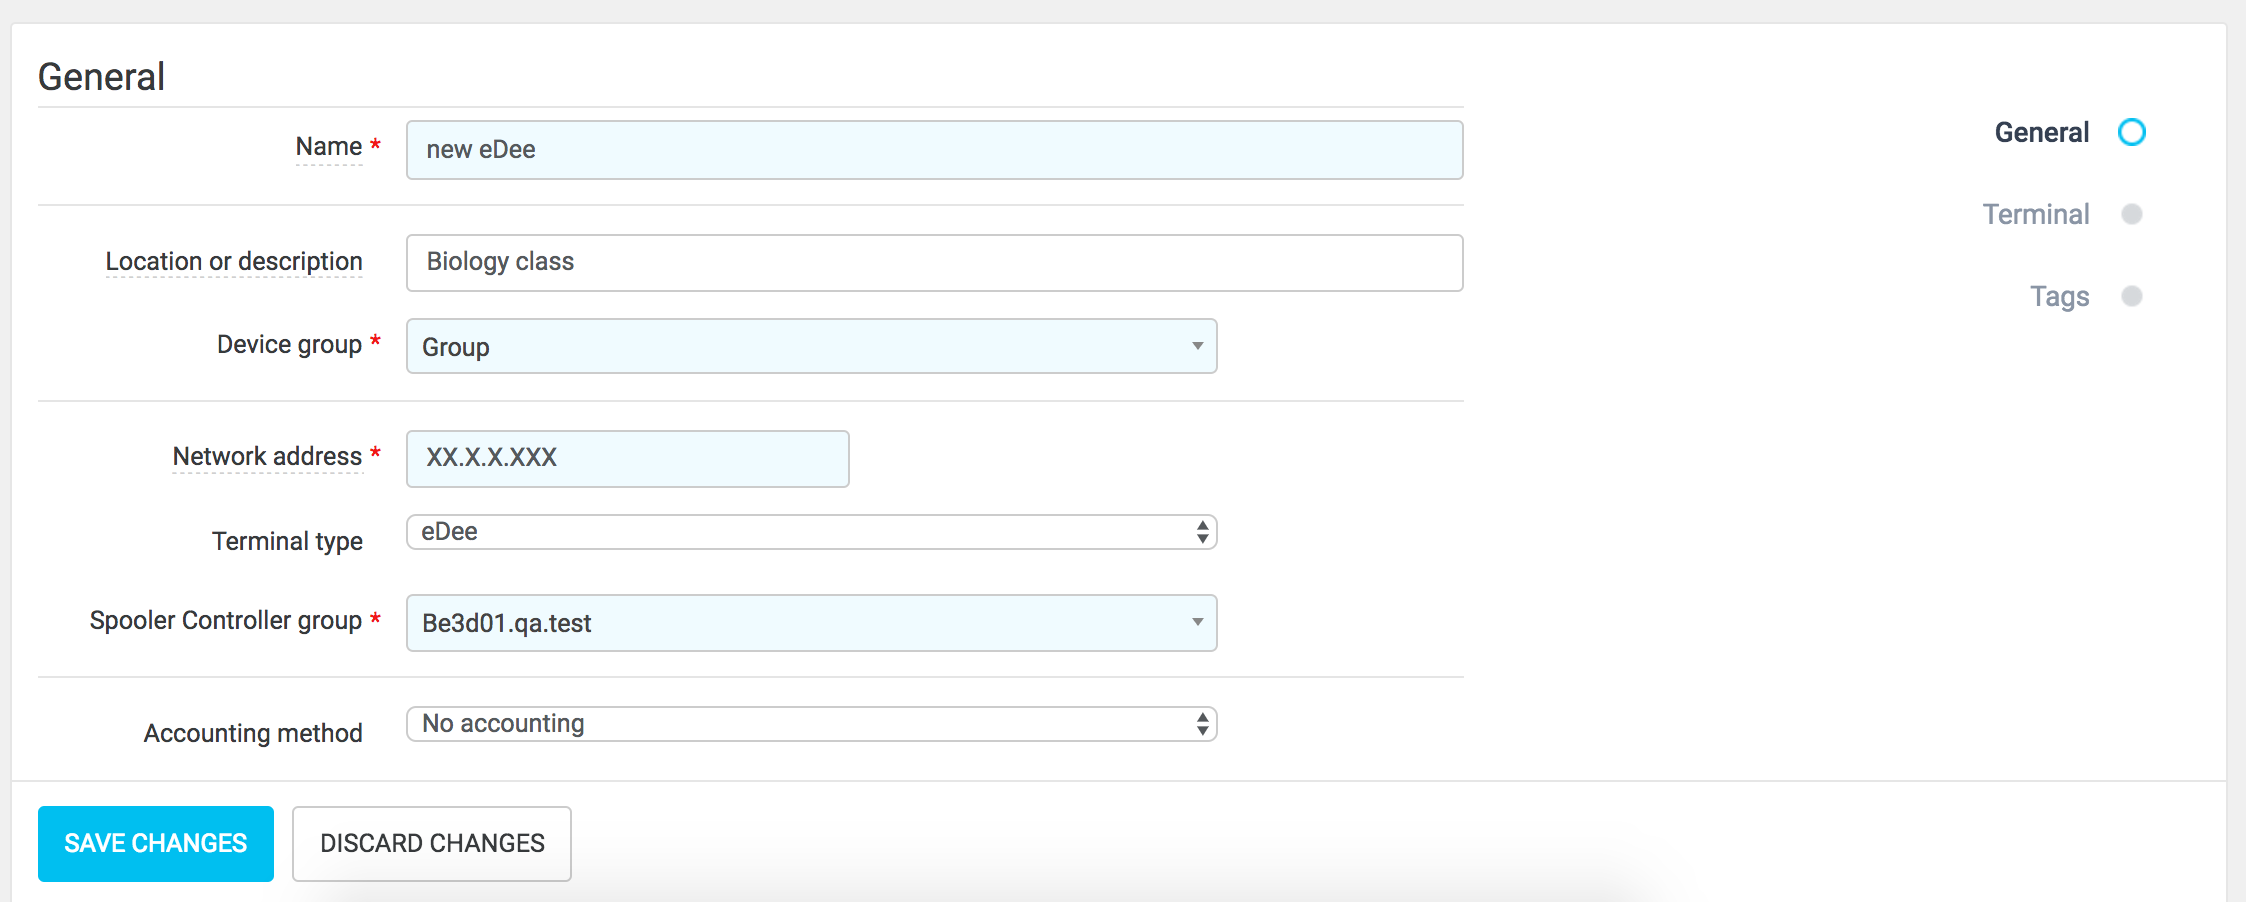
Picture: Filling in all required fields to add new device.
Open Terminal type selector and select YSoft eDee.
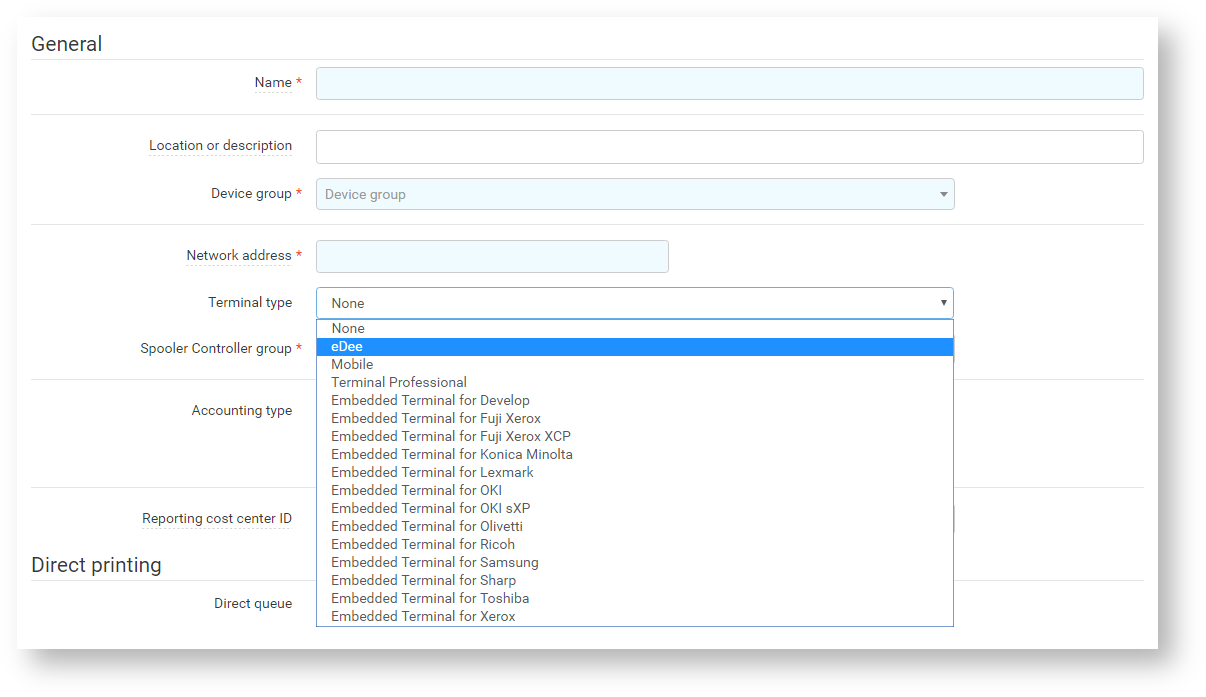
Picture: Selecting YSoft eDee terminal type.
Press Save Changes button.

Picture: Save changes button to add new device into Dispatcher Paragon.
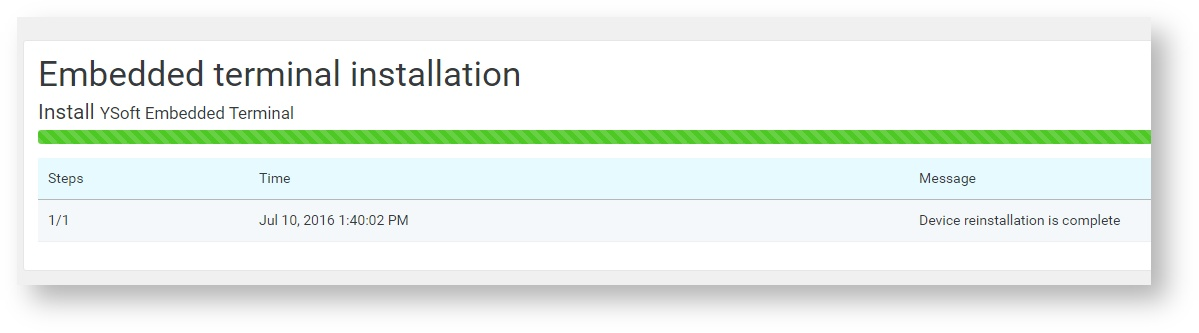
- Once the Save button is selected, SafeQ configures remotely the device and reinstalls the terminal.

- Once the terminal installation is complete, a confirmation message is displayed.
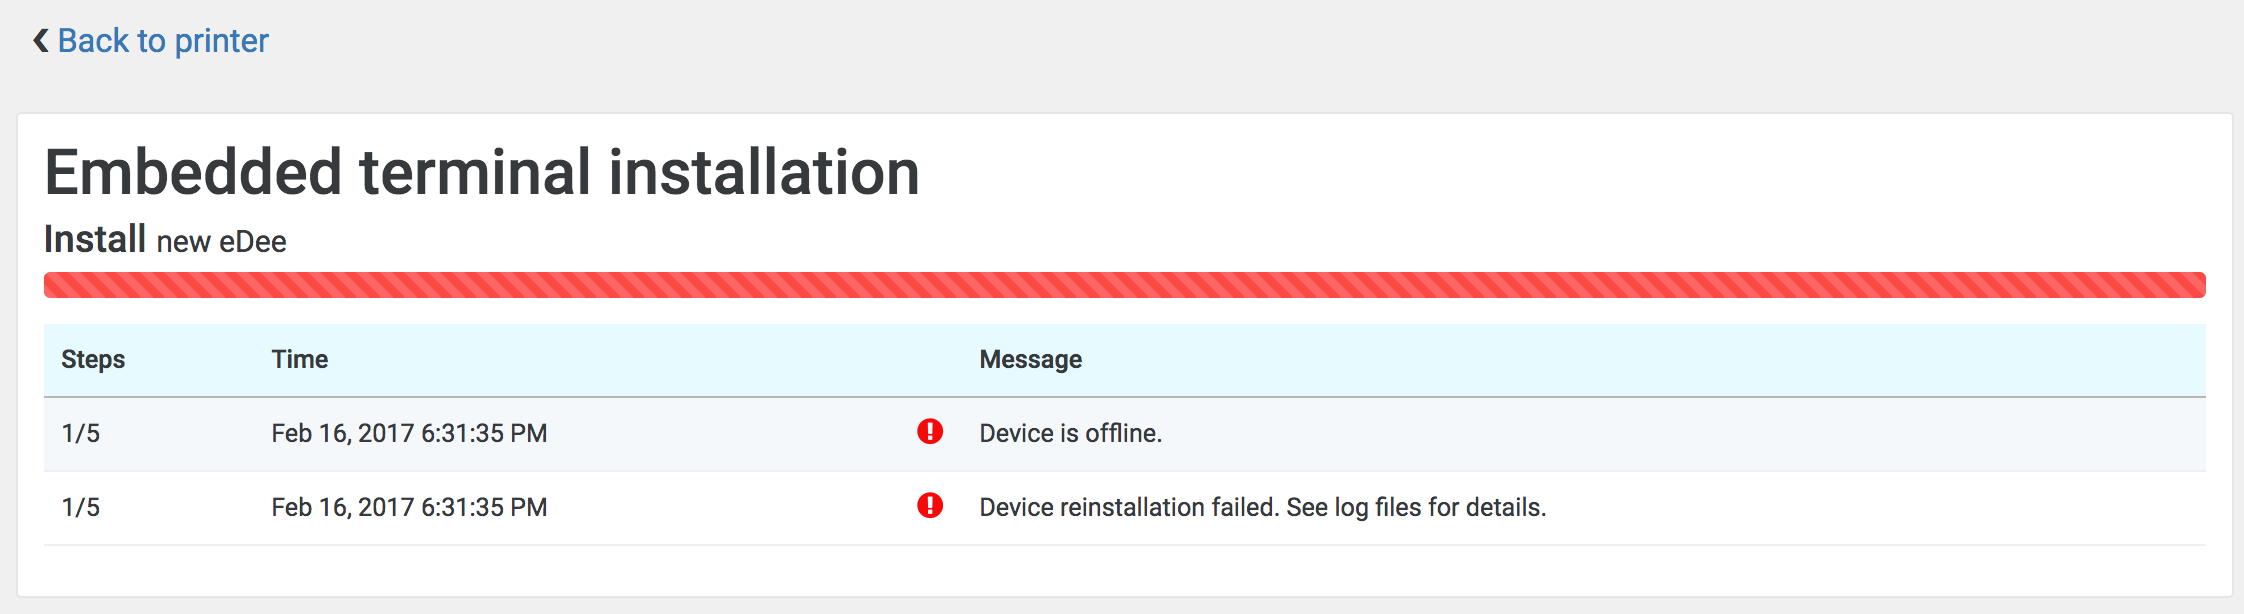
In case there is an error with the reinstallation following message is displayed.
8. Now a new eDee device is added.
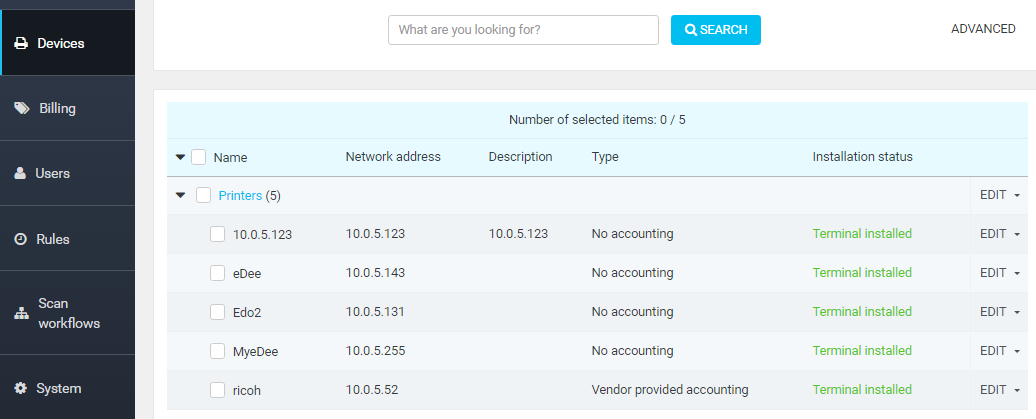
Picture: Administrator can see terminal ID of any device by pressing EDIT button.
Accounting
In case the customer has an accounting turned on, you should set up the pricing for eDee - please look at Configuring and Managing Price Lists.
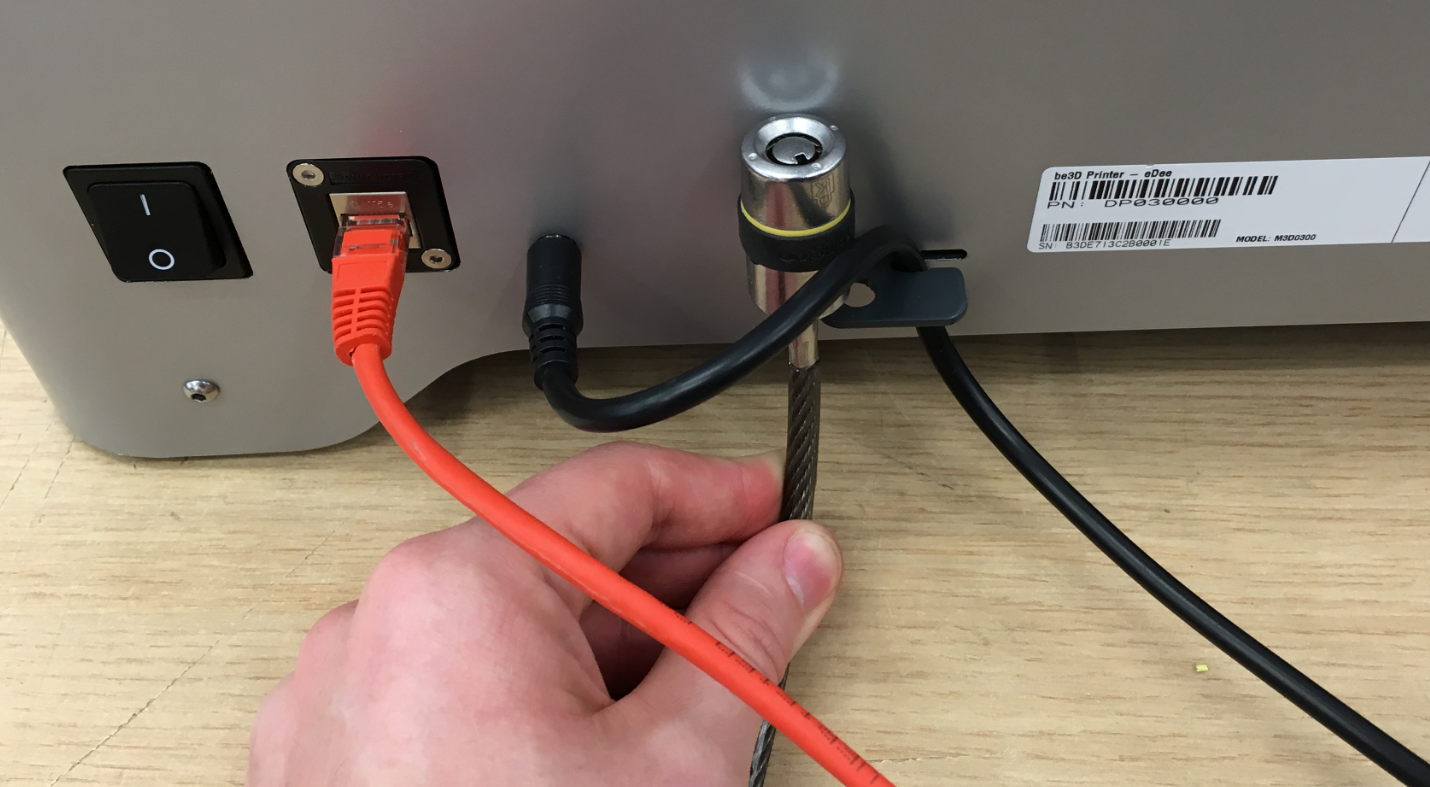
Locking the device - optional
YSoft eDee printer is ready to be safely attached to a table with a PC desktop Lock (e.g. Kensington K64617S). Guide the loose end of the lock, through the hole in the cable holder in the back of the printer as depicted in the following picture.