This section describes the scan application of Dispatcher Paragon Cloud Terminal for Konica Minolta. It is an alternative to Dispatcher Paragon Embedded Terminal for Konica Minolta - 1st Gen.
Scan delivery
Delivery of scan files is done by WebDAV only, so WebDAV has to be enabled as a scan server.
Workflow scanning
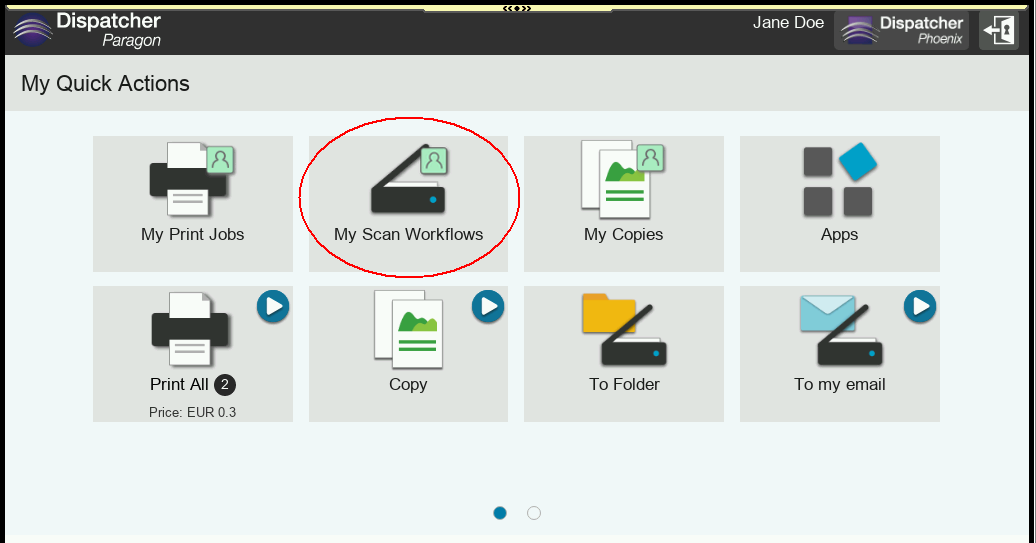
- At the MFD panel, tap the Cloud Terminal icon.
- Log in with your Card or username/password.
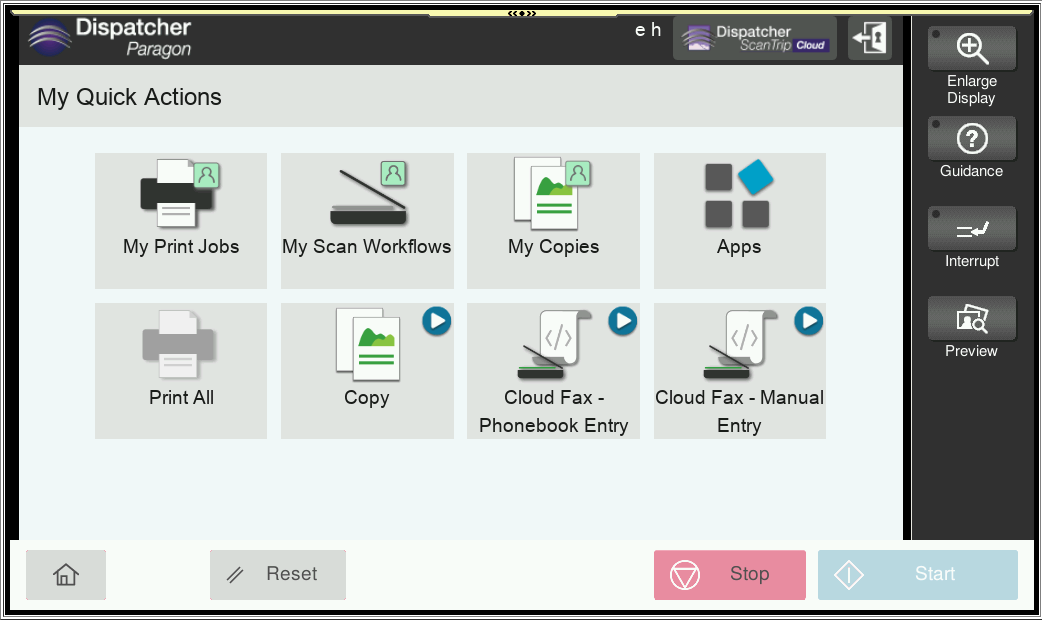
Open My scan workflows.
Select a scan workflow you want to execute. Some of the workflows are marked as Instant workflows and are executed directly from the workflows screen by tapping on the workflow. The other workflows need additional parameters to be entered and tapping on the workflow redirects you to a workflow detail screen.
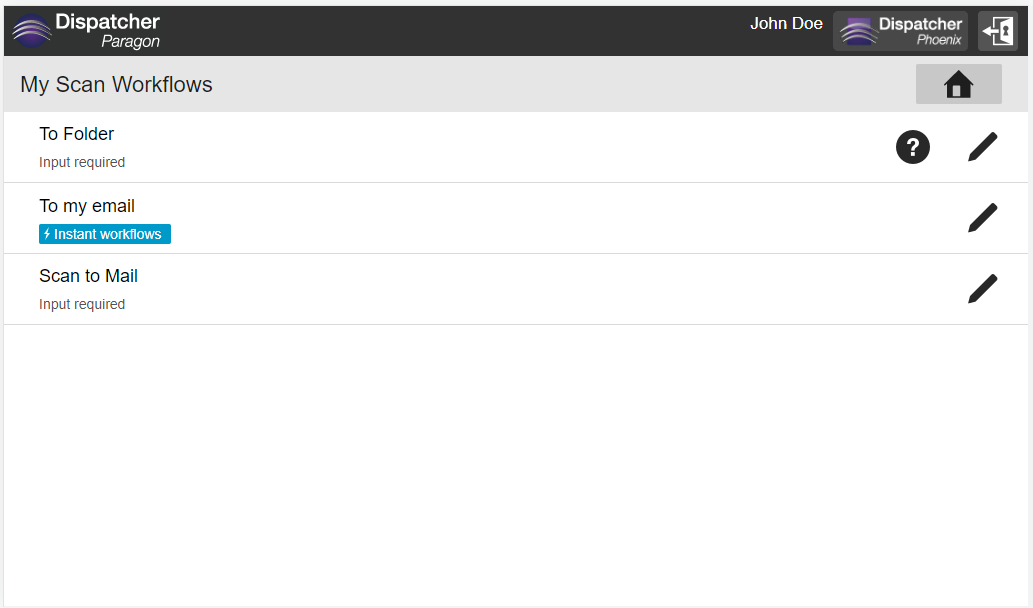
- Press the question mark icon
 to display the workflow's description.
 On the workflow detail screen, you can enter additional workflow parameters.
Tapping Scan settings tab opens a screen where you can select the properties of the scan job.
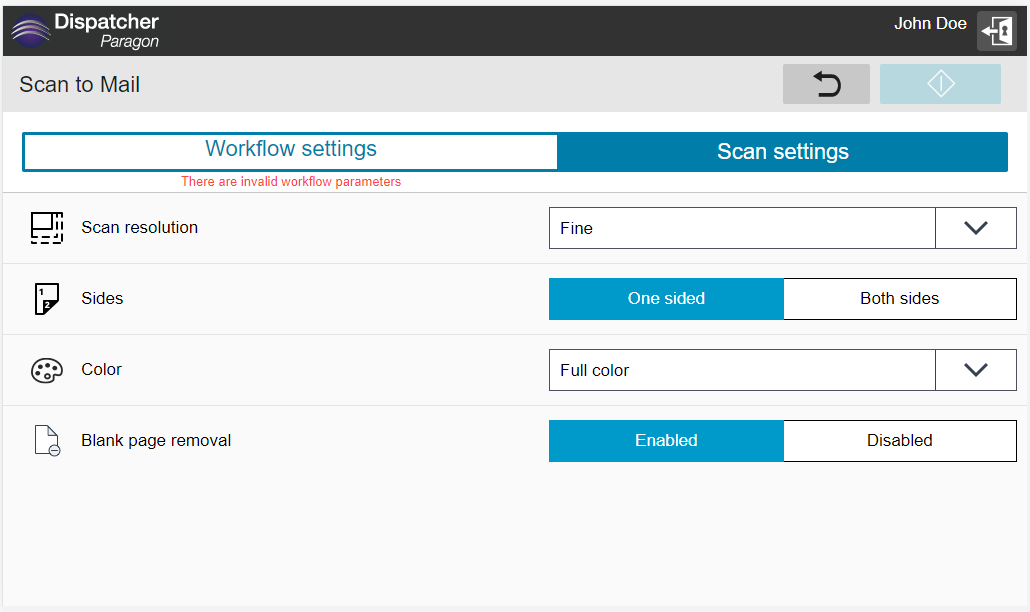
If the administrator enabled it for the workflow, you will also see the Konica Minolta Advanced Scan settings:
- Scan size
- Page setting
- Original type
- Background removal
- Density
- Blank page removal
- Resolution
- Sides
- Color
- File type
The workflow configuration might not allow you to configure scan or workflow settings. In that case, the tab is not shown.
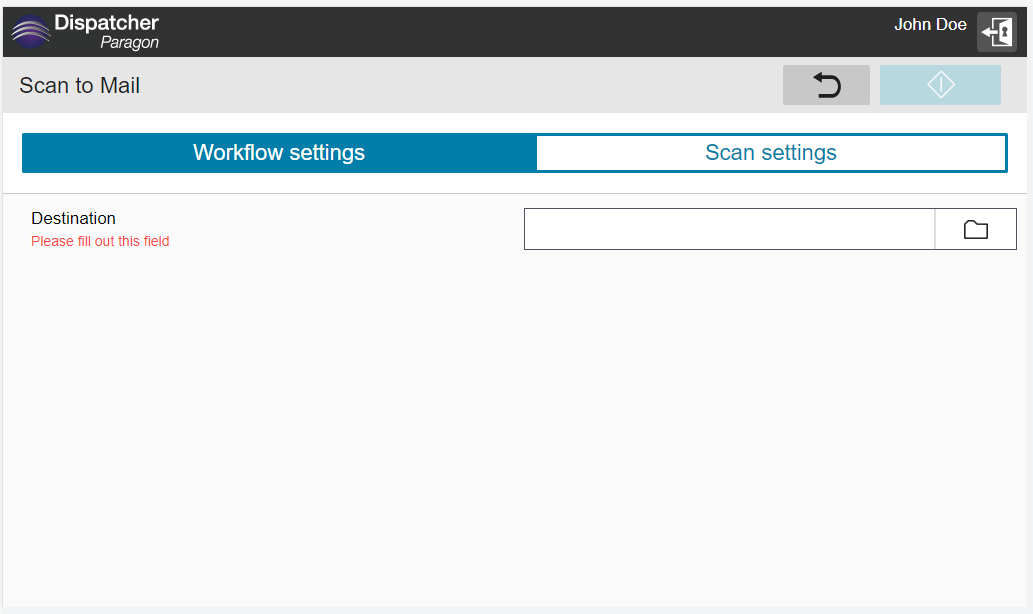
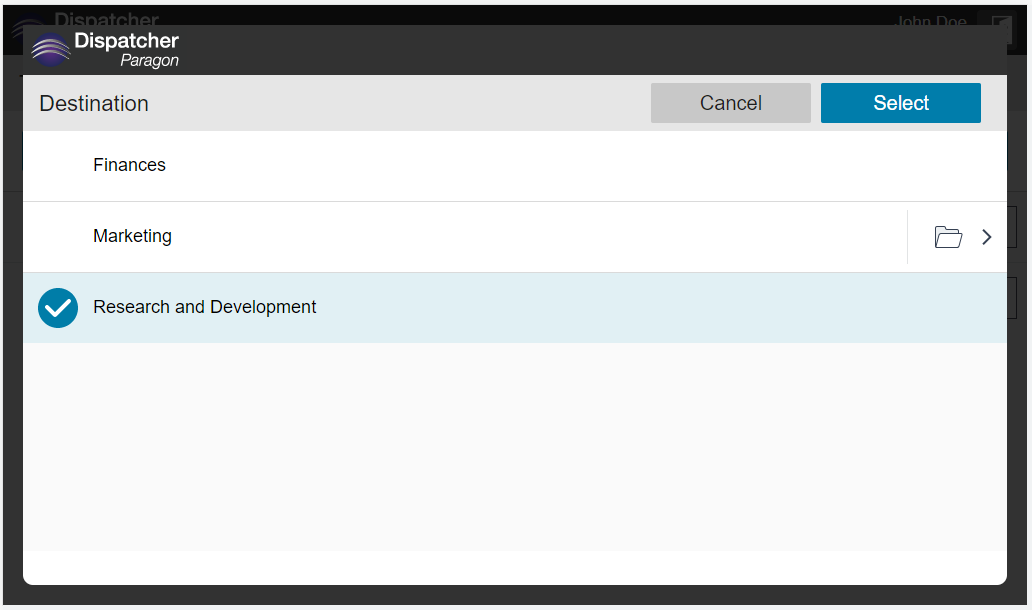
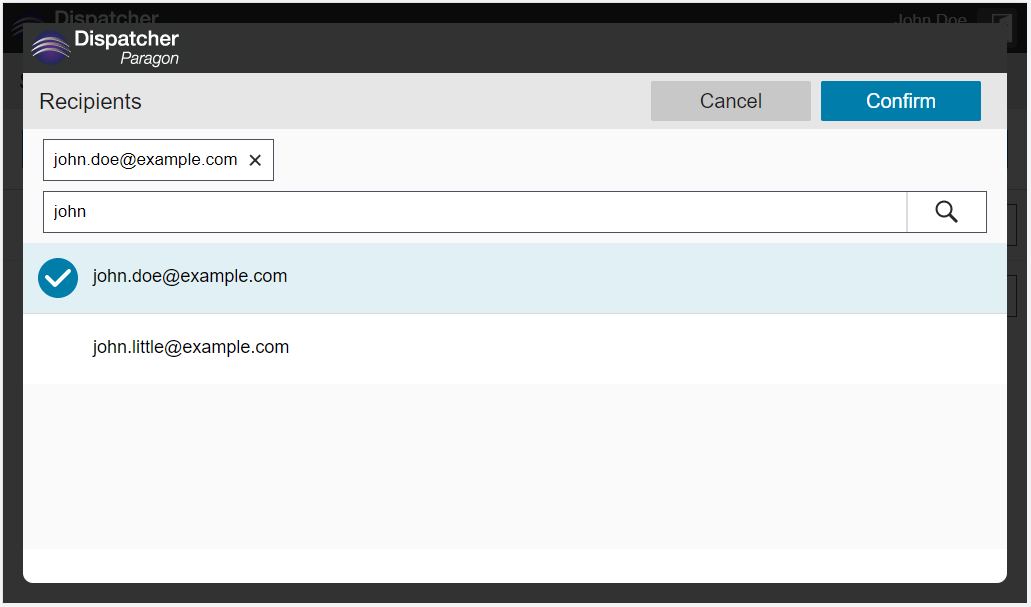
Some of the parameters allow you to browse folders (See this page for details: Folder browse parameter - Cloud terminal) or search for an email address (See this page for details: Email search parameter). Tapping such a parameter opens a new dialog for value selection.
When an input field is invalid, the Scan button is greyed out and an error message is shown.
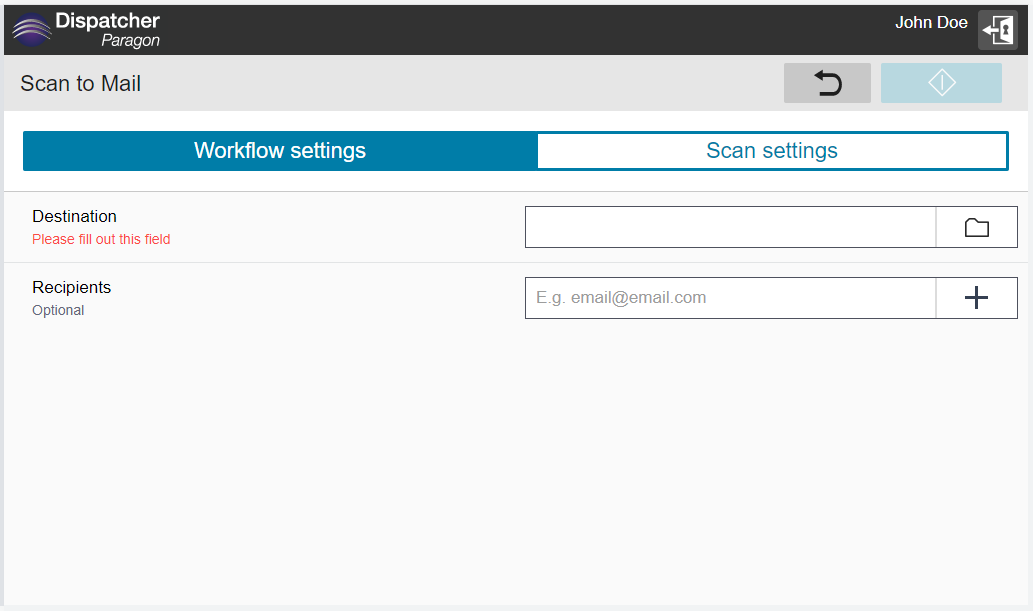

When you are ready and all the input fields are valid, tap the Scan button to initialize the scan job.
While scanning, you will see the information about the progress. When the scan is finished, the progress screen disappears.

Limitation: When the user is redirected to a native scan application and wants to use the functionality of the Cloud terminal, opening the Cloud terminal again is needed. If Kiosk mode is enabled, users will need to wait until the MFD’s user timeout period expires before being able to log in again.
Scan - Cloud Fax workflows
The Cloud Fax service is a high-capacity, reliable, and globally accessible service that enables the transmission and reception of faxes from a web portal or a Konica Minolta MFD. If your company purchased this service, perform the following steps to send faxes from the MFD:
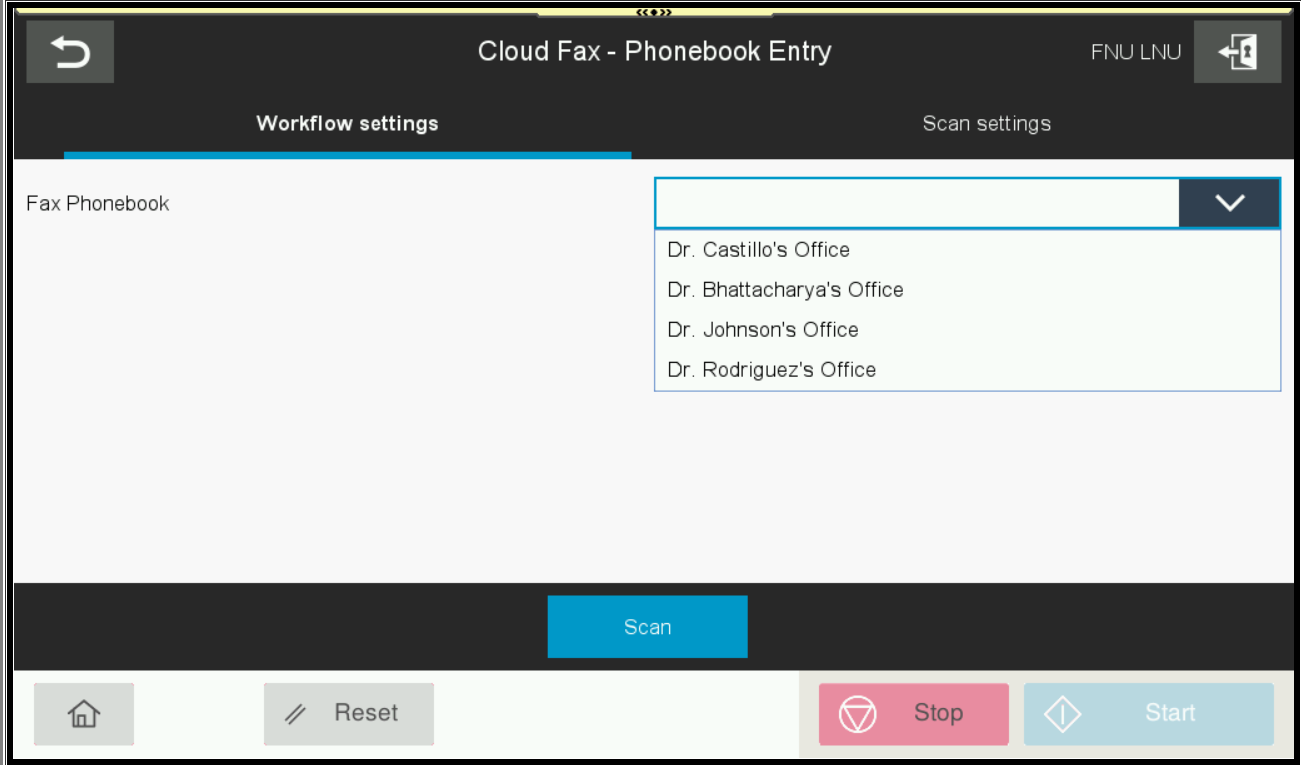
- Select a Cloud Fax sending method. There are two methods that your Administrator may have configured: Phonebook entry and Manual entry. Your Administrator could have configured one or both methods.
Phonebook entry – this method allows you to select a predefined fax number from a list of numbers. Your Administrator may list the recipient's name, fax number, or both. In this example, only the name of the recipient is shown. To update or add a new recipient, please contact your Administrator.
Manual entry – this method allows you to enter a fax number manually.
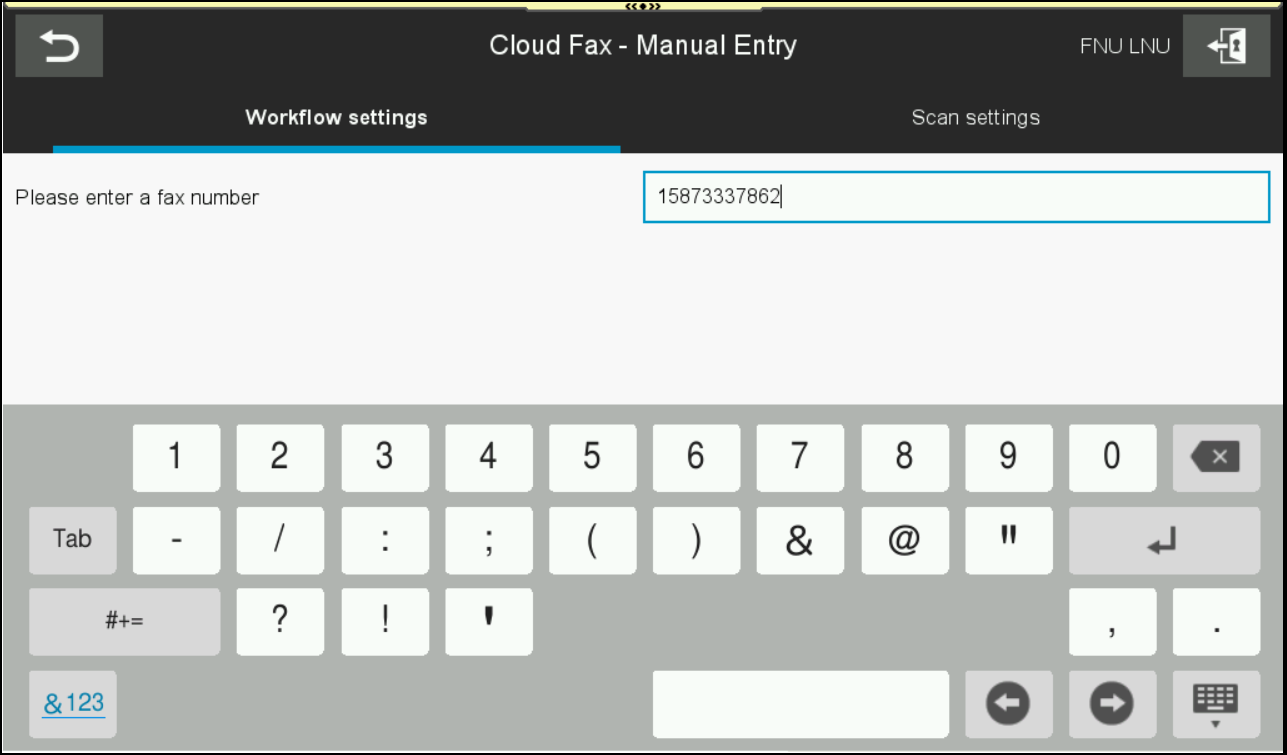
After selecting the recipient from the list or entering the number manually, tap Scan. Your document will be scanned and transferred to the cloud fax service. If your administrator configured email notifications in the system, you will receive an email notification with the status.