Email In
The Email In node actively monitors incoming and existing emails from folders on an email server. Emails can be dynamically filtered by a variety of fields including To, From, CC, bcc, Date, Size, Body, Subject and Header data to ensure that Dispatcher Phoenix is collecting the content that needs to be processed within the workflow. Currently, the Email In node supports the IMAP protocol which must be enabled for the email server being monitored in the workflow.
Note: Dispatcher Phoenix connects with a variety of email servers. You will need to enable IMAP for your server and configure an app password for servers, such as Gmail, that require two-factor authentication. Some email clients may slow your connection down depending on network usage.
Important! When upgrading from Dispatcher 8.6 or older to Dispatcher Phoenix 8.7 or newer, any workflows using an Email In node will need to have that node and any associated Index Forms replaced and configured before those workflows can be restarted.
Using the Email In Node
To open the Email In node, add an Email In collection node to the workflow and double-click on it.
There are several buttons and fields that appear, including:
-
Enabled - To enable this node in the current workflow, check the box at this field. If you leave the box blank, the workflow ignores the node and documents pass through as if the node was not present. Note that a disabled node does not check for logic or error conditions.
-
Node Name - The node name defaults into this field. This name appears in the workflow under the node icon. Use this field to specify a meaningful name for the node that indicates its use in the workflow.
-
Description - Enter an optional description for this node. A description can help you remember the purpose of the node in the workflow or distinguish nodes from each other. If the description is long, you can hover the mouse over the field to read its entire contents.
-
Help - To access Dispatcher Phoenix Online Help, click this button.
-
Save - To preserve your node definition and exit the window, click this button.
-
Cancel - To exit the window without saving any changes, click this button.
Application Setup
To use the Email In node, do the following:
-
Double-click the Email In node to open it.
-
In the Connection Type area, select an option from the dropdown.

Notes:
-
You must set up a Microsoft Exchange Online account or Google Mail account through Dispatcher Phoenix Web before it will appear in the dropdown.
-
The Microsoft Exchange Online function works for both the Microsoft Exchange Online and Outlook.com email services.
-
-
If using the Microsoft Exchange Online or Google Mail connection, select the desired account from the dropdown.
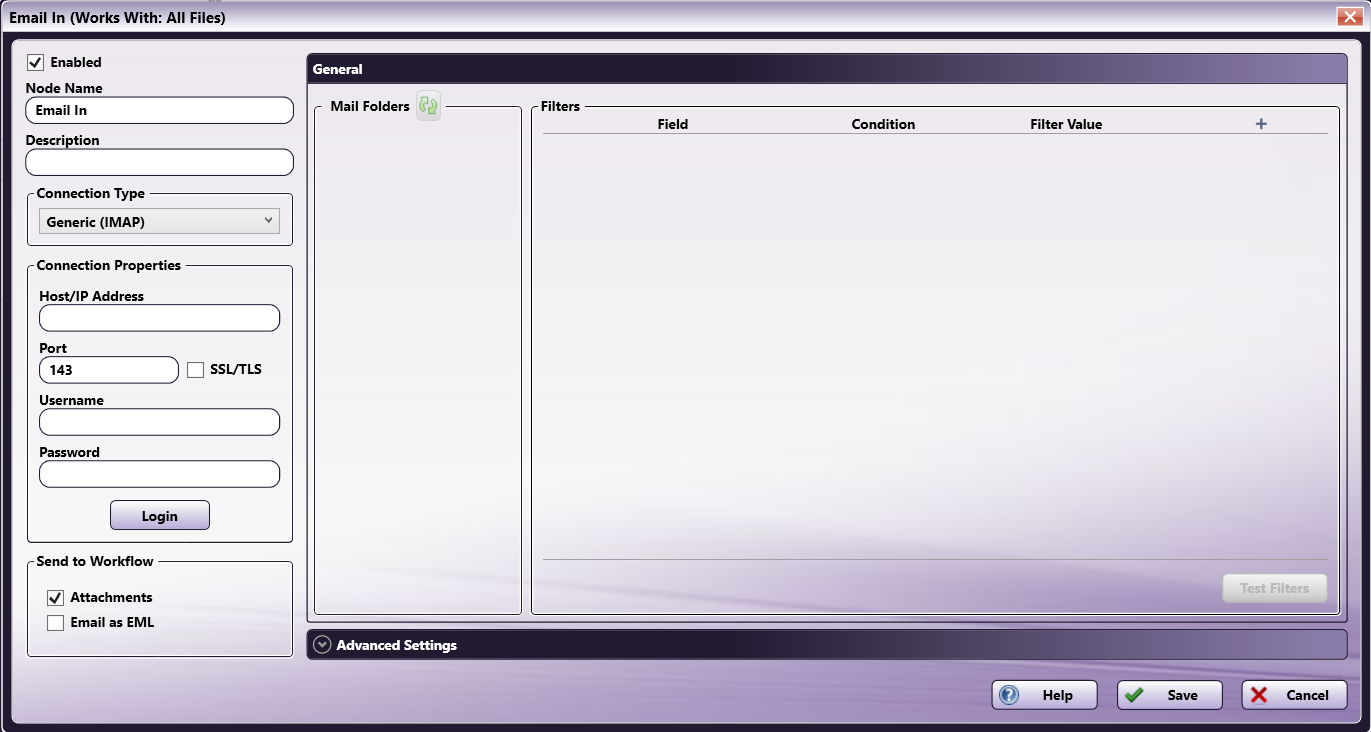
If using the Generic (IMAP) connection, enter the system information for the email server:
-
In the Host/IP Address field, enter the identifying host name for this server or its IP address.
-
In the Port field, enter the port used by the server for the email server (default is 143).
-
Check the SSL/TLS box to enable SSL or TLS security protocols.
-
In the Username field, enter the user name needed to connect to the email server.
-
In the Password field, enter the password needed to successfully log in to the email server (for Gmail users, this is your app password that is configured within your accounts security settings).
-
Click the Login button to test the connection with the email server.
Note: To avoid temporarily locking yourself out of your Gmail account, don’t exceed 2500 MB per day for IMAP downloads. Google recommends that if you’re setting up a single IMAP account on multiple computers, wait for some time between each setup.
-
-
In the Send to Workflow area, do the following:
-
Check the Attachments box to collect and process any attachments from an email through the workflow.
-
Check the Email as EML box to send the contents of an email as an EML file through the workflow.
-
-
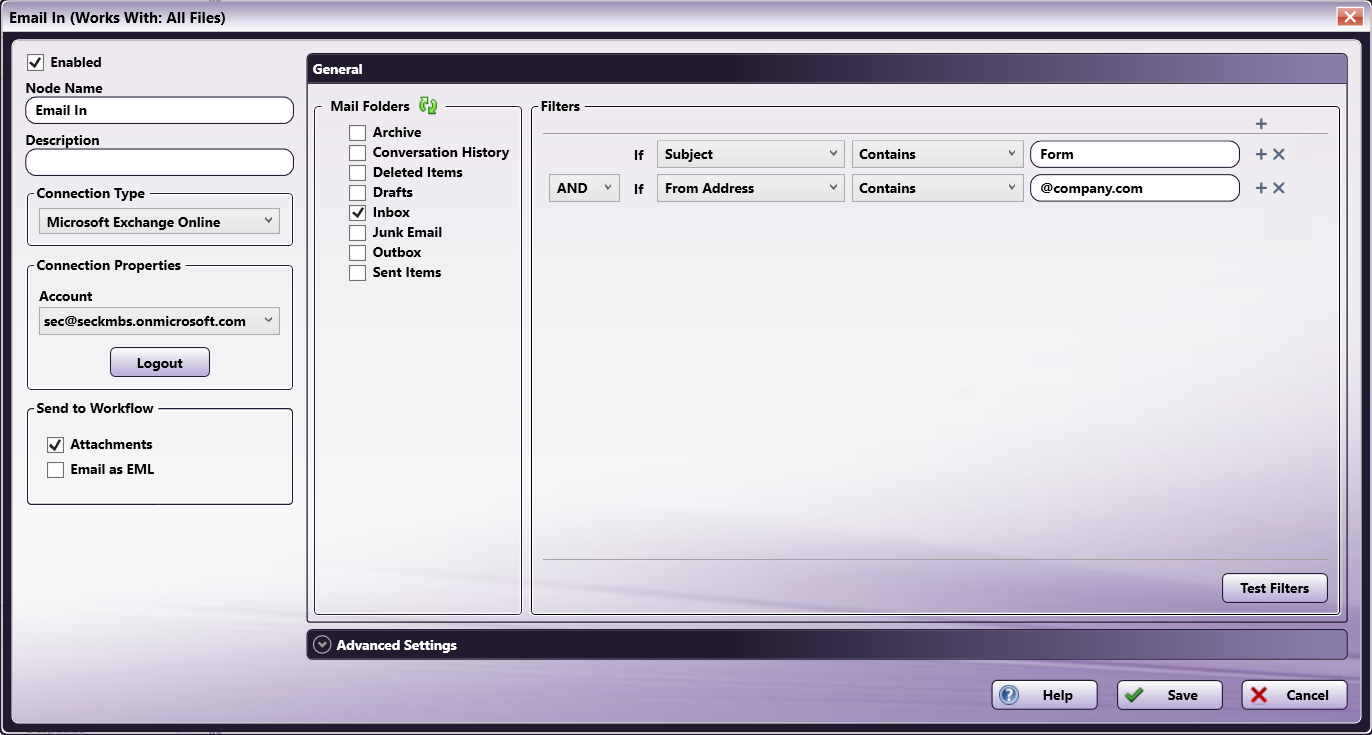
The General section will auto-populate with your Mail Folders once you have successfully completed the IMAP Connection Properties section. You can use the refresh button to repopulate the Mail Folders at any time.
-
In the Mail Folders area, select the folder(s) from which emails should be collected.
-
In the Filters area, select the criteria needed for the system to identify and collect all emails relevant to the workflow. To add a filter, use the + button in the upper right-hand corner. Click here for more information on creating and using filters.
-
-
The Advanced Settings section allows you to customize the actions taken by the email server once the email has been collected as well as specify which metadata should be extracted from emails.
-
Under After Collection, select the actions, if any, that should be taken when an email is collected by Dispatcher Phoenix. Options are:
- Process as group - Use this option to process emails in groups of 500 or less.
- Mark as read - Mark the email as read on the email server.
- Delete email from server - For Microsoft Exchange, emails are deleted, but are still accessible from within the Microsoft Exchange client. For Google Mail, emails are deleted, but are still accessible from this node and from within the Google Mail client. If the workflow is unexpectedly stopped, you may lose emails.
- Move to mail folder - Select the folder where the email should be stored once it has been collected from the email server and processed through the workflow.
-
Under Connection Timeout Setting, specify the number of seconds before a network connection times out (i.e., login or logout operations).
-
Under Metadata Extraction, indicate what metadata should be extracted from an email that is collected by the Email In node.
-
-
Select the Save button to keep your Email In configuration. You can also select the Help button to access online help and select the Cancel button to exit the window without saving any changes.
Filter Logic
Emails collected into a Dispatcher Phoenix workflow with Email In can be filtered by the following fields:
| Field | Description |
|---|---|
| Attachment Name | The name of each individual email attachment. |
| Attachment Size | The size of each individual email attachment. |
| Attachments | The presence of attachments in an email (i.e., has attachments or doesn’t have attachments). |
| Bcc Address | The list of addresses that are blind carbon copied. |
| Body | The content included in the body of the email. |
| Cc Address | The list of addresses that are carbon copied. |
| Date | The time period in which the email was sent or received. |
| Email Size | The total size of the email including attachments. |
| From Address | The email address of the account that the email was sent from. |
| Headers | The header content of an email. At least one element of the header must match a filter value. |
| Read | The status of the email (i.e., read or unread). |
| Subject | The subject line of the email. |
| To Address | The recipient address of the email. |
| Total Attachment Size | The total size of all of the attachments included on an email. |
For fields with customizable content, a variable Condition and Filter Value can be specified. Options for Conditions may include:
- Contains
- Doesn’t Contain
- Ends With
- Is
- Regular Expression
- Starts With
After adding more than one filter to the node, you can define filter logic. For example, your node may include the following two filter conditions:
1. Subject contains: "Form"
2. From Address contains: "@company.com"
By default, the AND filter logic will be applied to these two filters. This means that any emails in your designated folder which have a subject that contains the word “Form” and that are from a person with an @company.com email address will be automatically pulled into the workflow.
Note: Filter values are not case sensitive.
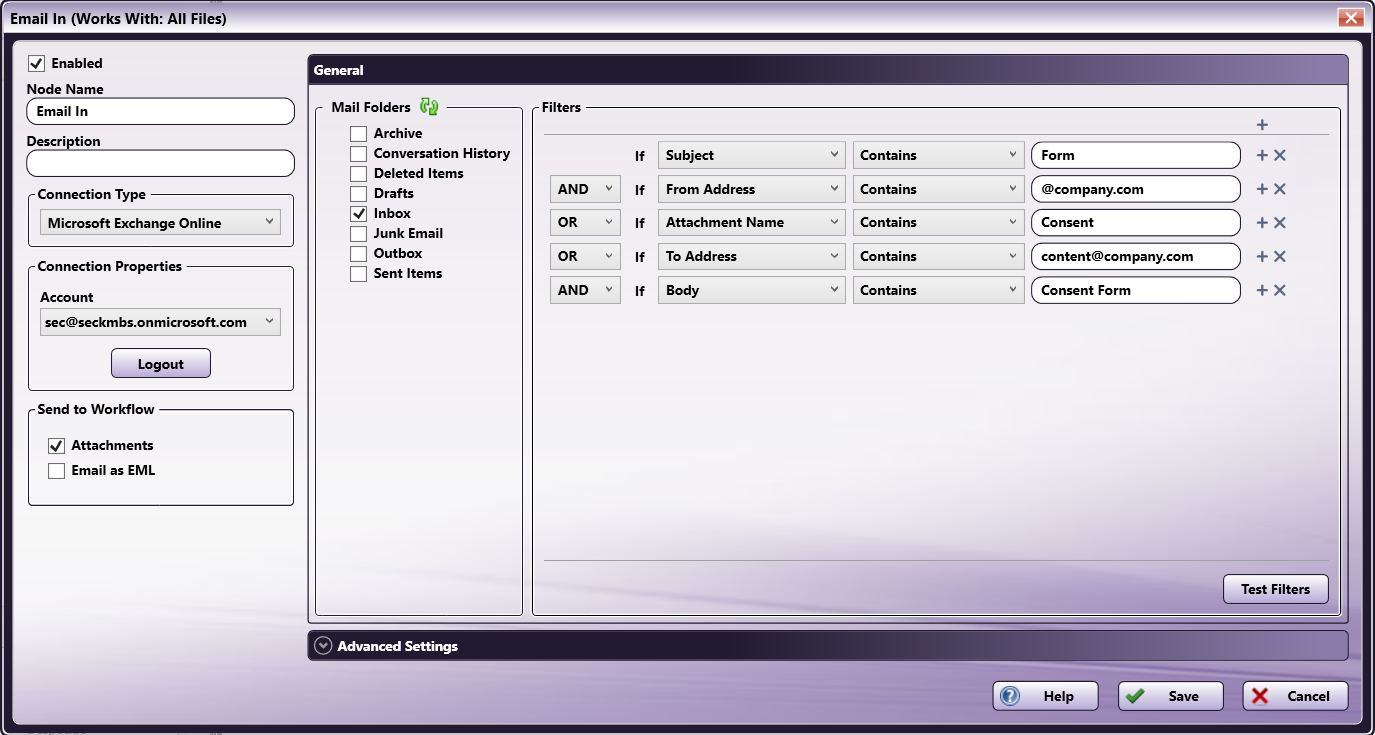
In some cases, you may need to find emails by sender OR the subject of the email. In this case, you would change the filter logic selection to OR.
Consecutive AND filters create a group of conditions while an OR separates filters from one another. For example:
(Filter 1 AND Filter 2) OR (Filter 3) OR (Filter 4 and Filter 5)
Metadata
The following metadata is created in the Email In node:
| Metadata Value | Description |
|---|---|
| {emailin:attachment_sizes} | A list of the size of each attachment with the email. |
| {emailin:bcc} | The list of addresses that are blind carbon copied. |
| {emailin:body} | The contents of the email body. |
| {emailin:cc} | The list of addresses that are carbon copied. |
| {emailin:date} | The sent or received date of the email. |
| {emailin:folder} | The folder an email was collected from. |
| {emailin:from} | The sender address of the email. |
| {emailin:headers} | Header’s internal email metadata, such as IP addresses and encoding types. |
| {emailin:host} | The Host/IP Email Server address. |
| {emailin:subject} | The subject line of the email. |
| {emailin:to} | The recipient address of the email. |
| {emailin:total_attachment_size} | The total size of all attachments within the email. |
| {emailin:username} | The email address of the account that emails are collected from. |