HTTP Out

The HTTP Out Node is used to distribute output files to a server via a URL. Use the HTTP Out Node settings screen to specify and test that URL.
Notes:
-
The HTTP Out node only supports the http POST request method to upload files to a server.
-
The HTTP Out Node supports metadata in URL.
Using the HTTP Out Node
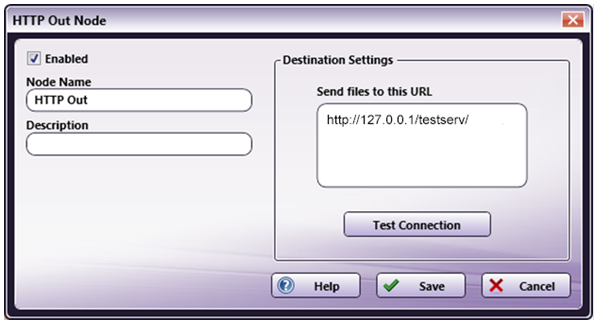
Add the HTTP Out Node to the workflow by dragging the node’s icon onto the Workflow Builder canvas, and then double-clicking on the icon to open the HTTP Out Node:
-
Select the Enabled box so that the process will run. When unchecked, this process is ignored. Documents pass through as if the node were not present (i.e., continue along the default or positive path). Note that a disabled node will not check for logic or error conditions.
-
In the Node Name field, enter a meaningful name for the HTTP Out node.
-
In the Description field, enter a description for the HTTP Out node. Although this is not required, it can be helpful to distinguish between multiple collection points. If the description is long, hover the mouse over the field to read its entire contents.
-
In the Send files to this URL field, specify the HTTP path to which files should be sent. An error message will pop-up if an illegal value is entered.
-
Click the Test Connection button to make sure the connection to the destination URL works as expected.
-
Click the Save button to save the changes. If Cancel is selected and the window is closed, the changes are not saved.
-
Click the Help button to access online help.
Testing the HTTP Out Node’s Destination Settings
When a job reaches an HTTP Out node, it is sent to the URL entered in the Destination Settings panel. Use the Test Connection button to make sure the connection to the URL works as expected.
-
Launch the HTTP Out Node settings screen.
-
Enter the destination server’s URL in the Send files to this URL field.
-
Click the Test Connection button:
-
The function checks the validity of the URL value entered in the field. If it is valid, a success message launches.
-
If the server is configured to require authentication credentials, the connection will fail. An error message launches noting this situation. The server-side authentication must be removed for the connection to be successful.
-
If the server is configured so that files cannot be submitted, a success message launches if the URL is valid. Even though the URL is valid, however, the server configuration will still prevent files from being sent to the URL. To correct this, the server-side settings MUST be modified so that the server can accept files.
Sample of an HTTP Out workflow
The purpose of this workflow is to distribute output files to a server via a URL.
In the sample workflow below, jobs are submitted to an Input folder and then sent to the HTTP Out server via the specified URL:
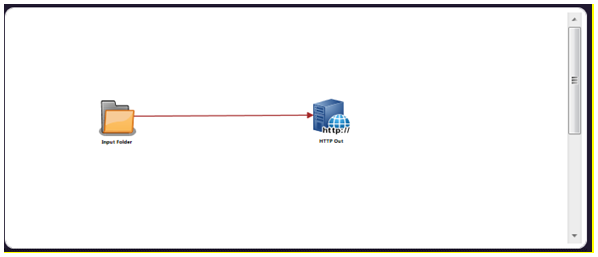
Input Folder Node: The source file path must be configured in the Input folder.
HTTP Out Node: The HTTP Out Node should be configured to send files to the destination URL. (See instructions in the Using the HTTP Out Node section providing earlier in this topic.)
Once the HTTP Out node is configured and the connection test is successful, the node may be used in workflows.
Note: Make sure that if the situation noted in Section Testing the HTTP Out Node’s Destination Settings, Step 6 is properly addressed or the HTTP Out node will NOT function as expected.
Sample Code for Setting up Server for HTTP Out
SAMPLE PHP SERVER CODE
PHP Server code can be used to set up a server to receive jobs from the HTTP Out node. The block below is an example of the code used to create the destination server using PHP:
<?php
if(empty($_GET) || $_GET['file'] == '') {
	echo "<p>'file' argument is missing in the request.</p>";
	return;
}

$uploaddir = 'C:/Users/test.user/Desktop/Test/output/'; //update the location of your file here.
$uploadfile = $uploaddir . $_GET['file'];

$data = file_get_contents('php://input');

echo "<pre>";
if(file_put_contents($uploadfile,$data)) {
        echo "<p>File uploaded successfully: " . $uploadfile . "</p>";
} else {
        echo "Failed to upload " . $uploadfile;
}
echo "</pre>";
?>