SharePoint Connector
The SharePoint Connector allows you to connect to a SharePoint site to store documents within the specified SharePoint repository.
Important! The SharePoint Connector supports Microsoft SharePoint 2016, 2013, 2010, 2007, and SharePoint Online, with Windows SharePoint Services v3. In addition, the SharePoint Connector supports the following authentication schemes:
-
Basic authentication over both HTTP or HTTPS
-
NTLM
-
Negotiate
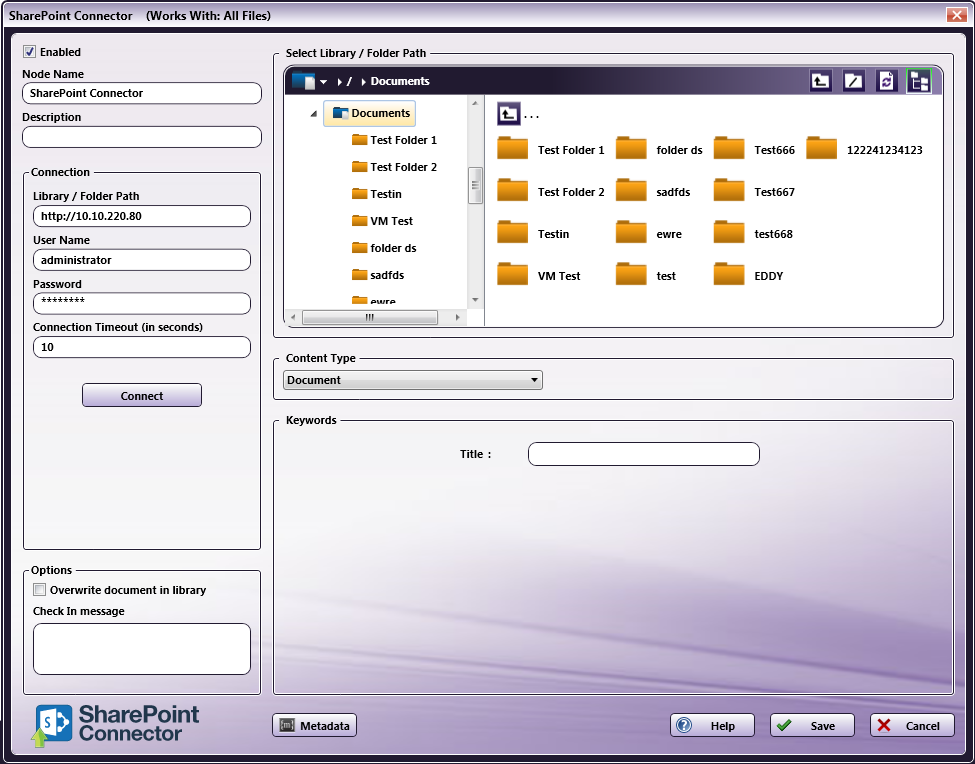
To open the SharePoint node’s properties window, add an output node for SharePoint to your workflow and double-click on it.
-
Check the Enabled box so that the process will be run. When unchecked, this output will be ignored. While the workflow will still validate, documents will not be output and may be lost.
-
In the Node Name field, enter a meaningful name for the SharePoint node.
-
In the Description field, enter a description for the SharePoint node. Although this is not required, it can be helpful to distinguish multiple processes from each other. If the description is long, you can hover the mouse over the field to read its entire contents.
-
Click on the Metadata button to open up the Metadata Browser window and add metadata variables to the fields in this window.
Configuring the SharePoint Server
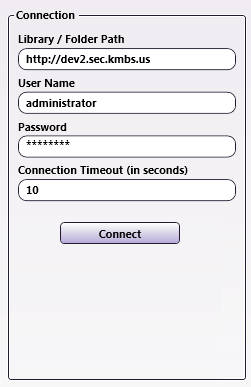
To begin, you must first connect to a SharePoint library. In the Connection area, do the following:
-
In the Library/Folder Path field, enter the URL of the SharePoint site
-
In the User Name and Password fields, enter the user name and password that is used to connect to the specific SharePoint server.
-
Change the seconds allotted for the time without communication (after the initial connection to the server) before a timeout occurs using the Connection Timeout field, if necessary. When loading large documents, the connection timeout value should increase (e.g., to upload a 25-page document, a timeout value of 100 seconds would be suitable).
-
When done, select the Connect button to connect to SharePoint.
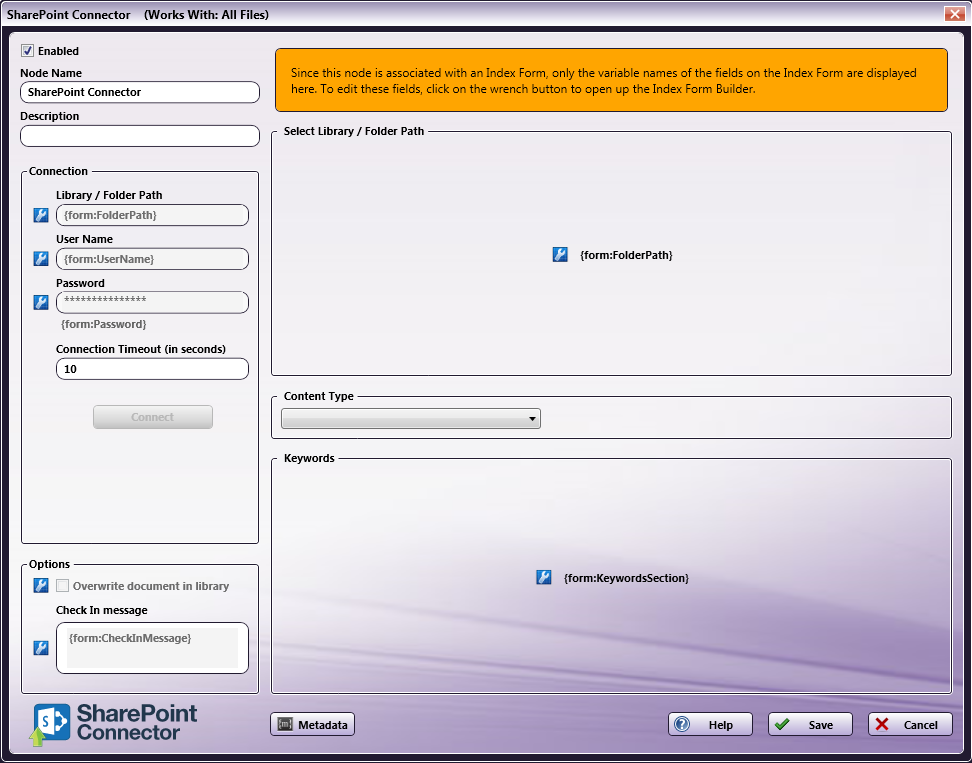
See the following illustration for an example:
Navigating through SharePoint Sites/Libraries/Folders
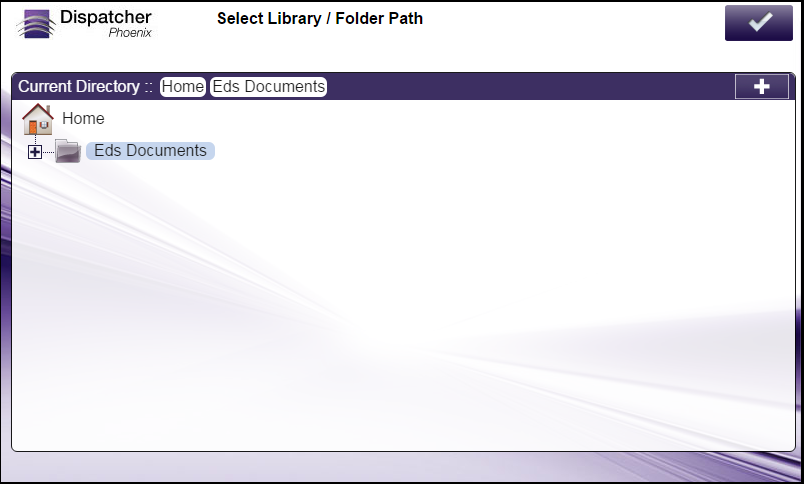
Once connected, the right hand side of the SharePoint node properties window displays the SharePoint site that you have specified. Underneath the site, you will see a visual representation of the libraries within the site and the folders/subfolders within each library.
In order to share files, SharePoint uses libraries. A library is a location on a SharePoint site where files can be collected, created, updated, and managed. Each library displays a list of files and key information about the files, also known as keywords.
In order to set up the SharePoint node correctly, you must specify which library and/or folder the documents should be distributed to. See the following illustration:
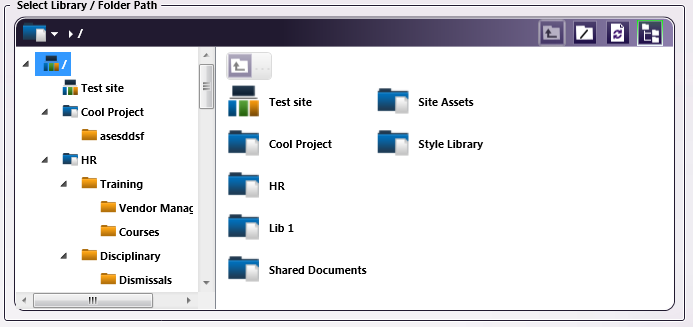
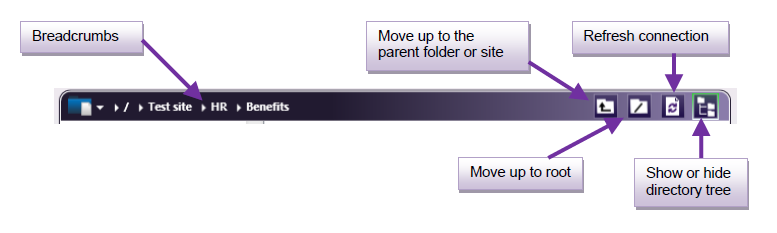
Navigation is similar to Windows Explorer where you can click on a site to see the libraries within it, click on a library to view the folders within it, and click on a folder to view the subfolders within it. Other navigation tools are provided on the top of the section, as in the following illustration:
Specifying Content Type
In the Content Type area, you can use the drop-down list to choose a pre-defined default content type for files uploaded to this library. Choosing a different content type will change the fields in the Keywords area below.
Note: If your workflow was created prior to the release of Dispatcher Phoenix version 6.3.4, you will need to create a new workflow in order to access the SharePoint content types functionality. Simply updating Dispatcher Phoenix and replacing the SharePoint Connector node will not work.
Specifying Keywords
In the Keywords area, a list of blank Keyword entry fields will appear for you to tag the documents for organization purposes within the repository. Each library has its own collection of keywords. Enter appropriate text into these fields to suit your purposes. For example, if the library has a “Title” keyword, you can enter a title to tag the document with an appropriate title.
You can click on the Metadata button to open up the Metadata Browser window and drag-and-drop metadata variables into the Keyword fields, if desired.
Note: Date keywords require a date format of YYYY-MM-DD. For example, 2013-03-01 is March 1, 2013.
Specifying Other Options
In the Options area, you can do the following:
-
Check the Overwrite document in library box to replace the existing document in the library.
-
In the Check in message area, you can enter a comment that will be included with the document when it is checked into the repository. This field is optional. In order for this message to be sent, the SharePoint server must be configured to support check-in messages (configured per library).
Using with Index Form
When using the SharePoint node on an Index Form, the window will be automatically populated with the variable names of the fields on the Index Form. Although you cannot edit the fields on this window, you can click on the wrench tool button to go to that section or field in the Index Form Builder. See the following illustration:
Using SharePoint Index Form With Multiple Inputs
Once you associate your SharePoint node with a MFP Panel node’s index form, all the information necessary to connect and route to a SharePoint site is entered at the MFP. Because of this, you cannot connect any other types of collection nodes (Input Folder, MFP User Box, etc.) to that indexed SharePoint node in your workflow. In this case, if you need to add other collection nodes to your workflow, you must add a new SharePoint node that is not connected to an index form. See the following illustrations for examples:
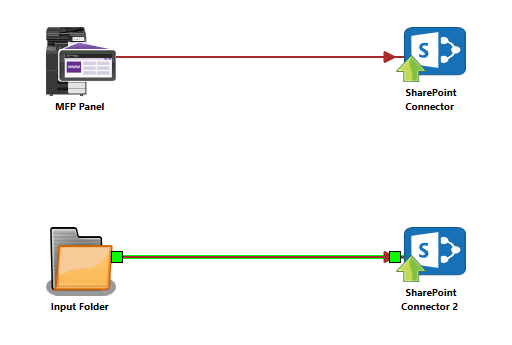
Example 1. In this illustration, SharePoint configuration is entered at the MFP panel AND files are automatically collected from an Input Folder and routed to a predefined SharePoint site:
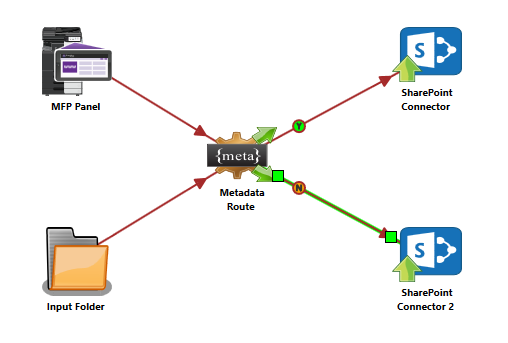
Example 2. In this illustration, the Metadata Route node is used to determine which SharePoint node the files should go to. All files that come from the MFP Panel node automatically go to the indexed SharePoint node; all other files are routed to the other SharePoint node:
Creating A SharePoint Index Form
You can create an index form that allows you to upload scanned documents to SharePoint repositories at the MFP. Do the following:
-
Make sure that your workflow includes a MFP Panel node and SharePoint node.
-
Configure the SharePoint node to connect to the appropriate SharePoint server and libraries.
-
Open up the Index Form Builder from the MFP Panel node. You should see a SharePoint button under the Workflow Index Fields area.
-
Drag and drop the SharePoint button to the Index Form work area. If the SharePoint node has already been configured, an index form with prepopulated fields will appear; otherwise, an index form with blank fields will appear, as in the following illustration:

SharePoint Index Form On MFP
At the MFP, the SharePoint Index Form will be separated into three separate screens, as follows:
1st screen: SharePoint Log In
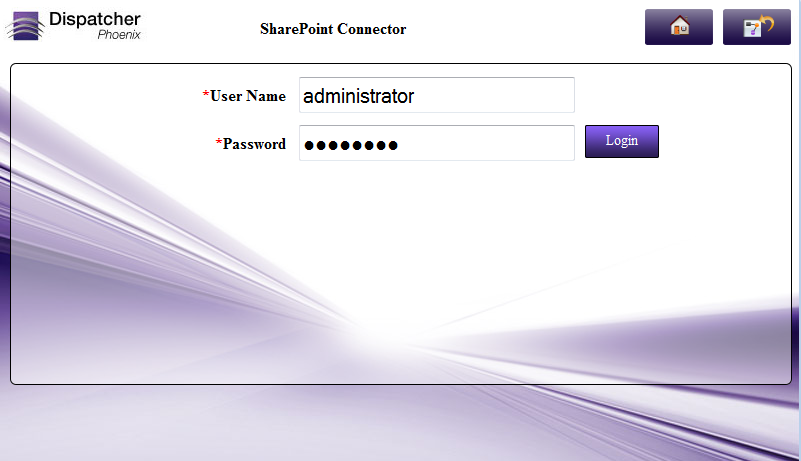
2nd screen: SharePoint Libraries/Folders Displayed
3rd screen: SharePoint Keywords Displayed

Database Browsing - SharePoint Configuration
You can also manually configure a query to retrieve data (e.g., list of folders, validation, etc.) from SharePoint.
Using the Index Form Builder, do the following:
-
Add a new field, such as a drop-down list.
-
Define an On Load event for the field; then add a Query.
-
Choose SharePoint Data Source from the Query drop-down list.
-
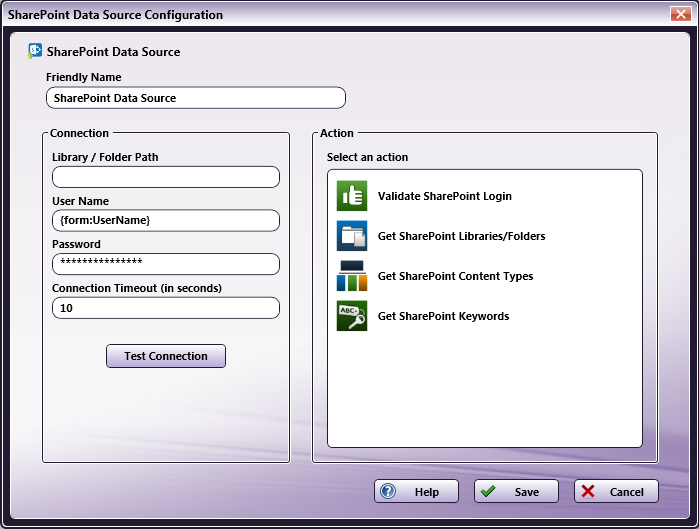
The SharePoint Data Source Configuration window appears, which allows you to perform specific actions in order to retrieve data from SharePoint.
Do the following:
-
In the Friendly Name field, enter an identifying name for the SharePoint data source configuration.
-
In the Connection area, provide the information necessary to connect to the SharePoint server.
-
Select the Test Connection button to make sure that you are connected properly to SharePoint.
-
In the Action area, choose what kind of action to perform on the SharePoint data source. Options include:
-
Validate SharePoint login - Use this action to validate the login credentials that are entered at the MFP (user name and password) against the SharePoint data source. This action returns the following records:
- [result] - The result of the login: true or false
- [message] - Text regarding a successful or unsuccessful login.
-
Get SharePoint Libraries/Folders - Use this action to display a list of the libraries and folders within the SharePoint site that you specified.
-
Get SharePoint Content Types - Use this action to display a list of content types within the SharePoint site that you specified.
-
Get SharePoint Keywords - Use this action to display the list of keywords belonging to the library that was selected. Since this retrieves dynamically created for fields, only use this action with the Expand Section Trigger.
You can click on the Metadata button to open up the Metadata Browser window and drag-and-drop metadata variables into the Keyword fields, if desired.
-
-