Release2Me Print Delegation
Users can access their Release2Me print queue and share print jobs with other users, using Dispatcher Phoenix Web’s Release2Me app. This web-based feature provides businesses with the flexible, advanced control they need to secure their printouts and reduce their printing costs.
Note: Users of the Print Delegation feature must be part of a corporate domain.
Getting Started
To access the Release2Me app, do the following:
-
Log into Dispatcher Phoenix Web, using your preferred web browser.
-
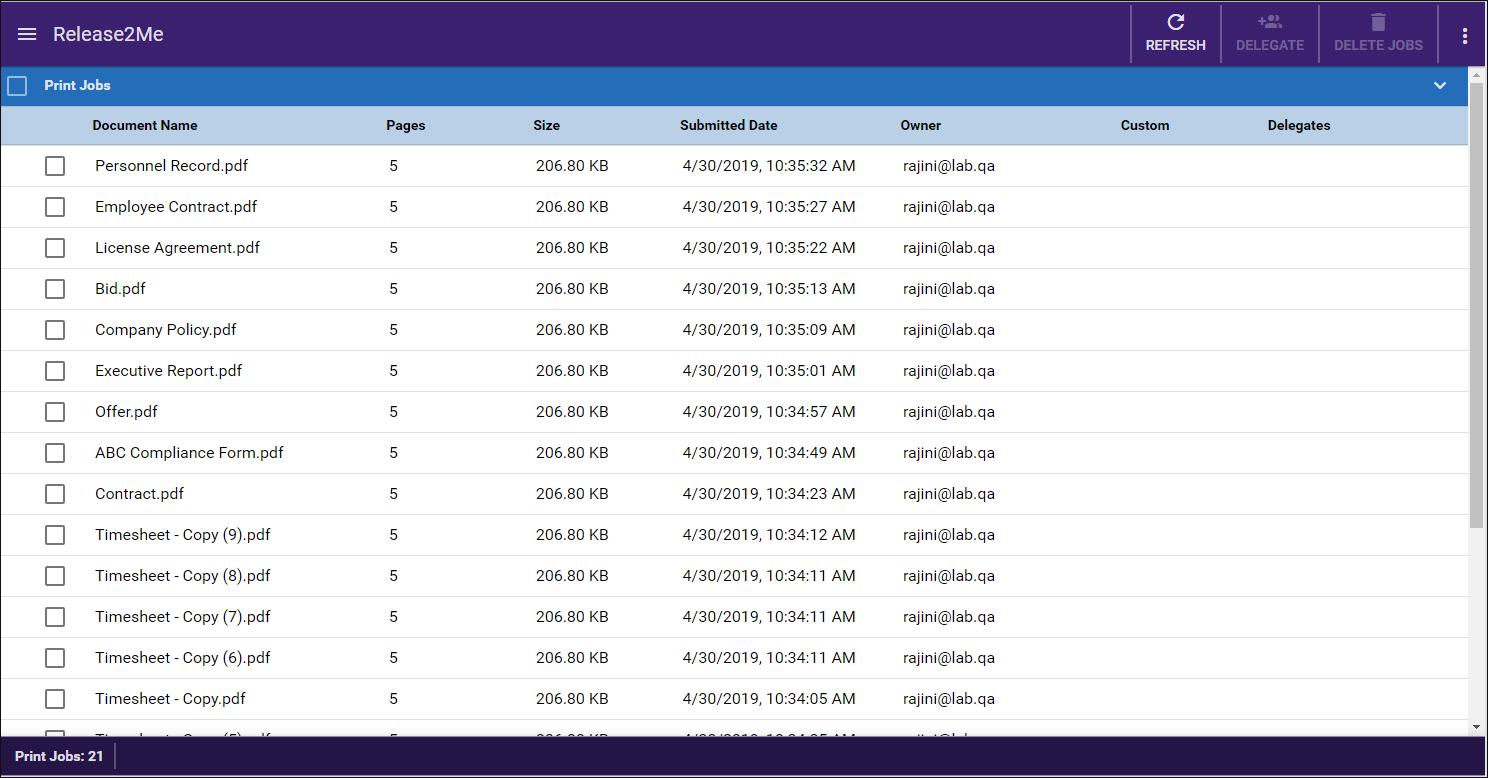
Select the Release2Me tile or the Tools > Release2Me option from the slide out menu to access your Release2Me print queue. See the following illustration for an example:

-
On the Release2Me page, you can do the following:
-
View the list of print jobs that are currently in your print queue. Details about each print job display, including the following:
- document name
- number of pages
- file size
- date it was sent to the queue
- job owner
-
Print Jobs - To select all jobs in the queue, check this box. To select an individual print job, check the box next to the Document Name.
-
REFRESH - To reload the print jobs in the list, click this button on the top toolbar.
-
DELEGATE - To share selected print jobs with users, click this button on the top toolbar.
-
DELETE JOBS - To delete selected print jobs, click this button on the top toolbar.
-
Delegating Print Jobs
To give another user the ability to release your print jobs from their Release2Me print queue at the MFP, do the following:
-
Select the print jobs in the list that you are interested in delegating to someone else.
-
Select the DELEGATE button.
-
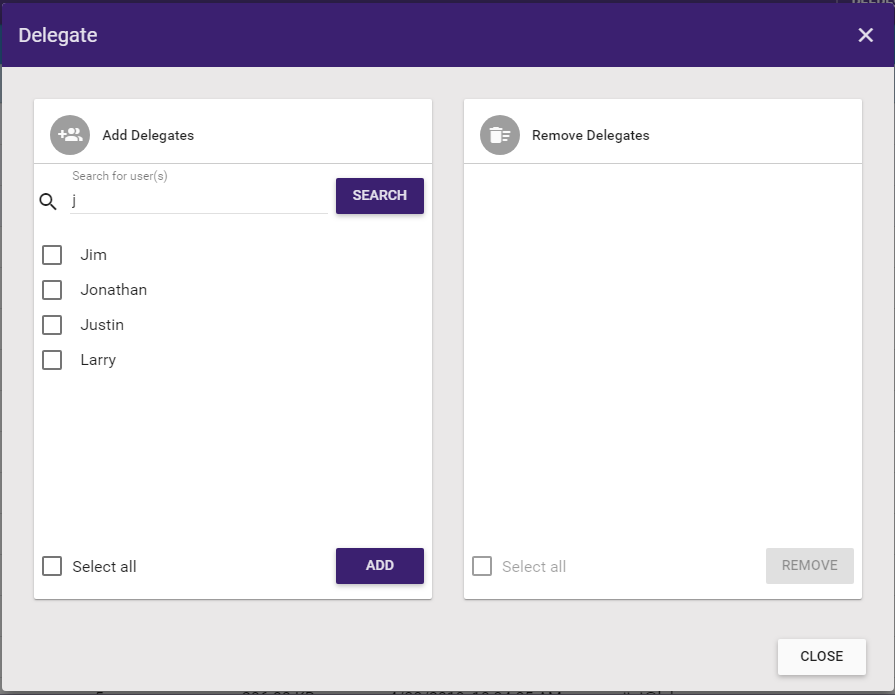
On the Delegate window, enter the user’s name in the Add Delegates box. Next, select the SEARCH button. The results appear in the box, as in the following illustration:

-
Check the box next to the user you want to share your print job with, or check the Select all box to share with all users listed.
-
Select the ADD button. Now the selected user appears on the Remove Delegates side of the window.
-
To remove delegates from a print job, check the box next to the user’s name in the Remove Delegates box, and then select the REMOVE button. You can also check the Select all button to select and remove all users.
-
Select the CLOSE button when done.
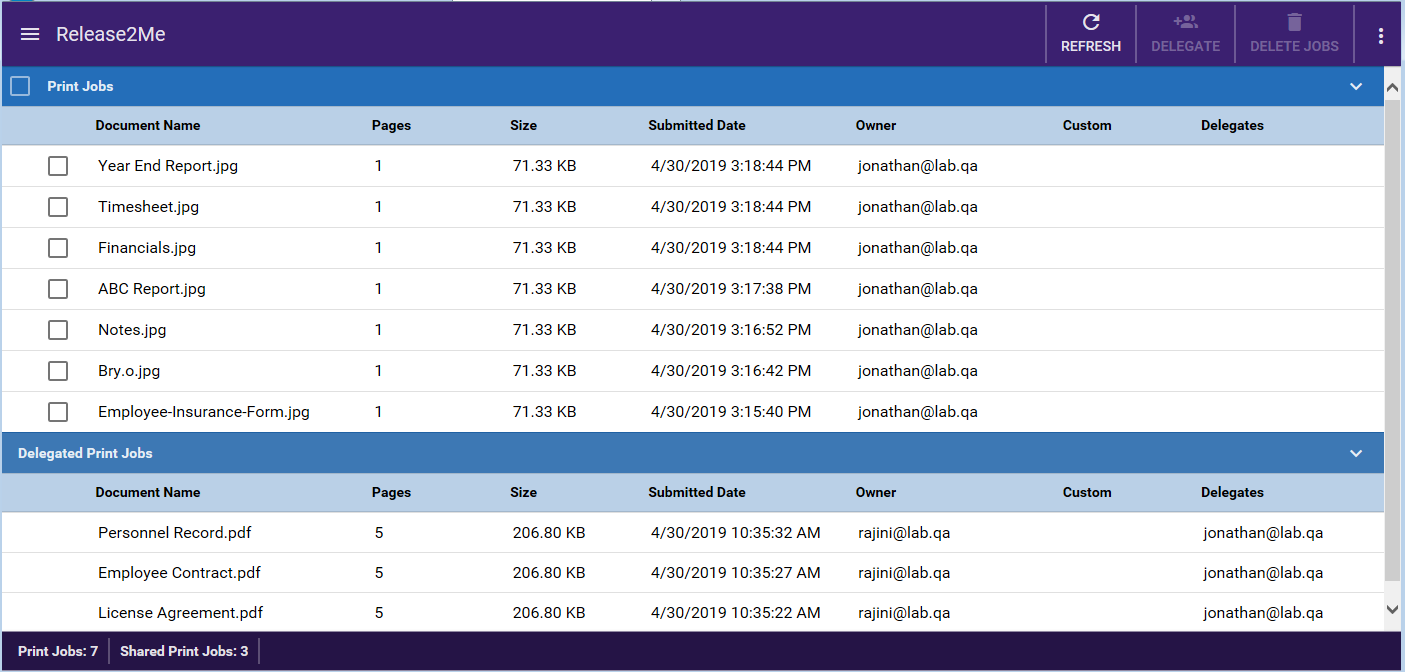
Once a print job has been delegated to another user, that user is listed in the print queue under the Delegates column. Once authenticated at an MFP, users can view their print jobs as well as the jobs that were delegated to them. They can then perform the same operations on ALL print jobs in their queue, including:
- Releasing jobs for printing.
- Releasing jobs for printing but keeping them in the queue.
- Deleting jobs from a queue.
- Specifying print sett
Deleting Print Jobs
To delete print jobs from your Release2Me print queue, do the following:
- Select the print jobs in the list you want to delete.
- Select the DELETE button.
Viewing Delegated Print Jobs
Users who have been delegated print jobs can view the delegated print jobs in their print queue on Dispatcher Phoenix Web. Dispatcher Phoenix Web’s Release2Me app displays all of the user’s local print jobs as well as a list of delegated print jobs.
See the following illustrations for an example:

Note: You cannot delegate or delete print jobs that have been delegated to you.

